Credits to Nyu-13 for allowing us to transcribe their Kyoko guide to populate this page.
Introduction
Kyoko, the ice queen.
Kyoko is a slower character. Some of Kyoko's attacks are also dual-part, or simply do very little/nothing on their own. Like her moves, Kyoko herself becomes more effective when varying her attack options. In general, Kyoko is not well armed for simply chasing the opponent down, but rather her gameplay is aimed more at strategic tactics or guerilla warfare. Learning to play Kyoko effectively requires patience and understanding of how all of her moves work, how the opponent works, and how everything works together. To some players it may seem that Kyoko is a challenging technical character, but the reality is that Kyoko can be as linear or dynamic as the situation calls for, and Kyoko players typically strive for an answer to just about any situation.
To play Kyoko you must utilize her various movesets while maintaining good positioning and meter management. Kyoko isn't a mindless one trick pony against everyone, unless the situation calls for it.
Overview
Kyoko is the most defensive character in the game, she's all about building a fort and rarely ever leaving it while denying as much area as possible in the process.
She is rather slow but has high damaging normals and amazing area denial allowing you to constantly hide behind something once you've set up and work with your high damage to get poke in and pressure your opponent.
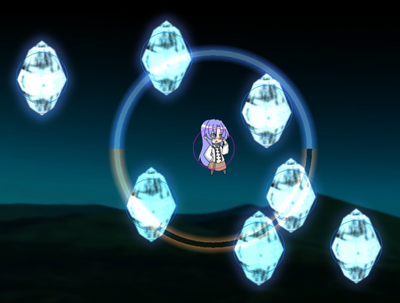
Kyoko's main gimmick are her Pylons which are basically the core of her current kit, these are the building blocks of your fort and deny area for a long period of time on top of reflecting some of your beams at your opponent.
Difficulty: Intermediate
Kyoko isn't the easiest to play but she's far from the hardest, the main depth of her kit comes really just from learning how to best set up your fort in a matchup. The rest is just knowing when you can leave it and how to protect it.
Gameplan
Farming Meter
Kyoko's best meter gain is on her dwA, Hold wA and SPwB. You usually want to set up a few Pylons asap, activate them with dwA and then throw out occasional Snowflakes(Hold wa) and a bunch of dwA.
You usually want to throw your snowflakes out to cover a rather huge area so they deny a lot of space, the place of where you place you Pylons is very much matchup dependant, but generally you don't want to be super close to a wall and try to have some distance from it.
Playing Aggressive
Kyoko, as mentioned before, is the most defensive character, therefore her aggro is almost non-existent. The very few things she can do to be more aggressive is to leave her fort and work with melee hyper(SP.Hyper(close)). Setting up some snowflakes or wB crystals to cage someone in can also help or using SP.Hyper(ranged) to try and close in on someone to set up a follow up.
Alternatively you can also try to set up Pylons to as a way to cage your opponent in, and get them to a point where they won't be able to avoid your SP.Hyper, Snowflakes or even wB crystals.
Playing Defensive
Playing defensive however is where it's at for Kyoko, having a plethora of defensive tools to completely keep her opponent from ever touching her. You generally want to work with Pylons(SpwB), dwA, Hold wA and some occasional usage of wB.
The toughest part of playing Kyoko is surviving early in order to set up your fort, the best way to do this is to deny a possible engage from your opponent with either Tap wA, Hold wA or SPwA(ranged), once you have them in any way hitstunned for bit you want to quickly set up a Pylon and activate it with dwA(knowing the exact pattern of dwA can assist you greatly for this). Once you got your first one up you quickly want to add a few more.
Now that you have your fort up you can concentrate on grinding up meter and denying as much area as possible. For this you want to throw out Snowflakes and more dwA inbetween with some sparing use of wB as well. Once you have some meter you can use D.Hyper to speed up the process of covering the arena in snow, or work with SP.Hyper(close) to get some damage in, SP.Hyper(ranged)to deal with possible laser threats or help you engage or N.Hyper as a somewhat mediocre ranged option should you be unable to leave your fort without getting hit.
Normal Moves
Weapon A
Drizzling Rain
|

|
| Type
|
Energy
|
Shots
|
| Beam
|
Primary: 4%x (64% normally)
|
16
|
| Damage
|
Meter Gain
|
Grazed Meter Gain
|
| 120
|
~13 uses
|
?
|
| Startup
|
Canceled Recovery
|
Full Recovery
|
| 17
|
9
|
44
|
| Wide spreading laser shots. Useful for destroying the opponent's ballistics or interrupting close range melee attacks. Not recommended to use from far away due to the ease at which it can be absorbed -- unless the intention is to clear out enemy ballistics. Can fire as few as one laser if ammo is low.
|
Hard Rain (Held)
|
 
|
| Type
|
Energy
|
Shots
|
| Ballistic
|
Primary: 15%x
|
1-3
|
| Damage
|
Meter Gain
|
Grazed Meter Gain
|
| 100, 150 (Ice spike)
|
~18 shots
|
?
|
| Startup
|
Canceled Recovery
|
Full Recovery
|
| 16
|
5
|
25
|
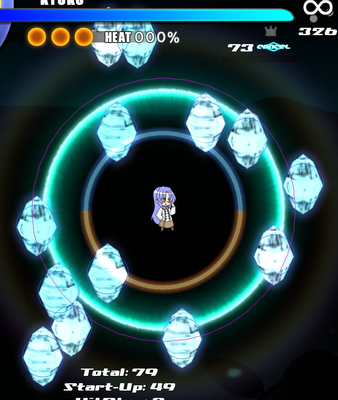
| Ice puffballs. Can be held for up to three puffball shots. Each shots comes out 5 frames later than the previous one. Hold a direction to rotate Kyoko while firing, allowing you to fire the second and third puffballs at different angles. The puffball(s) will become ice spikes on any impact, the ice spike itself becomes a stationary Ballistic attack that inflicts additional damage if the opponent runs into it. This move builds hyper meter per puffball and can be difficult/worthless for the opponent to absorb, making it a decent choice for meter farming -- though Cold Stream (dash + WA) builds meter much more rapidly.
|
Clear Stream
|
 
|
| Type
|
Energy
|
Shots
|
| Beam
|
Primary: 15%x per pair
|
4
|
| Damage
|
Meter Gain
|
Grazed Meter Gain
|
| 240x
|
~7 uses
|
?
|
| Startup
|
Canceled Recovery
|
Full Recovery
|
| 16
|
5
|
15
|
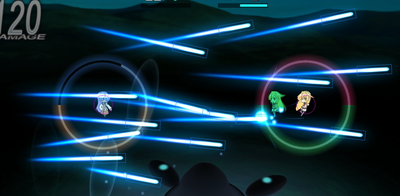
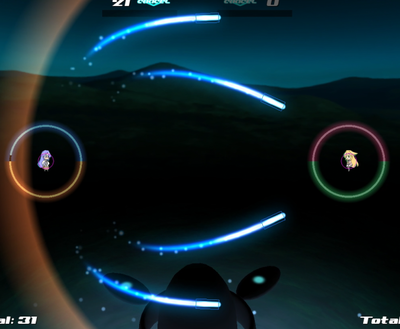
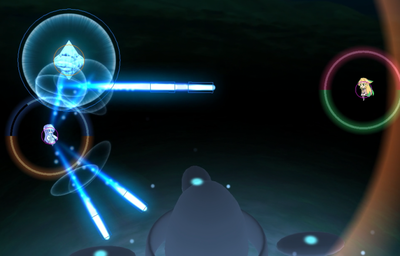
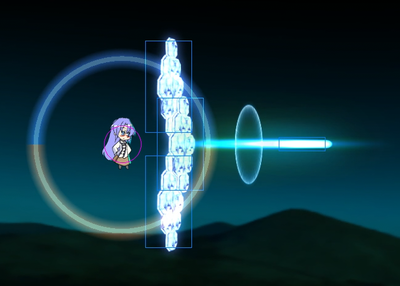
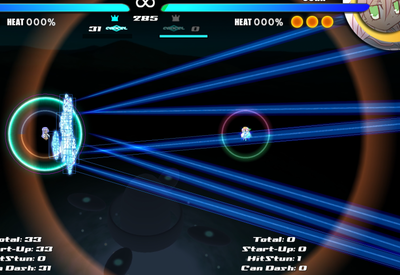
| Wide-Arc lasers. A staple move for Kyoko, especially when combined with Crystal (SP + WB). Builds hyper meter rapidly. This move tends to miss at close range due to the wide arc; the outer lasers fire straight while the inner lasers intersect at long range. However, these lasers will bounce off Crystals. Once bounced off a Crystal, the lasers will power-up the Crystal, and then the bounced lasers will then directly target the opponent's position instead of arcing. It should be noted that this move has little use by itself, though the effectiveness is drastically increased by bouncing off Crystals. If ammo is low it will fire only two lasers and if ammo is depleated it will fire zero. Second pair fires 2 frames after the first pair. Use often with Crystals.
|
Icicle (Close Range)
|

|
| Type
|
Energy
|
Shots
|
| Direct
|
Primary: 0%
|
-
|
| Damage
|
Meter Gain
|
Grazed Meter Gain
|
| 80x5
|
0
|
0
|
| Startup
|
Canceled Recovery
|
Full Recovery
|
| 9
|
37
|
47
|
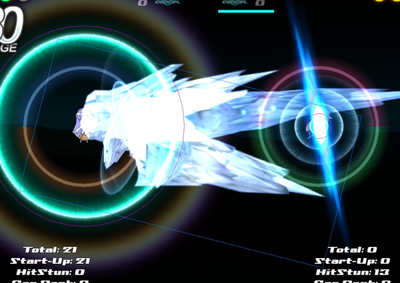
| Stabby ice. Last hit causes knockback. Not the best melee in the game, though still useful in some situations. The damage makes this not worth while as a combo move, but the speed makes it great as a quick defensive tool or as a combo extender. It covers the close range blind spot that Kyoko would otherwise have, if not for this move. -5 frame advantage.
|
Ripple (Far Range)
|
 
|
| Type
|
Energy
|
Shots
|
| Ballistic, Beam (reflected beams)
|
Primary: 0%
|
1
|
| Damage
|
Meter Gain
|
Grazed Meter Gain
|
| 0 (contact), 100 (reflected beams)
|
~101 uses
|
0, ? (reflected beams)
|
| Startup
|
Canceled Recovery
|
Full Recovery
|
| 20
|
1
|
11
|
| Reflector that lasts for 2 seconds (120 frames). This move will act as a stationary ballistic, though they do no damage by themselves. They will reflect enemy beams with a small wait which does static damage per beam. The reflection will convert the opponent's beam(s) into small homing beam(s). While this may seem useful for defense, the mirrors simply do not last long enough to be of much use. Often you are better off absorbing opponent beams by dashing through them instead of reflecting them. Additionally, Icy Crystals (WB) work as a defensive wall and as cannon fodder way better than this move. It is often used at the start of some matchups in order to give Kyoko some initial cover to start firing other/slower moves. Very rarely used after that -- unless the opponent is extremely good at breaking/evading ice bits and crystals.
|
Weapon B
Icy Crystal (Can be held)
|

|
| Type
|
Energy
|
Shots
|
| Ballistic
|
Sub: 10%x
|
2-7
|
| Damage
|
Meter Gain
|
Grazed Meter Gain
|
| 200x
|
~42 shots
|
?
|
| Startup
|
Canceled Recovery
|
Full Recovery
|
| 6-42
|
13-24
|
28-39
|
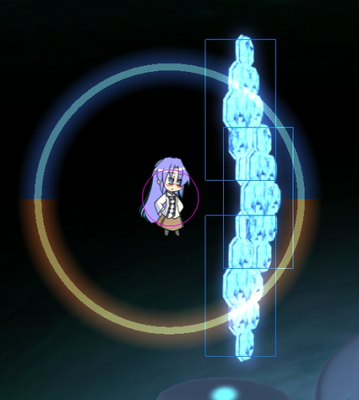
| Small ice bits. 6 frames between each crystal being summoned. Another staple move for Kyoko. The bits will autotarget the opponent after ~154 frames. If ammo is low, it will create only one ice bit. A second use will not cancel the first use, previously created ice bits will continue to act as normal and will not be removed by second use. This move has a lot of value because of the fact that it won't overwrite a previous use, because you can set many of them around the playing field making it more difficult to navigate through and difficult to dodge.
|
Crystal
|
 
|
| Type
|
Energy
|
Shots
|
| Direct
|
Sub: 40%
|
-
|
| Damage
|
Meter Gain
|
Grazed Meter Gain
|
| 0, 30 when powered
|
~10 uses
|
0
|
| Startup
|
Canceled Recovery
|
Full Recovery
|
| 11
|
5
|
20
|
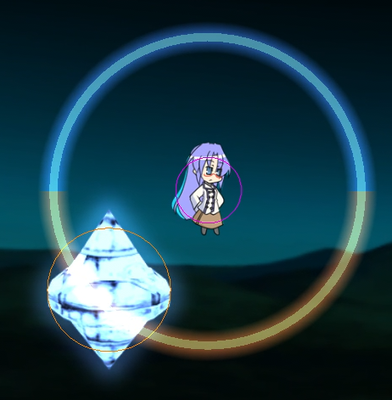
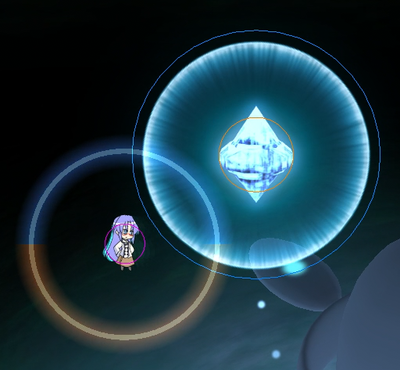
| Large crystal that has 400 HP. Lasts ~11.8 seconds (710 frames). By itself, this move's only use is to block incoming ballistic or beam attacks. Rather, this move reacts to Clear Stream (Dash + WA). Once one or more Clear Stream lasers intersect with it, the Clear Stream laser will ricochet off the Crystal and autotarget the opponent, "powering up" the Crystal in the process. Once a Crystal is powered up, it emits a glowing field. This field inflicts 30 damage when an opponent collides with it, creating an effective wall. While the Crystal move does very little by itself, you will be using it very frequently in order to boost your Clear Stream's effectiveness. It should be noted that it is not necessary to stay close to your Crystals once activated, though advisable, because a Crystal has the potential to ricochet Clear Stream shots from anywhere -- even if the Crystal is behind the opponent when the Clear Stream touches it.
|
Hypers
Early Summer Rain
|

|
| Type
|
Energy
|
Shots
|
| Direct, Beam (reflected beams)
|
-
|
16
|
| Damage
|
Meter Gain
|
Grazed Meter Gain
|
| 80x (laser), 0 (reflector), 100 (reflected beams)
|
0
|
0
|
| Startup
|
Canceled Recovery
|
Full Recovery
|
| 21
|
10
|
30
|
| Reflectors and spread lasers. Reflectors start spawning at frame 5. 2 frames between each laser. Laser spread is random. Not much damage at long range due to the spread. This move can also miss at point blank because the lasers fire from a distance in front of Kyoko. The reflectors act identical to Ripple (far SP + WA). There is a sweet spot where a large number of the lasers will likely hit, inflicting heavy damage. 800-1040 damage is fairly typical at this range, but the random spread can drop it to 160 even then. The random spread also makes it difficult to confirm into.
|
Freezing
|

|
| Type
|
Energy
|
Shots
|
| Ballistic
|
-
|
6
|
| Damage
|
Meter Gain
|
Grazed Meter Gain
|
| 100, 150 (ice spike)
|
0
|
?
|
| Startup
|
Canceled Recovery
|
Full Recovery
|
| 21
|
10
|
30
|
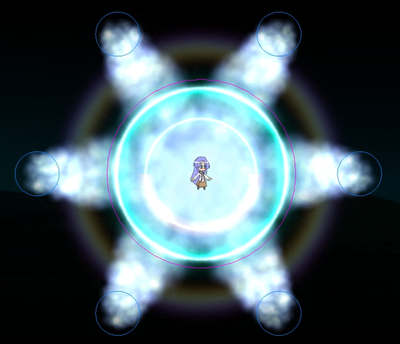
| Basically just like the Hard Rain move (held WA), except it fires in six directions. Not a whole lot of use. Can be dash canceled immediately after puffball creation, allowing for a long shield duration after use.
|
Ice Over
|

|
| Type
|
Energy
|
Shots
|
| Ballistic
|
-
|
13
|
| Damage
|
Meter Gain
|
Grazed Meter Gain
|
| 200x
|
0
|
?
|
| Startup
|
Canceled Recovery
|
Full Recovery
|
| 13
|
60
|
70
|
| Behaves the same as Icy Crystals (hold WB).
|
Tree of Ice (Close Range)
|

|
| Type
|
Energy
|
Shots
|
| Direct
|
-
|
-
|
| Damage
|
Meter Gain
|
Grazed Meter Gain
|
| 70x9
|
0
|
0
|
| Startup
|
Canceled Recovery
|
Full Recovery
|
| 9
|
42
|
52
|
| Very fast, good damage, decent range. Last hit does knockback. This is Kyoko's main hyper, since it's almost impossible to avoid if Kyoko is in range. It can miss if Kyoko is overlapping the opponent or they are strafing across her when used. However, for the most part this is the "guaranteed" damage Kyoko has. Ideally, you would start a combo with this in order to force the opponent to burst a full shield stock in order to avoid heavy damage, which is done by setting up lots of Icy Crystals (bits) then pinning them down with Tree of Ice. All around great offense and defense. Use often. +6 frame advantage.
|
Water Mirror (Far Range)
|

|
| Type
|
Energy
|
Shots
|
| Ballistic, Beam (reflected beams)
|
-
|
-
|
| Damage
|
Meter Gain
|
Grazed Meter Gain
|
| 0, 100 (reflected beams)
|
0
|
0, ? (reflected beams)
|
| Startup
|
Canceled Recovery
|
Full Recovery
|
| 21
|
10
|
20
|
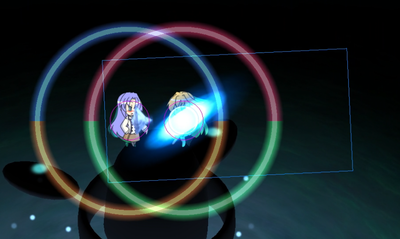
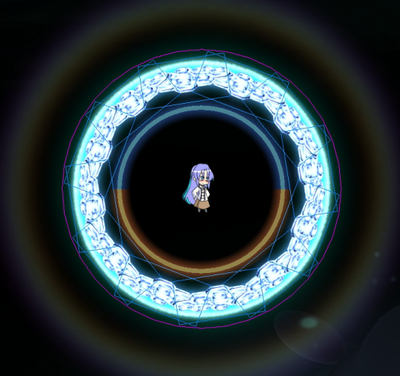
| Reflector ring that lasts for ~9 seconds (~548 frames). This move acts like Ripple (far SP + WA), except that the reflectors are thinner and circle Kyoko. Again the reflectors do no damage by themselves. The reflectors have the same health as normal reflectors, and reflected beams cause the same damage. Can be used to run into the opponent to cause them to enter hitstun.
|
Accel Hyper: Avalanche
|

|
| Type
|
Energy
|
Shots
|
| Direct
|
-
|
~30
|
| Damage
|
Meter Gain
|
Grazed Meter Gain
|
| 180x
|
0
|
0
|
| Startup
|
Canceled Recovery
|
Full Recovery
|
| 1 (71 for the last one to form)
|
91
|
101
|
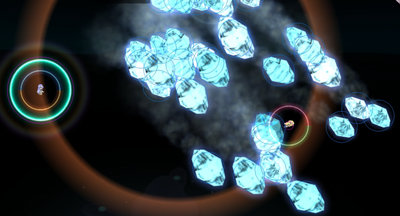
| Hail storm. Fills a good portion of the screen with a slow rain of very large Crystals, which always fall diagonally down-right. Because of the slow startup and slow projectile speed, it's sometimes easy to avoid. It's unreliable because the opponent can run away from the Avalanche long enough to Hyper near the end of the wave before being hit, or avoid it altogether. It's very difficult/situational to combo into, but possible. If your opponent is meterless, at high heat, and cornered into the wrong spot on the screen then you can smack them with this. Because Kyoko builds a lot of meter very quickly, it's sometimes viable to finish your opponent with this. Typically does 1260, but can do up to 2340 damage.
|
Combos
Kyoko is not a character with a lot of combos and relies more on poke with her high damage normals and quick capitalization of single hits, though i'll go over some of the few combos she does have:
Meterless
- Using Snowflakes to set up dwA hits
- Using snowflakes to catch someone with wB crystals, very inconsistent
Meter
- SP.Hyper(ranged) > SP.Hyper(close)
- Using the hitstun from your barrier to stunlock someone for an easy melee hyper (2 meter)
