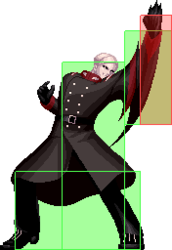
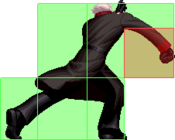
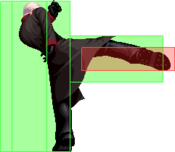
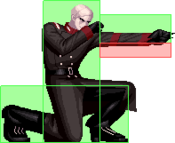
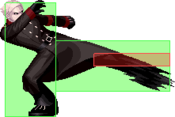
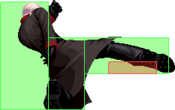
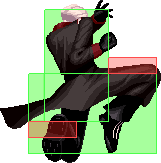
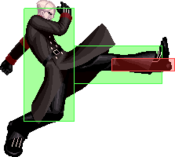
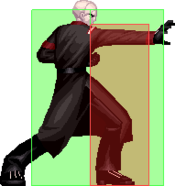
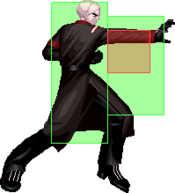
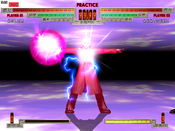
Akatsuki Blitzkampf/Adler
Background
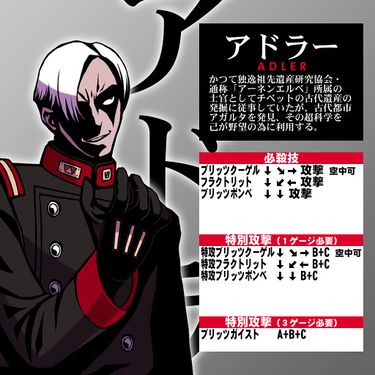
An officer once belonging to a research association on German ancestral inheritance, commonly known as Ahnenerbe, that was involved in the excavation of Tibet's ancient legacy. However, with the discovery of the ancient city of Agartha, he uses that superior science to further his own ambitions. (From character selection screen)
Read the translation of his arcade mode!
Adler is an officer for the Gesellschaft, as head of the Armed Schutzstaffel: the army of the Ahnenerbe, composed of his clones, the Elektrosoldat. Host of his own Blitz Engine, Adler was guided by the mysterious head of the Perfecti Kyoudan cult to retrieve and understand the unique Blitz Engine hosted within Akatsuki, the officer frozen in the Artic after a failed expedition to protect the Engine. Little does he know, the operation is much well thought than initially assumed.
Introduction
While visually he's similar to Elektrosoldat, Adler is a rushdown oriented character with moves more focused on getting in and running his incredible setplay with 236BC. Effectively a Urien function, Adler sacrifices neutral control for incredible pressure. He has access to the best setplay in the game with his EX fireball which works well with his multiple overheads and strong throw game. His 214X flip kick series can quickly close the distance and his strong assortment of normals lets him poke and anti-air very well. His neutral and defense are a bit lacking, and he can be quickly overwhelmed by other powerful rushdown characters. On top of that, his mixups only truly become effective once he gets the opponent in the corner. However, once his pressure starts, he becomes one of the most terrifying characters in the game.
Similar to: Urien
| Strengths | Weaknesses |
|---|---|
|
|
All damage values below were tested on Akatsuki with 1.000 armor ratio and full life on both sides (remember about "Health difference" and "Guts" systems)
Character Summary
- Special Moves
- 236A/B/C (EX, Air OK) - Blitzkugel: Fireball, more for setplay than neutral
- 214A/B/C (EX OK) - Flak Tritt: Flips up with a kick then does a divekick
- 22A/B/C (EX OK) - Blitzbombe: Discharges electricity from his body
- Level 3 Super
- A+B+C - Blitzgeist: Creates a spinning ball projectile around his body, good for combos and pressure
- Unique Attacks
- c.5[C], f.5[C], 2[C], 6B, 4C
- Armor Ratio = 1.025
- Walking Speed = 5.5 dots/frame
- Retreating Speed = 4.5 dots/frame
- Jump Startup = 3F
- Backdash Duration = 18F
Basic BNB: 2A > 2B > 214C
Metered BNB: 2A > 2B > 214B+C
Corner BNB: 2A > 2B > 214C(1 hit) > j.236B+C > j.A > j.B > 5A > 5B > 22C
Corner BNB vs Standing: 2B > 214A > 5A > 5A > 5B > 6B > 2A > 5B > 22C
Punish Combo: cl.B > 214A > 5B > 214C
Reflector: B+C > 214C
Notes on Ausf. Achse
Universal Changes
Combos over 40 hits will automatically launch the opponent. The only time this matters is 236BC loops against Blitztank.
Character Changes
He has slightly slower movement speed.
The distance of the divekick portion (second hit) of 214X is slightly reduced.
Normal Moves
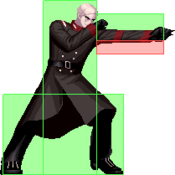
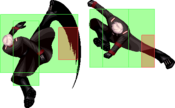
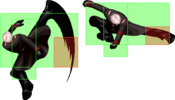
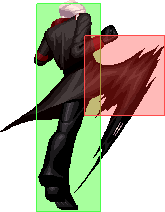
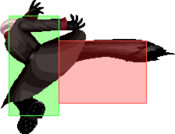
5A
|
|---|
5B (close)
|
|---|
5B (far)
|
|---|
5C (close) 5[C] 5[C]
|
|---|
5C (far)
|
|---|
2A
|
|---|
2B
|
|---|
2C
|
|---|
j.A
|
|---|
j.B
|
|---|
j.C
|
|---|
Command Normals
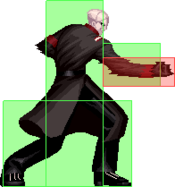
6B
|
|---|
4C
|
|---|
Special moves
ブリッツクーゲル - Blitzkugel
236+A/B/C/B+C (Air OK!) |
|---|
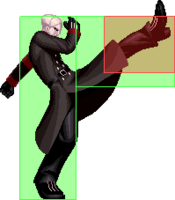
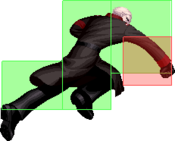
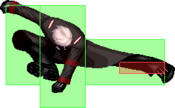
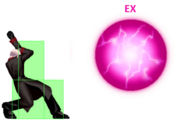
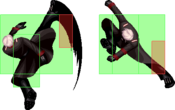
フラクトリット - Flak Tritt 214+A/B/C/B+C B B C C EX EX
|
|---|
ブリッツボンベ - Blitzbombe 22+A/B/C/B+C Of course Framedisplay doesn't show this. Why would it ever cooperate? Of course Framedisplay doesn't show this. Why would it ever cooperate?
|
|---|
Universal Mechanics
Reflector
Standing Reflector
5B+C |
|---|
Crouching Reflector
1/2/3B+C |
|---|
Jumping Reflector
j.B+C |
|---|
Throws
Ground Throw
5/4/6A+B |
|---|
Air Throw
(Air) A+B |
|---|
Super Move
ブリッツガイスト - Blitzgeist
A+B+C |
|---|
General Strategy
Neutral
Adler generally has to play more patient in neutral but he has ways to quickly get in. His main pokes are 2B and 6B. 2B is a decently long poke and can be canceled into a special or command normal, with 6B being the main one to cancel into although it can also be safely canceled into 236+X. However, it doesn't have quite the range that other poking tools have in the game. 6B is Adler's longest poke, as it goes a pretty good distance and will even low crush some moves. However, 6B is negative on both hit and block. However, you can play RPS after landing it (see under Pressure and Setplay). Adler's 236+X, while not the best projectile for it, can also be used in neutral. 236+A can be used like a regular fireball albeit with somewhat limited range, and the slower fireballs can be used to discourage opponents from coming in, be followed behind, or to make something safe. Unfortunately, the fireballs can be low profiled by many moves with sweeps in particular going under it. This isn't normally a problem if it's spaced, but some characters like Sai and Anonym have low profile moves that move forward far enough to punish it. In these situations, you can punish them with a 214+A since it will low crush or with a reflector. You can also perform a TK fireball to catch jumps or vertical moves, but the long recovery can make it risky. 214+X can also be used in neutral. 214+A is safe on block but doesn't go too far and can easily be reflectored. 214+C goes the farthest, so it can be used as a long range punish or to catch an opponent off guard. However, it is incredibly unsafe on block. It can be canceled into 236+B+C to be made safe, but if the opponent reflectors it too then it can still sometimes be punished (the cancel can be made to be a true blockstring in corner except versus Mycale). 214+B effectively has the same use as 214+C, just slightly less distance.
Anti-Air
Adler has a fairly decent anti-air game. f.5B is Adler's go to anti-air, as it's long ranged and when spaced well will rarely be beaten. If spaced especially well it'll even be safe from reflectors (except Tank's). If you manage to actually hit it then f.5B can be canceled into 6B for a short juggle into 214+C/B+C, making it fairly rewarding if you get it. It's also good at keeping the opponent locked in corner if they try to jump out. His other main option is 22+A/B. It's harder to use, as it's shorter ranged, but it can be buffered from A/B normals. 22+B is slower so it has to be used preemptively, but is more rewarding than 22+A since it can lead to a short juggle into 214+C. However, it tends to lose versus especially good landing aerials, and will never be safe from reflectors. Note, 22+A/B can also be used as a counter poke but that's a more niche use.
Air Game
Adler has a pretty strong air game overall. His j.A is a decent landing aerial but is most used for it's ability to crossup more than anything else, since his other aerials are better at landing and air to air. j.B is a long kick that is a good air to air, but has a big hurtbox to go with it. j.C is the main aerial. It's also good at air to air as it's surprisingly fast and doesn't increase his hurtbox size. It's also a good jump in, once again thanks in part to it not increasing his hurtbox much but also thanks to it having a good angle and being fairly active. It also just looks cool and hits hard so great move overall. Adler also has one of better air throws in the game, as his air throw causes a pretty long untechable knockdown. From it you can either get assured 22+C OTG damage, or get a safe jump. This makes it a valuable air to air tool, as well as making his air reset game scarier than other characters.
Combo Game
Adler is the only character in the game who really cares about standing or crouching confirms. This is because his 214+A whiffs on crouchers, forcing Adler players to have to learn BnBs for both situations. This is one aspect of Adler that makes him more difficult and technical than he would be otherwise. Additionally, his combos are incredibly variable depending on the starter, and while there is something of a general rhythm, gaining a master over all of Adler's situational combos can be tough.
Pressure and Setplay
This will be split into multiple sections due to the many different things Adler can do on offense.
6B RPS
After landing a 6B, regardless if it hits or is blocked, you get an RPS situation with the following options (these can also apply to a blocked 214+A):
- Backdash: Avoids the situation entirely, although the opponent can punish it with a hard read.
- Neutral Jump: Will avoid all attempts to punish it except any frame 4 or faster moves. If the opponent picks a move with high recovery it's possible to even punish them for it with a landing aerial.
- Throw: Will tech throws if the opponent tries to read a reflector or block, and will also just throw the opponent if they choose to block.
- Reflector: Beats any punish attempts with faster moves and allows you to punish them for it.
- 2A Mash: Beats some slower punishes and any attempts to punish the backdash. Also will just work if the opponent decides to block.
j.A Crossup
Adler's j.A is a quick and simple crossup. There's lots of situations where you can go for it, but it's especially easy to go for after his throws.
Meaty c.5[C] Overhead
Adler's c.5[C] is an overhead, but it's not normally possible to combo off of it. However, it's possible to be next to the opponent on knockdown, whiff c.5C and do a meaty c.5[C]. On Akatsuki, Adler, Soldat, Murakumo, and Kanae (also Perfecti in AA), this can be linked with relative ease into 214+B+C in midscreen, and into even more damaging options in corner. This combo can work on the rest of the cast, but it must be timed to hit very late as otherwise it won't link. This can be hit confirmed by looking at the character's health bar. What makes this setup extra deadly though is that it can be used to condition the opponent. Since you have to whiff c.5C first, instead of holding it to do the overhead which would get predictable fast, you can whiff c.5C then go for a throw or a low. This can be mashed on, but the opponent risks getting hit by the overhead to do that. You can also simply whiff c.5C and block to bait reversals. Additionally, if the opponent doesn't tech, then whiffed c.5C into 2B will hit meaty, making the mixup harder to deal with. If the opponent doesn't tech and you do the c.5[C] too early and whiff, then you go into RPS (look above). These c.5[C] mixups can also be combined with 236+B+C (look below).
236+C Setplay
After a corner combo, forego the 22+C ender and do 236+C instead. You generally should start by doing landing j.C after it. If the opponent attempts to reflect the projectile and j.C, it'll be a reflector safe jump so you can reflector them back. After conditioning with j.C, you can go for empty jump throw or empty jump low. However, this setup is weak to being reversaled, so be wary of that and attempt to bait a reversal if you think it's coming. Note, if the opponent doesn't tech at the end of the combo, then you get a safe jump and empty low is more viable.
236+B+C Setplay
After a corner combo, rather than foregoing the 22+C, cancel it into 236+B+C. Similarly, you'll want to start by conditioning with j.C. Once they expect it, you can go for empty jump low, although empty jump throw won't work with this setup. However, with 236+B+C you can go for 4C overhead. If the opponent gets hit by it, thanks to the 236+B+C you'll be able to get a short juggle after it (i.e. 4C > 236+B+C Hits > f.5B > 6B > 2A > 22+C). You can also combine this with c.5[C] overhead, and if it hits the 236+B+C will let you get a ground combo after it, leading to a lot of damage. However, the opponent might try to reflect the fireball. When reflected, the opponent is immune to attacks and throws. Luckily, there is a small gap between each reflect where the opponent won't be hit by the fireball that you can take advantage of. During these gaps, there's a tight window where you can throw or attack the opponent and punish them (note if you attack and hit their reflector you will get punished). However, this too can be countered by a smart opponent, as they can take advantage of the invincible frames to throw you instead if you get too close, or at least get a throw tech. This situation can be avoided entirely by spacing the fireball, easiest done after a 4C, from where you can go for a dash forward throw, air throw if they try to jump, or simply go for a high low. The weakness of doing this however is that it is even more susceptible to reversals or the opponent simply mashing or throwing you, although the opponent has to take a fairly big risk for these.
Untechable Throw Setup
By doing a very specific corner combo and setup, Adler is capable of creating a situation which is effectively an unblockable. First you do ... 214A > c.5C > 6B > 2A > 5A > 2A > 5A > 2A > 2A > 2B > delay 236C. After that, you dash forward and throw. If the opponent tries to tech the throw, their hurtbox gets extended into the 236+C, which is so plus on hit that even though you whiff a throw, there's still enough time to combo into 5A and the rest of a combo. If they try to attack, the same thing happens. If done very precisely, this will even beat reflector, although if not tight enough the opponent can reflector the projectile and punish you. This setup works regardless if the opponent techs or not, so don't worry about that. However, this setup is susceptible to being reversaled, so you have to be ready to bait that. The best counter play to this is to up back. From there, Adler can react and either air throw or do an air attack, making it become a hit throw 50/50. However, if you read that the opponent is going to up back, then you can 236+B which will catch them jumping meaty and can lead to a combo if it does hit. However, this obviously means that you don't get the full setup, so if the opponent manages to read that you're going to try to read them, or just doesn't up back because they don't know, then you'll just get normal pressure.
Instant Overhead j.A
On Murakumo, Fritz, and Wei, Adler's j.A can be used as an instant overhead. It's hard to setup but you need an active 236+B+C on the opponent when they're waking up. Because their hurtboxes get bigger when they're in blockstun, the j.A will hit them while they block 236+B+C. From here the rest of the hits of 236+B+C will land, and you can link into j.C in the same jump to a full combo. Since none of these characters have good reversal attacks, you don't need to fear being reversaled much during this setup. j.A also works as an instant overhead on Blitztank without even the projectile being out. However, you do need the 236+B+C for it to work since j.A won't break Tank's armor, leaving you wide open to be air thrown without it.
Defense
Adler has relatively decent defensive options. Besides universal options, he has 214+B+C and 22+B+C. 214+B+C is very good as it comes out at frame 4, has huge range, and will always get you out of the corner even if baited, but if properly baited it's a back hit punish which will hurt a lot. 22+B+C is also invincible, but not fully invincible, meaning it can be stuffed by particularly active moves. It's also slow so it's easy to safe jump. However, if the opponent doesn't know how to punish it properly, then you can get away with doing it more frequently. It's also possible for to go for a wakeup 214+A since it's fast low crushes, although since the low crush isn't frame 1 it can be meatied. Similarly, 22+A can be used on wakeup since it comes out very fast and may low profile some moves, but is susceptible to being meatied.
Overview
Adler is a pressure focused offensive character with great setplay and vortex ability. However this comes at the cost of a weak neutral, hard combo conversions, weak defense, and a high skill requirement to use him at his full potential. However when mastered, he is an incredibly difficult character to deal with, and once he gets going, it can be near impossible to stop him.
Other Resources
Old Adler Tutorial for Vanilla ABK
Adler Tutorial - ABK AA 10 minute tutorial on the arcade version (mainly different reflector combos). Check description for timestamps. Overall has a lot more information than the first tutorial video.
Adler Combo Playlist | ABK AA Work in progress.
Dead links :(
http://www.nicovideo.jp/watch/sm2358111
http://www.nicovideo.jp/watch/sm2384168
Combos
Combo terminology
| Symbol | Meaning |
|---|---|
| > | Cancel from the previous move to the following move |
| land | The player must land |
| , | Link from the previous move to the following move |
| dl./delay | Delay before using the following move |
| nj.X | Neutral Jump |
| AA | Anti-Air, must hit an airborne opponent |
| [X] | Hold the input |
| (X) | Optional input |
| [X]*N | Repeat (sequence) N number of times |
Notes:
- Because Adler is the only character in the game to care about if the opponent is standing or not, the tables below will list whether or not the combo works on crouchers.
- Corner combos will do ~200 more damage if the opponent was caught by 236C (which is very easy to hitconfirm due to the long hitstun).
Midscreen Combos
| Combo | Damage | Works on crouchers? | Video | Notes |
|---|---|---|---|---|
| 2A > 2B > 214C | ~1700 | Yes | Link |
Staple midscreen combo. Knocks down and sets up for oki. |
| 2A > 2B > (22C(1)) > 214BC | ~3100-3200 | Yes | Link |
Metered variation of the previous combo. |
| c.5B > 214A, c.5C > 214C | ~2700 | No | Link |
Punish combo. Harder to hitconfirm, but does more damage while still giving oki. |
| c.5B > 214A, 5A > 6B, 5A > 214C | ~2900 | No | Link |
A harder but more damaging version of the previous combo. |
| 2B > 6B/236A/236B | ~1500/2200 | Yes | - |
Confirm from a random 2B in neutral. |
| 214A(2), 5B > 6B, 214C | ~2400 | Yes | Link |
For the rare occasion you only land the second hit of 214A. |
| AA f.5B > 6B, 214C/214BC | ~2300 | N/A | Link |
Anti-Air combo that's relatively easy to hit confirm since it's still advantageous if 6B gets blocked. |
| Meaty c.5[C](2), 214BC | ~3300 | Yes | Link |
Overhead combo in midscreen. The only way to only hit the second hit of c.5[C] is if it is used as a meaty. |
| [c.5B > 214A]*2, 22B/{2B > 214C} | - | No | - |
Max meterless damage in midscreen. THIS ONLY WORKS IN ABK VANILLA |
Corner Combos
| Combo | Damage | Works on crouchers? | Video | Notes |
|---|---|---|---|---|
| 2A > 2B > 214A, 5AA > 5B > 6B, 2A > 2B > 22C > (22BC/236BC) | ~2500/3100-4300 | No | Link |
Staple corner combo against standing opponent. Does decent meterless damage and can start 236BC setplay. 22C can be replaced with 236C for oki. Ending with 22C allows Adler to safejump with j.C, ONLY IF THE OPPONENT TECHS THE KNOCKDOWN |
| 2A > 2B > 214A, 5AAA > 5B > 6B, Air Throw, 22C > (22C/22BC/236BC) | - | No | - |
A variant of the previous combo that only works against Blitztank. Does great damage if you can land it. |
| 2A > 2B > 214A, c.5C > 6B, [2A > 5A]*2 > 2AA > 2B > dl.236C | ~3048 | No | - |
Combo that sets up an untechable throw. Still does decent damage for a setup combo. |
| 5A > 5B > 22C, 2AA > 2B > 236C | ~2300 | Yes | Link |
Meterless combo for crouchers. Does OK damage for a meterless combo. |
| 2AA > 22B, 2AA > 2B > 236C | ~1500 | Yes | Link |
Alternative route to the previous combo. Doesn't require 2B to confirm. |
| 2A > 2B > 214C(1) > j.236BC, j.A, dl.j.B, 5A > 5B > 22C > (22BC/236BC) | ~3200-4500 | Yes | Link |
Basic combo on crouchers. Deals decent damage and gives oki, a safejump and/or more damage. |
| 2A > 2B > 214C(1) > j.236BC, c.5C > 6B, 5A > 5B > 22C > (22BC/236BC) | ~3400-4600 | Yes | Link |
A more optimal version of the previous combo. Slightly harder but does slightly more damage. |
| 2A > 2B > 214C(1) > j.236BC, j.A, dl.j.B, Air Throw, 22C > (22BC/236BC) | ~3000-3700 | Yes | Link |
Air Throw route. Does more damage and sets up the same options as the base combo. |
| Meaty c.5[C](2), 5A > Any combo | 1169-1226 + combo | Yes | Link |
Overhead conversion that only works against Murakumo and Perfecti. |
| (236BC set on top of the opponent), 4C, 5B > 6B, 2A > 22C > (22BC/236BC) | ~3300-4500 | Yes | Link |
4C combo when 236BC is set up. Not the best damage but still nice for when you get the 4C juggle. |
| (236BC set on top of the opponent), j.A > (236BC hits) > j.C, 5A > Any combo | - | Yes | - |
Instant overhead route. Does pretty high damage when you land it. Only works on Fritz, Wei, Blitztank, and Murakumo. |
| 2A > 2B > [236BC, 5AAA > 5B]*0-2 > 236BC, 5AA > 5B > 214A, 5AA > 5B > 6B, 5A > 5B > 22C | - | No | - |
Corner 236BC loop. Does great damage but spending 3 bars on it isn't really worth it, as the damage is already good enough with 2 bars. |
| 2A > 2B > [236BC, 5AAA > 5B]*0-2 > 236BC, 214A(2), c.5C > 6B, 2A > 2B > 6B, 2A > 2B > 22C | - | Yes | - |
A variant of the previous combo that works on crouchers. |
| 2A > 2B > [236BC, 5AAA > 5B]*0-2 > 236BC, j.A, j.B, 5AA > 5B > 214A, 5AA > 5B > 6B, 5A > 5B > 22C | - | No | - |
More damaging version of the 236BC loop. Only works on Sai, Kanae, Fritz, Wei, Anonym, Blitztank and Murakumo. |
| (j.C), c.5C > 236B > [236BC, j.A, j.B, 5A > 5B > 236A]*0-2 > 236BC, j.A, j.B, 5AA > 5B > 214A, 5AA > 5B > 6B, 5A > 5B > 22C | - | No | - |
Max damage 236BC loop. Only works on Wei, Elektrosoldat, Adler, Blitztank and Murakumo. |
| 2A > 2B > ABC, 5A > 5B > [6B, 5AA > 5B]*4 > 214A, 5AA > 5B > 6B, 5A > 5B > 22C | - | No | - |
Basic Level 3 combo that does high damage and is relatively easy to do. While combos using Level 3 are flashy and do bonkers damage, it's usually more worthwhile to go for EX moves instead. Still worth going for once in a while, though. |
| (j.C), c.5C > 236B > ABC, 5A > 5B > 6B, 5AAAA > 5B > 6B, [5A > 5B > 6B]*2, 5AAAA > 5B > 214A, 5AAA > 5B > 6B, {5A > 5B > 22C}/{Air Throw, 22C > 22BC} | - | No | - |
Tank-only level 3 loop that does great damage. The second ender is the optimal one, since it does more damage and gives a safejump, but the first is easier to do. |
| 2A > 2B > ABC, 5A > 5B > [6B, 5AA > 5B]*4 > 214A(2), c.5C > 6B, 2A > 2B > 6B, 2A > 2B > 22C | - | Yes | - |
A variant of the Level 3 loop that does very slightly less damage, in exchange of working against crouchers. |
Reflector Combos
| Combo | Damage | Position | Video | Notes |
|---|---|---|---|---|
| Reflector > dl.214C/214BC | ~1700 |
Midscreen | - |
Basic and easy Reflector combo. The delay is pretty long |
| Reflector > 214A, 2B > 214C | ~2163 | Midscreen | - |
High damage Reflector combo that has good corner carry |
| Air Reflector, Air Throw > 22C | - | Midscreen | - |
Air Reflector combo that gives good oki |
| Air Reflector, j.A, dl.j.B, c.5C > 214C | - | Midscreen | - |
Alternative route that prioritizes damage over oki |
| Reflector, 5B > 6B, c.5C > 6B, 2AA > 2B > 22C > (22BC) | ~3000 ~4300 |
Corner | - |
The normal used to chain into 6B changes depending on the distance. If Adler is too far from the corner after the Refector, use 2B. If you're still too far from it and get f.5C instead of c.5C, use 5B instead |
Ausf Achse Combos
This will only lists combos that changed.
- Reflector Combos
| Combo | Damage | Position | Video | Notes |
|---|---|---|---|---|
| Reflector > 214A, 22A/B | - | Midscreen | - |
Close Reflector combo. Does decent damage |
| Reflector, 2B > 6B, 22A | - | Corner | - |
Far Reflector corner combo. Nice conversion to know |
| Reflector, 2A > 6B, 2A > 22C | - | Corner | - |
Close Reflector corner combo. Does mildly more damage |
| Air Reflector, 2A > 214A | - | Midscreen | - |
Air Reflector combo. Not much different from just doing 214C, but it requires a bit more timing |
| Air Reflector, 5A > 5B > 55C | - | Corner | - |
Air Reflector corner combo. This is a pretty rare situation, so learning it isn't mandatory |
Frame Data
source
KD - Knockdown
VB - Variable
                       |     Frames      |  Frame Advantage  |
               Attack  | Total | Startup | On Hit | On Block | Notes
Throws and Reflectors  ---------------------------------------
                  5AB  |  25   |   5     |   KD   |     -    |
                  jAB  |  23   |   3     |   KD   |     -    |
                  5BC  |  17   |   7     |   KD   |    +3    |
                  2BC  |  17   |   7     |   KD   |    +3    |
                  jBC  |  16   |   6     |   KD   |    +3    |
              Normals  ---------------------------------------
                   5A  |  15   |   4     |    0   |     0    |
                   2A  |  15   |   4     |    0   |     0    |
                  c5B  |  20   |   5     |    0   |    -2    |
                  f5B  |  26   |   7     |   -4   |    -6    |
                   2B  |  26   |   7     |   -4   |    -6    |
                  c5C  |  25   |   6     |   +0   |    -4    |
                c5[C]  |       |         |   +4   |    +0    |
                  f5C  |  36   |   12    |   KD   |    -9    |
                f5[C]  |       |         |   KD   |     0    |
                   2C  |  33   |   8     |   KD   |   -10    |
                 2[C]  |       |         |   KD   |    -8    |
                  j.A  |  19   |   4     |   -4   |    -4    |
                  j.B  |  24   |   5     |   VB   |    VB    |
                  j.C  |  26   |   7     |   VB   |    VB    |
      Command Normals  ---------------------------------------
                   6B  |  28   |   13    |   -4   |    -4    |
                   4C  |  42   |   27    |   KD   |     0    |
             Specials  ---------------------------------------
                236+A  |  46   |   11    |   -5   |    -9    |
                236+B  |  46   |   19    |  -13   |    -1    |
                236+C  |  46   |   27    |  +11   |    +7    |
                214+A  |  48   |    7    |   KD   |          |
                214+B  |  50   |    7    |   KD   |   -12    |
                214+C  |  50   |    7    |   KD   |   -12    |
                 22+A  |  42   |    5    |   KD   |   -16    |
                 22+B  |  46   |    9    |   KD   |   -12    |
                 22+C  |  50   |   13    |   KD   |    -8    |
       EX and Level 3  ---------------------------------------
              236+B+C  |  26   |    9    |  +25   |   +21    |
              214+B+C  |  88   |    4    |   KD   |          |
               22+B+C  | 108   |    9    |   KD   |   -18    |
                A+B+C  |  16   |    6    |        |          | superflash 60F
Trivia
- The term Adler, the German word for the bird of prey "eagle", is both the last name of many people and an emblematic bird (notably in heraldry, bannistics, numismatics etc.) featured on many blazons since the feudal age, including the Nazi flag and the present German Bundeswappen and at times on the flags of Austria and Germany. (from Wikipedia article)
- Ahnenerbe was a real Nazi-era government study group that billed itself as a "study society for Intellectual Ancient History". It was developed to research the anthropological and cultural history of the Aryan race, and later lent itself to experimentation and voyages intent on proving that prehistoric and mythological Nordic populations had once ruled the world. (from Wikipedia article)
- Agartha is a legendary city that is said to reside in the Earth's core. It is related to the Hollow Earth theory and is a popular subject in Esotericism. (further reading)
