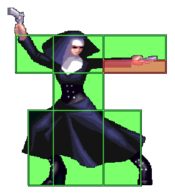
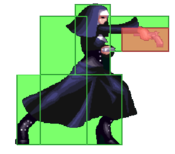
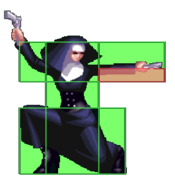
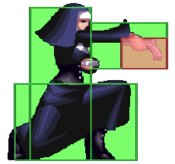
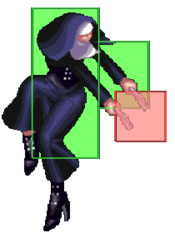
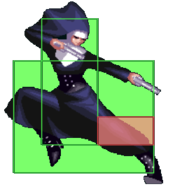
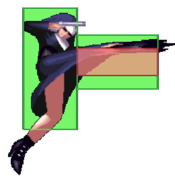
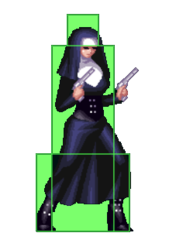
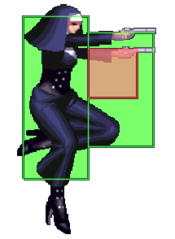
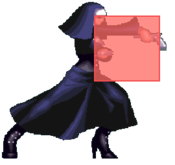
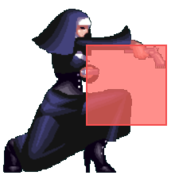
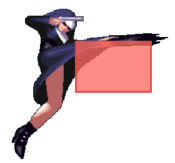
Akatsuki Blitzkampf/Anonym

From Mizuumi Wiki
Jump to navigation Jump to search

Background

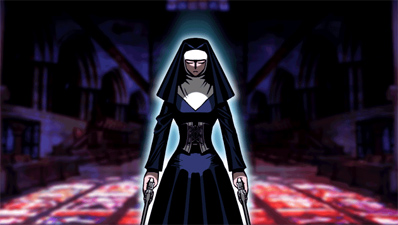
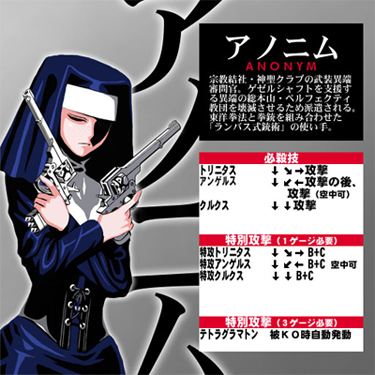
An armed officer of the Inquisition from the religious society, Holy Club. She is dispatched to destroy Gesellschaft, the organization supporting the heretic Perfecti Cult. She is a master of "Lambuth Style Gun-jutsu" a combination of oriental kempo and pistols. (from character selection screen)

Read the translation of her arcade mode!

Introduction

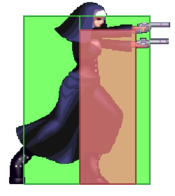
Anonym is a slippery runaway zoner that is limited by her unique bullet meter. Many of her normals shoot bullets, which must be reloaded at some point or you risk running out. She works great at fullscreen and has many good options up close to escape pressure. Since her bullets travel quickly, they can be difficult to parry and blocking bullets rewards Anonym with chip damage and screen space. Managing your bullets is the key to success, and with them, you can keep your opponent constantly guessing.

Similar to: Happy Chaos, Sion/Eltnum, Vlov

  • All of Anonym's shooting normals act as special attacks and inflict guard damage.


Strengths Weaknesses
  • High Mobility: Anonym has great movement options like her dashes, divekick, and 214X that make her difficult to lockdown.
  • Great Zoning: Bullets are fast, do chip, whiff cancel into each other, and can cover all angles including anti-air. This makes her incredibly difficult to blindly approach.
  • Resurrection Super: Great level 3 for a character that relies very little on meter.
  • Invincible Forward Dash: Anonym's forward dash heavily low profiles and has a little startup invincibility, making it an incredibly strong tool for running away, escaping the corner, and going in for an unexpected attack.
  • Ammo Meter: Anonym's zoning is restricted by the amount of bullets she has, which can make her predictable at best and punishable at worst.
  • Limited Abare: Outside of her C normals, Anonym's melee buttons lack range and generally have worse frame data than the rest of cast. Her forward dash of course is great for getting out of pressure but can become predictable.
  • Lowest Defensive Ratio: Anonym is tied for the lowest defensive ratio in the game, so she can't take too many hits.


All damage values below were tested on Akatsuki with 1.000 armor ratio and full life on both sides (remember about "Health difference" and "Guts" systems)

Character Summary

Move list

Special Moves
236A/B/C (EX OK) - Trinitas: Reloads then shoots 3 bullets
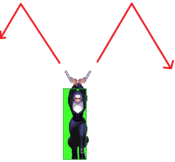
214A/B/C (EX OK, Air OK) - Angelus: Jumps then shoots forwards and behind
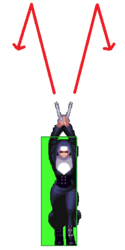
22A/B/C (EX OK) - Crux: Shoots upwards while bullets ricochet off the ceiling
Level 3 Super
Triggers automatically upon reaching 0 HP - Tetragrammaton: Resurrection super
Unique Attacks
Holding back while pressing a button will do a "normal" attack, consuming no bullets
5[A], 6A, 4C, 6C, j.2A/B/C
Stats & vitals

  • Armor Ratio = 1.050, 0.875 during A+B+C
  • Forward Speed = 4.5 dots/f
  • Backward Speed = 3.5 dots/f
  • Jump Startup = 3F
  • Backdash Duration = 27F
  • Back Dash as well as being invulnerable on frames 1-6 has lower body invincibility for most of the duration.
  • Forward Dash is invulnerable on frames 1-5. The only forward dash in the game with invulnerability. It can pass through opponents on frames 1-15 and has some upper body invulnerability on frames 6-20 (the whole dash is low to the ground).
Quick combo reference

Basic BNB: 1A > 1B > 6C

Basic BNB(2 bullets): 1A > 1B > 4C > 4A > 5B > delay 2C

Metered BNB: 1A > 1B > 4C > 236B+C

Metered BNB(4 bullets): 1A > 1B > 4C > 4A > 5B > 214A~C > j.214B+C

Reflector: B+C > 6C

Notes on Ausf. Achse

Universal Changes

No notable changes.

Character Changes

She has new effects on her bullets and 214X, making them easier to see. Also bullets have a bigger hitbox.

The backwards shot on 22X now launches, although this changes nothing except Blitztank combos.

Aerial gun normals have more landing recovery. On top of that, you can no longer cancel the landing recovery of them with a special.


Complete Changelog

Shooting Normal Moves

Note: Bullet normals can only be special cancelled on impact, e.g. 5C whiff>22X by itself won't work, but 5B(5B hits)> 5C (whiff)>22X will.

5A/5[A]
ABK-Anon-5A-Angles 3.png
Damage Guard Startup Adv Hit Adv Block
450/784/1005 High/Low 9 +1

-1 (5[A])

-6

-8 (5[A])

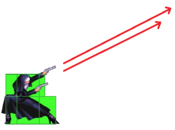
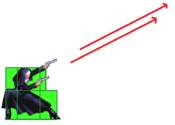
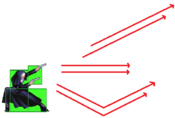
  • Anonym fires into the ground 1 to 3 shots (depending on how long you hold the attack button), that ricochet roughly at 2/3 screen point.
  • The angle makes the bullet really easy to avoid midscreen by jumping, or even dashing over it in some cases, making 2A a much more preferable poke.
  • Good for tacking on a little extra damage on OTG before Reloadcancelling the last 1-3 bullets, if you notice they're not techrolling their knockdown.
  • The 3 bullets on 5[A] have to be parried 2 times(unless you're Blitztank)
5B
ABK-Anon-5B-Angles-2.png
Damage Guard Startup Adv Hit Adv Block
950 High/Low 11 +2 -8
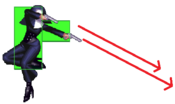
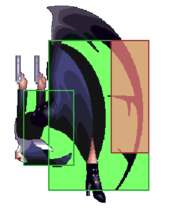
  • A single shot forward. Can be parried on reaction with relative ease, however being able to cancel into it from 2A and leading into specials/5C afterwards makes it a cornerstone of Anonym's zoning game.
  • Take care when using this move to anti-air, as the hurtbox at the end of the gun comes out before the actual projectile does.
5C
ABK-Anon-5C-Angles-2.png
Damage Guard Startup Adv Hit Adv Block
1450 High/Low 13 KD -10
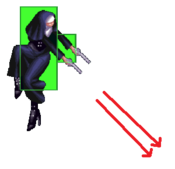
  • A diagonal shot that starts a juggle on hit, can be comboed into 236A\B or 22C.
  • Be careful when using this move as an anti-air, as the angle it hits at will often be jumped over up close.
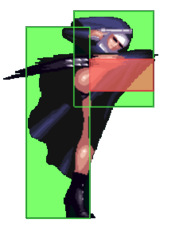
  • Anonym crouches slightly on startup, letting her get under moves like Elektrosoldat [4]B/C
  • Can be layered in a blockstring, since you usually do 1A > 1B > back jump rising j.4A, those looking to interrupt immediately after 1B might get hit by a delayed 5C, which you then cancel into 22A, making it completely safe unless parried and giving you a short juggle if it hits in the corner.
2/3A
ABK-Anon-2A-Angles-2.png
Damage Guard Startup Adv Hit Adv Block
350 High/Low 9 -1 -8
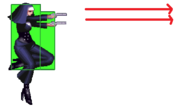
  • An extremely fast forward shot, difficult to parry on reaction without anticipating it, making this a great poke to stick out and keep the zoning game going.
  • Cancel into the rest of your bullet string on impact, or simply recover and keep playing the neutral.
2/3B
ABK-Anon-2B-Angles-2.png
Damage Guard Startup Adv Hit Adv Block
750 Low 11 +0 -11
  • A shot even lower than 2A (so it actually hits low). Same bullet speed as 5B. Mix this in instead of 5B from time to time to remind the opponent that you have a low-hitting bullet. Will go through Marilyn 214X.
2/3C
ABK-Anon-2C-Angles-2.png
Damage Guard Startup Adv Hit Adv Block
1150 Low 13 -1 -14
  • Another low shot, only this time Anonym lies on the ground, which effectively allows her to evade projectiles and other high attacks.
  • Make sure this move HITS before cancelling into it, as the recovery on block/whiff is brutal.
j.A
ABK-Anon-j.A-Angles-2.png
Damage Guard Startup Adv Hit Adv Block
400 High/Low 7 VA VA
  • Anonym shoots the ground aiming at ~3/4 point of the screen.
  • As an anti-air option you can try a pre-emptive roll/66 behind them and backjump with a rising j.A.
j.B
ABK-Anon-j.B-Angles-2.png
Damage Guard Startup Adv Hit Adv Block
900 High/Low 9 VA VA
  • Same as j.A, but aimed further forwards.
j.C
ABK-Anon-j.C-Angles-2.png
Damage Guard Startup Adv Hit Adv Block
1450 High/Low 11 VA VA
  • A shot directly forward.

Melee Normal Moves

4A
ABK-Anon-4A.png
Damage Guard Startup Adv Hit Adv Block
450 High/Low 4 -4 -4
  • Same range as 1A.
4B
ABK-Anon-4B.png
Damage Guard Startup Adv Hit Adv Block
950 High/Low 6? -4 -4
  • Has enormous range for it's speed and can even interrupt a lot of Fritz's normals.
1A
ABK-Anon-1A.png
Damage Guard Startup Adv Hit Adv Block
350 High/Low 4 +0 +0
  • Same range as 4A, only crouching and with less damage.
  • Crouching will make it more consistent for confirming a hit, as you're not moving backwards, making this the preferred jab overall.
1B
ABK-Anon-1B.png
Damage Guard Startup Adv Hit Adv Block
750 High/Low 6? +0 -4
  • Same advantage on block as 4B, however it moves Anonym forward slightly, making it easier to use for combos and confirms.
1C
ABK-Anon-1C.png
Damage Guard Startup Adv Hit Adv Block
1150 Low 9 KD -16
  • Anonym slides forward feet first, knocking her opponent down.
  • As with 2C, Anonym is very low to the ground.
  • A high risk option, but can net you a Reload if you do manage to hit with the slide.
j.4A
ABK-Anon-j.4A.png
Damage Guard Startup Adv Hit Adv Block
450 High 4 -4 -4
  • The hitbox is good enough that a rising j.4A will stuff out a lot of moves, making 7j.4A into air bullets/divekicks/j.4C etc. a cornerstone of Anonym keepaway.
j.4B
ABK-Anon-j.4B.png
Damage Guard Startup Adv Hit Adv Block
950 High 5 VA VA
  • Low hitstun and iffy hitbox makes every other air option much more preferred.
j.4C
ABK-Anon-j.4C.png
Damage Guard Startup Adv Hit Adv Block
1450 High 6 VA VA
  • Amazing air-to-air with quick startup and long range. Backjump j.4C can be a powerful keepaway tool in some matchups, letting you keep your bullets for more ground zoning.
  • Can combo into rising Airthrow if it hits Air-to-Air low enough to the ground

Command Normals

リロード - Reload
6A OR A/B/C(when out of ammo)
ABK-Anon-6A.png
Damage Guard Startup Adv Hit Adv Block
N/A N/A N/A N/A N/A
  • Anonym reloads her guns. Has signifficant recovery, so make sure you have enough space or advantage before reloading.
  • 22X with no bullets left counts as a special for all cancelling purposes. This makes Anonym reload and opens up a key technique that makes her bullethell neutral truly unstoppable -

Reloadcancelling.

e.g. (1 bullet left) 5B > 22X

(2 bullets left) 2A > 5B > 22X

(3 bullets left) 2A > 5B > 5C(whiff) > 22X (only works at fullscreen range! as you're cancelling the hit/block of 5B, not the 5C whiff)

(4 bullets left) 5[A] > 5B > 22X

etc.

Make sure to keep track of your current bullet count and look for opportunities to land these strings for a safer Reload!

  • Mix in 236B once they start overcommitting to punish the recovery of your reloads.
キルクイトス - Circuitus
4C
ABK-Anon-4C.png
Damage Guard Startup Adv Hit Adv Block
1450 High/Low 10? KD -16
  • Leads into her combos, can be used as a pre-emptive anti air due to slow startup, and it remains safe even on airblock.
  • During the "rising" part of the move has a brief period of low invincibility.
  • Does NOT actually put Anonym in the air for it's duration so you can still be thrown out of the startup
カノーネ - Kanone
6C
ABK-Anon-6C.png
Damage Guard Startup Adv Hit Adv Block
1400 High/Low 7? KD 14?
  • Surprisingly fast normal that is your main setup for Reloads midscreen. Can gatling straight into it from 4B/1B or link into it after a 4C (works even at tip range)
アヴァタール - Avatar
j.2A/B/C
ABK-Anon-j.2X.png
Damage Guard Startup Adv Hit Adv Block
1000 High/Low 23 VA VA

A descending front flip, with j.2A dropping straight down, j.2B - slightly forward, and j.2C - far forward

  • The divekick hitbox only kicks in where Anonym is near the ground, so this can still lose to a lot of air-to-airs.
  • However, it is still a very versatile movement tool that gives you a lot of options, like crossing up crouching opponents, or simply feinting your jump angle with j.2A, regaining screen space with j.2B or getting out of the corner with j.2C.
  • Go for an Airthrow combo/setup if you get an air-to-air hit with any of the divekicks (usually j.2B).
  • None of the divekicks hit behind the opponent unless they are crouching, including j.2A.
  • j.2A done meaty and low to the ground (not TK!) will be advantageous enough to parry back the opponent's wakeup parry, giving you a strike/throw(after a whiffed tk/fake divekick) mixup. This is practical after a corner throw, after which you can buffer the correct height for the meaty. This will still lose to wakeup DPs, so be careful going for this setup against DP-happy characters(Akatsuki, Soldat) and players. Example

Special moves

トリニタス - Trinitas
236+A/B/C/B+C
ABK-Anon-236A-Angles-3.png
A version
A version
ABK-Anon-236B-Angles-3.png
B version
B version
ABK-Anon-236C-Angles-3.png
C version
C version
ABK-Anon-236BC-3-Angles-2.png
EX version
EX version
- - - - -

Shoots three times reloading before it.

Version Damage Guard Startup Adv Hit Adv Block
A 1560 High/Low 35 +7 -6
  • A version makes Anonym roll forward while reloading and then shoots low. Combo filler, mostly used for confirming a 5C hit. Can 236BC afterwards to tack on some extra damage, especially against the big characters(Fritz,Wei,Blitztank), who will likely eat all the bullets from the super even midscreen.
B 1560 High/Low 33 -3 -16
  • B version has a delay because of the reloading and is exactly like 5B, but with three shots.
  • Mix 236B in places where you would usually Reload/6A to further trick the opponent.
C 1560 High/Low 34 KD -16
  • C version makes her hop back while reloading, then she shoots in a 45 degree up.
  • Can be used for a YOLO reload with bullets in front of you, however the projectile is easy enough to parry and Anonym's backdash is not usually used, nullifying any possibility of using this move for mindgames.
EX 2600 High/Low 5 KD -34

Shoots many times in the three directions the normal Trinitas would shoot. Invulnerable 1-4f on startup.

  • She reloads before and after.
  • With 1-4f startup invulnerability, 236BC is your main reversal option alongside 22BC. This may still trade with some meaties, although the bullet that traded will usually leave you in massive advantage, so mash 6C or a 5B string to confirm that situation(can be done every time you use this as a reversal if you're not sure you can react to the trade).
アンゲルス - Angelus
214+A/B/C/B+C, A/B/C (Air OK!)
ABK-Anon-214X-Angles-2.png
Only the first line for the aerial version. Double the amount of bullets on EX.
- - - - -

Shoots down three times in two directions (front and back) while jumping.

  • The first command makes her jump and with each button she jumps higher. The second command makes her shoot while doing a mid-air "jump".
  • Without any ammo it can be used as an escaping tool as both commands result in a somewhat double-jump.
  • 214B~A guaranteed covers the screen in bullets, making it a decent, albeit costly, neutral option for retreating.
  • Pressing B+C to do an EX after you've already done the first command won't do the EX version
  • Aerial version is functionally the second command (she goes in a direction) but it only shoots one bullet that bounces on the ground after a delay.
  • j.214C and j.236A/C (when facing away from the opponent, since you have to do the reverse of the input) are the crossups of choice for Anonym. j.214A can also be used as a movement fakeout for those expecting a j.214C.
  • j.214X has signifficant hitstun and can be cancelled into 236BC on landing.
Version Damage Guard Startup Adv Hit Adv Block
A N/A N/A N/A N/A N/A
  • Jumps the lowest.
B N/A N/A N/A N/A N/A
  • Jumps moderately high.
C N/A N/A N/A N/A N/A
  • Jumps the highest.
X > A 1781 (1000 in air) High/Low 13 (26 in air) VA VA
  • A version jumps back.
X > B 1781 (1000 in air) High/Low 13 (26 in air) VA VA
  • B version stays in place.
X > C 1781 (1000 in air) High/Low 13 (26 in air) VA VA
  • C version jumps forward.
EX 2359 High/Low 13 (15 in air) -31 (VA in air) -

Double-jumps upward and shoots down double the amount of times.

  • She reloads before and after.
クルクス - Crux
22+A/B/C/B+C
ABK-Anon-22A-Angles.png
A version
A version
ABK-Anon-22B-Angles-2.png
B version
B version
ABK-Anon-22C-Angles-2.png
C version
C version
ABK-Anon-22BC-Angles-2-Pink.png
EX version
EX version
- - - - -

Shoots once diagonally up and both bullets (from each gun) ricochet back down.

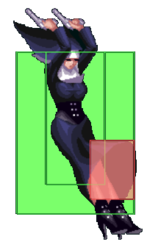
  • One of your main anti-air options (aside from hard callouts like 5C, Airthrow etc.)
  • 22X with no bullets left will give you a Reload instead, but still counts as a special for all cancelling purposes. See Reload (6A).
Version Damage Guard Startup Adv Hit Adv Block
A 800 High/Low 11 +6* -6*
  • A version shoots very upward and makes bullets fall closer to Anonym.
B 800 High/Low 11 +2* -10*
  • B shoots a little lower which makes fall far from her.
C 800 High/Low 11 KD -14*
  • C version has the lowest angle but bullets fall the furthest and picks them up into a combo on hit.
  • Will mostly ever hit from fullscreen range
  • Combo into 2A > 5B > 236A on raw hit
  • Blitztank beam zoning will easily lose to 22C > 2A > 5B > 236A
EX VA (normally hits twice for 1391) High/Low 5 KD -52*

Creates a somewhat rain of bullets using normal Crux three times (or more) in a row. Invulnerable 1-4f on startup.

  • 1-4f invuln super you can mix in instead of 236BC if you want to mess up your opponent's parry timings, or if they are above you.
  • Loses it's invulnerability after startup and can trade, just like 236BC.
  • She reloads before and after.

Universal Mechanics

Throws

Forward Throw
4/5/6+A+B
ABK-Anon-Ground-Throw.png
Damage Guard Startup Adv Hit Adv Block
1966 N/A 5 KD N/A

Anonym performs a quick series of punches and then kicks the opponent away. Having the best, furthest moving dash in the game, you will be using this a lot. Enough advantage on hit for a Reload/236B.

Air Throw
j.4/5/6+A+B
ABK-Anon-Air-Throw.png
Damage Guard Startup Adv Hit Adv Block
2000 N/A 3 KD N/A

Anonym grabs her enemy, flips and slams him or her into the ground below, then hops away. The opponent cannot techroll afterwards. Way less advantage than Ground Throw and leaves you closer to the opponent, which makes doing a Reload afterwards so much riskier. Nevertheless, Anonym gets a lot of mileage out of Airthrow thanks to her godlike, short recovery dash. Always be on the lookout for opportunities where your opponent will jump, expecting bullet zoning, and will eat a rising Airthrow from you.

TLDR; Your main callout for opponents expecting to get into your range with Jump Parry.

Reflectors

Standing Reflector
4/5/6+B+C
ABK-Anon-Parry-Attack-2.png
Damage Guard Startup Adv Hit Adv Block
500 High/Low 7 KD +3

6C>Reload on hit (always works) or 2A > 2B > 2C (hard!) to leave them at further range away from you

Crouching Reflector
1/2/3+B+C
ABK-Anon-Crouch-Parry-Attack.png
Damage Guard Startup Adv Hit Adv Block
400 N/A 7 KD +3

6C on hit.

Jumping Reflector
7/8/9+B+C
ABK-Anon-Air-Parry-Attack.png
Damage Guard Startup Adv Hit Adv Block
500 N/A 6 KD +3

Launches them higher, so you can do 4A > 5B > delay 2C on hit or simply 6C.

Super Move

テトラグラマトン - Tetragrammaton
Executes automatically when KO'ed (needs 3 super stocks)
ABK-Anon-A+B+C.png
Can't be visualized since its considered a projectile
Damage Guard Startup Adv Hit Adv Block
8 High/Low 11 KD -20

A flash of light appears and begins hitting the opponent rapidly 8 times while Anonym resurrects with 25% of her original health(3600 HP).

  • The 8 hits can be reflected and are treated as projectiles. Ground parry for some extra meter and advantage or jump forward parry to end up as close as possible after it recovers.
  • The super will force the opponent back during the resurrection by expanding Anonym's collision box (like an invisible force-field). Cannot be punished.
  • For 6 seconds after she stands up, Anonym gets a -25% to Damage Taken and deals +25% more Damage herself.

General Strategy

Overview

"Through analysis of thousands of recorded gunfights, the Cleric has determined that the geometric distribution of antagonists in any gun battle is a statistically-predictable element. The Gun Kata treats the gun as a total weapon, each fluid position representing a maximum kill zone, inflicting maximum damage on the maximum number of opponents, while keeping the defender clear of the statistically-traditional trajectories of return fire. By the rote mastery of this art, your firing efficiency will rise by no less than 120%. The difference of a 63% increased lethal proficiency makes the master of the Gun Katas an adversary not to be taken lightly." - DuPont


A hit-and-run type of zoner, Anonym wants to play the system mechanics while preventing her opponent from doing the same. Although she lacks any sort of blockstrings up close, her many movement options let her set up throws while, at the same time, playing around the opponent's toolkit and being a scary presence in neutral in general, chip damage on bullets to boot. Anonym not only has to manage her bullet count, but also her position on the screen, as being in the corner for her is a death sentence in a lot of matchups. The 3 bar passive Resurrection is very useful here, giving Anonym a second chance at least once per match.

General notes:

  • 7j.4A j.A/j.B/late j.C
  • Special cancel into 22X when out of bullets to reload faster, this is core knowledge for this character. (See Reload)
  • Bullet normals can only be special cancelled once a bullet reaches the opponent, be it on hit, block or parry.
  • Jumping parry is the best way to get close to Anonym after her Resurrection.
  • Constantly be on the lookout for opportunities for a roll/66 behind your opponent, so you can keep moving backwards while covering the screen with bullets. DO NOT turtle straight into the corner, this is where Anonym starts losing the match!
  • Roll/66 has very little recovery, so if you know your opponent's habits well, you can 66 rising Airthrow/66 Throw as a hard callout.
  • Likewise, you can layer rolls into your neutral to regain space even when not being aggressive e.g. roll forward 66 > backjump j.4A > j.4A/B.
  • j.214C > 236BC to get behind them or input j.236A/236C if already jumping over them for a pseudo-mixup.
  • After blocked j.2X, up back j.A is strong against opponents who mash.

Escaping the Corner

j2C

-Flip over the opponent to travel behind them

-The distance covered is always usually good, but can leave you open to a back attack


j214C

-Similar to j2C, although even better when the opponent gets counter hit

-The trajectory is not as forgiving, if the position does not look favorable, opt for j214A to fake out

-Confirm into 236BC on hit(always worth it if you can react to it)


66

-Surprisingly a good option as Anonym has some invincibility frames, can pass through fireballs with ease

-Works even better if the opponent jumps and you read/react to it


1C

-Similar to 66, although with more recovery


236BC

-If you can string into it, usually a favorable situation due to the sheer amount of knockback

-Not always advised on wakeup, but not a terrible idea either

-Can be painful when parried


Fighting your way out

Self explanatory, but most used normals for this situation are:

-1A, 1B, 1C, 4C, 6C

Combos

Symbol Meaning
> Cancel from the previous move to the following move
land The player must land
, Link from the previous move to the following move
dl./delay Delay before using the following move
nj.X Neutral Jump
X~Y Use Y followup after hitting X move
AA Anti-Air, must hit an airborne opponent
[X] Hold the input
(X) Optional input
[X]*N Repeat (sequence) N number of times

Note: 236BC and 214BC replenish all of your bullets.

Midscreen Combos

Combo Damage Bullet Cost Video Notes
1A > 1B > 6C 1596 0 https://youtu.be/xgqN0dVruJk

Go-to far 1A confirm. At closer ranges, do 4C into...

1A > 1B > 4C, 1A > 5B delay 2C 2357 2 https://youtu.be/mzmG7OOKWAY

Anonym's midscreen BnB. Sends the opponent back to fullscreen

1A > 4B > 4C, 1B > 2C 2226 1 https://youtu.be/Ex3MhqROujc

For when you only have 1 bullet

1A > 1B > 4C, 1B > 6C 2141 0 -

Close range confirm that costs no bullets

1A > 1B > 4C, 1B > 1C 2226 0 https://youtu.be/KTvS7V-L-q4

Ditto

1A > 1B > 4C > 6C 1961 0 -

When you see that the 4C hit with the very tip of it's hitbox, link into 6C. 1C also works, but leaves you closer on hit

1A > 4B > 4C, 1A > 5B > 236A 2463 1 https://youtu.be/uMItShTCFV0

236A leaves you with 3 Bullets. Not ideal unless you REALLY feel like closing in on your opponent

1A > 4B > 4C delay 236BC 3060 0 https://youtu.be/1YHPDrc8p6M

A basic metered option that reloads and tacks on a little extra damage, especially at lower Guts ratings

1A > 1B > 4C, 4A > 5B > 214A~C > j.214BC 3669~ 2-4 -

Anonym's main metered BnB, as well as her max damage midscreen. Omitting j.214BC results in 2534 damage

1A > 1B > 4C, 4A > 5B > 214A~C > 236BC 3927 4 https://youtu.be/0-2G9irGfL8

Needs to be close enough to the corner for the 214A~C to chase them down.

Corner Combos

Combo Damage Bullet Cost Video Notes
1A > 1B > 4C, 4A > 5B > 5C > 236A > 236BC 3635~ 2 -

The Midscreen-to-Corner combo(at the range where 5C hits). Cancelling into 236BC is always worth it, just like with all of the corner combos

1A > 1B > 4C, 1A > 5B > 5C > 22A > 5A > 5B > 5C > delay 236BC 4412 6 -

The Corner Loop. Basically, 5C lets you go into another gatling of choice. Theoretically, you can end the juggle in a number of different ways: 1B > 6C, Reloadcancel on the last bullet or a fake/real meaty 22A, but if you are seriously hitting someone in the corner with the game's keepaway zoner, you should capitalize by ending with a delayed 236BC, which will also bring you back to full bullets. All instances of 1A can be 4A, but 1A is preferred for consistency. These can cost anything, from 6 bullets...

1A > 1B > 4C, 1A > 5B > 5C > 22B, 1A > 5B > 5C XX 236BC 4530 5 https://youtu.be/tl3FTXAp-oA

...to 5 bullets...

1A > 1B > 4C, 1A > 5B > 5C, 1A > 5B > 5C > delay 236BC 4203 4 -

...to 4 bullets...

1A > 1B > 4C, 1A > 5B > 5C, 1A > 1B > 5C XX 236BC 4156 3 -

...to 3 bullets...

1A > 1B > 4C, 1B > 5C, 1A > 1B > 5C XX 236BC 4170 2 https://youtu.be/FOct2c2paGU
1A > 1B > 4C, 1A > 5B > 5C XX 236B XX 236BC 4009 2 https://youtu.be/SFf83_bsY2M

...to 2 bullets...

1A > 1B > 4C, 1A > 1B > 5C > 1A > 1B > 6C 2832 1 -
1A > 4B > 4C, 1B > 5C XX 236A XX 236BC 3860 1 https://youtu.be/I6C_2SZgjOU

...to 1 bullet

1A > 1B > 4C, 1B > 1A > 1B > 6C 2403 0 -

Use ONLY if you have 0 bullets and are somehow getting a hit in the corner

5C > 22A > 5B > 5C > 1A > 1B > 236BC 4360 4 -

5C > 22A Confirm example. Although this is a lot riskier to attempt in the corner, where the opponent is not pushed back on block, and a parried bullet can get you thrown into the corner

Reflector Combos

Combo Damage Position Bullet Cost Video Notes
Reflector, 6C 1280 Anywhere 0 -

Basic and easy Reflector combo, Reload afterwards

Reflector, 2A > 2B > 2C 1182 Midscreen 3 -

Will actually do slightly more damage than the above combo on average due to the higher amount of hits. Leaves them further away, but linking into 2A can be hard

Situational Combos

Combo Damage Bullet Cost Video Notes
AA j.2B/C, land, Air Throw - 0 -

More of an Air Throw setup than an actual combo

22C, 2A > 5B > 214A~A > (214BC) 3249 4-6 -

Fullscreen confirm with 22C. Omitting 214BC makes the combo cost 4 to 6 bullets and deal 2105 damage

22C, 2A > 5B > 236A > (214BC) 2845 3 -

A way cheaper variant of the previous combo. Omitting 214BC makes the combo cost 3 bullets and deal 2032 damage

AA 4C, slight delay 236BC 3346 0 -

Anti-air 4C becomes a whole lot more appealing once you run out of bullets

5C > 22C 2034 1 -

3/4 Screen autopilot 5C > 22C will combo, as 22C shoots at pretty much the same angle

5C > 236A/B 2467 3 -

5C > 236A will always work, but you have to be sure the 5C will definitely hit them. 236B also works, if you're close enough

Far 1C > 236BC 2341 0 -

1C actually launches them on hit, letting you combo into 236BC and get a reload if you somehow get a hit close to the corner

CH 236BC, 6C 2031 0 -

For when 236BC trades. Buffer the 6C every time you try to wake up with this super for more consistency

AA 4C, Air Throw 2912 0 -

For when you have no bullets AND no meter for the 236BC

2A > 5B > 236BC 2079/1886/2127 2 -

If it can win you the match, might as well

4B > 22A > j.4A > j.4C > 1A > 5B > 5C > 22A > 22BC 5216 4 -

Blitztank-specific. All hits of 22BC connecting deals massive damage

Frame Data

source
KD - Knockdown
VA - Variable
*UV - value(s) marked with "?" in the table is/are unverified
x~yF - a period from frame "x" till frame "y"

                       |     Frames      |  Frame Advantage  |
               Attack  | Total | Startup | On Hit | On Block | Notes
Throws and Reflectors  ---------------------------------------
            4/5/6+A+B  |  20   |    5    |   KD   |    --    |
          j.4/5/6+A+B  |  21   |    3    |   KD   |    --    |
                5+B+C  |  17   |    7    |   KD   |    +3    |
                c.B+C  |  17   |    7    |   KD   |    +3    |
                j.B+C  |  16   |    6    |   KD   |    +3    |
                  A+C  |  58   |   --    |   --   |    --    | cancellable after 32F
     Shooting Normals  ---------------------------------------
                   5A  |  28   |    9    |   +1   |    -6    |
          2 shot 5[A]  |  35   |   ""    |   -1   |    -8    |
          3 shot 5[A]  |  40   |   ""    |   -1   |    -8    |
                   5B  |  34   |   11    |   +2   |    -8    |
                   5C  |  40   |   13    |   KD   |   -10    |
                 2/3A  |  30   |    9    |   -1   |    -8    |
                 2/3B  |  36   |   11    |   +0   |   -10    |
                 2/3C  |  44   |   13    |   -1   |   -14    |
                  j.A  |  VA   |    7    |   VA   |    VA    | landing recovery 8F? *UV
                  j.B  |  VA   |    9    |   VA   |    VA    | landing recovery 8F? *UV
                  j.C  |  VA   |   11    |   VA   |    VA    | landing recovery 8F? *UV
        Melee Normals  ---------------------------------------
                   4A  |  19   |    4    |   -4   |    -4    |
                   4B  |  24   |    6?   |   -4   |    -6    | *UV
                   1A  |  15   |    4    |   +0   |    +0    |
                   1B  |  20   |    6?   |   +0   |    -2    | *UV
                   1C  |  40   |    9    |   KD   |   -16    |
                 j.4A  |  19   |    4    |   -4   |    -4    |
                 j.4B  |  20   |    5    |   VA   |    VA    |
                 j.4C  |  25   |    6    |   VA   |    VA    |
      Command Normals  ---------------------------------------
                   6A  |  39   |   --    |   --   |    --    | reloads on 21F
                   4C  |  38   |   10?   |   KD   |   -16    | *UV
                   6C  |  35?  |    7?   |   KD   |   -14?   | *UV
                 j.2A  |  VA   |   23    |   VA   |    VA    | landing recovery 6F
                 j.2B  |  VA   |   23    |   VA   |    VA    | landing recovery 6F
                 j.2C  |  VA   |   23    |   VA   |    VA    | landing recovery 6F
             Specials  ---------------------------------------
                236+A  |  66   |   35    |   +7   |    -6    | reloads on 21F
                236+B  |  74   |   33    |   -3   |   -16    | reloads on 21F
                236+C  |  75   |   34    |   KD   |   -16    | reloads on 22F
                214+A  |  46   |   --    |   --   |    --    |
                214+B  |  52   |   --    |   --   |    --    |
                214+C  |  58   |   --    |   --   |    --    |
              214 > A  |  VA   |   13    |   VA   |    VA    | landing recovery 20F
              214 > B  |  VA   |   13    |   VA   |    VA    | landing recovery 20F
              214 > C  |  VA   |   13    |   VA   |    VA    | landing recovery 20F
              j.214+A  |  VA   |   26    |   VA   |    VA    | landing recovery 20F
              j.214+B  |  VA   |   26    |   VA   |    VA    | landing recovery 20F
              j.214+C  |  VA   |   26    |   VA   |    VA    | landing recovery 20F
                 22+A  |  34   |   11    |   +6*  |    -6*   | *only if airborne opponent gets hit by/guards 1st shot
                 22+B  |  38   |   11    |   +2*  |   -10*   | *only if airborne opponent gets hit by/guards 1st shot
                 22+C  |  42   |   11    |   KD   |   -14*   | *only if airborne opponent guards 1st shot
       EX and Level 3  ---------------------------------------
              236+B+C  |  86   |    5    |   KD   |   -34    | 1~4F invincible, reloads on 68F of ex-flash,
                                                               hard to hit with the 1st shot from up close
              214+B+C  |  79   |   13    |   KD   |   -31*   | 1~11F invincible, reloads on 68F of ex-flash,
                                                               *if the last shot was blocked
            j.214+B+C  |  VA   |   15    |   KD   |    VA    | 1~15F invincible, landing recovery 51F, 
                                                               reloads on 33F of ex-flash,
               22+B+C  | 107   |    5    |   KD   |   -52*   | 1~4F invincible, reloads on 89F of ex-flash,
                                                               *if the last shot was blocked
              level 3  |  90   |   11    |   KD   |   -20    | superflash 90F, all frames invincible

Trivia
Anonym's Intro


General
FAQ
Controls
Netplay
Menus
HUD
Glossary
Links
Characters
Akatsuki
Mycale
Sai
Kanae
Fritz
Marilyn Sue
Wei
Anonym
Elektrosoldat
Blitztank
Adler
Murakumo
Perfecti
Mechanics
System Specifics
Frametool
Reflector
Changelog