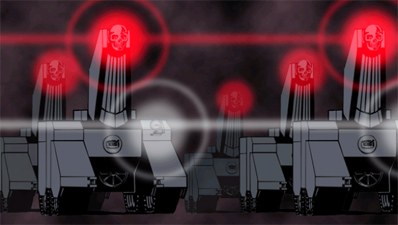
Akatsuki Blitzkampf/Blitztank
Background
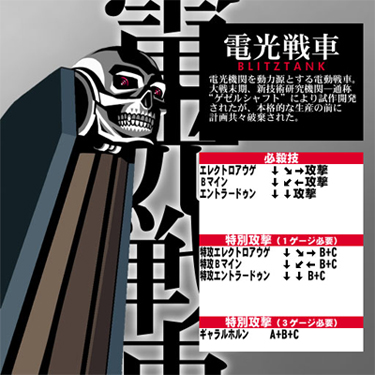
An electric tank powered by a Blitz Motor. At the last stage of the Great War, the military technical reasearch institute, commonly known as Gesellschaft, developed a prototype but it was discarded together with the project before full-scale production. (from character selection screen) Read the translation of its arcade mode!
Introduction
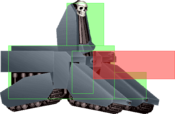
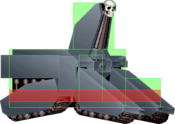
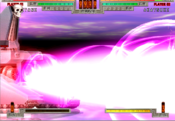
The character you show players who don't care much about the mechanics, but think Blitztank is cool. While its ginormous hitbox, weird playstyle, and generally lower tier placement might turn you off, Blitztank has unique strengths and is very much viable against even the best characters in the game. Blitztank's zoning is easily its greatest strength, with 236X and 214X giving it strong tools to threaten from a distance as well as force the opponent to be somewhat respectful. After getting a knockdown, Blitztank can start its setplay high low mix, making use of 214X to force the opponent to block on wakeup and then mixing between the overhead 5C and its lows, 2B and 2C. Then when Blitztank gains 3 bars, it gets access to the hype beam (Gjallarhorn), one of the best level 3s in the game. Not only does it deal an insane amount of damage, beat all other projectiles, confirm off all of its cancelable moves, and go full screen, but it's also a frame 2 move, the fastest move in the game. This means it can also be used to punish moves that are normally safe, making Blitztank with 3 bars incredibly dangerous. However, these advantages come with huge weaknesses. Blitztank's huge frame means it has to deal with everything from instant overheads to getting hit by sweeps across the screen. It also has other issues, particularly with it having weak anti-air and having a somewhat low damage output. Still, if you're willing to put in the effort, Blitztank can be oppressive and difficult to fight even against experienced players.
Similar to: Cyberbots, Politank, Justice
| Strengths | Weaknesses |
|---|---|
|
|
All damage values below were tested on Akatsuki with 1.000 armor ratio and full life on both sides (remember about "Health difference" and "Guts" systems)
Character Summary
- Special Moves
- 236A/B/C (EX OK) - Elektro Auge: Laser
- 214A/B/C (EX OK) - B-Mine: Shoots a mine into the air
- 22A/B/C (EX OK) - Entladung: Lightning attack
- Level 3 Super
- A+B+C - Gjallarhorn: Fast fullscreen laser that does great damage
- Unique Attacks
- 66, j.6C
- Armor Ratio = 0.925 (highest armor value unbuffed)
- Forward Speed = 5.0 dots/frame (average value)
- Backwards Speed = 4.0 dots/frame (average value)
- Jump Startup = 5F (slowest value)
- Backdash Duration = 30F (second longest)
Basic BNB: 2A > 236A/22A (> 236B+C/22B+C/A+B+C)
Basic BNB #2: 66 > 2A > 236B (> 236BC/A+B+C)
j.A Air-to-Air: 2A > 236B
j.A Air-to-Air #2: 22A > 22B+C (> 2A link > 214X)
214X Hit: > 5C/Airthrow(if in the air)
Reflector: B+C > 2A > 236B
Notes on Ausf. Achse
Universal Changes
Combos over 40 hits will automatically launch the opponent. This only matters on specific combos against Blitztank such as Adler's 236X loops.
Character Changes
Level 3 is now 6 frame startup (up from 2 frames)
Super armor now breaks from 800 damage instead of 1000, weakening it a bit although in the grand scheme of things it doesn't change too much.
Normal Moves
66
|
|---|
5A
|
|---|
5B
|
|---|
5C
|
|---|
2A
|
|---|
2B
|
|---|
2C
|
|---|
j.A
|
|---|
j.B
|
|---|
j.C
|
|---|
Command Normals
j.6C
|
|---|
Special moves
エレクトロアウゲ - Elektro Auge
236+A/B/C/B+C |
|---|
Bマイン - B-Mine
214+A/B/C/B+C |
|---|
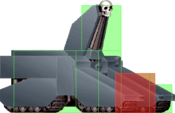
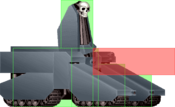
エントラードゥン - Entladung 22+A/B/C/B+C The hitbox is larger than this but can't be visualized. The hitbox is larger than this but can't be visualized.
|
|---|
Universal Mechanics
Throws
Forward Throw 4/5/6+A+B "Hey where's my throw hitbox?" "Hey where's my throw hitbox?"
|
|---|
Air Throw
j.4/5/6+A+B |
|---|
Reflectors
Standing Reflector
4/5/6+B+C |
|---|
Crouching Reflector
1/2/3+B+C |
|---|
Jumping Reflector
7/8/9+B+C |
|---|
Super Move
ギャラルホルン - Gjallarhorn A+B+C It's as if millions of mashers suddenly cried out in terror and were suddenly silenced. It's as if millions of mashers suddenly cried out in terror and were suddenly silenced.
|
|---|
General Strategy
On Armor
One of Tank's defining characteristics is its always active armor. The armor works like this:
- It can absorb one hit
- It can absorb up to 1000 damage
- Any multi-hit attack or attack exceeding 1000 damage will break it
- The damage from an absorbed attack is not reduced
The multi-hit rule also means that if the opponent cancels one move into another in a single string and the Tank player doesn't block or retaliate with a faster move, then the armor will be broken. Despite these weaknesses, armor is still very useful for Tank. It effectively means that jabs pressure on Tank isn't very effective, as it can mash out of it with 2A, 5A, or 22+A. It also means that many pokes that normally lead to combos won't work the same way on Tank, and instead of leading to a combo the poke might even get them punished. However, just because you have armor doesn't mean you shouldn't be blocking. Many characters have counters for Tank and due to its extra large hurtbox, many characters can safely poke Tank even if Tank armors it. Still, things like wake up throw or walk up throw are extra viable with Tank.
Neutral
Blitztank's neutral revolves around making good use of its normals, lasers, and mines to zone the opponent and build up bar. 5A and 5B are the normals to use in neutral, although 2B and 66 are good to use on occasion. 5A and 5B are projectiles so they can't be countered by reflectors, have long range, are disjointed, and are favorable on hit for Blitztank, so they're good when the opponent is a bit close for 236+B. 2B is Tank's main combo starter, so while it isn't as long ranged or safe to throw out, it's a lot more rewarding when it does hit. 66 has occasional uses for going through projectiles and pokes that can't break Tank's armor and get a hit in, although this is dangerous and shouldn't be done frequently.236+B is the main laser to use, as it covers most of the ground across the screen, does good chip, and can't be reflectored on reaction. On hit it can be confirmed into 236+B+C for extra damage and knockdown. However, it shouldn't be spammed in case the opponent jumps or reflectors it when they're close to Tank, as that's practically a free punish. For when the opponent jumps, 236+C is the move to use, as on hit it too can be confirmed into 236+B+C for extra damage and even on block will launch the opponent to full screen. However, it too has long recovery so it shouldn't just be thrown out. 214+X has multiple uses in neutral. 214+A should be used to dissuade the opponent from just running in and attacking, as getting hit by a mine hurts a lot. 214+B and 214+C should be used to add to Tank's zoning, as they can hit aerial opponents and even if it doesn't hit, the opponent will generally try to avoid the mine, often allowing Tank to throw in a laser as they do, or even approach. In order to avoid being cornered while zoning, Tank should be moving forward after knockdowns and 214+Xs, as being cornered as Tank can be very hard to deal with.
Offense and Okizeme
Blitztank, despite not looking the part, has pretty solid offense once it gets a knockdown. 214+X can be used as a setplay projectile from any part of the screen to force the opponent to block. It can be reflected, but if you're close to the opponent when they reflect, it's possible to throw them before 214+X hits, causing them to take a solid amount of damage and return to neutral. Once the opponent is respecting you, you can mix between Throw, 5C (overhead), 2B (low), 2C (low), and j.C. 5C is a surprisingly decent overhead, that while only knocking down, keeps the opponent close to Tank and lets it go for another setplay 214+A. 2B is the main low option to go for since it leads to all of Tank's main combos. 2C can also be used, and since it's quite delayed, it may fool the opponent into thinking you're going for an overhead. j.C can be used as a delayed overhead, and to beat an opponent's low options if they try to low profile the 214+X on wakeup. However, it's very well possible for the opponent to whiff a normal and still have enough time to air throw tank before j.C hits. j.C should only be used on the odd occasion. Since 214+X is quite plus on block, Tank gets a fairly easy tick throw setup from it, although this resets to neutral and doesn't let Tank continue to pressure. Mixing up these different options can make Tank's offense a lot more threatening than it would appear to be at a first glance.
Anti-Air
Anti-air is easily one of Tank's weakest aspects. None of Tank's normals cover the vertical range above him, meaning it is forced to use 236+C and 214+A as anti-airs. 236+C is the main anti-air, but has weaknesses. It is easy to air block, has a long recovery, and most importantly, it doesn't cover the spot right below where the laser hits. This means that it can't hit jumps that are early or late in their arc, and effectively means Tank has a dead zone it can't cover well. Additionally, 236+C's long recovery means that if the opponent simply moves forwards on the ground, then (with the exception of Wei and Blitztank) the laser will whiff and leave Tank wide open for a punish. 214+A can also be used as an anti-air since it will hit aerial opponents who might try to jump in. However, this obviously can't be done on reaction due to the move being slow, and even when used, it's more for forcing the opponent to block than actually punishing them for jumping. 5B can also be used somewhat like an anti-air due to it's somewhat high hitting hitbox. It can be used to hit opponents early or late in a jump where 236+C wouldn't hit. However, it obviously isn't too effective at this and won't be used too often. Anti-air reflector is viable with Tank, but just like other characters it is susceptible to the reflector safe jump. This all means that Tank's anti-air game is very weak, and this is one of the hardest things for Tank players to learn to play around.
Air Game
Since Tank's anti-air is weak, it isn't uncommon to try to meet the opponent in the air with j.A or an air throw. j.A can be very effective as an air to air and it causes a juggle leading to a short combo. However, it is very difficult to land with. Tank's air throw is also pretty rewarding, but like other air throws it's hard to hit. Besides air to airing though, jumping with Tank is a massive risk. Tank has the floatiest jump in the game and almost no good air options to go with it. This often means Tank ends up just floating around in the air, wide open for an anti-air or air throw. j.B, while at first seeming like a decent landing option, will often get beat out by anti-airs or a reaction reflector. j.C on paper is a good option since it halts all of Tank's air momentum before going straight back to the ground. However, in practice j.C is too slow to be a viable option and will normally get blown up by an anti-air or air throw. Tank's final air option is j.6C, which is actually decent. Because it sends Tank flying back, it can be used to get away from the opponent and to bait anti-airs. It's main weakness is that if used when near or in the corner and it's blocked or reflected, Tank is left wide open to a punish from the opponent. Regardless, Tank's air options overall are very weak, forcing it to play more grounded.
Defensive Options
Tank's defense is another one of its weakest aspects. None of Tank's reversal options are actually invincible. Wakeup 2A, 5A, 22+A, and A+B are all decent options since they're fast and due to armor will beat most options the opponent will go for. However, they can all be meatied by options that break Tank's armor, with the exception of 22+A which will still have the first hit come out sometimes. This makes waking up with Tank difficult sometimes. 22+B+C can be good to go for if you have the meter, since even if the opponent blocks it it's plus on block. However it isn't invincible either, and just like 22+A it can be beaten out. A+B+C can be used on wakeup, and can work sometimes since it's frame 2. However, even trading with it makes it not worth it, as you've just spent 3 bars and wasted your amazing super only to get 1000 damage. Wakeup j.C can also be used on occasion since it will beat lower hitting hitboxes, assuming they don't meaty you. Finally, 214+A can be used on wakeup to try to get a mine trade or at least force them to block since it doesn't disappear when Tank is hit. This only really works in corner, since the opponent can just combo forwards and avoid the mine entirely. Of course, it too can be meatied and beaten before the mine comes out, and even when it does it's very much possible for the opponent to reflector the mine and remain plus. This all means that picking your defensive options as Tank requires you to be very careful and have a good read on the opponent, or just try to weather the storm while blocking.
Size
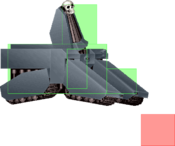
Knowing the weaknesses that come with Tank's size is important to learning the character as a whole. When standing, most aerials in the game can hit Tank while rising, leaving it open to unique pressure while standing. While crouching, Adler (j.A), Murakumo (j.C), and Perfecti (j.C, AA only) have access to an instant overhead on Tank, which can make playing against them uniquely difficult. Basically every character can do a crossup aerial on Tank, including aerials that normally only hit in front due to Tank's extra size. Tank will often get hit by pokes at further ranges than where other characters would get hit, which is more annoying than anything else but does hurt. Tank's extra size leave it open to unique combo routes that only work on it that somewhat mitigate the extra defensive rating unfortunately. The extra size also makes Tank's backdash pretty useless, as while it does go pretty far, it has a huge amount of recovery and the extra big hurtbox means that you often end up getting hit by whatever you were trying to avoid in the first place. These are all major disadvantages that you have no option but to play around if you choose to play as Tank. Still, if an opponent tries to exploit these weaknesses, then punish them for it like going for frequent air to airs.
Overview
Tank, while incredibly flawed, is a strong zoner with decent okizeme and mixups. However, this comes at the cost of the unique disadvantages of its size, weak defense, and a poor damage output. Still, if you're willing to master its complicated neutral and powerful offense as well as when to use the armor on defense, then Tank can become an incredibly difficult to fight opponent.
Combos
Close knockdown combos
- 2A > 22A/B/C
- ~ damage. Meterless 2A confirm. Comboing off 2A isn't easy but is possible, so make sure you hit the 22A fast. 22B+C can be added for extra damage, although good luck hit confirming it.
- 2A > 236A > 22B+C
- ~ damage. One bar 2A confirm, and even harder to hit. Can work from farther hits on 2A, but 22B+C might whiff from those ranges.
- 2B(2) > 22C
- ~1600 damage. Meterless, close range combo. Will not work from max range 2B (for that, use 1 hit). Make sure the 22C doesn't whiff or you're gonna eat it. 22B+C can be added on for extra damage.
- 2B(2) > 236A/B > 22B+C
- ~2800 damage. Also costs one bar, close knockdown, more damage.
Pushback combos
- 2A > 236A > 236B+C
- ~ damage. Max range 2A combo.
- 2B(2) > 236A/B
- ~1500 damage. Standard Blitztank combo. Hits full screen
- 2B(2) > 236A/B > 236B+C
- ~2400 damage. Standard metered Blitztank combo. Costs one bar, knocks down from full screen
- 2B(2) > 236A/B > A+B+C
- ~5300 damage. Standard Level3 combo. Fullscreen lazer.
Blitz Mine Combos
- 214A/B/C > 66 / 2C / 5C / Throw / Airthrow / 236A/B/C > A+B+C
- For when people get hit by Blitz Mines like idiots.
- ~1500 (Dash). For when they're too far away for anything else.
- ~1900 (2C)
- ~2200 (5C)
- ~2400 (Throws)
- ~5500 (A+B+C)
- [214A/B/C > 214B+C] x N > 214A/B/C > 5C/Throw/Airthrow or [[2B(2)] > 236A/B/C > 236B+C]
- Most damaging option out of landing a mine minus A+B+C. Not recommended to do more than once because the scaling doesn't make the meter worth it unless it'll kill. Don't do this deep in the corner, you won't get all the hits from 214B+C and it'll needless waste meter.
- 5C ender: ~3100 for one rep, ~4000 for two reps, ~4700 for three reps.
- Throw ender: ~3200 for one rep, ~4100 for two reps, ~5000 for three reps.
- 2B > 22A/B/C > 22B+C ender: ~ for one rep, ~ for two reps.
j.A combos
- (Midscreen, standing opponent) j.A [land] (2A/2B) > (236A/B/C or 22C) > (236B+C / 22B+C / A+B+C)
- Jump in combos. Won't happen too often because j.A's not an overhead, but if the opponent's asleep then do it.
- (Midscreen, airborne opponent) j.A [land] (2A/2B) > 236A/B > (236B+C)
- Knocks down further away from Blitztank, allowing for better ranged oki setups.
- (Corner, standing opponent) j.A [land] (2A/2B) > 236A > (236B+C)
- Linking from the j.A can be difficult due to the landing recovery on all of Tank's air normals.
- (Corner, airborne opponent) j.A [land] 236A > (236B+C / A+B+C)
- Knocks down, does decent damage for meter, but the hits from j.A can vary and may scale the A+B+C too hard. Most of these j.A combos are situational gimmicks.
22X Anti-Air Combos
- 22A > 22A/B/C > 22B+C
- Regular anti-air combo, does fairly high damage. Can also be comboed into A+B+C for even more damage.
- 22B+C Trade > 22A/B/C > 22B+C
- Anti-air combo for the scenario where 22B+C trades with an opponent doing an aerial. There won't be many opportunities to do it but it's good to know in case it happens.
Reflector Combos
- Reflector > 2A > 22B > (22+B+C / A+B+C)
- Fairly simple reflector combo, but requires the opponent to be close to you.
- Reflector > 236X > (236+B+C / A+B+C)
- Long range reflector combo, also pretty simple.
- Reflector > 5Ax1-4 > 2A > 22C > (22+B+C / A+B+C)
- Corner reflector combo. The extra 5A juggles only add a little damage but it looks cool.
Ausf Achse Combos
This will only lists combos that changed.
- Reflector Combos
- Reflector > 5Ax1-2 > 2A > 22C > (22+B+C / A+B+C)
- Same as the old corner reflector but less 5As.
Frame Data
source
KD - Knockdown
VA - Variable
*UV - value(s) marked with "?" in the table is/are unverified
x~yF - a period from frame "x" till frame "y"
                       |     Frames      |  Frame Advantage  |
               Attack  | Total | Startup | On Hit | On Block | Notes
Throws and Reflectors  ---------------------------------------
            4/5/6+A+B  |  21   |    5    |   KD   |    --    |
          j.4/5/6+A+B  |  19   |    3    |   KD   |    --    |
                5+B+C  |  17   |    7    |   KD   |    +3    |
                c.B+C  |  17   |    7    |   KD   |    +3    |
                j.B+C  |  VA   |    6    |   KD   |    VA    | landing recovery's the same as after jumping
              Normals  ---------------------------------------
                   5A  |  28   |    5    |   -3   |    -3    |
                   5B  |  40   |   12    |   +0   |    -2    |
                   5C  |  44   |   25    |   KD   |    -4    |
                  c.A  |  15   |    4    |   +0   |    +0    |
                  c.B  |  34   |   11    |   -4   |    -6    |
                  c.C  |  49   |   20    |   KD   |   -14    |
                  j.A  |  33   |    6    |   VA   |    VA    | landing recovery 10F
                  j.B  |  VA   |    6*   |   VA   |    -3    | landing recovery 22F, *on 6th frame upon landing
                  j.C  |  VA   |   28    |   VA   |    VA    | landing recovery 20F
      Command Normals  ---------------------------------------
                   66  |  37   |    9    |   KD   |   -13    |
                 j.6C  |  VA   |   13    |   KD   |    VA    | landing recovery 10F
             Specials  ---------------------------------------
                236+A  |  40   |   10    |   +0   |   -13    |
                236+B  |  46   |   15    |   -1   |   -14    |
                236+C  |  46   |   16    |   KD   |   -13*   | *if airborne opponent guarded the attack
                214+A  |  48   |   51    |  +73   |   +29    |
                214+B  |  48   |   51    |  +73   |   +29    |
                214+C  |  48   |   51    |  +73   |   +29    |
                 22+A  |  44   |    7    |   KD   |    -7    |
                 22+B  |  54   |    9    |   KD   |   -13    |
                 22+C  |  64   |   11    |   KD   |   -19    |
       EX and Level 3  ---------------------------------------
              236+B+C  |  66   |    9    |   KD   |   -23    |
              214+B+C  |  60   |   51    |  +73*  |   +29*   | *if opponent was hit by/guarded all 4 projectiles
               22+B+C  |  56   |    7    |   KD   |    +5    |
                A+B+C  |  97   |    2    |   KD   |    -9    | superflash 90F
Trivia
