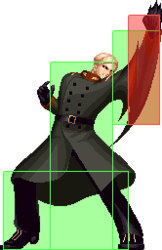
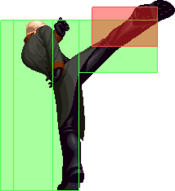
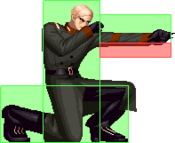
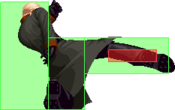
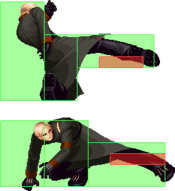
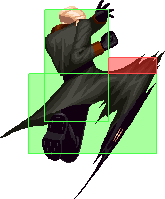
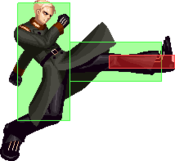
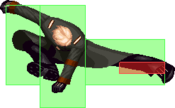
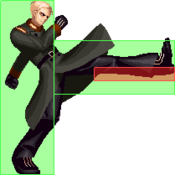
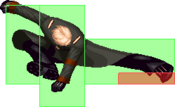
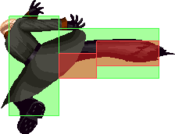
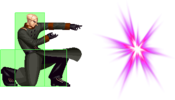
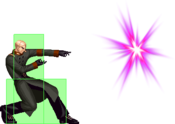
Akatsuki Blitzkampf/Elektrosoldat
Background
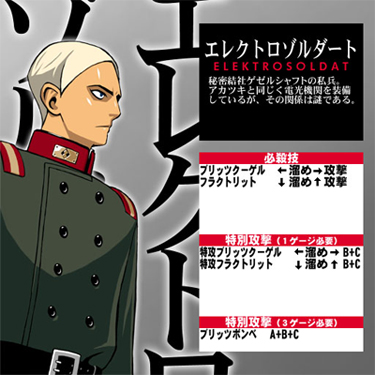
The private army of the secret society Gesellschaft. Like Akatsuki, they are equipped with a Blitz Motor but their relationship is a mystery. (from character selection screen)
Read the translation of his arcade mode!
Introduction
Elektrosoldat has many moves of Guile (Street Fighter II) with a bit of Kain R. Heinlein (Garou: Mark of the Wolves) thrown in, as well as some moves of his own. Despite his seeming lack of moves, he is quite a formidable opponent to fight and can rush down as well as he can turtle up. Uniquely, Flashkick is the only meterless reversal that beats crossups, which are otherwise very strong in this game.
Similar to: Guile, Kain, Remy
| Strengths | Weaknesses |
|---|---|
|
|
All damage values below were tested on Akatsuki with 1.000 armor ratio and full life on both sides (remember about "Health difference" and "Guts" systems)
Character Summary
- Special Moves
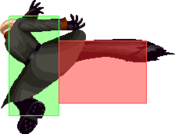
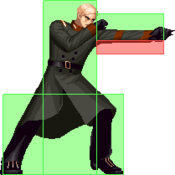
- [4]6A/B/C (EX OK) - Blitzkugel: Sonic boom
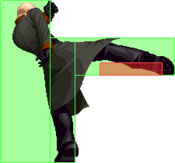
- [2]8A/B/C (EX OK) - Flak Tritt: Flash kick
- Level 3 Super
- A+B+C - Blitzbombe: Decent damage super that will OTG after an air throw
- Unique Attacks
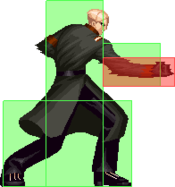
- 4C, 6C, j.4/6B
- Armor Ratio = 1.000
- Forward Speed = 5.5 dots/f
- Backward Speed = 4.5 dots/f
- Jump Startup = 3F
- Backdash Duration = 18F
Basic BNB: 2A > 2B > 6C > 2A > 4C
Corner BNB: 2A > 5B > 6C > [1]A > delay 2B > [2]8C (2 hits > [2]8B+C/A+B+C)
Corner BNB #2: 2A > 5B > 6C > 2A > 5B > 6C > 2A x4 > 2B > [2]8A (> [4]6B+C)
Airthrow: A+B > A+B+C
Reflector: B+C > 2B > [4]6B
Reflector #2: B+C > A+B+C
Notes on Ausf. Achse
Universal Changes
Not particularly affected.
Character Changes
6+ABC with less than 3 bars NO LONGER GIVES YOU 6C after a cancelable normal! You now get [4]6BC.
Universal Mechanics
Throws
4/5/6+A+B
|
|---|
j.4/5/6+A+B
|
|---|
Reflectors
Standing Reflector
4/5/6+B+C |
|---|
Crouching Reflector
1/2/3+B+C |
|---|
Jumping Reflector
j.4/5/6+B+C |
|---|
Normal Moves
(note: Unless otherwise mentioned, all of Sol's normals hit mid.)
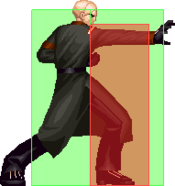
5A
|
|---|
c.5B
|
|---|
f.5B
|
|---|
c.5C
|
|---|
f.5C
|
|---|
2A
|
|---|
2B
|
|---|
2C
|
|---|
j.A
|
|---|
j.B
|
|---|
j.C
|
|---|
Command Normals
パンツァーシュレック - Panzerschreck
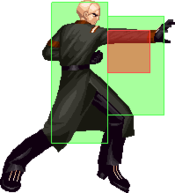
4C |
|---|
パンツァーファウスト - Panzerfaust
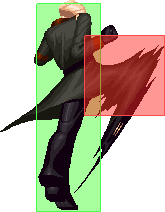
6C |
|---|
ヒュープシュラウバ - Hubschrauber
j.4/6B |
|---|
Special moves
ブリッツクーゲル - Blitzkugel
[4]6+A/B/C |
|---|
フラクトリット - Flak Tritt
[2]8+A/B/C |
|---|
Super
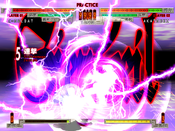
ブリッツボンベ - Blitzbombe A+B+C One of the censored things in the Arcade re-release. Here for completion's sake. One of the censored things in the Arcade re-release. Here for completion's sake.
|
|---|
General Strategy
Sol's one of the harder characters to play. Part of this is due to the charge nature of his special moves, requiring you to adopt a more defensive playstyle in order to maintain his charges as well as become accustomed to holding 1 (down-back) whenever you have a free moment. The second part of this is that it's very easy to become predictable with him, causing you to get reflected into bad situations. Sol's damage is also on the somewhat low side, ranking fairly badly outside the corner and still somewhat lackluster inside the corner. Despite this, Sol's strength lies in being able to maintain safe pressure and deal guard damage to open the way into his combos.
Boom Mixups and Tricks
The first thing to understand is that Sol's mixup is not high/low. He only has two low moves (and only one worth using), and no overheads, only jump attacks. With the addition of reflectors in the game, it becomes difficult to pressure safely by following Booms, which is a classic Guile tactic, as the threat of being reflected and countered is always present. However, keep in mind that reflected Booms do not get autocountered by an attack; the opponent must perform the attack on their own. This opens up a whole new field of possibilities in what you can do to pressure an opponent midscreen and push them towards the corner, which is where Sol begins to do most of his dirty work.
Let's examine the possibilities in a neutral situation where Sol throws a Boom. The opponent has these options:
- Block: In this game, proximity guard is set very close to your character, so opponents have full range of movement while a Boom is on screen. Proximity guard is a trait that defines how far an attack must be from your character before they are fixed in block animation instead of being allowed to walk backwards. Since you cannot lock opponents into block animation, they will be forcing themselves to walk back if they want to try and block your Boom from midscreen. This is a good thing, because blocking is the worst possible solution in this situation. Not only does Sol have initiative, the opponent will be cornering themselves and the Boom is +1 on block anyways. Most smart players will not simply allow themselves to block a midscreen Boom, leading to the next few possibilities.
- Jump: The classic Guile trap from SF2, which involves punishing opponents who jump over the Boom with an early jump kick. This does not work the same in Blitz due to the existence of reflectors, which make obvious traps like that dangerous to do. This is where one layer of mixup begins. To counter a jumping opponent, you can either do j.B 6B into a ground juggle or early j.C straight up. To counter this, the opponent can do a reflector as they jump up in hopes that you'll stick an attack out. To counter these countertactics, you can jump at them with an airthrow (for a good chunk of damage - 2000 points) or simply wait until they land from their reflector to punish them. Playing mindgames and reading the opponent is critical for this to work, and a few unlucky plays can lead to pain for Sol.
- Reflect: This is the most complex area for Sol to manage, a reflected Boom. First off, a reflected Boom means the opponent does not lose ground; second, depending on the distance Sol is at, they may or may not have initiative. Obviously at farther ranges Sol won't be able to get punished but he will also not be able to capitalize from the Boom itself. At closer ranges, another layer of mixup opens up. Since reflected Booms do not grant the opponent an automatic counter, they are forced to decide their next action just as Sol is. The obvious counter would be to use a reversal of some sort or a counterpoke, depending on range. However, since Sol is not committed to a move, he can easily block or avoid these moves and punish them on whiff. At certain ranges he can also time a 6C or 4C close to the point of impact of the Boom, requiring the opponent to doubleshield manually; staggering the timing on this can incur a knockdown. Since most opponents won't be crouch shielding a midscreen Boom, you can also go for the 2B (staggered to throw off reflect timing of course). The final option would be an opponent playing it safe by simply blocking and waiting for your attack, and against this the obvious counter is a throw, all leading towards the corner. Once again, just as with jumping, playing mindgames and reading the opponent is critical.
- Avoid/Counter: Certain characters have moves that can avoid Booms, depending on which one you use. High Booms can be avoided by using moves close to the ground such as Fritz's 2C, which neatly avoids the projectile and shuts Sol down from moving in. Sol's own 6C can go over low Booms at the right distance, allowing him to counter the opponent with a knockdown. This subset of space control is mostly reserved for close to midrange combat; at further distances, the opponent's attack would whiff, leaving them at a disadvantage most of the time. These attacks are the ones you will have to be careful of as they can destroy Sol's space control if he isn't careful.
EX Boom Mixups
EX Boom lasts forever until it hits the opponent, is blocked, reflected, or leaves the screen. It also takes up a sizeable portion of the latter so that it is difficult to evade it, although characters like Anonym and Kanae are able to roll past it in some situations, and Marilyn can wall jump over it. When it approaches the opponent, they will be forced to deal with it, and here's some situations which come up and what you can do to capitalize.
- Block: The first reaction to EX Boom is to block. This is exactly what you want with Sol, as a blocked EX Boom gives him massive frame advantage for him to push the opponent into the corner. Depending on what the opponent is doing, you can pressure with normals to whittle at their guard bar or go for the guard crush, or pause slightly to tick throw. You can also use the pushback off EX Boom to go into a full blockstring off of a j.C if they are close to the corner. When airblocked, you can use j.AB4B as an airtight string for further guard damage before falling back into further zoning or corner pressure, depending on how far the opponent is from the corner.
- Walk Backwards: Second reaction to EX Boom. While this buys the opponent some time they still have to deal with it eventually, and you can simply follow the opponent and back them into the corner for this. However, they may be buying some time and positioning to use the third option, which is...
- Reflect: Reflecting EX Boom is where things get tricky. During reflect hitstop, opponents cannot be thrown, making it difficult for you to run this option with Sol. You will have to mash throw to try and get them in between, and the opponent can countermash throw to break out. If you do get a throw, though, the EX Boom will tack on some additional damage during the animation. Reflecting EX Boom on the ground is not too problematic unless you are spaced too closely, because Sol has the ability to tack in extra hits in between the EX Boom's 4 hits to mess up their reflect timing: he can throw another Boom before or after EX Boom, or use 2A/B/6C.
Air reflecting EX Boom is where things become problematic for Sol. Because it is difficult for Sol to really control the air, the opponent is usually free to come down with an attack of their choice. The general solution would be to attempt an airthrow or be safe with a j.4B, or throw a B or C Boom to try and mess up the reflector timing.
Okizeme and Corner Game
(deep jc off midscreen 6c) (meaty boom) (meaty 2A) (airguard punish/preemptive airthrow, hold j.4throw to charge) (j.4B and j.AC tricks) (midscreen crossup) (fake crossup)
Combos
Combo terminology
| Symbol | Meaning |
|---|---|
| > | Cancel from the previous move to the following move |
| land | The player must land |
| , | Link from the previous move to the following move |
| dl./delay | Delay before using the following move |
| nj.X | Neutral Jump |
| X~Y | Use Y followup after hitting X move |
| AA | Anti-Air, must hit an airborne opponent |
| [X] | Hold the input |
| (X) | Optional input |
| [X]*N | Repeat (sequence) N number of times |
Midscreen Combos
| Combo | Damage | Video | Notes |
|---|---|---|---|
| 2A > 2B > 6C, 2A > 4C | 1776 | Link |
Main midscreen BnB, hitconfirmable from random pokes. If the opponent is too far for 4C to connect, do 6C instead (does less damage but you finish the combo and keep momentum afterwards). |
| 5C > 6C, 2A/2B > 4C | 2636/2827 | Link |
A variant of the previous combo, better suited as a punish. Needs to be done point blank. 2B > 4C only works at specific ranges, so you generally want to use 2A > 4C instead. |
| AA j.A > j.B > j.6B, land, 2B > 4C | 2116 | Link |
Air-to-air conversion. |
| Air Throw, ABC | 3710 | Link |
Throw into OTG level 3. Rewarding meterdump and great round finisher. |
| [2]8X(1-2) > [4]6BC | 2703 | Link |
More of a way to make Soldat's reversal safe on block (-2) than a combo. [2]8A does more damage while [2]8C allows more ambiguous cancels, both of which will lose if the opponent reflects your reversal on wakeup. |
Corner Combos
Notes: For the starting chain, c.5B is more damage than 2B (by ~149 damage, rounding is weird), but makes linking after A Kugal tighter than 2B (and maybe impossible on some crouchers(?), maybe I'm missing the link) due to pushback.
For the final string, you can juggle with multiple 2As or 5As (after the first 2A) for more damage if you wish to tack on more damage.
Follow up Kugels can be replaced by [4]6C for more damage or [4]6A for more consistency.
| Combo | Damage | Video | Notes |
|---|---|---|---|
| 2A > 2B > [6C, dl.2A > 5B]*2 > 4C | 2556 | Link |
Soldat's main corner BnB. 2A > 5B needs to be very slightly delayed to prevent drops. |
| [c.5C > 6C]*2, 2A (> 5A *N) > 5B > 4C | 3702 | Link |
Variant of the previous combo that more damage but requires you to be pointblank, which suits it more as a punish starter. Replace the second 5C > 6C with c.5B instead for more consistency but less damage. |
| [c.5B > 6C]*2, 2A > 5A *4 > 5B > 4C | 3334 | Link |
Alternative starter to the previous 6C loop to be more consistent to do at the cost of some damage, while being more damage than the main bnb. The max amount of 5As you can juggle after 2a is 5 (on Akatsuki at least, but can make 4C drop), while 4 is consistent, feel free to substitute as you please. |
| 2A > 2B > [4]6A, [5B > 6C, 2A]*2 > 5B > 4C | 2901 | Link |
Basic template of a Kugel combo. Usually done when hitconfirming a random [4]6A in the corner. |
| 2A > 2B > 6C, c.5B > [4]6A, , 5B > 4C | 2818 | Link |
A more damaging, but harder combo than 6C loops. Harder to set up a meaty Kugel afterwards, but you are safer from reversals. c.5B must come out as soon as possible. |
| 2A > c.5B > [4]6A, 5B > 6C, c.5B > [4]6A, 2A > 5B > [4]6B, 5B > 4C | 3303 | Link |
Optimal Kugel loop, which is basically a combination of the two previous combos. Also Soldat's best meterless combo. Notes from the previous combo also works here. |
| 2A > c.5B > [4]6A, 5B > 6C, 2A > dl.2B > [2]8C > [2]8BC | 4421 | Link |
Main metered BnB. Actually leaves Soldat plus after the combo, allowing him to continue pressure. |
| 2A > c.5B > [4]6A, 5B > 6C, c.5B > [4]6C, 2A > dl.2B> [2]8C (2) > [2]8BC | 4686 | Link |
More damaging version of previous combo, but you are less plus. Useful to guarantee a kill if you don't have level 3. |
| 2A > c.5B > [4]6A, 5B > 6C, c.5B > [4]6C, 2A > 5B > [4]6A, 2B, [2]8C (1) > ABC | 5700 | Link |
Max damage combo if you have level 3 available. |
Reflector Combos
| Combo | Damage | Position | Video | Notes |
|---|---|---|---|---|
| Reflector, microwalk 2B > 4C | 1767 | Universal | Link |
Requires the microwalk, otherwise the 4C will whiff. Alternatively you can 2B into delayed A/B Kugal to have it be meaty. |
| Crouching Reflector, Airthrow | 1889 | Universal | Link |
Works only against crouching opponent and at point blank range, otherwise, use the above or throw a Kugal afterwards. |
| Air Reflector, microwalk 2A > 5B > 4C | 1471 | Universal | Link |
Soldat's easy air reflector combo. |
| Air Reflector, Air throw | 1614 | Universal | Link |
Alternative air reflector combo that leaves you plus for a meaty A Kugal or dash up and begin pressure. Very easy and consistent to do. |
| Air Reflector, j.A > j.6B, 2B > 4C | 1800 | Universal | Link |
Harder but more damaging Reflector combo. Comboing into j.A can be difficult depending on the opponent's height. Can do jA jB j6B before the ground string, which does 2018. |
| Reflector, dl.5B > 6C, 2A > 5B > [4]6A, 2A > 4C | 2619 | Corner | Link |
Soldat's main corner Reflector combo. Can be optimized further, but still does good enough damage and sets up for a meaty [4]6X. |
| Reflector, [4]6C, Airthrow | 2342 | Corner | Link |
Easier corner Reflector combo. Lets you set up meaty A/B Kugal afterwards or walk up and continue pressure. Also works in AA, but you must use A Kugal instead (does 1682). |
| Reflector, 5B > [4]6C, j.B > j.6B, 5A *2 > 5B > 4C | 2893 | Corner | Link |
Extremely flashy and high damage Reflector combo, very cool. Doing 7/9BB will give you jB > j6B so you don't have to manually input. |
| Reflector, 5B > [4]6C, j.B > j.6B, 2A *3 > 2B > [2]8C(2) [4]6BC | 3750 | Corner | Link |
Metered version of the previous combo to tack on more damage but not be minus afterwards. |
| Reflector, 5B > [4]6C, j.B > j.6B, 2A > 2B > [2]8C(2) [2]8BC | 4356 | Corner | Link |
Damage variation of the above routes. You are -5/6 afterwards, so do this to ensure a kill. |
| Reflector, 5B > [4]6C, j.B > j.6B, 2A *3 > 2B > [2]8C(2) > ABC | 5500 | Corner | Link |
Level 3 combo, clean 5.5k, very good at closing out the round if you have 3 bars available. |
Ausf Achse Combos
This sill only list combos that changed.
Reflector Combos
| Combo | Damage | Position | Video | Notes |
|---|---|---|---|---|
| Reflector, [4]6C, 5A *2 > 2B > 4C | 1659 | Corner | Link |
Soldat's new corner Reflector BnB. Way more limited compared to Vanilla combos. |
| Reflector, [4]6C, 2A *2 > [2]8A > [2]8BC | 2628 | Corner | Link |
Metered version of the above combo, if you really want to tack on extra damage. |
| Reflector, [4]6C, 2A > 2B > [2]8C(2) > [4]6BC | 2190 | Corner | Link |
EX Kugal ender of the above combos. |
| Reflector, [4]6C, 2A *2 > 2B > [2]8C(2) > ABC | 3587 | Corner | Link |
Level 3 version of above, useful to close out a round off a reflector if you really need to. |
Matchups
All of this is strictly according to bellreisa's opinion.
General Guidelines
- 1) Know your Kugel mixups. Learn what the opponent does about your B Kugel pressure and bait/counter accordingly.
- 2) Use meaty B Kugel in the corner to protect yourself from reversals. Learn the timing of safe j.C so you can punish reflectors.
- 3) If someone air reflects a Kugel, you can airthrow them out of almost any followup.
- 4) You cannot reflect EX Kugel if turned around. Use this to mount pressure against opponents who back up when facing it.
- 5) Use A Flak Tritt in combos for damage and C Flak Tritt for easier hit confirming on wakeup. Remember that Flak Tritt -> EX Blitz Kugel is only safe point blank and a tiny bit further; if there is a wide enough gap, the opponent will be able to reflect and punish for free.
- 6) Sol's neutral jump is extremely powerful, as you can visually confirm into a punish if someone whiffs a move or use Sobat to move yourself as you need, whether it's to back off to safety or move in for pressure.
Akatsuki - 4.5/5.5
- This matchup is definitely winnable as long as you play smart and keep Akatsuki zoned. Akatsuki's pressure is strong, so block consistently while looking for 6B. Use Flak Tritt canceled into EX Blitz Kugel to gain space. The important part of this matchup is to keep Akatsuki spaced properly. At midscreen Soldat's game is stronger due to air control from TK Sobats and mixups off of reflected Kugels, as well as Akatsuki's somewhat lackluster midscreen options. Once in the corner, lay on the pressure by using meaty B Kugels and safe j.C, making sure to use the high-damage EX Flak Tritt ender if you land an opening. When Akatsuki has 3 levels, do not use 6C; his ABC will punish it clean on block.
Mycale - 4.0/6.0
- The main thing to remember in this matchup is that Soldat's normal A Kugel BnBs don't work on Mycale in the corner due to a skinnier hitbox, so you must adjust to do 6C combos instead. Mycale is difficult to get in on, but once you get in she loses her options except for EX Fenrir. Walk forward to reflect Freyas. Be careful of using TK Sobats because you may get tagged by random Fenrirs. Play patient and inch towards her until she's backed into the corner and proceed to run pressure, while running safe pressure/bait oki to draw out the EX Fenrirs. Without meter, Mycale's potential damage drops by quite a bit, so adjust your gameplay accordingly. One important thing to remember when fighting Mycale: the standard A Kugel BnB does not hit her due to her narrower hitbox, so adjust to 2AB 6C for his corner BnBs.
Sai - 3.5/6.5
- One of Soldat's worst matchups. Sai has all the tools he needs to fight him: his damage is higher overall, making it difficult for Soldat to maintain a lead. His C Elbow punishes Soldat's blocked 6C; switch to using 2B and 4C to compensate. His 2C slides under B Kugel; switch to A Kugel to stop someone who spams it. His j.214 allows him to change his air trajectory and fly over B Kugel, making it difficult to zone him; use TK Backwards Sobat to beat this. His j.C hits multiple times, making reflecting tricky, and on wakeup his crossup is basically impossible for Soldat to counter. Sai's corner pressure and midscreen elbow pressure are difficult for Soldat to deal with. Block patiently when Sai has Soldat cornered, as Sai can backdash bait wakeups and move in again with B Elbow effortlessly. A lot of Sai's blockstrings are safer than they look, so some Sai players may start running post-block reflects to bait out Soldat's pokes. If they don't do this, start poking out to push Sai back and bait out the reflects accordingly. 2B will stuff random elbows, cutting off that method for Sai to approach.
Kanae - 5.5/4.5
- Probably Soldat's only decent matchup, and only a slight advantage at that. While Soldat has far superior zoning to keep Kanae at bay, it is difficult for him to stop Kanae once she gets momentum. Look out for Kanae's 2C, as it will slide under B Kugel; switch to A Kugel occasionally to keep her honest. TK Sobat will stuff a lot of Kanae's pokes at the right range, so use those to get in. Your okizeme should be heavily focused on Kugels since it's much safer against Kanae, who can use counters or reflects to stop pressure. When running Kugel mixups, switch up your timing so you're not attacking at the same tempo consistently, as this will stop you from being countered. If Kanae begins approaching Soldat midscreen, backdash is a decent option, but look out for 236C and 2C.
Fritz - 3.5/6.5
- Another bad matchup for Soldat, requiring very patient and careful play. Fritz completely outdamages him, dealing more damage in two hits than Soldat does in a full combo. Fritz's fastfalls and teleports make it unsafe for Soldat to use Flak Tritts regularly. Fritz 2C punishes Soldat's blocked 6C for free, and once Fritz gets 3 levels of super his ABC can do that as well. Fritz can also 2C under B Kugel, thus shutting down Soldat's two main offensive options. To fight Fritz, Soldat must play extremely conservatively and use 4C almost all the time, and rely heavily on A Kugel over B Kugel. Soldat must be willing to deal with the fact that Fritz can escape his corner pressure for free as long as he has 1 level of super. Hit and run, as well as doing bits of damage here and there is essential to winning this matchup, and it will be an uphill battle even for a more skilled player.
Marilyn Sue - 4.5/5.5
- Mari's main strengths in this matchup are her damage and her 214. Superarmor allows her to plow through Kugels for free and the forward distance lets her punish Soldat's blocked 6C; use 2B and 4C to compensate. Mari's 2C will go under B Kugel on reaction so make sure to mix in A Kugel to keep her honest. Predictable 214s can be baited by neutral jumps. Try not to jump directly in on Mari, as her airthrow juggles deal a huge amount of damage. Approach her with Sobats and push her into the corner with a combination of Kugel mixups and baiting out 214s. Mari's wakeup options without meter aren't too great so as long as you have Kugel coverage or time it deep you should be able to continue pressuring her without too much worry.
Wei - 4.5/5.5
- Wei's primary advantage over Soldat is damage: once he gets meter, he can mount a devastating comeback. At mid-range, Wei's 2B can stuff TK Sobats so be careful about using them. Wei's blue powerup allows him to simply plow through Kugels, so if he does that switch the pressure up to melee attacks instead. Remember that once Wei gets meter his EX Shoulder can punish Soldat's 6C on block, so watch the bar carefully. Play the matchup patiently and solidly; letting Wei in allows him to start running crossup j.B pressure which Soldat cannot handle. Once Wei is under pressure, try to bait out his EX Uppercuts so he has no meter to run EX Boost or his ABC.
Anonym - 4.0/6.0
- Nun can run away from Soldat easily, and her bullets also go faster than Soldat's Kugels and through them as well. Soldat must be patient in this matchup and approach only once Nun's bullets begin to run low. Once that occurs, he can rush her down so as long as he looks out for her anti-air 4C, which will stuff the majority of his air attacks. Use j.4B to bait that out. Nun players will use her roll to try and get out of corner pressure, so be on the lookout to punish that with A Kugel, 2B, and throw. Generally, Nun players fall into two types: aggressive ones who burn meter on EX moves and patient ones who stock up for Resurrection. Soldat will be able to outlast the aggressive ones but a patient nun will be more difficult to beat. Remember that Resurrection is unpunishable, so have Soldat get back into the pressure as soon as you can afterwards.
Elektrosoldat - 5.0/5.0
- When fighting Soldat, remember to not get baited by max ranged 6C's that can tag you out of moves. Look out for Flak Tritts on wakeup when he has meter; adjust your jumpins accordingly to how the other player likes to respond. Soldat has no answer for his own B Kugel so you can use it freely for pressure.
Blitztank - 4.5/5.5
- Blitztank's main advantage is his superarmor. Throwing Kugels carelessly can also lead to a trade in Tank's favor with lasers. Once Tank gets 3 levels Soldat's entire Kugel game is shut down because of Tank's ABC, which is 2F startup. Stay on top of Tank and use his slower jump and massive hitbox to keep him pressured constantly.
Adler - 4.5/5.5
- Adler has a surprising number of tools to deal with Soldat's pressure. At midrange, Adler's 236B and 236C can stop B Kugels and TK Sobats. Max range 4C can hit Soldat outside of his own range, and Adler's j.C comes out surprisingly fast. If Adler is careless with his own fireball, you can nullify with Soldat's and walk forward to punish. Backdash out of Adler's 6B pressure if midscreen as the followup RPS is difficult for him to deal with. When being pressured by EX Fireball, block low at point blank range to cover 5[C]'s 1st hit, 2B, and 2C. Keep blocking low unless 5[C] was done, since the 2nd hit of it is high. At mid range, Adler will most likely be going for 4C so block high. Stay on top of Adler, as his point blank range game is not as strong as his midrange.
Murakumo - 4.5/5.5
- Mura has a damage advantage over Soldat (who doesn't), and on top of that he has pressure with mines that Soldat cannot stop as well as teleports to escape his pressure. Block patiently against mine pressure, as you may lose more life attempting to hit Mura out of it. Keep an eye out on teleports and use jump-back reflect or airthrow to beat out the options afterwards.
Ausf. Achse addendum from Element_
Perfecti - 4.5/5.5
- This matchup is very difficult for Soldat in neutral mainly due to his mediocre ability to maneuver around fireballs and Perfecti's TAP laser straight up removing your fireballs and EX fireballs from the equation. If Perfecti is taken to the corner, Soldat has a much easier time running pressure on Perfecti due to her not having reliable access to reflector if she is charging a laser in the background however. Play patiently in neutral and hold your advantage when she is in the corner.
Frame Data
source
KD - Knockdown
VA - Variable
*UV - value(s) marked with "?" in the table is/are unverified
x~yF - a period from frame "x" till frame "y"
                       |     Frames      |  Frame Advantage  |
               Attack  | Total | Startup | On Hit | On Block | Notes
Throws and Reflectors  ---------------------------------------
            4/5/6+A+B  |  25   |    5    |   KD   |    --    |
          j.4/5/6+A+B  |  23   |    3    |   KD   |    --    |
                5+B+C  |  17   |    7    |   KD   |    +3    |
                c.B+C  |  17   |    7    |   KD   |    +3    |
                j.B+C  |  16   |    6    |   KD   |    +3    |
                  A+C  |  50   |   --    |   --   |    --    | cancellable after 32F
              Normals  ---------------------------------------
                   5A  |  14   |    4    |   +1   |    +1    |
             close 5B  |  20   |    5    |   +0   |    -2    |
               far 5B  |  26   |    7    |   -4   |    -6    |
             close 5C  |  25   |    6    |   +0   |    -4    |
               far 5C  |  32   |    8    |   KD   |    -9    |
                  c.A  |  14   |    4    |   +1   |    +1    |
                  c.B  |  26   |    7    |   -4   |    -6    |
                  c.C  |  51   |    8    |   KD   |    -8*   | *-28F if only first hit was blocked
                  j.A  |  19   |    4    |   -4   |    -4    |
                  j.B  |  24   |    5    |   VA   |    VA    |
                  j.C  |  29   |   10    |   VA   |    VA    |
           c./5A > 5A  |  14   |    4    |   +1   |    +1    |
          c./5A > c.A  |  14   |    4    |   +1   |    +1    |
      Command Normals  ---------------------------------------
                   4C  |  32   |   13    |   +0   |    -4    |
                   6C  |  34   |   15    |   KD   |   -19    |
                 j.4B  |  VA   |    7    |   VA   |    VA    | landing recovery 1F
                 j.6B  |  VA   |    7    |   VA   |    VA    | landing recovery 1F
             Specials  ---------------------------------------
               [4]6+A  |  33   |    8    |   +5   |    +1    |
               [4]6+B  |  33   |    8    |   +5   |    +1    |
               [4]6+C  |  33   |    8    |   +5   |    +1    |
               [2]8+A  |  43   |    4    |   KD   |   -24    | 1~5F invincible
               [2]8+B  |  52   |    5    |   KD   |   -32*   | 1~5F invincible, *if 2 hits were blocked
               [2]8+C  |  63   |    6    |   KD   |   -40*   | 1~6F invincible, *if 3 hits were blocked
       EX and Level 3  ---------------------------------------
             [4]6+B+C  |  52   |    9    |   KD   |    -2    | 1~4F invincible
             [2]8+B+C  |  85   |    3    |   KD   |   -31    | 1~4F invincible
                A+B+C  | 108   |    9    |   KD   |    -9    | superflash 40F, 1~8F invincible
Trivia
