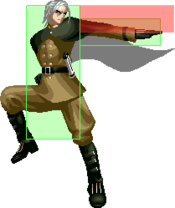
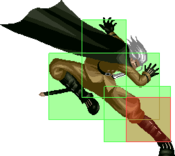
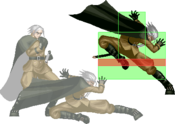
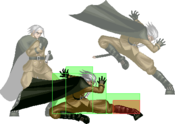
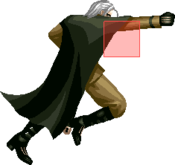
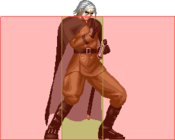
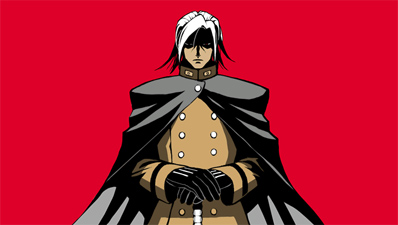
Akatsuki Blitzkampf/Murakumo
Background
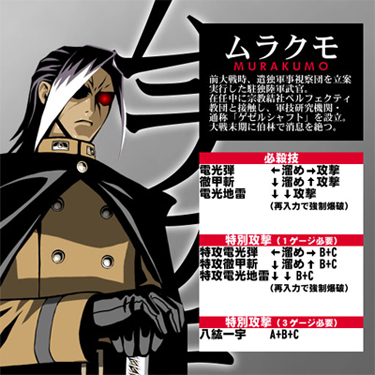
A military officer stationed in Germany who planned and implemented a German military affairs delegation during the previous Great War. During his tenure, he made contact with the religious society Perfecti Cult and established a military technical research institute commonly known as "Gesellschaft." In the last stage of the war contact with Berlin was lost. (from character selection screen)
Read the translation of his arcade mode!
Introduction
The man with the funny walk who wants to become God. Murakumo is no joke though. In classic boss character fashion, he has a tool for nearly every situation.
In short, Murakumo is a boss character with little to no bad matchups because of his versatility. He has a fireball for every situation, and his mixups put every other character in Blitzkampf to shame. If you handle this character well in neutral, your opponent will become scared of any move you make. His teleports are incredibly useful movement abilities, and also double as good mixup tools. Murakumo may not get amazing damage or corner carry, but he has a couple tools that let him overcome his damage problems. Combos into EX flash kick deal great damage, and mines, while serving as a good pressure tool, also lead to his most damaging combos in the corner.
Similar to: Oro, Heidern, M. Bison (Dictator)
| Strengths | Weaknesses |
|---|---|
|
|
All damage values below were tested on Akatsuki with 1.000 armor ratio and full life on both sides (remember about "Health difference" and "Guts" systems)
Character Summary
- Special Moves
- [4]6A/B/C (EX OK) - Denkoudan: Sonic boom/fireball
- [2]8A/B/C (EX OK) - Tekkouzan: Flash kick
- 22A/B/C (EX OK) - Denkou Jirai: Mine set/detonate
- Level 3 Super
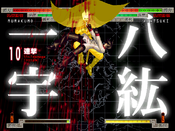
- A+B+C - Hakkou Ichiu: High damage, but low range, combo ender
- Unique Attacks
- 4C, j.2A/B/C, j.2A/B > 8A/B/C
- Armor ratio = 1.000 (Average armor value)
- Forward speed = 10.75 dots/F (Fastest in the game)
- Backwards speed = 5.0 dots/F (Fastest unbuffed value)
- Jump startup - 3F (Fastest unbuffed value)
- Backdash duration - 32F (Slowest backdash, but acts as a teleport with invuln on frames 11-22)
Basic BNB: 2A > 5B > 2B > 2C
Metered BNB: 2A > 2A > 2B > [2]8B > 8B+C
22A/22B Mine Hit: 2B > 2C
22C Mine Corner Hit: > 9j.A j.B -> land 9j.A j.C > 5A x3 > 2A x2 > 2B > [2]8B > 8B+C/A+B+C
Reflector: B+C > 2B > 2C
Notes on Ausf. Achse
Universal Changes
None of these changes were especially important to Murakumo, though losing access to high damage reflector combos with [2]8EX hurts.
Character Changes
Murakumo has a taunt now! It deals extremely minimal damage and is mostly useless but...
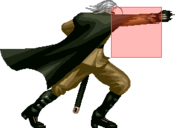
5B was changed to a long range kick with the same frame data. This is an incredible poke and pressure tool.
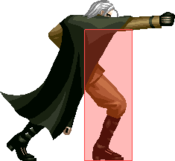
2B has a new animation and slightly lower range. Sadly, this reduces its usage to primarily blockstring fodder.
j.B has a new animation as well, but the usage is the same. Maintains its cross-up hitbox and decent jump in properties.
Non-EX mines will disappear instantly if Murakumo is hit. Does NOT apply to EX mines, so you can still be a scumbag for 1 bar. This nerf requires a bit of a gameplan change, since you can't rely on 22A/B/C to bail you out of everything anymore.
Normal Moves
5A
|
|---|
5B
|
|---|
2A
|
|---|
2B
|
|---|
j.A
|
|---|
j.B
|
|---|
j.C
|
|---|
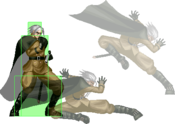
Illusions
One of Murakumo's main gimmicks are his illusions. Think of Hibiki from Blazblue Centralfiction, though not as fleshed out.
電光欺瞞 - Denkou Giman 5C 5C 2C 2C 4C 4C
|
|---|
Command Normals
電光迷彩 - Denkou Meisai
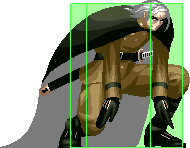
j.2A/B/C |
|---|
人間迫砲 - Ningen Hakubou
j.2A/B > 8A/B/C |
|---|
Special moves
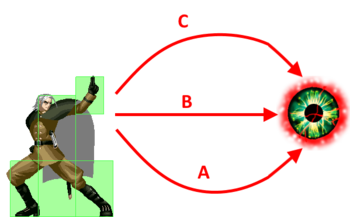
電光弾 - Denkoudan
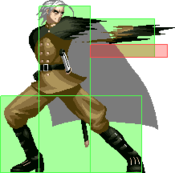
[4]6+A/B/C/B+C |
|---|
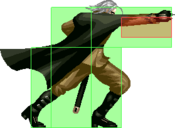
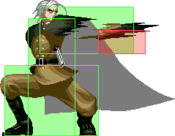
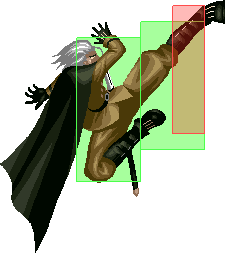
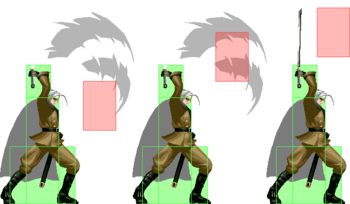
徹甲斬 - Tekkouzan [2]8+A/B/C/B+C Note: The hitboxes displayed above are only for the C version. Note: The hitboxes displayed above are only for the C version.
|
|---|
電光地雷 - Denkou Jirai
22+A/B/C/B+C |
|---|
Universal Mechanics
Reflector
Standing Reflector
4/5/6+B+C |
|---|
Crouching Reflector
1/2/3+B+C |
|---|
Jumping Reflector
j4/5/6+B+C |
|---|
Throws
Standing Throw 4/5/6+A+B KORE DE KORE DE
|
|---|
Jumping Throw
j.4/5/6+A+B |
|---|
Super Move
八紘一宇 - Hakkou Ichiu
A+B+C |
|---|
General Strategy
Neutral
For most matchups, neutral is where Murakumo thrives. He can choose to play defensively with mines and fireballs, or go full rushdown with teleports and his borderline unfair walk speed. Switching between these playstyles is important to maintain momentum while being extremely unpredictable.
For defensive zoning, mines become an important tool to prevent people from rushing you down as they stay active even if you take damage (non-EX mines disappear if you take damage in the arcade version, so be careful there). For opponents who are fullscreen or jump happy, defensive mine + [4]6C is an almost unbeatable combination.
When a jumping opponent learns to parry [4]6C, you can punish with an air throw or air to air with j.A. Since whiffing B and C normals build meter, whiffing 5B -> [4]6X will net you a little bit of extra meter on top of keeping you in place and throwing out extra hitboxes.
[2]8A -> [2]8BC is an amazing tool to counter approaches with only 5 frames of startup, and leads to major damage. You can almost play Murakumo like Electrosoldat with his flashkick, though be careful of jumping parries.
- Note: Zoning is extremely difficult against characters like Anonym and Blitztank who have fast traveling fullscreen projectiles since they perfectly contest your fireballs.
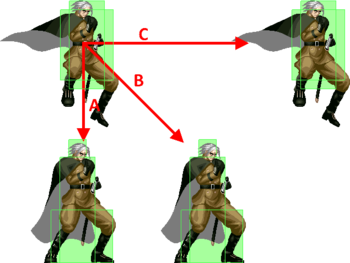
For offensive play in neutral, jumping and teleports become Murakumo's most important rushdown tools. Here is a quick rundown on when each of Murakumo's teleports is most useful.
66 (Dash Teleport): Great for gaining distance or closing the gap, but generally not better than walking forward. Occasionally leads into ideal scramble situations where you teleport behind your opponent and their button whiffs.
j.2A: Forms the basis for half of Murakumo's teleport crossups with the 8X upwards kick follow up you can perform after j.2A/B. Goes straight down, so it usually won't cross up and is sometimes a good option for baiting parry.
j.2B: The second half of the teleport crossups. Use this when your teleport will put you behind your opponent so you can instantly cross them up with the 8X follow up.
j.2C: Easily the best teleport. Inputting j.2C will let you perform an air action afterwards, which can become borderline instant overheads that lead into full combos. Use this if your opponent is trying to play defensively, or when your spacing creates an ambiguous crossup.
Because you can block in the air, jumping is an incredible option. It is almost completely safe and Murakumo has some solid air buttons to back it up. j.A has little recovery so you can jump upwards, j.A, and still have air time to do another jumping attack or even a teleport.
One strangely effective application for this is jumping forward in neutral, hitting j.A j.B/C, then immediately jumping back and doing the same thing. This builds meter while also throwing out hitboxes for your opponent to somehow run into.
This round demonstrates this strategy in practice.
Outside of those options, Murakumo can make good use of his walkspeed to approach with a fireball to cover him and following C fireball with a jump cheats neutral entirely. If you're a really good gambler, throwing out C normals is also not a terrible idea.
If your opponent starts parrying your mixups, delay your attacks or throw. This pattern becomes Murakumo's most common scenario.
Mixup Options and Advantage
After Murakumo gets in, he has a couple general pressure options. Stagger pressure or throw. Murakumo's basic blockstring is 2A x n -> 5/B2B. 2A can stagger into itself, and 5B/2B staggers from 2A. Common blockstring enders after 5B/2B include [4]6X to reset pressure, 5C for a riskier pressure reset and overhead mixup, and 4C for reflector happy opponents.
If your opponent starts blocking too much or parries your stagger pressure once you're in, abuse your walk speed and throw them. It is important you go for a mixup early in your pressure or you leave yourself vulnerable to parries.
Okizeme
After landing a combo, your opponent will be hit by one of the following enders which lead to different okizeme flowcharts.
2C knockdown: This ender leads to the best okizeme you can get midscreen. With a tight link and a deep meaty, you can combo 5C into 5/2A for looping setplay. In the corner you can safely set a mine as well.
Here's a video demonstrating some mixups you can do after 2C knockdowns midscreen
[2]8X knockdown: This knockdown isn't amazing, but you are able to meaty by walking up or jumping in. Higher damage especially when dumping meter, but generally less preferred than 2C.
Throw knockdown: Unfortunately the worst knockdown situation midscreen. You can walk up and 2B for a meaty, but this is very tight and one-dimensional. Generally advised to set a mine and switch to a zoning style afterwards unless in the corner.
Air combo > 2B > mine set (corner exclusive): The best corner oki you can get, but only off situational combos that require meter or a mine launcher combo. The mine gives you insurance on anything you want to do, see below for more info.
Corner Pressure
This is where Murakumo really shines. If you get a single knockdown in the corner with mine oki, you can effectively keep your opponent locked down there until the mine expires. There are very few ways to escape the corner that beat mine lockdown (to cover ground options) and C fireball (to cover aerial options). If you are content with taking the meter + chip damage, your opponent will start to crack under the pressure.
If you would rather make use of the mine, you can go for a blockstring and detonate the mine at the end to give you a ton of plus frames. This gives you an opportunity to land a fancy mine launcher corner combo (detailed in the combos section), but leads into tick throw/mixup opportunity if blocked.
Defense
If you're in a sticky situation, either midscreen or in the corner, Murakumo has few options to escape. His best button to mash during blockstrings is 5A, but that becomes vulnerable to stagger pressure, which everyone in this game has. Murakumo needs to spend meter for any kind of invincibility on wakeup, and even that becomes risky since every one of his reversals is minus on block. If you HAVE to push buttons on the defensive, parry is the safest option.
However in the vast majority of situations, blocking will be your best bet.
Other Resources
Good netplay match compilation that details all the techniques here.
Japanese Murakumo Wiki (Also has a section for Ausf Achse)
Combos
Combo terminology
| Symbol | Meaning |
|---|---|
| > | Cancel from the previous move to the following move |
| land | The player must land |
| , | Link from the previous move to the following move |
| dl./delay | Delay before using the following move |
| nj.X | Neutral Jump |
| AA | Anti-Air, must hit an airborne opponent |
| [X] | Hold the input |
| (X) | Optional input |
| [X]*N | Repeat (sequence) N number of times |
Note: 2AA > 2B is approximately the time it takes to charge a special move, use this ground string if you are not already holding down back when your combo begins.
Midscreen Combos
| Combo | Damage | Video | Notes |
|---|---|---|---|
| 2A > 5B > 2B > 2C, [4]6A, (OTG 2B > 2C) | 1828 2189 with OTG |
- |
Murakumo's main combo, and pretty much the only midscreen combo you'll be doing most of the time. If the opponent techs the 2C knockdown, [4]6A will automatically meaty them. |
| 2A > 5B > 2B > [2]8A > [2]8BC/ABC | - | - |
A variant of the previous combo that sacrifices oki for damage. |
| AA j.A/j.C, land, Air Throw | - | noLink Crossunder |
More of an Air Throw setup than an actual combo. Not going for the Air Throw lets Murakumo cross under the opponent, as shown in the second video. |
Corner Combos
Note: Meterless combos without mine detonations are the same as midscreen
| Combo | Damage | Mine required? | Video | Notes |
|---|---|---|---|---|
| 2A > 2B > [2]8C > [4]6BC, 2AA > 2B > [2]8B > ([2]8BC) | 3216/4615 2854/4263 |
No | Link |
The damage route, which trades mine oki for big damage (which is only enhanced by the use of an extra bar). The second set of damage values corresponds to a 2AA > 2B starter |
| 2A > 2B > [2]8C > [4]6BC, 2AA > 2B > 22X, (OTG 2B > 22X) | 2680 | No | Link |
The oki route. Mine will hit OTG if the opponent doesn't tech the knockdown, giving free damage and another mine set. |
| (22A hits), 2B > 2C | 1976 | Yes | - |
Conversion for when the opponent gets hit by a mine. Same goes for the other two combos. |
| (22B hits), 9j.A, j.C, land 2B > 2C | 2580 | Yes | - | - |
| (22C hits), 9j.A*2, land, 9j.A, j.C, land (5A/2A/5B) > 2B > 2C | 2772 | Yes | - |
5A/2A/5B can only be done if close enough. |
| (22B/C mine set), 2A*N > 2B > 22X, 9j.A, j.C, land 5B > [4]6A, 2AA > 2B > [2]8B > ([2]8BC) | 3164 4565 |
Yes | Link |
Optimal meterless mine corner combo. 2A scaling is almost minimal, so use as many as need to hitconfirm (this also applies to the next combo). Just like the mineless route, this can lead into mine oki for less damage. |
| (22B/C mine set), 2A > 2B > 22X, 9j.A, j.B, land 9j.A, j.C, 5A*N > 22A > 2B > [2]8B > ABC | ~6900, can go past 8000 | Yes | Link |
Murakumo's highest damage combo. Pop off if you ever land this in a set. |
Reflector Combos
| Combo | Damage | Video | Notes |
|---|---|---|---|
| Reflector, 2B > 2C | 1805 | - |
Basic and easy Reflector combo. |
| Reflector, 2B > [2]8X > [2]8BC | 3432 | - |
More damaging Reflector combo. Only works if Murakumo is close to the opponent. |
Ausf Achse
Murakumo's routes don't change in Ausf Achse, even for reflector combos. Though reflector combos deal less damage across the board now, so spending meter on them is discouraged.
Frame Data
source
KD - Knockdown
VB - Variable
*UV - value(s) marked with "?" in the table is/are unverified
x~yF - a period from frame "x" till frame "y"
                       |     Frames      |  Frame Advantage  |
               Attack  | Total | Startup | On Hit | On Block | Notes
Throws and Reflectors  ---------------------------------------
            4/5/6+A+B  |  20   |    6?   |   KD   |    --    | *UV
          j.4/5/6+A+B  |  20   |    3    |   KD   |    --    |
                5+B+C  |  17   |    7    |   KD   |    +3    |
                c.B+C  |  17   |    7    |   KD   |    +3    |
                j.B+C  |  16   |    6    |   KD   |    +3    |
              Normals  ---------------------------------------
                   5A  |  15   |    4    |   +0   |    +0    |
                   5B  |  21   |    6    |   +0   |    -2    |
                   5C  |  46   |   32    |   +1   |    -1    |
                  c.A  |  15   |    4    |   +0   |    +0    |
                  c.B  |  34   |    7    |  -12   |   -14    |
                  c.C  |  42   |   15    |   KD   |   -12    |
                  j.A  |  15   |    4    |   +0   |    +0    |
                  j.B  |  24   |    5    |   VB   |    VB    |
                  j.C  |  25   |    6    |   VB   |    VB    |
           c./5A > 5A  |  15   |    4    |   +0   |    +0    |
          c./5A > c.A  |  15   |    4    |   +0   |    +0    |
      Command Normals  ---------------------------------------
                   4C  |  32   |   --    |   --   |    --    |
                 j.2A  |  VB*  |   --    |   --   |    --    | landing recovery 16F, 4F invincible after that,
                                                               *33F if done right after the jump
                 j.2B  |  VB*  |   --    |   --   |    --    | landing recovery 16F, 4F invincible after that,
                                                               *34F if done right after the jump
                 j.2C  |  VB   |   --    |   --   |    --    | 16-21F invincible, cancellable into air normal after 32F
          j.2A/B > 8A  |  43   |    5*   |   KD   |   -25    | cancels j.2A/B landing recovery starting from 8F; *29th frame
                                                               in its fastest variation (when done from ascending j.2A)
          j.2A/B > 8B  |  51   |    5*   |   KD   |   -33    | cancels j.2A/B landing recovery starting from 8F; *26th frame
                                                               in its fastest variation (when done from ascending j.2A)
          j.2A/B > 8C  |  59   |    5*   |   KD   |   -41    | cancels j.2A/B landing recovery starting from 8F; *23rd frame
                                                               in its fastest variation (when done from ascending j.2A)
             Specials  ---------------------------------------
               [4]6+A  |  42   |   13    |   +1   |    -3    |
               [4]6+B  |  42   |   13    |   +1   |    -3    |
               [4]6+C  |  42   |   13    |   +1   |    -3    |
               [2]8+A  |  45   |    5    |   KD   |   -25    |
               [2]8+B  |  47   |    7    |   KD   |   -25    |
               [2]8+C  |  49   |    9    |   KD   |   -25    |
                 22+A  |  40   |   42*   |   KD   |   +19*   | setup ends on 25F, mine auto explodes 17F after being
                                                               triggered, Mura crouches during frames 3~38, *if triggered
                                                               instantly after the setup
                 22+B  |  40   |   44*   |   KD   |   +21*   | setup ends on 27F, see all of the above
                 22+C  |  40   |   46*   |   KD   |   +23*   | setup ends on 29F, see all of the above
            22 > 22+A  |  30   |    9    |   KD   |    -4    | narrow hitbox on 9F, wide - on 11F; if the enemy enters
                                                               mine's trigger range before you finish detonating it, it
                                                               will auto-explode
            22 > 22+B  |  30   |   13    |   KD   |    +0    | narrow hitbox on 13F, wide - on 15F; see above
            22 > 22+C  |  30   |   17    |   KD   |    +4    | narrow hitbox on 17F, wide - on 19F; see above
       EX and Level 3  ---------------------------------------
             [4]6+B+C  |  50   |   13    |   KD   |    -1    | 1~4F invincible
             [2]8+B+C  |  53   |    5    |   KD   |   -25    | 1~4F invincible
               22+B+C  |  40   |   40*   |   KD   |   +29*   | setup ends on 23F, mine auto explodes 17F after being
                                                               triggered, Mura is 1~2F invincible and crouches during
                                                               frames 3~38, *if triggered instantly after the setup
      22+B+C > 22+B+C  |  30   |    9    |   KD   |    +8*   | narrow hitbox on 9F, wide - on 11F; if the enemy enters
                                                               mine's trigger range before you finish detonating it, it
                                                               will auto-explode; *in case all 4 explosions were blocked,
                                                               often becomes +6 with grounded opponents
                A+B+C  |  40   |    4    |   KD   |   -20    | superflash 40F, 1~4F invincible
Trivia
