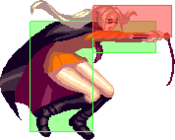
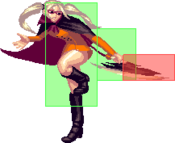
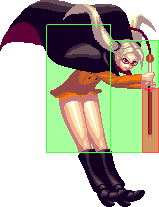
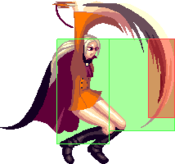
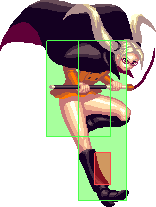
Akatsuki Blitzkampf/Mycale
Background
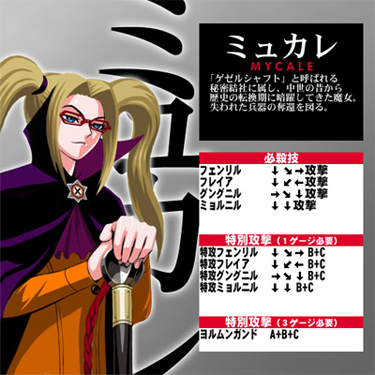
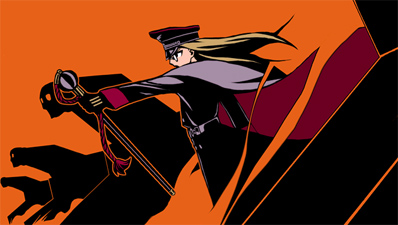
A witch belonging to a secret society called Gesellschaft, she has been operating from the shadows at the turning points of history since the olden days of the Middle Ages. She plans to recover a missing weapon. (from character selection screen)
Read the translation of her arcade mode!
Introduction
Mycale is a tricky summon-based zoner with unique screen coverage to make the opponent struggle in neutral.
Similar to: Dizzy, Hilda, Dormammu, JP
| Strengths | Weaknesses |
|---|---|
|
|
All damage values below were tested on Akatsuki with 1.000 armor ratio and full life on both sides (remember about "Health difference" and "Guts" systems)
Character Summary
- Special Moves
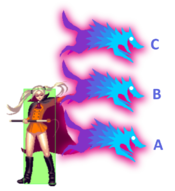
- 236A/B/C (EX OK) - Fenrir: Horizontal dog summon
- 214A/B/C (EX OK) - Freyja: Ground fire summon
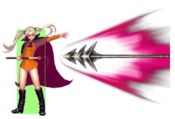
- 632A/B/C (EX OK) - Gungnir: Spear summon
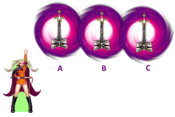
- 22A/B/C (EX OK) - Mjolnir: Falling hammer summon
- Level 3 Super
- A+B+C - Jörmungandr: High damage, safe on block reversal
- Unique Attacks
- 8C, j.2A/B/C
- Armor ratio = 1.050 (first lowest *default)
- Forward speed = 4.5 dots/frame (second slowest default)
- Backwards speed = 3.5 dots/frame (second slowest default)
- Jump startup - 4F (second slowest default)
- Backdash duration - 24F (fourth slowest)
- Her forward dash goes through opponents.
*Not counting Wei's buffs or Anonym's post-ressurection armor increase
Basic BNB: 2A > 2B > 214A
Metered BNB: 2A > 2B > 214A > 632B+C > 5B > 214B
Reflector: B+C > 214C (>632B+C > 214B)
Notes on Ausf. Achse
Universal Changes
The nerfs to reflector combos affect her more since she had some of the best reflector combos in the game very important to her defence.
Character Changes
Her reflector attacks can't be special canceled anymore, hurting her reflector combos even more.
Her crouching reflector attack now causes a wallbounce. This isn't significant but it slightly changes her routes.
Universal Mechanics
Reflectors
Standing Reflector
4/5/6+B+C |
|---|
Crouching Reflector
1/2/3+B+C |
|---|
Jumping Reflector
7/8/9+B+C |
|---|
Throws
Standing Throw
|
|---|
Aerial Throw
|
|---|
Normal Moves
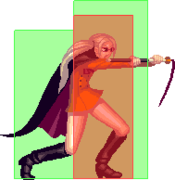
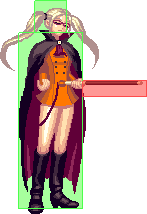
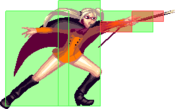
5A
|
|---|
5B
|
|---|
5C (far)
|
|---|
5C (close)
|
|---|
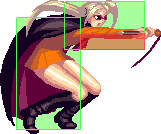
2A
|
|---|
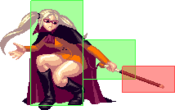
2B
|
|---|
2C
|
|---|
j.A
|
|---|
j.B
|
|---|
j.C
|
|---|
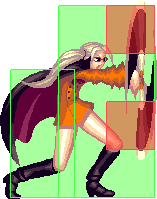
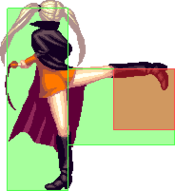
8C
|
|---|
Command Normals
ナーゼタウヘン - Nase Tauchen
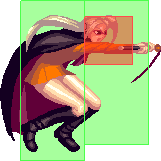
j.2+A/B/C |
|---|
Special Moves
Mycale's specials will disappear when she is hit https://www.youtube.com/watch?v=70J7ynxcdJ8
フェンリル - Fenrir
236+A/B/C/B+C |
|---|
フレイア - Freyja
214+A/B/C/B+C |
|---|
グングニル - Gungnir
632+A/B/C/B+C |
|---|
ミョルニル - Mjolnir
22+A/B/C/B+C |
|---|
Super Move
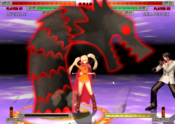
ヨルムンガンド - Jörmungandr A+B+C Reminds me of the drawings I made in first grade Reminds me of the drawings I made in first grade
|
|---|
General Strategy
Negative Edge 22+X
One of Mycale's most unique attributes is her ability to hold down a button when doing 22+X to keep the move in place until releasing it. This is an important technique to get a good handle of to use Mycale well, as it can be used to enhance all aspects of her play at the cost of some moves. In general though, 22+A for neutral, don't use 22+B at all, and 22+C for offense. Held 22+A is especially strong in neutral, as it essentially gives Mycale a hitbox in front of her that she can release at any time, discouraging the opponent from recklessly coming in. While holding 22+A, Mycale loses access to her A normals, throw, and A special moves. This is fine if she's zoning though, as her A normals are short ranged and mostly for comboing, throw doesn't matter unless she's up close, and the A special moves are generally short ranged and not used as much in neutral. In addition, she also still has access to reflector and EX moves with A held, giving her access to some unique and powerful albeit situational combos, as well as meaning she can still defend herself with parry. 22+B should pretty much never be used, as it causes you to lose access to B normals, throw, reflector + EX moves, and B specials while not having a valuable enough screen position to make up for it. You can use it for zoning but it really isn't worth it. 22+C causes Mycale to lose access to C normals, reflector, and EX moves, but in return gains access to extra strong offensive potential. While 22+C will appear at full screen, if you're near or in corner then this is the one to go for. It can be used to gain plus frames for extending pressure, allows for unique combo extensions, and by releasing the hammer during throw, gains the highest damage throw conversion (outside of Marilyn air throw) in the game. However, it can be hard to find time and a situation to setup 22+C, so be on the lookout for opportunities to use it.
Neutral
Mycale's main goal in neutral is, of course, to zone the opponent with her many projectiles and long range normals while slowly pushing them towards the corner. Mycale's good poking normals are 2B, which is her main combo poke, 5C, an incredibly long poke that knocks down, and 2C, a slightly shorter low that also knocks down and low profiles a few things. Mycale's many projectile tools allow her to cover many parts of the screen and with variable timings. 236+X is generally the main tool to start the zoning with, as Fenrir is a slow moving projectile that covers a good angle as well as going under other projectiles once it reaches the ground. In addition, 236+C is good at catching jumps making it a vital tool for her neutral game. From here, 214+X is a great tool to further push her zoning. The fire created by 214+X is very quick to come out and lasts for a while, making it good for controlling ground space or harassing the opponent from afar. In particular, if the opponent tries to parry her other projectiles, 214+X can force them to block or catch them walking forward trying to parry due to it's quick speed. 22+X can also be used in neutral, including without it being held as it still covers a good amount of space, does decent damage, and is very plus on hit or block. However, it is slow and is best used with 22+A in neutral as described in the previous section. 632+X, while mainly an okizeme or pressure tool, does have slight use in neutral, but only really when Mycale is set up with other projectiles on screen. It appearing on the opponent's position makes it useful especially when the opponent has to worry about blocking other projectiles, and it being very plus on block allows Mycale to push her position forward and/or setup more projectiles. In general, you want to be pushing forward after all your projectiles except under some situations to avoid being cornered and to try to gain screen control. However, there will be many situations where you're forced to retreat back to get out of danger, so be careful of your screen position.
Offense and Okizeme
Mycale while lacking high low mix still has pretty decent pressure once she can get in. She has lots of ways to be plus on block, with her 5A being a humongous +4 on block, leading to easy tick throws and frame traps. 632+A can be used to end a block string against respectful opponents to gain plus frames and continue her pressure, although this carries the obvious risk of being mashed on. 632+B+C can end a block string for plus frames too, but is a lot safer due to its faster startup. With enough meter even, Mycale can use 632+B+C for guard break setups. Also having a 22+X (mainly 22+C) has a lot of application in her offensive game as described in the previous section, although it needs to be setup from a knockdown to be safe. However, Mycale's offense truly shows in her oki capabilities. 632+X has strong application on okizeme, leading to some dirty setups. On an opponent that techs, 632+B can be used to meaty, although it will whiff on a regular knockdown. 632+C has a lot more uses. While it won't hit meaty, it's possible to throw the opponent before it hits, leading to extra damage on the throw. Once the opponent is aware of this mixup, you can bait a throw tech and let them get hit by the 632+C, leading to a full combo. Another mixup with 632+C is to be close to the opponent, then dash through the opponent. Since Mycale's dash switches sides, the spear will hit as a cross up. This one is a bit more gimmicky though as Mycale's dash has no invincibility, so it's very easy to mash out of. Mycale generally relies on hit throw mixups, and has several ways to keep her turn, although they come with risks.
Air Game
Jumping in general is not the best idea with Mycale. She has one of the floatier jumps in the game, but also has the worst horizontal movement on a jump in the game, even worse than Tank's. This means that jumping with Mycale is a committal option, and can be anti-aired with relative ease. However, Mycale's j.2X series can help mitigate these issues. Her j.2X divekick lets her return to the ground a lot quicker and can counter anti-airs, and thanks to it almost always being plus on block, it's very useful as a landing option. However, it's not super effective as it's still very much susceptible to being anti-aired. In terms of her regular aerials, they're all somewhat weak. j.B is generally the best landing option but is still somewhat stubby. j.A is a pretty good air to air but Mycale's weak jump makes air to airs not so easy to go for. j.C can be used for either landing or air to air but is underwhelming at both. '8C is a gimmicky air to air that while rewarding to hit, rarely has opportunities to do. Her air throw is nothing to write home about, although it has a pretty cool animation. On higher hitting landing j.A or j.B, for a somewhat gimmicky setup Mycale can cancel them into j.2X which can catch an opponent trying to tech a tick throw or mashing jab.
Anti-Air
Mycale doesn't have any good anti-air normals, as none of them cover the vertical space above her, so Mycale has to rely on her specials. 236+C and 236+B are the main moves to use here, as together they cover the entire vertical space above her. However, if an instance of 236+X is already on the screen, then Mycale won't be able to summon another to anti-air with, so be careful not to spam the move too much in neutral. Additionally, 236+X can be reflectored on reaction and punished, making it somewhat dangerous against experienced opponents. Alleviating this to a degree is 22+X. Each 22+X covers a fairly large vertical space, and 22+A in particular is great for catching opponents trying to jump in on Mycale. However, 22+X is best used when already setup, which takes some time, so it can't be used on reaction. 2C on occasion can be kinda used as an anti-air, since it may low profile an aerial and hit, but this is a last resort option if anything. Mycale can of course anti-air reflector, and since she has some of the best reflector combos in the game, it's a good option to go for, although it has the usual weakness of safe jumps.
Defensive Options
Mycale's defense is a weaker aspect although it's not completely terrible. Mycale's abare is decent, as her A normals have good frame advantage, and her 2B is fast and has decent range, so while she will get outclassed by some characters she can fight close up. However, she only has two invincible options, the main on being her 236+B+C. It does have the advantage of being only -9 on block and having high pushback, making it difficult to punish. However, it is slow making it easy to safe jump, and it can be reflectored for an easy full punish. Her other reversal option is her A+B+C. It does high damage, comes out very fast, and is fully invincible. However, like any level 3 reversal, it's risky as it getting blocked means you're both going to get punished and you've wasted 3 bars, so it should be used sparingly. Making her defense especially weak though is that she has the lowest armor rating in the game. This means that once the opponent gets in on her, it only takes a few mixups and combos to reduce her health to nothing. This means that you want to avoid being put under pressure at all costs when playing as Mycale, as it's very possible to be winning a full match, then get knocked down once and die after a few interactions. However, this doesn't mean you should be desperate to escape, as that will make your actions easy to read by a good opponent. Instead, be patient and watch for opportunities to escape or reversal the opponent.
Overview
Overall, Mycale is a difficult to use but very rewarding zoner. She has lots of strong zoning tools and can easily take the pace of match, and has some surprisingly strong offense. However, she has multiple flaws in her gameplan and can lose a match in the blink of the eye if the opponent gets going on her. However, she offers a playstyle and tools no one else (except Perfecti) has, and when used to her full potential can be hard to fight back against.
Combos
Combo terminology
| Symbol | Meaning |
|---|---|
| > | Cancel from the previous move to the following move |
| land | The player must land |
| , | Link from the previous move to the following move |
| dl./delay | Delay before using the following move |
| nj.X | Neutral Jump |
| AA | Anti-Air, must hit an airborne opponent |
| [X] | Hold the input |
| ]X[ | Release the input |
| (X) | Optional input |
| [X]*N | Repeat (sequence) N number of times |
j.2X Loop
One of Mycale's harder but important combos is the divekick loop. Basically, Mycale hits c.5C, her launcher, then combos an aerial into divekick and repeats it one more time. You can also just do one rep although it'll do less damage and have significantly less corner carry. There are variations of the combo for midscreen, corner, and with or without meter. Regardless though, it's her best combo choice whenever she can get it. However, since it requires c.5C, it can be hard to find an opportunity to start the loop. Below are listed the different starters for the loop and the different variations.
Starters
c.5C > Loop
- Raw c.5C. You can go for it from a dash, but it's not recommended.
j.C > c.5C > Loop
- Starter from aerial. Hard to hit confirm but is useful since it doesn't require any additional setup.
j.2B/j.2C > c.5C > Loop
- Very tight combo from divekick. The divekick needs to hit very deep for this to work.
With A or C Mjolnir Setup 2B > Release A/C (> 632A) > c.5C > Loop
- Combo into the loop from a Mjolnir setup. 632A can be added for additional damage and consistency. You won't get a chance to do this often but it does a lot of damage if you can get it.
632X > c.5C > Loop
- It's very easy to combo into c.5C if you land a Gungnir since it's super plus and pushes the opponent towards you, although this obviously requires a setup in advance.
Midscreen
| Combo | Damage | Video | Notes |
|---|---|---|---|
| 2A > 2B > 214A | 1413 | Link |
Main midscreen and corner combo. Doesn't give knockdown or do much damage but gets the opponent away from you. |
| 2A > 2B > 214A > 632BC, 5B(1-4)/2B > 214B/632X/22X | 3212 | Link |
Meter midscreen combo. Very good combo as it gives good damage and lets you set up your oki tools. 2B can be used instead of 5B if the opponent is far from you. |
| 2A > 2B > 214A > 632BC > 214BC | 4089 | Link |
Two bar midscreen combo. Isn't really worth doing unless it's going to kill. |
| 2A > 2B > 214A > ABC | 5181 | Link |
Midscreen level 3 combo. Also only really worth doing if it's going to kill. |
| 214X > 632BC > 214X | 3602 | Link |
Metered mid or fullscreen conversion off 214X to get a knockdown. |
| c.5C, [j.A > j.2C > land]*2 > 5A > 5B(1) > 214B/632X/22X | 2988 | Link |
Midscreen meterless divekick loop. Does high damage, corner carry, and sets up your oki tools. |
| c.5C, j.A > j.2C > land > 5B(1) > 214B > 632BC | 3860 | Link |
Midscreen 1 bar divekick loop. Does even more damage, and while you won't get a good oki setup, it leaves the opponent right next to you. |
| c.5C, [j.A > j.2C, land]*2, 5A > 5B(1) > 214B > ABC | 6650 | Link |
Midscreen level 3 divekick loop. Does huge damage, but really is only worth doing if it will kill. |
Corner
| Combo | Damage | Video | Notes |
|---|---|---|---|
| 2A > 2B > 214A > 632BC, 5B (1-4) > 22C(held) | 3117 | Link |
Corner 1 meter combo from the basic combo. Ends in 22C hammer set to leave A+B open for throwing. |
| 2A > 2B > 214A > 632BC, 5B (1-4) > 236A > 236+B+C | 4518 | Link |
Corner 2 meter combo from the basic combo. Does more damage but still not great since it's generally better to go for setups. |
| c.5C, j.B > j.2A, land, j.A > j.B > j.2A, 5A > 5B(1-4) > 214A/22X/632X | 3556 | Link |
Corner meterless divekick loop. Does even more damage but can be quite difficult to pull off. |
| c.5C, j.B > j.2A, land, j.A > j.B > j.2A, 5A > 5B(4) > 236A > 236BC | - | noLink |
Corner 1 bar divekick loop. Adds a good amount more damage although obviously doesn't give an oki setup. |
| c.5C, j.B > j.2A, land, j.A > j.B > j.2A, 5A > 5B(4) > 236A > ABC | - | noLink |
Corner level 3 divekick loop. Once again, does huge damage but only worth it if it'll kill. |
| 22C 632A c.5C, j.B > j.2B, land, j.A > j.B > j.2A, 5A > 5B > 236A > ABC | 8098 | Link |
Corner level 3 divekick loop with situational starter. |
Situational Combos
| Combo | Damage | Position | Video | Notes |
|---|---|---|---|---|
| (22B set), 632X > ]B[, (22B hits), 214B (> 632BC > 214B) | - | Midscreen | noLink |
A long distance combo for the rare occasion you have 22B set and land a 632X in neutral. |
| (22B set), 632C > ]B[, 22BC, 632BC, 214BC | 7031 | Midscreen | Link |
Long distance 3 meter combo conversion. Only practical on a reflector bait or as a guard break combo as the 22BC at the beginning deals a lot of guard damage. Release the 2B as close to pressing the 22BC as possible. |
| (22X set), A+B > ]X[ | 3158 | Anywhere | Link |
Mjolnir during throw. You actually specifically want to release the Mjolnir after the main damage part of the throw is done to get max damage, meaning it requires a little bit of practice to time correctly. However, it allows Mycale to deal a whole 3K damage off her, which is great with her strong tick throw game. |
| (22A set), j.B/2B/5B(2-4) > 22BC > ]A[, (22A hits) > (22BC hits) > (j.2B), land, c.5C, Loop | - | Corner | noLink |
A corner limited but super high damage combo that requires a 22A setup. This will deal ridiculous damage but is incredibly hard to land, even if you have the setup in place. |
| (22A set), j.B/2B/5B(2-4) > 214BC(5) > ]A[, (22A hits), c.5C, Loop | - | Corner | noLink |
An easier version of the above combo that deals less damage. |
| (22C set), (5A > 2B)/5B(1-2) > 632A~]C[ > (22C hits) > 22BC > (632A hits) > (22BC hits) > (j.2B), c.5C, Loop | - | Corner | noLink |
A further improved but even harder version of the corner Mjolnir setup combo. This will deal huge damage but is probably among the hardest combos in the game. 632A and ]C[ needs to happen at the same time. |
| (22A set), 632C > 22BC > (632C hits) > (22BC hits), 5B(4) > 632]A[, (22A hits) > 22BC > (632A hits) > (22BC hits) > (j.2B), c.5C, Loop | - | Corner | noLink |
The legendary 3 bar non level 3 Mycale combo. While this is among the highest damaging as well as most difficult combos in the game, you are never going to land this combo unless you somehow get a guard break in the corner with a 22A already set. |
Reflector Combos
| Combo | Damage | Position | Video | Notes |
|---|---|---|---|---|
| Reflector, 214B > (632BC > 214B/C) | - | Midscreen | noLink |
Easy midscreen reflector combo, although lower damage. May need to end in 214B or 214C depending on the distance from the corner if meter is added. |
| Reflector, 632A, 5B(2-4) > 214B | - | Midscreen | noLink |
Moderate difficulty midscreen reflector combos. |
| Reflector, 632A, 214A > {(632BC, 214A)/ABC} | - | Midscreen | noLink | - |
| Reflector, 632A, j.B > j.2C, land, 5A > 5B(1) > {214B > (632BC/ABC)/}22X/632X | - | Midscreen | noLink |
Harder midscreen reflector combo but does a lot more corner carry, damage, and can give a setup. |
| Reflector, 5AA > 5B(4) > 214A | - | Corner | noLink |
Very easy corner reflector combo. |
| Reflector, 214A > 632BC, 5B(2-4) > 214A/(236A > 236BC) | - | Corner | noLink |
Moderate corner reflector combo. A second meter can be added for additional damage although it may not be worth it. It's also possible to level 3 at the very start but once again it's not really worth it. |
| Reflector, j.B > j.2A, land, j.A > j.B > j.2A, land, 5A > 5B(2-4) > 214A/22X/632X | - | Corner | noLink |
High difficulty corner reflector combo. Can't be gotten from an air reflector in corner. Deals very good damage and allows for a setup. |
| Reflector, j.B > j.2A, land, j.A > j.B > j.2A, land, 5A > 5B(2-4) > 236A > 236BC/ABC | - | Corner | noLink |
Meter burn variations of the high difficulty corner reflector combo. Generally not worth it unless it will kill. |
Ausf Achse Combos
This will only list combos that changed.
Reflector combos
| Combo | Damage | Position | Video | Notes |
|---|---|---|---|---|
| Reflector, 214C > (632BC > 214B) | 2367 | Midscreen | Link |
Basic easy reflector combo. Stew's Note: I couldn't get the 214B ender to work. |
| Reflector, ABC | 3921 | Anywhere | Link |
Easy level 3 reflector combo. |
| Reflector, 632A, 5B(2-4) > 214B | - | Midscreen | noLink |
Basic 632A extension. |
| Reflector, 632A, 214A > ({632BC, 214A}/ABC) | - | Midscreen | noLink |
More advanced 632A extension, good damage for a reflector combo. |
| Reflector, 5A, 5A > 5B > 214A | 1308 | Corner | Link |
Basic corner reflector combo. |
| Reflector, 214A > 632BC, 5B > 214A | - | Corner | Link |
Higher damage meter extension. Stew's Note: I couldn't get the 214A ender to work. |
| Reflector, 214A > 632BC, 5B > 236A > 236BC | - | Corner | noLink |
Max damage reflector combo, not generally worth it but it's good damage off a reflector. |
Frame Data
source
KD - Knockdown
VA - Variable
*UV - value(s) marked with "?" in the table is/are unverified
x~yF - a period from frame "x" till frame "y"
                       |     Frames      |  Frame Advantage  |
               Attack  | Total | Startup | On Hit | On Block | Notes
Throws and Reflectors  ---------------------------------------
            4/5/6+A+B  |  21   |    5    |   KD   |    --    |
          j.4/5/6+A+B  |  19   |    3    |   KD   |    --    |
                5+B+C  |  16   |    7    |   KD   |    +4    |
                c.B+C  |  16   |    7    |   KD   |    +4    |
                j.B+C  |  16   |    6    |   KD   |    +3    |
              Normals  ---------------------------------------
                   5A  |  11   |    4    |   +4   |    +4    | *UV
                   5B  |  27   |    6    |   -1   |    -3    | *UV
             close 5C  |  27   |    7    |   KD   |    -6    | *UV
               far 5C  |  28   |   11    |   KD   |    -4    | *UV
                  c.A  |  14   |    4    |   +0   |    +0    | *UV
                  c.B  |  21   |    7    |   -1   |    -3    | *UV
                  c.C  |  27   |   10    |   KD   |    -5    | *UV
                  j.A  |  15   |    4    |   +0   |    +0    | *UV
                  j.B  |  24   |    6    |   VA   |    VA    | *UV
                 7/9C  |  25   |    7    |   VA   |    VA    | *UV
                   8C  |  28   |    7    |   KD   |    VA    | *UV
      Command Normals  ---------------------------------------
                 j.2A  |  VA   |   13    |   VA   |    VA    | landing recovery 3F? *UV
                 j.2B  |  VA   |   13    |   VA   |    VA    | landing recovery 3F? *UV
                 j.2C  |  VA   |   13    |   VA   |    VA    | landing recovery 3F? *UV
             Specials  ---------------------------------------
                236+A  |  46   |   10    |   -6   |   -10    |
                236+B  |  50   |   12    |   -9*  |   -12*   | *if airborne enemy was hit by/guarded the attack
                236+C  |  54   |   14    |  -11*  |   -14*   | *if airborne enemy was hit by/guarded the attack
                214+A  |  46   |   15    |   -1   |    -5    |
                214+B  |  50   |   16    |   -4   |    -8    |
                214+C  |  54   |   17    |   -7   |   -11    |
                632+A  |  50?  |   31    |  +11?  |    +7?   | *if not at screen's edge, there's a 3F hit delay, *UV
                632+B  |  50?  |   51    |  +31?  |   +26?   | *if not at screen's edge, there's a 3F hit delay, *UV
                632+C  |  50?  |   71    |  +51?  |   +46?   | *if not at screen's edge, there's a 3F hit delay, *UV
                 22+A  |  46?  |   30    |   VA   |    +9?*  | *if airborne enemy guarded the hit, *UV
                 22+B  |  50?  |   31    |   VA   |    +6?*  | *if airborne enemy guarded the hit, *UV
                 22+C  |  54?  |   32    |   VA   |    +3?*  | *if airborne enemy guarded the hit, *UV
       EX and Level 3  ---------------------------------------
              236+B+C  |  83?  |    9    |   KD   |    -9?   | 1~9F invincible
              214+B+C  |  75   |   15    |   +1   |    -3    | 1~5F invincible
              632+B+C  |  79   |   26    |   KD   |   +13    | 1~9F invincible;
                                                               if not at screen's edge, there's a 2F hit delay
               22+B+C  |  80   |   29    |   VA   |   +15*   | 1~5F invincible, *if airborne enemy guarded 5 hits
                A+B+C  | 104   |    5    |   KD   |    -2    | superflash 50F, 1~9F invincible
Trivia
