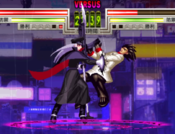
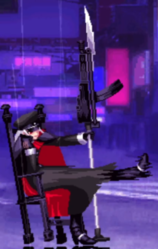
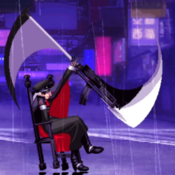
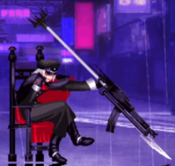
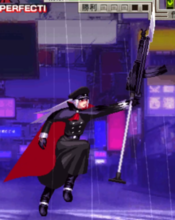
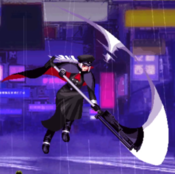
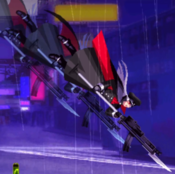
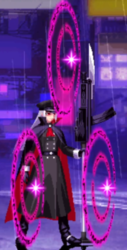
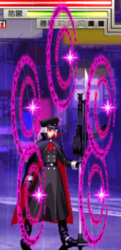
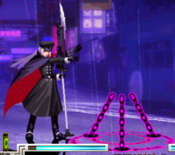
Akatsuki Blitzkampf/Perfecti
Disclaimer: Perfecti is in the arcade release (Ausf Achse) only!
Background
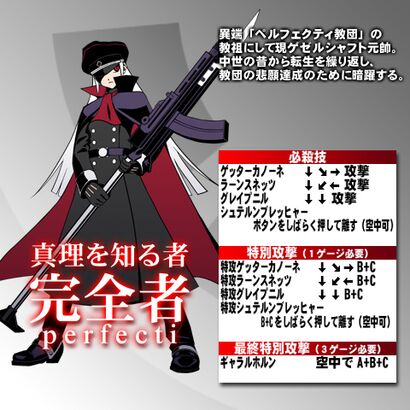
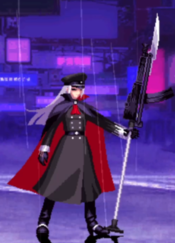
She is the founder of the heretic Perfecti Cult and the current commander of Gesellschaft. She has been repeatedly reincarnating since the Middle Ages, operating from the shadows in order to fulfill the cult's dearest wish. (from character selection screen)
Read the translation of her arcade mode!
Introduction
Perfecti is a zoner somewhat similar to Mycale, but has some key differences. Perfecti has great normals, possibly even the best normals in the game. Moves like f.5B are big, do good damage, and are cancelable. She also has strong projectiles that are fast and cover good angles, which combined with her normals, make her great at keeping the opponent out. She also has strong setplay with 214+X and thanks to her humongous j.C, she has an instant overhead on the entire cast although it won't lead to anything without a setup.
However, she has plenty of weaknesses. She has among the worst movement and defense in the game, making it hard for her to pressure opponents as well as escape pressure. She also has weak defensive options, since her fastest buttons are stubby and don't lead to much and she doesn't have strong reversals. She also can't deal much damage outside of situational combos and, similar to Mycale, has a high skill floor.
Overall, she has the best zoning and neutral in the game, and is very hard for some characters to properly deal with.
Similar to: Hilda, Dhalsim, Nu-13
| Strengths | Weaknesses |
|---|---|
|
|
All damage values below were tested on Akatsuki with 1.000 armor ratio and full life on both sides (remember about "Health difference" and "Guts" systems)
Character Summary
- Special Moves
- 236A/B/C (EX OK) - Götterkanone: Fireball
- 214A/B/C (EX OK) - Ransnetz: Homing missiles
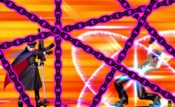
- 22A/B/C (EX OK) - Gleipnir: Grounded chains that hold the opponent
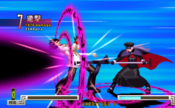
- Charge and Release A/B/C/B+C (EX, Air OK) - Sternbrecher: Fullscreen negative edge laser
- Level 3 Super
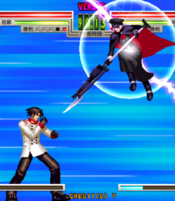
- j.A+B+C - Gjallarhorn: High damage invincible dive kick. Only useful situationally.
- Unique Attacks
- j.2A/B/C
- Armor ratio = 1.050 (first lowest *default)
- Forward speed = 4.0 dots/frame (second slowest default)
- Backwards speed = 3.0 dots/frame (slowest default)
- Jump startup = 4F (second slowest default)
- Backdash duration = 24F (fourth slowest)
- Her forward dash is a cross between Mycale's and Murakumo's where it is a teleport that can switch sides but goes a fairly short distance.
*Not counting Wei's buffs or Anonym's post-resurrection armor increase
Basic BNB: f.5B > 236A
Metered BNB: f.5B > 236A/B > 22+B+C > A/B/C Sternbrecher
Reflector: B+C > 236B/C
Universal Mechanics
Reflectors
Standing Reflector
4/5/6+B+C |
|---|
Crouching Reflector
1/2/3+B+C |
|---|
Jumping Reflector
7/8/9+B+C |
|---|
Throws
Standing Throw
|
|---|
Aerial Throw
|
|---|
Normal Moves
5A
|
|---|
5B (close)
|
|---|
5B (far) This is the button This is the button
|
|---|
5C (close)
|
|---|
5C (far)
|
|---|
2A
|
|---|
2B
|
|---|
2C
|
|---|
j.A
|
|---|
j.B
|
|---|
j.C Makes Murakumo's j.C blush Makes Murakumo's j.C blush
|
|---|
Command Normals
シュトゥーカ - Stuka
j.2X |
|---|
Special Moves
ゲッターカノーネ - Götterkanone
236+A/B/C/B+C |
|---|
ラーンスネッツ - Ransnetz
214+A/B/C/B+C |
|---|
グレイプニル - Gleipnir 22+A/B/C/B+C If you somehow land this in neutral you are obligated to taunt If you somehow land this in neutral you are obligated to taunt
|
|---|
シュテルンブレッヒャ - Sternbrecher Charge and Release A/B/C/B+C (Air OK!) Level 1 Laser Level 1 Laser Level 3 Laser Level 3 Laser Air Laser Air Laser EX Laser EX Laser
|
|---|
Super Move
ギャラルホルン - Gjallarhorn j.A+B+C This shouldn't need to be said, but this is NOT a reversal This shouldn't need to be said, but this is NOT a reversal
|
|---|
General Strategy
Using Sternbrecher
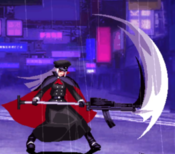
Sternbrecher, the negative edge laser, is your best neutral tool in combination with your missiles. Generally you want to be charging using the C button at all times except when you need a specific C normal (instant overheads for example).
Here are some restrictions you have when charging using specific buttons.
A: Lose your fastest normals, grounded fireball, fastest missiles, and you cannot throw.
B: Lose your best pokes, best neutral fireball, and you cannot parry or throw.
C: Lose your best jump in, longest range poke, dedicated anti air fireball, and you cannot parry.
Sternbrecher has a few levels of charge, with the level 2 and 3 charges being the most important. All versions are great at baiting full screen parries where your opponent may try to parry a fireball, deal great chip damage, and have good pushback.
You should almost always be charging this move, but keep in mind there are certain situations where you may wish to throw away your charge to regain access to reflector as your main defensive tool.
Neutral
Perfecti does her best work at fullscreen where your options can contest your opponent's approach. Right from round start, your goal is to get a knockdown and run away to zone with oppressive fireball, missile, and laser pressure.
A gameplan flowchart should look something like this: get a knockdown -> charge C laser -> set A/B missiles -> either meaty with a projectile to get chip damage and space or bait a reflector for more damage and space.
Depending on how your opponent likes to approach, you will need to use different tools to handle them. For example, a jump heavy opponent can easily jump over your laser angle, but will have a lot of trouble with 236B/C, Perfecti's great air to air combos, and 5A/2B all of which are good options against air approaches.
An opponent who is competent at parrying your fireballs will have a hard time parrying your unreactable laser. An opponent who dashes up on the ground will have a lot of trouble contesting your amazing 5B.
Play around with your wide range of zoning tools to create unique timing patterns that make it almost impossible to approach.
Offense and Okizeme
Perfecti close range mixup situations mostly boil down to stagger pressure and strike/throw situations. She has no standing overhead options, but occasionally j.C can be an extremely potent instant overhead on the entire cast.
For stagger pressure, 2A is the only button you need since after cancelling into a B normal you will almost always cancel into a fireball. This part of her kit isn't amazing, but functional enough to let you beat mashers and throw people who respect you too much.
Though not getting many opportunities to use it, Perfecti has amazing corner pressure with missiles. After knockdowns in the corner, you can set a 214A missile and run looping strike/throw mix until you guess wrong. Alternatively for meter, you can set 214EX which leads into combos from instant overhead j.C. These combos are extremely damaging and are a real mixup option your opponent has to respect. See the combos section below for more information.
Air Game
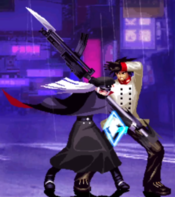
Perfecti's walk speed is abhorrent, so you will be making good use of your good aerial options to move around and stay slippery. Her air normals are great with j.A being an air to air that combos into j.B, which is an amazing air to air as well. j.C is your best jump in, but if you are charging a laser, j.B can be just as good. If opponents start trying to parry your anti airs, her air throw is great as well. Gives you back some health, deals respectable damage, and gives you full screen distance.
The most unique part of her air kit is the j.2X series of divekicks, the heavier the button, the more horizontal of an angle you get. They all hit mid and are generally safe on block, but lead to very unique situations with regards to missile setplay and reflector baiting.
j.2A when done at certain angles will whiff entirely but lets you recover quick enough to grab a parry, when backed up by missiles this can be especially powerful.
j.B has similar functions to both A and C versions, but is really only used at certain spacings to create ambiguous mixups where A and C versions would whiff or cross up.
j.2C goes the furthest, which lets you escape the corner easily, and sometimes allows for missiles to cross up.
Defense
Defense is easily the weakest part of a dedicated zoner's toolkit, where Perfecti is no exception. Abare with 5A/2A is fine, but generally unadvised in a game where everyone has access to great stagger pressure. With meter you can use 236EX which is invincible, but can be avoided easily making it a linear option with only niche use. Overall your best bet is to block or parry. Even though reflector combos were nerfed across the board in Ausf. Achse (now featuring rollback netcode!), Perfecti has access to surprisingly good damage with reflector combos into 22B.
Overview
Overall Perfecti is a good dedicated zoner who is able to play around the main system mechanic (reflector) in multiple ways to her advantage. Use your wide arrange of zoning options to keep your opponent out, and be patient when they get in.
Perfecti is considered to be less powerful than most of the cast, but still is a perfectly viable character. Since Ausf. Achse was only recently made playable online, Perfecti is a largely undeveloped and underplayed character.
There are many things that may be found in the future to her benefit, so if you want a zoner with a multitude of setups and options Perfecti is for you.
Combos
Combo terminology
| Symbol | Meaning |
|---|---|
| > | Cancel from the previous move to the following move |
| land | The player must land |
| , | Link from the previous move to the following move |
| dl./delay | Delay before using the following move |
| nj.X | Neutral Jump |
| AA | Anti-Air, must hit an airborne opponent |
| [X] | Hold the input |
| (X) | Optional input |
| [X]*N | Repeat (sequence) N number of times |
| Starter | The combo can be started with one of the following:
|
Midscreen Combos
236A can be replaced with 236B if close enough for a bit more damage.
| Combo | Damage | Video | Notes |
|---|---|---|---|
| Starter > 236A | ~1540 | Link |
Perfecti's main combo. Grants a knockdown and doesn't need to be hitconfirmed since it's safe at most ranges, but barely does any damage. |
| Starter > 236[A] > 22[BC], ]A[ (level 1/2) > ]BC[ (level 1) | ~3688/3921 | Link |
Metered midscreen combo. Does big damage, but is also expensive. ]BC[ can be replaced with another laser of f.5C, but this does a lot less damage. |
| Starter > 236A > 22B[C], Dash, dl.5A > f.5B > ]C[ | - | - |
High damage one bar combo. |
| Starter > 236B > 22B[C], j.B, land f.5B > ]C[ | - | - |
A slightly more damaging version of the previous combo. Requires Perfecti to be close to the opponent. |
| AA j.A > j.B > (j.]C[) > j.ABC | - | - |
Basic air-to-air level 3 combo. Easy to hitconfirm and does a lot of damage, but you'll rarely do this. |
| ]A[ (level 4) > ]BC[ (level 4) | ~12967 or K.O. | Regular; ToD |
Extremely meme combo, despite the fact that it's literally the only possible ToD present in ABK. You are legally allowed to pass out while popping off if you ever land this in a real match. Also, Perfecti needs to be at low health for this to ToD. |
Corner Combos
| Combo | Damage | Video | Notes |
|---|---|---|---|
| c.5B > 236C, 5A > 2B(2) > 236C | - | - |
Basic meterless corner combo. Does ok damage but it's better to spend meter if you get an opportunity to do a 236C corner combo. |
| c.5B > 236C, 5A > 2B(1) > 236C > 22BC, 5AA > 5B > 236B | - | - |
1 bar corner combo. Does a bit more damage than the meterless version, but can be a little tight to land. |
| c.5B > 236B > 22BC, 5AAAA > 5B > 236B | - | - |
1 bar combo that works on crouchers. Only does a bit less damage than the previous combo, on top of being safer to go for. |
| c.5B > 236B > 214BC, 2A > 5B > (214BC hits) > 236B, (f.5C) | - | - |
Harder, but slightly more damaging variant of the previous combo. |
| (A is being held), c.5B > 236C > 214B[C], 2B(2) > (214BC hits) > 236[B], ]A[ > (]BC[) | - | - |
Very high damage meter combo. Deals great damage especially if ]BC[ is added but is very tight and requires good execution. Also is of course situational due to it requiring 236C and you have to be charging A prior to the combo. |
Situational Combos
| Combo | Damage | Position | Video | Notes |
|---|---|---|---|---|
| (B is being held), 236[C], ]BC[ | - | Midscreen | - |
Basic long distance guard break combo that leads to good damage. Can be hard to get since you have a tight window to charge. |
| (214[B]C set), 236[C] > (214BC hits) > ]BC[ | - | Midscreen | - |
Higher damage long distance guard break combo. Not really worth the meter unless it will kill. |
| j.C, land c.5B > 236C, 5AA, j.A > j.]B/C[ > j.ABC | - | Corner | - |
Corner level 3 combo. Very situational since it requires a standing opponent and for you to be incredibly close, as well as being really tight, but does great damage. |
| (214A set), 2A > 2B > 236X, j.]X[ > j.ABC | - | Corner | - |
Alternative corner level 3 combo, pretty much a guard break only combo but does higher damage than the alternative. You can get it if you get an oki 214A and your opponent tries to throw tech, but that's fairly rare. |
Reflector Combos
| Combo | Damage | Position | Video | Notes |
|---|---|---|---|---|
| Reflector > 236B/C | - | Midscreen | - |
Basic meterless reflector combo. Very simple but is often your only option. |
| Air Reflector, f.5C | - | Midscreen | - |
Meterless air reflector combo. Perfecti can't do much from air reflector so this is normally all you get. |
| Reflector > 236B/C, f.5C | - | Midscreen | - |
Slightly harder, but more damaging reflector combo. |
| Reflector > 236B/C, j.2C, 214X | - | Midscreen | - |
Hard reflector combo that gives a good knockdown. Don't do it if you want to stay zoning, but it's generally recommended. |
| Reflector > 22B, ]X[ | - | Midscreen | - |
Mildly advanced reflector combo that's consistent and does pretty good damage. |
| Reflector > 236A > 214[BC], Dash ,5A*N > (214BC hits) > 236A, ]BC[ | - | Corner | - |
Difficult and high damage corner reflector combo. Situational like any corner reflector combo. Good option to go for when you can get it. |
Frame Data
KD - Knockdown
VA - Variable
*UV - value(s) marked with "?" in the table is/are unverified
x~yF - a period from frame "x" till frame "y"
                            |     Frames      |  Frame Advantage  |
                    Attack  | Total | Startup | On Hit | On Block | Notes
    Throws and Reflectors  ---------------------------------------
               4/5/6+A+B   |  31   |    5    |   KD   |     -    |
             j.4/5/6+A+B   |  VA   |    4    |   KD   |     -    |
                 5+B+C/D   |  36   |    7    |   KD   |    +3    |
                 c.B+C/D   |  36   |    7    |   KD   |    +3    |
                 j.B+C/D   |  VA   |    6    |   KD   |    +3    |
                  Normals  ---------------------------------------
                     5A    |  15   |    4    |   +0   |    +0    |
                5B (close) |  21   |    6    |   -0   |    -2    |
                  5B (far) |  30   |    7    |   -8   |    -10   |
               5C (close)  |  27   |    8    |   KD   |    -4    |
                 5C (far)  |  38   |    11   |   KD   |    -12   |
                     c.A   |  15   |    4    |   +0   |    +0    |
                     c.B   |  27   |    6    |   -2   |    -4    |
                     c.C   |  35   |    10   |   KD   |    -11   |
                     j.A   |  VA   |    4    |   VA   |    VA    |
                     j.B   |  VA   |    6    |   VA   |    VA    |
                     j.C   |  VA   |    7    |   VA   |    VA    |
          Command Normals  ---------------------------------------
                  j.2A/B/C |  VA   |    16   |   KD   |    VA    | 10F, 12F, 14F of landing recovery.
                 Specials  ---------------------------------------
                   236+A   |  46   |    11   |   KD   |    -9    |
                   236+B   |  47   |    12   |   KD   |    -9    |
                   236+C   |  48   |    13   |   KD   |    -9    |
                   214+A   |  32   |    95   |   VA   |    VA    |
                   214+B   |  32   |    125  |   VA   |    VA    |
                   214+C   |  32   |    155  |   VA   |    VA    |
                    22+A   |  68   |    29   |    -   |    -22   | restrains 57F
                    22+B   |  68   |    29   |    -   |    -21   | restrains 57F
                    22+C   |  68   |    29   |    -   |    -20   | restrains 57F
             [X] Level 1   |  56   |    16   |   -10  |    -23   |
             [X] Level 2   |  57   |    15   |   KD   |    -22   |
             [X] Level 3   |  58   |    14   |   KD   |    -21   |
             [X] Level 4   |  118  |    14   |   KD   |    -30   |
           j.[X] Level 1   |  VA   |    16   |   -10  |    VA    | 4F landing recovery
           j.[X] Level 2   |  VA   |    15   |   KD   |    VA    | 4F landing recovery
           j.[X] Level 3   |  VA   |    14   |   KD   |    VA    | 4F landing recovery
           j.[X] Level 4   |  VA   |    14   |   KD   |    VA    | 4F landing recovery
           EX and Level 3  ---------------------------------------
                 236+D     |  46   |    11   |   KD   |    -19   | 10F invincible
                 214+D     |  32   |    85   |   VA   |    VA    |
                  22+D     |  67   |    27   |    -   |    -15   | restrains 57F
          [BC] Level 1     |  54   |    8    |   KD   |    -11   |
          [BC] Level 2     |  194  |    8    |   KD   |    -21   |
        j.[BC] Level 1     |  VA   |    8    |   KD   |    VA    |
        j.[BC] Level 2     |  VA   |    9    |   KD   |    VA    |
               j.A+B+C     |  VA   |    9    |   KD   |    VA    | 8F invincible, 10F landing recovery on block or whiff
Trivia
- Perfecti's Japanese name, 完全者 ("kanzen-sha") literally translates to "Perfect One".
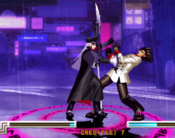
Gameplay Example
