Arcana Heart 3/AH3LM/Mei-Fang
 |
Outdated Version
|

美凰
Introduction
WIP. Scroll down for actual gameplay info.
Strategy
fluff
Arcana Selection
Mei's strong pressure game allows her to beat the opponents easily without relying on an Arcana so most players pick what they feel fit their play style the most. She also doesn't have that many bad match-ups so she can almost use any Arcana. Most players either choose an Arcana that further strengthen the tools she already has or an Arcana that improves some of her lackluster tools.
Notable Arcanas
Mei's most popular arcana choice and arguably the best one. It perfectly covers up most of Mei's glaring weaknesses. Thunder's passive attributes makes Mei's weak clash game to quite a formidable one. It improves her lackluster okizeme game and allows her to continue her overwhelming pressure through the use of Thunder's super moves. It also further improves Mei's already high damage output to obnoxious levels. If you want an Arcana that covers up most of Mei's weakness then this is your best choice.
Base Combos
Meterless
2A 5B 236C~C 5A j.A j.E(2) dj.A dj.B dj.C dj.1236C (7270 damage)
Simple and easy meterless combo that ends into oki.
2A 2B 236C~C 5A j.E(1) jc 3D j.E(2) sj.B dj.B dj.C dj.1236A
Does a bit more damage than the standard meterless combo. Kinda not worth the effort.
Extend Force Cancel
2A 5B 5C 236C~A~A EFC 6C (5B>6C)*4 2C (9880 damage)
The combo that every Mei player uses because it's very simple and easy to do. Also gives you time to set up oki.
j.B 2A 5B 236C~C 421A 236B~(delay)C 421A 236B~C EFC 2[E] J.5DD j. A j.B dj.A dj.B dj.C j.214AB
Mei's infamous flip loop combo that melts characters. A jump-in starter makes the combo harder. You don't have to do delays if you started with a grounded normal. Definitely worth the effort to learn.
Move List
Note: Click on the images of the moves to see the full frames.
Normal Moves
|
5A  |
Mei's standing jab that has a 3 frame startup and is jump cancellable. It can link into 4A, 5B, 2B or 6B. One of her few options during clash situations. |
|
2A  |
A frame slower than her 5A and has a shorter hitbox than most characters 2A but still very good. Links into her B normals. |
|
4A  |
A standing low that has fast startup and has very good starting proration. But it has a very small hitbox and will whiff very frequently. Use it sparingly. |
|
5B  |
Fairly good range and plus on block. Also moves you forward by quite a bit. Mostly used as a combo filler due to 2B being the much better option for blockstrings. |
|
2B  |
This move is Mei's best normal hands down and it got even better in this version. Good range, decent startup and very plus on block. Also the pushblock on it is minimal. Use it. |
|
6B  |
Mei's anti-air option. It has a faster startup in this version but the hitbox is still very short. Also chains into 5B for some reason. |
|
5C  |
Very good range and can clash easily. It has a faster startup than her B normals. Also jump cancellable but it pushes the opponent pretty far. Prorates damage heavily though. |
|
2C  |
Mei's sweep. It has a pretty good reach and can duck under moves. Used mostly as a combo ender. |
|
6C  |
Mei's farthest reaching normal. Doesn't launch anymore and pulls in the opponent a bit so it's used for easy high damage combos. Start-up is even slower now and it barely moves forward now though. |
|
5E  |
A shoulder charge that surprisingly has good startup. Has clash from around her shoulder to her torso. Travels very far if charged and wallslams on hit. |
|
2E 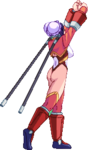 |
Mei's main tool for forcing clashes. Rather poor anti-air capabilities despite how the animation looks like. Mostly used as a combo filler for her EFC Rekka loop. |
|
j.A  |
Mei's go to normal when it comes to air-to-air pokes. Has a pretty good active frames and has 3 frames of startup. |
|
j.B 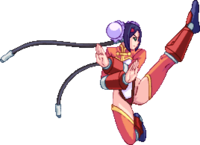 |
A move mostly used for when the opponent is right on top of you since the hitbox on it ends right on top of Mei's extended foot. Decent startup and active frames but it loses to many moves in neutral. |
|
j.C  |
A rather beefy jump-in move and enables Mei to dish out potential massive damage Hitstun on it makes confirming combos very easy. The downside is that it loses very easily in neutral though so it's main usage is for cross-ups. |
|
j.E 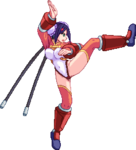 |
Mei's double rising kicks is another one of her important moves due to how many options you can do off of using it. The start-up on it is very good and it has a very active hitbox due to its multi-hit property. It has a fair amount of hitstun too so doing a followup is very easy. Not to mention it is also jump cancellable. |
Special Moves
|
Byakko Houken  |
The mandatory Lunge Punch for all Baji Quan users. However, she can't really use it as well as the other practitioners. You can now cancel into Seiryuu(623X) on hit or block so it's a bit more useful that it was in AH3. It's still not used that much because of how much of AH3 is spent in the air.
|
|
Seiryuu Kouzan  |
A rising shoulder charge that doesn't exist in Baji Quan because humans don't have rocket boosters on their legs. This move has different invincibility properties depending on which version is used. Can now cancel into Suzaku (j.1236X).
|
|
Genbu Toujin  |
Mei's gameplay defining move. The crux of her gameplay revolves around using these Rekkas to control the pace of the match. From using them for her blockstrings to her actual combos. The different versions change the distance she travels, the start-up and damage. The first and second hit can now be cancelled into Chikatsu Tenshin (421X), Seiryuu (623X), and Byakko (214X) which strengthens her previously lackluster ground pressure.
|
|
Suzaku Hourin  |
Mei turns around and attacks with a flaming hand. The number of hits and damage depend on which version you use. Mostly used for combo enders due to it groundslamming and being able to airdash out of the recovery.
|
|
Chikatsu Tenshin 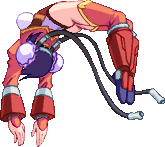 |
Mei does a backflip with invincibility frames. This move can be special cancelled so it's used for kara cancelling her specials so it's quite versatile in usage. She's airborne as soon as she starts the flip so you can cancel into Suzaku (j.1236X) for a fast overhead! It's actually used more for offensive purposes than defensive.
|
Super Moves
|
Shisei Oudou |
A rondo which starts with Byakko's animation. Damage isn't that great but it can combo from almost anything Mei does so it's quite versatile. The last hit can be cancelled to Tenbu Senshou (j.214AB) to put out more damage. |
|
Tenbu Senshou  |
A diving overhead attack that causes an explosion on the ground. Mei's dive is an overhead and the explosion is air unblockable. The damage of the explosion gets better the higher Mei is in the air when she does the super. Often used as a combo ender for massive damage. |
|
Kaiten Enbu |
A super version of Suzaku. It hits overhead but can be blocked after the super flash so it's mostly used as a combo ender to continue pressure on the opponent. The flames still persist even after you homing cancel it so you can do some gimmicky setups. |
Critical Heart
|
Kirin Kougeki  |
Mei's starting Critical Heart move which received a massive buff in this version. It now has a better start-up and travels half-screen during the super flash. It also has a ton of invincibility, ignores clash and guard breaks aerial opponents so you can use it very easily to punish the opponent if he throws out something in neutral. On top of that, it's also very easy to combo into. It has 2 routes it goes into if it hits. |
|
Daihou Senkou  |
The mecha fires a large laser on the opponent. The recovery has been reduced on this move but it lost its hard knockdown property so there's no reason to use this move anymore. |
|
Houou Hougeki  |
The second part of Mei's Critical Heart. Does more damage than Daihou Senkou and goes into the final part of her Critical Heart so you want to use this if you have 3 meters available. |
|
Houou Hougeki Funha  |
The final and actual part of Mei's critical heart. It gains multi-hit properties and does more damage while in Extend Force. |