Arcana Heart 3/AH3LM/Yoriko Yasuzumi
 |
Outdated Version
|

安栖 頼子
Introduction
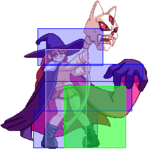
Yoriko is a hybrid character who incorporates elements of a mid-range rush-down oriented character with some elements of a zoning-type character. Most notably, Yoriko has long range command normals which can be used to poke and confirm on an opponent at longer ranges. Her primary gimmick relies on her Ancient Talisman special, which, if preformed correctly, will allow Yoriko's specials and supers to become powered up for a short time. When Yoriko is powered-up, her entire gameplan changes and she can go on full offensive since her powered-up special are extremely good.
Yoriko's weakness comes when she has to deal with strong brawler-type characters up close since her all of her low-level moves have high start-up. She can also suffer from issues in air-to-air exchanges since her extended normals also extend her hitbox. Because of this, she sometimes has to rely on projectiles to cover her approaches in neutral, since can have a hard time approaching, depending on the match-up.
Yoriko also lacks a non-metered reversal so most times has to respect the other player on wake-up. Yoriko does have a strong backdash with a lot of invulnerability frames, but it comes with somewhat hefty recovery. Yoriko is the ideal pick for someone who likes characters with mid-range confirms, strong pressure and minor zoning elements,
Arcana Selection
Yoriko is a strong character on her own and Arcana choice doesn't really help her combo-ability. Any Arcana that can augment her offense or give her enough projectile support to complete an Ancient Talisman is a good choice for her.
Recommended Picks
Love
Love is a good all-around Arcana pick. Love's projectiles can give Yoriko coverage mid-screen and Love Laser is great for hitting people far away (and if it counter hits, you can convert it into a full combo). Good meter gain, good burst recovery, and good combo synergy with Love's Eclipse make this a strong pick in AH3LM.
Blossoms
Blossoms Arcana not only gives you the great Burst regeneration but also allows you to end your Arcana Chains in Multi-layered, which basically guarantees at least a triangle Pent. The meter gain isn't too good with Blossoms, but you can also lay down plants and grow them for more meter. Because of the changes to Multi-layered in AH3LM, it's mid-screen, neutral, and even setup ability has been lowered, but it's still a good pick for Yoriko.
Sacred
Since Sacred was buffed in AH3LM, it has become a viable choice for Yoriko. Sacred's projectiles are not very useful for Yoriko in neutral, but they can guarantee a triangle Pent. Holy Song is a great additional to Yoriko's defense, since not only does it come out fast, but it also has a huge hit area and you can combo it into big damage on counter hit. The only word of caution with Holy Song is that it has no invincibility on it, so you can't use it to beat meaties or solid setups. Finally, the Sacred Eclipse is very strong and it can help keep people from using guard cancels foolishly on you.
Sin
Sin is a mainstay pick for Yoriko. Sin has good projectiles and great Extend Force duration for extending combos and pressure. You can also do Guard Break setups in the corner and mid-screen with Sin's 5[E]. However, the meter gain for Sin isn't fantastic unless you're taking damage or blocking a lot, so it may take you awhile to build up meter for Guard Cancels and Safe Ancient Talisman Method. In addition to that, Sin's burst recovery isn't great, so it's unwise to burst often. In spite of that, you do deal more damage while you have low HP in Extend Force, increasing Sin's comeback potential.
Sin is a great choice for a Yoriko player as long as they don't mind being limited on meter initially and having to hold your bursts.
Tyr
Many Yoriko players have been switching to Tyr as of late. Tyr doesn't offer any projectile coverage after a 6C, but it does allow you to to stay in Extend Force with Pent active for longer because of the passive ability of Tyr. The meter gain for Tyr is also very strong for both hitting the opponent and being hit/blocking, so with using Tyr, Yoriko will hit 2-3 meter stock in no time as long as you are being spartan with your usage. Tyr 623E can also be using in blockstrings to catch people guard cancelling to try to get out or to catch mashing. Definitely a great pick for players who want to play more offensively.
Fenrir
A little more of an interesting pick for Yoriko. Fenrir gives Yoriko strong pressure options close to the ground, even even allows her to do some tricks with Fenrir's canon fire. Again, this pick is for more aggressive players who want to force their opponent into a mistake.
Strategy
Zoning
Yoriko has great zoning tools and can keep the opponent at bay from both a horizontal and vertical perspective.
On the ground, she can pressure with any of her long range command normals. 6A > 3B is a good mid-range hit confirm chain that leads into good damage. You can also Extend Force Cancel it at any point to continue pressure. Yoriko's 6B also hits at a long range and will hit people in low air areas, standers, but will whiff crouchers. 2C/3C are good space control normals, but you must take care with them, as a whiff almost guarantees a punish. The same goes for 6C -- very good space control but a whiff is guaranteed punish.
In the air, Yoriko can control space horizontally with j.B and can easily confirm it into 236A/C, or she can use her spit command normals (j.3BC, j.6BC, j.4BC) to control the space beneath and in front of her. Her spit command normals are most likely the best zoning tools in the game. Not only do they give you tons of frame advantage, but they're convertable on hit in some situations (counter hit spits are always convertable in the air) and they can keep your opponent locked down in many ranges.
Offense and Pressure
Yoriko is a character who has strong ranged pressure tools available to her. A lot of her pressure game, however, focuses on using her shorter range normals in neutral to score a knockdown and gain some advantage, allowing her to further pressure the opponent with her ranged moves.
On the ground, Yoriko has a few strong pressure strings she can use:
2A > 2A > 2B - Good against people who tend to guard cancel often. Easy to hit confirm and allows for you to react to a 6GC by jump canceling the 2B and jumping back. It also allows you to react to a 4GC by just mashing 2A if they don't have any guard cancel reversals.
6A > 3B - Good mid-range confirm. Use this against players who tend to try to jump a lot to catch them in jump start up (6A and 3B are both lows). Good safety on this chain, but you need to have either HC or EFC available in case the opponent 6GC's you, since 6A and 3B are not jump cancelable.
2C (HC/EFC) - Good mid-to-long range confirm. Great for punishing people who jump a lot since 2C is air unblockable. 2C is also an extremely rewarding starter, which allows you to get around 11K damage and a triangle Pent from it. 2C is unsafe on block, however, which is why you always want to be ready to cancel it with HC or EFC.
These strings are strong and allow you to pressure your opponent with a good amount of safety. Most of Yoriko's ability to open people up once they're blocking comes from Extend Force Canceling her normals into either an instant overhead or a low. You also need to be able to adjust your strings based on your opponents responses. For example, if you notice your opponent tries to jump out a lot, mix small frame gaps into your strings and try to tag the jump out with a delayed 2C. If your opponent likes to use 6GC, you probably will want to use 2AAA to bait out the guard cancel and the jump back or forward and punish the recovery of it.
Defense
Yoriko's defensive options are somewhat limited in AH3LM. Her only real reversal (EX Pent) was changed to be easily punishable on block, which makes using it as a reversal even more dangerous. She does benefit from the addition of Extend Blast, but that falls in the same category as EX Pent - very punishable if baited. Pented 236A/C can still be used as reversals, but since the total Pent time was reduced in AH3LM, most times when you get knocked down or comboed while in Pent mode, that will exhaust your gauge completely leaving you unable to use those options. Finally, her command grab super can be used as a reversal, since it has full invulnerability on start up, but it requires your opponent to be in your face. Another downside to this is that the non-Pented version of the command grab super isn't 0 frame start up, meaning if the opponent is able to jump, they can jump it on reaction.
In terms of her non-reversal defensive options, 236C is your best wake-up for situations where stuff isn't meaty on you and your opponent is trying to maintain their advantage. Some Arcana choices can give you some more varied wake up options (such as Tone or Sacred).
When Yoriko is in pressure, she has a few tricks up her sleeves!
If an opponent is pressuring you on the ground with very little frame gaps, you can do: 4GC -> 6A > 3B to catch them from a distance and combo into 2C > 3C > 6C.
If the opponent is pressuring you on the ground at a bit longer of a range, you can also do 4GC > j.236A to rush in on them and either hit them or make them block.
If an opponent is approaching you from the air, you have a few options: 3A, 4GC > j.236C, and raw 236C. Sometimes, if the opponent is using a very low homing trajectory, 3A will straight up hit them and you can easily go into an air combo from that. Worst case scenario with 3A is if you clash, at which point you can high jump guard to try to reset the situation. If the opponent is approaching you from far above, grounded 236C can hit them on the way in since it reaches so high. The only issue with the grounded version of 236C is that if it whiffs, you are completely open to a punish. On the other hand, if you 4GC > j.236C, you don't get as much height on her rush, but you have free movement afterwards, since the air version of 236X allows you to keep movement after a rush.
If an opponent is hovering above you, rising j.A works wonders because of it's great hitbox. If you connect with it, you can convert it into 236C for a full air combo into a triangle Pent setup.
You can also fill in some of her defensive gaps with Arcana selection. Sacred allows you to use Holy Song as a reversal or a spacing tool (beware as it has no invincibility). Tone allows you use Vivo, which again, it not a true reversal, but it's fast enough to reversal anything that isn't meaty and disrespect at a large range. Because of the large vertical and horizontal space that Yoriko's 5E/2E occupy, Thunder can be a good defensive option to negate an oncoming attack and either attack from it or assume a defensive posture.
Combos
All of Yoriko's basic and more advanced combos can be found in the videos below. The video below was created using AH3, but the vast majority of her confirms and converts are the same in AH3LM.
Videos
Move List
Note: Click on the images of the moves to see the full frames.
Normal Moves
|
5A  |
Chainable 5F normal. Hits mid. Good horizontal and vertical range. |
|
2A  |
Chainable 5F normal. Hits low. Great range. Most common hit confirm normal for Yoriko. |
|
6A (Close)  |
This normal was added in AH3LM. Hits low. This will come out when you use 6A and your opponent is close enough to be hit by it. Comes out slightly faster than the far version, making it good to use from a 4D or a 4GC. Also has a better starting prorate than the far version (.93 compared to .70). |
|
6A (Far)  |
Long range grounded poke. Hits low. Chains directly into 3B for a target combo. Can be punished on whiff due to it's recovery, but otherwise a great poking move that can either continue pressure from a range, or combo into a Pent setup. |
|
3A  |
Fast and reliable anti-air move. Comes out very fast, is air-unblockable, and has a great start-up clash frame on it. This move is also jump/high jump cancelable, making it very easy to convert from. |
|
5B  |
Good mid-range move. Has start-up clash frames and is a good combo starter. Not used as often as 2B. Can chain into 3B. |
|
2B  |
Good range, start-up clash frames and projectile reflect on the hitbox. Chains into 3B. |
|
6B (Close)  |
This normal was added in AH3LM as well. Hits low. This will come out when you use 6B and your opponent is close enough to be hit by it. The close version of 6B is air-unblockable, unlike the far version. Because of it's small hit area, it's somewhat difficult to setup air guard break scenarios with it, but it can be used to punish poor air techs. Is jump cancelable. |
|
6B (Far)  |
Long range low air poke. The far version is air-blockable. Is also jump cancelable. |
|
3B (Close)  |
This move is similar to 6A but it causes a techable knockdown instead of a standing hit. Not very useful on it's own since it's hard to confirm with. Generally used as a combo or pressure move. Chains into 2C. |
|
3B (Far)  |
Same usage as the close version of 3B. Mostly relegated to combos because of difficulty confirming and converting with it. Chains into 2C. |
|
5C  |
Has start-up clash and a good hitbox. Not a very good combo move, but can be useful for trying to cause a clash to get out of certain situations. |
|
2C  |
Very strong grounded poke and a combo move. Has a huge hit range and is air-unblockable. This move can be used during strings to keep people from jumping out. It can be chained into 6C on hit or block, and if it hits, Yoriko can convert it into huge damage and a Pent setup. |
|
6C (Close)  |
This normal was also added in AH3LM with the same conditions as her other close/far moves. Unlike the far version of 6C, it doesn't have the same amount of hit stun on it. This move is also a little harder to convert from because of the lessened hit stun, but it's still possible. |
|
6C (Far)  |
Yoriko's longest range poke and a good combo tool. This can be used as a spacing tool if you notice the opponent likes to stay closer to the ground. It can also catch people either in homing or jump start up. |
|
3C  |
Longer range 2C. Air-unblockable. Great range but comes out very slow and has a lot of recovery. Very risky to poke with. Commonly used in combos or long pressure strings. |
|
j.A  |
Comes out in 5F. Great hitbox (has a hitbox on Mike's head and his extended fist) but a bit slow compared to other character's jump normals, so not that useful in a clash situation. Great for raw air-to-air, however. |
|
j.B  |
Good horizontal spacing jump move and Yoriko's most comment air-to-ground move. Her hurtbox is extended with this move, so take care in using it for approaches as she tends to get hit out of this move a lot. |
|
j.C  |
Decent hit box. Ground slams on hit. Not used that often in combos but is used frequently in whiff air normal mix-ups. |
|
j.[C]  |
Has a great vertical hitbox and it often used to hit people as an instant overhead. Not very useful as an approach move because of the start up and the reach. Can be chained into any of Yoriko's spit normals. |
|
j.3BC  |
Downward spit command normal and probably one of the best zoning moves in the game. Has moderate start up, so it's best used when you have some sort of advantage on your opponent. If your opponent gets hit with this high enough up, you can follow up into j.B and convert into a full combo. Cannot be Homing Canceled. |
|
j.6BC  |
Forward spit command normal. Great space control. Pushes Yoriko back upon use. Can only really be converted on a counter hit, but if it counter hits, you can easily convert it into j.B > j.E for a full combo. |
|
j.4BC  |
Upward spit command normal. Somewhat difficult to use. It's primary function is as an anti-air, but the start up is so slow that you'll either get hit before it comes out or your opponent will have moved by the time it comes out. In spite of that, not a bad move. Good to use if you know where your opponent is going to be and are willing to take a bit of a risk. |
|
j.E  |
Mostly a combo move but can be used as a mid-screen mix-up tool close to the ground (IAD > j.2E > j.E is a hard to react to double overhead). Not very good in neutral because of it's heavy recovery. |
|
j.2E  |
Great air combo ender and also a good defensive move. This move has start up clash frames, so in the air, you can use this move either in a clash or to force a clash with the opponent. This move's hitbox will persist past a clash, making it a pretty reliable clash move. |
|
5E  |
Pretty decent E move. Hits a large area in front of Yoriko and slightly above her, and once it starts, it's treated as airborne. Will some people off guard but it is unreliable in that regard. It is also hard to combo off. |
|
2E  |
Good E move. Primary usage is as an anti-air or a guard break move. 2E covers a different distance than 3A, so you can use it on some opponents who attack you more directly, but be caution of it's start up (12F for uncharged). |
Special Moves
|
Assailing Punishment of Hell (236A/j.236A)  |
Yoriko's horizontal rush special. Was formerly a low, now hits mid in AH3LM. A good combo move (combos directly into 236AB on the ground for a free triangle Pent setup) and a somewhat usable neutral move. It can be used from a 4GC in pressure, but beware of advancing opponents and using this in the corner since it has very long start up (start up is 22F). The air version of this comes out slightly faster and you have free air movement after using the air version. |
|
Assailing Punishment of Hell (236B/j.236B)  |
Yoriko's arcing rush special. Hits overhead. Not much utility for this as a combo move or in neutral since you can't convert any damage from it, but it can be used for a quick in a string on an unsuspecting opponent. |
|
Assailing Punishment of Hell (236C/j.236C)  |
Yoriko's vertical rush special (her DP). Comes out in 7F on the ground (5F in the air) and has low invincibility on start up. Not a true reversal since it doesn't have full invincibility, but it's fast enough that you can disrespect on anything shy of a meaty. The ground version of 236C travels much higher vertically than the air version, so you can potentially hit opponents high up in the air with it when they thought they were safe. The downside to the ground version is that if it whiffs, you don't have any control of Yoriko until she lands and recovers. The air version, however, doesn't travel nearly as high as the ground version, but you do have air movement after using it if it whiffs. Use with caution. |
Powered Up Special Moves
 |
Assailing Punishment of Hell 「襲い来る地獄の制裁」 A Powered Up Version - 236A
|
 |
Assailing Punishment of Hell 「襲い来る地獄の制裁」 B Powered Up Version - 236B |
 |
Assailing Punishment of Hell 「襲い来る地獄の制裁」 C Powered Up Version - 236C |
 |
Powered Howling Anguish of Hades 「噴き上がる奈落の苦悶」 - 421ABC |
 |
Powered Up Raining Retribution of Makai 「降り注ぐ魔界の報復」 - J214ABC |
Super Moves
 |
World Conquering Power of the Demon King 「世界を統べる魔王の威光」 - 236AB |
 |
Life and Death Controlling Taboo Magic 「生死を御する禁忌の魔術」 - 63214AB |
 |
Safe Ancient Talisman Method 「古のタリズマンを安全に作る方法」 - 632146AB |
Critical Heart
|
Heaven and Earth Scorching Conflagration of Makai (641236AB)  |
Chainable 5F normal. Hits mid. Good horizontal and vertical range. |
Extend Force Critical Heart
|
Heaven and Earth Scorching Conflagration of Makai (641236AB)  |
Chainable 5F normal. Hits mid. Good horizontal and vertical range. |