 |
Outdated Version
- This page is for an outdated version of the game (AH3LMSS). To see Kira Daidohji's character page for the latest version (AH3X), click here.
|
Profile
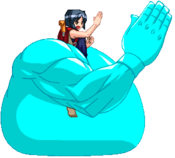
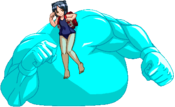
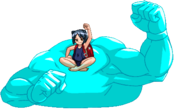
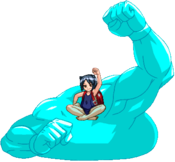
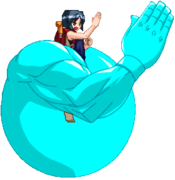
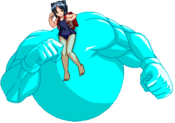
The brilliant, hyper-genius who obtained her post-doctorate in celestial physics from the Celestial University of Massachusetts at the age of 10, Kira is extremely arrogant and possesses zero social skills. While grudgingly open and sincere with those she respects, anyone outside of her circle of friends will be treated to almost comical levels of scorn and abuse. Unfortunately for everyone, her circle of friends is more of a line, as she currently only respects two people: Professor Mei-Ling Hua, and Catherine Kyoubashi, who attended university with her.
Using the power of the independent ether conductor she invented, she has attempted to take over the world more times than can be conveniently counted, but has always come up short, much to her chagrin. She is resentful over the fact that her friends and rivals, Catherine and Mei-Fang were invited to Rosenberg, the organization created to stop celestial disasters in Japan. While removing the planar rifts in Japan, she also not-so-patiently plans her revenge against those who would thwart her (i.e.: everyone).
Overview
Grappler that can fly.
Recommended Arcana
Few Arcana perfectly compliment Kira. Most of the time, you will go with choices that supplement her high stamina and increase her damage potential. Think of it as upgrading a tank.
Metal
One of, if not the most popular arcana for Kira. Not only does it supplement your stamina, but metal can boost your damage of small confirms enormously. Metal Kira has an easy confirm into Dikaiosi that eats chunks of health at a time. You can continue to make Kira strong and stronger for that round with Epidosis. Metal shield also helps Kira with some mixups post knock down. They can't hit you, but you can grab them.
Earth
Earth gives you a lot more stamina but takes some power out of your punches. Luckily, Earth Punches can fix that with the right confirms. Earth's 6D can also give you some interesting gimmicks for your SPD.
Evil
Evil (Commonly referred to as poison) offers powerful projectile okizeme, and a swap positions super to combo while your force gauge is recovering. Teleports can also be used to mess up the positioning of zoning characters such as Scharlachrot, and make approaching them that much easier.
Thunder
Thunder takes Kira's existing clash game and adds to it with a fantastic reversal/anti-air in the form of 623E and clash frames on forward dash. During okizeme, Fearg Lorg can lock down your opponent as they try to guess their way around a throw mixup. It's especially dangerous since Kira's 623 series can punish people trying to chicken block it on wakeup.
Normal Moves
5A
5A
|
| Damage
|
Guard
|
Cancel
|
Startup
|
Active
|
Recovery
|
Frame Adv
|
Level
|
| 700
|
All
|
-
|
8
|
7
|
4
|
+4
|
A
|
Can be jump canceled. Technically Kira's fastest ground normal, but tends to hit in the later active frames against most crouching characters.
|
|
5B
5B
|
| Damage
|
Guard
|
Cancel
|
Startup
|
Active
|
Recovery
|
Frame Adv
|
Level
|
| 1700
|
All
|
-
|
16
|
8
|
24
|
-11
|
C
|
Causes ground bounce. Upper-body clash in the middle of startup. Holding the button cancels the attack for a fake-out.
|
|
5C
5C
|
| Damage
|
Guard
|
Cancel
|
Startup
|
Active
|
Recovery
|
Frame Adv
|
Level
|
| 2200
|
Mid
|
-
|
18
|
4
|
20
|
-1
|
D
|
Full-body clash from frame 1, does not last through the full startup. Some low attacks may go under the clash hitbox. Air unblockable.
|
|
5E
5E
|
| Version
|
Damage
|
Guard
|
Cancel
|
Startup
|
Active
|
Recovery
|
Frame Adv
|
Level
|
| Normal
|
3000
|
Mid
|
-
|
35
|
5
|
37
|
-18
|
D
|
| Charged
|
4000
|
Unb
|
-
|
56
|
6
|
37
|
-
|
E
|
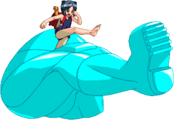
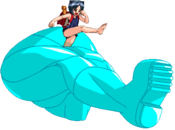
Giant dropkick. Has full-body clash frames in the middle of its long startup. Large recovery on whiff.
|
|
2A
2A
|
| Damage
|
Guard
|
Cancel
|
Startup
|
Active
|
Recovery
|
Frame Adv
|
Level
|
| 500
|
All
|
-
|
10
|
3
|
6
|
+3
|
A
|
Jump cancelable chop. Reflects projectiles downwards.
|
|
2B
2B
|
| Damage
|
Guard
|
Cancel
|
Startup
|
Active
|
Recovery
|
Frame Adv
|
Level
|
| 1400
|
Mid
|
-
|
10
|
4
|
24
|
-4
|
C
|
Air unblockable uppercut. Can be super jump canceled. Reflects projectiles straight up. Despite its appearance it can't be used for anti-airs in most situations due to its large hurtbox.
|
|
2C
2C
|
| Damage
|
Guard
|
Cancel
|
Startup
|
Active
|
Recovery
|
Frame Adv
|
Level
|
| 2200
|
Low/Air
|
-
|
9
|
6
|
24
|
-7
|
D
|
Kira's only low attack. Huge range.
|
|
2E
2E
|
| Version
|
Damage
|
Guard
|
Cancel
|
Startup
|
Active
|
Recovery
|
Frame Adv
|
Level
|
| Normal
|
2400
|
Mid
|
-
|
17
|
4
|
17
|
+2
|
D
|
| Charged
|
2800
|
Unb
|
-
|
37
|
3
|
23
|
-
|
E
|
Short full-body clash on startup. Reflects projectiles diagonally upwards. Fairly big vertical range, especially when fully charged. While difficult due to its slow speed, it's occasionally possible to use it as an anti-air.
|
|
6C
6C
|
| Damage
|
Guard
|
Cancel
|
Startup
|
Active
|
Recovery
|
Frame Adv
|
Level
|
| 2600
|
-
|
-
|
26
|
4
|
15
|
+4
|
D
|
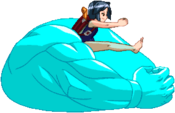
Air unblockable rushing kick. Has some full-body clash frames in the middle of startup. Launches the opponent towards the opposite wall on hit.
|
|
j.A
j.A
|
| Damage
|
Guard
|
Cancel
|
Startup
|
Active
|
Recovery
|
Frame Adv
|
Level
|
| 700
|
High/Air
|
-
|
8
|
6
|
14
|
-
|
A
|
Kira's only jump cancelable air normal.
|
|
j.B
j.B
|
| Damage
|
Guard
|
Cancel
|
Startup
|
Active
|
Recovery
|
Frame Adv
|
Level
|
| 1600
|
High/Air
|
-
|
17
|
4
|
17
|
-
|
C
|
Similar clash properties to 5B, launches the opponent towards the ground.
|
|
j.C
j.C
|
| Damage
|
Guard
|
Cancel
|
Startup
|
Active
|
Recovery
|
Frame Adv
|
Level
|
| 2400
|
High/Air
|
-
|
20
|
6
|
23
|
-
|
D
|
Has clash properties from frame 1, similar to 5C.
|
|
j.E
j.E
|
| Damage
|
Guard
|
Cancel
|
Startup
|
Active
|
Recovery
|
Frame Adv
|
Level
|
| 2500
|
High/Air
|
-
|
12
|
26
|
9
|
-
|
D
|
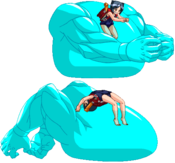
Body press with a wide hitbox and unclashable property. Premier move to use for crossups on opponents below Kira.
|
|
Throws
Neutral Throw
Throw
|
| Damage
|
Guard
|
Cancel
|
Startup
|
Active
|
Recovery
|
Frame Adv
|
Level
|
| 2000
|
Throw
|
-
|
5
|
1
|
23
|
-
|
-
|
Leaves opponent airborne.
|
|
Lever Throw
Lever Throw
|
| Damage
|
Guard
|
Cancel
|
Startup
|
Active
|
Recovery
|
Frame Adv
|
Level
|
| 2500
|
Throw
|
-
|
3
|
1
|
23
|
-
|
-
|
Sideswaps opponent right next to Kira
|
|
Air Throw
Air Throw
|
| Damage
|
Guard
|
Cancel
|
Startup
|
Active
|
Recovery
|
Frame Adv
|
Level
|
| 2500
|
Throw
|
-
|
3
|
1
|
23
|
-
|
-
|
Slams the opponent on the ground
|
|
Special Moves
Kira Driver
Kira Driver
[360]X
|
| Version
|
Damage
|
Guard
|
Cancel
|
Startup
|
Active
|
Recovery
|
Frame Adv
|
Level
|
| A
|
5000
|
Throw
|
-
|
7
|
1
|
33
|
-
|
-
|
| B
|
6500
|
Throw
|
-
|
5
|
1
|
35
|
-
|
-
|
| C
|
8000
|
Throw
|
-
|
3
|
1
|
37
|
-
|
-
|
Command grab. Hard knockdown. The A version has the most range, but lowest damage and longest startup. New in SSS: throw invincibility during startup!
|
|
Flying Kira Driver
Flying Kira Driver
j.214X
|
| Version
|
Damage
|
Guard
|
Cancel
|
Startup
|
Active
|
Recovery
|
Frame Adv
|
Level
|
| A
|
5600
|
Throw
|
-
|
3
|
1
|
35
|
-
|
-
|
| B
|
5600
|
Throw
|
-
|
5
|
2
|
35
|
-
|
-
|
| C
|
5600
|
Throw
|
-
|
7
|
4
|
35
|
-
|
-
|
Air command grab. Hard knockdown. All versions deal the same damage. The A version has the fastest startup, but shortest active frames. Throw invincibility during startup.
|
|
Daidouji Bunker Buster
Daidouji Bunker Buster
63214X A/B A/B C C
|
| Version
|
Damage
|
Guard
|
Cancel
|
Startup
|
Active
|
Recovery
|
Frame Adv
|
Level
|
| A
|
4000
|
Throw
|
-
|
12
|
12
|
35
|
-
|
-
|
Full-body clash throughout the entire startup and active frames.
|
| B
|
4000
|
Throw
|
-
|
22
|
20
|
35
|
-
|
-
|
Rushing grab with some invincibility during the startup. The duration of the invincibility is nerfed from AH3LM.
|
| C
|
4000
|
Throw
|
-
|
16
|
10
|
17
|
-
|
-
|
Jumps into the air for an air command grab. Recovers while in the air on whiff.
|
|
j.Daidouji Bunker Buster
Aerial Daidouji Bunker Buster
j.623X
|
| Version
|
Damage
|
Guard
|
Cancel
|
Startup
|
Active
|
Recovery
|
Frame Adv
|
Level
|
| A
|
4500
|
Throw
|
-
|
10
|
-
|
-
|
-
|
-
|
| B
|
4400
|
Throw
|
-
|
12
|
-
|
-
|
-
|
-
|
| C
|
4500
|
Throw
|
-
|
14
|
-
|
-
|
-
|
-
|
Aerial command throw similar to the C version of the grounded Daidouji Bunker Buster. C version covers the most ground, but has the longest startup.
|
|
Crowning Suplex
Crowning Suplex
X during Daidouji Bunker Buster
|
| Damage
|
Guard
|
Cancel
|
Startup
|
Active
|
Recovery
|
Frame Adv
|
Level
|
| 2000
|
Throw
|
-
|
-
|
-
|
-
|
-
|
-
|
Follow-up move which deals respectable amounts of damage and leaves the opponent close to Kira. Hard knockdown.
|
|
Ekoda Style Cluster
Ekoda Style Cluster
41236X
|
| Version
|
Damage
|
Guard
|
Cancel
|
Startup
|
Active
|
Recovery
|
Frame Adv
|
Level
|
| A
|
2200
|
All
|
-
|
15
|
3
|
14
|
-2
|
-
|
| B
|
2400
|
All
|
-
|
21
|
3
|
16
|
+11
|
-
|
| C
|
3000
|
All
|
-
|
27
|
3
|
16
|
+15
|
-
|
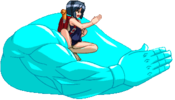
Kira hops forward and does a clap. C version is the slowest, but has the most range and damage. All versions dodge lows and (ground) throws during some of the startup.
|
|
Ekoda Style Grenade
Ekoda Style Grenade
623A
|
| Damage
|
Guard
|
Cancel
|
Startup
|
Active
|
Recovery
|
Frame Adv
|
Level
|
| 2400
|
Throw
|
-
|
11
|
4
|
38
|
-
|
-
|
Anti-air grab which resets the opponent on the ground.
|
|
Ekoda Style Rocket Launcher
Ekoda Style Rocket Launcher
623B
|
| Damage
|
Guard
|
Cancel
|
Startup
|
Active
|
Recovery
|
Frame Adv
|
Level
|
| 0, 2600
|
Throw
|
-
|
11
|
4
|
38
|
-
|
-
|
Anti-air grab which throws the opponent at the wall. Staple combo-filler.
|
|
Ekoda Style Landmine
Ekoda Style Landmine
623C
|
| Damage
|
Guard
|
Cancel
|
Startup
|
Active
|
Recovery
|
Frame Adv
|
Level
|
| 3200
|
Throw
|
-
|
11
|
4
|
38
|
-
|
-
|
Anti-air grab which launches the opponent into the air. Used over 623B for more damaging EF combos.
|
|
Super Moves
Armageddon Buster
Armageddon Buster
[720]AB
|
| Damage
|
Guard
|
Cancel
|
Startup
|
Active
|
Recovery
|
Frame Adv
|
Level
|
| 1200, 2400, 6400
|
Throw
|
-
|
3+0
|
4
|
34
|
-
|
-
|
Super command grab. 0 frame startup post-flash and fully invincible. Causes a hard knockdown.
|
|
Flying Armageddon
Flying Armageddon
j.6321463214AB
|
| Damage
|
Guard
|
Cancel
|
Startup
|
Active
|
Recovery
|
Frame Adv
|
Level
|
| 1200, 2400, 6400
|
Throw
|
-
|
1+0
|
2
|
37
|
-
|
-
|
Aerial super command grab. Causes a hard knockdown. Its 1f startup makes it one of Kira's most threatening options against airborne opponents.
|
|
Critical Heart
Last Armageddon Drop
[1080]AB
|
| Version
|
Damage
|
Guard
|
Cancel
|
Startup
|
Active
|
Recovery
|
Frame Adv
|
Level
|
| Normal
|
2800, 3200, 2400, 7900
|
Throw
|
-
|
3+0
|
4
|
34
|
-
|
-
|
Description for Generic Critical Heart.
|
| Extend Force
|
2800, 3200, 2400, 11400
|
Throw
|
-
|
3+0
|
3
|
30
|
-
|
-
|
Similar properties compared to her 720 command grab, but far greater damage.
|
|
Combos
Kira has a high amount of flexibility in her combos, and depending on the situation you can choose which variation will work best for you, there is rarely a "best" combo for a given situation and it will come down to choosing whether you want high damage, superior okizeme/resets, self-buffing (Metal), or meter gain. These routes will work with most arcanas and work great as a base to experiment with.
Meterless Combos
2AB 41236B 2B j.A dj.AB(delay)E 2C
Alternative Ender: Replace 2C with 5AA 623B (Some arcanas can make use of the 623B wall bounce to set up okizeme or power up.)
2AB j.AC 2B j.A dj.AB(delay)E 2C
- Ex: https://streamable.com/4zmjkg
- This requires you to be close to the opponent while starting, but can lead to great damage. This combo also works off raw 2B starters for very high meterless damage.
EFC Combos
623C EFC 5D j.CA dj.EB delay j.C 2C
- Ex: https://streamable.com/4z0axt
- This combo will allow you to convert off otherwise sloppy hits such as anti airs or awkward far away confirms where 623C will still reach. 623C always tosses them in the same way, so the awkward conversion can transition into your standard BNB timing.
Arcana Specific Combos
Evil
- 2B 2E 214214E jE land 2C 623E
- 2B 623B EFC 2C 623E
Light
- 2B 623C EFC JAB 623E dj JBC land 2C
Videos
External Links

