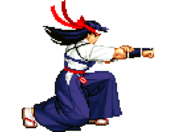
Art of Fighting 3/Kasumi Todoh
| 藤堂 香澄, Tōdō Kasumi | |
|---|---|
| Difficulty | Hard |
| Playstyle | Rushdown/bait and punish |
| Birthplace | Japan |
| Occupation | Student |
| Fighting style | Todohryu Aikijutsu |
| Weight Class | Moderately Heavy (8/10) |
| Birthday | March 29 |
Introduction
| Player 1 Color | Player 2 Color |
 |

|
Kasumi Todoh, the daughter and sole heiress of Ryuhaku Todoh, grew up learning her father's style. Upon hearing that her father was defeated by Ryo Sakazaki, son of a rival school, the Kyokugenryu Karate, and that he has been missing since then, she seeks to seek him out and avenge him for his defeat.
The daughter of Todoh himself, Kasumi makes her debut in Art of Fighting 3. As Todoh’s daughter, she absolutely does not disappoint in this game: hard hitting damage, fast attacks, crazy corner carry, a tool kit that does nothing but benefit Kasumi from every mechanic in the game, and is a nightmare to deal with in any situation. What’s worse, she’s smaller than everyone else! (Except Wang) Executing her beyond the basic chain combos and raw damage takes some work, but once you invest in the character, you’re playing with the strongest force in Art of Fighting 3 that isn’t Wyler. Her biggest defining trait would be her okizeme, which happens to be so strong, that Kasumi potentially wins the entire round just from one knockdown if you know what you're doing. Kasumi's mixups constantly leave the opponent second guessing their approach against her, especially because being knocked down by Kasumi is the last thing you want.
To be fair, let's list her negatives first. She has no long range zoning options whatsoever. She is also arguably the hardest character to play in the game hands down, given her higher execution barrier. Her super isn't the most useful, either, only because it's blockable and has long startup which makes it easy to block in neutral. And... That's it. Kasumi can juggle for days, her 236A can define her gameplay alone, practically everything she has can either start a combo or cause a knockdown, in addition to carrying the opponent to the corner. While she's far less scary in most of the KOF games, Kasumi is a monster of a character in Art of Fighting 3. She doesn't even need her spirit meter to win entire rounds, either, her normal moves are so good that she doesn't even have to use any of it. Even so, you will likely find yourself using it for her two special moves anyways as they are among the best special moves in the whole game. In other words, there's almost nothing bad that can be said about Kasumi. If you've mastered this game and her tool kit to its fullest, Kasumi is a nigh-impossible to stop menace.
| Strengths | Weaknesses |
|---|---|
|
|
Move List
Esoterics
Color Coding
- Green refers to special move damage/frames when done in green meter, or otherwise the strongest damage it can deal.
- Blue refers to special move damage/frames when done in blue meter, or otherwise moderate damage it can deal.
- Purple refers to special move damage/frames when done in purple meter, or otherwise the weakest damage it can deal.
- Orange refers to the damage dealt in chip damage during block.
- Colors may be used otherwise to associate frames/scenarios to avoid confusion, i.e. Kasumi's 4C parry having two different sets of frame data.
Attacks, Notation and Damage
- [Brackets] refers to the specific attack in a string/rush combo that the attack box data is referring to.
- The arrow > on the left of it is the attacks that need to be done before the move in brackets can be performed. If there is an X, it means there are multiple ways of getting to the move in brackets which will be listed in the description.
- Damage values always assume grounded damage with no modifiers. If two damage values are listed with a / in-between them, it lists the damage it deals for grounded and airborne respectively.
- This is because these attacks are used in strings or otherwise as follow-ups where they're more likely to connect with airborne opponents rather than grounded opponents, such as Jin's 6B which hits twice, the first hit leaving the opponent airborne before the second hit.
- Ground/Aerial means if the attack is performed grounded or airborne. If an aerial, being hit during the attack will result in the attacker being knocked down.
- There is no true throw invulnerability in Art of Fighting 3, so when a move is listed as "Throw Invulnerable" it means the attack changes the character's hurtboxes in a way that the throw hitbox cannot collide with it.
Reading Frame Data
- Description of the five stats:
- Startup frames counts all frames before the first active frame comes out, aka how long it takes for the attack to come out
- Active frames is how long the attack is able to hit the opponent, starting at the first active frame
- Recovery frames is how long it takes before the player resets to neutral and can act again
- Total is all three stats above added up, so total number of frames in the move
- Hit/Block advantage is how much faster or slower you can act than the opponent by the number of frames
- Frame advantage, both on hit and block, always assumes frame advantage after the first active frame connects.
- If an attack lists "QKD" in its properties, this means it's an attack that can be teched out of faster than a normal knockdown. This affect only applies to counter hit launches or if the attack connects with the opponent in the air.
- When a move lists ST, SKD, etc. followed by a number in (parentheses) it indicates the frame advantage for the attacking player. Not all knockdowns are plus on hit and depends on the move.
- Knockdown frames always assume frame advantage against Jin. Everyone except for Robert, Sinclair, and Wyler share 16f of wakeup recovery after a knockdown. For Robert, Sinclair, and Wyler, add +1 frame advantage.
- This rule also applies to SKDs, however in this case Jin and everyone else shares 58f total of being in an SKD state except for Lenny, who is in an SKD state for 59 frames instead. For SKD frame advantage against Lenny, add +1 frame advantage.
- The wiki omits STKD frame advantage mostly because those are always plus no matter what, so it's somewhat pointless.
- The frames in (parentheses) next to a "Cancellable into..." sentence is how long you can delay a follow-up, AKA which exact frames you're allowed to cancel into a follow-up. If it states "onwards" then the cancel can be done whenever after the given frame. This info helps both for buffering inputs and also delaying strings for mixups.
Other Tips
- Moves are sorted by ascending number followed by ascending alphabet, so lower numbers first followed by lower alphabet letters. Moves with two button presses are organized last.
- It is recommended you read the brief descriptions to how the attacks animate in-game to familiarize yourself with each attack. Unfortunately, due to the rotoscoped graphics, animations lack key frames that help distinguish themselves as separate moves when viewed as single frames. This in turn makes some moves that share frames look identical to one another without context to how they are supposed to appear, without resorting to using gifs.
General Frame Data
| Character | Jump Startup | Jump Recovery | Jump Frames | Hop Frames | Crouch Frames | Restand Frames | Crouch Height |
| 5f | 8f | 52f | 41f | 6f | 6f | Short | |
| Walk Startup | Walk Speed | F. Dash Frames | F. Dash Speed | F. Dash Distance | Backdash Frames | Backdash Speed | Backdash Distance |
| 0f | Fast | 28f | Fast | Far | 16f | Fast | Short |
Grounded Normals
Far 5A
|
|---|
Close 5A
|
|---|
5B Mid Crunch Kick Mid Crunch Kick
|
|---|
5C Chop Kick Chop Kick
|
|---|
2A / Full Crouch 2A Driving Duck Punch Driving Duck Punch
|
|---|
2B / Full Crouch 2B Kusanagi Kusanagi Reverse Kusanagi Reverse Kusanagi
|
|---|
Jumps
j.A
|
|---|
j.B/C
|
|---|
Dashing Normals
66A Sou Sho Dan 66A Dash Attack 66A Dash Attack
|
|---|
66A > [4B] Sou Sho Yaritotsu Kyaku 4B Launcher Followup 4B Launcher Followup
|
|---|
66A > [2B] Kusanagi Kusanagi
|
|---|
66B Hisou Hisou
|
|---|
Command Normals
3A Forearm Bash Forearm Bash
|
|---|
4A
Sassho On Kyaku / Sakken On Uchi |
|---|
3B Yaritotsu Kyaku Yaritotsu Kyaku
|
|---|
4C~[A] Tsuyuharai Tsuyuharai
|
|---|
5AB Gohsen Gohsen
|
|---|
Launchers
4B Shiranami Shiranami
|
|---|
6B Mid Crunch Kick Mid Crunch Kick
|
|---|
Rush Combo Attacks
6A Jaw Slice Jaw Slice
|
|---|
6X[A] Skyward Palm Skyward Palm
|
|---|
6XA[C] Heavy Chop Heavy Chop
|
|---|
6X[B] Chop Kick Chop Kick
|
|---|
Specials
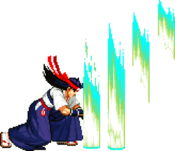
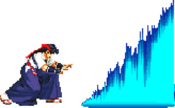
Kasane Ate 236A Normal Version; in Blue Spirit, only the first two pillars come out, and in Purple Spirit, only the first pillar comes out. Normal Version; in Blue Spirit, only the first two pillars come out, and in Purple Spirit, only the first pillar comes out.
|
|---|
Raiho Hoh 214A Normal Version Normal Version Weakened Version Weakened Version
|
|---|
Cho Kasane Ate
463214A |
|---|
Miscellaneous
Raz 4C Kasumi pushes herself forward during the parry. Kasumi pushes herself forward during the parry.
|
|---|
Taunt / Rivalry 5D Kasumi's universal taunt. Kasumi's universal taunt. Kasumi's taunt when she's facing against Ryo or Robert. Kasumi's taunt when she's facing against Ryo or Robert.
|
|---|
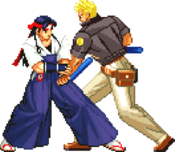
Throw 6C / Mochi Mawashi Zen Kasumi's universal throw. Kasumi's universal throw.
|
|---|
Pursuit 3A/B when opponent is on the ground Kasumi's Pursuit, Kanwari Kasumi's Pursuit, Kanwari
|
|---|
Strategy
| Moves to USE | Moves to AVOID |
|---|---|
|
|
General Strategy
Kasumi's monstrous pressure, okizeme, and combo game make shaking her off incredibly difficult with an impeccable punish game to boot. One mistake on the opponent's end can lead to an okizeme vortex they cannot escape without guessing her mixups correctly and escaping however best the opponent can. Kasumi having average damage output and basically zero zoning matters very little when Spirit effectively makes zoning a resource and her pressure and okizeme create countless opportunities to pry opponents up and potentially even start deadly combos. Kasumi's gameplan is to continue pressuring the opponent and bait as many combos and knockdowns as she can to keep her momentum up.
In general, Kasumi fits the system very well, including having access to the only 4C parry that pushes her forward. Not only does this push Kasumi forward rather quickly for ambiguous pressure setups, but this extends the window Kasumi has to catch an opponent's pressure. She even has the only follow up in the game on her parry in 5A, but landing this is incredibly difficult and impractical. Kasumi has a second parry through 4A, which can catch all attacks as long as it collides with Kasumi's jab. While it doesn't push her forward, it has no unique animation unless it hits meaning Kasumi can press 4A all she wants and the opponent would have no idea, because 4A becomes 5A if the parry window whiffs. Kasumi can follow up on it since the stagger is pretty long, but landing a 4A parry requires frame perfect execution. Kasumi's other normals, on top of being able to delay her strings, make great pokes that the opponent has to respect. Most notably, Kasumi's 5AB is one of her fastest attacks in the game with great reach and recovery, and because 4B can chain into 5AB, the move becomes its own ambiguous mixup that can call out any opponent who flinches. She can also use 5A to poke out of pressure near instantly (albeit average range), 2B which shrinks her hitbox tremendously for a quick sweep kick that leads to her crazy okizeme, dash A to force combos or okizeme, dash B to punish from fullscreen, 2A for a faster low than 2B, is also harder to interrupt and also shrinks her hitbox a little, the list goes on. Kasumi's move list may be small but she can use everything she has one way or another and excel at doing so, especially her specials.
Despite packing only two special moves, they are among the deadliest in the game. Kasane Ate is arguably the best special move in the game for several reasons: it is plus on block, it can anti-air, is very fast, deals great chip damage, cannot be punched out like other projectiles, deals great damage, can end combos, forces a hard knockdown for okizeme, has good range, only costs 25% Spirit, and shuts out the opponent from trying to escape okizeme pressure. Once the opponent learns how to punish it, any character in the game can punish it on whiff, but the window is very small. The opponent has to wait for the attack to finish before acting on a whiff punish, and still Kasumi recovers quickly from Kasane Ate. It is a very deadly special move that only compliments Kasumi's other amazing tools. Her second special, Raiho Hoh, is an overhead that, while the range isn't as good as Kasane Ate, is still decent and also recovers quite fast despite the slightly longer startup. A simple but very effective 50/50 Kasumi can always setup on okizeme is to choose between her 2B or Raiho Hoh: 2B will knockdown again and repeat the vortex, while Raiho Hoh will hit anyone expecting to block low and, most importantly, start a combo from anywhere on the screen. It is possible for Kasumi to be too far away to deal her most damaging combos, but this isn't a common problem for her. Raiho Hoh can even combo into itself in the corner to create some unique combos. Kasumi's super, Cho Kasane Ate, suffers from some startup but deals amazing damage and is even capable of starting combos, on top of extending combos off of Raiho Hoh, including great range. It is blockable, so Kasumi players should be cautious about using it as it is hard to hitconfirm, but is all the more rewarding when it does land.
Compared to the rest of the cast, Kasumi has no bad matchups. She is fast, great at punishing, packs great range, and does just about anything better than the other characters, including her great corner carry. Kasumi's only flaw compared to other characters would be that her midscreen combos aren't quite as deadly. Kasumi's midscreen combos are still quite deadly, however, and if she pushes the opponent into the corner, Kasumi deals even greater damage in the corner that with good execution, can potentially secure a round win. Her not having an unblockable ranbu super doesn't matter much when she can interrupt them, and Karman having a midscreen TOD combo relies on him having the setup needed to do it anyways (assuming it works on Kasumi). Kasumi isn't invincible like Wyler, however, as any whiff Kasumi does, even on some of her fast attacks, are just enough to make her bite the dust pretty bad just like the rest of the cast, only it takes much more effort to setup whiff scenarios against Kasumi when she can force her way in.
So why is Kasumi difficult?
She sounds amazing, and she is, Kasumi in the right hands will crush any character in the game. But there's several reasons Kasumi is so brutal to play: high execution, difficult and situational combos, combos that even if consistent you have to change the timings of attacks just to properly connect them, the inability to teach new players proper meter management, an incredibly difficult cross-up, reliance on understanding the system mechanics to their fullest to optimize every situation, and her okizeme. That's a lot to keep in mind, but let's break it down.
Firstly, for her actual combos, she's got the most possible combos of any character in the game, regardless of screen position or matchup. Do you need all those combos? No, but they deal a ton of damage, anyways. However, her regular BnBs are hard enough as it is as she's the only character who frequently requires the player either microwalk or dash cancel to continue her juggle combos. On top of this, you have to perform juggle combos differently with regards to her jab as she has both a close and far version of her jab. The close version is used much more than the far version, but the far version still has its uses for specific juggles and the fact that it can confirm into her launcher as a frame perfect link. This is on top of the fact that each character has different weights to them and is knocked back different distances as a general basis that requires Kasumi change her button presses ever so slightly to not accidentally drop the combo, or in other cases, be acutely aware of how high or low from the ground the opponent is to properly connect the combo in a fast paced game. Kasumi can even combo off of her cross-up, but this demands amazing execution to pull off.
Kasumi's special moves are incredibly strong tools, too, but for a beginner in AOF3, this can prove detrimental. Not so much because they won't understand how to use said special moves, they aren't difficult to learn how to use to begin with, but when Kasumi doesn't need her super or even need meter to crush matches to begin with most of the time, new players can find themselves often burning through their meter without thinking about practical reasons for saving it or applying it in other areas of their gameplay. Of course, this is only hypothetical as this really depends on the player themselves and how they learn meter management, but other characters are better at teaching how to manage meter than others especially since it matters a lot more for them. Otherwise, Kasumi benefits from basically the entire system in some way, however minute, but knowing all these details and mastering the system to that extent is something that takes a lot of practice. And as for her okizeme, she can crush every option the opponent has when done right, to the point they are forced to guess every time they are knocked down by her. Not only that, but it's 50/50 pressure where either she reloops you into another knockdown, or it leads to a juggle combo which kills the opponent.
This is only a brief overview of why Kasumi is so difficult, but to truly maximize her output basically demands the player knows everything about the game off the back of her hand. Without that info, she can still work but has to encounter far more interactions than she should ever have to. Kasumi at the highest level can land one attack and from that point win the whole round even if it doesn't kill the opponent because of how oppressive her toolkit is.
Okizeme
To call Kasumi's okizeme hard to deal with is an understatement. The short answer is Kasumi's okizeme and mixup game is so powerful that she only really needs one hit to win a round if the player knows what they're doing and how to manipulate the game mechanics in their favor. Kasumi always has access to her 50/50 mixups, but during okizeme, becomes unreactable and for every option she has, she has several others to punish the opponent and keep them locked down, leaving the opponent with almost no escape other than to guess what Kasumi will do next every time they're knocked down.
Versus Crouching
To start simple, assume that upon wakeup, the opponent crouches to block low. With this, Kasumi has several options already:
- 3A, hits overhead which leads to stagger
- 3B, hits overhead which leads to stagger
- 4C~A unblockable which also leads to a cross-up and leaves her plus against most characters
- 4B to use as a 5AB mixup to score a knockdown
- Kasane Ate to force chip damage, knocks down if it hits
- Raiho Hoh, her 214A, that hits overhead and allows her to link her jab during the juggle as well, plus on block, and crushes 4C
- Walk up throw
- Hop to avoid wakeup low kicks into jump-in attack juggle punishes
- Taunting
- 4C to punish attemps at regular attacks
All of these options besides Kasane Ate (unless they let go of block) guarantees Kasumi the ability to either start a juggle off of an overhead wrongblock stagger or a knockdown. Since 3A hits overhead, it means the opponent is staggered and thus, Kasumi can follow-up with a juggle. It's arguably the weakest option, only because if both hits connect, then Kasumi gets no stagger and is -8 on hit while also lacking active frames, but regardless is an overhead option. 3B also hits overhead, and while starts 3 frames slower than 3A, pushes Kasumi forward, keeping her closer to the opponent when she staggers them, and thus making it easier to juggle while also being a much faster alternative to 214A's 23 frame startup. Speaking of, Kasumi can spend meter to use 214A, which hits overhead, leads to an easy juggle combo even in blue meter, can combo into jab after it hits where said jab allows her to combo into her dash launcher for a juggle combo, and is +2 on block allowing her to keep her turn. Against Jin, she is only able to do the far jab, but regardless, she is still able to combo from it so if you are able to link far 5A into 66A, Jin will still receive the jab's damage. If, somehow, 66A > 4B is blocked, Kasumi is still +1 on block. So say you want to instead try another mixup. Kasumi can walk/dash forward and perform 4C, thus crossing behind the opponent and giving her access to her unblockable follow-up, where (against most characters) she is still plus. Then there is all of her other options: 4B which while it doesn't hit overhead, if the opponent gets careless, Kasumi can cancel into 5AB at any point for a 7f knockdown attack, allowing her to loop her okizeme. A walk up throw would also knockdown and deal close to 25% of their life bar. Kasumi can hop over wakeup low kicks to negate that option (as can all characters). The list goes on, but this is the gist of what she is capable of doing on wakeup when the opponent is crouching.
Versus Standing
Now let's assume the opponent is standing. Kasumi has these options:
- All of her lows - 2A, 2B, and their Full Crouch variants
- 4C~A unblockable which also leads to a cross-up and leaves her plus against most characters
- 4B to use as a 5AB mixup to score a knockdown
- Kasane Ate to force chip damage, knocks down if it hits
- Raiho Hoh, her 214A, that hits overhead and allows her to link her jab during the juggle as well, plus on block, and crushes 4C
- Walk up throw
- Taunting
- 4C to punish attemps at regular attacks
- 4A which, if timed right, deals 25% damage and staggers giving Kasumi another chance to juggle the opponent
- 5C, a 3f button that is impossible to react to and is only -7 on block with decent range
- 66A dash attack which gives her 4B or 2B, a launcher that is +1 on block and a low hitting knockdown attack respectively
- Her jab which can confirm into launcher
Every low Kasumi has is deadly when used right - 2A leads to STKD on counter hit, thus also meaning juggles, FC 2A leads to Kasumi being plus both on hit and block with a LCHL on counter hit, 2B is an instant knockdown regardless of counter hit or not, and FC 2B can SKD on counter hit as well, though while Kasumi won't get any juggle off of it, she still earns okizeme from it. If the opponent attempts to attack, but Kasumi uses Kasane Ate, she can not only force chip damage if their health is low enough to score the round, but also by the time the startup finishes, if the opponent is attacking, Kasumi effectively forces a trade with them and will almost always deal more damage due to the counter hit bonus. Not only that, but Kasumi has both 4C and 4A to parry mids and overheads. 4A is harder to time and works on only certain types of attacks, but if timed and spaced correctly (which Kasumi can always buffer anyways, giving her a normal jab if it misses), Kasumi deals a huge chunk of damage and gets a juggle afterwards. The biggest takeaway from all of this that demands patience and game knowledge from the opponent is 5C. A 3f button that knocks down on hit and has enough range to punish approaches from the opponent, it allows Kasumi to loop into her okizeme almost effortlessly. While 214A being +2 on block and 66A > 4B being +1 on block seems like nothing in the context of Art of Fighting 3 (and it is), at any point Kasumi can press 5C afterwards and stop the opponent from attempting to fight back at Kasumi. This also goes for any time she is minus on block or hit, too, as long as she isn't overly minus. It hits mid, so it can be parried, thus Kasumi can't use it recklessly, but even then, if blocked is only -7 and is likely spaced out on okizeme already. And if the opponent attempts to use 4C to retaliate a 5C or any similar attack, Kasumi can use 214A which completely ignores 4C and allows her to punish with a full juggle. It doesn't work on normal counters.
What Kasumi Needs to Worry About
Of course, whether the opponent is standing or blocking, Kasumi still has to worry about some outliers:
- Karman has a 4 frame reversal with 236B
- Wang has a 3f reversal with 623A
- Albeit both options don't have i-frames
- The fact all characters have 4C to parry mids and overheads
- Karman and Jin having their counters
- Wakeup low kicks
- Moves with i-frames and/or desperation supers (such as Jin's 22C or Karman's ranbu super)
- Ryo's Zan Retsu Ken (which she can both punish on block and sweep under with 2B, keep in mind it vacuums)
- Robert's Genei Kyaku
With almost all of this, Kasumi only has to block. And above all else, the opponent must keep in mind she has her own 4C which pushes her forward, her 4A counter jab, forced trades with Kasane Ate, her overabundance of mixups, 5A which can confirm into a launcher or at worst, still leave her +1 on block, and 5C, a 3f button that can stop the opponent's approach instantly while leading to a knockdown which loops Kasumi's okizeme and/or forcibly steal her turn back or act as an instant follow up attack whenever she's plus on block in case the opponent gets too confident over the small frame advantage difference. The biggest thing that prevents the opponent from ever being able to escape Kasumi's pressure is the fact that all jumps have startup attached to them, and despite all characters having different jump startup frames, it's enough for Kasumi to always punish any attempts at a jump to escape. The opponent is also incapable of backdashing away since backdashes provide zero invincibility. No matter the situation, the opponent is forced to take Kasumi head on during her okizeme and guess what precisely it is she will do next and react immediately due to how little time is given to think about Kasumi's next steps.
Matchups
VS  Jin
Jin
Jin's double jump and heavy weight makes it both easier for him to avoid Kasane Ate and avoid Kasumi's deadly juggles respectively. Kasumi still has the better air normals however, and Jin's okizeme isn't as prominent as Kasumi's so even though he's not as easy to juggle, he's still forced to play at Kasumi's pace if he gets knocked down himself. He's slower too, which makes it easy for Kasumi to pressure him. Invisibility can help the Jin player escape a really bad situation with the i-frames, and if the player focuses on only getting simple combos and mixups in, the damage output will speak for itself. Scoring whiff punishes with launchers by playing defensively is also recommended for Jin players. While helicopter spin and invisibility help out Jin a decent bit if used carefully, Jin would especially benefit from having his super ready and forcing the Kasumi player to guess when or if he'll use it, which poses the problem of managing Jin's spirit. Kasumi can taunt to mitigate this, but if Jin can use it, this makes okizeme risky for Kasumi despite it being her strongest asset; Jin's super will deal more damage as a counterattack. Kasumi doesn't need to do much otherwise, because although Jin is a defensive character, if she opens him up and gets the life lead, Jin is forced to start going after Kasumi now, only this time lacking fast normals and specials, and having to play risky with both anticipating Kasumi to flinch and using double jumps to force a reaction. Delayable strings aren't too useful for Jin in this matchup since he has so few rush combos, Kasumi can low crush some of them, and they're relatively safe for Jin anyways that delaying it requires hard reads. On the bright side, Jin has reliable overheads like Kasumi, so he can apply some basic mixups if he has to, and his 4A launcher is fast if he manages to rope Kasumi into range.
VS  Karman
Karman's 5C can hit Kasumi on round start, or he can otherwise choose to use his 236B reversal or a 4B if Kasumi tries to approach him without an immediate attack. Although Kasumi has some use for blocking low against Rody, Karman poses zero threat since his meaningful lows come out too slowly in comparison to Kasumi's great lows which give her far better reward on hit than they do Karman's lows. This forces Karman in a matchup where attempting lows is too easy to punish, and has to rely on 4B and jab pressure to choke the Kasumi player into making a mistake. But since he can only rely on highs and mids, and Kasumi has a parry that pushes her forward, on top of her 4A parry and other fast long ranged normals, Karman can be very prone to easy punishes. He racks up damage fast thanks to his instant pursuit and has easier juggles than Kasumi does, assuming he can land some pokes and/or counterhits. His only real advantage is he can use his unblockable super on wakeup if he has the spirit for it, which Karman has very little reason to use outside of counter in this matchup when all of his specials just leave him wide open to being punished and Kasumi has more than enough to work with for punishing him. Jumps are committal too, since he has no real air buttons to jump in with outside of maybe hop j.A, but none of his buttons reach far enough to contest with Kasane Ate unless he trades. And with very few rush combos of any kind, Karman can't use delayable strings to his advantage and pose a real threat. The best strategy for Karman would be to run away once he gets the life lead and force Kasumi to approach him. Since his jabs are so powerful at frustrating opponents, that's the one area that Karman can consistently pressure Kasumi in, on top of being very safe to use if Kasumi doesn't parry it back. Not a horrendous matchup, but Karman has very little he can work with to actually open Kasumi up that it makes it difficult to come back from a life deficit against semi-patient Kasumi players.
VS  Lenny
Lenny
Almost no one plays Lenny so this alone gives her an advantage against the cast, even Kasumi. But since Lenny's air game is risky at best and non-existent at worst, Kasumi can jump whenever she feels like it and the only ways Lenny can meaningly fight it off is through jabs or fireballs if timed correctly. Lenny can't jump against Kasumi or else she'll be smacked by Kasane Ate, which Lenny has no answer for to take head on. On grounded whiff, she could potentially use a fireball if the player reacts super quickly, or her throw, but that's it. Lenny also has no lows that can really challenge Kasumi while also lacking good ways of pushing Kasumi into the corner without taking massive risks, meaning she'll probably have little chance to pop off a corner death loop unless she succeeds in landing a 4C parry and can then launch Kasumi after wakeup. Combined with her pitiful damage, Lenny's gotta play very one note to pose a threat against Kasumi and play patiently, waiting for whiffs. Kasumi's pressure is too much for Lenny to deal with outside of jabs which are counterable anyways. Any time Lenny throws out 2A and it's blocked or it whiffs, Kasumi can freely punish it with 66B. Kasumi can also freely zone out Lenny with Cho Kasane Ate due to Lenny's bad air game. As long as Kasumi doesn't use it point blank or very close, Lenny will struggle to punish it and has no moves that can out range it to whiff punish Kasumi's super.
VS  Robert
Robert has round start advantage by default, as Kasumi is forced to play defensively. Robert can throw out 5B which will always beat out Kasumi's 5AB to land a free poke or knockdown on counterhit, unless he inputs it too late. Kasumi can counter this with her 4C parry, but if Robert reads this then Kasumi will be punished pretty badly, whether it be a low or Robert's BnB which will take away hald her health. It's unlikely Kasumi will land her 4A parry, either, nor will Kasane Ate be fast enough to come out to beat 5B. Robert can also backdash cancel and force a whiff from Kasumi for another strong punish. Kasumi may opt for 2B instead, but unless Robert delays his 2B timing on accident, the hitbox will catch Kasumi before she's able to low crush it. So unless Kasumi takes a risk or tries to force a trade, she has to wait for Robert to do something. Outside of round start, Kasumi wins the matchup. And even on round start, if the Kasumi player feels they can get away with it, they can backdash and cancel into taunt, to deplete some of Robert's meter. Kasumi's taunt is the biggest reason why Robert suffers in this matchup, since Kasumi has a special taunt that depletes more of his and Ryo's meter, and if she does the full taunt, Robert's spirit is fully depleted. And on any knockdown, Kasumi is free to taunt Robert all she wants, which takes away the special moves he can hardly work without. Robert won't have to worry too much about dealing with Kasumi, since his most common BnB still works against her, and only needs two reps to take a round, plus he has his ranbu super. Plus, he has many fast moves and a few overheads to contest with Kasumi's mixup game. But having so few lows makes challenging Kasumi difficult, especially when Kasumi can pop out a 2B to throw off Robert's momentum. Unless Kasumi messes up right in front of Robert, it's unlikely he'll land his 4A launcher either, so he must rely on his 5AB launcher for whiff scenarios. Kasumi can easily shut out Robert's air game with Kasane Ate, making starting combos off of jumps unreliable, or using Hien Ryūjin Kyaku too risky to be worth the reward. That said, Robert is a defensive character, and with Kasumi having no zoning options, she is forced to approach Robert, which always puts Kasumi within poking range and allow Robert to create whiffs or force Kasumi to approach him. The Robert player has to play extra patiently, and likely have to plan around less meter than he actually currently has, but he's not at a major disadvantage. Robert doesn't suffer in the matchup too bad until you realize one massive issue - Kasumi's special taunt that she uses only against Robert and Ryo makes her completely immune to Robert's ranbu super. What this effectively means is that whenever Robert pops super, all Kasumi has to do is taunt. Robert is unable to hit her at any point, and once the active frames go away, Kasumi can cancel taunt and freely punish Robert however she pleases. This won't work on wakeup because Kasumi's hurtbox will still be wide enough to connect with Robert's ranbu super, but when she faces away, it is rendered void. In other words, Robert's super can be defeated by a mere taunt and in neutral, should never be used if Kasumi is taunting or else Robert sets himself up to eat a fat punish for it.
VS  Rody
Rody
Kasumi has little reason to block low against Rody, other than anticipating a 1BB mixup. If Rody's 1BB gets blocked, Kasumi can punish with nearly anything due to the huge frame disadvantage Rody suffers, and given her strong okizeme and combos, this is the last thing Rody wants as the second lightest character in the game that is also a rushdown fiend. The fact that Rody has to force himself in front of Kasumi to be a real threat is already pretty bad since that just makes it easier for Kasumi to punish simple mistakes. Rody can at least fight off Kasumi with his projectile if used very judiciously, but Kasumi can punish even this with 66B if she's close enough. For Rody to get by in the matchup, he needs to be very careful about guessing on his 50/50s and landing raw pokes consistently, especially taking advantage of delayable strings and forcing the Kasumi player to react and get baited into delayed, raw pokes. Fortunately for Rody, his combos are just as effective on Kasumi as they are on most everyone else so he doesn't have to force himself to learn Kasumi specific combos, which he doesn't need very many combos either to score a round, nor does he really need spirit when Kasumi is gonna be in his face the majority of the match anyways. The Rody player might be able to land one 646A if he can time it perfectly, however unlikely and will probably end in him getting smacked anyways. If Rody lands a knockdown against Kasumi, this is his chance to turn the whole round around in his favor, but this doesn't change Kasumi's frightening presence with her powerful normals and specials that can do what Rody can also do, just better and baiting rushdown instead of playing rushdown herself. Still, Rody has both speed and range to help himself, the Rody player just needs a ton of patience to pull through.
VS  Ryo
Ryo
This is Kasumi's "worst" matchup in the sense that she still has the advantage, but Ryo lags behind only a little in comparison to other characters. Firstly, Ryo's TOD will not work on Kasumi under any circumstances, so that leaves Ryo to rely on normal BnBs instead, but since they deal high damage anyways, it doesn't matter. Using 6AA > 6C > 6B on Kasumi can actually leave Ryo wide open for a free punish if mistimed, since he'll fly right past Kasumi. Secondly, Kasumi has better normals in general than Ryo does, due to 5AB and her lows, however Ryo has plenty of other solid normals he can use and can deal with Kasumi's range fine enough. Thirdly, if the Kasumi player can pull off the execution, her corner combos will still work just as well against Ryo which means he loses massive chunks of health, despite his heavy weight class. Finally, one of Ryo's strongest tools, Zan Retsu Ken, can be completely nullified by Kasumi with either 2B or Kasane Ate unless the Kasumi player spaces incorrectly. Kasumi won't have as easy of a time anti-airing Ryo in this matchup, because either Ryo is going for a crossup which Kasumi can't use Kasane Ate in time for, or Ryo's doing a wall jump which makes the Kasane Ate timing tricky. This gives Ryo fairly easy air pressure if the Kasumi player doesn't know when to time air-to-airs against Ryo or isn't fully sure how to punish either wall jump. Ryo also has his fireballs which let him earn chip damage and some zoning pressure, though Kasumi can easily jump most of them. Otherwise, Ryo loses to Kasumi from raw speed alone, but both characters have strong okizeme, good range, and both have enough tools to deal with each other that it's a 6-4 at worst in Kasumi's favor. Ryo also has the unblockable ranbu super which makes comebacks easier for him. That's at least assuming he has the meter for it, because like Robert, Ryo has a huge disadvantage against Kasumi's unique taunt for both characters that can completely deplete their spirit meter. Unlike Robert, however, Ryo doesn't rely on spirit quite as much, but depending on how you play Ryo, it can potentially kill his steam.
VS  Sinclair
This matchup's pretty easy for Kasumi. 5AB and Kasane Ate shut down everything Sinclair can do. If Sinclair doesn't play perfectly then it's all downhill moving forward as Kasumi is significantly faster than Sinclair in every regard. While Sinclair can use jab, and it will hit Kasumi the same as it would anyone else, Kasumi's 5AB will reach Sinclair well out of jab range. In order for Kasumi to lose, the Kasumi player has to either make serious mistakes, or the Sinclair player has to commit to pure offense and hard reads. Doing Sinclair's TOD against Kasumi will almost never happen given Kasumi's advantages, so Sinclair will have to opt for the zoning, poking game instead, and maybe a 50/50 here and there. Incredibly rough for Sinclair in every regard.
VS  Wang
Wang
Another great matchup for Kasumi, but nowhere near as bad. Kasumi's air game and range easily beat out Wang's neutral game, making the Wang player have to perfect their spacing to optimally whiff punish Kasumi. Using ground pound is incredibly risky as Kasumi can easily anti-air Wang, particularly her dash attack, so it's unlikely Wang can get away with using it. Wang will be punished hard for using his longest recovery moves against Kasumi, especially on block. His DP is still as effective as a defensive tool against Kasumi, however, and combined with ranbu super, Wang isn't completely out of defensive options. He can bring it back if he's in desperation thanks to the added benefits, despite the tight window to do so. If Wang can score a knockdown on Kasumi though, this is a major chance for the match to turn around in his favor thanks to his solid okizeme. Kasumi can circumvent this by taunting, of course, but if the Wang player keeps pushing forward, she will have little chance to do so. He also has really fast moves just like Kasumi if he can manage to sneak in. Still, Kasumi is several steps above Wang, so it's a rough matchup, but not horrendous.
Combos
Note: Combos marked with a ★ symbol are the optimal combos available to the character. Characters are also denoted by the first three letters of their names to indicate that the combo works on them. If it works on all characters, it will, obviously, be marked as "All."
- JIN: Jin
- KAR: Karman
- KAS: Kasumi
- LEN: Lenny
- ROB: Robert
- ROD: Rody
- RYO: Ryo
- SIN: Sinclair
- WAN: Wang
- WYL: Wyler
Combo theory notes:
- General rule of thumb for Kasumi combos is to link each attack as soon as possible, these are difficult links to perform consistently when they aren't rush combos.
- Jump B links are an incredibly small window, but against some characters such as Ryo are impossible to do without the corner.
- It is possible to still link into 66A,4B during juggle combos even if you get 5A instead of cl.5A, but it becomes a frame perfect link. This is also possible on the ground, but is still frame perfect.
- If Kasumi lands a cross-up, while she can extend the combo particularly with far 5A, it essentially becomes a double frame perfect link.
Rush Combos
| Rush Combos | |||||
| Combo | Difficulty | Damage | Works On | Notes | |
| 6AB | Easy | 640 | All | Basic rush combo. Effective, but there’s really no reason to use this over her next rush combo, except for the few combos where 6AAB will whiff as opposed to 6AB. It's better to use as a basic poke string like in Virtua Fighter, assuming you're in range with her jab. | |
| 6AAB | Easy | 832 | All | Typical Art of Fighting 3 rush combo. Does its job well, and if for whatever reason you're in a bind where you can't do optimized combos, this'll satisfy. Not safe on block, but Kasumi has slightly better recovery. | |
| 6AAC | Easy | 864 | All | A rush combo you'll most likely use in combos, but it makes really good damage for a combo ender and will always hit in the corner. | |
| 6BAB | Easy | 1160 | All | This rush combo does good damage, but it can whiff on the third or even second hit depending on the spacing and character you’re fighting against. While not a bad option to combo off of, unless it’s for a blockstring then it’s probably not worth it, and even then it isn’t very safe. You usually won’t land this consistently unless you intentionally remove the 6B. And chances are, you will remove the 6B, especially in the corner where this pushes Kasumi forward the most that helps give her jab links that normally would be impossible to do, making for some extra damage. To remove the last 6B isn't losing anything as a result. | |
| 6BAC | Easy | 1200 | All | Much like 6AA 6C, only it starts with 6B instead. Better rush combo for juggles than 6B 6A 6B is. | |
| 4A,5AB | Easy | 1120 | All | The timing is a little tight, but nothing too difficult. Deals good damage and good wall carry, and is easy to combo with or even throw out and catch the opponent off guard. Delaying the string gives Kasumi a pretty decent mixup where she can score a knockdown on an opponent letting their guard down. | |
| 6BB | Easy | 920 | All | Double kicks that look cool, but isn't particularly special other than maybe making juggles more interesting. | |
Juggle Combos
| Juggle Combos | |||||
| Combo | Difficulty | Damage | Works On | Notes | |
| 6BA > 5AB > 3A Pursuit | Easy | All | |||
| cl.5A > 66A,4B > 66B | Easy | 1376 | All | ||
| (Counterhit/Anti-Air) 5A > 236A | Easy | 1520-1600 | All | ||
| (corner) 214A > 214A > cl.5A > 236A | Easy | 2560 | ROD, RYO | ||
| ★cl.5A > 66A,4B > microwalk 6BA > 5A > 5AB | Moderate | 2096 | RYO | Easier combo than the microdash combo linking two jabs together, although not as much damage. You can omit the 5A to make the 5AB easier to land and you barely lose any damage. | |
| 6BA (whiff the A) > 4B,5AB > 3A Pursuit | Moderate | All | |||
| (close to corner) 214A > cl.5A > 66A,4B > walk forward > 6BA > cl.5A > 66A,4B > OTG 3A (Rody) | Moderate | 2672 | ROD | ||
| (close to corner) 214A > cl.5A > 66A,4B > 66A,4B > cl.5A > 6AAC > 3A OTG (Ryo, should work on all) | Moderate | 3032 | RYO | ||
| (close to corner) 214A > cl.5A > 66A,4B > microwalk 6BA > 5A > 5C > 3A OTG (Jin, may not work on everyone) | Moderate | 2752 | JIN | ||
| (corner) 214A > SDM > 66A,4B > cl.5A > 66A,4B > OTG 3A (Ryo) | Moderate | 3007 | RYO | ||
| cl.5A > 66A,4B > microwalk/dash cl.5A x2 > 6AAB OR 6AAC OR 236A | Hard | 2232-2496 | All | 6AAC followup (and similar strings) will not work on heavier characters, including Ryo and Jin. Lighter characters only need the microwalk if you can only link one cl.5A as opposed to two, but heavier characters need the dash cancel into cl.5A to hit confirm the link, otherwise it is impossible to do the full combo. | |
| cl.5A > 66A,4B > dash 4B > 66A,4B OR 6AAB | Hard | 2176-2216 | ROD | ||
| ★cl.5A > 66A,4B > dash cl.5A x2 > 4B,5AB | Hard | 2328 | All | Kasumi's most consistent midscreen combo that works on everyone, but you have to vary the timings of your button presses depending on the matchup. Also depending on how high the opponent is from the ground, 5AB must be delayed, doing it immediately after 4B will make it whiff if they're too high up from the ground which is usually the case. In some cases, you can land 5AB right away if they're low enough, but it's still better to delay it to be on the safe side. Fortunately, you can cancel into 5AB at any point after 4B so it's just a matter of knowing when to align the attack correctly. If you use this in the corner, you will most likely have to omit one cl.5A jab in order to not drop the combo. | |
| (Cross-up) j.B > 5A > 5AB | Hard | 1024 | RYO | ||
| ★(corner) j.B > 66A,4B > cl.5A > 66A,4B > cl.5A > 6AAB | Hard | 2640 | ROD | Jump normal aside, combine this with a 214A or a cl.5A jab and this makes for rewarding meterless corner damage. Timing the 6AAB rush combo will take practice, but in some matchups it shouldn't be too difficult. | |
| (corner) cl.5A > 66A,4B > microwalk cl.5A > microwalk cl.5A > microwalk cl.5A > 66A,4B > 3A OTG | Hard | 2192 | JIN | ||
| (corner) cl.5A > 66A,4B > microwalk cl.5A > microwalk cl.5A > 66A,4B > cl.5A > 5A > 3A OTG | Hard | 2432 | JIN | ||
| (corner) cl.5A > 66A,4B > microwalk cl.5A > microwalk cl.5A > 4B,5AB > 3A OTG | Hard | 2712 | JIN | ||
| (corner) 214A > 214A > cl.5A > microwalk cl.5A > 66A,4B OR 6AB > OTG 3A | Hard | 2256-2656 | ROD, RYO | ||
| (corner) 214A > cl.5A > 66A,4B > cl.5A > 66A,4B > cl.5A > 66A,4B OR 6AB > 3A OTG | Hard | 2752-3192 | RYO | ||
| (corner) 214A > SDM > 66A,4B > cl.5A > 5A > 66A,4B > 3A OTG (Robert, I think it works on all) | Hard | 3247 | ROB | ||
| (midscreen to corner) (Cross-up) j.B > 5A > 66A,4B > microwalk 6BA > 5A > 66A,4B > 3A OTG (Karman, but should work on all) | Very Hard | 2368 | KAR, RYO | ||
| (close to corner) 214A > cl.5A > 66A,4B > (slight delay) 214A > 5A > 6AAC > 3A OTG (Wang, same deal) | Very Hard | 3312 | WAN | ||
| (corner) 214A > 214A > cl.5A > 5A > 66A,4B > cl.5A > 66A,4B > OTG 3A (Karman, should work on all) | Very Hard | 2896 | KAR, ROD, RYO | If Kasumi is too far away from the corner to link cl.5A > 5A, she can omit it and still finish the rest of the combo. | |
| Death Combos | |||||
| ★(corner) 214A/cl.5A > 66A,4B > hop forwards j.A (both hits) > microwalk cl.5A > microwalk cl.5A > 4B,5AB | Very Hard | 4096 | All(?) | A variation of her midscreen BnB. it might even be possible midscreen, too. However, this combo is a nightmare to pull off timing j.A to land both hits perfectly. But if you can do it, while it won't kill the opponent by itself it will leave a massive dent in their health bar, especially if Kasumi is in desperation. If Kasumi is in desperation, this combo should deal about 98%-99% damage, so it's a borderline touch of death combo. A third jab may even be possible to guarantee it as a TOD combo, but it is currently unknown if true. Here's an example of the combo here. | |
| (corner) 214A > hop forward j.A (2) > cl.5A > 66A,4B > hop forward j.A (2) > cl.5A x2 > 4B, (delay) 5AB > 3A Pursuit | Very Hard | 4096 | ROB | Video example here. | |
| (corner) WB 3B > microwalk cl.5A > 66A,4B > hop forward j.A (2) > cl.5A > microwalk cl.5A > 66A,4B > cl.5A > 4B, (delay) 5AB | Very Hard | 4096 | RYO | Video example here. | |
| (corner) WB 3B > microwalk cl.5A > 66A,4B > FDC cl.5A > 4B > cl.5A > microwalk cl.5A > 4B > 5A > 5AB > 3A Pursuit | Very Hard | 4096 | KAS | Video example here. | |
| (corner) 214A > hop forward j.A (2) > cl.5A > 66A,4B > FDC cl.5A > microwalk cl.5A x3 > 4B, (delay) 5AB > 3A Pursuit | Very Hard | 4096 | JIN | Video example here. | |
| (corner) (214A) > cl.5A > 66A,4B, hop forward j.A (2) > cl.5A > microwalk cl.5A > 4B > 5A > 4B, (delay) 5AB > 3A Pursuit | Very Hard | 4096 | ROD | Video example here. | |
| (corner) (214A) > cl.5A > 66A,4B > hop forward j.A (2) > cl.5A > microwalk cl.5A > 4B > 4B > 5A x2 > 5AB | Very Hard | 4096 | WYL | Video example here. | |
