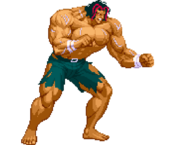
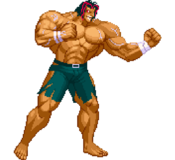
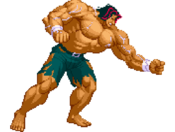
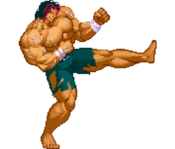
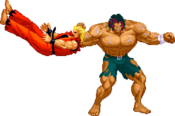
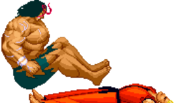
Art of Fighting 3/Wyler

From Mizuumi Wiki
Jump to navigation Jump to search
ワイラー, Wyler Portrait AOF3 Wyler.png
AOF3 Wyler Win Screen.png
Difficulty Braindead
Playstyle Turtle
Birthplace Unknown
Occupation 5th Generation head of the House of Wyler
Fighting style Original Grappling Style
Weight Class Light (1/10)
Birthday October 22

Introduction

Player 1 Color Player 2 Color
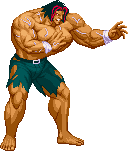
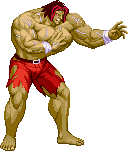
AOF3 Wyler 1P.png AOF3 Wyler 2P.png

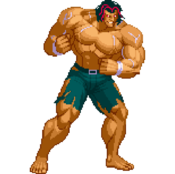
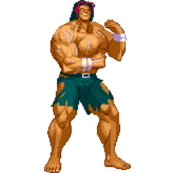
Wyler, the final boss of the game, who is working on perfecting a powerful Elixir that was originally developed by his and Freia's fathers. But the essential data needed for completing it was taken by Freia's father when the two's partnership broke up. Wyler believes this action is the cause of his father becoming destitute and even the cause of his death. He now searches Freia, with the help of Rody and Lenny.

The final boss of Art of Fighting 3, Wyler is a big buff dude hellbent on recovering old lab data to create a deadly elixer. And boy, is he a problematic buff dude. As typical of SNK boss character, Wyler is quite broken and is, of course, banned from competitive play. He isn't banned for just being a boss character, however, as Wyler has a very particular tool up his sleeve which makes him obnoxious to fight by itself: his 5A. While his jab can be dealt with using jump attacks and a couple select moves, it doesn't change that they need to be both well timed and spaced in order to stop Wyler's jab pressure. Huge damage, it combos into itself, launches on counter hit, juggles, and has insane reach with almost zero startup despite its lengthy recovery since it chains into itself. Aside from that, his specials are all stronger than everyone else's special moves combined with easy combos, as if you'd ever need them. He's got a decently cool design, but these are the reasons why Wyler is banned in tournaments.

Now technically speaking, Wyler is not the strongest character in the game. He has no super at all, no lows whatsoever, and is very easy to juggle. And whenever he stops jabbing, he actually has quite a bit of recovery to it which prevents him from being able to anti-air or escape in time if the opponent jumps at him. And while everyone does need to work to get in, Karman especially, they can all deal with him to some extent and Kasumi especially proves to still give Wyler a lot of trouble. He's a menace, but still not comparable to the likes of Kasumi. He is arguably top tier, maybe even god tier due to the simple fact that he has the easiest combos in the game with the highest reward, but not good enough to top Kasumi's overall character. Regardless, as a character who offers so little to the game and only ever really needs to rely on about 4-5 moves at most, he is banned from competitive play in the West for the simple fact that as a character, he is a buzzkill. By not only providing nothing to the game, it requires an immense amount of patience from players to deal with him doing anything. So no, he isn't completely broken, but allowing him in tournament play would immediately turn away new players and otherwise turn the meta around into "who can counter Wyler" on top of making the game boring to play when 5A is all he needs half the time.

Tournament legality being put into question as he is counterable, guide being created to counteract Wyler with every character. Once released it'll be up to each TO to decide for themselves whether he should still be allowed or not.


Strengths Weaknesses
  • Braindead execution: Your entire controller but the A button could be broken, and you could be blindfolded while multitasking other things. If you can mash the A button, you will still win the match if the other player either doesn't know better, has no patience, or is playing Karman.
  • Mash A to win combo that basically no one can beat: Wyler's jab counter hit combo deals absurd damage for simply mashing the A button, which doesn't incentivize using any of his other combos.
  • Cannot be thrown by anyone: The throw will activate, but Wyler will just shake the opponent off and knock them back a little.
  • Super powerful specials: Red Shoulder can't be interrupted and Black Out deals higher damage than even Kasane Ate with fast startup, a deadly combo.
  • Fastest meter charge: Self-explanatory. Wyler naturally charges meter faster than the rest of the cast.
  • Super fast backdash that can cancel into Taunt: Wyler's backdash will always reach its full length as he is able to taunt during it, despite being airborne, making approaching him punishing as you lose meter for it.
  • Only defense modifier in the game that makes him take less damage: All attacks deal only 87.5% of their original damage against Wyler, so he lives longer.
  • No SDM: Has no super to fall back on, but in the long term this means almost nothing.
  • Lightest character in the game: All combos can work on him and he possibly even has Wyler only combos. On top of being a massive target, it makes Wyler easy to juggle and overall somewhat negates his defense modifier.
  • No lows: For whatever reason, Wyler is programmed to not have a single low in his entire movelist. If fighting against Wyler, the player never has to guess whether to block high or low, as everything can be blocked high. This in turn also means using 4C parries are much easier to land. Even Lenny has one low to work with.
  • Jab spam can still be countered: Everyone in the roster other than Wyler himself has an answer for dealing with jab spam, and once the player exploits this weakness of Wyler's, the rest of his kit starts to show how mediocre he can really be. He may still have the upper hand against some characters, notably Karman, but easily loses against some others.
  • No one will like you if you play this guy
  • Banned in competitive play
  • Tournament legal in Japan

Move List

Esoterics

Color Coding

  • Green refers to special move damage/frames when done in green meter, or otherwise the strongest damage it can deal.
  • Blue refers to special move damage/frames when done in blue meter, or otherwise moderate damage it can deal.
  • Purple refers to special move damage/frames when done in purple meter, or otherwise the weakest damage it can deal.
  • Orange refers to the damage dealt in chip damage during block.
  • Colors may be used otherwise to associate frames/scenarios to avoid confusion, i.e. Kasumi's 4C parry having two different sets of frame data.

Attacks, Notation and Damage

  • [Brackets] refers to the specific attack in a string/rush combo that the attack box data is referring to.
  • The arrow > on the left of it is the attacks that need to be done before the move in brackets can be performed. If there is an X, it means there are multiple ways of getting to the move in brackets which will be listed in the description.
  • Damage values always assume grounded damage with no modifiers. If two damage values are listed with a / in-between them, it lists the damage it deals for grounded and airborne respectively.
  • This is because these attacks are used in strings or otherwise as follow-ups where they're more likely to connect with airborne opponents rather than grounded opponents, such as Jin's 6B which hits twice, the first hit leaving the opponent airborne before the second hit.
  • Ground/Aerial means if the attack is performed grounded or airborne. If an aerial, being hit during the attack will result in the attacker being knocked down.
  • There is no true throw invulnerability in Art of Fighting 3, so when a move is listed as "Throw Invulnerable" it means the attack changes the character's hurtboxes in a way that the throw hitbox cannot collide with it.

Reading Frame Data

  • Description of the five stats:
  • Startup frames counts all frames before the first active frame comes out, aka how long it takes for the attack to come out
  • Active frames is how long the attack is able to hit the opponent, starting at the first active frame
  • Recovery frames is how long it takes before the player resets to neutral and can act again
  • Total is all three stats above added up, so total number of frames in the move
  • Hit/Block advantage is how much faster or slower you can act than the opponent by the number of frames
  • Frame advantage, both on hit and block, always assumes frame advantage after the first active frame connects.
  • If an attack lists "QKD" in its properties, this means it's an attack that can be teched out of faster than a normal knockdown. This affect only applies to counter hit launches or if the attack connects with the opponent in the air.
  • When a move lists ST, SKD, etc. followed by a number in (parentheses) it indicates the frame advantage for the attacking player. Not all knockdowns are plus on hit and depends on the move.
  • Knockdown frames always assume frame advantage against Jin. Everyone except for Robert, Sinclair, and Wyler share 16f of wakeup recovery after a knockdown. For Robert, Sinclair, and Wyler, add +1 frame advantage.
  • This rule also applies to SKDs, however in this case Jin and everyone else shares 58f total of being in an SKD state except for Lenny, who is in an SKD state for 59 frames instead. For SKD frame advantage against Lenny, add +1 frame advantage.
  • The wiki omits STKD frame advantage mostly because those are always plus no matter what, so it's somewhat pointless.
  • The frames in (parentheses) next to a "Cancellable into..." sentence is how long you can delay a follow-up, AKA which exact frames you're allowed to cancel into a follow-up. If it states "onwards" then the cancel can be done whenever after the given frame. This info helps both for buffering inputs and also delaying strings for mixups.

Other Tips

  • Moves are sorted by ascending number followed by ascending alphabet, so lower numbers first followed by lower alphabet letters. Moves with two button presses are organized last.
  • It is recommended you read the brief descriptions to how the attacks animate in-game to familiarize yourself with each attack. Unfortunately, due to the rotoscoped graphics, animations lack key frames that help distinguish themselves as separate moves when viewed as single frames. This in turn makes some moves that share frames look identical to one another without context to how they are supposed to appear, without resorting to using gifs.

General Frame Data

Character Jump Startup Jump Recovery Jump Frames Hop Frames Crouch Frames Restand Frames Crouch Height
Portrait AOF3 Wyler.png
7f 5f 55f 46f 4f 5f Tall
Walk Startup Walk Speed F. Dash Frames F. Dash Speed F. Dash Distance Backdash Frames Backdash Speed Backdash Distance
0f Slow 21f Fast Average 44f Slow Far


Normals

5A
AOF3 Wyler 5A.png
Short Swing
Short Swing
Damage Guard Startup Active Recovery Total Hit Adv Block Adv Counterhit Property
256 Mid 4 - - - -11 -16 LCHL Ground
  • Spirit restored when blocked: 257 points
  • Able to anti-air
  • This is the ONLY tool Wyler needs. It may seem like a plain old jab, but hoo boy, it most definitely is not a normal jab. It is hands down the most irritating move in the entire game, far worse than any Genocide Cutter could be.
  • Its range is insanely high for a jab, it's the fastest jab in the game that can cancel into itself, making its long recovery pointless, it can anti-air, it launches on counter hit, it combos into itself on juggles, it deals high damage for a jab, and while possible, punishing it head-on is often times headache-inducing as only specific strategies work against it.
  • You can win entire matches by standing still and spamming 5A if they don't know how to handle it. It's minus on hit and block, in fact its recovery is quite massive so if they jump at you while you're 5A chaining, Wyler will not be able to stop in time to anti-air the characters or move out of the way because of being stuck in the 5A animation.
  • There are ways to circumvent it, such as Kasane Ate, or timing your attacks with perfect precision, but it takes a ton of patience and perfect timing/spacing.
List of moves that can deal with 5A chains
  • Jin: j.C, 214A
  • Karman: j.A, 2B, 646A/B (all moves need to be spaced far away and timed precisely or else he gets jabbed out anyways)
  • Kasumi: jump attacks, Kasane Ate, 4A, 4C, 66B
  • Lenny: jump attacks, jab, 6A, fireball, 4B
  • Robert: jump attacks, 214B
  • Rody: jump attacks, fireball, 4A
  • Ryo: jump attacks, Zan Retsu Ken
  • Sinclair: jump attacks, 28A, 214A
  • Wang: jump attacks, 22A

5B
AOF3 Wyler 5B.png
Iron Stomp
Iron Stomp
Damage Guard Startup Active Recovery Total Hit Adv Block Adv Counterhit Property
320 + 320/400 Overhead 10 - - - KD -9 LCHL Ground
  • Spirit restored when blocked: 321 x2 points
  • Basic kick attack. The range isn't amazing, but it will hard knockdown on hit and hits overhead. At point blank range, it hits twice. Not a threat per se, but it will still annoy you if it hits.

5C
AOF3 Wyler 5C.png
Hammering
Hammering
Damage Guard Startup Active Recovery Total Hit Adv Block Adv Counterhit Property
576 Overhead 18 - - - SKD -11 SKD Ground
  • Spirit restored when blocked: 577 points
  • Able to anti-air
  • Wyler stomps the ground. Again, the range isn't amazing, but it will soft knockdown and will hit overhead. Something to throw out if you'd rather bait the opponent into approaching you.

2A/B
AOF3 Wyler 2A.png
Rising Uppercut
Rising Uppercut
Damage Guard Startup Active Recovery Total Hit Adv Block Adv Counterhit Property
480 + 480/600 Overhead 6 - - - Launch (both hits) -12 HCHL Ground
  • Spirit restored when blocked: 481 x2 points
  • Able to anti-air
  • Wyler does an uppercut which will launch the opponent. If he's too close, it will hit twice and nullify the launch, but it will still hard knockdown.
  • It needs to hit only once for it to launch. But in any case, it gives Wyler free combos and combos mean damage. It's pretty fast too, so it will make the opponent miserable, especially when it hits overhead and will launch regardless of how many hits are landed.

3A/B
AOF3 Wyler 3A.png
Smash Fist
Smash Fist
Damage Guard Startup Active Recovery Total Hit Adv Block Adv Counterhit Property
448 Overhead 12 - - - KD -15 KD Ground
  • Spirit restored when blocked: 449 points
  • Wyler swats his fist forward at the opponent's legs. Surprise: it hard knocks down and hits overhead. It's minus on block so there's no good reason to use it.

4B
AOF3 Wyler 4B.png
Driving Kick
Driving Kick
Damage Guard Startup Active Recovery Total Hit Adv Block Adv Counterhit Property
960 Mid 18 - - - KD -22 KD Ground
  • Spirit restored when blocked: 961 points
  • Wyler pauses briefly before charging forward with a kick. Hard knock down, but is in fact not an overhead. He can use this for a delayed approach towards the opponent, but his 6BB Rush Combo renders this attack almost null.

j.A/B/C
AOF3 Wyler 5B.png
Damage Guard Startup Active Recovery Total Hit Adv Block Adv Counterhit Property
480 High 5 - - - Varies Varies LCHL Ground
  • Spirit restored when blocked: 481 points
  • Wyler does a dinky little kick in the air. Nothing crazy, especially when Wyler can't even jump over anyone because his hurtbox is too big. It's angled downwards, though, so it at least serves its purpose. Wyler just won't be able to challenge the opponent horizontally.
  • This attack is a poor jump in since Wyler's sheer size might makes it difficult closing the gap between j.X and the opponent's hurtbox.

6A
AOF3 Wyler 5A.png
Short Swing
Short Swing
Damage Guard Startup Active Recovery Total Hit Adv Block Adv Counterhit Property
320 Mid 7 - - - -2 -7 LCHL Ground
  • Spirit restored when blocked: 321 points
  • Able to anti-air
  • Wyler does a quicker version of his 5A, but is minus on both hit and block. Pushes him forward a little. Forward dash attack A will cancel into this.

6A[A]
AOF3 Wyler 2A.png
Uppercut
Uppercut
Damage Guard Startup Active Recovery Total Hit Adv Block Adv Counterhit Property
480 Mid 4 - - - Launch +1 HCHL Ground
  • Spirit restored when blocked: 481 points
  • Able to anti-air
  • Wyler combines both his 5A and 2A into an auto combo that pushes him forward. It does not hit overhead, but Wyler can freely spam this since it's +0 on block and the opponent can't really challenge it. Forward dash attack A will cancel into this.

6AA[C]
AOF3 Wyler 5C.png
Hammering
Hammering
Damage Guard Startup Active Recovery Total Hit Adv Block Adv Counterhit Property
320 / 400 - - - - - - - - Ground
  • Spirit restored when blocked: 321 points
  • Able to anti-air

6B
AOF3 Wyler 5B.png
Rush Stomp
Rush Stomp
Damage Guard Startup Active Recovery Total Hit Adv Block Adv Counterhit Property
320 Overhead 9 - - - KD +2 KD Ground
  • Spirit restored when blocked: 321 points
  • Wyler does a faster version of his 5B. Unlike 6AA, however, this rush combo does hit overhead. Forward dash attack B will cancel into this.

6B[B]
AOF3 Wyler 4B.png
Driving Kick
Driving Kick
Damage Guard Startup Active Recovery Total Hit Adv Block Adv Counterhit Property
448 Overhead 8 - - - KD -16 KD Ground
  • Spirit restored when blocked: 449 points
  • The rush combo that more or less replaces 4B for Wyler, when the rush combo is more safe for Wyler than a raw 4B. Forward dash attack B will cancel into this.

Specials

Red Shoulder
646A
AOF3 Wyler 646A.png
Damage Guard Startup Active Recovery Total Hit Adv Block Adv Counterhit Property
1120 (280) / 864 (216) / 320 (80) Overhead 36 - - - KD -37 X Ground
  • Spirit cost: 960 (~24%)
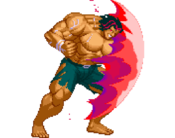
  • Wyler pauses for a bit before he charges forward with a giant hitbox that cannot be interrupted and hits overhead.
  • It also hurts quite a lot as is typical of Wyler, because he isn't complete otherwise.

Black Out
236A
AOF3 Wyler 236A.png
Damage Guard Startup Active Recovery Total Hit Adv Block Adv Counterhit Property
1280 (320) / 1024 (256) / 640 (160) Mid 13 - - - - - X Ground
  • Spirit cost: 1024 (25%)
  • Able to anti-air
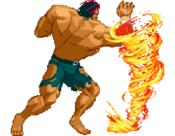
  • Wyler does a Joe Higashi Hurricane Upper, except this one is very big and hurts for a third of the opponent's entire life bar.
  • If Wyler, for whatever reason, doesn't want to pester the other player with 5A, he can very easily zone them out with this move and effectively shut out anyone from approaching him, even though 5A already does that.
  • The range isn't amazing, but this is Wyler we're talking about so it will still infuriate you.

Bounce Back
28~5A
AOF3 Wyler 2A.png
Damage Guard Startup Active Recovery Total Hit Adv Block Adv Counterhit Property
640 (160) Mid 2 - - - -16 -21 X Ground
  • Spirit cost: 640 (~16%)
  • Able to anti-air
  • Wyler does a weaker version of his 2A attack that reflects projectiles.
  • Input has to be done before Wyler jumps. You can do 28A, but the timing to press A while holding 8 is very small, so it's easier and more consistent to reset the stick to neutral before pressing A.

Miscellaneous

Raz
4C
AOF3 Wyler 4C.png
Damage Guard Startup Active Recovery Total Hit Adv Block Adv Counterhit Property
0 High/Mid 0 13 26 39 KD X X Ground

Taunt
5D
AOF3 Wyler Taunt.png
Damage Guard Startup Active Recovery Total Hit Adv Block Adv Counterhit Property
- - - - - - X X X Ground
  • A complete taunt takes away 1693/1694 points of spirit meter.

Throw
6C
AOF3 Wyler Throw.png
Damage Guard Startup Active Recovery Total Hit Adv Block Adv Counterhit Property
960 High - - - - X X X Ground

Pursuit
3A/B when opponent is on the ground
AOF3 Wyler Pursuit.png
Damage Guard Startup Active Recovery Total Hit Adv Block Adv Counterhit Property
256 OTG - - - - Varies X X Ground
Universal OTG Pursuit Frame Advantage
  • Jin: +13
  • Karman: -8
  • Kasumi: -4
  • Lenny: +12
  • Robert: +8
  • Rody: -1
  • Ryo: -6
  • Sinclair: -6
  • Wang: -13
  • Wyler: -1
  • If Wyler pushes himself far enough past the opponent, this will result in a side-switch with Wyler facing the opposite direction. The opponent will recover behind him, but this also means that Wyler will be forced into his turn around animation before he can act again, effectively leaving him an extra -8 in frame advantage against the other player.

Strategy

Moves to USE Moves to AVOID
  • 5A, 6AA, 2A, sometimes 5C
  • Backdash
  • Fireball
  • Doesn't really need anything else
  • Jump attack is particularly bad

General Strategy

Wyler can be broken down into a very simple formula: use 5A and 2A as anti-airs, sometimes fireball too. 5A can punish just about anything in the game if Wyler is close enough and gives him 50%+ damage combos by itself, and if that isn't enough he has 6AA which launches and gives him similar damage. His fireball is the hardest hitting fireball that isn't a Haoh Shou Kou Ken in the game, and just a couple counter hits or fireballs will kill the opponent. That's Wyler's entire game structure, just be obnoxious and land as many hard hitting attacks as you can. Having reduced damage also helps you survive longer, unless the opponent somehow gets a juggle in on you which can prove very problematic. He can also use 5C as a delayed poke which is hard to deal with, and 28A as a projectile reflector. He has a really fast dash so he can get in easily, and his backdash acts like it's grounded so he can do backdash taunt and still travel the full distance, on top of hard to deal with tactics like backdash 6B as a safe-ish run in poke. Wyler's only jump-in sucks, and there's no guessing to block high or low against him as all of his attacks hit overhead and mid, so there's never any reason for the opponent to crouch block against him. Regardless, he's only looking to be an annoying pest and land a few very hard blows onto the opponent. The only characters he struggles with are Kasumi and Lenny, whereas everyone else is forced to play at his pace with an immense amount of patience and need for good spacing.

Matchups

Combos

Note: Combos marked with a ★ symbol are the optimal combos available to the character. Characters are also denoted by the first three letters of their names to indicate that the combo works on them. If it works on all characters, it will, obviously, be marked as "All."

Character Combo Abbreviations
  • JIN: Jin
  • KAR: Karman
  • KAS: Kasumi
  • LEN: Lenny
  • ROB: Robert
  • ROD: Rody
  • RYO: Ryo
  • SIN: Sinclair
  • WAN: Wang
  • WYL: Wyler
Juggle Combos
Combo Difficulty Damage Works On Notes
CH 5A x n Simple 308 + (320 x n) All This combo is all you ever really need. No one can counter it from close range, and if they're far away, they can't approach with projectiles either since jab will nullify all projectiles. This wins matches by itself and will bore the entire playerbase to death once you start using it. Talk about a deadly combo.
6AA > 236A Simple 2400 All Combo for if you want to be crafty, but that's it really. Still deals really good damage.
6AA > 6AA > 6AA Simple Timing the follow-up 6AA rush combos might be a bit awkward but makes for a very damaging combo against Rody for only slightly more work than mashing 5A.


General
FAQ
Controls
HUD
Glossary
System
Training Mode
Characters
Jin
Karman
Kasumi
Lenny
Robert
Rody
Ryo
Sinclair
Wang
Wyler