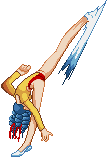
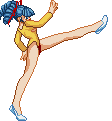
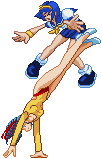
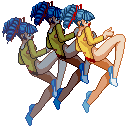
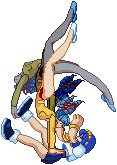
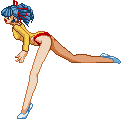
| Kumi Ookubo
|
|
|
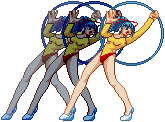
| Colors
|
| 1 |
2 |
3 |
4
|
|
|
|
|
|
Profile
Personal Details
| Gender |
Birthday |
Zodiac |
Height |
Weight |
Blood Type |
Likes |
Dislikes |
Dream / Goal
|
| Female |
September 7 |
Virgo |
158cm |
42kg |
AB |
Cats |
Scary things |
Wants to marry a nice guy and have many children.
|
| Favorite Words
|
|
|
School Details
| Year |
Class |
Attendance # |
Favorite Subject |
Disliked Subject |
Love Status |
Charm Point
|
| 1st / Freshman |
A |
3 |
Home Economics |
Nothing |
Has a crush |
Her forelocks
|
Overview
Playstyle
- Info
- stun: 22
- Playstyle
-
Strength & Weakness
Playstyle
|
Kumi <insert description here> |
| Pros |
Cons |
- Long legs = good range.
- Excellent pressure/mixup with 2A/B, 6B, 214A/B (last hit overhead), 214C (overhead hitgrab), 22A/B(last hit low), 22C (last hit overhead) & combos from throws.
- 22A/B/C are amazing to win clash battles.
- Can fast fall by tapping 22 mid air, giving Kumi additional air options.
|
- Low / stun damage output.
- No clash box on her dash.
- Due to the above fact and her weak projectiles, she can struggle vs zoners.
|
Move List
Standing Normals
5A
5A
|
| Damage
|
Stun
|
Guard
|
Air Guard
|
Cancel
|
Properties
|
Startup
|
Active
|
Recovery
|
Adv. (Hit / Block)
|
Invincibility
|
| 2-3
|
1
|
All
|
-
|
-
|
-
|
6
|
-
|
-
|
-
|
-
|
High jab, whiff on crouchers.
Can be used to combo after throw or before rejumps.
|
|
6A
6A
|
| Damage
|
Stun
|
Guard
|
Air Guard
|
Cancel
|
Properties
|
Startup
|
Active
|
Recovery
|
Adv. (Hit / Block)
|
Invincibility
|
| 12-16
|
2-4
|
All
|
yes
|
-
|
-
|
7
|
-
|
-
|
-
|
-
|
Push the opponent really far.
I can only see it use to extend a ground chain, as it knockback the opponent really far as a juggle.
|
|
5B
5B
|
| Damage
|
Stun
|
Guard
|
Air Guard
|
Cancel
|
Properties
|
Startup
|
Active
|
Recovery
|
Adv. (Hit / Block)
|
Invincibility
|
| 15-21
|
1-3
|
All
|
yes
|
-
|
-
|
8
|
-
|
-
|
-
|
-
|
Kumi strikes with her leg upward.
Her long leg make an awesome launcher but also a great anti-air. Though you might use 5C more often as guard cancel anti-air.
|
|
6B
6B
|
| Damage
|
Stun
|
Guard
|
Air Guard
|
Cancel
|
Properties
|
Startup
|
Active
|
Recovery
|
Adv. (Hit / Block)
|
Invincibility
|
| 20-25 (ball alone 8)
|
4 (2)
|
High
|
yes
|
-
|
-
|
9
|
-
|
-
|
-
|
-
|
Make her ball roll off her arm, both the arm & the ball hit overhead.
Used to mixup after a 2A, though you'll be forced to go into 5C or a dash attack/special.
Its best use is to use only the ball as a meaty/ranged overhead / to cover specific space.
You can only cancel it before the ball comes out.
|
|
5C
5C
|
| Damage
|
Stun
|
Guard
|
Air Guard
|
Cancel
|
Properties
|
Startup
|
Active
|
Recovery
|
Adv. (Hit / Block)
|
Invincibility
|
| 26-31
|
2-3
|
All
|
yes
|
-
|
-
|
16
|
-
|
-
|
-
|
-
|
Same move as her 5B. The big difference is you can use this one as a GC option!
Use efficiently, it can completely reverse a pressure situation in your favor.
|
|
Crouching Normals
2A
2A
|
| Damage
|
Stun
|
Guard
|
Air Guard
|
Cancel
|
Properties
|
Startup
|
Active
|
Recovery
|
Adv. (Hit / Block)
|
Invincibility
|
| 2-3
|
1
|
Low
|
yes
|
-
|
-
|
7
|
-
|
-
|
-
|
-
|
Kumi use her hoola hoop to hit the toes of her opponent.
Fairly standard 2A, that's her main approach tool as her jab whiff on croucher.
|
|
3A
3A
|
| Damage
|
Stun
|
Guard
|
Air Guard
|
Cancel
|
Properties
|
Startup
|
Active
|
Recovery
|
Adv. (Hit / Block)
|
Invincibility
|
| 13-17
|
2
|
Low
|
yes
|
-
|
-
|
8
|
-
|
-
|
-
|
-
|
Good crouching anti-air.
Deceptively, it doesn't go all around her, still a good anti-air with minimal risks.
Also can be used to juggle after a throw or 214C super. It works better than a 2A as its hitbox is higher & moves upward.
|
|
2B
2B
|
| Damage
|
Stun
|
Guard
|
Air Guard
|
Cancel
|
Properties
|
Startup
|
Active
|
Recovery
|
Adv. (Hit / Block)
|
Invincibility
|
| 15-21
|
3-5
|
Low
|
-
|
-
|
-
|
12
|
-
|
-
|
-
|
-
|
One of the best 2B in the game, it has an incredible range and move you forward a bit.
Its main downside is its long recovery if not cancelled into something.
To confirm into 2BB, don't space it too far, otherwise the launcher will whiff.
Also 2BB can combo into itself, 3 to 4 times depending how you start your combo. It's actually one of the most damaging starter you can do but limit your air chain / sideswitch potential.
|
|
Jumping Normals
jA
jA
|
| Damage
|
Stun
|
Guard
|
Air Guard
|
Cancel
|
Properties
|
Startup
|
Active
|
Recovery
|
Adv. (Hit / Block)
|
Invincibility
|
| 7-9
|
1
|
high
|
-
|
-
|
-
|
8
|
-
|
-
|
-
|
-
|
Small knee in your face. It's basically like a jab... but in the air.
Good for quick overhead after a hop or as a air chain starter, but avoid adding too many of them to not scale your combo.
|
|
j6A
j6A
|
| Damage
|
Stun
|
Guard
|
Air Guard
|
Cancel
|
Properties
|
Startup
|
Active
|
Recovery
|
Adv. (Hit / Block)
|
Invincibility
|
| 15-18
|
2-4
|
high
|
-
|
-
|
-
|
9
|
-
|
-
|
-
|
-
|
Stretch her leg forward, it has 2 hits.
Great move to setup rejumps in your combo due to the nearly non existent knockback.
On a grounded enemy, the first hit pops them in the air.
|
|
jB
jB
|
| Damage
|
Stun
|
Guard
|
Air Guard
|
Cancel
|
Properties
|
Startup
|
Active
|
Recovery
|
Adv. (Hit / Block)
|
Invincibility
|
| 17-26
|
2-3
|
high
|
-
|
-
|
-
|
11
|
-
|
-
|
-
|
-
|
A 45° angle downward kick with both legs.
It will be your main jump-in kick thanks to its long range & its 2 hits that make it easier to confirm.
|
|
jC
jC
|
| Damage
|
Stun
|
Guard
|
Air Guard
|
Cancel
|
Properties
|
Startup
|
Active
|
Recovery
|
Adv. (Hit / Block)
|
Invincibility
|
| 16-21 (31-40 no tech)
|
2-3
|
high
|
-
|
-
|
-
|
15
|
-
|
-
|
-
|
-
|
Same moves as your jB, but it groundslam.
The fact it looks like jB and its 2 hits will help to sometimes win aerial clash battle.
If you hit a grounded opponent with only the second hit, you'll turn them around making it a good tick throw option.
|
|
Throws
Ground Throw
Throw
|
| Damage
|
Stun
|
Guard
|
Air Guard
|
Cancel
|
Properties
|
Startup
|
Active
|
Recovery
|
Adv. (Hit / Block)
|
Invincibility
|
| 16-18
|
2
|
Throw
|
-
|
-
|
-
|
-
|
-
|
-
|
-
|
-
|
Leaves opponent airborne for easy combo conversion.
Go directly into 2BB loops right of the bat to maximize your damages ouput.
|
|
Air Throw
Air Throw
|
| Damage
|
Stun
|
Guard
|
Air Guard
|
Cancel
|
Properties
|
Startup
|
Active
|
Recovery
|
Adv. (Hit / Block)
|
Invincibility
|
| 8-12
|
1
|
Throw
|
-
|
-
|
-
|
-
|
-
|
-
|
-
|
-
|
Kumi flips in the air & slam the opponent on the ground.
You can combo out of it easily with 3A for most characters; if they're heavier, like by example Genichirou, you'll need to time a 5A as soon as you get out.
|
|
Special Moves
66A
66A
|
| Damage
|
Stun
|
Guard
|
Air Guard
|
Cancel
|
Properties
|
Startup
|
Active
|
Recovery
|
Adv. (Hit / Block)
|
Invincibility
|
| 9-12
|
2-3
|
All
|
-
|
-
|
-
|
-
|
-
|
-
|
-
|
-
|
Charge in with the hula hoop pointing forward.
In juggle it let the opponent closer to you than 66B, which is useful for far 2B confirm to get close & Jump Cancel into air series.
|
|
66B
66B
|
| Damage
|
Stun
|
Guard
|
Air Guard
|
Cancel
|
Properties
|
Startup
|
Active
|
Recovery
|
Adv. (Hit / Block)
|
Invincibility
|
| 20-23
|
3-5
|
All
|
-
|
-
|
-
|
-
|
-
|
-
|
-
|
-
|
Kumi French CanCan her way through. A really good dash-in anti-air, also good for quick punish / pressure.
Can be used for combo as it's jump cancellable like 66A, but it's rather tricky due to a its knockback.
⚠️ Every hits except the last one whiff on crouchers.
|
|
Stick Shot
Stick Shot
236A/B/C 236A 236A 236B 236B
|
| Version
|
Damage
|
Stun
|
Guard
|
Air Guard
|
Cancel
|
Properties
|
Startup
|
Active
|
Recovery
|
Adv. (Hit / Block)
|
Invincibility
|
| A
|
8-12
|
2-4
|
All
|
-
|
-
|
-
|
-
|
-
|
-
|
-
|
-
|
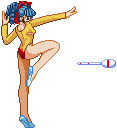
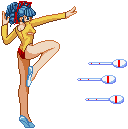
Kumi throw her gymnast baton at the opponent.
They're not really useful for pure zoning as they are small & slow, but more useful for some pressure situation or forcing an approach.
The A version is the low height / slow projectile, which I found useful for Okizeme situation to force them to block while you're getting in or preparing to cut their (air) escape.
|
| B
|
8-12
|
2-4
|
All
|
-
|
-
|
-
|
-
|
-
|
-
|
-
|
-
|
The Mid/high height / fast projectile version.
Same use as before with the added bonus that it can soemtimes anti-air / stop people from jumping out on oki.
You'll mainly switch between A or B depending the timing of knockdowns oki or pressure.
|
|
Spinning Swan Kick
Spinning Swan Kick
214A/B
|
| Version
|
Damage
|
Stun
|
Guard
|
Air Guard
|
Cancel
|
Properties
|
Startup
|
Active
|
Recovery
|
Adv. (Hit / Block)
|
Invincibility
|
| A
|
15-19
|
4-6
|
All-High
|
yes
|
-
|
-
|
-
|
-
|
-
|
-
|
-
|
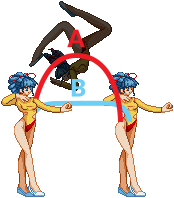
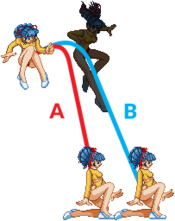
Kumi turns back and backflip on your face like a graceful swan. Last hit is overhead, the rest is mid (both versions).
This move is a really important tool of kumi's arsonal, so you'll have to learn how to use it efficiently. It can be used as:
- pressure / mixup option,
- third jump / air movement,
- making whiff & punish some lows,
- air confirm into ground combo,
- a billion of other situations...
But let's talk about this specific version:
214A main use is to keep your opponent from jumping out of your pressure, it's even stronger in the corner.
Be cautious though, as it can be punished on reaction if they didn't jump.
It can also be useful to get out of some dicey clash situation or to try to stun after a 2BB (even though it has less hits than 214B, its jump arc make all hits connect).
|
| B
|
19-27
|
5-7
|
All-High
|
yes
|
-
|
-
|
-
|
-
|
-
|
-
|
-
|
The B version is your main grounded version for pressure.
It stays close to the ground & will punish your opponent for mashing lows. It leads into full combo if you're close & fast enough.
In guard cancel or clash situation where 22A/B loses to lows, 214B will punish them. Be aware that most uppercuts will win against it though.
|
|
Spinning Swan Kick - Air Version
Spinning Swan Kick - Air Version
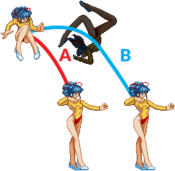
j214A/B Angles from Double jump height. Angles from Double jump height.
|
| Version
|
Damage
|
Stun
|
Guard
|
Air Guard
|
Cancel
|
Properties
|
Startup
|
Active
|
Recovery
|
Adv. (Hit / Block)
|
Invincibility
|
| A
|
14-21
|
3-4
|
All-High
|
yes
|
-
|
-
|
-
|
-
|
-
|
-
|
-
|
Unlike the ground version, j214A is the one with the shortest range.
You can use to surprise your opponent by changing your momentum or dropping on them. You can also confirm from a jB vs crouchers (from a hop by example).
|
| B
|
19-25
|
5-7
|
All-High
|
yes
|
-
|
-
|
-
|
-
|
-
|
-
|
-
|
Same as j214A but with more forward momentum.
Which make avoiding anti-air, getting out of the corner or escaping dicey situation easier.
Remember it's not 100% free as she has a bit of recovery.
|
|
Spinning Swan Kick - Grab
Spinning Swan Kick - Grab
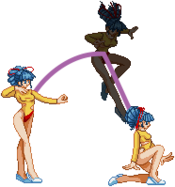
632A/B Specific fall animation Specific fall animation Basically the same angles Basically the same angles j632's angles from double jump height. j632's angles from double jump height.
|
| Version
|
Damage
|
Stun
|
Guard
|
Air Guard
|
Cancel
|
Properties
|
Startup
|
Active
|
Recovery
|
Adv. (Hit / Block)
|
Invincibility
|
| Ground
|
22-27
|
2-4
|
All
|
yes
|
-
|
-
|
-
|
-
|
-
|
-
|
-
|
Use the same animation as a Spinning Swan Kick, until Kumi grabs the opponent, flips in the air and groundslams them on the ground. Hitgrab mid.
⚠️Warning:
you'll get this move by mistake a lot and never get it when you actually want it...
Try to be cautious when you want a 214 move or when you're dashing into lows and use the neutral + special button shortcut (5Y) when you actually want it.
There's barely any differences between the two versions:
- their angles are fairly similar but 632A goes a bit higher, while 632B stay closer to the ground,
- they deal the same amount of damage.
|
| Air
|
22-27
|
2-4
|
All
|
yes
|
-
|
-
|
-
|
-
|
-
|
-
|
-
|
This is the version you'll use most of the time.
Even though it barely adds damages at the end of a long combo, it is still a good finisher:
- it gives you enough time to oki / start your pressure (if they tech the 2nd bounce),
- it sideswitches your position; which avoids putting them in the corner (can limit your combo option) or get you out of the corner.
|
|
Ribbon Cutter
Ribbon Cutter
22A/B low low
|
| Version
|
Damage
|
Stun
|
Guard
|
Air Guard
|
Cancel
|
Properties
|
Startup
|
Active
|
Recovery
|
Adv. (Hit / Block)
|
Invincibility
|
| A
|
26-35
|
3
|
All > Low
|
yes
|
-
|
-
|
-
|
-
|
-
|
-
|
-
|
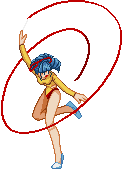
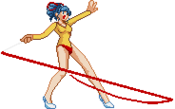
Kumi twirls her ribbon in the air before sweeping low.
Ribbon cutter (both version) is another important special for Kumi:
due to its speed & number of hits, you'll be able to use it as a pseudo reversal (no iframes) or in clash situation and it's also a pretty good anti-air.
The A version always launches the opponent in the air, but IS NOT jump cancellable. You also don't risk to go through the opponent like it can happen with the B version.
|
| B
|
34-41
|
5-6
|
All > Low
|
yes
|
-
|
-
|
-
|
-
|
-
|
-
|
-
|
Same use as 22A, but with a major difference: it is jump cancellable on hit!
Meaning it will be the prefered version to use as an anti-air, because it will let you confirm into a air series.
One downside is it doesn't launch, and if you're too close and hits on the ground, there's a chance you'll move through the opponent. Which 90% of the time isn't in your favor.
You can try to be creative and go through the opponent and cancel into a super, but it is a huge risk/low-mid reward option.
|
|
Supers
Stun Stick
Stun Stick
236C
|
| Damage
|
Stun
|
Guard
|
Air Guard
|
Cancel
|
Properties
|
Startup
|
Active
|
Recovery
|
Adv. (Hit / Block)
|
Invincibility
|
| 40-45
|
3
|
G.Unblockable / Air Blockable
|
-
|
-
|
-
|
-
|
-
|
-
|
-
|
-
|
Kumi throws 3 sticks low to the ground. Ground unblockable / air blockable.
Ground unblockable sounds cheap, but sadly it's not as broken as it seems.
The opponent once hit is able to block or attack right after it. It's similar to how grab work in LO: the first grab part breaks your guard, but you can block or counter grab during it.
Its real use is to surprise in a blockstring to get good damage + free mixup or to force your opponent to jump on oki, leading maybe into a 22B anti-air situation.
|
|
Triple Swan Throw
Triple Swan Throw
214C
|
| Damage
|
Stun
|
Guard
|
Air Guard
|
Cancel
|
Properties
|
Startup
|
Active
|
Recovery
|
Adv. (Hit / Block)
|
Invincibility
|
| 37-46
|
3
|
High
|
-
|
-
|
-
|
-
|
-
|
-
|
-
|
-
|
Kumi jumps knee first, grabs the opponent, flips & groundslams her opponent thrice. Overhead hitgrab, doesn't side-switch like her 632 moves.
A bit too slow to be good to be a real mixup option, it can be delayed for frame-trap vs lows & it's a good confirm close to the corner.
You can combo out of it with 5A, 5B or 3A. You can even loop it multiple times.
It's not her most damaging combo, but it can allow restuns if you have good position, 120% meter & the execution for it.
Another potential use: if your opponent misses his ground-tech & you're close enough, try to 214C it. It could lead into a combo.
⚠️ Addendum about combo post-214C ⚠️
It's tight & depends heavily on who's your opponent:
3A against light character will be easier to do, but heavier character will require a well timed 5A.
Here's a short preview, check the combo section for more precise info:
- 1fr window vs Genichirou (5A only),
- 3~4fr window vs Cathy, Torami & Ryuko (vs the last two, 3A is possible but tighter than 5A).
- 6fr window vs Tamaki, Karina (3A whiff on her)
|
|
Ribbon Slicer
Ribbon Slicer
22C Overhead Overhead
|
| Damage
|
Stun
|
Guard
|
Air Guard
|
Cancel
|
Properties
|
Startup
|
Active
|
Recovery
|
Adv. (Hit / Block)
|
Invincibility
|
| ±45-50
|
±10-14
|
Mid > High
|
-
|
-
|
-
|
-
|
-
|
-
|
-
|
-
|
Kumi performs a ribbon cutter followed by spinning swan kick. Last hit is overhead.
Great moves to add lot of damage/stun at the end of your combo or to win clash battles.
Don't overuse it though, as it has the same weakness than Ribbon Cutter (no iframes post-flash, vulnerable to lows) & seasoned opponent will know how to punish it.
|
|
Combos
| Combo Notation Guide:
|
- ( ) = optional, typically the combo will be easier if omitted.
- [ ] = Input is held.
- ~ = Delay the next hit.
- / = Option to choose between multiple actions.
- + = Multiple buttons are pressed simultaneously.
- {}xN = That part can be repeated N number of times, range provided.
- X(#) = Next action is taken after a certain number of hits from X move.
- xx = Cancel A into B (A xx B), mainly written when it needs to be really fast.
- CH = Counter Hit.
|
Midscreen
- 2A 2BB ~ 2BB ~ 2BB (~ 2BB) jA j6A (jB) djA j6A jB jC / j632B (60-70 dmg - 16-20 stun)
- Main BnB from lights. The number of 2BB you'll be able to do depends of how many hits you did before.
- {2BB ~}x4 jA j6A (jB) djA j6A jB jC / j632B (76-84 dmg - 17-23 stun)
- Best damage/stun you can get. Best uses after getting a stun.
- 2A 2BB jA j6A [Land] (5A) 2BB → air series.
- Rejump combo, can be useful to do a ground super instead or to convert from an air to air jA.
- 66B jA j6A | djA j6A jB jC/j632B
- | (5A) 2BB ...
- Confirm from anti-air dash B.
- {214C 5B}xn (until 120% runs out or stun) (40-70 dmg - 14-20 stun?)
- The memes loop, you might need to change the normal depending the opponent's character:
- 5B seems to be consistent, 5A depends character's hurtbox, 3AA isn't that consistent but should do more damages.
- Reminder: it's not her best combo, and due to its character specific / "RNG" side I recommend doing it only if you catch so
- 214C 3AAB 2BB → air series (60-70 dmg - 16 stun)
- 214C 5A 2BB 2BB → air series (50-60 dmg - stun)
- 214C 5B jA j6A [Land] 5A 5B → air series (55-58 dmg - 16-18 stun)
- Some combos ideas post-214C.
- If you still have resources you can go into 22C or another super instead of going for the air series.
Here a table to know how long your frame window is to combo after 214C/Air Throw:
| Opponent |
… 214C 5A |
… 214C 3A |
… 214C 5B
|
| Asuka
|
❌ |
3 |
3
|
| Ryuko
|
4 |
2-3 |
3
|
| Torami
|
3-4 |
2 |
2
|
| Megumi
|
3 |
6-8 |
5-8
|
| Kumi
|
5 |
4 |
4
|
| Tamaki
|
4-5 |
❌ |
2-3
|
| Karina
|
5 |
0-1 |
4
|
| Nana
|
4-5 |
4-6 |
5-6
|
| Kiyoko
|
5-6 |
0-1 |
3
|
| Cathy
|
3-4 |
❌ |
2
|
| Shinobu
|
6 |
5 |
5
|
| Tetsuko
|
3 |
3 |
3
|
| Genichirou
|
1 |
❌ |
0-1
|
※ The window might vary depending how far you hit the 214C...
Or it might depend if it's used raw or in combo? Maybe height dependent? Character hurtbox? (╯°□°)╯︵ ┻━┻
Videos
