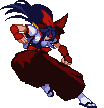
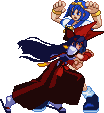
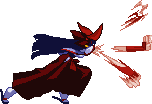
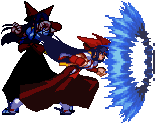
| Nana Owada
|
|
|
| Colors
|
| 1 |
2 |
3 |
4
|
|
|
|
|
|
Profile
Personal Details
| Gender |
Birthday |
Zodiac |
Height |
Weight |
Blood Type |
Likes |
Dislikes |
Dream / Goal
|
| Female |
October 17 |
Libra |
152cm |
42kg |
O |
Tradition |
Western culture |
To succeed her mother and grandmother and become leader of the Owada style.
|
| Favorite Words
|
| “
|
花鳥風月
Birds and flowers, wind and moon.
|
”
|
|
School Details
| Year |
Class |
Attendance # |
Favorite Subject |
Disliked Subject |
Love Status |
Charm Point
|
| 2nd / Junior |
A |
2 |
Classical Literature |
English (language) |
Has a fiancee |
Black hair
|
Overview
Playstyle
- Info
- stun: 20 (lowest)
- Playstyle
-
- Control, either Pressure/mixup or Defensive
Amazing at close range, she keeps you guessing with her fast overhead/low, while still having decent options in mid ranges with far reaching normals & projectiles.
Surprisingly she's also good at defending with good reversal options... But one mistake and she might just die due to her low stun.
Strength & Weakness
Playstyle
|
Nana is short/mid range focused character with good pressure/mix but also decent defense. But make one mistake will sign your death as she has the lowest stun of the game. |
| Pros |
Cons |
- Great projectiles! Not for zoning but to limit the opponent's.
- Queen of pressure & mixups with 2A/6A/66A + her projectiles.
- Incredibly fast 6A Overhead + it moves forward
- 66A's 2nd hit that changes into a throw if it's blocked.
- OS Throw with Mashable
- Good defense with a plethora of reversals like 214A/22A/214C/22C.
|
- Easily stunned, she has the lowest stun stamina in the game (20).
- Really short normals
- Low damage output.
|
Move List
Standing Normals
5A
5A
|
| Damage
|
Stun
|
Guard
|
Air Guard
|
Cancel
|
Properties
|
Startup
|
Active
|
Recovery
|
Adv. (Hit / Block)
|
Invincibility
|
| -
|
-
|
All
|
-
|
-
|
-
|
-
|
-
|
-
|
-
|
-
|
Standard jab, whiff on crouchers.
Her arm's hurtbox is behind her hand & a bit under her arm, while the clashbox is all around her hand. So it can be good for some clash situations.
|
|
6A
6A 6A 6A 6AA 6AA 6AAA 6AAA
|
| Version
|
Damage
|
Stun
|
Guard
|
Air Guard
|
Cancel
|
Properties
|
Startup
|
Active
|
Recovery
|
Adv. (Hit / Block)
|
Invincibility
|
| 6A
|
-
|
-
|
OH
|
-
|
-
|
-
|
8fr
|
-
|
-
|
-
|
-
|
One of the best mixup tool in the game!
Having a overhead on a light button is overall great for a few reasons:
- It can be cancelled from & into a 2A making a crazy fast high/low mixup possible.
- It's cancellable into 2BB or any B buttons, meaning easier confirm & full combo
On top of that, it moves forward for further mixup/better confirm & also looks similar to her 66A.
Which isn't overhead but forces a tick throw on block (and do a follow up low on hit).
All this makes Nana potential mixup go through the roof!
As a side note:
It's also useful as a kara cancel tool, making her specials reach further than normal.
|
| 6AA
|
-
|
-
|
All
|
-
|
-
|
-
|
-
|
-
|
-
|
-
|
-
|
Nana stabs forward with her open palm.
Easy confirm but limit your option to B buttons or specials/supers, you can't go back to 2A.
Maybe not great at the start of the combo, it could be useful at the end or during corner combos.
|
| 6AAA
|
-
|
-
|
All
|
-
|
-
|
-
|
-
|
-
|
-
|
-
|
-
|
Nana uses her 66B as last hit of this chain.
It's identical to her dash B, meaning you cannot go back A/B buttons, but you can super cancel it anytime or jump cancel it on hit only.
|
|
5B
5B
|
| Damage
|
Stun
|
Guard
|
Air Guard
|
Cancel
|
Properties
|
Startup
|
Active
|
Recovery
|
Adv. (Hit / Block)
|
Invincibility
|
| -
|
-
|
All
|
-
|
-
|
-
|
-
|
-
|
-
|
-
|
-
|
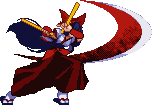
Nana swoops down & slashes with her fan. Far reaching launcher.
As Nana crouches during the first part of teh animation & get some upper invulnerability while the hitbox is out, it could be used as a far anti-air.
Like any 5B, it doesn't knockdown by itself but even if you hit with the tip you can confirm into 5C or 22A/B.
|
|
6B
6B 6B 6B 6BB 6BB
|
| Version
|
Damage
|
Stun
|
Guard
|
Air Guard
|
Cancel
|
Properties
|
Startup
|
Active
|
Recovery
|
Adv. (Hit / Block)
|
Invincibility
|
| 6B
|
-
|
-
|
Mid
|
-
|
-
|
-
|
-
|
-
|
-
|
-
|
-
|
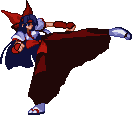
Nana high kicks with her left leg, getting ready for the second kick.
As it's still special cancellable, it can replaces 2BB 22B (as 2B6B 22B) for more stun.
It's also jump or super cancellable, but it has less applicable uses.
|
| 6BB
|
-
|
-
|
Mid
|
-
|
-
|
-
|
-
|
-
|
-
|
-
|
-
|
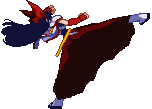
Nana high kicks a second time, but loses the possibility to special cancel the move making it way less useful...
Now, its only use now is for corner combos:
either you cancel it into supers or you go for a frame 1 jump cancel link into (jA/jB >) jC...
|
|
5C
5C
|
| Damage
|
Stun
|
Guard
|
Air Guard
|
Cancel
|
Properties
|
Startup
|
Active
|
Recovery
|
Adv. (Hit / Block)
|
Invincibility
|
| -
|
-
|
All
|
-
|
-
|
-
|
-
|
-
|
-
|
-
|
-
|
The startup is fully invincible (with 1 clashbox), it's reduced to upper body invincibility when the hitbox.
It could be used as far anti-air or to go through some moves (excpet if they're low).
|
|
Crouching Normals
2A
2A
|
| Damage
|
Stun
|
Guard
|
Air Guard
|
Cancel
|
Properties
|
Startup
|
Active
|
Recovery
|
Adv. (Hit / Block)
|
Invincibility
|
| -
|
-
|
Low
|
-
|
-
|
-
|
-
|
-
|
-
|
-
|
-
|
A low kick with decent range, your main low opener & perfect for mixup with 6A.
|
|
3A
3A
|
| Damage
|
Stun
|
Guard
|
Air Guard
|
Cancel
|
Properties
|
Startup
|
Active
|
Recovery
|
Adv. (Hit / Block)
|
Invincibility
|
| -
|
-
|
Low
|
-
|
-
|
-
|
-
|
-
|
-
|
-
|
-
|
A bit slower than 2A, but go a bit further.
Also has a hitbox before the actual hit, having higher chance to clash / win small interaction.
|
|
2B
2B
|
| Damage
|
Stun
|
Guard
|
Air Guard
|
Cancel
|
Properties
|
Startup
|
Active
|
Recovery
|
Adv. (Hit / Block)
|
Invincibility
|
| -
|
-
|
Low
|
-
|
-
|
-
|
-
|
-
|
-
|
-
|
-
|
Nana backs off then slide forward with a low kick.
You'll use it mainly to confirm into full combo once you've opened with 2A/6A.
Thanks to the forward hitbox of 5B, 2BB should reach even if you only hit the tip of 2B.
You can also try some variant like 2B 6B(1) or 2BB 6B(1) to get a bit more damage/stun.
|
|
Jumping Normals
j.A
jA
|
| Damage
|
Stun
|
Guard
|
Air Guard
|
Cancel
|
Properties
|
Startup
|
Active
|
Recovery
|
Adv. (Hit / Block)
|
Invincibility
|
| -
|
-
|
high
|
-
|
-
|
-
|
-
|
-
|
-
|
-
|
-
|
Amazingly fast & forward air jab.
Great for air to air clash, it's also one of her main air filler to add more stun as it's fast and keep the opponent close allowing more aerial to connect.
Keep in mind, it's not a good jumpin, outside maybe with hops.
There's also this weird uncrossup, but it should be your main strategy.
|
|
j.6A
j6A
|
| Damage
|
Stun
|
Guard
|
Air Guard
|
Cancel
|
Properties
|
Startup
|
Active
|
Recovery
|
Adv. (Hit / Block)
|
Invincibility
|
| -
|
-
|
high
|
-
|
-
|
-
|
-
|
-
|
-
|
-
|
-
|
This good looking air-to-air jumping high kick, has an incredible feature: the whole leg has no hurtbox!
With is long range, long active frame & this disjointed kick is an amazing air-to-air / air footsies tool in general.
Add to that the usual trait of j6As of stopping airborn opponent's momentum, and it's now also a good combo tool.
As a jumpin, it will have trouble to hit crouchers, but can be useful to extend pressure on standing opponent.
Note that this j6A doesn't launch grounded opponents.
|
|
j.B
jB
|
| Damage
|
Stun
|
Guard
|
Air Guard
|
Cancel
|
Properties
|
Startup
|
Active
|
Recovery
|
Adv. (Hit / Block)
|
Invincibility
|
| -
|
-
|
high
|
-
|
-
|
-
|
6fr
|
-
|
-
|
-
|
-
|
It's in competition with jC as her best jumpin/crossup button.
It has no hurtbox on until her knee, makling it a somewhat disjointed hitbox.
It creates ambigous left/right mixup by hopping over crouchers.
But it's also an easy confirm into jC if you hit someone standing.
Which will ground-splat or if spaced correctly: turn them around. Allowing for an untechable throw setup.
|
|
j.C
jC
|
| Damage
|
Stun
|
Guard
|
Air Guard
|
Cancel
|
Properties
|
Startup
|
Active
|
Recovery
|
Adv. (Hit / Block)
|
Invincibility
|
| -
|
-
|
high
|
-
|
-
|
-
|
10fr
|
-
|
-
|
-
|
-
|
At first, it seems shorter & slower than jB but like all jCs, it has a fully invulnerable startup & auto-correct on crossup.
The hitbox is even out 1fr before getting your hurtbox back!
It also ground-splats and as an added bonus it can turn people around (if spaced/timed correctly), creating an untechable throw setup.
|
|
Throws
Neutral Throw
Throw
|
| Damage
|
Stun
|
Guard
|
Air Guard
|
Cancel
|
Properties
|
Startup
|
Active
|
Recovery
|
Adv. (Hit / Block)
|
Invincibility
|
| 0
|
0
|
Throw
|
-
|
-
|
-
|
-
|
-
|
-
|
-
|
-
|
Nana throws her opponent in the air, letting them open for a combo.
As it pretty fast, it just reinforces her mixups tools like 6A/2A or even 66A that is a baked in tick throw tool.
The throw itself does no damage/stun.
You can jump into an air combo directly, but I recommend to step/micro-dash or use one of your long reaching moves (6A/5B/6B/5C) to start the combo, then chain it with a 22B into full air combo or into supers for more unscaled damage.
|
|
Air Throw
Air Throw
|
| Damage
|
Stun
|
Guard
|
Air Guard
|
Cancel
|
Properties
|
Startup
|
Active
|
Recovery
|
Adv. (Hit / Block)
|
Invincibility
|
| -
|
-
|
Throw
|
-
|
-
|
-
|
-
|
-
|
-
|
-
|
-
|
Sadly, this throw will not lead to a combo but at least it'll give you around +15fr for oki if they ground-tech, and if they don't: micro-dash 2Bxx236A then run to setup some nasty pressure.
|
|
Special Moves
66A
66A First hit First hit 66A followup on hit (low). 66A followup on hit (low). 66A followup on block (throw). 66A followup on block (throw).
|
| Damage
|
Stun
|
Guard
|
Air Guard
|
Cancel
|
Properties
|
Startup
|
Active
|
Recovery
|
Adv. (Hit / Block)
|
Invincibility
|
| -
|
-
|
Mid
|
-
|
-
|
-
|
-
|
-
|
-
|
-
|
-
|
Outside the shadows behind this move the 1st hit is similar to a 6A, except it's not overhead... But here's the catch! The 2nd hit will change depending if you hit or get blocked:
- On hit: it goes for a 2B followup, sadly only confirmable into supers.
- On block: it goes for a throw! (well a "grab" confirmable into throw)
Albeit being only a gimmick, with her strong 2A/6A mixup, having a fake overhead into tick throw will catch by surprise any sleeping/mental stacked opponent.
|
|
66B
66B
|
| Damage
|
Stun
|
Guard
|
Air Guard
|
Cancel
|
Properties
|
Startup
|
Active
|
Recovery
|
Adv. (Hit / Block)
|
Invincibility
|
| -
|
-
|
High
|
-
|
-
|
-
|
-
|
-
|
-
|
-
|
-
|
As much as it looks like a good far-range 2B confirm, at any range where it could connect, 22B is always the better choice. Here's a short explanation:
- 66B
You want to jump cancel on the 1st hit, as the 2nd hit send further you'd want to for combo, but it can be stupidly tight depending the distance.
- 22B
It does as much damage/stun at 2B's tip range, and closer it does way more.
Launch angles are also more convenient & consistent.
That distinction done, what's left?
Well it can be a good far reaching punish move (cancel into 22C for lot of damage).
And maybe a weird anti-air as it has upper boy invincibility on the 2nd hit... though I wouldn't bet on it.
|
|
Ouka Ren Geki
Ouka Ren Geki
Mash A or B
|
| Damage
|
Stun
|
Guard
|
Air Guard
|
Cancel
|
Properties
|
Startup
|
Active
|
Recovery
|
Adv. (Hit / Block)
|
Invincibility
|
| -
|
-
|
High
|
-
|
-
|
-
|
-
|
-
|
-
|
-
|
-
|
Amazing tool to build meter!
Btw you continue to mash, it will add more hits & doubles the meter gain.
The B version gives 25% to 50% if mashed, while the A version only builds 16.6% / 33.3%.
I recommend only using the B version, for simple reasons:
- Can be done instantly thanks with 5Y.
- Gains twice as much meter.
- Deals more damage/stun (A≃20/6 vs B≃25/10).
As far as I've tested, the only advantage of the A version is it can jump/super cancel until the 3rd hit, where the B version can only jump/super cancel until the 2nd hit.
Side note:
Like all mashable, it should win during a grab animation if the other person tech or try to grab back.
⚠️ Need more test.
|
|
Fuugetsu Sen
Fuugetsu Sen
236A/B
|
| Version
|
Damage
|
Stun
|
Guard
|
Air Guard
|
Cancel
|
Properties
|
Startup
|
Active
|
Recovery
|
Adv. (Hit / Block)
|
Invincibility
|
| A
|
-
|
-
|
All
|
-
|
-
|
-
|
-
|
-
|
-
|
-
|
-
|
Nana's signature fan projectiles.
They aren't meant for zoning, but for pressure/mixup or to control/close space.
236A is the best example for this and also your main projectile: it goes straight, stops shortly after & stays there for a moment.
It's useful to prevent dashes, to force a jump or to create left / right mixups / unblockable situation.
|
| B
|
-
|
-
|
All
|
-
|
-
|
-
|
-
|
-
|
-
|
-
|
-
|
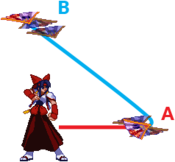
Nana throws her fan forward, which then boomerangs at an upward angle.
A anti-air projectile, mainly used after you conditioned your opponent to jump over the 236A fan. It travels faster but is a bit slower to recover than 236A.
To reinforce the anti-air aspect: her hurtbox is actually behind her back/on her back leg. Meaning she can't be hit on her torso & forward leg.
|
|
Resshuu Ha
Resshuu Ha
214A/B FUS RO DAH FUS RO DAH
|
| Version
|
Damage
|
Stun
|
Guard
|
Air Guard
|
Cancel
|
Properties
|
Startup
|
Active
|
Recovery
|
Adv. (Hit / Block)
|
Invincibility
|
| A
|
15-21
|
3-5
|
All
|
-
|
-
|
-
|
17fr
|
-
|
-
|
-
|
-
|
Being a Miko of the Dragon Shrine, Nana can scream to wallbounce her opponents.
Both version do the same damage/stun, the only difference is 214A starts slow, albeit with 7fr of invincibility, but recovers faster while 214B starts faster but takes longer to recover.
As you guessed, you'll use use 214A to invul through the offense or your opponent, either on wake up or more often as a GC.
You won't get a combo like you would with a 22A/22B but it'll give you space to breath, start your pressure/ control space with projectiles.
|
| B
|
15-21
|
3-5
|
All
|
-
|
-
|
-
|
7fr
|
-
|
-
|
-
|
-
|
No iframes on this version and while it starts with a clashbox, it will loses clash battles due to its startup. Also, It isn't super cancellable.
Otherwise, it's a good ender to surprise your opponent with a wallbounce. Though try to not be too close to the wall yourself as if they tech, you'll be in recovery & vulnerable.
|
|
Ushiwaka no Mai
Ushiwaka no Mai
22A/B Spins & hits twice before ender Spins & hits twice before ender 22A ender 22A ender 22B ender 22B ender
|
| Version
|
Damage
|
Stun
|
Guard
|
Air Guard
|
Cancel
|
Properties
|
Startup
|
Active
|
Recovery
|
Adv. (Hit / Block)
|
Invincibility
|
| A
|
-
|
-
|
All
|
-
|
-
|
-
|
7fr
|
-
|
-
|
-
|
-
|
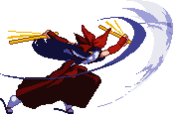
Nana twirls hitting with her fans and ending with a fan hitting downward.
Your reversal of choice!
it has 6fr of invincibility with a clash box and on the 7th frame, the first active frame, she has only a hurtbox bellow her knees.
Sadly, it doesn't launch like her 22B. So no air combo but you'll have some options:
- Let it finish, getting some advantage for pressure.
- Jump cancel it at any moment to go into a left/right mixup or back.
- If you jump cancel around the 2nd hit you can combo a jC (jA hits too, but due to your momemtum it seems impossible to combo after).
- cancel into any super for good damage.
|
| B
|
-
|
-
|
All
|
-
|
-
|
-
|
-
|
-
|
-
|
-
|
-
|
Your launcher of choice! With the caveat it needs to hit someone airborn or hits after a launcher/knockdown (eg. 5B, 2B, 5C...).
Because it doesn't knockdown by itself, if you hit it raw you'll only be able do a short air chain or super. Anything else and they'll be able to tech out.
Outside that it deals a tad more damage/stun than 22A and send at better angles for combo in most occasion.
Hitting it raw/early then combo in 22C will dish out a lot of damages! (Cancel before the last hit for more damage in general)
|
|
Supers
Fuugetsu Ougi Ran
Fuugetsu Ougi Ran
236C
|
| Damage
|
Stun
|
Guard
|
Air Guard
|
Cancel
|
Properties
|
Startup
|
Active
|
Recovery
|
Adv. (Hit / Block)
|
Invincibility
|
| -
|
-
|
All
|
-
|
-
|
-
|
-
|
-
|
-
|
-
|
-
|
Nana sends 2 fans at the same time, each of them is taking a different trajectory.
Similar use to her normal fans, it stops people from approach mindlessly while you can apply pressure.
One thing to note, the fan flying backward, even though it has a hitbox, doesn't hit on the way back.
Outside being a neutral/pressure tool, it could be used for corner loops... But frankly, it's not worth it:
- it's inconsistent, you need specific spacing + the previous hit needs to be meaty enough to link.
- it doesn't rack stun like Tamaki's 236C, it just adds 1-2 stun per super.
- the damage output is low.
Do it once and go into another could be ok, but at this point, trying a reset or use another super & continue pressure sounds better.
|
|
Chou Resshuu Ha
Chou Resshuu Ha
214C *Miko flip* *Miko flip* SUPPA FUS RO DAH SUPPA FUS RO DAH
|
| Version
|
Damage
|
Stun
|
Guard
|
Air Guard
|
Cancel
|
Properties
|
Startup
|
Active
|
Recovery
|
Adv. (Hit / Block)
|
Invincibility
|
| Ground
|
-
|
-
|
All
|
-
|
-
|
-
|
8fr
|
6fr-7fr
|
-
|
-
|
-
|
Another good reversal option!
The whole flip is invincible (23fr for the flip + 36fr for the flash) and the first hitbox comes at 8fr!
Cherry on top, both the flip and the scream projectile are air unblockable.
Also, unlike 214B, even if you're as close of the corner you can, you won't be punished if they tech!.
The only downside is its damage output is second lowest of all her supers, after 236C.
|
|
Bu Tou Souen Jin
Bu Tou Souen Jin
22C / 22C~88C Bu Tou Souen Jin: Ichi Bu Tou Souen Jin: Ichi Bu Tou Souen Jin: Ni
(88C modifier) Bu Tou Souen Jin: Ni
(88C modifier)
|
| Version
|
Damage
|
Stun
|
Guard
|
Air Guard
|
Cancel
|
Properties
|
Startup
|
Active
|
Recovery
|
Adv. (Hit / Block)
|
Invincibility
|
| Ichi
|
-
|
-
|
All
|
-
|
-
|
-
|
-
|
-
|
-
|
-
|
-
|
Someone offscreen toss her a naginata, Nana grabs it & immediately slashes downward. It's her go to super!
It's the easiest to combo, has some iframes before (and during) the flash & is easily the most damaging super while still giving decent stun.
All in all, it's amazing move!
It can be a punish move, anti-air & is her best damage/combo ender super... but it's an easy one to understand.
You slash, damage go brrr. Nothing much to say.
|
| Version
|
Damage
|
Stun
|
Guard
|
Air Guard
|
Cancel
|
Properties
|
Startup
|
Active
|
Recovery
|
Adv. (Hit / Block)
|
Invincibility
|
| Ni
|
-
|
-
|
All
|
-
|
-
|
-
|
-
|
-
|
-
|
-
|
-
|
The second form of "Bu Tou Souen Jin", Nana grabs the naginata & suddenly spins it in circle..? Mokay.
Going from her best super to a... questionable one.
This version does less damage, a bit more stun (if all hits connect) but can drop easily depending how it hits the opponent.
As an advice never use it when:
- the opponent is close to you, it's likely to drop or go through the opponent.
- don't use it in combos, outside the chance of drops, 22C will always deals more damage.
The only good use for this super is a fullscreen surprise poke/anti-air/punish move.
But at least it's great at this: as soon as you see them move, boom! Spin on them.
Execution Tips:
Do 22C then hold down 2 & input Z+C.
2Z (hop) is a shortcut for 88, it makes this super input faster & way easier to do.
|
|
Combos
| Combo Notation Guide:
|
- ( ) = optional, typically the combo will be easier if omitted.
- [ ] = Input is held.
- ~ = Delay the next hit.
- / = Option to choose between multiple actions.
- + = Multiple buttons are pressed simultaneously.
- {}xN = That part can be repeated N number of times, range provided.
- X(#) = Next action is taken after a certain number of hits from X move.
- xx = Cancel A into B (A xx B), mainly written when it needs to be really fast.
- CH = Counter Hit.
|
True combo
Missed tech punish
Videos
