Asuka 120 LimitOver/Ryuko Yamazaki

From Mizuumi Wiki
Jump to navigation Jump to search
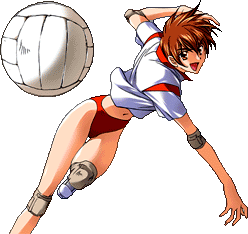
Ryuko Yamazaki
A120LO Ryuko-Portrait.png
Colors
1 2 3 4
Color 1 for Ryuko Yamazaki Color 2 for Ryuko Yamazaki Color 3 for Ryuko Yamazaki Color 4 for Ryuko Yamazaki

Profile

Personal Details
Gender Birthday Zodiac Height Weight Blood Type Likes Dislikes Dream / Goal
Female August 9 Leo 168cm 48kg A Japanese-style meals Lies To get in the industry and conquer the World Cup.
Favorite Words

死して屍拾う者なし
After death, you won't find a corpse.

School Details
Year Class Attendance # Favorite Subject Disliked Subject Love Status Charm Point
2nd / Junior B 31 Lunch break All of them No comment Firmness

Overview

Playstyle

Info
stun: 26
Playstyle

Strength & Weakness

Playstyle
Ryuko is like a train, either she runs over her opponent or derails. Her unique kit allows her to get in quickly & take you for a ride with her scary high/low/throw mixups & if anything hit you're in a world of hurt.
Pros Cons
  • Good damage output.
  • Shonen Spirit AKA Hyper armor can shut down some characters down but...
  • Godlike air throw range
  • 214A/B Overhead hitgrab
  • Hard to stun, tied with Cathy for 3rd best stamina (26).
  • Weird set of specials, not bad but you'll have to get used to them.
  • ... it can also be suicidal in some matchups.
  • Combo structure is a bit different (2B not being a sweep but launcher move)
  • Disappointing air normals
  • Has a difficulties to build stun (her 2B 66B racks up stun but once she goes airborne it's done)

Move List

Standing Normals

5A
5A
A120LO Ryuko 5A.png
Damage Stun Guard Air Guard Cancel Properties Startup Active Recovery Adv. (Hit / Block) Invincibility
4-7 1 All - - - - - - - -

normal but damaging jab.

6A
6A
A120LO Ryuko 6A.png
6A
6A
Damage Stun Guard Air Guard Cancel Properties Startup Active Recovery Adv. (Hit / Block) Invincibility
11-15 1-3 All - - - - - - - -

Awkward punch toward the face.
Not incredible, but can be use as to stop hops / or late Anti Air. Chain it asap as it knock foes far from you otherwise.

5B
5B
A120LO Ryuko 5B.png
Damage Stun Guard Air Guard Cancel Properties Startup Active Recovery Adv. (Hit / Block) Invincibility
13-18 2-4 All - - - - - - - -

Straight Uppercut, typical 5b Launcher.

6B
6B
A120LO Ryuko 6B-1.png
A120LO Ryuko 6B-2.png
A120LO Ryuko 6B-3.png
Damage Stun Guard Air Guard Cancel Properties Startup Active Recovery Adv. (Hit / Block) Invincibility
20-25 2-4 High - - - - - - - -

Downward swing. Last hit is overhead, but is only jump & super cancellable.
Overall a bit hard to use, but you can use it to combo a j236B to setup an untechable throw: check the combo/setup at the end of this tweet.

5C
5C
A120LO Ryuko 5C.png
Damage Stun Guard Air Guard Cancel Properties Startup Active Recovery Adv. (Hit / Block) Invincibility
11-15 1-3 All - - - - - - - -

Another uppercut, down with the other arm this time.
Launches a bit higher than 5B, and used in combination with it, can launch a bit above high jump height.

Pretty ok as a GC 5C, it has 3 clash hits:

  • on hit, you can convert into a combo
  • on clash, you can try to get away with a backdash or (high) jump cancel.

Crouching Normals

2A
2A
A120LO Ryuko 2A.png
Damage Stun Guard Air Guard Cancel Properties Startup Active Recovery Adv. (Hit / Block) Invincibility
2-3 1 Low - - - - - - - -

Short range 2A.

3A
3A
A120LO Ryuko 3A.png
Damage Stun Guard Air Guard Cancel Properties Startup Active Recovery Adv. (Hit / Block) Invincibility
11-15 1-3 Low - - - - - - - -

Sadly is outshined by 2B in range & damage, it also knockback foes far so you can't combo with 214X.

2B
2B
A120LO Ryuko 2B.png
Damage Stun Guard Air Guard Cancel Properties Startup Active Recovery Adv. (Hit / Block) Invincibility
15-21 3-5 Low - - - - - - - -

Really great sweep, setting for her best combos.
2B will combo with all you main moves: 2BB, 66B, 236B, etc.
※ 2B xx 214B is also possible if the opponent is high enough. eg: 2B 66B 2B xx 214B

Good range, good damage, the only down side is you have to use 3 or 2B, as 1B is another move.
Nothing big, but migth take some times to get used if you usually always hold back during combos.

1B
1B
A120LO Ryuko 1B-1.png
A120LO Ryuko 1B-2.png
Damage Stun Guard Air Guard Cancel Properties Startup Active Recovery Adv. (Hit / Block) Invincibility
11-15 2 Low - - - - - - - -

Short range launcher, sends the opponent a tiny bit higher than 5B, but less than 5C.

Sadly it's a bit of an awkward direction+button combination:
Generally you want to sweep out of crouch blocking, but here you'll most like whiff or do "1BB" which doesn't work (doesn't cancel into 5B).

Jumping Normals

j.A
jA
A120LO Ryuko jA.png
Damage Stun Guard Air Guard Cancel Properties Startup Active Recovery Adv. (Hit / Block) Invincibility
7-9 1 high - - - - - - - -

Typical jA, short range, renda cancellable.

j.6A
j6A
A120LO Ryuko j6A.png
Damage Stun Guard Air Guard Cancel Properties Startup Active Recovery Adv. (Hit / Block) Invincibility
11-15 1-3 high - - - - - - - -

Has a better range than what you would thinnk firsthand.
Like most j6A, it pops grounded opponent in the air & has small to no knockback in the air.

j.B
jB
A120LO Ryuko jB-1.png
A120LO Ryuko jB-2.png
A120LO Ryuko jB-3.png
Damage Stun Guard Air Guard Cancel Properties Startup Active Recovery Adv. (Hit / Block) Invincibility
17-24 + 14-19 (31-43) 5-8 + 2-4 (7-12) high - - - - - - - -

Similar to 6B but in the air. Last hit groundbounce.
Overall pretty awkward in air chain, I would advise to only use it from a hop or as a finisher/before a air special.

If it hits a ground opponent with only the last hit, you can turn them around, guaranteeing an untechable throw.
You can create double overhead mixup/crossup with j236B / still turn them around them. Check this tweet

The last hit will also bounce them against the wall if they're cornered.

j.C
jC
A120LO Ryuko jC.png
Damage Stun Guard Air Guard Cancel Properties Startup Active Recovery Adv. (Hit / Block) Invincibility
11-15 1-3 high - - - - - - - -

Fast aerial smash. Groundbounce opponent.
Less damaging then jB, but faster: giving less time to react to the groundbounce.

Can also turn opponent on hit like jB, easier to time but you can cancel it into air special.

Throws

Neutral Throw
Throw
A120LO Ryuko Throw.png
Damage Stun Guard Air Guard Cancel Properties Startup Active Recovery Adv. (Hit / Block) Invincibility
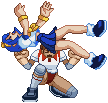
15-21 2-4 Throw - - - - - - - -

Grab the opponent, jump in the air & do a back breaker.
You can easily combo after it. Either into 2B 66B/214B or directly 66B.

Air Throw
Air Throw
A120LO Ryuko AirThrow.png
Damage Stun Guard Air Guard Cancel Properties Startup Active Recovery Adv. (Hit / Block) Invincibility
15-21 2-4 Throw - - - - - - - -

Similar uses as the ground throw.

Special Moves

66A
66A
A120LO Ryuko 66A.png
Damage Stun Guard Air Guard Cancel Properties Startup Active Recovery Adv. (Hit / Block) Invincibility
20-25 2-4 All - - - - - - - -

A worst version of 66B? Seriously, it has a shorter dash range, lower hitboxes & it knockbacks the opponent far from you...

66B
66B
A120LO Ryuko 66B.png
Damage Stun Guard Air Guard Cancel Properties Startup Active Recovery Adv. (Hit / Block) Invincibility
22-27 2-4 All - - - - - - - -

Charge & heabutt the opponent. Your best starter/launcher.

It launches them really close to you allowing to start whatever you want.
You can loop 2B 66B, or branch into 2B 236B, 2B 214B or air combo.

Tatsumaki Receive
Tatsumaki Receive
236A/B
A120LO Ryuko 236A.png
236A
236A
A120LO Ryuko 236B.png
236B
236B
Version Damage Stun Guard Air Guard Cancel Properties Startup Active Recovery Adv. (Hit / Block) Invincibility
A 7-9 + 5-7 2-4 All - - - - - - - -

Slides on the ground punch first.
Sadly it isn't a low, has a long recovery & isn't super cancellable... Making its utily overall pretty bad.

You can crossover with it... Not sure if it could help in making whiff the opponent during Clash battle or GC situations.

B 15-21 + 1 1-2 All - - - - - - - -

Somehow doing a server while going in the air.

If you get the second hit, you can generally combo after —if done early in the combo.
Sadly used later in the combo, it will send them too high and hitstun will run out before you can hit them again.

Avoid using it on block, as you'll be vulnerable until you touch the ground.

Air Tatsumaki Receive
j236A/B
A120LO Ryuko 236A.png
236A
236A
A120LO Ryuko j236B.png
236B
236B
Version Damage Stun Guard Air Guard Cancel Properties Startup Active Recovery Adv. (Hit / Block) Invincibility
A 15-21 1 All - - - - - - - -

Straight forward psycho-receive in the air.
Better than the ground version and can be used as a finisher in the air. Closer to teh wall you are the better it is to surprise your opponent.

B 13-18 - Overhead - - - - - - - -

45° down psycho-receive, can be seen as a dive kick.
You best aerial special! It is an overhead, turns the opponent & opens the door to a lot of mixups.
Also, if you get the 2nd hit, it's a laucher!

Here's some mixups ideas:

Done low
  • Land > lows/throw
  • Land > instant j236B


Done from a high/ double jump cancel
  • In front > low
  • Fake crossup > low
  • Crossup > 2B/6B
  • Crossup > untechable throw

Check this tweet to see some examples.

Quick Driver
Quick Driver
214A/B
A120LO Ryuko 214A-1.png
A120LO Ryuko 214A-2.png
Version Damage Stun Guard Air Guard Cancel Properties Startup Active Recovery Adv. (Hit / Block) Invincibility
A 24-34 4-7 Overhead - - - - - - - -

Even though it looks like a command throw, it's actually a overhead hitgrab.
Not as powerful but still good mixup, it deals decent damage & you can combo in & from it.

Overall the move isn't crazy good like in SP2.
In neutral, it can avoid lows but only if their hitbox is small/close to the ground... And if you clash with them, you won't be able to cancel until you land, so you will lose most clash situations.

In combo it is supposedly good, but its startup & hitbox makes it hard to connect consistently.
The timing & combo routes might change depending your opponent's weight & hurtbox while falling.

Both version are pretty similar, the only difference is the 214B jump further than 214A.

B 24-34 4-7 Overhead - - - - - - - -

Go a bit further & feels as fast as than A version.

Inazuma Serve
Inazuma Serve
22A/B/C
A120LO Ryuko 22A.png
A120LO Ryuko 22-Angles.png
Different angles
Different angles
Version Damage Stun Guard Air Guard Cancel Properties Startup Active Recovery Adv. (Hit / Block) Invincibility
A 22-27 3-7 All - - - - - - - -

Ryuko does a volleybal serve, the angle of the serve & bounce change depending which strength you used.

Fun fact, if you hit the ball bouncing back with another serve you'll send it back with a new ball.
You'll send it at the corresponding strength of the latest serve (eg: if you use the super to bounce it back, you'll send 2 super balls).

For this purpose, 22A is the easiest to use. It bounces higher than the B & the C goes through.
You can try to juggle more balls, but it gets harder & there's a risk that the balls collide which each other, cancelling most or all of them.

B 20-33 3-7 All - - - - - - - -

If the A version is for pressure/blockstring, the B version is mainly to zone full/mid screen.
You can use the ball to class with a dash attack or normal and cancelling it, but that's about it.

It can also be used as an anti-air as you can actually hit while rising, and 22B hits sooner than 22A.

EX 32-57 2-4 All - - - - - - - -

Similar to the 22A angle, it won't bounce back on block but instead go through.
The ball is air unblockable if the opponent isn't in a blockstring.

Unique Supers

Hyper Tackle
Hyper Tackle
236C
A120LO Ryuko 236C-1.png
A120LO Ryuko 236C-2.png
stop there on whiff
stop there on whiff
A120LO Ryuko 66A.png
Hit/block - Unblockable
Version Damage Stun Guard Air Guard Cancel Properties Startup Active Recovery Adv. (Hit / Block) Invincibility
Ground 15-21 + 35-39 (50-64) 2-4 All > Ground Unblockable - - - - - - - -

Your go to super as an ender. Heavy damage & good for pressure/blockstring.
Second hit is ground unblockable but air blockable.
You can catch people by suprise, though it can be avoided by highjump, backdash or dodge.

Kill Point
Kill Point
632C
A120LO Ryuko 6321C.png
Version Damage Stun Guard Air Guard Cancel Properties Startup Active Recovery Adv. (Hit / Block) Invincibility
Ground 24-33 2-4 All - - - - - - - -

Big Falcon Punch, wallbounce but doesn’t move the camera.
Can get punished easily if you do it in the corner.

Shonen Spirit
Shonen Spirit (Hyper Armor)
623C
A120LO Ryuko 623C.png
Version Damage Stun Guard Air Guard Cancel Properties Startup Active Recovery Adv. (Hit / Block) Invincibility
Ground 0 0 - - - - - - - - -

🔥120% only!🔥
Give you armor for the duration of your 120%!
The armor only works on the ground against everything but command grab & hitgrab.


Combos

Combo Notation Guide:
( ) = optional, typically the combo will be easier if omitted.
[ ] = Input is held.
~ = Delay the next hit.
/ = Option to choose between multiple actions.
+ = Multiple buttons are pressed simultaneously.
{}xN = That part can be repeated N number of times, range provided.
X(#) = Next action is taken after a certain number of hits from X move.
xx = Cancel A into B (A xx B), mainly written when it needs to be really fast.
CH = Counter Hit.

True combo

Missed tech punish

Videos

General
FAQ
Controls
Systems
Training
Netplay
Links
Characters
Asuka Honda
Ryuko Yamazaki
Torami Houjyou
Megumi Suzuki
Kumi Ookubo
Tamaki Shindou
Karina Toyota
Nana Owada
Kiyoko Mitarai
Cathy Wild
Shinobu Kawasaki
Tetsuko Ougigaya
Genichirou Shindou