Story
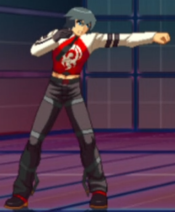
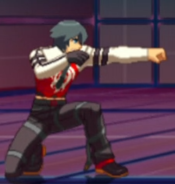
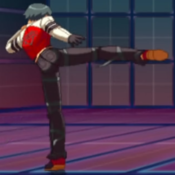
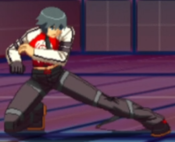
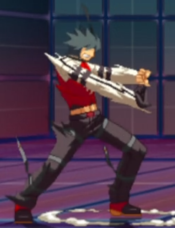
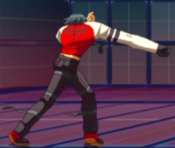
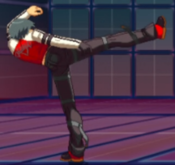
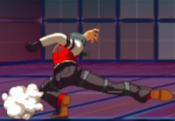
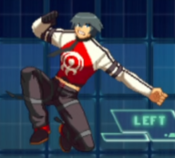
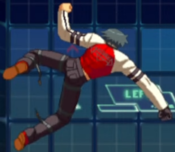
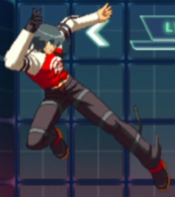
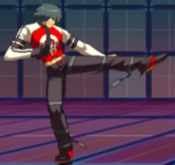
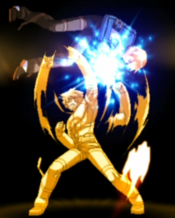
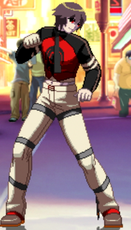
MG Hikaru
『MGヒカル』
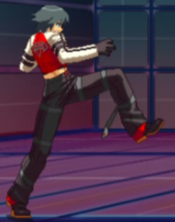
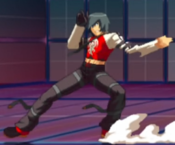
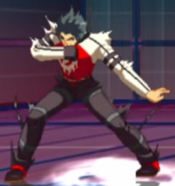
Hikaru waited in line for a limited edition sculpt of an underage girl whose underwear is falling off totally normal anime figure so long that he went insane. Upon staring into the figure Hikaru learned the secrets of the universe. No longer was just regular Hikaru, now he is MG Hikaru aka Master Grade Hikaru aka Monster Girl Hikaru aka Moe Guardian Hikaru aka Mother Goose Hikaru aka My Guy Hikaru.
Playstyle
Health: 29000 Stun: 85
MG lacks a fireball, a DP, and a fast forward moving special, what he has instead is a command grab, lots of stun, and a suite of feints to keep his pressure unpredictable. He tends to suffer a bit in neutral, but once he gets in he's a force to be reckoned with.
Mobility (Run vs Step)
Run: MG's run isn't really special he gets the same mobility everyone else does, and like everyone else he can use it for microdash combos to make stuff a bit easier.
Step: MG doesn't get much out of step canceling compared to other characters since he has so many feints that he can cancel into that move him forward.
Specials
- Whirlwind Slice Kick (Shippuu Sokutou Kyaku) 236B/D:
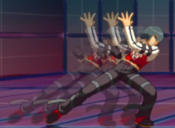
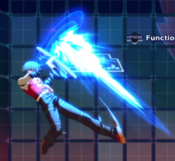
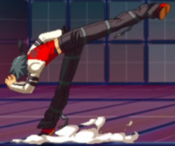
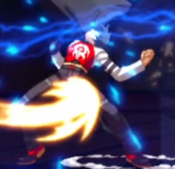
Whirlwind Slice Kick is a multi purpose tool for MG Hikaru, though it is mostly used as a combo extender. The B version can be safe on block during a string due to push back but the D version wont due to how far forward MG hops before performing the kick. The D version being feintable allows you to reset combos. It is not recommended to reset block pressure with the feint as you don't recover fast enough to stop the opponent from reacting with a fast enough button. Both versions force a knockdown allowing for some oki setups.
- God Speed Punch (Kami Jinken) 214B/D Can be held:
God Speed Punch is the closest thing MG Hikaru has to a meterless reversal. Has armor against highs and mids making this a solid tool when dealing with characters with fast approaching high/mids on the ground and air to ground approaches. It will lose to lows and throws so any fast approaching low moves on the ground and any throws will still hit, making usage of this move very match up dependent.
Supers
- Shin! Meteor Tiger Assault Kick (Shin Ryuusei Koshuu Kyaku) 21414236B/D:
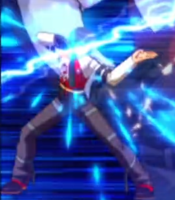
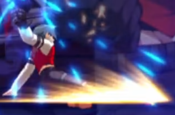
A fast approaching super that starts with a low that travels a little under half screen. The super itself is solid for punishing whiffed buttons in midrange if you have the reaction speed for it, and opening up some new combo routes on the ground for MG.This is not something MG was previously lacking however, making this super not as useful as one would think when compared to the alternatives.
- Electrical Phoenix Thunderstrike Kick (Denou Raida Kyaku) j.236236B/D:
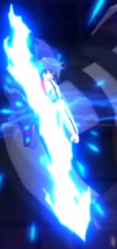
The difference in the B and D versions is the D version will have MG rise a bit in the air, making it the usual version for combos due to it being easier to combo into. In terms of usefulness this super gives MG a very much needed meter ender for air combos and provides a hard knockdown, making this one of the preferred options for MG
Recommended Sets
- Whirlwind Slice Kick and Electrical Phoenix Thunderstrike Kick:
This set gives Mg a multitude of options for pressure and combos, both on the ground and in the air. Whirlwind Slice Kick gives MG a few more combo routes and a solid ender for both ground combos and block strings thanks to the B verion and the D version gives him another feint to vary his resets and pressure. Thunderstrike Kick on the other hand gives MG his best air combo ender, filling a slot that the rest of his kit and other extra move options cant really perform.
- God Speed Punch and Electrical Phoenix Thunderstrike Kick:
Effectively the same as the above set however the change into God Speed Punch gives MG another defensive option to utilize, albeit a situation one. Besides that this set doesn't drop Thunderstriker Kick so MG still has solid enders for all of his combos, though he know lacks the meterless knockdown that Whirlwind Slice Kick provided.
Move List
Click on a header to expand that section of the movelist
Normal Moves
Normal Moves
5A
5A
|
| Damage
|
Stun
|
Guard
|
Startup
|
Active
|
Recovery
|
Frame Advantage (block)
|
Cancelable
|
Counterhit Properties
|
| -
|
-
|
High/Low
|
8f
|
-
|
-
|
+1
|
yes
|
-
|
Pretty standard 5A, range is a bit short. Good as an anti-IAD button or for beating out slow moves like guardbreaks. Links off of 214A at close range.
|
|
2A
2A
|
| Damage
|
Stun
|
Guard
|
Startup
|
Active
|
Recovery
|
Frame Advantage (block)
|
Cancelable
|
Counterhit Properties
|
| -
|
-
|
High/Low
|
7f
|
-
|
-
|
+4
|
yes
|
-
|
Faster than 5A and more advantage on block. Good normal for pressure strings.
|
|
5B
5B
|
| Damage
|
Stun
|
Guard
|
Startup
|
Active
|
Recovery
|
Frame Advantage (block)
|
Cancelable
|
Counterhit Properties
|
| -
|
-
|
High/Low
|
7f
|
-
|
-
|
-7
|
Yes
|
-
|
Great reach, quite useful in neutral. Links off of 214A.
|
|
2B
2B
|
| Damage
|
Stun
|
Guard
|
Startup
|
Active
|
Recovery
|
Frame Advantage (block)
|
Cancelable
|
Counterhit Properties
|
| -
|
-
|
Low
|
8f
|
-
|
-
|
+4
|
Yes
|
-
|
Low hitting light normal. Links into 2A and itself on hit.
|
|
cl.C
cl.C
|
| Damage
|
Stun
|
Guard
|
Startup
|
Active
|
Recovery
|
Frame Advantage (block)
|
Cancelable
|
Counterhit Properties
|
| -
|
-
|
High/Low
|
12f
|
-
|
-
|
-5
|
yes
|
Stagger
|
Great combo filler, combos off any light normal if close enough. Moves Hikaru forward, so he's almost always in range for a cl.D after.
|
|
5C
5C
|
| Damage
|
Stun
|
Guard
|
Startup
|
Active
|
Recovery
|
Frame Advantage (block)
|
Cancelable
|
Counterhit Properties
|
| -
|
-
|
High/Low
|
16f
|
-
|
-
|
-10
|
yes
|
Stagger
|
Also good combo filler, will combo off light normals just like cl.C.
|
|
2C
2C
|
| Damage
|
Stun
|
Guard
|
Startup
|
Active
|
Recovery
|
Frame Advantage (block)
|
Cancelable
|
Counterhit Properties
|
| -
|
-
|
High/Low
|
11f
|
-
|
-
|
-4
|
Yes
|
Stagger
|
Great anti-air normal, super jump cancel into an air combo on hit. Throw it out as early as possible. Be careful to avoid using it during ground combos, as it has terrible horizontal range and might get you killed.
|
|
cl.D
cl.D
|
| Damage
|
Stun
|
Guard
|
Startup
|
Active
|
Recovery
|
Frame Advantage (block)
|
Cancelable
|
Counterhit Properties
|
| -
|
-
|
High/Low
|
14f
|
-
|
-
|
-4
|
yes
|
Stagger
|
Useful in combos after cl.C
|
|
5D
5D
|
| Damage
|
Stun
|
Guard
|
Startup
|
Active
|
Recovery
|
Frame Advantage (block)
|
Cancelable
|
Counterhit Properties
|
| -
|
-
|
High/Low
|
15f
|
-
|
-
|
-7
|
No
|
Stagger
|
High angle kick. Pretty good hitbox but not cancelable
|
|
2D
2D
|
| Damage
|
Stun
|
Guard
|
Startup
|
Active
|
Recovery
|
Frame Advantage (block)
|
Cancelable
|
Counterhit Properties
|
| -
|
-
|
Low
|
13f
|
-
|
-
|
-1
|
No
|
Launch
|
|
|
|
j.A
j.A
|
| Damage
|
Stun
|
Guard
|
Startup
|
Active
|
Recovery
|
Frame Advantage (block)
|
Cancelable
|
Counterhit Properties
|
| -
|
-
|
High
|
7f
|
-
|
-
|
-
|
Yes
|
-
|
Fast, high hitting air normal, used mostly in air-to-air situations.
|
|
j.B
j.B
|
| Damage
|
Stun
|
Guard
|
Startup
|
Active
|
Recovery
|
Frame Advantage (block)
|
Cancelable
|
Counterhit Properties
|
| -
|
-
|
High
|
7f
|
-
|
-
|
-
|
Yes
|
-
|
MG stole this move from regular Hikaru who stole it from Kyo and it's just as good for MG as it is for them. Fast, chains into j.C or j.D to make comboing off it easy, and it can cross-up if you space it right.
|
|
j.C
j.C
|
| Damage
|
Stun
|
Guard
|
Startup
|
Active
|
Recovery
|
Frame Advantage (block)
|
Cancelable
|
Counterhit Properties
|
| -
|
-
|
High
|
12f
|
-
|
-
|
-
|
Yes
|
Stagger
|
Not a bad jump-in, beware of long startup though.
|
|
j.D
j.D
|
| Damage
|
Stun
|
Guard
|
Startup
|
Active
|
Recovery
|
Frame Advantage (block)
|
Cancelable
|
Counterhit Properties
|
| -
|
-
|
High
|
-13f
|
-
|
-
|
-
|
Yes
|
Stagger
|
One of MG Hikaru's best normals. Has uses in air-to-air, as a jump-in, for crossing up, pretty much anything. Just like j.C this move has long startup, and comparatively it does not hit as deep.
|
|
Command Moves
Command Moves
6B
Turned Drop Kick
6B
|
| Version
|
Damage
|
Stun
|
Guard
|
Startup
|
Active
|
Recovery
|
Frame Advantage (block)
|
Cancelable
|
Counterhit Properties
|
| Raw
|
-
|
-
|
High
|
23f
|
-
|
-
|
-2
|
Yes
|
-
|
| Version
|
Damage
|
Stun
|
Guard
|
Startup
|
Active
|
Recovery
|
Frame Advantage (block)
|
Cancelable
|
Counterhit Properties
|
| Canceled
|
-
|
-
|
High/Low
|
-
|
-
|
-
|
-
|
Yes
|
-
|
A jumping overhead kick, only actually hits overhead if done raw, otherwise it hits mid. Can cancel into air moves.
|
|
6D
Flash Assault Kick
6D
|
| Damage
|
Stun
|
Guard
|
Startup
|
Active
|
Recovery
|
Frame Advantage (block)
|
Cancelable
|
Counterhit Properties
|
| -
|
-
|
High/low
|
22f
|
-
|
-
|
+0
|
No
|
-
|
A step kick that moves forward, which helps a lot with combos. If you hold down D MG will feint
|
|
Universal Mechanics
Universal Mechanics
Throw
Throw
5/6AC
|
| Damage
|
Stun
|
Guard
|
Startup
|
Active
|
Recovery
|
Frame Advantage (block)
|
Cancelable
|
Counterhit Properties
|
| -
|
-
|
Throw
|
5f
|
-
|
-
|
-
|
No
|
-
|
Ground throw. Due to having a command grab that allows for combos, Mg Hikaru's regular throw loses some of its value. However due the the nature of being a regular throw it does allow for sideswaps and is faster both in startup and input. It will also recover much faster then the command grab on whiff.
|
|
Guard Crush
Guard Crush
6CD
|
| Damage
|
Stun
|
Guard
|
Startup
|
Active
|
Recovery
|
Frame Advantage (block)
|
Cancelable
|
Counterhit Properties
|
| -
|
-
|
Guard Break
|
-
|
-
|
-
|
-
|
No
|
-
|
Guard Crush. Mg Hikaru's is notable as it cancels into a fully charged 214C even from max range, building up absurd amounts of stun in only a few hits. You are guaranteed a stun against any 85 stun or less character with just the guard Crush and the follow-up combo without any additional meter. 90-120 stun characters can be stunned with extra meter with the amount required being varied per character. For both situations the opponent cannot be in block stun when the guard crush connects in order for it to actually build up stun. Bravo having 130 stun cannot be stunned without a reset(Needs testing to see if a specific route can circumvent this)
|
|
Roll
Roll
CD
|
| Damage
|
Stun
|
Guard
|
Startup
|
Active
|
Recovery
|
Frame Advantage (block)
|
Cancelable
|
Counterhit Properties
|
| -
|
-
|
High/Low
|
-
|
-
|
-
|
-
|
No
|
-
|
Roll. Due to not having a non-metered catch all reversal like regular Hikaru, you will find yourself relying on rolling a bit more then other characters as a defensive option
|
|
Tactical Guard
Tactical Guard
CD
|
| Damage
|
Stun
|
Guard
|
Startup
|
Active
|
Recovery
|
Frame Advantage (block)
|
Cancelable
|
Counterhit Properties
|
| -
|
-
|
High/Low
|
-
|
-
|
-
|
-
|
No
|
-
|
|
|
|
Special Moves
Special Moves
41236P
Houzankou
41236P
|
| Version
|
Damage
|
Stun
|
Guard
|
Startup
|
Active
|
Recovery
|
Frame Advantage (block)
|
Cancelable
|
Counterhit Properties
|
| A
|
-
|
-
|
High/Low
|
19f
|
-
|
-
|
-3
|
-
|
Stagger
|
| C
|
-
|
-
|
High/Low
|
25f
|
-
|
-
|
-5
|
-
|
Launch
|
| EX
|
-
|
-
|
High/Low
|
17f
|
-
|
-
|
-11
|
-
|
-
|
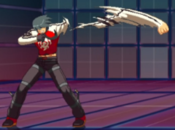
Spinning backfist. A version leaves them standing, C version knocks them away & can lead to combos in the corner. EX version is invincible and will give both good corner carry and wall slam. Because Hikaru gets low to the ground you can use this to low profile some things. If you do the C version and hold the button down MG will do the startup and then stop before the active frames would come out, you can use this feint to setup tic throws or just for mindgames in general. Feinting builds meter so it can be spammed when you stun your opponent to build meter for a combo.
|
|
623P
Bright Star Tripple Attack (Kisei Sanrengeki)
623P
|
| Version
|
Damage
|
Stun
|
Guard
|
Startup
|
Active
|
Recovery
|
Frame Advantage (block)
|
Cancelable
|
Counterhit Properties
|
| A/C
|
-
|
-
|
High/low
|
8f
|
-
|
-
|
-
|
-
|
-
|
| EX
|
-
|
-
|
High/low
|
4f
|
-
|
-
|
-
|
-
|
-
|
No difference between A and C versions. EX version is faster and you can combo into it. All versions launch for a combo and lead to good corner carry.
|
|
j.236K
Blue Sphere Break (Soukyuuha) [Retsu]
j.236K
|
| Version
|
Damage
|
Stun
|
Guard
|
Startup
|
Active
|
Recovery
|
Frame Advantage (block)
|
Cancelable
|
Counterhit Properties
|
| B
|
-
|
-
|
High/Low
|
15f
|
-
|
-
|
-
|
-
|
-
|
| D
|
-
|
-
|
High/Low
|
26f
|
-
|
-
|
-
|
-
|
-
|
| EX
|
-
|
-
|
High/Low
|
17f
|
-
|
-
|
-
|
-
|
-
|
B version is faster, D will stop your aerial momentum, which makes repeatedly doing tk j.214D great for building meter. D version, however, is too slow to combo off anything besides raw 6B grounded hit. B version is fast enough to combo off air normals. EX version stops your momentum like the D version, but has B's startup, hits three times, and juggles.
|
|
214P
Fast Press Slap
214P
|
| Version
|
Damage
|
Stun
|
Guard
|
Startup
|
Active
|
Recovery
|
Frame Advantage (block)
|
Cancelable
|
Counterhit Properties
|
| A
|
-
|
-
|
High
|
22f
|
-
|
-
|
+0
|
-
|
Stagger
|
| C
|
-
|
-
|
High
|
28f
|
-
|
-
|
+3
|
-
|
Ground bounce
|
| [C]
|
-
|
-
|
High
|
38f
|
-
|
-
|
+8
|
-
|
-
|
| EX
|
-
|
-
|
High
|
21f
|
-
|
-
|
+3
|
-
|
Ground bounce
|
Overhead chop. A version will combo from heavy normals and force them into a standing position. C version won't combo naturally from anything, but can be charged to guard crush. Charged C version will also cause a stagger state on hit. EX version is as fast as the A version and causes an OTGable knockdown. All versions do a lot of stun.
|
|
Extra Special Moves
236K
Whirlwind Slice Kick (Shippuu Sokutou Kyaku)
236K
|
| Version
|
Damage
|
Stun
|
Guard
|
Startup
|
Active
|
Recovery
|
Frame Advantage (block)
|
Cancelable
|
Counterhit Properties
|
| B
|
-
|
-
|
High/Low
|
11f
|
-
|
-
|
-13
|
-
|
Wall bounce
|
| D
|
-
|
-
|
High/Low
|
24f
|
-
|
-
|
-9
|
-
|
Stagger (first hit)
Wall bounce (Second hit)
|
Step kick. Both versions wall slam, B version is faster, D version steps forward and can be held to feint. Can be used as a situational anti-air, but mostly used for wall bounce combos. Due to the D version gaining meter even on feint it can be used like C Houzankou to build meter when you stun the opponent
|
|
214K
God Speed Punch (Kami Jinken)
214K
|
| Version
|
Damage
|
Stun
|
Guard
|
Startup
|
Active
|
Recovery
|
Frame Advantage (block)
|
Cancelable
|
Counterhit Properties
|
| B/D
|
-
|
-
|
High/Low
|
26f
|
-
|
-
|
-11
|
-
|
-
|
| [B]/[D]
|
-
|
-
|
High/Low
|
66f
|
-
|
-
|
-1
|
-
|
-
|
Has super armor until you release the punch. If you press both kicks you can cancel the stance and feint. Good for calling out mash, but will lose to lows and throws.
|
|
Ultimate Chaos Moves
Ultimate Chaos Moves
236236P
Burst God Fist (Bakunetsu Shinken)
236236P
|
| Damage
|
Stun
|
Guard
|
Startup
|
Active
|
Recovery
|
Frame Advantage (block)
|
Cancelable
|
Counterhit Properties
|
| -
|
-
|
High/Low
|
-
|
-
|
-
|
-13
|
-
|
-
|
A combination of Hikaru's Quake Crushing Fist (623+P) and High-Grade Knuckle (236+P). The High-Grade Knuckle only happens if the Quake Crushing Fist hits and also has wall slamming properties.
|
|
236236K
Lightning Blue Sphere Break (Inazuma Soukyuuha)
236236K
|
| Damage
|
Stun
|
Guard
|
Startup
|
Active
|
Recovery
|
Frame Advantage (block)
|
Cancelable
|
Counterhit Properties
|
| -
|
-
|
High/Low
|
-
|
-
|
-
|
-12
|
-
|
-
|
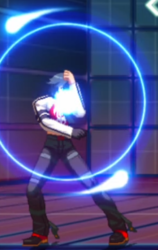
MG Hikaru kicks a wave of Soukyuuha at his target. 9 hits.
|
|
Extra Ultimate Chaos Moves
2141236K
Shin! Meteor Tiger Assault Kick (Shin Ryuusei Koshuu Kyaku)
2141236K
|
| Damage
|
Stun
|
Guard
|
Startup
|
Active
|
Recovery
|
Frame Advantage (block)
|
Cancelable
|
Counterhit Properties
|
| -
|
-
|
Low
|
-
|
-
|
-
|
-14
|
-
|
-
|
Three kicks. The first is a slide that must be blocked low. The second is a roundhouse with air unblockable properties. The final kick only happens if the second successfully hits.
|
|
j.236236K
Electrical Phoenix Thunderstrike Kick (Denou Raida Kyaku)
j.236236K
|
| Damage
|
Stun
|
Guard
|
Startup
|
Active
|
Recovery
|
Frame Advantage (block)
|
Cancelable
|
Counterhit Properties
|
| -
|
-
|
High/Low
|
-
|
-
|
-
|
-
|
-
|
-
|
Divekick that hits 4 times. An easy to use yet effective air combo ender which gives a hard knockdown.
|
|
Destruction Chaos
Destruction Chaos
2363214PP
Congregation Awakening -End of the Great Providence- (Shinto Kakusei -Ooinaru Kago no Shuuen-)
2363214PP
|
| Damage
|
Stun
|
Guard
|
Startup
|
Active
|
Recovery
|
Frame Advantage (block)
|
Cancelable
|
Counterhit Properties
|
| -
|
-
|
-
|
-
|
-
|
-
|
-29
|
-
|
-
|
This move resets combo scaling, meaning it'll always add a lot of damage, but since it's 3 bars opportunities to use it are kind of slim, but if you ever get a stun or something after a long combo and have 3 bars to burn this is a good option to keep in mind.
|
|
Combos
Midscreen
5A > 5B > cl.C > cl.D > 6D > 41236A/C
Basic combo. Using the A version of 41236+P leaves your opponent standing for a reset, C version does more damage/Stun and leads to a soft knockdown. You can also follow up after the C version in the corner. If you're too far for cl.C 5C will still work, but in that case go directly to 6D as getting a 5D will ruin the combo. There doesn't seem to be a spacing where you can get a close C but not close D.
5A > 5B > cl.C > cl.D > 6D > 236B/D
Same as above, only with the 236K extra special move. At some spacings you'll get a wall bounce and can continue the combo
5A > 5B > cl.C > cl.D > 6D > 623AC > see below
Same as the above 2, but uses half a bar to extend. Do the combo below after getting the command grab.
623AC > (iad > jB > jD) or (microdash 5A) > cl.C > sjc > j.B > j.C > j.D > land > j.B > j.C > j.D > (j.236236D) or (j.214B)
Midscreen combo off command throw, might be possible midscreen off non-ex but much harder. Delay the super jump chain as much as you can. It's tough at first but it's not that hard once you learn the timing. If you don't want to learn the rejump you can just cut that out and go straight into super, but you'll miss out on corner carry. You can also avoid the super jump cancel if you immediately jump and catch the opponent with j.B, but that can screw up your height and cause the super to miss.
5A > 5B > cl.C > cl.D > 6D > 41236A > exceed > 41236A > 236236A(1) > chaos shift > 41236A > 236236A(1) > chaos shift > 41236A > 236236A > chaos shift > 5B > cl.C > sjc > j.B > j.C > j.D > land > j.B > j.C > j.D > double jump > j.B > j.C > j.D > j.214B
Midscreen exceed route, you can let the next few hits of the suepr connect if you want, but if you accidentally launch the opponent then it'll screw up the route. Let the last super get all the hits before chaos shifting so you can get the rejump. You can sub the pre-exceed 41236A for a 214A, it does slightly less damage but slightly more stun.
In addition to the above, MG can use the wall bounces off of 236K and 41236AC to extend combos that are close to the corner, they require specific spacings to give enough time to properly follow up.
Corner
5A > 5B > cl.C > 214A > 5A > 5B > 5C > 6B > j.214BD > j.B > j.C > j.D > land > j.B > j.C > j.D > double jump > j.B > j.C > j.D > j.214B
214A > 5A will only work if you're very close, if you're not confident in the spacing you can go straight from cl.C into 6B.
5A > 5B > cl.C > 214A > 5A > 5B > 5C > 6D > 214AC > microdash > 2B > cl.C > sjc > j.B > j.C > j.D > land > j.B > j.C > j.D > double jump > j.B > j.C > j.D > j.214B
This route is better for stun, but does less damage.
5A > 5B > cl.C > 214A > 5A > 5B > 5C > 6D > 41236C > 5B > 5C > 6B > j.214BD > j.A > j.C > double jump > j.B > j.C > j.D > j.214B
This route does less damage than either of the above, but it's better damage if you don't want to do the rejump.
5A > 5B > cl.C > 214A > 5A > 5B > 5C > 6D > 236236P > chaos shift > 5B > cl.C > sjc > j.B > j.C > j.D > land > j.B > j.C > j.D > double jump > j.B > j.C > j.D > j.214B
2 bar combo, doesn't do that much more damage, but useful for when you need the kill.
5A > 5B > cl.C > 214A > 5A > 5B > 5C > 6D > 41236A > exceed > 41236A > 236236A(1) > chaos shift > 41236A > 236236A(1) > chaos shift > 41236A > 236236A > chaos shift > 5B > cl.C > sjc > j.B > j.C > j.D > land > j.B > j.C > j.D > double jump > j.B > j.C > j.D > j.214B
corner exceed, it's basically the same as the midscreen one, but with a 214A extension.
Colors
- Console Versions: You can hold R1 button while selecting a character to get an alternative color.
- Arcade Version: You can hold START button while selecting a character to get an alternative color.
- Hikaru and MG Hikaru can not choose the same color when fighting each other. If the same color is chosen, the player who chose second will be automatically given the next color in the lineup.

