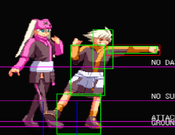
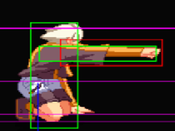
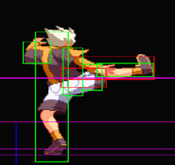
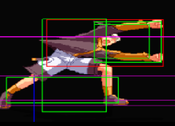
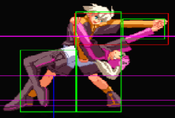
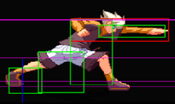
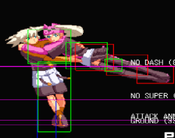
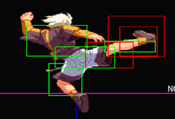
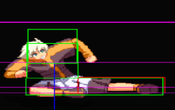
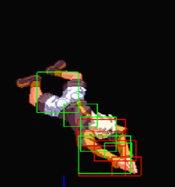
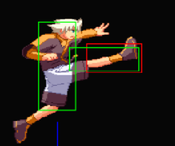
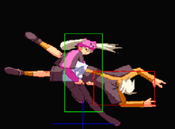
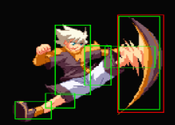
Chaos Code/NSC/Cait & Sith
Story
Cait & Sith
『ケット&シー』
Cait & Sith's father, Pit, got turned into a hat for some reason and so now Cait (Brother) & Sith (Sister) must find the Chaos Code and use it's limitless power to revive their still alive father. Cait also wants revenge on Cerberus for getting Pit cursed and Sith wants to get her collection of boyslove manga autographed by Catherine.
Playstyle
Health: 27000
Stun: 75
Cait & Sith are a puppet character with strong mix-ups and pressure strings thanks to the two being able to act independently. They have a wide variety of practical unblockable setups as well as lots of hard to block high/low mix-ups. Their damage is on the lower side and with notably low health and stun they can't afford to make many mistakes. A lack of long range options and limited defensive tools along with technically demanding setups and combos make them a lot of work, but if you like doing a safejump and then blockstringing into an unblockable that then leads back into the same safejump, this is the character for you.
Mobility (Run vs. Step)
Run: The most common choice for Cait & Sith. Run makes up for their stubby normals and microdashes are extremely useful in combos and for stagger pressure. Also their run animation is adorable.
Step: Cait & Sith don't have a particularly good step. They can still step cancel moves which can lead to strong tick throws, but the worse mobility really hurts.
Extra Move Selection
Rising dragon attack is Cait & Sith's only chance to have a meterless anti-air. On counterhit it can give combos and it has use in 236236p combos. It's not very exciting, but it's a very solid tool. Only the C version is invulnerable, and only through its startup.
If you do want a meterless reversal you can pick either extra move. trick through isn't fully invun but you can still use it to get out of pressure since it's so slow nothing will actually meaty it. It'll lose to grabs though. rising dragon attack is more reliable but you can't really get a combo off of it unless you spend meter or get a counter hit while the opponent is cornered.
Daddy's surprise meal is the better mix-up option, and while mixing up opponents isn't something Cait & Sith struggle with, they usually have to go through a bunch of set-up first. Surprise meal can be done whenever, including when sith isn't around, and it does give followups in the corner (although you can get better followups off my own style)
My own style is a reversal super, but also it's Cait & Sith's best option for damage off a super. The different followups ensure that you can get a good combo no matter what position you're in.
Recommended Sets
Cait & Sith's extra moves are all useful, each one provides something that they don't normally have. Any combination of 2 is probably fine, these sets are just a suggestion.
Trick through & My own style
This set takes trick through mainly as a reversal to get out of frame traps and my own style as extra insurance and added damage. Trick through is very easy for an opponent to play around, but if they're playing around it they're not doing all the frame traps they could be so just the threat of it is good. My own style is a lot safer as a reversal if you have the meter, but also it leads to good damage in pretty much any situation. The main weakness of this set is that it forces you to use 236236p or something like 5A as anti-airs, and while the anti-air super is reliable, it leaves Cait stuck without Sith which can be a huge problem.
Rising Dragon attack & Trick through
This set gives Cait & Sith the defensive tools that they otherwise don't really have. Rising dragon attack works pretty well as an anti-air and as a reversal if the opponent does something obvious. Trick through is a serviceable reversal and since it's a grab rather than a hit it has to be baited more directly. The issue is that it doesn't really give them any kind of way to extend damage beyond slightly stronger 236236p combos thanks to Rising Dragon Attack, but those leave Cait without Sith for a while which can make it hard to continue pressure or open opponents up.
Rising Dragon attack & My own style
More or less the same as the above, but it trades trick through for My own style which is a more reliable reversal, but costs a full bar. My own style is also a good way to increase damage, although own style combos don't really synergize with RDA, so you can end up spending entire matches never really getting use out of one of your extra moves.
My own style & Daddy's surprise meal
This set kind of gives up on getting a good anti-air and instead focuses on improving Cait & Sith's offense. The two supers don't really synergize in the sense that you probably wont use both in the same combo, but instead they cover 2 very different situations which ends up giving Cait & Sith a more well rounded offense.
Move List
Click on a header to expand that section of the movelist
Normal Moves
5A
5A
|
|---|
2A
2A
|
|---|
cl.B
cl.B
|
|---|
5B
5B
|
|---|
2B
2B
|
|---|
cl.C (together)
cl.C (together)
|
|---|
5C (together)
5C (together) Caption. Caption.
|
|---|
cl.C (apart)
cl.C (apart)
|
|---|
5C (apart)
5C (apart)
|
|---|
2C (together)
2C (together)
|
|---|
2C (apart)
2C (apart)
|
|---|
cl.D (together)
cl.D (together)
|
|---|
5D (together)
5D (together)
|
|---|
5D (apart)
5D (apart)
|
|---|
2D
2D
|
|---|
j.A
j.A
|
|---|
j.B (together)
j.B (together)
|
|---|
j.B (apart)
j.B (apart)
|
|---|
j.C (together)
j.C (together)
|
|---|
j.C (apart)
j.C (apart)
|
|---|
j.D (together)
j.D (together)
|
|---|
j.D (apart)
j.D (apart)
|
|---|
Command Moves
3C
Spear Punch
3C |
|---|
Air Throw (Together)
Air Throw (Together)
5/6AC |
|---|
Air Throw (Apart)
Air Throw (Apart)
5/6AC |
|---|
Universal Mechanics
Normal Throw (Together)
Throw (Together)
5/6AC |
|---|
Normal Throw (Apart)
Throw (Apart)
5/6AC |
|---|
Guard Break
Guard Crush
6CD |
|---|
Parry
Tactical Guard
CD |
|---|
Roll
Roll
AB |
|---|
Special Moves
22K (together)
Suicide Little Sister Set
22K (together) |
|---|
22K (apart)
Suicide Little Sister Anti-Air
22K (while sith is set) |
|---|
236K
Suicide Little Sister Atack
236K |
|---|
214P
Combination Brother and Sister Crush
214P |
|---|
22P
Forgive Me, Little Sister Decoy Attack
22P |
|---|
214K
Great Overhead Nova
214K (air okay) |
|---|
236P
Miracle Super Tackle
236P |
|---|
Extra Special Moves
623P
Rising Dragon Attack
623P |
|---|
632146K
Our Graceful Trick Through
632146K |
|---|
Ultimate Chaos Moves
236236P
Parent and Daughter Special Attack - Swooping Daddy Balloon
236236P |
|---|
2363214P
Brother and Sister Special Attack - Double Spin Attack Deluxe
2363214P |
|---|
Extra Ultimate Chaos Moves
6321463214K
Daddy's Surprise Meal
6321463214K |
|---|
2363214K
My Own Style Special Attack... Dynamic Special Attack
2363214K |
|---|
Strategy
Neutral
The Main goal in Neutral is to force your opponent to block something. From there you can use sith to extend pressure and do mix-ups into oki. 22P is a good tool for taking up space and if the opponent blocks it you'll have plenty of time to run in with Cait and do something, the problem is it doesn't go very far horizontally on it's own, so you really want to set sith up first with 22K. The spacing you want her at is going to vary a bit depending on the matchup, but generally you want her about halfway in between you and the opponent if you're keeping them out or being kept out, and close behind them if you're playing near. By keeping sith in between you and the opponent she can move either direction to stop an approach or start locking down. By keeping her behind you keep her a bit safe. Wherever she is it's important you use her fairly quickly. If you let sith wait for too long she'll fall asleep and be vulnerable to hits and have more startup on sister moves. Aside from using 22P to cover an approach you can also use Sith to cover the recovery of one of Cait's moves. This lets you take some of the risk off of neutral plays. What move you want varies depending on spacing but 236B/D are both good for extending blockstun since they're relatively fast, and 22P or 22K can be good to catch evasion as well as 22P having the most blockstun out of any of Sith's moves.
Cait & Sith don't really have great anti-air options. 623P is a pretty standard DP which means it works fine, but the angle is such that it doesn't deal with opponents directly on top very well. Sisterless j.B is a pretty good air-to-air but it requires sith to be gone with isn't always the case. You can get it sometimes when you jump when she's following but there's not a consistent way to set this up. Either close C can also work as anti-air although neither is especially reliable. Parry is of course always an option, but it's obviously very risky and not always available. 236236P can be an okay option if you have spare meter, but it has no blockstun so it only really works if you know they'll swing, and it makes you lose access to sith for a decent amount of time. Often times running or rolling under jump-ins is a good option since it lets you reset to neutral.
When an opponent is trying to get in and options that you don't want to try and contest, IAD back immediate together j.D is a fairly safe option. It rarely leads to anything particularly great, but it typically lets you see what kind of approach your opponent is taking. Together j.B also works as a good air footsies tool, it's hitbox is concentrated below but not as far low as j.A so it can still work for air-to-airs, that plus it's speed and it's cross-up hitbox let's it beat out both lower air buttons and run under attempts. Sisterless, j.D can still work okay, the hitbox isn't' as good in general but it hits higher up vertically which can beat some things together j.D can't. There's no real sisterless option that's as good as together j.B, you'll have to choose between the air to air power of sisterless j.B or the jump-in power of j.A, both of those options do still have very long active frames though. The biggest issue that Cait and Sith have in air footsies situations isn't their lack of options really, it's that at any given time they only have half available and sometimes it's the half you weren't expecting due to Sith desynching.
With meter, 236AC becomes available and is a really strong tool. It's basically hikaru's master knuckle but with a lot of pushback on block. It has a great hitbox, can stuff air approaches, wall bounces on counterhit, goes very far forward, is safe on block even without sith(mostly, it's a safe by spacing situation so something like kudlak beam super can punish), and if it goes under Cait is typically rolled so far away that an opponent can't punish unless they were specifically baiting it, and even on normal hit it wall splats which can give a combo if sith is set close enough. This is the move that's most worth spending meter on if you're gonna spend meter on a move in neutral. You have to be careful of course, it's not an unstoppable move, but it is one of cait and sith's best. 236BD is the other EX move that has good uses in neutral, but sith is hitable during the entire animation so if you're fighting a character with projectiles or any other way to hit sith out of it fairly easily it's usually not worth spending the meter just to get her stuffed. EX overhead has some uses too since it's got fastish recovery and a pretty good hitbox with good reward on counterhit, but it's a bit slow to really be useful like that.
Pressure
If Sith is set, you can do basically anything into a Sith move and be plus. 22A/C will give the most blockstun (and 22A will pull the opponent into Cait), although it has very long startup. 22B/D is very fast, but doesn't have a ton of blockstun and dizzies Sith for a long time. 236B is fast and returns Sith quickly, although the blockstun isn't as high as 22A/C.
With Sith not set your options for pressure resets are smaller. At far ranges 236B will be plus, although you'll usually be a bit too far to do much. 236D is slow but Cait will recover before Sith actually hits usually, which means you get a lot of advantage to work with. 22A/C is also slow, but has the most blockstun of any meterless cancel. 236BD is both fast enough to beat mashing if you do it from a heavy, and very plus on block. And finally 22B/D doesn't actually do anything for you in the moment, but it gets Sith set for later pressure/mix-up, and can be good against overly patient opponents or ones who are conditioned to block. For all of these, Cait's animation is the same, your opponent will have to react to Sith if they are reacting. Use 236B to frame trap and then use one of your other options if the opponent has committed to blocking, use 236BD to trade in meter for both frame advantage and the setup for later pressure/mix-up.
When going for throws keep in mind that if you do a throw while together you'll set Sith up (unless she doesn't set, which happens sometimes fairly randomly), so while you don't get a combo off throw you still get a pretty good oki situation. If you get a throw while Sith is set you can call her to continue the combo (as 22A at the right timing will keep the opponent standing, or a 236B late into the throw will give Cait time to juggle).
Matchups
Click on a header to expand that Matchup section
vs Rui
Slide punishes
All versions of slide can be punished at point blank with A or B normals (and the C version can be punished by basically anything). If A slide is done from about match start + half a backdash away it's safe.
If the C version is done from about match start + 1 backdash away it's still punishable, but you need to use a longer reaching normal, 5C (together) and 2C (both versions) are the most consistent ways to punish it at this range. If the C version is done from anything beyond that spacing it's safe.
For either strength, you can react with 63214B (trick through) and grab rui out of the slide thanks to the invun. Because Cait takes a step forward this punishes even on ranges that would whiff. The problem with this, beyond requiring a somewhat tight reaction, is that you can't distinguish between A or C slide when they start-up and you're punishable if you whiff the command grab. So you either need to be in range for A slide, or be confident a C slide is coming.
EX slide's max range is at about match start + 1 backdash. Here it's safe to everything but EX tackle. If it's done closer either 2 hits will connect, followed by a third that will frame trap (but is itself punishable with A or B normals) or 1 hit will connect. If only 1 hit connects most normals can punish.
DP punishes
B DP can be punished with pretty much anything you want and depending on your timing you can hit Rui out of the air or let her touch the ground. The initial hits of the DP are really high up, so you can do a meaty 2B or 3C and low profile it, then punish with a clean counter hit.
D DP will blockstring you if you standblock the first hit, but if you crouch you can let the later hits whiff and have Rui side swap or punish early and get a counter hit. Moves that'll work for a counter hit here include DP(623A or C) which gives an OTG, A or EX tackle (236A or AC) which both will wallbounce. You can also do 22B while together to setup sith, and then punish Rui after.
EX DP is basically the same as the D version, but the hits will never blockstring and the later hits are harder to counter hit. The most consistent way to get a counter hit is to buffer an A DP (623A) while blocking. Alternatively you can punish Rui out of the air or set sith and then punish with cl.B. If you want to punish Rui out of the air, the easiest way to get the right height is to buffer a cl.B out of blockstun, letting it whiff as a framekill, and then buffer a second cl.B, this one actually connecting, and super jump cancel off of that. If you want to punish by setting sith, 22B puts sith in a spot where she'll be on top of rui after you start your punish, so 22D will make getting things like rekka > 236B more stable.
Rekkas
A rekkas are usually punishable with a far C (together) or a 2D at worst. However on a far C punish you'll usually be too far out to get rekkas to combo, so go into EX overhead if possible. There's no real answer to frame traps, but if you do go for a DP, avoid A DP (623A) as that usually trades in Rui's favor. For the final A rekka, the only real consistent punish outside the corner is EX tackle (236AC)
for C rekkas, the third rekka wont blockstring, you can DP and get a counter hit with either version. Otherwise you can block and punish with basically anything. Do watch out as it is an overhead. Rui doesn't have a low for this situation, so you can just always block high for the third rekka.
for EX rekka, it sometimes doesn't all combo and you can slide or EX tackle between hits and get a counter hit. If it does all counterhit it pushes out far enough that only tackles will punish.
Rising Orbit
If Rui cancels into Rising Orbit (Demon Flip) during pressure, you can meet her in the air and do an air normal or air throw, this will lose to rui doing the C followup (air throw) however. If you know she's doing the heavy version you can DP her with 623A and it should beat all options, if your reaction is late though you might whiff DP and die. You can punish the light version with 623C, but you don't get a counter hit so the reward isn't as high. Against both you can do Swooping Daddy Balloon (236236P) to anti-air if she's close enough. This is probably the safest option, but it does cost a bar.
Super Punishes
Fighting Gear special (DP super) is kind of weird, it looks like it hits twice, but the second hit is really high up and you can jab and get a counter hit after blocking the first hit. If you buffer EX tackle (236AC) or A DP (623A) out of blockstun you can get a Counterhit punish if you block it point blank, from further out though jab is really the only thing that'll counter hit. If the super whiffs it's harder to punish as you have to worry about running into the active frames, but there is a fair bit of landing recovery so you should be able to run up and punch her as long as you're not full screen. If the super connects from far enough away, it'll do the full animation, but Cait and Sith will fall out and can almost always punish.
Rainbow Drop Combination (Divekick super) does hit overhead, but the startup is long enough that you should be able to react. The spacing Rui lands at can be hard to guess at superflash, and she ducks really low on recovery which can cause some things to whiff. The most consistent punishes are either version of 2C.
vs Bravo
EX lariat punishes
EX lariat is safe, so you need to make it whiff to actually punish. The most straight forward way is to backdash it, which can put Cait in an awkward position. If you were directly on top of bravo when you backdashed you'll be too close to just slide and get a CH, you'll need to time the slide to hit just before the EX lariat finishes. If you're too early you'll trade (not in your favor) or just lose straight up. If you're too late you can still tag the recovery, but it'll be a normal hit so you wont get any real damage. 3C is a better option if you're not confident in the CH slide timing, as it'll launch on normal hit. If Sith is with you then 5D is another option from this range, but it has a pretty strict timing to get the CH just like slide. From just a few steps back slide gets a lot better, since the later frames of slide don't have Cait's hurtbox quite so extended you can dodge bravo's plates and CH pretty consistently. Any further back than this and you'll want to walk up to the CH slide range. EX lariat lasts for a really long time so it shouldn't be too hard to make it.
Some ways to deal with Bravos mashing this on wake up are to backdash and quickly input 22A/C or 236B/D. This will let you hold onto some pressure while taking you out of lariat range. Also, if you meaty with 2D from far enough away you can trade with lariat's early vulnerable frames (which tend to not CH you for whatever reason) or beat it outright. Additionally keep in mind that if you meaty a tech roll your opponent cannot reversal, so if a Bravo ground techs after air throw you can meaty and either punish a reversal attempt or confirm a blocked hit into a guard break setup. If Bravo isn't teching your soft knockdowns it gives you more time to setup.
If you end up blocking EX lariat it pushes you out to a kinda awkward spacing. Bravo is plus here and is in range to 5A. 2D will go under a 5A and also beat a second lariat or any other normal save for a 2A which will whiff if you don't stick a button into it. You can up-back or backdash out of the 5A, although lookout for EX sausage if you decide to jump.
EX sausage
Depending on the spacing you can sometimes punish this with A or B normals, but other than that you can't really challenge this. Slide will go under and can CH but Sausage is too fast to realistically react to. Trades with Sausage are basically never going to be in your favor since it has a huge CH wall bounce on it.
Explosive Dumpling
Bravo's 22K extra move is a Grab with invun frames that can be annoying to deal with. The thing to keep in mind is that the invun is mainly lower body and while there are some full invun frames they don't come until after frame 1, so if you meaty with a jump-in you should be safe. As for punishing it on whiff, it's best to just try and hit it with a jumping normal by IADing or something. Going for a grounded punish can get scooped by another mashed out. The heavy version is the one with more invun, but the light version recovers faster and it's hard to tell the difference.
Combos
Cait and Sith are fairly low damage, but chaos code is a high damage game so its still very easy to close out rounds quickly. They don't build stun crazy fast but since their combos are long and damage low you tend to have lots of oppertunities to stun, especially if you opt to end combos early for oki/reset potential
Click on a header to expand that combo section
Beginner Combos
These routes are repeated in their proper sections below, but highlighted here for newer players. These are the basic routes, there may be more optimal ones but as a new player familiarize yourself with these. They are listed in the order that it's recommended you learn them:
5A > 5B > cl.C > 214A > 214A > 214A
Meterless confirm. The knockdown from the Rekka is good enough to get some setups from 22B/D or 236BD. If you want to cash out by canceling this into super, do it on the second 214A, before the opponent is knockded down, for better scaling.
5A > 5B > cl.C > 236A > 2363214A
2 bar super cancel. Cait and Sith's exceed combos aren't very strong, so when you have 3 bars you're usually better off spending 2 of them like this and maintaining your last one for EX moves or to build up another super cancel.
5A > 5B > cl.C > 214BD(together) > [9] > j.A > j.C > j.D > double jump > j.A > j.C > j.D > air throw/214BD
EX confirm that works anywhere on screen (as long as sith is with you). There's actually not a lot of time to hit the j.A after the EX, but if you hold down 9A it should buffer. 214BD does more damage as ender. It also gives a hard knockdown instead of a soft one. In the corner the soft knockdown is sometimes better, but midscreen the positioning is different as well and 214BD is usually preferable.
5A > 5B > cl.C > 214AC > 2A > 2C > sjc > j.A > j.C > j.D > air throw
EX confirm for when near corner. Teleports Sith to Cait so it's good for when she's in an awkward position.
(sith set) > 5A > 5B > cl.C > 214A > 236B > 5A > cl.C > sjc > j.A > delay j.C > delay j.D > land > rejump j.A > j.C > j.D > double jump > j.A > j.C > j.D > air throw
Corner extension for when sith is set. You'll do this a lot when you get a hit right after an air throw, which is pretty common since IAD j.A after air throw will beat reversals if opponents tech roll. The rejump here works off of a lot of things, and there's similar rejumps for when together as well, but this is probably the easiest starter for them. The timing for the 236B changes slightly depending on Sith's position, but what you want is for it to hit at the end of the 214A animation. If you find them too hard you can do j.214BD as an ender without sith. The trick is to watch your opponent's height, you want them as low as possible so j.A can hit as soon as possible. You can control this via delaying the air chains and depending on how early you catch your opponent after the 236B.
With Sith Midscreen
5A > 5B > cl.C > 214A > 214A > 214A
Basic confirm into rekka, afterwards you can use 22B/D to put sith in position or use 236BD to meaty and put sith in position at the same time while leaving cait free to do whatever he wants, like bait a DP.
5A > 5B > cl.C > (236A) > 2363214A
Real basic confirm into ranbu. Good for midscreen damage and corner carry if you aren't confident in the longer combos. Use the tackle for a super cancel if you want to dump an extra bar for some extra damage
5A > 5B > cl.C > 214AC > otg 2A > 2C > sjc > j.A > j.B > j.C > land > j.A > j.C > j.D > double jump > j.A > j.C > j.D > j.A+C
Confirm into ex rekka, you only get the otg and rejump if you were already kind of close to the corner. If you want to dump some extra meter on this you can land and super after either the first air series or after the second instead of double jumping.
5A > 5B > cl.C > 214BD > [9] > j.A > j.C > j.D > double jump > j.A > j.C > j.D > j.A+C
Basic half bar midscreen combo, if you want you can a more plus knockdown and bit more damage by ending in an air 214BD. Note that this combo only works if Sith is with Cait, otherwise the properties of 214BD change
5A > 5B > cl.C > 214BD > [9] > j.A > j.B > j.C > land > 236236A > 5A > cl.C > sjc > j.A > j.B > j.D > super hits > possible otg
In case you want to spend some extra meter. You need to delay the air normals a little bit to give C&S enough time to land without the opponent teching out. The combo you do after 236236A is highly dependent on how close you are to the corner, the further you are the less stable it becomes, not really recommended if you're far away but you can go for it if you're confident.
With Sith Corner
All midscreen combos still work in the corner
2A > 2B > 2C > 236D > microdash > otg 2A > cl.C > sjc > j.A > j.B > j.C > land > j.A > j.C > j.D > double jump > j.A > j.C > j.D > j.A+C
Corner stand confirm BnB
2A > 2B > 2C > 214B > otg 2A > cl.C > sjc > j.A > j.B > j.C > land > j.A > j.C > j.D > double jump > j.A > j.C > j.D > j.A+C
Variation of the above for crouching opponents
2A > 2B > cl.C > sjc > j.214B > otg 2A > cl.C > sjc > j.A > j.B > j.C > land > j.A > j.C > j.D > double jump > j.A > j.C > j.D > j.A+C
Another variation, this one doesn't require stance confirming, but it way harder.
2A > 2B > 2C > 236BD > microdash > otg 2A > cl.C > sjc > j.A > j.C > j.D > land > j.A > j.C > j.D > j.214D > 22D > Land > 5A > cl.C > sjc > j.A > j.C > j.D > land > j.A > j.C > j.D > double jump > j.A > j.C > j.D > j.214BD
Metered combo, if you microdash with the right timing the game will forget that 236BD is an ex move and make it build you some meter back. Even if you don't get that you should build up enough meter for the ex overhead ender if you do the full rejump combo
2A > 2B > 2C > 236BD > microdash > 5A (restand) > 5B > 5C > 214A > 236B > 2A > cl.C > sjc > j.A > j.C > j.D > land > j.A > j.C > j.D > double jump > j.A > j.C > j.D > j.A+C
Alternative to the above that uses a restand glitch. Timing on that 5A is tight, you might find it easier to do 5A > 5B (restand) > 2C > 214A instead with each of the normals being done as fast as possible (don't forget chaos code has an infinite buffer on normals as long as you hold the button down), but that will only work when very close.
Sith Set
5A > 5B > cl.C > 214A > 236B > 5A > cl.C > sjc > j.A > j.C > j.D > land > j.A > j.C > j.D > double jump > j.A > j.C > j.D > j.A+C
236b into rejump, microdash before the 5A pickup outside of the corner.
5A > 5B > cl.C > 214A > 22A > iad j.C > j.D > 5A > cl.C > 5D > j.214D > 2A > cl.C > sjc > j.A > j.C > j.D > land > j.A > j.C > j.D > double jump > j.A > j.C > j.D > j.A+C
You can omit the iad and just run up and do 5A if you want.
2A > 2B > cl.C > 5D > j.214D > otg 2A > cl.C > sjc > j.A > j.C > j.D > land > j.A > j.C > j.D > j.214D > 22D > Land > 5A > cl.C > sjc > j.A > j.C > j.D > land > j.A > j.C > j.D > double jump > j.A > j.C > j.D > j.214BD
pretty easy stand confirm, replace 5D > j.214d with just 214B to make it work on crouching. Corner only
2A > 2B > cl.C > 5D > j.214D > otg 2A > cl.C > sjc > j.A > j.C > j.D (input as 236D) > j.214D > 236D hits > land > otg 2A > cl.C > sjc > j.A > j.C > j.D > land > j.A > j.C > j.D > double jump > j.A > j.C > j.D > j.A+C
Variation of the above that uses 236D instead of 22D for the air combo extension. By doing this you free up sith allowing you to end the combo with an airthrow.
Rising j.A > 236B > falling j.C > cl.C > sjc > j.A > j.C > j.D > land > j.A > j.C > j.D > double jump > j.A > j.C > j.D > j.A+B
Combo off instant overhead. Only works against Bravo, Kudlak, and Cerb (but only during specific frames of his crouching animation), however if timed meaty rising j.A will hit everyone except C&S and Kagari. Corner only.
With My Own Style
the neutral & down followups can be otg'd in the corner and lead to normal corner OTG routes
2363214B > [8] > microdash > 5A > cl.B > sjc > j.A > j.B > j.C > land > j.A > j.C > j.D > double jump > j.A > j.C > j.D > j.A+C
Will carry corner to corner.
2A > 2B > 2C > 236BD > microdash > 5A (restand) > 5B > cl.C > 2363214B > 22A (at around hit 4) > [6] > iad j.C > j.D > 2A > 2B > 2C > 236D > otg 2A > cl.C > sjc > j.A > j.C > j.D > land > j.A > j.C > j.D > double jump > j.A > j.C > j.D > j.A+C
Combo into guard break followup, does good damage. You don't need the restand if you have sith already setup. Do a 236A before the super to unscale it and do even more damage for an extra bar, or do a 236BD instead of 236D in order to loop and look really cool.
236A > exceed > 2A > 2B > 2C > 236BD > microdash > 5A (restand) > 5B > 5C > 236A > 2363214B > 22A (at around hit 4) > [6] > iad j.C > j.D > 2A > 2B > 2C > 236BD > microdash > 5A (restand) > 5B > 5C > 236A > 2363214B > 22A (at around hit 4) > [6] > iad j.C > j.D > 2A > 2B > 2C > 236D > otg 2A > cl.C > sjc > j.A > j.C > j.D > land > j.A > j.C > j.D > double jump > j.A > j.C > j.D > j.A+C
Exceed combo using restands and guard breaks.
236A > exceed > 236AC > 2363214B > [5] > 236AC > 2363214B > [2] > 236AC > 2363214A
Much simpler exceed not using restands or guard breaks
With Rising Dragon Attack
5A > 5B > cl.C > 214AC > otg 2A > cl.C > sjc > j.A > j.C > j.D > Land > 236236A > 623C > super hits > otg 2A > cl.C > sjc > j.A > j.C > j.D > Land > j.A > j.C > j.D > double jump > j.A > j.C > j.D > j.214BD
Rising dragon attack is the best move to use for combo filler with 236236A, it's also an easier combo. This will work midscreen or corner, but you might not get the otg pickup if you're too far from the corner.
2A > 2B > 2C > 236AC > microdash > 5A > 5B > cl.C > 623C > 22D > 5A > cl.C > sjc > j.A > j.C > j.D > land > j.A > j.C > j.D > double jump > j.A > j.C > j.D > j.214BD
Corner combo using Rising dragon attack. If sith is already set you can just ignore the first few hits. If you use 236AC it wont matter if you get the restand or not, although ideally you want it. This route does higher damage than other routes with sith set, but it can't lead to an airthrow knockdown which means your oki options are somewhat limited.
2A > 2B > 2C > 236AC > microdash > 5A > 5B > cl.C > 5D > j.214D > otg 2A > cl.C > sjc > j.A > j.C > j.D > land > 623A > 22D > Land > 5A > cl.C > sjc > j.A > j.C > j.D > land > j.A > j.C > j.D > double jump > j.A > j.C > j.D > j.214BD
This is a harder and longer version of the above, it requires getting the restand off 236AC and doesn't actually do much more damage. But it nets around 6 extra stun which is nice.
Unblockable setups
Off of a rekka knockdown you should have enough time to set sith with 22b and still meaty with 2C. Input the meaty as 22C and hit 6CD, Sith's spin will keep the opponent locked down and they'll eat the guard break. Only works in the corner. Same setup works off of a throw only you don't need to set sith since the throw animation will set her for you. If the opponent rolls out of this they'll get caught by 22C and pulled in (22C should push out but because the roll swaps sides out becomes in) and you can combo.
Alternatively you can input 22A > 6A+C instead of 2C. This will give 2A > cl.C on block which will still meaty into sith for the unblockable, but will back throw if the opponent rolls through Cait. If sith is set far enough back from the opponent the 22A will meaty them out of a wake up parry. If they block coming out of the parry Cait will be at advantage and can pressure, if they try to attack after the parry they'll get caught by 22A and Cait will be able to combo. The punish on roll is smaller than the above setup, and with sith positioned right similar parry baits can be accomplished, but when input correctly the throw bait is totally automatic and maintains the corner while spending no resources.
After a successful together airthrow in the corner, meatying with an immediate IAD j.A will cover tech roll. This meaty cannot be reversaled as you cannot reversal after a tech roll in chaos code, if they try to buffer anything they'll just get hit. Because of this a sequence like j.A > j.D > 22A > cl.C > 6C+D is completely inescapable once the opponent has tech rolled (with the exception of Kudlak who can guard cancel out if he has install). If the opponent doesn't tech roll you can recognize the j.A whiff and setup something else instead.
Midscreen you'll need to use 22A to vacuum the opponent into your guard break. Do a meaty 2A and chain into 2C by inputing 2A > 5 > 2A+C, this will give you 2A>2C on block but call sith with 22A. Then hit 6CD for the guard break like usual.
If sith is set you can blockstring into the 2363214K extra super, then call sith with 22A before the final hit and hold 6 to get the unblockable followup, it's not too difficult to time although you want to make sure you call sith early enough that the 22A doesn't end up hitting after the guard break. This is easiest in the corner either after a rekka/EX overhead knockdown into a 22B set, a throw, an air throw, or after a blocked 236BD. It's also possible midscreen although sith's positioning will be much more strict and there aren't very good setups.
In training mode you'd have to record the setup then try to get out of it to test, but once you get it right it becomes easy to eyeball it.
Hiding Inputs
When Sith is set Cait doesn't have any animation for 236K, 22K, or 22P. In theory this lets Sith attack without putting Cait at risk, but because all inputs are interpreted by both characters at once it's not really possible to have Sith attack while Cait does nothing. It's also a problem because Cait's attacks can telegraph Sith's in situations where she's off screen. The most obvious way to hide inputs is to give sith commands while Cait is in the middle of an animation he can't cancel. Something to keep in mind is that the buffer for special moves in chaos code is gigantic, so doing things like using a roll to hide the input can work, but it's very easy to wind up coming out of a roll that's switched sides with an opponent and get a 214K because the game held on to a 236K input. Backdash is really good for hiding inputs but the timing for it can be hard, especially for 22P/K since you have so little time to input the move.
For reference, the input priority for normals and system mechanics is Tactical Guard > Throw > Roll > Exceed > C > D* > A > B (*While A+D gives D on the ground and in the air, A+B+D gives roll on the ground and A when in the air.)
But, for Sith's set specials it's 236B > 236D > 22K > 22A > 22C
This means an input of 236BD gives Cait a D normal but Sith 236B.
Also of note, Sith's buffer for special moves is smaller than Cait's. You can see this by inputting 236 and then delaying for a bit and pressing A+B together. If you delay long enough Cait will do a shoulder tackle while sith does nothing. While that specific example is not useful, Cait and Sith do have an overlapping input of 236K and 2363214K. It's very useful to be able to keep sith set during 2363214K because that allows her to keep opponents locked down and let Cait go for the unblockable followup.
Character Specific Bugs
Lost inputs
It's unfortunately very common for the game to just eat inputs with Cait & Sith. In particular Hitstop seems to cause inputs to drop, but if you're consistent with timing it doesn't screw up combos much.
Desynch
Sometimes even though Sith is together with Cait, she wont move with him correctly and you'll get the sisterless versions of moves (mostly Sith wont jump with Cait and thus Cait wont get together air moves). This really only happens when Sith starts running back to Cait after performing a move or being hit and seems to be related to not tracking him properly as he moves.
False Set
It's also possible for Sith to just decide not to act when Cait asks her to, he'll make the pointing animation but Sith will just not do anything. It appears to happen when Cait tries to set Sith on the same frame an opponent does a special of their own but the exact cause is unknown. It could maybe be useful as a feint if it was consistent but as of now there's no known way to force this bug.
Sister install
It's possible to get Sith both set and attached to Cait. This Sith install glitch is super rare but probably extremely useful if you're reading this and know how to make it happen on command please update this section.
Colors
- Console Versions: You can hold R1 button while selecting a character to get an alternative color.
- Arcade Version: You can hold START button while selecting a character to get an alternative color.

