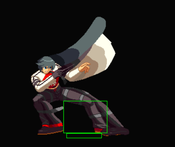
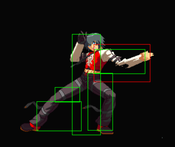
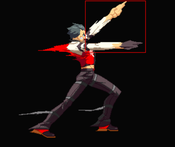
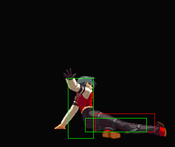
Story
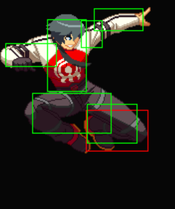
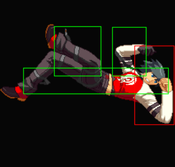
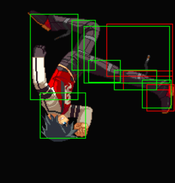
Hikaru Otagi
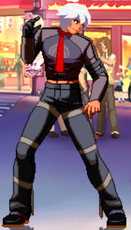
『ヒカル』
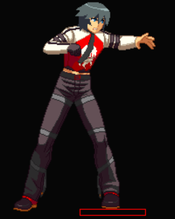
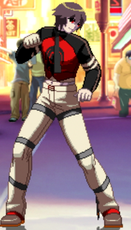
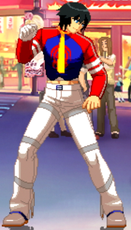
A hyperactive Otaku with a strong sense of justice. He's given the mission of retrieving the Chaos Code for the Earth-Union military who want to use it's unlimited power for something villainous. Unbeknownst to Hikaru, a shadowy figure is hot on his trail but it's fine cause the shadowy figure is just lupinus and all she wants is to ask him out.
Playstyle
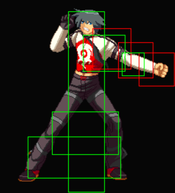
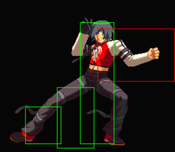
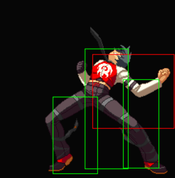
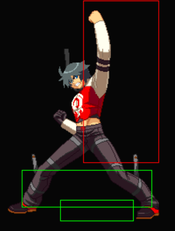
Health : 30 0000 Stun : 100 Full hitboxes
Hikaru has a typical shoto style moveset, but his focus isn't on the normal space control shoto playstyle. Instead he wants to get in and apply pressure. His damage is very high with a proper conversion and he has a decent set of tools to fish for counter-hits when in neutral. Hikaru is a great character for anyone who wants to land a single counterhit and win the round off of it.
Mobility (Run vs Step)
Run: Running with Hikaru is a good choice. You're often in situations where you need to chase opponents down, either to extend a combo, apply pressure, or just to get in.
Step: Step canceling for surprise tic throws can be pretty scary for Hikaru since he can combo off his normal grab. The faster meter gain is also very helpful since EX knuckle is such a powerful tool.
Specials
- ’’’Shadow Tornado Fang 214A/C (you can press Punch or Kick as an additional input for a follow up):’’’
Shadow Tornado Fang is useful for combos in the corner and can be good for some mix-up stuff since it's evasive.
- ’’’Quake Crushing Fist 623A/C:’’’
Quake Crushing Fist can give easy confirms and can be used for pressure since the heavy version is plus.
Supers
- ’’’Splitting Break Touch Of Curse 214214 A/C:’’’
Splitting Break Touch of Curse Can lead to high damage if you get a hit after it connects, but because of the way scaling interacts with the damage buff, it doesn't actually end up being the high damage option and is probably hikaru's least useful special move.
- ’’’Swoop Charging Kick 236236 B/D (in air):’’’
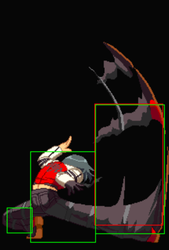
Swoop Charging kick is very useful since it can be comboed after hitting, it also has a huge hitbox and sends you straight down, so it can be used defensively, though it really isn’t advised.
Recommended Sets
Hikaru works fine mostly on his own, both of his extra special moves compliment him in similar ways but Touch of Curse is not as useful as Swoop Charging kick.
Shadow Tornado Fang & Swoop Charging kick
This is the most common set you'll see hikaru's use. Shadow Tornado Fang is generally a more useful utility move than Quake Crushing fist and they both extend combos, so most players prefer this.
Quake Crushing Fist & Swoop Charging Kick
This set is less common, but Quake Crushing Fist can be a lot easier to get a handle on and can make for easier combo routes.
Shadow Tornado Fang & Touch of Curse
Touch of Curse isn't as strong as swooping charge kick in most ways, but it is cooler and Hikaru is a cool character, so by running it you get to be double cool.
Move List
Click on a header to expand that section of the movelist
Normal Moves
Normal Moves
5A
5A
|
| Damage
|
Stun
|
Guard
|
Startup
|
Active
|
Recovery
|
Frame Advantage (block)
|
Cancelable
|
Counterhit Properties
|
| -
|
-
|
High/Low
|
7f
|
-
|
-
|
+1
|
yes
|
-
|
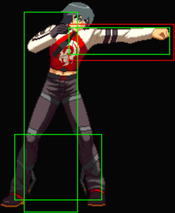
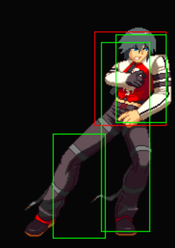
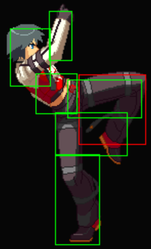
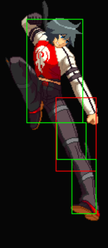
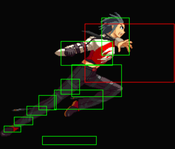
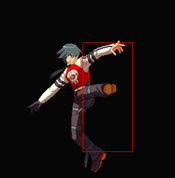
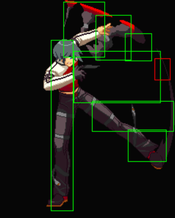
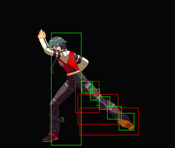
Whiff on most crouchers, but useful as an anti-air because of it's speed and decent hitbox.
|
|
2A
2A
|
| Damage
|
Stun
|
Guard
|
Startup
|
Active
|
Recovery
|
Frame Advantage (block)
|
Cancelable
|
Counterhit Properties
|
| -
|
-
|
High/Low
|
7f
|
-
|
-
|
+4
|
Yes
|
-
|
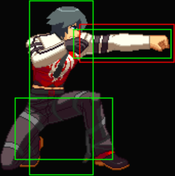
Fast and links into itself, very useful for stagger pressure.
|
|
cl.B
cl.B
|
| Damage
|
Stun
|
Guard
|
Startup
|
Active
|
Recovery
|
Frame Advantage (block)
|
Cancelable
|
Counterhit Properties
|
| -
|
-
|
Low
|
6f
|
-
|
-
|
+1
|
yes
|
-
|
Hikaru's fastest normal, doesn't link into much so if you get it out be ready to cancel it.
|
|
5B
5B
|
| Damage
|
Stun
|
Guard
|
Startup
|
Active
|
Recovery
|
Frame Advantage (block)
|
Cancelable
|
Counterhit Properties
|
| -
|
-
|
High/Low
|
9f
|
-
|
-
|
-6
|
Yes
|
-
|
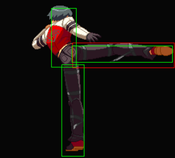
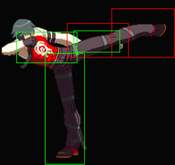
Pretty fast and good reach. Good footsies normal
|
|
2B
2B
|
| Damage
|
Stun
|
Guard
|
Startup
|
Active
|
Recovery
|
Frame Advantage (block)
|
Cancelable
|
Counterhit Properties
|
| -
|
-
|
Low
|
8f
|
-
|
-
|
+2
|
Yes
|
-
|
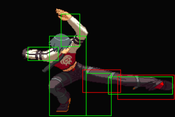
Another good fast normal, good in stagger pressure since the low hit will catch people trying to up-back after a 2A and if they block it Hikaru is still plus. The low hitbox also makes this a good move to pick up opponents from an OTGable knockdown
|
|
cl.C
cl.C
|
| Damage
|
Stun
|
Guard
|
Startup
|
Active
|
Recovery
|
Frame Advantage (block)
|
Cancelable
|
Counterhit Properties
|
| -
|
-
|
High/Low
|
12f
|
-
|
-
|
+0
|
yes
|
Stagger
|
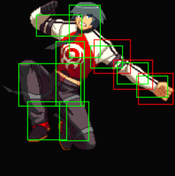
Good damage and stun in combos. Looks like a good anti-air but it really isn't
|
|
5C
5C Caption. Caption.
|
| Damage
|
Stun
|
Guard
|
Startup
|
Active
|
Recovery
|
Frame Advantage (block)
|
Cancelable
|
Counterhit Properties
|
| -
|
-
|
High/Low
|
12f
|
-
|
-
|
-10
|
yes
|
Stagger
|
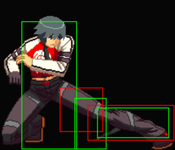
Decent range and good hitbox, it's not very good on block or whiff but it's cacelable which is pretty nice
|
|
2C
2C
|
| Damage
|
Stun
|
Guard
|
Startup
|
Active
|
Recovery
|
Frame Advantage (block)
|
Cancelable
|
Counterhit Properties
|
| -
|
-
|
High/Low
|
8f
|
-
|
-
|
-6
|
Yes
|
Stagger
|
Great all-around normal. Good in combos and a solid anti-air. Try not to whiff it tho
|
|
cl.D
cl.D
|
| Damage
|
Stun
|
Guard
|
Startup
|
Active
|
Recovery
|
Frame Advantage (block)
|
Cancelable
|
Counterhit Properties
|
| -
|
-
|
High/Low
|
7f
|
-
|
-
|
-2
|
yes
|
Stagger
|
This thing is real fast and it's barely negative. It'd be a godlike normal if it had better range and wasn't a close normal. As it is it's good in combos and for punishes.
|
|
5D
5D
|
| Damage
|
Stun
|
Guard
|
Startup
|
Active
|
Recovery
|
Frame Advantage (block)
|
Cancelable
|
Counterhit Properties
|
| -
|
-
|
High/Low
|
14f
|
-
|
-
|
-5
|
No
|
Stagger
|
Works as an anti-air although it's a bit slow. Can be good for counterhit fishing but you don't get anything on normal hit.
|
|
2D
2D
|
| Damage
|
Stun
|
Guard
|
Startup
|
Active
|
Recovery
|
Frame Advantage (block)
|
Cancelable
|
Counterhit Properties
|
| -
|
-
|
Low
|
14f
|
-
|
-
|
-2
|
No
|
Launch
|
Hits low and has decent range, can only combo on counterhit but you at least get a good knockdown. It's pretty safe on block but if it whiffs it's got a lot of recovery so be wary of sticking it out.
|
|
j.A
j.A
|
| Damage
|
Stun
|
Guard
|
Startup
|
Active
|
Recovery
|
Frame Advantage (block)
|
Cancelable
|
Counterhit Properties
|
| -
|
-
|
High
|
7f
|
-
|
-
|
-
|
Yes
|
-
|
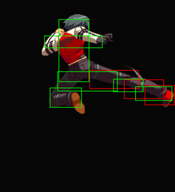
Whiffs on most crouchers which makes it more of an air-to-air or combo piece. By doing IAD j.A and letting it whiff on purpose you can also land from an air dash quickly to go for a low or throw and mix the opponent up.
|
|
j.B
j.B
|
| Damage
|
Stun
|
Guard
|
Startup
|
Active
|
Recovery
|
Frame Advantage (block)
|
Cancelable
|
Counterhit Properties
|
| -
|
-
|
High
|
7f
|
-
|
-
|
-
|
Yes
|
-
|
Lots of active frames, Hikaru's best overhead for IADs. Can crossup similar to kyo j.B from KOF
|
|
j.C (together)
j.C
|
| Damage
|
Stun
|
Guard
|
Startup
|
Active
|
Recovery
|
Frame Advantage (block)
|
Cancelable
|
Counterhit Properties
|
| -
|
-
|
High
|
11f
|
-
|
-
|
-
|
Yes
|
Stagger
|
Another good jump-in. Has better hit/blockstun than j.B being a heavy normal, and has a better hitbox for beating anti-airs.
|
|
j.D (together)
j.D
|
| Damage
|
Stun
|
Guard
|
Startup
|
Active
|
Recovery
|
Frame Advantage (block)
|
Cancelable
|
Counterhit Properties
|
| -
|
-
|
High
|
9f
|
-
|
-
|
-
|
Yes
|
Stagger
|
More of a dedicated air-to-air than any of his other normals. It can work as a jump-in but j.B and j.C have much better hitboxes for that.
|
|
Command Moves
Command Moves
6B
Revolving Drop Kick
6B
|
| Version
|
Damage
|
Stun
|
Guard
|
Startup
|
Active
|
Recovery
|
Frame Advantage (block)
|
Cancelable
|
Counterhit Properties
|
| Raw
|
-
|
-
|
High
|
23f
|
-
|
-
|
-11
|
Yes
|
Launch/Stagger
|
| Version
|
Damage
|
Stun
|
Guard
|
Startup
|
Active
|
Recovery
|
Frame Advantage (block)
|
Cancelable
|
Counterhit Properties
|
| Canceled
|
-
|
-
|
High/Low
|
19f
|
-
|
-
|
-11
|
Yes
|
Launch/Stagger
|
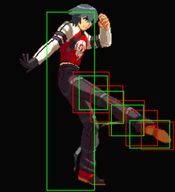
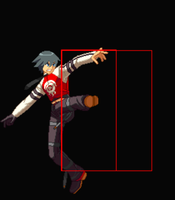
Has more hitstun than other normals, so this is an important juggle tool.
|
|
j.3B
Charging Kick
j.3B
|
| Damage
|
Stun
|
Guard
|
Startup
|
Active
|
Recovery
|
Frame Advantage (block)
|
Cancelable
|
Counterhit Properties
|
| -
|
-
|
High
|
13f
|
-
|
-
|
-
|
No
|
-
|
Causes a ground bounce on grounded hit, causes a juggle state on air hit. Can be used to change your air momentum, but it's main use is mid combo.
|
|
Double Dragon (1)
Double Dragon (1)
6D
|
| Damage
|
Stun
|
Guard
|
Startup
|
Active
|
Recovery
|
Frame Advantage (block)
|
Cancelable
|
Counterhit Properties
|
| -
|
-
|
High/Low
|
15f
|
-
|
-
|
-3
|
only to 6DD
|
-
|
Only sees some situational use in neutral, as Hikaru is airborne for a few frames. Despite its good range, it's a very high risk/low reward move to use since you can't cancel it into anything except 6DD
|
|
Double Dragon (2)
Double Dragon (2)
6DD
|
| Damage
|
Stun
|
Guard
|
Startup
|
Active
|
Recovery
|
Frame Advantage (block)
|
Cancelable
|
Counterhit Properties
|
| -
|
-
|
High/Low
|
9f
|
-
|
-
|
-2
|
No
|
-
|
If you're close enough to the corner it causes a wallbounce, which you can use to extend combos
|
|
Universal Mechanics
Universal Mechanics
Throw
Throw
4/5/6AC
|
| Damage
|
Stun
|
Guard
|
Startup
|
Active
|
Recovery
|
Frame Advantage (block)
|
Cancelable
|
Counterhit Properties
|
| -
|
-
|
Throw
|
5f
|
-
|
-
|
-
|
No
|
-
|
Hikaru has one of the better normal throws in the game, since he can combo off it. Midscreen the options aren't great, really just 214BD to otg. But in the corner he can pickup with a 2B and go into a full juggle.
|
|
Guard Crush
Guard Crush
6CD
|
| Damage
|
Stun
|
Guard
|
Startup
|
Active
|
Recovery
|
Frame Advantage (block)
|
Cancelable
|
Counterhit Properties
|
| -
|
-
|
Unblockable
|
-
|
-
|
-
|
-
|
No
|
-
|
Guard Crush. Hikaru doesn't have much use for his Guard crush. He doesn't really have a way to blockstring into it so it's always going to be pretty risky to throw out.
|
|
Roll
Roll
AB
|
| Damage
|
Stun
|
Guard
|
Startup
|
Active
|
Recovery
|
Frame Advantage (block)
|
Cancelable
|
Counterhit Properties
|
| -
|
-
|
-
|
-
|
-
|
-
|
-
|
No
|
-
|
|
|
|
Tactical Guard
Tactical Guard
CD
|
| Damage
|
Stun
|
Guard
|
Startup
|
Active
|
Recovery
|
Frame Advantage (block)
|
Cancelable
|
Counterhit Properties
|
| -
|
-
|
High/Low
|
-
|
-
|
-
|
-
|
No
|
-
|
|
|
|
Special Moves
Special Moves
236P
High-Grade Knuckle
236P
|
| Damage
|
Stun
|
Guard
|
Startup
|
Active
|
Recovery
|
Frame Advantage (block)
|
Cancelable
|
Counterhit Properties
|
| -
|
-
|
High/Low
|
11f(A) 19f(C)
|
-
|
-
|
-7(A) -10(C)
|
-
|
Stagger(A) Wall Bounce(C)
|
A version doesn't go very far, C version goes further and has more active frames so if you space it right you can make it safe. Mostly a move to cancel out of in combos, but if the C version counterhits it'll lead to a big combo.
|
|
236AC
Master-Grade Knuckle
236AC
|
| Damage
|
Stun
|
Guard
|
Startup
|
Active
|
Recovery
|
Frame Advantage (block)
|
Cancelable
|
Counterhit Properties
|
| -
|
-
|
High/Low
|
11f
|
-
|
-
|
-6
|
-
|
Wall Bounce
|
Wall bounces on counter hit and has a really good hitbox. On normal hit and in combos it causes a wall slam that can be comboed from the right spacings/heights. This move is probably hikaru's best tool.
|
|
623K
Thunderstrike Kick
623K
|
| Version
|
Damage
|
Stun
|
Guard
|
Startup
|
Active
|
Recovery
|
Frame Advantage (block)
|
Cancelable
|
Counterhit Properties
|
| B
|
-
|
-
|
High/low
|
4f
|
-
|
-
|
-27
|
-
|
OTGable knockdown
|
| Version
|
Damage
|
Stun
|
Guard
|
Startup
|
Active
|
Recovery
|
Frame Advantage (block)
|
Cancelable
|
Counterhit Properties
|
| D
|
-
|
-
|
High/low
|
9f
|
-
|
-
|
-27
|
-
|
OTGable knockdown
|
| Version
|
Damage
|
Stun
|
Guard
|
Startup
|
Active
|
Recovery
|
Frame Advantage (block)
|
Cancelable
|
Counterhit Properties
|
| EX
|
-
|
-
|
High/low
|
5f
|
-
|
-
|
-53
|
-
|
OTGable knockdown
|
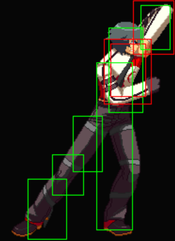
Anti-air kick, good to end air combos with. B version is invun until active, D and ex versions are invun through active frames. So B version is better to use if you want a trade for a combo and D version is better if you think you might get beat out or if you really don't want the trade. Ex version is basically a better D version and it knocks down giving hikaru some oki.
|
|
236K
Blue Sphere Break
236K
|
| Damage
|
Stun
|
Guard
|
Startup
|
Active
|
Recovery
|
Frame Advantage (block)
|
Cancelable
|
Counterhit Properties
|
| -
|
-
|
High/Low
|
14f
|
-
|
-
|
-
|
-
|
-
|
Fireball that travels in an arc. B version goes down and stays more or less at ground level. D version goes up. Ex version throws 2 fireballs. Frame advantage depends on spacing, but non-ex versions are usually negative. EX version can also be used to launch opponents for an air combo.
|
|
214K
Blast Triple Kick
214K
|
| Version
|
Damage
|
Stun
|
Guard
|
Startup
|
Active
|
Recovery
|
Frame Advantage (block)
|
Cancelable
|
Counterhit Properties
|
| B
|
-
|
-
|
Low
|
14f
|
-
|
-
|
-6
|
-
|
-
|
| Version
|
Damage
|
Stun
|
Guard
|
Startup
|
Active
|
Recovery
|
Frame Advantage (block)
|
Cancelable
|
Counterhit Properties
|
| D
|
-
|
-
|
Low(first 2 hits), High(last hit)
|
14f
|
-
|
-
|
-25
|
-
|
-
|
| Version
|
Damage
|
Stun
|
Guard
|
Startup
|
Active
|
Recovery
|
Frame Advantage (block)
|
Cancelable
|
Counterhit Properties
|
| EX
|
-
|
-
|
Low
|
14f
|
-
|
-
|
-8
|
-
|
-
|
Tatsu. The heavy version has an overhead in it but it's not a real mix-up. Ex version will wall slam which lets you combo with the right spacing.
|
|
Extra Special Moves
214P
Shadow Tornado Fang
214P
|
| Version
|
Damage
|
Stun
|
Guard
|
Startup
|
Active
|
Recovery
|
Frame Advantage (block)
|
Cancelable
|
Counterhit Properties
|
| A
|
-
|
-
|
N/A
|
34f
|
-
|
-
|
-
|
-
|
-
|
| Version
|
Damage
|
Stun
|
Guard
|
Startup
|
Active
|
Recovery
|
Frame Advantage (block)
|
Cancelable
|
Counterhit Properties
|
| C
|
-
|
-
|
N/A
|
46f
|
-
|
-
|
-
|
-
|
-
|
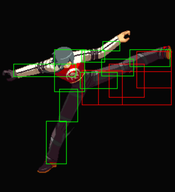
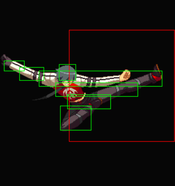
Hikaru ducks back and then swoops forward. A version is faster, C version goes further back and moves him forward more at the end. There's a unique followup on every button or you can let it fully recover and throw. It has a little invun on startup, but not enough to cover for any of the followups. However it'll evade highs specifically for most of the animation. A version can be canceled after 16f, C version can be canceled after 26f.
|
| Version
|
Damage
|
Stun
|
Guard
|
Startup
|
Active
|
Recovery
|
Frame Advantage (block)
|
Cancelable
|
Counterhit Properties
|
| 214P~A
|
-
|
-
|
High/Low
|
8f
|
-
|
-
|
-5
|
-
|
Stagger (no followup) Launch (A/D followup)
|
| Version
|
Damage
|
Stun
|
Guard
|
Startup
|
Active
|
Recovery
|
Frame Advantage (block)
|
Cancelable
|
Counterhit Properties
|
| 214P~A~A
|
-
|
-
|
High/Low
|
-
|
-
|
-
|
-8
|
-
|
Launch
|
| Version
|
Damage
|
Stun
|
Guard
|
Startup
|
Active
|
Recovery
|
Frame Advantage (block)
|
Cancelable
|
Counterhit Properties
|
| 214P~A~D
|
-
|
-
|
High/Low
|
-
|
-
|
-
|
-16
|
-
|
Launch
|
Has upper body invun until the first active frame, so it can be good for beating out/trading with high hitting moves. It's cancel-able into another of the Shadow Tornado Fang followups by hitting B/C or into one of 2 special kick followups if you hit A/D.
|
| Version
|
Damage
|
Stun
|
Guard
|
Startup
|
Active
|
Recovery
|
Frame Advantage (block)
|
Cancelable
|
Counterhit Properties
|
| 214P~B
|
-
|
-
|
High/Low (first hit) H (second hit)
|
5f
|
-
|
-
|
-3
|
-
|
Launch (first hit) Stagger (second hit)
|
Evades lows, so it can be good for beating out low hitting moves. You can pick up after hitting in the corner making it good for combos.
|
| Version
|
Damage
|
Stun
|
Guard
|
Startup
|
Active
|
Recovery
|
Frame Advantage (block)
|
Cancelable
|
Counterhit Properties
|
| 214P~C
|
-
|
-
|
High/Low
|
12f
|
-
|
-
|
-9
|
-
|
Wall Bounce
|
Upper body invun until active where it gets full invun for a bit. Wall slams on normal hit which can lead to combos if you have the right spacing. It tends to get low profiled a lot so watch out. Useful as a counter poke.
|
| Version
|
Damage
|
Stun
|
Guard
|
Startup
|
Active
|
Recovery
|
Frame Advantage (block)
|
Cancelable
|
Counterhit Properties
|
| 214P~D
|
-
|
-
|
Low
|
5f
|
-
|
-
|
-16
|
-
|
Launch
|
| Version
|
Damage
|
Stun
|
Guard
|
Startup
|
Active
|
Recovery
|
Frame Advantage (block)
|
Cancelable
|
Counterhit Properties
|
| 214P~D~A
|
-
|
-
|
High/Low
|
-
|
-
|
-
|
-8
|
-
|
-
|
Slides forward to give some extra reach. It's not great on it's own, but it can be canceled into either the B or C followup or a kick followup with A.
|
|
623P
Quake Crushing Fist
623P
|
| Version
|
Damage
|
Stun
|
Guard
|
Startup
|
Active
|
Recovery
|
Frame Advantage (block)
|
Cancelable
|
Counterhit Properties
|
| A
|
-
|
-
|
High/Low
|
23f
|
-
|
-
|
8
|
-
|
-
|
| Version
|
Damage
|
Stun
|
Guard
|
Startup
|
Active
|
Recovery
|
Frame Advantage (block)
|
Cancelable
|
Counterhit Properties
|
| C
|
-
|
-
|
High/Low
|
31f
|
-
|
-
|
+2
|
-
|
-
|
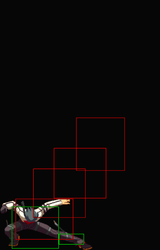
Launches the opponent for a combo. A version is fast enough to be combo'd into pretty easily. C version cannot counterhit.
|
|
Ultimate Chaos Moves
Ultimate Chaos Moves
214214K
Spinning Tiger Assault Kick
214214k
|
| Damage
|
Stun
|
Guard
|
Startup
|
Active
|
Recovery
|
Frame Advantage (block)
|
Cancelable
|
Counterhit Properties
|
| -
|
-
|
High/Low
|
10f
|
-
|
-
|
-49
|
-
|
Wall Bounce
|
This super wall bounds when near the corner so it's very useful for normal and Exceed combos. It has a bit of invun so it can be used as a reversal, but it loses it quickly. It travels very quickly as well making it decent at long range punishes.
|
|
Sky Break Thunderstrike Kick
236236K
|
| Damage
|
Stun
|
Guard
|
Startup
|
Active
|
Recovery
|
Frame Advantage (block)
|
Cancelable
|
Counterhit Properties
|
| -
|
-
|
High/Low
|
7f
|
-
|
-
|
-75
|
-
|
Wall Bounce
|
Knocks the opponent down with the last hit. Has invun.
|
|
Extra Ultimate Chaos Moves
j.236236K
Swoop Charging Kick
j.236236K
|
| Damage
|
Stun
|
Guard
|
Startup
|
Active
|
Recovery
|
Frame Advantage (block)
|
Cancelable
|
Counterhit Properties
|
| -
|
-
|
High/Low
|
2+2f
|
-
|
-
|
-14
|
-
|
Wall Bounce
|
Releases a vertical energy wave that hits three times when he lands. Can be combo'd after.
|
|
214214P
Splitting Break Touch of Curse
214214P
|
| Damage
|
Stun
|
Guard
|
Startup
|
Active
|
Recovery
|
Frame Advantage (block)
|
Cancelable
|
Counterhit Properties
|
| -
|
-
|
High/Low
|
6f(A)
|
-
|
-
|
-14
|
-
|
-
|
Hikaru punches the opponent a bunch. He punches them so hard that for a while afterwards (until the stop blinking) he'll do an extra 20% damage. A version is faster
|
|
Destruction Chaos
Destruction Chaos
23663214PP
Super Divine Combination Strike
23663214PP
|
| Damage
|
Stun
|
Guard
|
Startup
|
Active
|
Recovery
|
Frame Advantage (block)
|
Cancelable
|
Counterhit Properties
|
| -
|
-
|
-
|
7f
|
-
|
-
|
-29
|
-
|
-
|
Level 3. It does a lot of damage but not as much as exceed combos usually. It's easy to confirm into if you don't want to do an exceed, and it wont put you into overheat so it has some use, but not much.
|
|
Combos
most of hikaru's more advanced routes revolve around confirming into 6B and then super jump canceling into his j.3B command normal. This is a bit difficult but it's ultimately very rewarding.
2B > 5C > 6B > 214A~D~B > 2B > cl.C > sjc > j.A > j.C > j.D > land > j.B > j.C > j.D > double jump > j.B > j.C > j.D > j.623D/j.623BD
Corner route that avoids using j.3B or any metered extensions. You can use this at some midscreen spacings too, if you use D~C instead of D~B for the dandy step followups then run up to capitalize off the wall splat.
2B > 5C > 6B > sjc > j.236236K > 214A~A > 2C > cl.D > sjc > j.C > j.D > land > cl.D > 236AC > 6B > 214C~D~B > 2C > 6B > sjc > j.C > j.D > land > cl.D > sjc > j.A > j.C > j.D > land > j.A > j.C > j.D > double jump > j.A > j.C > j.D > j.623D(1)
video example Confirm off of air super. The rejumps all require delays inbetween buttons, the combo can be ended at any of those points instead of extending it so much if you have trouble.
2B > 5C > 6B > sjc > j.236236K > cl.D (whiff) > cl.D > sjc > j.C > j.D > land > cl.D > sjc > j.C > j.D > land > 5A > cl.C > sjc > j.C > j.D > j.623D(1)
video example Alternate version of the above, doesn't require the 214P extra move
2B > 5C > 6B > sjc > j.236236K > cl.D (whiff) > cl.D > 236AC > 236AC > 2C > cl.D > sjc > j.C > j.D > land > 5A > cl.C > sjc > j.A > j.C > j.D > j.623D(1)
video example Another alternate version that works corner to corner.
2B > 5C > 6B > sjc > j.236236K > cl.D (whiff) > 214A~A > 2C > cl.D > sjc > j.C > j.D > land > cl.D > sjc > j.C > j.D > 5A > sjc > j.A > j.C > j.D > 236236K > 6B > 214C~D~B > 2C > 6B > sjc > j.C > j.D > land > cl.D > sjc > j.A > j.C > j.D > land > j.A > j.C > j.D > double jump > j.A > j.C > j.D > j.623D(1)
video example Another alt version that uses 214P and an extra super.
2B > 5C > 6B > sjc > j.3B > 2C > cl.D > 6B > 236AC > 6B > 214C~D~B > 2C > 6B > sjc > j.C > j.D > land > cl.D > sjc > j.A > j.C > j.D > land > j.A > j.C > j.D > double jump > j.A > j.C > j.D > 623D(1) > exceed > 236B > 236236K > chaos shift > j.3B (whiff) > 236C > 236236K > j.3B (whiff) > 236C > 236236K > chaos shift > j.3B (whiff) > 6B > 214C~B > cl.D > 214A~A~B > 2A > 6B > sjc > j.C > j.D > land > cl.D > sjc > j.A > j.C > j.D > land > j.A > j.C > j.D > double jump > j.A > j.C > j.D > j.623D(1)
video example exceed combo
2B > 5C > 6B > 236BD > 2C > sjc > j.C > j.D > cl.D > sjc > j.C > j.D > 2A > cl.C > sjc > j.A > j.C > j.D > 623D(1) > exceed > 236B > 236236K > chaos shift > j.3B (whiff) > 236C > 236236K > j.3B (whiff) > 236C > 236236K > chaos shift > j.3B (whiff) > 6B > 214C~B > cl.D > 214A~A~B > 2A > 6B > sjc > j.C > j.D > land > cl.D > sjc > j.A > j.C > j.D > land > j.A > j.C > j.D > double jump > j.A > j.C > j.D > j.623D(1)
video example Corner exceed combo
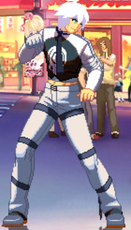
Colors
- Console Versions: You can hold R1 button while selecting a character to get an alternative color.
- Arcade Version: You can hold START button while selecting a character to get an alternative color.
- Hikaru and MG Hikaru can not choose the same color when fighting each other. If the same color is chosen, the player who chose second will be automatically given the next color in the lineup.

