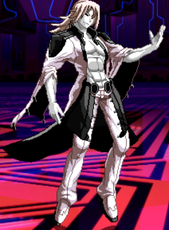
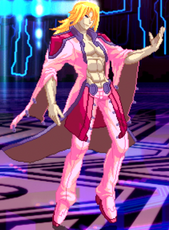
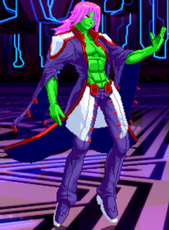
Story
Kudlak-SIN
『クドゥラック-SIN』
Kudlak comes from a long line of magicians and is the last to know the secret of magic (if you ignore all the other characters who are magic). When growing up kudlak lost interest in magic and pursued science and technology instead, but then he decided to go back to magic and now he wants to use the unlimited power of the Chaos Code to make the world worse as revenge for... something.
Playstyle
Health: 27500 Stun Threshold: 75
Kudlak is a character that specializes in zoning tactics. He can summon sacrificial dolls to aggressively control space, act as shields, or hinder the opponent's approach. He also has access to tools that are just not anywhere else in the game, like a jumping low, stealing meter/health, and a guard cancel.
Mobility (Run vs Step)
Run: Run is the most common bounce, simply because Kudlak doesn't really benefit from the step cancels. His pressure is geared more towards pushing the opponent away than trying to get in
Step:
Kudlak's extra moves are all crazy strong and do things a chaos code character shouldn't be able to do. He doesn't have any real obvious holes in his toolset either, so you're really just free to pick any 2 that you think are good. Of the 4 Atonement is the only one that doesn't really stand out, but it has it's uses.
Recommended Sets
Surrender & Envy
Surrender drains meter from the opponent & can be used as a mix-up on it's own. Envy is a jumping low. Together they can create situations where an opponent has to guess high/low/throw and on 2 out 3 of those situations they lose a chunk of meter. Kudlak also doesn't need any extra moves for exceed combos thanks to Weep, so you can create situations where you win round 1, have a big stock of meter, and you opponent has nothing because you stole all their resources. Very good position to be in.
Envy & Doubt
Doubt gives guard cancels and, on it's own can enable extended pressure or combo strings thanks to the fast recovery. This can help Kudlak escape bad situations and Envy can help create openings.
Surrender & Doubt
Same as the above but with Surrender. The situation of canceling into Doubt off of a normal that hits the opponent standing is a very good one for surrender, either tic throwing into it or comboing into it. It's not a use of meter that would be good for most characters, but because Doubt's guard cancel stocks last forever it's not really a waste if you didn't have them up.
Move List
Click on a header to expand that section of the movelist
Normal Moves
Normal Moves
5A
5A
|
| Damage
|
Stun
|
Guard
|
Startup
|
Active
|
Recovery
|
Frame Advantage (block)
|
Cancelable
|
Counterhit Properties
|
300
2 stun
|
-
|
High/Low
|
7f
|
-
|
-
|
+1
|
yes
|
-
|
Kudlak snaps his left fingers, creating a red glowing slash that is his jab. Minimal damage, sweep range (fantastic for a neutral jab).
|
|
2A
2A
|
| Damage
|
Stun
|
Guard
|
Startup
|
Active
|
Recovery
|
Frame Advantage (block)
|
Cancelable
|
Counterhit Properties
|
300
2 stun
|
-
|
High/Low
|
6f
|
-
|
-
|
+1
|
yes
|
-
|
A zombie comes off the ground, stabbing the opponent with his drill on his hand. Fast startup, slightly shorter range than 5A, but has the same damage.
|
|
5B
5B
|
| Damage
|
Stun
|
Guard
|
Startup
|
Active
|
Recovery
|
Frame Advantage (block)
|
Cancelable
|
Counterhit Properties
|
300
2 stun
|
-
|
Low
|
7f
|
-
|
-
|
-2
|
Yes
|
-
|
Kudlak snaps his right fingers to summon a zombie that attacks with its arms from the ground. This move is a standing low that reaches to the kneecap, low damage.
|
|
2B
2B
|
| Damage
|
Stun
|
Guard
|
Startup
|
Active
|
Recovery
|
Frame Advantage (block)
|
Cancelable
|
Counterhit Properties
|
400
2 stun
|
-
|
Low
|
7f
|
-
|
-
|
+1
|
Yes
|
-
|
Zombie attack with a diagonal upward drill this time. Small range, same range as 5B.
|
|
5C
5C
|
| Damage
|
Stun
|
Guard
|
Startup
|
Active
|
Recovery
|
Frame Advantage (block)
|
Cancelable
|
Counterhit Properties
|
700+ 700
3+3 stun
|
-
|
High/Low
|
12
|
-
|
-
|
-4
|
Yes
|
Stagger
|
A bigger version of 5A in the form of an intertwined red wave. High damage, can be used as an anti-air because of its large rectangular hitbox. 2 hits with decent recovery.
|
|
2C
2C
|
| Damage
|
Stun
|
Guard
|
Startup
|
Active
|
Recovery
|
Frame Advantage (block)
|
Cancelable
|
Counterhit Properties
|
1300
4 stun
|
-
|
High/Low
|
10f
|
-
|
-
|
-6
|
Yes
|
Stagger
|
Kudlak does an upward slash, almost like an uppercut. Similar horizontal range and damage as 5C. Mediocre startup with slow recovery but its range is useful for situational anti-airs.
|
|
5D
5D
|
| Damage
|
Stun
|
Guard
|
Startup
|
Active
|
Recovery
|
Frame Advantage (block)
|
Cancelable
|
Counterhit Properties
|
500+800
5+6 stun
|
-
|
High/Low
|
15f
|
-
|
-
|
-15
|
No
|
Stagger
|
Kudlak summons two zombies that lunge into the opponent and knock them down fullscreen when midscreen and wallsplats in the corner. Even though the zombies appear on a height from the waist upward, they can hit crouching opponents too. Slightly lower damage than 5C, 2 hits.
|
|
2D
2D
|
| Damage
|
Stun
|
Guard
|
Startup
|
Active
|
Recovery
|
Frame Advantage (block)
|
Cancelable
|
Counterhit Properties
|
1400
6 stun
|
-
|
Low
|
14f
|
-
|
-
|
-1
|
No
|
Launch
|
A zombie appears from the ground, hugs the opponent’s feet, causing a knockdown. Mediocre startup with fast recovery, its range is the same length as the Chaos gauge
|
|
j.A
j.A
|
| Damage
|
Stun
|
Guard
|
Startup
|
Active
|
Recovery
|
Frame Advantage (block)
|
Cancelable
|
Counterhit Properties
|
600
2 stun
|
-
|
High
|
7f
|
-
|
-
|
-
|
Yes
|
-
|
Mid-Air version of 5B with the zombie reaching horizontally and closer to Kudlak. Fast, same damage as 5A. The horrible vertical hitbox and great horizontal hitbox makes this only useful in air-to-air situations
|
|
j.B
j.B
|
| Damage
|
Stun
|
Guard
|
Startup
|
Active
|
Recovery
|
Frame Advantage (block)
|
Cancelable
|
Counterhit Properties
|
500
2 stun
|
-
|
High
|
8f
|
-
|
-
|
-
|
Yes
|
-
|
Similar to j.A, but this time the zombie reaches diagonally downwards. Unlike jA, this move is awesome for jump-ins and IAD approaches, and is also a great combo filler.
|
|
j.C
j.C
|
| Damage
|
Stun
|
Guard
|
Startup
|
Active
|
Recovery
|
Frame Advantage (block)
|
Cancelable
|
Counterhit Properties
|
800
4 stun
|
-
|
High
|
8f
|
-
|
-
|
-
|
Yes
|
Stagger
|
Similar to j.B, but with two zombies. The hitbox is not wide, but taller. Same speed as j.B, causes less damage than 5C.
|
|
j.D
j.D
|
| Damage
|
Stun
|
Guard
|
Startup
|
Active
|
Recovery
|
Frame Advantage (block)
|
Cancelable
|
Counterhit Properties
|
500 + 500 + 1000
3 + 3 + 7 stun
|
-
|
High
|
15f
|
-
|
-
|
-
|
Yes
|
Stagger
|
Similar to j.A, but with two zombies for a 3 hit air normal. Slow but reaches far. Less damage than j.C for just 1 hit but if you get all 3 it's really strong. The final hit has a lot of histun and launches the opponent which will send them really far away if you don't have them cornered.
|
|
Command Moves
Command Moves
6B
Betray
6B
|
| Damage
|
Stun
|
Guard
|
Startup
|
Active
|
Recovery
|
Frame Advantage (block)
|
Cancelable
|
Counterhit Properties
|
800
2 stun
|
-
|
High
|
20f
|
-
|
-
|
-19
|
Yes
|
-
|
A zombie appears on sweep range that sucks in the opponent (if it hits).
|
|
Universal Mechanics
Universal Mechanics
Throw
Throw
4/5/6AC
|
| Damage
|
Stun
|
Guard
|
Startup
|
Active
|
Recovery
|
Frame Advantage (block)
|
Cancelable
|
Counterhit Properties
|
| -
|
-
|
Throw
|
5f
|
-
|
-
|
-
|
No
|
-
|
|
|
|
6C+D
Guard Break
6CD
|
| Damage
|
Stun
|
Guard
|
Startup
|
Active
|
Recovery
|
Frame Advantage (block)
|
Cancelable
|
Counterhit Properties
|
| -
|
-
|
Guard Break
|
36f
|
-
|
-
|
-
|
No
|
-
|
|
|
|
C+D
Tactical Guard
CD
|
| Damage
|
Stun
|
Guard
|
Startup
|
Active
|
Recovery
|
Frame Advantage (block)
|
Cancelable
|
Counterhit Properties
|
| -
|
-
|
High/Low
|
-
|
-
|
-
|
-
|
No
|
-
|
|
|
|
A+B
Roll
AB
|
| Damage
|
Stun
|
Guard
|
Startup
|
Active
|
Recovery
|
Frame Advantage (block)
|
Cancelable
|
Counterhit Properties
|
| -
|
-
|
High/Low
|
33f
|
-
|
-
|
-
|
No
|
-
|
|
|
|
Special Moves
Special Moves
Note : Unless stated otherwise, Kudlak can never have two zombies/dolls of the same type on the screen at the same time. Most of them have a cooldown period before disappearing that must be taken into account.
236X
Houzankou
236X
|
| Damage
|
Stun
|
Guard
|
Startup
|
Active
|
Recovery
|
Frame Advantage (block)
|
Cancelable
|
Counterhit Properties
|
| -
|
-
|
High/Low
|
25f, 18f(AC), 16f(BD)
|
-
|
-
|
+4(A), +3(B), +7(C), +6(D), +22(AC), +12(BD)
|
-
|
-
|
The Maw. Kudlak summons a zombie torso that opens up to bite the opponent at a set range. Each version summons the maw increasingly far away, with A being the closest at ~1 character length and D being the furthest at ~4 character lengths. Punch maws (A and C) push the opponent away on hit and kick maws (B and D) bring them in. There's a cooldown after summoning a maw where you can't summon another of that type (punch/kick) for a little bit, however there is no cooldown on EX Maw. There are 2 EX versions of this move, both summon a zombie that grabs and then explodes. A+C summons this zombie in between the ranges of B and C, B+D summons this zombie in between the ranges of C and D.
|
|
22K
Weak
22K
|
| Damage
|
Stun
|
Guard
|
Startup
|
Active
|
Recovery
|
Frame Advantage (block)
|
Cancelable
|
Counterhit Properties
|
| -
|
-
|
High/low
|
20f, 44f(EX)
|
-
|
-
|
-
|
-
|
-
|
The Floater. Moves across the ground, B version goes slow, D version goes faster, EX version goes very slow and has more hitstun. The EX version also has a strange property where setting it can trigger proximity guard if you're close enough, however none of the floaters trigger proximity guard when their hotboxes are actually active, including EX. At point blank non-EX floaters are +0 at worst.
|
|
214K
Passion
214K
|
| Damage
|
Stun
|
Guard
|
Startup
|
Active
|
Recovery
|
Frame Advantage (block)
|
Cancelable
|
Counterhit Properties
|
| -
|
-
|
High/Low
|
40f(B), 44f(D), 28f(EX)
|
-
|
-
|
-
|
-
|
-
|
The Walker. Zombie who walks forward and then explodes into spikes. Walkers will explode on their own if they don't see anything after a while. The trigger for exploding is if they line up with an opponent's X coordinate, so if someone jumps over a walker they'll go off even if the opponent is at the top of the screen. Walkers have a hurtbox and can get killed by active hitboxes including projectiles or normals that collide with them. Notably, they'll walk right past other walkers or Sith since neither will trigger the other. B version is slower, D version is faster. EX verion is slow, has a hitbox when being summoned, and is invincible (that is to say, the walker is invincible, Kudlak is not). Walkers will not go away if Kudlak is hit, usually this doesn't matter much since the walker itself will get hit in most situations Kudlak is getting hit, but because the EX walker is invun he can be a combo breaker. EX Walker also waits a bit before fading from the screen, locking out any version of the move for a longer period of time.
|
|
214P
Misanthropy
214P
|
| Damage
|
Stun
|
Guard
|
Startup
|
Active
|
Recovery
|
Frame Advantage (block)
|
Cancelable
|
Counterhit Properties
|
| -
|
-
|
High/Low
|
17f(A), 23f(C), 22f(EX)
|
-
|
-
|
-8(A), -2(C), -7(EX)
|
-
|
-
|
Kudlak dashes in and slashes. C version goes further, EX version launches. The C version can also launch for a juggle if the opponent is near the corner cornered and Kudlak is at the right distance.
|
|
623P
Confession
623P
|
| Damage
|
Stun
|
Guard
|
Startup
|
Active
|
Recovery
|
Frame Advantage (block)
|
Cancelable
|
Counterhit Properties
|
| -
|
-
|
High/Low
|
50f, 27f(EX)
|
-
|
-
|
-
|
-
|
-
|
Blood Jesus. This zombie stays in place and activates when an opponent gets close, turning into a sword and slashing. EX version hits when it comes out and crumples making it a good combo piece. All versions can be done in the air. Ideally you set this up just above the ground so that it will stop both ground and air approaches. Another common use is placing a blood jesus above a cornered opponent as they wake up so that they have to deal with the hitbox if they try and jump out of the corner.
|
|
Extra Special Moves
632146K
Surrender
632146K
|
| Damage
|
Stun
|
Guard
|
Startup
|
Active
|
Recovery
|
Frame Advantage (block)
|
Cancelable
|
Counterhit Properties
|
| -
|
-
|
Throw
|
5f
|
-
|
-
|
-
|
-
|
-
|
Command grab that takes meter away from the opponent. Can be comboed into really easily thanks to 6B. After the grab you can OTG the opponent for a further combo. The amount of meter your opponent loses is pretty significant, it's over half a bar and does not scale. Denying meter to your opponent can be really strong in a game where most characters can do TODs with full resources.
|
|
j.214K
Envy
j.214K
|
| Damage
|
Stun
|
Guard
|
Startup
|
Active
|
Recovery
|
Frame Advantage (block)
|
Cancelable
|
Counterhit Properties
|
| -
|
-
|
Low
|
-
|
-
|
-
|
-
|
-
|
-
|
Hands appear on the ground under Kudlak. The hands have a sort of travel time, where the higher up kudlak is when he snaps his fingers the longer it takes the hands to appear (usually between ~25 and 30 frames). This move is a jumping low, the D version hits a bit further out than the B version. Both versions will launch for a combo.
|
|
Ultimate Chaos Moves
Ultimate Chaos Moves
236236P
Passive
236236P
|
| Damage
|
Stun
|
Guard
|
Startup
|
Active
|
Recovery
|
Frame Advantage (block)
|
Cancelable
|
Counterhit Properties
|
| -
|
-
|
High/Low
|
-
|
-
|
-
|
-
|
-
|
-
|
Kudlak stabs himself and then sucks blood from the opponent. Steals health and has invun through active frames. The animation restands, but you can't chaos shift until it launches.
|
|
236236K
Weep
236236K
|
| Damage
|
Stun
|
Guard
|
Startup
|
Active
|
Recovery
|
Frame Advantage (block)
|
Cancelable
|
Counterhit Properties
|
| -
|
-
|
Low
|
-
|
-
|
-
|
-
|
-
|
-
|
Beam super, you can react to the flash so the low hit property isn't really a mix-up, but it is funny. The total duration of this super is pretty short so it makes good exceed fodder.
|
|
Extra Ultimate Chaos Moves
214214P
Atonement
214214P
|
| Damage
|
Stun
|
Guard
|
Startup
|
Active
|
Recovery
|
Frame Advantage (block)
|
Cancelable
|
Counterhit Properties
|
| -
|
-
|
High/Low
|
-
|
-
|
-
|
-
|
-
|
-
|
Big tornado, sends the opponent really high up. The tornado will stay on screen once summoned even if kudlak gets hit out of it so this could potentially trade favorably. Passive is generally the better reversal though.
|
|
214214K
Doubt
214214K
|
| Damage
|
Stun
|
Guard
|
Startup
|
Active
|
Recovery
|
Frame Advantage (block)
|
Cancelable
|
Counterhit Properties
|
| -
|
-
|
High/Low
|
-
|
-
|
-
|
-
|
-
|
-
|
Install super that gives guard cancels. Press forward or back and A+B while in blockstun to guard cancel roll. This is the only way that any character can do anything while in blockstun. It's strength is matchup dependent but in matchups against characters who have strong block pressure this can be extremely strong. It can also allow kudlak to punish some moves that are otherwise safe. There's also very little recovery on the install itself which means you can kind of just activate whenever (tho keep in mind it's not totally instant) and use the superflash to see what your opponent is doing. You can also use this super as a way to RC a normal for 1 bar, or a special for 2 bars.
|
|
Destruction Chaos
Destruction Chaos
23663214AC
Tree of Life
23663214A+C
|
| Damage
|
Stun
|
Guard
|
Startup
|
Active
|
Recovery
|
Frame Advantage (block)
|
Cancelable
|
Counterhit Properties
|
| -
|
-
|
-
|
-
|
-
|
-
|
-
|
-
|
-
|
Kudlak dashes forward and performs two hits. if the second connects, he then pierces the opponent's stomach with his hand before summoning a tree of Blood that hits multiple times. It's a pretty classic Destruction Chaos with a good range too boot.
|
|
Combos
- Any combo listed with a 2A starter also works off a jump-in j.C or j.D.
- For most combos ending in j.D(3), j.623AC can be added in the corner for a substantial damage increase and a hard knockdown.
Beginner Combos
2A > 5B > 5C > 5D
Don't sleep on the basics. 5D ender on a grounded opponent will send them full screen and allow you to set up projectiles such as 623A/C, 22B/D, and 214B/D.
2A > 5B > 5C > 6B > 214AC > j.B > j.C > j.D(1) > jc > j.C > j.D(3)
Ground chain into air series. Normal jump is necessary to allow the jump cancel after the first j.D. Buffer 9B during the 214AC animation to ensure the beginning of the air series connects.
632146B/D > 2C > 214A/C
Basic combo off command grab. Can substitute with 214AC into air series, if desired.
j.214B > 2A > 2C/5C > 5D
Jumping low into hard knockdown. If point-blank after j.214B, 5C can be used; otherwise, substitute with 2C for stability.
Advanced Combos
2A > 5B > 5C > 6B > dl 22B > 2A > 2C > (6B > dl 22B > 2A > 2C) > 214AC > j.B > j.C > j.D(1) > jc > j.C > j.D(3)
The 6B > dl 22B loop in parentheses will only connect in the corner or if the initial hit is at absolute point-blank range; if 2A hit in the middle of its range, omit the second loop and continue with the air series.
CH 214BD > walk forward > j.B > j.C > j.D(1) > jc > j.C > j.D(3)
This pickup off CH 214BD works at most ranges, although the timing of the air series after the initial hit will vary depending on the opponent's distance from you and from the wall. Be careful not to run after the initial hit, as this will cause you to super jump and leave you unable to jump cancel your first j.D.
(near corner) j.214B > 2A > 2C > sjc > j.B > j.C > j.D(2) > j.623AC
The third hit of j.D will leave you too low to cancel into j.623AC at the end, so the early cancel is necessary for this ender.
632146B/D > microdash 2B > 2C > sjc > j.B > j.C > j.D(1) > land > j.A > j.C > j.D > dobule jump > j.A > j.C > j.D > 623AC > falling 623A
With delay rejump. The microdash isn't needed for most spacings, but it can help your timing for delaying 2B. For the air series you want to delay such that the opponent is as low as possible and in as much hitstun as possible. Video Example
632146B/D > 2B > 2C > sjc > j.C > j.D > land > j.A > j.B > double jump > j.A > j.B > j.C > 623AC > falling 623A
No delay rejump, the timings can be kinda tight here, but if you have trouble with delays you can do this instead. Video Example
5A > 5B > 5C > 6B > 22B > 5A > 5B > 5C > 6B > 214C > 2A > 2C > sjc > j.B > j.C > j.D(1) > land > j.A > j.C > j.D > dobule jump > j.A > j.C > j.D > 623AC > falling 623A
Corner meterless launch. Getting 214C to launch and be comboable is spacing dependent, the opponent needs to be at a particular spacing out of the corner and kudlak needs to not push them to the corner. The first part of this string sets that up. This combo does not work on Cait & Sith. Video Example
Exceed combos
The best way into Exceed is to use 214A instead of 214AC in a chain on a grounded opponent, then activate.
...214A > BC > 2C > 214A > 236236B/D > AB > 2C > 5D(2) > 214AC > 236236B/D > AB > 2C > 236236A/C
A relatively simple Exceed combo that works between roughly midscreen and the corner. Delay timings will vary depending on distance from the corner at the time of Exceed activation.
Substitute 214AC for the first 214A after Exceed activation if farther than half screen for the extra corner carry. This will cause you to run out of meter after the second roll cancel, so end with 2C > 5D instead.
632146B/D > BC > 236236B/D > AB > 2C > 5D(2) > 214AC > 236236B/D > AB > 2C > 236236A/C
Roughly the same combo as above, but with a command grab starter.
...214A > BC > 236A > 236236B/D > AB > 5D(2) > 236B > 236236B/D > AB > 5D(2) > 236A > 236236B/D
Works from midscreen video example
Colors
- Console Versions: You can hold R1 button while selecting a character to get an alternative color.
- Arcade Version: You can hold START button while selecting a character to get an alternative color.


