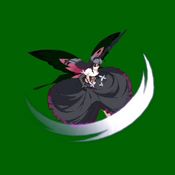
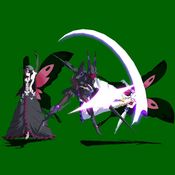
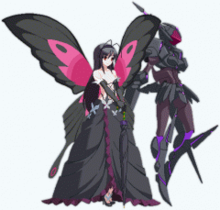
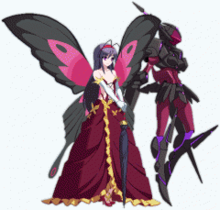
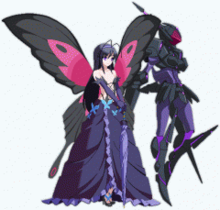
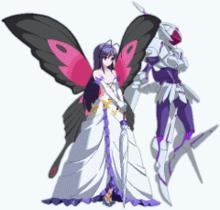
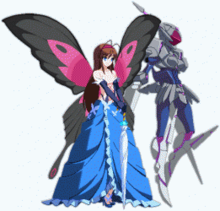
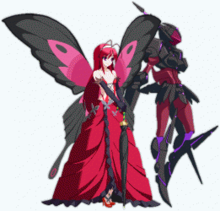
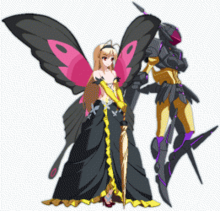
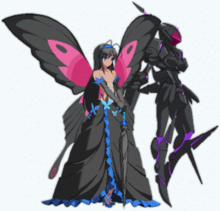
Dengeki Bunko: Fighting Climax/DFC/Kuroyukihime

From Mizuumi Wiki
Jump to navigation Jump to search
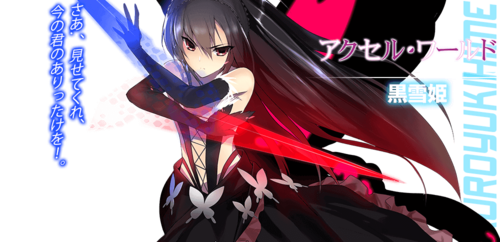
Kuroyukihime

Introduction

Originally from the light novel Accel World.

Gameplay

A synopsis of this character's play-style, strengths, weaknesses, etc

Pros 1. Her trump card has many variety to suit different kinds of play-style. 2. Instead of her own body, she uses her Avatar instead. and her attacks have a distance. Meaning more time to recover after a failed attempt.

  • Example 3

Cons

  • Example 1
  • Example 2
  • Example 3

Recommended Assists

Kino - Kino is everyone's friend. Death By Piercing is good, but 5S is faster and goes full screen. 6S can be used to juggle into Power Up Blast.

Accelerator - Get a knockdown and hit 5S to park Last Order on them. Instant respect. Against characters not packing Kino, long-range 5S shuts down approaches. 6S ground wave can be jumped, but is fast, reaches about as far as a Mode Red 236C, and launches.

Assist Character - Short description of why this assist is recommended with this character

Potentials

Universal Potential: Increases damage dealt by 10% for 20 seconds when health falls under 30%. If behind in rounds won, increases damage dealt by 20% instead.

Character Potential: Block 10 attacks to gain 1 bar of Climax Gauge. Can be activated once a round.

Move List

L = Low, H = High, A = Air
JC = Jump Cancel, SC = Support Cancel, EX = EX Cancel
ISC = Impact Skill Cancel, TCC = Trump Card Cancel, CAC = Climax Art Cancel

Startup includes the first active frame.

Normal Moves

5A
DFC.Kuroyukihime.5A.jpg
Damage Startup Active Recovery Frame Adv Cancels Guard Hitbox
300 7 2 16 -5
+8 (JC)
JC, SC, EX, ISC, TCC, CAC HLA -

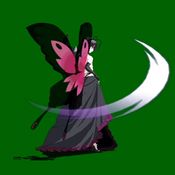
Forward slash. Mash for the Quick Combination autocombo.

2A
DFC.Kuroyukihime.2A.jpg
Damage Startup Active Recovery Frame Adv Cancels Guard Hitbox
250 7 3 15 -5 SC, EX, ISC, TCC, CAC LA -

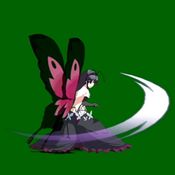
Crouching slash. Hits low. Chains into itself up to three times, then goes into the Quick Combination autocombo.

5B
DFC.Kuroyukihime.5B.jpg
Damage Startup Active Recovery Frame Adv Cancels Guard Hitbox
500 10 4 21 -10
+10 (JC)
JC, SC, EX, ISC, TCC, CAC HL -

Knee attack with Black Lotus. Jump cancelable and air unblockable.

2B
DFC.Kuroyukihime.2B.jpg
Damage Startup Active Recovery Frame Adv Cancels Guard Hitbox
450 10 3 19 -7
+10 (JC)
JC, SC, EX, ISC, TCC, CAC HL -

Downward stab with Lotus. Reaches slightly longer than 5B on grounded foes. Not a low or overhead. Air unblockable.

5C
DFC.Kuroyukihime.5C.jpg
Damage Startup Active Recovery Frame Adv Cancels Guard Hitbox
700 12 3 26 -12 SC, EX, ISC, TCC, CAC HLA -

Swinging kick up with Black Lotus. Slow startup, and no aerial hitbox directly in front of KYH. (If opponent jumps in throw range, this will whiff.) Can buffer Starburst Stream and it will only come out on hit.

2C
DFC.Kuroyukihime.2C.jpg
Damage Startup Active Recovery Frame Adv Cancels Guard Hitbox
650 11 4 24 -11 SC, EX, ISC, TCC, CAC HLA -

Low heel drop from Lotus. Air unblockable, though the hitbox makes it impractical for AA. Not an overhead, and doesn't knock down.

j.A
DFC.Kuroyukihime.jA.jpg
Damage Startup Active Recovery Frame Adv Cancels Guard Hitbox
250 8 3 X+2 Varies JC, SC, EX HA -

Jumping slash. Very short range means it's only occasionally useful to stuff very slow attacks.


j.B
DFC.Kuroyukihime.jB.jpg
Damage Startup Active Recovery Frame Adv Cancels Guard Hitbox
450 10 3 X+3 Varies JC, SC, EX HA -

Slightly upward slash with Lotus. Not that great horizontally, or downward. Usually combo filler.

j.C
DFC.Kuroyukihime.jC.jpg
Damage Startup Active Recovery Frame Adv Cancels Guard Hitbox
650 11 4 X+4 Varies JC, SC, EX HA -

Slanting downward slash with Lotus. KYH's furthest-reaching attack horizontally, and downwards. Kind of slow, works as anticipatory air-to-air.


Special Moves

Death by Piercing
「デス・バイ・ピアーシング」

236X
Air O.K.
DFC.Kuroyukihime.236X.jpg
Version Damage Startup Active Recovery Frame Adv Cancels Guard Hitbox
A 700 Ground: 14
Air: 13
4 Ground: 24
Air: X+14
Ground: -10 to -12
Air: -8 to -25
SC, EX
TCC, CAC (Ground only)
HLA -

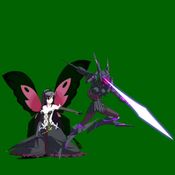
Straight thrust from her position.

  • Button pressed determines range. C is longest and will reach about 4/5 screen
  • Startup is the same for all strengths
  • Great for controlling midrange


  • In Mode Red, all versions have longer reach and wallbounce. Frame data is identical to the normal versions, however.
Version Damage Startup Active Recovery Frame Adv Cancels Guard Hitbox
B 700 Ground: 14
Air: 13
4 Ground: 26
Air: X+14
Ground: -12 to -14
Air: -12 to -28
SC, EX
TCC, CAC (Ground only)
HLA -

fluff

Version Damage Startup Active Recovery Frame Adv Cancels Guard Hitbox
C 700 Ground: 14
Air: 13
4 Ground: 28
Air: X+14
Ground: -14 to -16
Air: -12 to -25
SC, EX
TCC, CAC (Ground only)
HLA -

fluff

Version Damage Startup Active Recovery Frame Adv Cancels Guard Hitbox
EX 1500 Ground: 14
Air: 13
4 Ground: 24
Air: X+14
Ground: -10 to -12
Air: -9 to -31
SC
TCC, CAC (Ground only)
HLA -

Wallbounces. In Mode Red, the move reaches full-screen.

Death by Flashing
「デス・バイ・フラッシング」

214X
Air O.K.
DFC.Kuroyukihime.214X.jpg
Version Damage Startup Active Recovery Frame Adv Cancels Guard Hitbox
A 700 10 6 Ground: 34
Air: X+10
Ground: -16
Air: Varies
SC, EX, TCC, CAC HLA -

Diagonal upward thrust with Black Lotus. Has follow-ups.

  • Button used determines angle & position of Lotus for follow-ups.
  • A is an almost horizontal angle.
Version Damage Startup Active Recovery Frame Adv Cancels Guard Hitbox
B 700 10 6 Ground: 34
Air: X+10
Ground: -16
Air: Varies
SC, EX, TCC, CAC HLA -
  • Slightly steeper angle.
Version Damage Startup Active Recovery Frame Adv Cancels Guard Hitbox
C 700 10 6 Ground: 34
Air: X+10
Ground: -16
Air: Varies
SC, EX, TCC, CAC HLA -
  • About a 45 degree angle. Follow-ups whiff on grounded opponents.
Version Damage Startup Active Recovery Frame Adv Cancels Guard Hitbox
EX 1465 11 20 15 (Both) Ground: +8 to +3
Air: +16 to +6
SC, TCC, CAC HLA -
  • Three hits, no followups.
  • Third hit causes hard knockdown.
Follow-up: Attack
「攻撃」

A or B
after Death by Flashing
Air O.K.
Version Damage Startup Active Recovery Frame Adv Cancels Guard Hitbox
A Normal: 320
Blue: 488
Normal: 10
Blue: 10, 10
Normal: 6
Blue: 6, 14
Normal: 20
Blue: 17, 12
Air: X+10
Normal: -2
Blue: +6
Air: Varies
SC, EX, TCC, CAC HLA -

An additional slash from Lotus. Can be done on hit or whiff. Pulls opponent toward Kuroyukihime.

  • In the air, move has identical frame data to the grounded version.
  • In Mode Blue, does two additional slashes and pushes opponent away.
Version Damage Startup Active Recovery Frame Adv Cancels Guard Hitbox
B Normal: 444
Blue: 610
Normal:4 10, 10
Blue: 10, 10
Normal: 6, 6
Blue: 6, 20
Normal: 20, 38
Blue: 27, 18
Air: X+10
Normal: -6
Blue: +3 to 0
Air: Varies
SC, EX, TCC, CAC HLA -

Two additional slashes from Lotus. Can be done on hit or whiff. Pushes opponent away.

  • In Mode Blue, does three additional slashes and pulls opponent toward Kuroyukihime.
    • Frame data note: In Mode Blue, slash one is separate, slashes two and three are counted together.
Follow-up: Feint
「フェイント」

C
after Death by Flashing
Version Damage Startup Active Recovery Frame Adv Cancels Guard Hitbox
C Blue: 558 Normal: 10
Blue: 10, 10 (Lotus)
Normal: 6
Blue: 6, 14 (Lotus)
Normal: 18 (no cancel)
Cancel: X+6
Blue: 18 (no cancel), 28 (Lotus)
(no cancel)
Normal: -27
Blue: -10
SC, Jump Normals Normal: N/A
Blue: HLA (Lotus)
-

Can be done on hit or whiff. Lotus slashes like in the Follow-up Attack B, but it doesn't hit. Instead, Kuroyukihime teleports into the air where Lotus ends the slashes.

  • This is a special air state; you cannot block, air jump, or do specials/supers, but you can use Cancel Support and jumping normals.
  • Normals in this state can't be cancelled into anything, but j.B will ground-slam aerial opponents.
    • Frame data note: This follow-up has identical properties in the air and on the ground. Of course, you have more air time with the air version.
  • In Mode Blue, Lotus's slashes have a hitbox, and will pop the opponent into the air.
  • Kuroyukihime has enough advantage on hit to link a j.C (or a j.B if spaced properly for the knock down).


Universal Mechanics

Throw
6C or 4C
DFC.Kuroyukihime.64C.jpg
Damage Startup Active Recovery Frame Adv Cancels Guard Hitbox
1100 4 1 100 +50 (hit) SC, EX, TCC, CAC N/A -

Standard throw. Does 4 hits, nice long window for canceling into Supports, etc. Leaves the opponent about a half-screen away if you don't cancel it.

Impact Skill
Death by Barraging
「デス・バイ・バラージング」

5A+B
DFC.Kuroyukihime.5AB.jpg
Damage Startup Active Recovery Frame Adv Cancels Guard Hitbox
1073 13 17 37 -17 SC, EX, CAC (hit)
TCC
Green only: JC (hit)
HLA -

Barrage of straight thrusts from Lotus while walking forward. Armored, but the timing of the armor frames is really hard to use to bulldog through attacks.

  • In Mode Green, can be special/jump-cancelled on hit (not block).
Impact Skill
Soft Act Counter
「柔法当身」

2A+B
DFC.Kuroyukihime.2AB.jpg
Damage Startup Active Recovery Frame Adv Cancels Guard Hitbox
1350 1
Hit: 4 (normal)
2 (Green)
~28
Hit: 1
Whiff: 38
Hit: 41 (Failure)
59 (Success)
Failure: -30
Hit: +42(normal)
+66 (Green)
SC, EX, CAC, TCC HLA -

Counters close range physical attacks. Throws the opponent behind her. May not work against Climax Arts.

  • Counter window activates very quickly, does not last as long as animation freeze. Slight delay between absorbing the hit and the follow-up attack.
  • It is very possible to safejump this. Crossups and late-timed jump-ins can make the follow-up hit whiff entirely or give the opponent enough time to block and retaliate.
  • In Mode Green, recovery decreases, and Kuroyukihime throws the opponent high into the air behind her, allowing for an air combo.
Impact Break
4A+B
DFC.Kuroyukihime.4AB.jpg
Damage Startup Active Recovery Frame Adv Cancels Guard Hitbox
First Hit: 900
Launcher: 800
First Hit: 22
Launcher: 9
First Hit: 8
Launcher:2
First Hit: 14 First Hit: -2
Launcher: -37
First Hit: N/A
Launcher: SC, EX, TCC, CAC
(on hit)
First Hit: HA
Launcher: HLA
-

Universal armored overhead. Standard follow-up attack.

Trump Card
Overdrive
「オーバードライブ」

A+C
DFC.Kuroyukihime.64C.jpg
Version Damage Startup Active Recovery Frame Adv Cancels Guard Hitbox
Mode Blue
6A+C
N/A 0 N/A ~30 N/A N/A N/A -

Increases Kuroyukihime's attack power by 10%.

  • Black Lotus turns blue.
  • Death by Flashing's Follow-up Attack does an extra hit, and the Follow-up Feint gains a hitbox.
Version Damage Startup Active Recovery Frame Adv Cancels Guard Hitbox
Mode Green
2A+C
N/A 0 N/A ~30 N/A N/A N/A -

Increases Kuroyukihime's defense by 15%.

  • Black Lotus turns green.
  • Soft Act Counter’s recovery is reduced and the counter attack will launch the opponent high for juggles.
  • Death by Barraging becomes jump cancelable and special cancelable
Version Damage Startup Active Recovery Frame Adv Cancels Guard Hitbox
Mode Red
4A+C
N/A 0 N/A ~30 N/A N/A N/A -

Increases Kuroyukihime's attack power by 10%.

  • Black Lotus turns red.
  • Death by Piercing gains a bigger hitbox and wallbounces on hit.
Version Damage Startup Active Recovery Frame Adv Cancels Guard Hitbox
Random
5A+C
N/A 0 N/A ~30 N/A N/A N/A -
  • Activates a random Overdrive mode.
  • Practically useless.


Climax Arts

Death by Embracing
「デス・バイ・エンブレイシング」

41236B+C
DFC.Kuroyukihime.41236BC.jpg
Damage Startup Active Recovery Frame Adv Cancels Guard Hitbox
3500 9 5 30 -18 N/A HLA -

A hit grab. Blockable, reaches just a bit short of 5C's max range.

Starburst Stream
「スターバースト・ストリーム」

63214B+C
DFC.Kuroyukihime.63214BC.jpg
Damage Startup Active Recovery Frame Adv Cancels Guard Hitbox
2760 14 94 ~85 -53 N/A HLA -

Fires multiple blasts of energy. Same name as Kirito’s Climax Art, but it's a rare non-ranbu 63214 move.

  • Like most 63214 moves, recovers 20% of the blast gauge during superflash.
  • Punishable when blocked point blank (or mid range, or if the opponent has a quick fireball).
  • No invincibility during the attack.
  • Easily confirmable from mid and far range, especially from Death By Piercing.


Combos

Combo Notation Guide:
( ) = optional, typically the combo will be easier if omitted
[ ] = Input is held
/ = Option to choose between multiple actions
+ = Multiple buttons are pressed simultaneously
(x N) = Attack can be repeated N number of times, range provided
(#) = Next action is taken after a certain number of hits
-> = Special is cancelled to add on special
CH = Counter Hit

Note: Damage listed is without Power Up Blast/Trump Card Overdrive unless otherwise specified.

Assorted Combos

Quick Combination

5A > 5A > 5A > 5A > 5A(2) (> 5A)
  • 1703 (2138). Equivalent to 5A > 5B > 5C > 214A -> B(2) (> 236A+B).
2A > 2A > 2A > 2A > 2A > 2A -> 2A(2) (> 2A)
  • 1573 (1903). Equivalent to 2A > 2A > 2A > 2B > 5C > 214A -> B(2) (> 236A+B).
  • Less damaging than the 5A combo, so if you're gonna mash, mash 5A after you hit-confirm.

Air Combo Enders

(etc.) > j.B > j.C > 8jc > (j.B >) j.C > j.214C -> B(2) (/ j.214A+B)
  • Opponent can tech high in the sky as you land. Meter ender causes hard knockdown. Make sure to input the jump cancel as 8 to get the spacing right for the third hit of EX Flashing.
  • You may need to omit the second j.B off of some starters, depending on height.
(etc.) > j.B > j.C > 8jc > j.B > j.C > j.236A (> j.236A+B)
  • Opponent can tech as you they hit the ground. EX ender adds ~200 damage and forces opponent to tech later (as you land).

Overdrive OTG Ender

(etc.) 5A > 5B > 2B > 2C > 2A > 2A
  • Tacks on a little extra damage to opponents lying on the ground near you.

Midscreen

5A/2A Starter

Meterless

5A > 5B > 5C > 236C
  • 1472. Safest meterless option, since it sends the opponent flying.
5A > 5B > 5C > 5A+B
  • 1663. Lets the opponent tech near you, so probably not advisable.
5A > 5B > 5C > 214A -> B(2)
  • 1703. Leaves the opponent standing at slight advantage about a 5C's reach away.
2A > 5A > 5B > 5C > 236C
  • 1526. Most damage meterless Piercing combo from an A starter. Throw in an extra 2A for lazy low confirms and 100 less damage.

0-1 Stocks, During Mode Green

(2AxN >)5A > 5B > 5C > 5A+B > jc > (Air Combo Ender)
  • Standard meterless ender does 2420, 1 stock ender does 2668 with knockdown.

0 Stocks, During Mode Blue

(2AxN >) 5A > (5B >) 5C > 2C > 214A -> C -> j.B
  • 2262. You will need to subtract attacks depending on spacing to connect the j.B knockdown at the end, especially if you start with one or more 2As or hit from 2A/5A's max distance.

0 Stocks, During Mode Red

(2AxN >) 5A > 5B > 5C > 2C > 236C > 236C
  • 2286. Good times with wall bound.

1 Stock, During Mode Red

(2AxN >) 5A > 5B > 5C > 236C > 236C > delay 236A+B > 236C
  • 2816. Even better times with wall bound.

1 Stock

(2A >) 5A > 5B > 5C > 5A+B(5) > 214A+B
  • 2235. Knocks down the opponent just outside 5C range.
(2A >) 5A > 5B > 5C > 5A+B(5) > 236A+B
  • 2230. The "get out of my face" option.

2 Stock

(2A >) 5A > 5B > 5C > 214A -> B(2) > 41236B+C
  • 3173. Death by Embracing does more damage than Starburst Stream. Leaves opponent at roughly round-start distance.
(2A >) 5A > 5B > 5C > 5A+B > 61234B+C
  • 2805. Starburst Stream combo, for getting people out of your face and across the stage. Thanks to the magic of Damage Scaling(tm), Barraging has better proration into Starburst than Flashing.

Trump Card (Mode Red)

(2A >) 5A > 5B > 5C > 5A+B(5) > 4A+C > 236C > 236C
  • 2275. Link the second Piercing as they bounce off the wall.

Trump Card (Mode Blue)

(2A >) 5A > 5B > 5C > 214A -> A > 6A+C > 5B > 5C > 214A -> C -> j.B
  • 2335. Don't mash the j.B followup link. Side-switches, causes soft knockdown.

Trump Card & 2 Stocks

(2AxN >) 5A > 5B > 5C > 214A -> A > 4A+C > (5B >) 5C > 2C > 236C > 236C > 63214B+C
  • 3426. Slightly delay the attack after Mode Red activation so the opponent is closer to you. Omit the second 5B if you start from a couple of 2As. (You can do this one without the super ender, but it does less damage than the Barraging combo above.)
(2AxN >) 5A > 5B > 5C > 5A+B(5) > 4A+C > 5A+B(5) > 41236B+C
  • 3754. A much easier and more damaging Mode Red activation combo.
(2AxN >) 5A > 5B > 5C > 214A -> A > 6A+C > 5B > 5C > 214A -> B > 41236B+C
  • 3911. Nice damaging option for Mode Blue fans.

5B/5C Anti-Air

No Trump Card

5B > jc > Air Combo Ender
  • For the one-stock ender, at peak height, you may want to omit the 214C and go right into 214A+B.
5B > 5C > 236C
  • 1262. Piercing won't catch foes at the apex of the jump.
(5B >) 5C/2C > 214C -> B
  • (1493) 1324. Meterless option if you don't want to do an air combo or stuffed something with a C attack.

During Any Trump Card Overdrive

5C/2C > jc > (Air Combo Ender)
  • You may need to omit the first (or second) j.B depending on the height/spacing of the opponent when you catch them with 5C/2C. It's possible to combo into Mode Blue's C warp -> j.B follow up, but because of proration it won't knock down.

Throw Starter

1 Stock

4/6C(4) > 236A+B
  • 1532. Blow away.
4/6C(4) > 214A+B
  • 1534.

2 Stocks

4/6C(4) > 412346B+C
  • 2570.
4/6C(4) > 63214B+C
  • 1993. Fly away now.

Trump Card (Mode Red)

4/6C(4) > 4A+C > 236C > 236C
  • 1570.

Trump Card (Mode Blue)

4/6C(4) > 6A+C > 214C -> C -> j.B
  • 1531. Opponent can tech the knockdown.

4A+B Starter

4A+B -> B > Air Combo Ender
  • Basic 1-stock EX Flashing ender does 2380.

2 Stocks

4A+B -> B > 63214B+C
  • 2445. Buffer it during the zoom-in on the second hit of the follow-up. Not worth it unless you can burn some Trump Cards to end the match (does ~2900 if you use two).

5A+B Starter

1 Stock

5A+B(5) > 236A+B
  • 1505.
5A+B(5) > 214A+B
  • 1507. At close ranges, the third hit of EX Flashing will whiff and the opponent will be able to air-tech above you.

2 Stocks

5A+B(5) > 41236B+C
  • 2543.
5A+B(5) > 63214B+C
  • 1966. As usual, pick damage or flinging opponent across the stage.

Trump Card (Mode Blue)

5A+B(5) > 6A+C > 5B > 7jc > j.C > j.214A -> C -> j.B
  • 1720. For showboats.

Trump Card (Mode Red)

5A+B(5) > 4A+C > 5C > 236C > 236C
  • 1688.

Trump Card & 2 Stocks

5A+B(5) > 4A+C > 5C > 236C > 236C > 63214B+C
  • 2665.

2A+B Starter

1 Stock

2A+B > 236A+B
  • 2052.
2A+B > 214A+B
  • 2059. Pick your distance, etc.

2 Stocks

2A+B > 63214B+C
  • 2774.
2A+B > 41236B+C
  • 3170. Again, distances.

During Code Green

2A+B > 5C > jc > (Air Combo Ender)
  • 2491 or 2727 for one stock. Omit the second j.B and input the jc as 9jc.

236X Starter

Most of these combos can be used for grounded hits and anti-air.

1 Stock

236C > 236A+B
  • 1510 (ground hit). Can be used for anti-air hits, but not at max height.

2 Stock

236C > 63214B+C
  • 2347 ground, 2277 air hit. Braindead easy at any height, works on anti-air hits, etc.

During Mode Red

236C > 236C
  • 1345 air hit. Timing can be tricky on very high anti-airs.

1 Stock, During Mode Red

236C > 236C > 236A+B (> 236C)
  • 2438 ground hit (with optional ender), 2057 air hit (w/o). Link the 236Cs, cancel quickly into EX Piercing, then link the last C Piercing. Last 236C may not work on high aerial opponents. Easiest at near-max range.

2 Stocks, During Mode Red

236C > 236C > 63214B+C
  • 2785 ground hit, 2691 air hit. Easy and fun.

214B/C Anti-Air Starter

Trump Card (any)

214B/C -> A > 4/2/6A+C > 214C -> B
  • ~1528 (damage will vary based on Overdrive Mode used). Not an especially great mode activation setup, but the best you're getting off a raw Flashing.

Corner

Meterless, Trump Card-less

Any two normals > 236C
  • Two hits or less before a Piercing is an untechable knockdown. Use when you want to create some space and not deal with a forward-teching opponent in your face.

0 Stocks, During Mode Red

(2AxN >) 5A > 5B > 5C > 2C > 236C > (Overdrive OTG Ender)
  • 2279.

1 Stock, During Mode Red

(2AxN >) 5A > 5B > 5C > 2C > 236C > delay 236A+B > 5C > 236C
  • 2849. Used to knock 'em back down in the corner. Delay the EX Piercing just enough to give yourself the height needed to link the 5C.

Assists

Kino

1 Stock (or during Overdrive), Blast OK

5A > 5B > 5C > 6S + 5A+B(5) > 6S hits > dash ABC
  • Prototypical combo into launch into Power Up Blast.

Accelerator

1 Stock (or during Overdrive), Blast OK

4/6C(3) > 6S > 4/6C(4) > 6S hits > dash > ABC
  • Throw into assist launch into Power Up Blast. Time the 6S with the third hit of the throw. Wait until the opponent is done pinballing off the edges of the screen before Blasting.

Enju

3(+1) Stocks, Trump Card (Mode Red), Blast OK

2A > 2A > 5B > 5C > 5A+B(5) > 4A+C > 5A+B(5) > 236A+B > 236A+B > 5S > ABC > dash 5A+B(1) > 41236B+C
  • 4637. Hit 5S as soon as the second 236A+B connects, then Power Up Blast as soon as Enju hits. Dash up and time the Barraging so the opponent is low enough they don't fly out of Embracing.

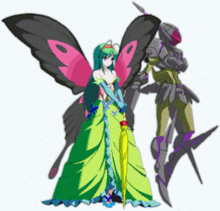
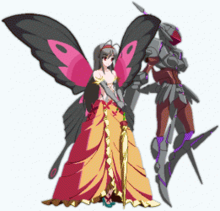
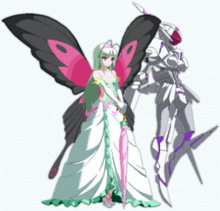
Colors

Color 1 Color 2 Color 3 Color 4
DFCKuroyukihime-1.png
DFCKuroyukihime-2.png
DFCKuroyukihime-3.png
DFCKuroyukihime-4.png
Color 5 Color 6 Color 7 Color 8
DFCKuroyukihime-5.png
DFCKuroyukihime-6.png
DFCKuroyukihime-7.png
DFCKuroyukihime-8.png
Color 9 Color 10 Color 11 Color 12
DFCKuroyukihime-9.png
DFCKuroyukihime-10.png
DFCKuroyukihime-11.png
DFCKuroyukihime-12.png
Color 13 Color 14
DFCKuroyukihime-13.png
DFCKuroyukihime-14.png
Dengeki Bunko: Fighting Climax
General

ControlsFAQGlossaryHUDSystem

Characters

AkiraAsunaKirinoKiritoMiyukiKuroyukihimeMikotoRentaroSelvariaShanaShizuoTaigaTomokaYukina

Assists

AcceleratorAliciaBoogiepopCeltyDokuroEnjuErioHaruyukiHoloInnocent CharmIzayaKinoKojouKoukoKuronekoLeafaMashiroPaiRyuujiSadaoTatsuyaToumaWilhelmina