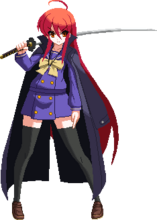
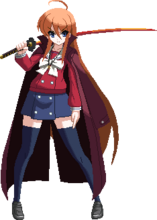
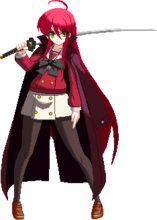
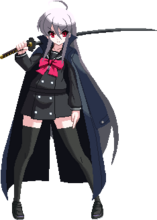
 |
Outdated Version
- This page is for an outdated version of the game (DFC). To see Shana's character page for the latest version (DFCI), click here.
|
Introduction
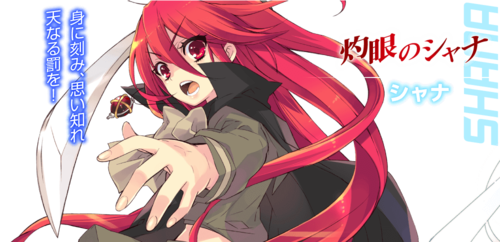
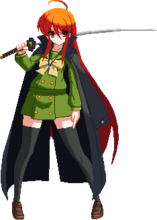
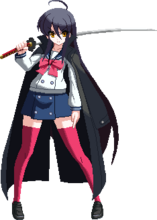
Originally from the light novel Shakugan no Shana.
Gameplay
A synopsis of this character's play-style, strengths, weaknesses, etc
Pros
- Excellent normals for pressure and reactive play
- Has an airdash
- Moveset allows for clean hit confirms virtually every time
- Full screen projectile
- Has very high damage output alongside easy access to gauge
- Trump Card is excellent for continuing pressure, as well as forcing your opponent to whiff
Cons
- Has "mediocre" Impact Skills
- Can't use a double jump from an airdash
Recommended Assists
Kino - Arguably the best assist in the game. The safe, fast fireball adds a lot to your ability to play neutral safely and smack other assists doing things you don't want.
Leafa - Generically strong assist. Helps in neutral and pressure.
Enju - Good combo and confirm potential, good abilities.
Kojou - Good combo assist for entering Power Up state or standard finisher. Also a very good oki assist after a climax or EX GnO
Potentials
Universal Potential: Increases damage dealt by 10% for 20 seconds when health falls under 30%. If behind in rounds won, increases damage dealt by 20% instead.
Character Potential: Hit with attacks 10 times to increase damage dealt by 10% for 20 seconds. Can be activated once a round.
Move List
L = Low, H = High, A = Air
JC = Jump Cancel, SC = Support Cancel, EX = EX Cancel
ISC = Impact Skill Cancel, TCC = Trump Card Cancel, CAC = Climax Art Cancel
Startup includes the first active frame.
Normal Moves
| 5A
|
| Damage
|
Startup
|
Active
|
Recovery
|
Frame Adv
|
Cancels
|
Guard
|
Hitbox
|
| 300
|
6
|
2
|
16
|
-5
+8 (JC)
|
JC, SC, EX, ISC, TCC, CAC
|
HLA
|
-
|
- It has a big hitbox, good for converting into random combos
- Total length is pretty long, so it’s dangerous to wiff
- Chains into all other normals
|
|
| 2A
|
| Damage
|
Startup
|
Active
|
Recovery
|
Frame Adv
|
Cancels
|
Guard
|
Hitbox
|
| 250
|
5
|
2
|
18
|
-7
|
SC, EX, ISC, TCC, CAC
|
LA
|
-
|
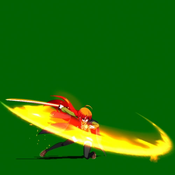
- Quick slash forward, hits low
- Like with 5A, total length is pretty long, so it’s dangerous to whiff
- Chains into itself 3 times
- 4th time onward becomes 2B > 5C > Gouka
|
|
| 5B
|
| Damage
|
Startup
|
Active
|
Recovery
|
Frame Adv
|
Cancels
|
Guard
|
Hitbox
|
| 500
|
9
|
2
|
18
|
-5
+10 (JC)
|
SC, EX, ISC, TCC, CAC
|
HL
|
-
|
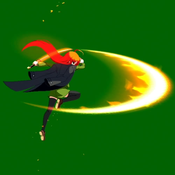
- Rising slash forward that is air unblockable and jump cancellable
- Can be used as a predictive anti-air, but its hitbox isn’t the best for it (loses to Asuna’s j.C)
- Deadly if she uses it after the opponent blocks a jump attack or assist in the air
|
|
| 2B
|
| Damage
|
Startup
|
Active
|
Recovery
|
Frame Adv
|
Cancels
|
Guard
|
Hitbox
|
| 450
|
9
|
3
|
19
|
-7
|
SC, EX, ISC, TCC, CAC
|
L
|
-
|
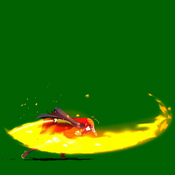
- Leans forward into a sweeping slash, hits low and is air unblockable
- Not jump cancelable outside Trump Card
- Pretty long range, not quite as much as 5C
- Depending on the opponent, it can punish a whiffed jump in while they are landing
|
|
| 5C
|
| Damage
|
Startup
|
Active
|
Recovery
|
Frame Adv
|
Cancels
|
Guard
|
Hitbox
|
| 700
|
11
|
3
|
22
|
-8
|
SC, EX, ISC, TCC, CAC
|
HLA
|
-
|
- Horizontal slash at the knees, not a low
- Longest range normal, but has no upward hitbox
- 5C > 5A+B can drop at the absolute maximum range of 5C
- Great normal for checking an opponent on the ground
|
|
| 2C
|
| Damage
|
Startup
|
Active
|
Recovery
|
Frame Adv
|
Cancels
|
Guard
|
Hitbox
|
| 700
|
10
|
4
|
20
|
-7
|
SC, EX, ISC, TCC, CAC
|
HL
|
-
|
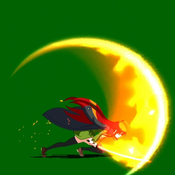
- Downward slash in a semi-circle
- Very good anti-air as it is air unblockable
- Short range, possible to whiff 2B > 2C
- Faster recovery than 5C
- Can be used as a situational anti-air against certain moves (Tomoka’s j.C and a deep Asuna j.C for example)
|
|
| j.A
|
| Damage
|
Startup
|
Active
|
Recovery
|
Frame Adv
|
Cancels
|
Guard
|
Hitbox
|
| 250
|
7
|
2
|
X+2
|
Varies
|
JC, SC, EX
|
HA
|
-
|
- Quick slash forward, jump cancellable
- Fast start up with a good hitbox, perfect for air-to-air
- Short duration overall, but if she whiffs it she can’t do anything until she lands
|
|
| j.B
|
| Damage
|
Startup
|
Active
|
Recovery
|
Frame Adv
|
Cancels
|
Guard
|
Hitbox
|
| 450
|
9
|
3
|
X+3
|
Varies
|
JC, SC, EX
|
HA
|
-
|
- Downward slash forward, jump cancellable
- Well rounded air normal, good for both air-to-air and jumping in
- Good to use for re-jump pressure
|
|
| j.C
|
| Damage
|
Startup
|
Active
|
Recovery
|
Frame Adv
|
Cancels
|
Guard
|
Hitbox
|
| 650
|
10
|
4
|
X+4
|
Varies
|
JC, SC, EX
|
HA
|
-
|
- Upward slash forward, jump cancellable
- Long startup but lots of damage and untech time
- Strongest against opponents in front of her, but it does have a hitbox below it as well
|
|
| j.[C]
|
| Damage
|
Startup
|
Active
|
Recovery
|
Frame Adv
|
Cancels
|
Guard
|
Hitbox
|
| 800
|
19
|
4
|
X+4
|
Varies
|
JC, SC, EX
|
HA
|
-
|
- Full circular slash around her, jump cancellable
- Will only hit once, no matter the positioning
- Will stop her air momentum, allowing for short hop attacks
- Longest horizontal range among her jump normals
- Lower hitbox is like Kirino’s j.C. Very difficult to evade
- Wall bounces and knocks down on hit
|
|
Special Moves
Hien
「飛焔」
236X
Air O.K.
|
| Version
|
Damage
|
Startup
|
Active
|
Recovery
|
Frame Adv
|
Cancels
|
Guard
|
Hitbox
|
| A
|
Close: 880
Mid: 600
Far: 400
|
Ground: 15
Air: 17
|
31* (max)
|
X+14
|
+8 to -16
|
SC, EX
|
HLA
|
-
|
Jumps back and launches a wave of fire, floats on hit. Full screen projectile. Has the slowest startup but recovers the fastest
|
| Version
|
Damage
|
Startup
|
Active
|
Recovery
|
Frame Adv
|
Cancels
|
Guard
|
Hitbox
|
| B
|
Close: 880
Mid: 600
Far: 400
|
Ground: 14
Air: 16
|
25* (max)
|
X+17
|
-2 to -21
|
SC, EX
|
HLA
|
-
|
A mix of both moderate start up and recovery
|
| Version
|
Damage
|
Startup
|
Active
|
Recovery
|
Frame Adv
|
Cancels
|
Guard
|
Hitbox
|
| C
|
Close: 800
Mid: 600
Far: 400
|
Ground: 12
Air: 14
|
24* (max)
|
X+20
|
-9 to -25
|
SC, EX
|
HLA
|
-
|
Fast start up but long recovery
|
| Version
|
Damage
|
Startup
|
Active
|
Recovery
|
Frame Adv
|
Cancels
|
Guard
|
Hitbox
|
| EX
|
Ground: 1088
Air: 1300
|
Ground: 13
Air: 14
|
Hit: 69
Whiff: 16* (max)
|
Ground: 22 (whiff)
Air: X+16
|
+15 to -4
|
SC
|
HLA
|
-
|
Startup is faster (combos from A normals) and she doesn’t jump back, so it’s a grounded move with less recovery
- Does 5 hits, so it will destroy single hitting projectiles
- Restore 10% of the Blast Gauge
- Wall bounds on hit
|
|
Guren no Oodachi
「紅蓮の大太刀」
214X
Air O.K.
|
| Version
|
Damage
|
Startup
|
Active
|
Recovery
|
Frame Adv
|
Cancels
|
Guard
|
Hitbox
|
| A
|
1148
|
Ground: 8
Air: 9
|
17
|
Ground: 34
Air: X+16
|
Ground: -12
Air: -7 to -15
|
SC,EX
TCC, CAC (ground version only)
|
HLA
|
-
|
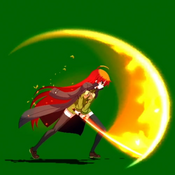
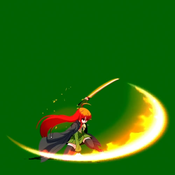
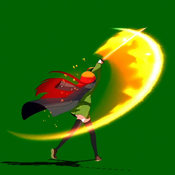
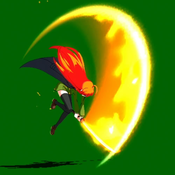
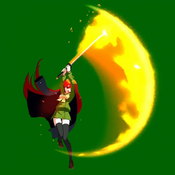
Full spinning slash that hits all around Shana and floats on hit.
- Last hit launches the opponent off the ground if they are hit while standing (short untechable time)
- Gigantic hitbox for controlling the air. It can also be used to beat early anti-airs and to go over lows
- Recovers surprisingly quickly, but she lands close to the opponent and can always be punished with 5A into a full combo
|
| Version
|
Damage
|
Startup
|
Active
|
Recovery
|
Frame Adv
|
Cancels
|
Guard
|
Hitbox
|
| B
|
1228
|
Ground: 8
Air: 9
|
17
|
Ground: 37
Air: X+16
|
Ground: -13
Air: -9 to -15
|
SC,EX
TCC, CAC (ground version only)
|
HLA
|
-
|
Shana hops forward a little more than the A version before beginning her fire arc.
|
| Version
|
Damage
|
Startup
|
Active
|
Recovery
|
Frame Adv
|
Cancels
|
Guard
|
Hitbox
|
| C
|
1307
|
Ground: 8
Air: 9
|
17
|
Ground: 40
Air: X+16
|
Ground: -14
Air: -6 to -15
|
SC,EX
TCC, CAC (ground version only)
|
HLA
|
-
|
Shana hops further up before beginning her fire arc.
|
| Version
|
Damage
|
Startup
|
Active
|
Recovery
|
Frame Adv
|
Cancels
|
Guard
|
Hitbox
|
| EX
|
1465
|
Ground: 8
Air: 9
|
17
|
Ground: 39
Air: X+16
|
Ground: -13
Air: -4 to -15
|
SC
TCC, CAC (ground version only)
|
HLA
|
-
|
Last hit causes more untechable time and restore 10% of the blast gauge
|
|
Universal Mechanics
Throw
6C or 4C
|
| Damage
|
Startup
|
Active
|
Recovery
|
Frame Adv
|
Cancels
|
Guard
|
Hitbox
|
| 1100
|
4
|
1
|
59
|
+53 (hit)
|
SC, EX, TCC, CAC
|
N/A
|
-
|
|
|
|
Impact Skill
Gouka
「劫火」
5A+B
|
| Damage
|
Startup
|
Active
|
Recovery
|
Frame Adv
|
Cancels
|
Guard
|
Hitbox
|
| 1096
|
12
|
6
|
40
|
-20
|
SC, EX, CAC (hit only)
TCC
|
HLA
|
-
|
2-hit charging slash, floats on hit
- Cancellable into EX specials, Climax Arts, Trump Card and Combo Blast
- Only cancellable into Trump Card and Combo Blast on block
- The fast startup and charge makes it unsuitable as an anti-air against deep jump ins
|
|
Impact Skill
Shinku
「真紅」
2A+B
|
| Damage
|
Startup
|
Active
|
Recovery
|
Frame Adv
|
Cancels
|
Guard
|
Hitbox
|
| 1457
|
First Hit: 20
Second hit: 13
|
First Hit: 2
Second Hit: 2
|
First Hit: 28
Second Hit: 34
|
First Hit: -15
Second Hit: -21
|
SC, EX, CAC (hit only)
TCC
|
HLA
|
-
|
Sweeps at the opponent’s feet with fire
- Follow up is a attack-grab with a flaming hand
- You can stagger the follow-up as late as the fire effect completely disappearing
- Same cancel conditions as Gouka, plus the follow-up
- First hit will vacuum opponent towards Shana
- Long range but weak up close as a reversal and weak as an anti-air.
|
|
Impact Break
4A+B
|
| Damage
|
Startup
|
Active
|
Recovery
|
Frame Adv
|
Cancels
|
Guard
|
Hitbox
|
First Hit: 900
Launcher: 800
|
First Hit: 22
Launcher: 9
|
First Hit: 8
Launcher:2
|
First Hit: 14
|
First Hit: -2
Launcher: -37
|
First Hit: N/A
Launcher: SC, EX, TCC, CAC
(on hit)
|
First Hit: HA
Launcher: HLA
|
-
|
Short hop into a downward slash
- Follow-up attack is a low-air charge, so she bounces back and is airborne on block (in recovery until landing)
- Can cancel the follow up into her trump card on block
- Has very short range (attack > 4A+B will whiff if the opponent push blocks)
|
|
Trump Card
Shinpan
「審判」
5A+C
|
| Damage
|
Startup
|
Active
|
Recovery
|
Frame Adv
|
Cancels
|
Guard
|
Hitbox
|
| N/A
|
0
|
N/A
|
~50
|
N/A
|
N/A
|
N/A
|
-
|
A large flaming eye appears behind Shana, cancelling any action and returning her to neutral
- No hitbox, but it is strike invincible throughout the move (not throw invincible)
- Will fill half of a Climax Gauge stock on activation
- In addition to all the universal effects of Trump Cards, Shana’s will also make her Climax gauge increase gradually. Cancels out normal gradual increase and the effect of Power Up Blasts
|
|
Climax Arts
Guren no Souyoku
「紅蓮の双翼」
41236B+C
|
| Damage
|
Startup
|
Active
|
Recovery
|
Frame Adv
|
Cancels
|
Guard
|
Hitbox
|
| 3514
|
9
|
15
|
32
|
-20
|
N/A
|
HLA
|
-
|
Wraps herself in fire, rises straight up then charges down forward
- No invincibility and is air blockable, so it’s not a good anti-air
- Frame data note: Advantage only considers if the descending part is blocked. In-between the two parts, the opponent can run behind you.
|
|
Kessen Ougi
「決戦奥儀」
63214B+C
|
| Damage
|
Startup
|
Active
|
Recovery
|
Frame Adv
|
Cancels
|
Guard
|
Hitbox
|
| 400, 540, 1962* (max)
|
First hit: 12
|
First hit: 5
|
34, 40, 54*
|
-24, -28, -33
|
N/A
|
HLA
|
-
|
Invincible super. Can press the buttons again for two follow up attacks, even on whiff.
- If the second attack is blocked or whiffs, the opponent can freely move during the Shinpan of the third attack. If the second attack hits, the Shinpan will freeze time like normal
- Restores 20% of the Blast Gauge
- Damage data note: If you correctly delay the second follow-up into the third one, you can get the maximum damage output.
- Frame data note: Recovery is variable as you can delay the follow-ups as much as you like. These are approximations based on inputting the follow-ups as quickly as possible.
|
|
Combos
Midscreen
5A Starter
- stuff > 5A+B > 214A+B > (41236B+C)
- stuff > 5A+B (1 hit) > Shinpan > 5C > 2C > j.BC > dj.BC > j.214C > (j.214A+B)
- 5C > 2C is a midair catch after Shinpan.
4A+B Starter
- 4A+B > B > j.A > etc
- Notes about this particular combo
Kino Assist
- 5A > 5B > 5C > 6S > 5A+B > (6S hits) > j.BC > dj.BC > j.214C > (j.214A+B)
- 5A > 5B > 5C > 5A+B (1 hit) > Shinpan > 5A > 5B > j.B > j.BC > [j.214C > 6S] OR [j.214C > j.214A+B > 6S] > (6S hits) xx 5A+B 41236B+C
- 5A > 5B is a midair catch after Shinpan.
- Hit 6S 2 to 3 hits into j.214C (or j.214A+B, if you opt to spend three meter instead of two).
- After 6S hits, link 5A+B to hit them as they're falling.
Enju Assist
- stuff > 5A+B > 5S > j.BC > dj.BC > j.214c > j.214A+B
- Hit 5S immediately after inputting 5A+B; don't wait for 5A+B to hit.
Corner
5A Starter
3 meters 3026 damage
5A > 5B > 5C > 5AB (1hit) > 236AB > 5AB (2hits) > 236AB > j.B > j.C > jc.B > j.C > 214C > 214AB
4A+B Starter
- 4A+B > B > j.A > etc
- Notes about this particular combo
Assists
Assist Character 1
- 5A > 5B > 5C > 5D > etc
- Notes about this particular combo
Assist Character 2
- 5A > 5B > 5C > 6D > etc
- Notes about this particular combo
Colors
| Color 1
|
Color 2
|
Color 3
|
Color 4
|
|
|
|
|
|
| Color 5
|
Color 6
|
Color 7
|
Color 8
|
|
|
|
|
|
| Color 9
|
Color 10
|
Color 11
|
Color 12
|
|
|
|
|
|
| Color 13
|
Color 14
|
|
|
|
