 |
Outdated Version
- This page is for an outdated version of the game (DFC). To see Taiga Aisaka's character page for the latest version (DFCI), click here.
|
Introduction
Originally from the light novel Toradora!
Gameplay
A synopsis of this character's play-style, strengths, weaknesses, etc
Pros
- Normals are longer than they seem
- Is able to make most blockstrings safe
Cons
- Lack of Neutral Tools
- Lackluster Mix-up
- Low Damage without spending a good amount of resources
Recommended Assists
Kojou Akatsuki -
Kojou gives Taiga very good Oki, Combo tools, and gives her the ability to safely mix up the opponent.
Leafa - Leafa is used as a combo extender, Oki and neutral assist.
Kino - Kino gives Taiga combo extensions as well as a strong neutral tool.
Ryuji Takasu - Gives Taiga a decent oki tool as well as something to deal with projectiles. Also a good combo extender.
Dokuro Mitsukai - Easy to use assist with a fast projectile and simple combo extension.
Potentials
Universal Potential: Increases damage dealt by 10% for 20 seconds when health falls under 30%. If behind in rounds won, increases damage dealt by 20% instead.
Character Potential: Throw the opponent 3 times to increase damage dealt by 10% for 10 seconds. Can be activated twice a round.
Move List
L = Low, H = High, A = Air
JC = Jump Cancel, SC = Support Cancel, EX = EX Cancel
ISC = Impact Skill Cancel, TCC = Trump Card Cancel, CAC = Climax Art Cancel
Startup includes the first active frame.
Normal Moves
| 5A
|
| Damage
|
Startup
|
Active
|
Recovery
|
Frame Adv
|
Cancels
|
Guard
|
Hitbox
|
| 300
|
5
|
2
|
14
|
-3
+8 (JC)
|
JC, SC, EX, ISC, TCC, CAC
|
HLA
|
-
|
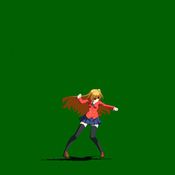
Taiga throws her fist out in front of her. A fast mid with good horizontal reach. Jump cancel-able.
|
|
| 2A
|
| Damage
|
Startup
|
Active
|
Recovery
|
Frame Adv
|
Cancels
|
Guard
|
Hitbox
|
| 250
|
5
|
3
|
14
|
-4
|
SC, EX, ISC, TCC, CAC
|
Low
|
-
|
She crouches and pokes her leg all the way out. A fast low that can be chained three times. Good hitbox, often used off of empty jumps to hit low or to tick throw.
|
|
| 5B
|
| Damage
|
Startup
|
Active
|
Recovery
|
Frame Adv
|
Cancels
|
Guard
|
Hitbox
|
| 500
|
8
|
3
|
16
|
-4
+10 (JC)
|
JC, SC, EX, ISC, TCC, CAC
|
HL
|
-
|
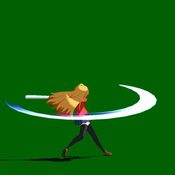
A long poke where Taiga pulls out a bat and swings in front of her. A move with very good horizontal reach. Jump cancel-able. Air unblockable which makes it good for guard breaking and confirming off of opponents who are stuck blocking an assist in mid air.
|
|
| 2B
|
| Damage
|
Startup
|
Active
|
Recovery
|
Frame Adv
|
Cancels
|
Guard
|
Hitbox
|
| 450
|
9
|
3
|
14
|
-2
+10 (JC)
|
JC, SC, EX, ISC, TCC, CAC
|
L
|
-
|
A bag is swung towards the opponents feet. A long low, about the same length as 5B. Air unblockable. Jump cancel-able.
|
|
| 5C
|
| Damage
|
Startup
|
Active
|
Recovery
|
Frame Adv
|
Cancels
|
Guard
|
Hitbox
|
| 700
|
11
|
3
|
22
|
-8
|
SC, EX, ISC, TCC, CAC
|
HLA
|
-
|
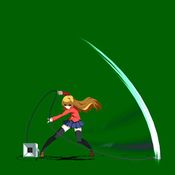
She whips a cord from an amp(?) at the opponent. Mostly combo filler.
|
|
| 5[C]
|
| Damage
|
Startup
|
Active
|
Recovery
|
Frame Adv
|
Cancels
|
Guard
|
Hitbox
|
| 874
|
16
|
32
|
26
|
-6
|
SC, EX, ISC, TCC, CAC
|
HLA
|
-
|
Taiga swings the cord from the amp above her head. Can be used to preemptively catch jump outs or as a meaty, but is mostly a combo tool. Has the largest reach out of her normals but not exactly meant for footsies.
|
|
| 2C
|
| Damage
|
Startup
|
Active
|
Recovery
|
Frame Adv
|
Cancels
|
Guard
|
Hitbox
|
| 700
|
10
|
4
|
22
|
-9
|
SC, EX, ISC, TCC, CAC
|
HLA
|
-
|
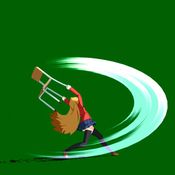
A school chair is swung upwards, often used to otg but is mostly a combo filler. Not suggested as an anti-air (The chair does not hit as high as it looks), but is air unblockable. A good tool to use in full range footsies as well.
|
|
| j.A
|
| Damage
|
Startup
|
Active
|
Recovery
|
Frame Adv
|
Cancels
|
Guard
|
Hitbox
|
| 250
|
7
|
6
|
X+2
|
Varies
|
JC, SC, EX
|
HA
|
-
|
A short ranged air to air with Taiga's knee. Doesn't see very much use due to j.B being the superior air to air in range.
|
|
| j.B
|
| Damage
|
Startup
|
Active
|
Recovery
|
Frame Adv
|
Cancels
|
Guard
|
Hitbox
|
| 450
|
9
|
3
|
X+3
|
Varies
|
JC, SC, EX
|
HA
|
-
|
This time Taiga swings her bag upwards and above her head. Very good hitbox and very good as an air to air.
|
|
| j.C
|
| Damage
|
Startup
|
Active
|
Recovery
|
Frame Adv
|
Cancels
|
Guard
|
Hitbox
|
| 650
|
11
|
4
|
X+4
|
Varies
|
JC, SC, EX
|
HA
|
-
|
Taiga swings downward on the opponent with a badminton racket. Good jump in move.
|
|
| j.[C]
|
| Damage
|
Startup
|
Active
|
Recovery
|
Frame Adv
|
Cancels
|
Guard
|
Hitbox
|
| 700
|
24
|
14
|
X+4
|
Varies
|
SC, EX
|
Strike: HA
Projectile: HLA
|
-
|
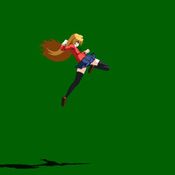
Taiga charges the swing from j.C but shoots a shuttlecock at the opponent right below her. The shuttlecock will not hit high, but the strike will. Shuttlecock will also not hit if too close. The shuttlecock can be cancelled into air EX or specials on hit or block. Uses are dubious as Taiga must be perfectly above her opponent for the shuttlecock to hit. The move also shifts Taiga's momentum slightly.
|
|
Special Moves
Hell Thrust
「地獄突き」
236X
|
| Version
|
Damage
|
Startup
|
Active
|
Recovery
|
Frame Adv
|
Cancels
|
Guard
|
Hitbox
|
| A
|
732
|
10
|
3*3 hits
|
45
|
-7
|
SC, EX, TCC, CAC
|
HLA
|
-
|
Taiga does 2 stabs with her bokken ending in one finishing strike. Mainly combo filler.
|
| Version
|
Damage
|
Startup
|
Active
|
Recovery
|
Frame Adv
|
Cancels
|
Guard
|
Hitbox
|
| B
|
965
|
9
|
3*4 hits
|
61
|
-9
|
SC, EX, TCC, CAC
|
HLA
|
-
|
Taiga does 3 stabs with her bokken ending in one finishing strike. Mainly combo filler.
|
| Version
|
Damage
|
Startup
|
Active
|
Recovery
|
Frame Adv
|
Cancels
|
Guard
|
Hitbox
|
| C
|
1082
|
8
|
3*5 hits
|
76
|
-12
|
SC, EX, TCC, CAC
|
HLA
|
-
|
Taiga does 4 stabs with her bokken ending in one finishing strike. Mainly combo filler.
|
| Version
|
Damage
|
Startup
|
Active
|
Recovery
|
Frame Adv
|
Cancels
|
Guard
|
Hitbox
|
| EX
|
Normal: 1353
Charged: 2500
|
Normal: 8
Charged: 83
|
3*7 hits
Charged: 7
|
Normal: 86
Charged: 22
|
Normal: -8
Charged: -10
|
SC, TCC, CAC
|
HLA
|
-
|
Taiga does 6 stabs with her bokken ending in one finishing strike. Will cause a wallbounce in the corner and ends in a hard knockdown. Can be used in OTG combos. Can be held with either A or B to do one large strike that goes full screen dealing a total of 2500 damage. NOT UNBLOCKABLE IF HELD. Will cause a large pushback on block like Trump if held.
Restores 10% Blast Gauge on hit.
|
|
「移動 地獄突き後に」
6 or 4
During Hell Thrust
|
| Damage
|
Startup
|
Active
|
Recovery
|
Frame Adv
|
Cancels
|
Guard
|
Hitbox
|
| N/A
|
N/A
|
N/A
|
N/A
|
N/A
|
N/A
|
HLA
|
-
|
Taiga can move backwards or forwards by holding 4 and 6 during Hell Thrust. May be needed to make the move safer/confirm from a farther distance.
|
|
Snow Sled Ram
「雪ソリ特攻」
214X
|
| Version
|
Damage
|
Startup
|
Active
|
Recovery
|
Frame Adv
|
Cancels
|
Guard
|
Hitbox
|
| A
|
964
|
9
|
16
|
37
|
Normal: -4
Sled only: +12
|
SC, EX, TCC, CAC
|
LA
|
-
|
Taiga pulls out her sled and slides on the ground for a low hitting attack. The sled will hit autonomously if initial hit is whiffed. Relatively safe on block.
|
| Version
|
Damage
|
Startup
|
Active
|
Recovery
|
Frame Adv
|
Cancels
|
Guard
|
Hitbox
|
| B
|
1024
|
11
|
23
|
39
|
Normal: -4
Sled only: +9
|
SC, EX, TCC, CAC
|
HLA
|
-
|
Taiga pulls out her sled and jumps in the air. The sled will hit autonomously if initial hit is whiffed. Relatively safe on block.
|
| Version
|
Damage
|
Startup
|
Active
|
Recovery
|
Frame Adv
|
Cancels
|
Guard
|
Hitbox
|
| C
|
1024
|
18
|
27
|
33
|
Normal: +2
Sled only: +18
|
SC, EX, TCC, CAC
|
HLA
|
-
|
Taiga pulls out her sled and slide forward a bit before jumping into the air. The sled will hit autonomously if initial hit is whiffed. Relatively safe on block. Will cause a hard knockdown.
|
| Version
|
Damage
|
Startup
|
Active
|
Recovery
|
Frame Adv
|
Cancels
|
Guard
|
Hitbox
|
| EX
|
1550
|
7
|
32
|
36
|
Normal: +2 to -3
Sled only: +22
|
SC, TCC, CAC
|
HLA
|
-
|
Taiga pulls out her sled and jumps in the air for a multi hitting attack. Causes hard knockdown and relatively safe on block. The sled will hit autonomously if initial hit is whiffed.
Restores 10% Blast on hit.
|
|
Jumping Snow Sled Ram
「ジャンピング雪ソリ特攻」
j.214X
|
| Version
|
Damage
|
Startup
|
Active
|
Recovery
|
Frame Adv
|
Cancels
|
Guard
|
Hitbox
|
| A
|
880/1024
|
11
|
25
|
39
|
-4 or worse
|
SC, EX
|
HLA
|
-
|
Taiga pulls out her sled while in the air and does a small low angle jump. Relatively safe on block, but very punishable on whiff. Travels the least distance. The sled will hit autonomously if initial hit is whiffed.
|
| Version
|
Damage
|
Startup
|
Active
|
Recovery
|
Frame Adv
|
Cancels
|
Guard
|
Hitbox
|
| B
|
880/1024
|
11
|
26
|
39
|
-4 or worse
|
SC, EX
|
HLA
|
-
|
Taiga pulls out her sled while in the air does a small low angle jump jump. Relatively safe on block, but very punishable on whiff. Travels medium distance (1/2 screen). The sled will hit autonomously if initial hit is whiffed.
|
| Version
|
Damage
|
Startup
|
Active
|
Recovery
|
Frame Adv
|
Cancels
|
Guard
|
Hitbox
|
| C
|
1024
|
11
|
23
|
39
|
-4 or worse
|
SC, EX
|
HLA
|
-
|
Taiga pulls out her sled while in the air and does a small low angle jump. Relatively safe on block, but very punishable on whiff. Travels the largest distance (3/4 screen). The sled will hit autonomously if initial hit is whiffed.
|
| Version
|
Damage
|
Startup
|
Active
|
Recovery
|
Frame Adv
|
Cancels
|
Guard
|
Hitbox
|
| EX
|
1681
|
9
|
31
|
40
|
-3 or worse
|
SC
|
Mid
|
-
|
Taiga pulls out her sled for a multi hitting sled attack. Travels roughly the same distance as the C version. Relatively safe on block, but very punishable on whiff. The sled will hit autonomously if initial hit is whiffed.
Restores 10% blast on hit.
|
|
Universal Mechanics
Throw
6C or 4C
|
| Damage
|
Startup
|
Active
|
Recovery
|
Frame Adv
|
Cancels
|
Guard
|
Hitbox
|
| 1100
|
4
|
1
|
81
|
+50 (hit)
|
SC, EX, TCC, CAC
|
N/A
|
-
|
Taiga grabs her opponent and headbutts them. Causes OTGeable hard knockdown. The headbutt is also EX/Climax cancellable.
|
|
Impact Skill
It's a Raid!
「殴り込みじゃあああっ!」
5A+B
|
| Damage
|
Startup
|
Active
|
Recovery
|
Frame Adv
|
Cancels
|
Guard
|
Hitbox
|
| 1209
|
12
|
11
|
37
|
-22
|
SC, EX, TCC, CAC
(hit only)
|
HLA
|
-
|
Taiga does a three hit attack with her bokken. Main component of combos and has armor.
|
|
Impact Skill
Tiger Upper
「タイガーアッパー」
2A+B
|
| Damage
|
Startup
|
Active
|
Recovery
|
Frame Adv
|
Cancels
|
Guard
|
Hitbox
|
| 1223
|
12
|
12
|
39
|
-34
|
SC, EX, TCC, CAC
(hit only)
|
HLA
|
-
|
Taiga does a DP-esque upper with her bokken. Has armor.
|
|
Impact Break
4A+B
|
| Damage
|
Startup
|
Active
|
Recovery
|
Frame Adv
|
Cancels
|
Guard
|
Hitbox
|
First Hit: 900
Launcher: 800
|
First Hit: 22
Launcher: 9
|
First Hit: 8
Launcher:2
|
First Hit: 14
|
First Hit: -2
Launcher: -37
|
First Hit: N/A
Launcher: SC, EX, TCC, CAC
(on hit)
|
First Hit: HA
Launcher: HLA
|
-
|
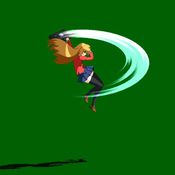
Universal overhead attack. The animation is identical to her j.C. Follow up with any attack button into a launcher.
|
|
Trump Card
Don't Ignore Me!
「無視すんなああ!」
5A+C
|
| Damage
|
Startup
|
Active
|
Recovery
|
Frame Adv
|
Cancels
|
Guard
|
Hitbox
|
| 3000
|
26
|
62
|
34
|
+4 to -5
|
N/A
|
HA
|
-
|
Taiga kicks a trash can which goes in a diagonal arc full screen. Hits overhead, but is air blockable.
|
|
Climax Arts
You're Pissing Me Off!
「むかつくんじゃぁあああ!」
41236B+C
|
| Damage
|
Startup
|
Active
|
Recovery
|
Frame Adv
|
Cancels
|
Guard
|
Hitbox
|
| 3685
|
10
|
4
|
50
|
-37
|
N/A
|
HLA
|
-
|
Taiga stomps her foot which will cause a shockwave in front of her (This hitbox extends vertically up to Taiga's height). The opponent then gets pinned to a telephone pole and Taiga will ferociously kick her opponent.
|
|
Ranbu of Tiger and Dragon
「竜虎乱撃」
63214B+C
|
| Damage
|
Startup
|
Active
|
Recovery
|
Frame Adv
|
Cancels
|
Guard
|
Hitbox
|
| 2944
|
5
|
23
|
20
|
-22
|
N/A
|
HLA
|
-
|
Taiga runs forward with her bokken. If she makes contact, she will start attacking her opponent in a cartoon cloud. Ryuji will come out and try to stop her but she finishes her assault anyway. Whatever colour assist you choose for Ryuji will be the colour shown, otherwise the colour will match Taiga's.
Has slight invincible startup.
Restores 20% Blast Gauge on hit.
|
|
Combos
Notation Guide:
- Numbers: Indicate direction (2 is down, 6 is forward, etc)
- (A): Light Attack
- (B): Medium Attack
- (C): Heavy Attack
- (S): Assist
- (>): The next part of the combo
- (OTG): On-the-ground. Attacks hitting a knockdowned opponent
- ([]): Brackets around a move indicate the move should be held down
- (X): Any attack button A/B/C
- (j.X): Jumping Attack/Move
- General Notes:
>In order for j.214AB to hit fully, you must delay it so that Taiga is just below her opponent when she does the move.
Midscreen
2A Starter
- 2A > 2B > 5C > 5AB
- 2A > 2B > 5C > 5AB > 41236BC
- 2A > 2B > 5C > 5AB > 214AB > 41236BC
- 2A > 2B > 5C > 5AB > 236AB > 63214BC
- 2A > 2B > 5C > 5AB > 214AB > 2B OTG
5A Starter
- 5A > 5B > 5C > 236C > 236AB
- 5A > 5B > 5C > 5AB (2 hit) > 214AB > 5B > 5C > 236C > 41236BC
- 5A > 5B > 5C > 5AB > 214AB > 5[C] > 236C > 41236BC [Midscreen to Corner]
- 5A > 5B > 5C > 5AB (2 hit) > 214AB > 5B > 5AB > 41236BC
- 5A > 5B > j.A > j.C > j.B > micro dash 5A > 5B > j.A > j.C > j.B > 5B > 214A > 41236BC [Standing Opponent] [Trump Active]
- 5A > 5B > j.C > j.B > micro dash 5A > j.C > j.B > 2A > 2B > 5C > 5AB > 41236BC [Smaller Standing Opponents] [Trump Active]
5C Starter
- 5[C] > 5AB > 5AC
j.C Starter
- j.C > 2A > 2B > 5C > 5AB > 214AB
- j.C > 5A > 5B > 5C > AB (2 hit) > 214AB
Throw (6C/4C)Starter
- Throw > 2AAA > 2B > 2C
- Throw > 41236BC
- Throw > 214AB > 2A > 5B > 236C > 41236BC
- Throw > 5AC
- Throw > 2AAA > 2B > 2C > 214A > 236AB
4AB/2AB Starter
- 4AB > Follow Up > j.B > j.C > double jump > j.B > j.C > j.214AB > 41236BC
- Meaty 4AB > 2A link > 2B > 5C > 5AB
- 2AB (CH) > 214AB > 5B > 5AB > 41236BC
214X Starter
- 214C > j.B > j.C > double jump > Power Up Blast
Corner
2A Starter
- 2AAA > 2B > 5C > 236C > 236AB > 5B > j.A > j.B > j.C > j.214A > ABC > 41236BC
- 2A > 2B > 5C > 236C > 236AB > 5B > 5C > 236C > 41236BC
j.C Starter
- j.C > 2A > 2B > 5C > 236C > 236AB > 5B > j.A > j.B > j.C > j.214AB
AB Starter
- 4AB > Follow up > j.B > j.C > double jump backwards j.B > j.C > j.214AB > 41236BC
Assists
Ryuji Takasu
- 6S > 5A > 2AA > 2B > 5C > 236C [Ryuji Hits] > 236[AB]
- 2A > 5B > 6S > 5C > 5AB > [Ryuji Hits] > 5B > Power Up Blast
- 2A > 5B > 6S > 5C > 5AB [2 Hits] > 214AB > 5B > 236C > 5B > Wait > Power Up Blast
- 2A > 5B > 6S > 5C > 5AB > j.214AB > 5B > 236C > 236[AB]
- 2A > 5B > 6S > 5C > 5AB > 5B > 236C > [Ryuji Hits] > run > 5AC
- 4AB > Follow Up > 6S > j.B > j.C > double jump > j.B > j.C > 214AB > ABC > [Ryuji Hits] > 236[AB]
Kino
- 2A > 2B > 5C > 5AB + 6S > jump forward j.C > land 5[C] > 5AB > 214AB > 41236BC
- j.C > 2A > 2B > 5C > 5AB (6S) > run up Power Up Blast
- 4AB > Follow up + 6S > j.B > j.C (Kino hits) > land 5[C] > 5AB > 41236BC
Dokuro Mitsukai
- 5A > 5B > 5C > 236C > 5S > j.B > j.C > double jump > j.B > j.C > j.214C
- j.B > j.C > double jump > j.B > j.C > 5S > land > Power Up Blast OR 236C > 41236BC [Jumping Opponent Air-To-Air Confirm]
Setups (Okizeme/Mixups)
Okizeme Setups:
After 236AB:
1. Run forward 214C
The sled is meant to hit as a meaty and will give Taiga some advantage.
Colors
| Color 1
|
Color 2
|
Color 3
|
Color 4
|
|
|
|
|
|
| Color 5
|
Color 6
|
Color 7
|
Color 8
|
|
|
|
|
|
| Color 9
|
Color 10
|
Color 11
|
Color 12
|
|
|
|
|
|
| Color 13
|
Color 14
|
|
|
|
External Resources
Official Character Intro:
- https://www.youtube.com/watch?v=Q9HQKcNtXnI
Combo Videos:
- https://www.youtube.com/watch?v=wHguRszr6JY
- https://www.youtube.com/watch?v=ym_dGDeCuzI
- https://www.youtube.com/watch?v=pQYmRUi0YSw
- https://www.youtube.com/watch?v=obOZ3xFQryU
Match Videos:
- https://www.youtube.com/user/TaigaArchive

