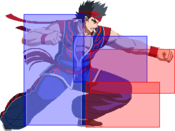
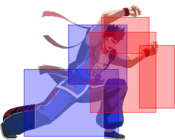
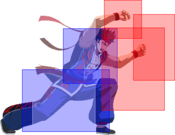
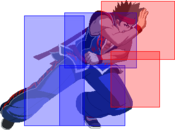
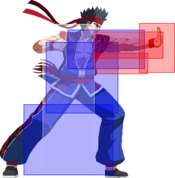
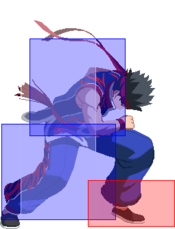
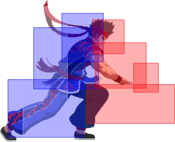
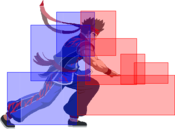
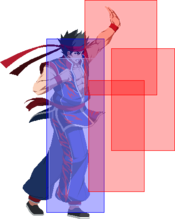
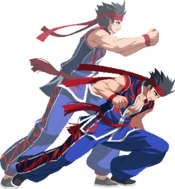
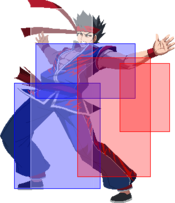
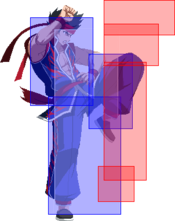
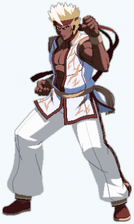
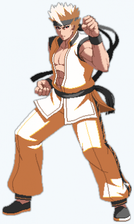
Dengeki Bunko: Fighting Climax/DFCI/Akira Yuki
Players to Watch
JP:
- Ashuura (Rank 1 Akira/Erio), mains KYH/Rusian OR Mashiro OR Iriya
- Mizore (Rank 4 Akira/Erio OR Celty OR Dokuro)
- NG (Rank 7 Akira/Tatsuya)
- Tomo (Former Rank 2 Akira/Erio)
- Yosshi (Rank 2 Akira/Erio)
NA:
- Clashmech (Akira/Wilhelmina), can be found in DFCI Discord
Introduction
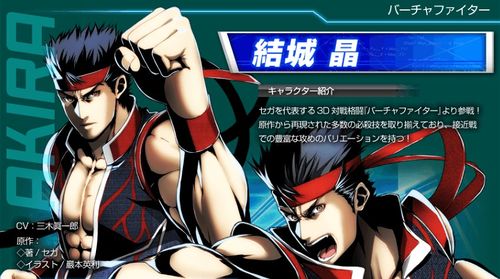
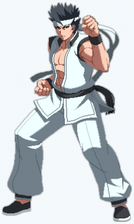
Akira is a Hakkyoku-ken fighter battling in the 5th World Fighting Tournament to test his skills and to find a worthy opponent. He's never seen without his trusty hachimaki.
A guest character from the SEGA arcade game series Virtua Fighter, specifically wearing his outfit from Virtua Fighter 5.
Akira is the quintessential fighting game rushdown character. He sports decent, quick normals with deceiving range for an unarmed fighter. His game plan is to get in your face and condition you to make unforced errors in close-range combat and punish. His unique dash move 666B can quickly close mid-range gaps and start his turn. With the absolute best back dash in the game, he can move out of opponents' close-range pokes and move back in with his equally-quick forward dash.
Pros
- Best back dash in the game, lasting a total 20f, allowing you to bait, whiff punish, and cause players to over-commit to answering you
- Arguably best Red Trump Card in the game due to its horizontal reach. Tetsuzankou is your best anti-air, your best reversal, and among one of your best raw punish moves.
- Unique 666B move can catch opponents off-guard with its deceptive reach. It makes landing for the opponent scary at more ranges than you'd expect.
- Great routing outside of A2A interactions, with a EX launcher, meterless wallbounce corner routing, solo trump install options, etc.
- Above average pressure. Some above average stagger options with 2C/2[C], 214A, with backdash on your barely minus frames to whiff punish with 236B, wait and see, etc.
Cons
- Decent assist synergy, just major dependence on said assist. Synergy is insanely important with the lower tiers.
- The only step-dash movement character in the game, and as such players may feel alienated on movement concepts and not being predictable with 66B.
- Extreme difficulty vs aerial opponents, making his best AA option his movement and positioning. He has no grounded AA, his reward on A2A interactions is terrible, and microdash unders/walk unders are going to be next to impossible. This is his steepest learning curve by far.
- Players may struggle to make pressure ambiguous, as jump cancelling is medicore due to poor ATGs, making him easy to box out if Akira does not abuse the massive stagger windows DFCI offers.
Recommended Assists
Erio - Debatably Akira's best assist. Erio augments Akira's oppressive close-range game to maximize any advantages he pushes. 5S removes any opponent hitboxes that touch her while she jumps, netting easy punishes against antsy foes and forcing respect. 6S is a pressure extender and pseudo-projectile that goes off by hitting (pushing) her to help her slide across the screen. You can repeat this more than once per 6S call and can hit her with 66B, 236B, etc to make said options safer to throw out as she is insurance for you in neutral.
Dokuro - Dokuro is Akira's safest pick, as he can use it as an extension after his launcher 214AB. Likewise, 5S in neutral covers Akira's biggest weakness, making him more difficult to mindlessly jump on in neutral.
Celty - An interesting one for Akira that takes a bit of work to make truly strong. 6S is obviously an oki tool but 5S works as a way to be a threat from even further on the screen. You can play more spaced out vs an opponent's landing and still 66B a far ranged 5S on block. A good assist, but you'll have to work to make it rewarding.
Tatsuya - Only used by NG, and almost entirely as a combo assist. Akira can 6S after 214AB launcher into fairly high damage routing. Makes his reward explosive and 5S counter is a fun oki gimmick.
Wilhelmina - Used by Clashmech, Wilhelmina, gives Akira a decent set of additional neutral options, and works as a decent combo tool. He should get a left/right with 6S, but making 6S hit to make him a problem will take a bit of work. When he does hit, though, it is an issue for the opponent.
Potentials
Universal Potential: Increases damage dealt by 10% for 20 seconds when health falls under 30%. If behind in rounds won, increases damage dealt by 20% instead.
Character Potential: Counter hit the opponent twice OR counter-hit the opponent once with a charged attack to increase damage dealt by 10% for 10 seconds. Can be activated three times a round.
Gameplan
This section is dedicated to showing unique elements in a characters gameplan and for Akira will likely discuss which spacings to do these at. Unlike other characters, he lives and dies by his positioning and the players' movement. Pressing the good button will not be enough.
Neutral
General Movement/Positioning and Backdashing
Akira's unique movement, his stepdashes, is a double-edged sword that is his highest learning curve to become scary. Akira is the only character with a step-dash and in true FPan fashion this trade-off gives him an insane backdash. Akira's backdash clocks in to a total frame count of 20f, making it the only backdash in the game a player cannot punish after a whiffed A and/or B button with 5C/5AB. A backdash so fast that he can use it to set-up whiff punish opportunities in scramble spacings.
However, even though his backdash is only 20f total, you need to be careful how you apply it. This is still a disadvantageous amount of frames to mindlessly put out, and this game not having an AUB reversal means you cannot cover a bad backdash with a DP on reaction to a jump-in. We need to first establish Akira's general positioning and layer0 movement and then we can discuss a few use cases for backdashing, and get an idea on how to make backdashing ambiguous as a neutral option.
Akira's base walk-speed is on the lower side, having a stepdash means our general grounded vectors are predictable, we have no airdash due to this game not being an airdasher game, and our weak ATG presence means jumping about will only work against Akira. Likewise, a majority of the roster has fairly good ATG buttons and without a grounded AA as well as low A2A damage, even weaker ATG characters are going to be jumping onto Akira to test his understanding of AAing with his positioning. In general, you will be hunkering down in that round-start spacing and sometimes just outside of it. This spacing lets you consistently steer clear of that mix of dash buttons and jumping in on you, while your constant threat of 66B exists in the case of Iriya, Rusian, as well as them poorly burning through their air options quickly. At this spacing you can also do things like 8~[4]j to passively move yourself and stay ambiguous vs the opponent, as JUST sitting there is easy to answer with a plethora of options. While in 8~[4]j, you have the ability to fall with a button, as well as dj in various ways to circumvent a dash landing pin attempt or to angle yourself above an opponent jumping at you to thwart their approach. You can also choose to airblock in 8~[4]j or after your double-jump to air reflect-guard the opponent which will give you room to play with this better spacing and possibly score an AA hit. This general spacing will be your best friend in which you can choose to show your hand at times with Akira's various tools that will discussed later, as well as move in to pin landings, bait out doublejumps, 2C AA doublejump landings, etc.
Now we can discuss backdashing use cases. One way to use it is by backdashing after landing, ideally when landing outside a character's dash 5A spacing where you will avoid them dash C button pinning your landing. This can basically either slow down the opponent by making them wait to call out your backdash, or cause them to commit deeper with a deep dash 5C button to either grab you if you wait/hit you on backdash. In the best case, you will find yourself being able to push the thin line of disadvantage on landing by backdashing out of dash 2A/5A which you can whiff punish with 2C and ideally at worst you'll block a C normal. If you backdash as you land and they go airborne, you can wait out a greedy double-jump towards you in which you can choose to try to 9jA it, dash-under, gamble with 2AB as they no longer have a double-jump to block it on clash, etc. Once this is an option that has been established, even just once or twice, you can land and block on disadvantage and layer your landing with fuzzy 2A, fuzzyjump (171), etc to check over-commitment if the opponent is antsy about hardreading your backdash. Some downsides to overusing this is some characters like Asuna have strong 5ABs to call out backdash and take space even if they're too late, Kirino's 236A can negative a lot of the RPS due to its multi-tool nature, Kuroko/Tatsuya/KYH all have ranged tools to call you out if they're looking for backdash as well as good AA options if you just jump again, Celty 5S is blazing fast and will stop you in your tracks if they use it to pin your landing, and assists like Iriya/Rusian may mean the opponent doesn't focus on pinning your landing but instead establish their 1P mini-game. As such, besides keeping the MU in mind, you have to remember that on a "bad" jump landing and simply blocking is sometimes a part of the game and this backdash spot is simply an RPS decision you can show at times to catch players off guard.
Another possible use case for it is barely entering 9j~X spacing, and preemptively backdashing out. Against some players, you may find that they will be quick to jump when you show any signs of approach, whether that is towards you or away from you. By establishing this use-case of backdash, you open the door to waiting out the opponent's double-jump if they 8/9j in which you can AA their landing from said dj with 2C, you can cut off double-jump vectors if they 7j, or you can use it to get your assist established. Like before, the set of characters and assists listed means this is not your layer 1.
A final sample use-case of backdash is in situations where the opponent is ready for 66B/236B, ie. round-start 236B, you can backdash, then possibly 66B or wait and see. This avoids a 9j, and you can take a second before committing to 66B to identify that. You do run the risk of the opponent delaying their jump timings, cause you to whiff 66B and put yourselves under them.
Akira has more use-cases for backdash, but these give some ideas on how to incorporate your backdash into an already existing gameplan, rather than forcing it to be the gameplan itself. Despite how ridiculous a 20f backdash is that is still a notable amount of recovery to commit to often. You should avoid falling into habits with backdash and keep in mind that sometimes you have to just hold the opponent's better decision and block, especially at times in trump state where you can then look to wait or fuzzy out of their pressure to try again. Don't rush your death.
Picking an Assist
In DFCI, every character lives and dies by their assist but especially so for "weaker" characters like Akira. Picking Dokuro will enable a stronger AA presence with threatening reward as well as a fullscreen projectile if you aren't confident in your neutral. Erio, debatably the strongest choice, gives you 5S which nullifies any attacks against you making your ground game genuinely frustrating. 6S is a projectile and once she begins to slide she cannot be hit off the screen no matter what. She will come back on the screen and if hit again she will slide again. This enables you to more aggressively 66B, 236B, etc. as she works as insurance to cover you. Celty gives you 5S to more safely pin landings from further range and you can keep the opponent locked with 66B after to begin pressure. No matter which assist you pick, even if it's not these 3, just remember to think about how it can cover Akira's weaknesses, or amplify his general reward to maintain momentum.
Various Famous Attacks
5A/2A
Unlike other characters, Akira's stepdash means he is not really using this to dash pin landings or dash 2A control space in front of him as it is very commital. However, these two buttons are still important for Akira to control his space at times when the opponent is getting too close for comfort.
66B
The god button. This tool covers a massive part of the screen at lightning fast speed, can be chained into other normals on block, is jump cancelable and air unblockable, etc. You can mix it in on roundstart if the opponent is ready for 236B by doing backdash 66B, you can use it to pin landings, you can use it to stop Rusian players from thinking they can mindlessly call 6S vs you, and in general it encourages unknowing opponents to hit buttons early and randomly, as well as jump around to cover it not realizing they are doing EXACTLY what you need them to to get your offense started. Love this button and know that if its not working, you're over-using it and not thinking about the next layers.
2C
Awesome 2C. This button can AA opponents landing from doublejump, works as a great whiff punisher out of backdash, and can sometimes be an abare in scrambles. Always cancel it into 214A for neutral applications.
236B
Insanely strong tool that is -13 but pushes the opponent pretty far, but this doesn't make it unpunishable. Often seen on round-start as round-start spacing is perfect for it. Not AUB but can catch jump-startup. If done closer than round-start spacing, it can be worth it to delay trump cancel to check people SOMETIMES.
Offense
5A/2A
Standard DFCI stuff, 5A lets you jump cancel either instantly or delayed to mess with your timings, and you can stagger this into more A normals with respect or into 2C/2[C] to check opponent's if they reflect-guard. 2A is a good low option to check fuzzys.
2B/5B
Neither buttons are remarkable by any means, but a way to change your pressure up from the usual 5A/2A~A, 5Ajc/5A~jc, 5A/2A~2C, etc. You can use 2B/5B as a string ender, as a delayed jc option, or check disrespect with a stagger 2C/2[C].
2C, 2[C]
Incredible pressure tools. Great reach, fairly fast for C normals, and your main way of answering reflect-guard. You can stagger into 236A/214A, with 214A being an auto-hitconfirm option that's barely minus.
214A
The most common string ender. It's probably good to be cognizant of not ending every string with this just because it auto-hitconfirms, but on block you can backdash after, in which you are put in a perfect spacing to 2C whiff punish players trying to take their turn, or you can wait and see.
236A
Niche pressure tool which has poor reward, but is sometimes necessary to present to answer reflect-guard.
214[C]
An overhead special that is only -3. Often autopilotted into 214AB to hitconfirm it, in which players may assist cancel as well in trump state to get pressure going further. Hits fairly far so it can be spaced to be as good as a +0 special.
236B
Even more niche tool, sometimes seen after making space in the corner. I like to sometimes establish stagger trump cancel after to check opponent's knowledge of Akira. A smarter player knows it's ranbu punishable however at those kind of spacings.
Backdash
As stated, it is seen after things like 214A, 214[C] (> 214AB), as well as 236A/236B. In general, you can establish it after slightly disadvantageous strings or after a spaced falling jB to bait out fuzzy options. Your 20f backdash makes this an annoying thing to deal with.
214B
Truthfully, I'm not 100% on how this tool is exactly used for pressure and as such feel free to edit this if you certain you have better use cases down. Akira can establish 214B after 5[C] in pressure, likely while he is in trump and has an assist with him (ie. Erio 5S) as this is a common fuzzy spot for dashing/jumping in response to Akira jump-cancelling 5[C]. Alternatively, it may be that 5[C] could be mistaken for 214[C] due to charged startup similarity and opponents get antsy and stand. Clearly has some use, but use with caution due to it whiffing on crouchers.
Defense
For defense, patience is everything. Your lack of grounded AAs, no run dash to run out of the corner, and average 2AB means you need to take it easy. On the plus side, all of your normals on RG or throwtech move you forward, meaning you are slightly annoying to jump bait and as such a player reading your defensive option will give you more space than what normal characters get. This can open up a variety of fuzzy options for you.
Move List
L = Low, H = High, A = Air, UNB = Unblockable
JC = Jump Cancel, SC = Support Cancel, EX = EX Cancel
ISC = Impact Skill Cancel, TCC = Trump Card Cancel, CAC = Climax Art Cancel
Startup includes the first active frame.
Normal Moves
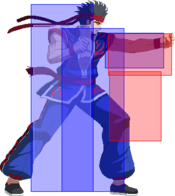
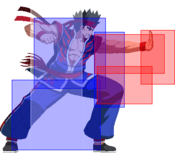
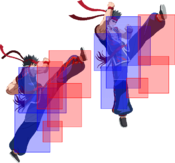
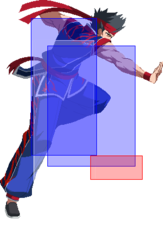
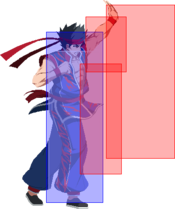
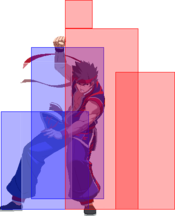
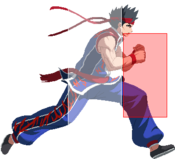
| Chusui 「冲捶」 5A |
|---|
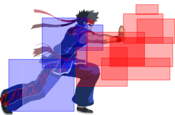
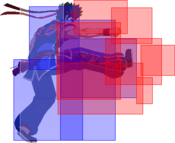
| Housui 「崩捶」 2A |
|---|
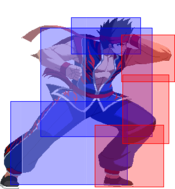
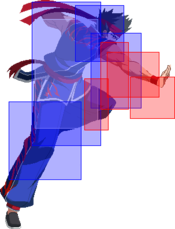
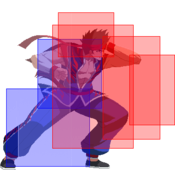
| Rimon Chouchu 「裡門頂肘」 5B |
|---|
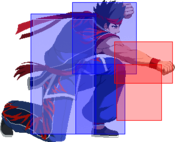
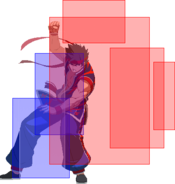
| Souka Housui 「捜下崩捶」 2B |
|---|
| Chouzan Housui 「跳山崩捶」 5C |
|---|
| Chouzan Housui (MAX) 「跳山崩捶 (MAX)」 5[C] |
|---|
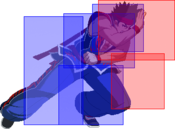
| Maho Shoukou 「馬歩衝靠」 2C |
|---|
| Zesshou Daiden Housui/Maho Shoukou (MAX) 「絶書大電崩捶」/「馬歩衝靠 (MAX)」 2[C] |
|---|
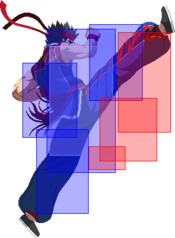
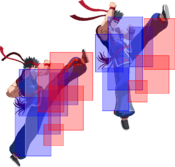
| Touku Rakushou 「投句洛書」 j.A |
|---|
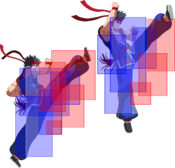
| j.B |
|---|
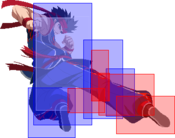
| Tankyaku/Utankyaku 「端脚」/「右端脚」 j.C |
|---|
Command Normal
| Rimon Chouchu Lv.2/Yakuho Chouchu 「裡門頂肘・二式 」/「薬舗頂肘」 666B |
|---|
Special Moves
| Mouko Kouhazan 「猛虎硬爬山」 236A |
|---|
| Byakko Soushouda 「白虎双掌打」 236B |
|---|
| Renkantai 「連環腿」 236C |
|---|
| Renkantai (Air Version) 「連環腿(空中可)」 j.236X j.236A/B/C j.236AB |
|---|
| Shura Haoh Koukazan 「修羅覇王靠華山」 236A+B |
|---|
| Jouho Senshou 「上歩川掌」 214A |
|---|
| Kaiko 214B 「開跨」 |
|---|
| Koboku 「虎撲」 214C |
|---|
| Koboku (MAX) 「虎撲 (MAX)」 214[C] |
|---|
| Youhou 「揚炮」 214A+B |
|---|
Universal Mechanics
| Throw Shin'iha 「心意把」 6C or 4C |
|---|
| Impact Skill Tenzankou 「貼山靠」 5A+B |
|---|
| Impact Skill Teishitsu Dantai 「提膝弾腿」 2A+B |
|---|
| Impact Break 4A+B |
|---|
| Trump Card Tetsuzankou 「鉄山靠」 5A+C |
|---|
Climax Arts
| Hougeki Unshin Soukoshou 「崩撃雲身双虎掌」 41236B+C |
|---|
| Yuki-ryu Hakkyoku-ken Hiden ・ Hozan 「結城流八極拳秘伝・崩山」 63214B+C |
|---|
Combos
Solo
Universal
Stuff > 214A > ...
- Be very mindful of same move proration in this route. For example, if you do 2A5B2C 214A, after 214A you'll need to pick-up with 5A2B, as using 2A again or 5B again some routes below may be much tighter and/or give less reward.
66B OR 2A 2B > 2C > 214A > 5A > 5B > jAjB > djBjC (j236C)
- Standard meterless BnB for Akira. 66B and 5B do not share same move properties so SMP will not kick in if you use both. j236C adds nearly 100 damage, but will give worse advantage and as such should probably not be done close to the corner. If you omit j236C, you can delay the jC in djBjC slightly to have a few extra frames of advantage to move into a better airtech position.
2AB (counter-hit) > recover > 5A > 5B > 214A...
- Counter-hit 2AB has great routing, and can do what Stuff > 214A... can mostly 1:1.
66B OR 2A 2B > 2C > 214A > 5B > 5AB > 214AB > recover > ...
- Standard 1 bar Akira BnB. You can do 214[C] as they fall to add 200 extra damage while still have enough time to recover and call an assist, you can powerblast after 214AB or OTG with it after 214[C], or can call your assist after 214AB (ie. Dokuro 5S, Tatsuya 6S) for combos.
66B OR 2A 2B > 2C > 214A > 5A > 5B > 214AB > recover >...
- Easier 1 bar BnB for Akira if you struggle with 5B 5AB after 214A.
4AB~X > jBjC > djBjC (j236C)
- Standard Akira 4AB BnB.
4AB~X > 214AB > ...
- An alternative Akira 1 bar 4AB BnB, for if you understandably do not want an airtech situation.
2AB > delay > 214AB > recover > 214[C]
- 214AB needs to be a very very long delay to hit after 2AB hit. 214[C] should not OTG.
Stuff > 214AB > 214[C] > 5AC
- 214[C] should NOT OTG, as if it does 5AC will whiff. Trump will hit OTG here, but does a lot more damage than the routes below by 200-300 damage.
Stuff > 236AB(2) 5AC cancel OR 236AB(3) 5AC cancel
- An Akira trump install route. 236AB(2) 5AC will cause a true trump hit and 236AB(3) 5AC will cause an OTG trump hit for better advantage.
Stuff > 214AB > delay > 236AB > 426BC
- Akira kill route. A privilege for Akira where he gets burst-locked 4 bar routing. Very nice.
Corner
2A 2B 2C > 214A > 5B > 2C > 236C
- While I advised against using the same move twice before, we use 2C again here for height purposes. By doing 2C 236C, we give enough height to have lots of left/right ambiguity. One, you can let the opponent land, and then either micro-walk forward 9j/8[6]j or omit the micro-walk for a corner gap left/right. Alternatively, with the height given by the second 2C in 2C 236C, you can dash into the corner after 236C. From there, you can do superjump instant 8dj for a drift-back left/right.
2A 2B 2C > 214A > 5B > 2C > 236C > recover > (micro-walk back) delay > 5A > 5B > 236AB(2)5AC OR 236AB(3)5AC
- Corner trump routing. You may need to micro-walk back slightly after 236C to keep the opponent in the corner.
Stuff > 214AB > (2C) 236C (recover > 236B)
- This route is for being near the corner but not in it. If you are near the corner, you can still wall-bounce the opponent with 236C. If you are far enough and still get the wall-bounce, Akira will recover early enough to also add a 236B which grants HKD.
66B (5[C]/2[C]) > 214A > 5B > 236B > 214AB > OTG 2AA.../Powerblast/OTG Powerblast etc.
- Corner routing for 66B that uses 236B for additional damage. 236B will use one of your wallbounces, so this routing is mostly for powerblasting.
66B (5[C]) > 214A > 2C > 5AB > 214AB > delay > 236C > recover > 236B > 5AC
- Near corner trump install routing.
Assists
Dokuro
5S Hit > delay > 5B > 2C > 214A > 2B > 5AB > 214AB...
- Raw Dokuro 5S hit-confirm. Standard BnB with multiple options after 214AB.
jAjB > djBjC > 5S Cancel > land, 214[C]
- A2A Dokuro 5S combo. Not the best damage, but very good for Akira's otherwise awful A2A reward.
Tatsuya
(jB) 5B/66B > 214A > 6S Cancel > dash > 214[C] > 2A > 2C > 214A > 5A > 214A > 426BC
- Akira/Tatsuya jump-in BnB.
(jB or 5A) 5B > Combo-Blast > recover, 6S > dash > 214[C] > 2A > 5B > 214A > 5A > 5B > 236C > 5[C] > 236B > 426BC
- Fairly difficult combo, you may have to omit things due to proration and/or spacing issues.
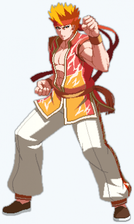
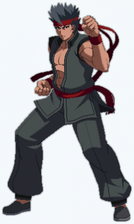
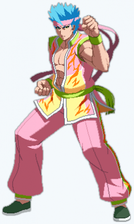
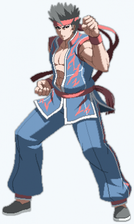
Colors
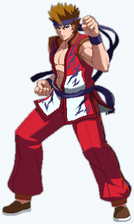
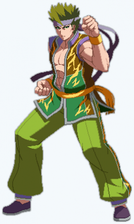
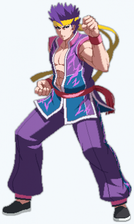
| Color 1 | Color 2 | Color 3 | Color 4 |
|---|---|---|---|
| Color 5 | Color 6 | Color 7 | Color 8 |
| Color 9 | Color 10 | Color 11 | Color 12 |
| Color 13 | Color 14 | Color 15 | Color 16 |
| Color 17 | Color 18 | Color 19 | Color 20 |
| Color 21 | Color 22 | Color 23 | Color 24 |
