Dengeki Bunko: Fighting Climax/DFCI/Emi Yusa
Players to Watch
JP:
- Shino (Rank 1 Emi/Iriya OR Celty), Pretty much the final Emi. Has optimized Iriya endlessly.
- Leo (Former Rank 1 Emi/Wilhelmina), High speed monster that makes Emi look stronger than she is. Dangerous.
- Segawa (Rank 2? Emi/Iriya OR Mashiro), Strong fundamentals. Known for his Yukina.
- DAI (Rank 13 Emi/Iriya OR Wilhelmina), Mains Yuuki, plays every character. A good resource for Emi/Wilhelmina.
NA:
- StraylightP/Yokai (Emi/Iriya), Now plays Yuuki. Can be found in Lunatic Perilune footage or in the DFCI Discord.
Introduction
Hero of Ente Isla who fought the Demon King. Though she pursued him to Japan, she is currently working as a call center agent to pay for her living expenses. She then finds the Demon King in Tokyo...
Originally from the light novel series Hataraku Maou-sama!, localized as The Devil Is a Part-Timer!.
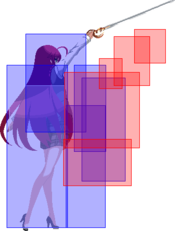
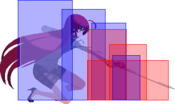
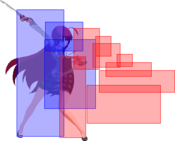
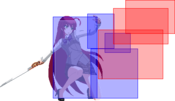
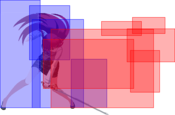
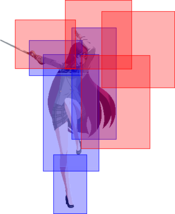
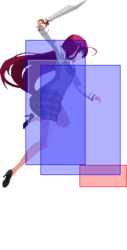
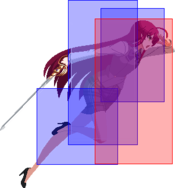
Emi is often a misunderstood character in the realm of DFCI. She's been deemed a shoto, a Shana knock-off in archetype, and is even considered weak by some. However, in the right hands Emi is a monster whos gameflow goes from being slow and passive to explosive out of no where. Her 5A is ridiculous, reaching way above her ahoge, her 2B is a solid grounded AA, 5B is an above average grounded poke, 2C is an absurd sweep, j236x is frustrating to get around, and even her fireball has some utility outside of trump where it is rather weak. With the right assist, like Iriya or Celty to encourage approaching via 5S and strong okizeme as a reward on hit, or Wilhelmina to make her random stray hits insanely explosive, Emi is able to hold her ground even against the game's strongest characters. Having a keen sense of scouting, good trump install spots and awareness on gameflow will make for Emi to be a strong contender against any team.
Pros
- Great passive playstyle. Emi's ridiculous 5A, AA 2B, and j236x/236x series allows for the right assist to make her hard to approach in the right hands.
- 5A. This normal is ridiculous and insanely difficult to bait, leading to players pressing very early air buttons to answer it, making late-stand guard rather strong.
- Blue Trump gives her access to potentially explosive damage and vastly improved zoning and offensive options, and trump install gives Emi an entire bar of meter. A well timed trump install can lead to insane steamrolling.
- Her 63214BC Climax Art (ranbu) is a full screen projectile that can punish reckless opponents.
Cons
- Medicore assist synergy. This character only really shines with Iriya/Celty/Wilhelmina.
- Very average approach options. While that alone isn't a con, this character's mediocre dash with SLOW jump normals makes MUs against other defensive characters mindnumbingly frustrating without Iriya/Celty/Wilhelmina as she is easy to bait into commitment if you are too impatient.
- Needs strong gameflow understanding for good trump activation spots. Emi rides or dies on her momentum once blue trump is active, and newer players may find themselves using it too early.
- -6 blue trump. Still a good defensive option, but alongside Kirito this blue trump is grab punishable on whiff.
Recommended Assists
Iriya - Emi's strongest assist. 5S makes her defensive playstyle more consistent as plate and its buffs encourages the opponent to approach and have an answer. If they choose not to approach, Emi gains a plate to flick in order to play neutral easier. Plate works great as a mixup tool on oki, and in trump she has plenty of access to setups with her improved routing. 6S works as a fullscreen punisher tool to present sometimes, and in trump it allows her to get more aggressive.
Wilhelmina - Emi's previous contender for strongest assist. With the right amount of resources, Emi's combos with 6S lead to insane damage. Emi gaining 1 bar on trump install allows for her to make-up for lack of resources if needed. Outside of trump, 5S works as an OK poke, and 6S can cover airtechs, lead to good reward on oki, or even setup left/rights off of 2C etc.
Celty - Not common by any means but a nice contender for Emi. 5S makes her grounded game much scarier, allowing for a stronger neutral game as it will encourage opponents to jump. With 6S, Emi gains consistent oki with insurance due to Celty's 2 hits, as well as left/rights in trump state with it.
Potentials
Universal Potential: Increases damage dealt by 10% for 20 seconds when health falls under 30%. If behind in rounds won, increases damage dealt by 20% instead.
Character Potential: Hit the opponent with 10 attacks (in the case of multi-hitting moves only the first hit is counted) for Attack Level 1 for 20 seconds. Can be activated once a round.
Gameplan
This section is dedicated to showing unique elements in a character's gameplan, not necessarily defining it entirely (ie. explaining how Emi might play around abusing 5A in neutral and what that enables, but not exactly what spacings to be at).
Neutral
Emi 101
Emi is a very strange character by DFCI standards. Despite not necessarily being weak, new Emi players will find her kit very lackluster and underwhelming. Her dash speed is just average, her fireballs are very high commitment outside of trump, her j236x series seems strong due to its slight homing feature until you realize its framedata on block, her having a blue trump that gives 0.5 bars of meter seems awesome until you realize it's the most minus trump card in the game despite being identical to Shana, who is a contender for having the best trump in the game, her crouching 2B AA is 2f slower than average for a grounded AA in this game, and possibly more. HOWEVER, not all of these are as bad as they seem and some of it has its own benefits which will be discussed below. Likewise, Emi has plenty of clear strong points. She has the second best backdash in the game tied with Kirino, her 5A is unbelievably good, her 2B being a crouching AA is extremely convenient for 5A RPS layers and as a dash/walk-under tool, trump state makes her fireballs, j236x, and general damage terrifying, and having even "the worst" blue trump is better than having a red trump for defensive OS purposes. Emi may have to work a little bit more than some characters in neutral, but with Iriya/Wil/Celty this character is still a contender for top 10 easily due to a strong defensive playstyle with an easily accessible wincon.
Picking An Assist
Like most of the roster, Emi lives and dies by the assist she choices. The most stable picks are the usual 3, Iriya/Wil/Celty. These assists allow for a more defensive, slower playstyle with an accessible wincon. However, as Emi's trump routing is very strong by solo character standards, you can opt to play around with assists like Dokuro, Mashiro, Uiharu, Kuroneko, and possibly more if you master the character herself.
Choosing Iriya is the strongest pick for Emi. Iriya 5S gives Emi a way to encourage the opponent to approach her, as well as greatly enhance her oki. In trump, she gets access to looping plate setups which are rather strong and easy to achieve.
Choosing Wilhelmina gives Emi a very flexible wincon. Wilhelmina enables great neutral coverage, strong oki options, and a high damage ceiling.
Choosing Celty is almost entirely for the neutral flexibility. Emi does get access to some strong oki setups, but most important 5S works as a way to make Emi's grounded game stronger. Additionally, 5S can be used to call out defensive fuzzy options safely, and in trump airborne 5S demands respect, and enables airborne 6S which covers a new vector entirely helping in obnoxious match-ups such as versus Kuroyukihime.
General Spacing
Emi's ideal spacing to hover around is going to be at outside of her 9jB spacing. From here, she is able to play around making intentional space to bait forward jumps, where she can call them out with 5A/2B. Additionally, she can play around her assist of choice and the RPS that comes with it, or jump-scout on her own with 8[4]j, 9j, 9j7dj, 7j9dj etc. movements. Basically, Emi's grounded neutral outside of 5A is somewhat lackluster, and as such you shouldn't be afraid to make some space to take advantage of your 5A, jB, j236x, and assist.
Anti-Air Concepts
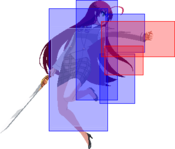
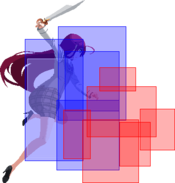
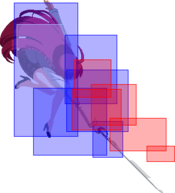
Emi has a plethora of great anti-air options. While not AUB, 5A works great at swatting lazy jump-ins. Her 2B, while slower than the usual grounded AA, is a crouching AA meaning it is unlikely to lose to opponents hitting an air button early. Her dash speed is not bad and her ability to control space via airscouting with jB to cut off the opponent's air movement is fairly nice. Cycling through these options appropiately, and at times playing around letting players land and pinning them with 5B/5C will keep your AAing ambiguous. Additionally, specific to Emi, her trump-card works great as an AA against double-jumping players if the time to trump appears. Emi's high trump recovery means players falling from a double-jump, their final air option, will whiff against Emi's invulnerable recovery out of trump where she can take her turn.
Abusing 5A
What makes Emi a character worth playing. If you don't enjoy using this button you probably want to pick a different character. Emi's ridiculously disjointed 5A arcs up and forward, allowing for you to swat lazy jump-in attempts. If the opponent is low enough, you can cancel into 5B/2B to guard-crush them.
5A Counterplay
For better or worse, there is some counterplay to keep in mind as the Emi player and understanding these layers will be what separates a weak Emi player from a strong one.
One of the most common 5A counterplay options is for the opponent to hit their air button early. This will counter-hit Emi's 5A, and most characters will get a full confirm afterwards. As such, learning to late-stand guard is very important. By intentionally stand-guarding as late as possible, you will cause players to whiff their early air button, and after standing you can buffer a fuzzy 5A in which if they whiff/press nothing, you get a 5A which you can 5A again for 5A5B, and if you block the jump-in nothing should come out. You don't need to worry about perfectly late stand-guarding, but learning to intentionally duck under an opponent's jump attack will greatly increase the strength of 5A AA as the opponent will be forced to press a jump button lower and later, increasing the effectiveness of the tool.
Another common 5A counterplay option is using double-jump. Opponent's with buttons that have deep vertical reach can intentionally bait out a 5A, whether the intention is fuzzy 5A or 5A AA, by double-jumping a few moments into an 8/9j arc. If this occurs, the situation is still mostly favorable for you. Assuming they don't perfectly time their double-jump to whiff punish 5A, you have the ability to present late-stand guard after recovering, 5A again if you're feeling lucky, possibly 2B, or even 2AB as the likelihood of your opponent not coming down with a button after you whiff 5A is low. If you are patient, such as looking to late-stand guard a 9j and the opponent double-jumps, you can call it out with a walk/dash-under 2B, rising jA, etc.
Something you may also see is an opponent, such as Yuuki or Taiga with their jBs, Rentaro and Kuroko jC, etc. space said button at tipper range where you would get stuffed for trying to 5A. Against players like this, you can walk-back to force a whiff and pin their landing/play with your assist, you can call it out with a read with your own 9jB, you can walk back to make them whiff and 9j~X after they land, etc. Likewise, a 2B AA might be possible against some of the roster here. Lots of ambiguity here as this decision is fairly low risk on both sides being basic neutral scouting.
Using 236x
Emi's 236x fireball series is not great but not bad either. This tool should be used sparingly, such as against a landing, vs an obvious assist call, or at far ranges to encourage superjump scouting. It additionally works as a great fullscreen punisher. In trump, this tool becomes MUCH stronger, gives her access to some of the best OTGs in the game, makes her ability to scout out grounded options a little better, and more. However, it should still be used with caution in trump.
236x Counterplay
What will be made obvious as soon as you pick Emi is that if you fall into habits with 236x you will probably explode instantly. The move has roughly 40f~ of recovery on whiff and with almost all of the roster jump-scouting in this game it is easy to make it whiff. As such, doing it occasionally at spacings where only superjump would reach could encourage reads from your opponent do so, in which you can take advantage of an easy AA such as dashing under the sj arc, 5A/2Bing, etc.
Using j236x
Emi's j236x is a fairly strong tool at thwarting the opponent, appearing to be similar to Mikoto j[C] but much weaker due to not having Mikoto j[C]'s jump cancel properties. The tracking on it is fairly lenient, it can be made safe if done too high with a j236AB cancel, you can do said cancel or a combo-blast cancel on the entire way down while in recovery, and it is an air-stall tool. If the opponent is close, it guarantees that any strength of j236x will home and hit the opponent.
j236x Counterplay
There are some key issues with j236x. If an opponent plays just outside j236B spacing which ironically enough is the outside 9jB spacing we talked about, mindless j236x runs some risk. If the opponent blocks it on the ground and you haven't done the j236x low, you run the risk of going on the defense as the opponent moves up to take their turn or at worst you could be punished. Due to this, you may be forced to j236AB to stay threatening which is somewhat expensive. Alternatively, you can present j236x lower which if done at closer spacings could result in you getting surprise jX'd by an opponent aggressively scouting. With all of this in mind, j236x is best established as a retreating tool, as an option to catch antsy opponents moving after they land, etc. It is also important if you think the opponent is patiently looking to ground block j236x/force it to whiff to establish jB scouting, dash buttons, feints, and assist calls to get them back in a headspace where j236x is effective again. In some MUs, like vs Tatsuya/KYH, this tool may not be very viable in neutral.
Using Trump
Your trump timing with Emi will determine your success at higher level play. For trump installing, there are a plethora of ways to do so such as combo install, frametraps, double-jump AA as discussed before, to call-out an opponent's attack/assist, etc. However, the actual timing of when it is right from a wincon standpoint depends greatly on a few factors. With enough meter stocked, you can trump install in a kill combo when the opponent is around 35%-45% to either win the round or force the opponent to use their blast. By forcing them to use their escape blast, you are now in a position to kill them for less meter spent, and if they haven't trump installed yet you are able to force it out while in trump state, where you can do so at low risk with instant assist call etc. There may also be times where it makes sense when you are around 50-60% HP and the opponent is around 30%-45% to aggressively use your trump card against double-jumps, or after a high-commitment scouting option to force control of the gameflow. This is because it is very likely the opponent is looking to trump install if they haven't already due to being cornered, and by doing so before them you give them an ultimatum of possibly being checkmated for not trumping or to trump in a position where you have the advantage to keep them locked with your assist etc. Most importantly, remember to not trump install too early, such as to "power-blast install". You are not Shana and doing this will result in you being ran over later in the round even if you get a 60% lifelead as they will enter trump-state later and you are forced to play around 5A RPS against an opponent who can bait it effortlessly with airborne assist calls etc.
Offense
Emi's offense is fairly lackluster outside of trump state. She has the usual 2A/5A to call out defensive options, her 5B has great reach, and 2C and 5C work as great string enders to keep ending strings/jump-cancelling on 5A/5B ambiguous, or to call out pushblock by doing strings such as 2A~2C or 2A~5C. 2C in particular is only -5, meaning a well-spaced 2C string ender has somewhat decent framedata on block. Emi's j236x series works great for pressure, as its air-stall property as well as the ability to stagger into j236AB/combo-blast makes the post-block threat fairly ambiguous. Emi can also make use of her 236x fireball series as an ambiguous frametrap if she wishes, but she recovers at the same time as the opponent airteching meaning Emi is left in a bad spot. If you wish to extend pressure via specials, your 214x series, such as 214B/214C, works as a great stagger options to easily hit-confirm off of, in which you can 236AB cancel to stay safe on block. Avoid doing this often though unless you are looking to trump install or have plenty of meter to burn.
Defense
Emi's defense is fairly strong, being very difficult to answer if the Emi player is patient. As discussed earlier, you have a great 5A to play around calling out lazy jump cancels in which you can late-stand guard to force greedy whiffs from early air button players. This encourages the opponent to jump cancel from further away, or with a drift-back motion, giving you more room to breathe in the corner. Likewise, if it is a good time to trump, you can present it not only as an answer to double-jumps, but to invuln through wide staggers. Yes, your trump card is grabbable after the flash. However, this takes a read from the opponent where presenting fuzzy 2A/5A, fuzzyjump/fuzzy superjump, etc. becomes strong.
Move List
L = Low, H = High, A = Air
JC = Jump Cancel, SC = Support Cancel, EX = EX Cancel
ISC = Impact Skill Cancel, TCC = Trump Card Cancel, CAC = Climax Art Cancel
Startup includes the first active frame.
Normal Moves
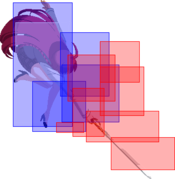
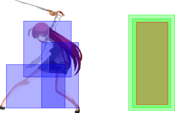
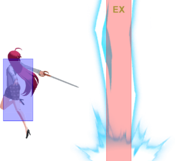
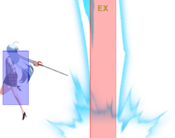
| 5A |
|---|
| 2A |
|---|
| 5B |
|---|
| 2B |
|---|
| 5C |
|---|
| 2C |
|---|
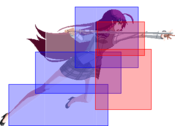
| j.A |
|---|
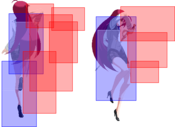
| j.B |
|---|
| j.C |
|---|
| j.[C] |
|---|
Special Moves
| Skylight: Volant Blade 「天光飛刃」 236X 236A/B/C 236AB |
|---|
| Skylight: Frigid Waltz 「天光氷舞」 214X 214A/B/C Trump Card Install 214AB Trump Card Install |
|---|
| Providence: Fanged Light 「天衝光牙」 j236X j.236A/B/C Trump Card Install j.236AB Trump Card Install |
|---|
| Skylight: Zephyr Blade 「天光風刃」 j214X j.214A/B j.214C Trump Card Install j.214AB |
|---|
Universal Mechanics
| Throw 6C or 4C |
|---|
| Impact Skill Providence: Fanged Tempest 「天衝嵐牙」 5A+B |
|---|
| Impact Skill Skylight: Conflagration Decapitation 「天光炎斬」 2A+B |
|---|
| Impact Break 4A+B |
|---|
| Holy Vitan β 「ホーリービタンβ 」 A+C |
|---|
Climax Arts
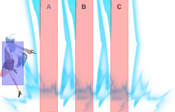
| Awaken: Emilia the Brave 「覚醒・勇者エミリア」 41236B+C |
|---|
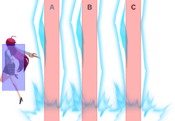
| Critical Hit 「かいしんのいちげき」 63214B+C |
|---|
Combos
Midscreen
Stuff > 2C
- Meterless HKD routing.
5A > 5B > jB~jC > 2A > 2B > 2C
- Standing meterless HKD routing.
HKD > A+B+C
- Emi does not have a solo power-blast routing outside the corner. You will need to do it as an OTG/whiff.
5A (5B) > jAjB > djBjC > j214C
- Meterless 5A AA routing. 5B/2B can be done after 5A at lower AA heights.
4AB > jAjB > djBjC > j214C
- Meterless 4AB routing. No HKD.
4AB > jAjBjC > j214B > j214AB
- 1 bar 4AB HKD routing. Any more buttons adds too much proration for a knockdown. Doing any other j214x but j214B before j214AB results in techable KD.
Stuff > 5AB > 214AB
- Standard 1 bar route. Slightly less damage than 214x 214AB.
Stuff > 214A/B > 214AB
- Go to 1 bar BnB.
5A (5B) > jAjB > djC > j214C > j214AB
- One bar 5A AA routing. 5B/2B can be done after 5A at lower AA heights.
j236x > j236AB
- On j236x hit, to get HKD you need j236AB. Truthfully, it's not worth the meter and j236AB should be to make j236x safe on block, but it's worth knowing.
Stuff > 214B > 236AB > 426BC
- Highest damage 3 bar routing for non-trump.
236AB > 624BC
- Fullscreen punisher route. Can punish with just ranbu if possible/desired.
Corner
Stuff > 5AB/214x > 236AB
- Go-to corner BnB. After 236AB, Emi can powerblast install with the wallbounce and it will hit, takes some practice. Also, you can walk the opponent into the corner then 9j for a left/right mixup depending on if you've pushed them into the corner or not.
Stuff > 5AB/214x > 236AB > 2C > 214B > 426BC
- 3 bar corner combo.
Grab > 236AB > 214AB > 426BC
- 3 bar corner grab meterdump.
Trump
Stuff > 214B > 5AC > 5B > 214A(1) > j214AB > ...
- Go-to trump install route that also shows up the basis of Emi trump routing. In trump, j214AB is now extendable. Therefore, most of your trump routing goes into 214x(1) j214AB. Afterwards, you can take the HKD, do 214C 426BC, 214C 214AB, 214C 236AB 426BC, etc.
Stuff > 214x(1) > j214AB > ...
- Like above, just without the trump install.
Stuff > 2C > 5C > jB~jC > j214C > (wall-bounce) > 214C > ...
- Corner trump route. Low wall-bounce j214x can be extended. After 214C, you can 2C>214B>426BC, 214AB, 426BC, 236AB>426BC, etc. Great for Celty players.
Stuff > 2C > 5C > jB~jC > j214C > (wall-bounce) > 214C(1) > j214AB > 5AB > ...
- Corner trump route. Low wall-bounce j214x can be extended. After 5AB, you can 426BC, 236AB>426BC, etc. Can omit the 5AB for burst-locked routing.
Assists
Iriya
NOTE: It is important to note that in all the Iriya plate loop routes, you can replace "delay 214C > 2C" with "2C > 5C" for stability at the cost of 200-300 damage. In some situations, it may be difficult to correctly delay the 214C to hit low enough for the combo link into 2C.
j.[C] > j.B > plate hits > delay 214C > 2C > 214B(1) > j.214AB > Iriya 5S cancel > land > OTG j9.B (Plate Flick)
- Trump iriya oki double overhead confirm. Loops into another plate setup. This works as a same-side double overhead. Due to the floating property on BEj.C, most opponents are not ready for the timing on the overhead and usually get hit on the j.B. Regardless, the timing of the combo routing is nearly identical. You want to time the combo so that Iriya's 5S is ready to call again right as the auto follow-up happens on the j.236AB. Rinse and repeat with your other mix-up options.
Partial Charge j.C > 2A > plate hits > delay 214C > 2C > 214B(1) > j.214AB > Iriya 5S cancel > land > OTG j9.B (Plate Flick)
- Same side high-low but the partially charged j.C will force the opponent to react for j.[C] > j.B vs j.{C} > 2A.
2A > 5A > plate hits > delay 214C > 2C > 214B(1) > j.214AB > Iriya 5S cancel > land > OTG j9.B (Plate Flick)
- You can do j.8 drift to make the left/right ambiguous on the 2A. Depending on your spacing after the plate hits, you may need to microdash to continue the setplay.
Drift left/right > 4AB > plate hits > delay 214C > 2C > 214B(1) > j.214AB > Iriya 5S cancel > land > j9.B(OTG + Plate Flick)
- A simple left/right overhead mix-up. While relatively easy to block offline, it keeps the opponent weary of over committing to fuzzy defensive option selects.
Drift left/right > Throw > plate hits > max delay 214AB > OTG 5C+Iriya 5S > 2A x2
- The last general plate mix-up option is throw but unfortunately Emi cannot continue the Iriya setplay loop if she presents this option. You want to max delay the 214AB as the plate will hit on throw and cause the opponent to float unusually high.
Iriya Fireworks > 2C > 5C > 214A(1) > j.214AB > land > tk j.214AB > land > 214AB > 41236BC
- Confirm for Iriya fireworks l/r.
Wilhelmina
4C/6C (grab) > slight delay > 5S > 9j[C] > IAD (j696) > jA+B+C
- Grab powerblast combo with Wil 5S cancel.
6S hit > long delay > 214C > 5B > jAjB > djBjC > j214B > (j214AB)
- Combo for when 6S hits. Delay 214C to hit on the way down after 6S launches the opponent.
6S hit > long delay > 214C > 2C > 5C > 214B(1) > j214AB > (214AB >) 426BC
- Cash-out route for 6S hit in trump, which you should do even if it's without the 214AB as it's a great, high-damage starter.
Stuff > 214B > 5AC > 5B > 9jB > 6S Cancel > j214A > land > j214C > j[C] > dj[C] > j214B > j214AB > 426BC
- Explosive meter-dump trump install combo. Somewhat long, so expect to get bursted.
Celty
6S hit > 214C > 5B > jAjB > j214B > j214AB
- Insanely tight routing, don't feel bad if you can't get it. Probably easier if only Celty 6S second hit hits. Do the alternative routing below for consistency.
6S hit > 5B/2B > jBjC > djC > j214B > j214AB
- 6S hit consistent BnB.
Stuff > j214AB(1) > 6S Cancel > ...
- Routing for outside of trump, where you cannot normally extend j214AB. After 6S launches them, you can 236AB 426BC, 426BC, etc.
Okizeme
Solo
Stuff > 214AB Ender > ...
- Solo "mix-up". You can 9j for same-side land 2A, micro-walk 9j for cross-up land 2A, you can intentionally delay the jump slightly for a jX meaty, etc.
Iriya
NOTE: For trump looping plate confirms, see Emi/Iriya combo section above.
2A > 5C > 214B > 214AB > Iriya 5S (no cancel) > microdash > 2A x3 > 5B > 2C (Plate Flick)
- Basic hard knockdown route into Iriya plate set. You need to slightly delay the 2A OTGs so that Iriya finishes eating and 2C flicks the plate from the table.
2A > 5C > 214B > 214AB > Iriya 5S (no cancel) > Power-Up Blast
- Same as above route but allows you to set Iriya and OTG with Power Blast to get your meter gameflow started. You will have enough frame advantage for okizeme or meaty to protect Iriya since you won't be able to flick the plate during the combo.
2A > 5C > 214B > 236AB > Iriya 5S (no cancel) > ...
- Corner variant of the Iriya plate flick combo. No microdash is required for this one but you will still need to practice the timing of the OTG string so that 2C flicks the plate. Alternatively, you can summon Iriya and not go for the OTG flick, instead opting to do a left/right since 236AB causes a wallbounce that will leave corner space.
- [1] 2A x3 > 5B > 2C (flicks plate)
- [2] j.8 drift forward or back for wallbounce left/right mix-up
2A > 5C > 214B > Trump > 5B > 214A(1) > j.214AB > Iriya 5S cancel > land > OTG j9.B (Plate Flick)
- This is the fundamental Iriya routing for Emi. This works essentially everywhere but it's best suited for midscreen as the j.236AB auto follow-up will not cross-up in the corner, meaning your mix-up potential when you OTG with j.B will be severely hampered.
Throw(1) > Trump > 2A > 5A > 2C > 214A(1) > j.214AB > Iriya 5S cancel > land > OTG j9.B (Plate Flick)
- The same trump install into Iriya plate loop setup except the starter is throw. The important part is activating trump to allow for the Iriya plate loop okizeme to start, so the low damage is nearly irrelevant.
5C > 236C > 214AB(4) > Trump > 2C > 214B(1) > j.214AB > Iriya 5S cancel > land > OTG j9.B (Plate Flick)
- A slightly more damaging install that works from 214AB, making it an easy confirm from any ground hit at any range.
5B > 5C > 214B > 236AB(1) > Trump > IAD slight delay j.214A > delay j.236AB > Iriya 5S Cancel > land > dash OTG 2C > 2A > 5B(Plate Flick)
- This routing balances damage and stability while prioritizing carrying the opponent to the corner. Keep this in mind if you have meter to spare and damage is your perogative.
5B > 2C > (5C) > j.B > (j.C) j.214B > land > 214A(1) > j.214AB > Iriya 5S cancel > land > OTG j9.B (Plate Flick)
- The corner variant of the midscreen Iriya loop involves wallbouncing from j.214B, which is finicky you will need to keep both combo proration low and the opponent's height low enough that 214A(1) hits. When in doubt, you can omit 5C and/or j.C and opt for the wallbounce earlier. You will need to experiment to understand the height requirement to link 214A(1). The wallbounce means there is corner space to continue using all the potential mix-ups notated above.
5A anti-air > j.A > j.C > dj > j.B > j.C > j.214AB > land > 214AB(1) > Iriya 5S > slight delay OTG 2C (Plate Flick)
- This variant uses 214AB and therefore presents a lot less mix-up potential. That said, the 214AB is the most consistent and works from any height whereas the j.214AB hard knockdown is height dependent. Basically, this variant works off of any confirm. However, your frame advantage is much lower compared to the j.214AB okizeme variant. In any case, the mix-ups are less significant and more an implicit threat to keep the gameplan of Iriya plate buffs ongoing.
Stuff > j214AB > 5S Cancel > ...
- Fireworks l/r. Do 9j to sideswap, and then after landing you can 8j > jB (same-side) or airdash (cross-up). Confirm in Iriya combo section.
Wilhelmina
Stuff > 2C > slight delay > 6S Cancel > dash 9j > ...
- 1-bar left/right setup with 2C HKD. Same-side: 7dj, Cross-up: land 2A.
Stuff > 214x(1) > j214AB > recover > 9j6S (sideswap, land)...
- Trump l/r setup. If you 8j after landing, you can do a l/r where you either: 9dj (cross-up), airdash (cross-up, unsafe vs ranbu/some 5ABs), falling jC (same-side)
- The above setup options run the risk of being fuzzy BD OS'd, so you can alternatively do: 2A/4AB (same-side, risks blue trump), superjump 7dj (cross-up, has to be done before opponent wakes up, lets you punish BD)
Stuff > 214x(1) > j214AB > recover, micro-walk > 6S > superjump > 8dj...
- Trump l/r setup. Falling jB/jC = same-side, airdash = cross-up. Very unsafe against blue trumps as they can invuln through wilhelmina and punish as they please.
Celty
Stuff > 214x > 214AB > 6S Cancel > ...
- Pretty ambiguous setup. Time 6S cancel to ideally be right around the time the final 214AB hit hits. From there, you can micro-walk 9j to cross-up land 2A, 7dj to go same-side, or omit the micro-walk to do a same-side land 2A. You can purposely 6S cancel slightly later to mess with fuzzy timings, bait out trumps, leave wider gaps for more mix with respect, etc.
Stuff > 214x(1) > j214AB(3) > slight delay > 6S Cancel > 9j (sideswap, land)...
- Trump l/r setup, 6S cancel as opponent begins to descend from j214AB. If you 8j after landing, you can do a l/r where you either: 9dj (cross-up), airdash (cross-up, unsafe vs ranbu/some 5ABs), falling jC (same-side)
- The above setup options run the risk of being fuzzy BD OS'd, so you can alternatively do: 2A/4AB (same-side, risks blue trump), superjump 7dj (cross-up, has to be done before opponent wakes up, lets you punish BD)
External Links
Colors
| Color 1 | Color 2 | Color 3 | Color 4 |
|---|---|---|---|
| Color 5 | Color 6 | Color 7 | Color 8 |
| Color 9 | Color 10 | Color 11 | Color 12 |
| Color 13 | Color 14 | Color 15 | Color 16 |
| Color 17 | Color 18 | Color 19 | Color 20 |
| Color 21 | Color 22 | Color 23 | Color 24 |

