Dengeki Bunko: Fighting Climax/DFCI/Mikoto Misaka
Players to Watch
JP:
- Gosyo (DFC Rank 1 Mikoto/Mashiro), plays a lot of random teams in Ignition. A fun watch with good fundamentals.
- Yuda (Rank 1 Mikoto/Kouko), absolute fundamentals beast that plays out in the boonies. Great for learning non-Rusian Mikoto.
- Taka (Rank 2 Mikoto/Rusian), Strongest Mikoto/Rusian player. Lots of ambiguous decision-making to learn from and has been around forever.
- Buriki (Rank 3 Mikoto/Rusian), Has lots of fancy Rusian combos and setups. A bit aggressive by Mikoto standards but still good.
- Momoi (Rank 4 Mikoto/Rusian), Slightly robotic but plays a good 1P Mikoto game.
- Utage (Rank 5 Mikoto/Rusian), Very well rounded Mikoto with good micro-awareness.
NA:
- j.g. (Mikoto/Rusian), ex-Kuroko player who can be found in Lunar Perilune footage.
Introduction
A junior high student, she's a powerful Electromaster nicknamed "Railgun". Even though she's in Academy City, she's one of only seven high-powered espers (Level 5).
Originally from the light novel series Toaru Majutsu no Index, localized as A Certain Magical Index.
Mikoto is DFCI's resident zoning character and despite some abstract tools she is likely the most traditional zoner in the game. She boasts above average normals, various fullscreen tools, as well as an incredible j[C] to keep the opponent locked down. Mikoto's run-speed is above average as well making poor air movement easy for her to circumvent. Her 214AB series is arguably one of the best reversals in the game, as despite the lack of invulnerability the speed she goes airborne is likely in the single digits. A character who is simple on the surface that has a lot to master and optimize.
Mikoto's biggest weakness is the huge deadzones on her zoning normals. 5[C] and 2[C] in particular are buttons that look incredible but they only cover a thin part of the screen, and if the opponent can maneuver around them or reads her patterns she can be easily punished. This means Mikoto's neutral mostly relies on j[C] and its layers, with some grounded neutral as well. On top of that, her Impact Skills are basically useless defensively, her fastest normal is 6F, meaning being patient and taking advantage of the reflect-guard vs 214AB RPS is her best bet at escaping pressure. Her anti-airs are also somewhat lacking, especially for a character that's so focused on controlling the neutral game. As such, mastering her movement and positioning is key to good anti-airing.
Pros
- Strong zoning game that is unstoppable in trump. This paired with Rusian will bring mental anguish to impatient players.
- Above average movement. Her fast run speed, an airdash that she can use after double-jump, and her 214/j214x series makes answering her movement a challenge.
- EX Magnetic Move (214AB) is arguably the best reversal in the game due to its speed when applied right and with Rusian she can call and protect him from it.
- Can convert basically any hit into hard knockdown.
- Strong neutral game means she doesn't need her support to play neutral, giving her decent assist synergy.
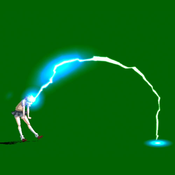
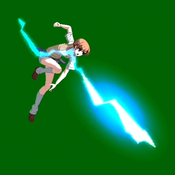
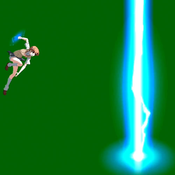
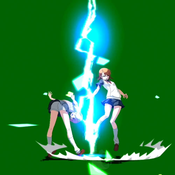
- Her Railgun Climax Art is one of the best Climax Arts in the game. An incredible fullscreen punisher that covers the screen.
Cons
- If she misjudges a zoning option in neutral, she usually is stuck in significant lag and can be punished hard. Mainly 5[C] and 2[C] which are often "noob-traps".
- Mediocre anti-airs and abysmal Impact Skills mean she has to spend meter on 214AB or Blast to escape bad situations caused by small mistakes in neutral if she believes she can't wait out the situation.
- Lots of low-reward interactions. As such, learning which interactions are worth cashing out on is insanely important. You cannot win by mindlessly autopiloting neutral 20 times and will need to optimize your reward to compete with Top 5.
Recommended Assists
Rusian - Currently the most popular assist in Japan for Mikoto, after the Arcade v2.3 revision and for good reason. One of the best assists to play Mikoto with as she no longer has to take much risk to encourage the opponent to come to her. On any knockdown, including stray j[C]s, she is able to safely summon 6S which she can protect with generally low-risk due to her j[C]. Once Rusian manages to travel safely off-screen thanks to Mikoto's cover, the second phase is guaranteed to come out giving Mikoto an opportunity to perform a throw/high/low/block mixup just before the goblins hit, with the risk/reward heavily weighted in her favor. 5S is a counter move with a huge trigger box to ward off overly eager opponents.
Mashiro - Mashiro is a strong contender for Mikoto with most of the utility being in 6S. Like with Rusian, after getting a good knockdown Mikoto can summon 6S which she can easily cover. This allows her to get more aggressive once 6S is active and she can bait out resources such as blue trumps. Her 2C makes for a great anti-fuzzy tool forcing opponents to guess on high/low/throw mixups with the cats. Likewise, Mikoto can have cats work as extensions off stray hits like 2[C] and j[C] allowing for unique combos.
Kouko - If it weren't for Rusian being such a Well Designed Assist by the Game Planning Genius KAMONE SERIZAWA, Kouko would easily be Mikoto's strongest assist with a very high skill curve. Both 5S and 6S end their attacks with a charm effect, which tracks the opponent and if it reaches them drains their meter giving it to you until you are hit. 5S works as a combo-tool to install trump and powerblast, and 6S works as an option to make the opponent perform poor movement choices as well as an incredible mix-up tool. The reward on 6S is high due to Mikoto's confirms afterwards and is a threat to the opponent. Mikoto will have to learn to play neutral without a strong assist carrying her, as Kouko is easy to hit in neutral with some assists like Celty or Dokuro.
Potentials
Universal Potential: Increases damage dealt by 10% for 20 seconds when health falls under 30%. If behind in rounds won, increases damage dealt by 20% instead.
Character Potential: Use 3 Extend Action attacks (5[C], 2[C] or j.[C]) for Attack Level 1 for 10 seconds. Can be activated twice a round. The attacks do not need to hit the opponent to count.
Gameplan
This section is dedicated to showing unique elements in a characters gameplan, not necessarily defining it entirely (ie. explaining how Mikoto might play around her j[C] in neutral and what it enables but not exactly what spacings to be at).
Neutral
General Positioning
Depending on your assist, the way you are going to approach your positioning will change drastically. For starters, we'll go over Mikoto 101 before diving into some other concepts.
To start, let's discuss Mikoto's gameplans and need to knows. Mikoto is a zoner in which her best zoning tool outside trump state is easily j[C]. j[C] is rather difficult for most of the roster to get past let alone punish, as she is often doing it very low and on block she is able to jump cancel it. Mikoto will be using the threat of j[C] to get the opponent to commit to approach, in which she can play a tug-of-war where she feints j[C]s, gives up more space in a feint to encourage overcommitment, she can check ground approaches with her rather large 5C with micro-dash 5C from this j[C] position, etc. As Mikoto, you will need to remember that despite how good your tools are you need to respect the opponent's buttons and/or assist and as such you shouldn't fall into a loop of just cycling your j[C] layers. Sometimes it may be best to just use your movement to your advantage with dash feints, walking in and out of spacings, layering both with 7js, etc. Beyond Mikoto's large normals with equally large recovery is a character with incredible movement and options to escape scrambles to her advantage. Remember that sometimes it is not always best to be the one to act first, or that it may be best to feint yourself doing so.
Now if it wasn't obvious, you should burn the spacing at which j[C] hits into your mind as well as the PER MATCHUP SPACING that would be your opponent dashing up when you jump, and you delay that j[C] to be done while falling. This second spacing, the dash-up one, will be closer vs slower characters like Ako or Shizuo, but further vs Yuuki, Asuna, Shana, Taiga, Kirino, etc. These two separate spacings, with the latter being a bit further out is your general range to move around in passively. From this spacing, Mikoto can perform various actions which I'll try to break down individually. These actions include dash/micro-dash 2A or 5C, (dash) 8[4]j or 7j, superjump and superjump 7dj among various other things. Of course, with all of these air options, Mikoto also has access to a double-jump to make more space for herself if needed as well as an airdash in the case of an aware opponent dashing under her.
Dash/micro-dash 2A and 5C is your go-to option for calling out an opponent who is very antsy about calling out your jumping feints or abusing their grounded speed to circumvent j[C]. 2A is going to be used more-so in that first spacing where j[C] would hit, and 5C has a bit more freedom. With dash 5C you can look to preemptively check grounded movement, pin a landing after an opponent burns a doublejump and you're too far for a good dash-under, etc. In general, both these options should be used sparingly as your opponent will often be jumping in this game in which they could clear your 5C entirely, leading to a jump-in starter.
For this next option, 8[4]j, the dash is (optional) as you have to remember that if you commit to a dash/micro-dash to feint, this is a generous number of frames spent on an action in which the situation you thought you were comfortable in could change drastically. Whether you dash/micro-dash or not, 8[4]j has a lot more freedom than the previous options. Out of 8[4]j, you can jC to protect your space vs an antsy opponent that looks to dash-up preemptively, you can dj in various directions to angle yourself above jumps/make space to trick people into moving in, or most importantly, you can land and do nothing. If a player is looking to avoid your 8/9jC spacing, and is looking to react to you double-jumping the entire time you go down from your jump (or looking to pin a landing after whiff jC), what happens if you do nothing at all? Even if the opponent does have an option ready, the time at which they will react to this 0f landing lag option will be slower than you, in which you can land 5C, jump again, fuzzy superjump, etc. This final layer of 8[4]j, where you do nothing is important to keep in mind to avoid gambling 8[4]jC vs dj too often.
7j is a little more obvious, as it forces space between you and the opponent, gets you out of scrambles, and you have dj and airdash as insurance if the landing is tight. Taking some space, either with walk or small dashes, then 7jing can also be a way to bait out commitment on your opponent's end. If they do something like 9j on reaction to your movements, and you're already halfway through a 7j, you are outside of their 9j spacing and able to get aggressive with playing the dj RPS.
The final option listed, superjump and superjump 7dj, is a nice option to establish at times. Superjump jB/jC can be done at different timings to catch opponent's off-guard, and 7dj can be done to bait out and see what the opponent's answer is. On 7dj, you can j[C] to catch 5B/2B AAs, fall with jC to protect your space from dash-unders, 214x if your able to take the risk in R2 winners side, etc.
j[C] Counterplay and Layers
j[C] is your strongest tool as it allows for Mikoto's positioning and movement to remain ambiguous and dangerous. However, it is a charged move and as such the opponent can preemptively dash up with the right run speed or superjump to get around it early. Due to this, you'll need to pick these j[C] spots somewhat wisely and focus on placing them preemptively in neutral outside of using it to sometimes "poke" at people's landings. Even if you aren't going to do j[C], you should at times feint with a jump in which you can delay toss out a jC to catch opponents if you believe they are ready for it in which you can catch them dashing up or control the air from a rising jA. jC is a normal which is a little slower than most jCs but the trade-off means it gets access to 4 active frames which is high by DFCI standards. An option with less commitment is doing stuff like 8[4]j to feint a j[C] and doing a 7dj on the way down. In a majority of MUs, this will either put Mikoto at a spacing too far for the opponent to pin on landing, or if they jump at you, you will ideally be in a spot where you avoid the jump arc entirely and play around playing the dj RPS where you can dash under on an early dj, pin their landing with 5A/5C/j[C], or if they delay the dj for too long and you're worried, summon your assist, etc. If the opponent does a superjump when you go for 8[4]j~7dj, you may be forced to block depending on the timing. However, if you find yourself landing right as they begin to superjump, you may be able to dash-under them on time leaving them in a bad position. Likewise, a 7dj as they superjump may put you above them, allowing for a jC to keep them locked down. While there is much more nuance on the layers of j[C], all of this alone should give you the realization that j[C] isn't simply strong due to it being out but the threat itself.
Buffing Powerblast
In DFCI, it is most common to select an escape-blast buff. However a few characters, like Kirino and Mikoto will go for power-blast buff. With power-blast buff, you gain access to a stronger defensive option and easier power-blast installs as you have no combos into it with some teams on Mikoto. Power-blast also becomes a safer AA option in R1 to install and slower characters have to work harder to call out power-blast whiffing, giving you more respect in R1 while power-blast is on the table. As such, in certain MUs you may find yourself wanting to buff power-blast for an easier time to get it off, and can consider escape-blast vs teams like Shana/Tatsuya to escape blast 214x > CA combos, or vs Qwenthur to not get checkmated on 5AB.
Choosing an Assist
Choosing an assist is a tough decision for Mikoto. Rusian will be the most common option as she's the strongest team due to neutral being much easier. The RPS of presenting j[C] becomes less necessary, as the passive threat of Mikoto summoning 6S is something that must be stopped by the opponent. If they try to do such in a blatant manner, with bad air movement decisions, Mikoto can dash-under and instead of playing a difficult AA RPS game, she can just keep running fullscreen to summon 6S from further. Mikoto can easily cover Rusian during 6S with a variety of her tools, j[C] being the strongest. Mikoto can also jump, dj, j214x and 6S cancel the j214x to get Rusian out in which she only really has to put effort into thinking of how to get down without getting punished. In trump, she no longer has to even think about how she gets 6S out, and she is able to do so for free on 214x/214AB 6S cancel. A strong team for sure.
For Kouko, you're trading off Rusian's neutral utility for something much more abstract, but also consistently higher damage. She has above average damage, easy trump and powerblast installs, a great debuff with her charm to steal meter, and in trump she's scary in neutral in her own way as Mikoto can mash 5[C] etc. in a more threatening manner. Kouko in neutral is rather strange. She slowly moves forward until she reaches the opponent, however long that takes, and once she begins to swing she becomes persistent and unhittable. Opponents may try to run through her, or jump over her, but this itself is good for you as you can force pressure on the opponent or put yourself in an advantageous position. Learning to do things such as pushblock the opponent into Kouko is also rather strong, giving your clear respect when she's not hitting the opponent while she's out. Kouko does have the downside in neutral of going away in 1 hit. While you can play the advantage of pressuring the opponent for taking their time to hit Kouko, that becomes harder vs Kirino/Celty/Dokuro/etc. As such, saving Kouko outside of trump for okizeme is the best choice. She has great options to establish respect for Kouko such as j[C], in which on hit you can setup a l/r with Kouko, as well as high damage on 4AB/grab. You can use Kouko approaching to throwbait/tickthrow, and when Kouko starts to hit you can do 4AB with the blockstun to encourage reflect-guarding. If they opponent begins to reflect-guard due to this or because of life deficit, you can actually push the opponent out of Kouko blockstun at different timings to force a RG whiff, to tickthrow/jumpbait, etc. A final note to consider with Kouko is that her cooldown doesn't begin until she walks off screen again. As such you may find yourself wanting to intentionally move the screen closer for her to walk off faster.
General Tools
5A
Not the best option in neutral for Mikoto, but dash 5A can be a nice way to control space in front of you or pin the opponents landing. Despite Mikoto's fast dash speed, you should try not to rely too much on it as an approaching option as you are gambling your life away.
2A
A nice option for Mikoto to control the space in front of her. There are times when 5C/dash 5C make feel too risky, and as such micro-dash 2A can control the space in front of you and possibly recover fast enough to block a jump-in from an opponent.
5C
While most characters relying on their 5C in neutral is a pitfall trap, Mikoto's arc on her 5C can make it a safer option than most despite still having a good bit of risk. This tool is commonly seen to pin an opponent's landing and keep an opponent blocking on said landing, in which you can stagger into 236B/C to hitconfirm/push yourself out on block to give yourself room to lame out the opponent. With 5C established as a landing pinning tool, you can sneak in more dangerous dash 5A/5B, in which you get better stagger options, jump cancels, etc.
jA
Slightly above average A2A tool for Mikoto. This tool is great for calling out bad doublejumps from an opponent, such as after a dash-under, or possibly on a read from a jumpy Shizuo/Yuuki/etc. It's best to buffer jB behind this in which you can easily 7djB[C] hitconfirm on hit.
jB
One of Mikoto's strongest buttons. This tool is a great A2A to protect your space on 7j movements in neutral if you feel like an opponent is closing in as jC is much slower, and jB has a smaller horizontal hurtbox poking out. jB can also be established on your airdashes such as after j[C] on block or after 7j when feinting j[C] as it can sometimes cross-up on airdash.
jC
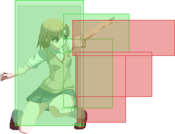
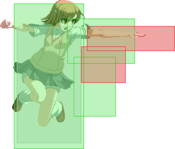
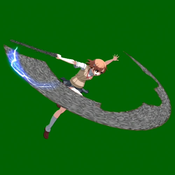
Very strong button but slower than most jCs. This move takes 12f to startup but has the benefit of being active for 4f which is very high by DFCI standards. Throwing this button out as a general ATG, and throwing it out fairly early on a 9j is rather strong. Likewise, establishing it in j[C] feint spots where the opponent has closed in is hard to contest once jC is out.
5[C]
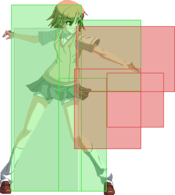
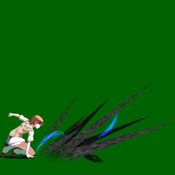
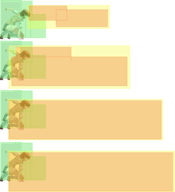
A difficult tool to describe outside trump. It has 18f of startup, is only active for 2f, and is -22 on block. Being -22 means that it can be punished by a variety of tools, like Emi/KYH/Qwen/Kuroko 236AB, Asuna 5AB, Celty 5S, etc. Even if you 214x cancel, a variety of characters can still punish that. As such, being aware of what MUs it becomes more dangerous on block in is important and being ready to 214AB[2] to save yourself is important. Even if this tool hits, 236AB is going to likely whiff unless you preemptively do it, and railgun does not always hit making it generally low reward outside trump. Without an assist on the screen, like Mashiro/Kouko/Rusian, it should be carefully used to get the opponent moving.
2[C]
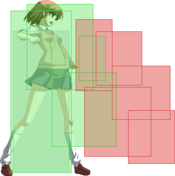
A very risky tool to throw out in neutral without an assist like Rusian on the screen. It is slow as a neutral tool, and doesn't catch players jumping. Try to avoid throwing it out just because it's big without an assist covering you.
j[C]
Mikoto's god button. Impossible to traverse when it's out, and if she does it low she can usually recover and block on whiff. The passive threat of this button existing allows for Mikoto to encourage approaches even without Rusian, giving her freedom to control her opponent.
214AB
Mikoto's insurance. Should be carefully used due to how expensive it is but can punish slower players for not punishing certain options on time. Likwewise, in certain scramble situations you absolutely don't wanna be in (vs Tomoka, Kuroko, etc) you can use it to keep your opponent in check.
2AB
This move is PURELY a punisher or an option to call fullscreen players out for 5A/2Aing Rusian. Some characters can be called out on reaction when do certain specials, like Shizuo 236x in which you can mash 236AB behind 2AB and it'll only come out on hit.
236AB, 426BC
Like 2AB, these two options are nice fullscreen whiff punishers. 426BC can be used to snipe players powerblasting or whiffing very unsafe specials/assist calls. If you are on the ball, Mikoto can even railgun players calling Rusian without support buffs on reaction. It should not be used preemptively as it becomes a waste of meter. 236AB can be used for all the same cases as railgun, but also can be a last resort to protect Rusian if needed.
Trump-State Mikoto
In neutral, trump state Mikoto becomes a monster. She gains access to j[C]jA(w), which makes her airstall for less time to land faster or be safer after dj[C]. She also can do 5[C]5A(w)/5[C]jc, making 5[C] much safer and less risky vs even characters like Tatsuya. On block she can even do things like 5[C]2[C]j[C] back to back in neutral due to rebeats and free jump cancels. These zoning buffs combined with universal trump mechanics like free assist call with no startup, even in the air makes Mikoto a steamrolling monster if she plays her cards right.
Offense
5A
A great pressure starter for Mikoto. You can stagger into ~2AA, ~2C, ~2A5C/~2A5B, as a variety of anti-fuzzy/frametrap options, almost all of which should not whiff on 5A being reflect-guarded, you can delay/instant jump-cancel in which you have a great jB/jC to do 8[4]j behind as well as preemptive 7dj to bait out A2A/AAs and j[C], you can recover from 5A and grab, stagger into 2A4AB, etc. Lots of incredible freedom for a non-trump zoner.
2A
1f slower than average for a 2A in DFCI, but still rather large. Standard low jab which is used to apply pressure.
5B/2B
As 2B is not a low, 5B and 2B serve similar utility in pressure. 2B is -6 and 5B is -7, but 5B is about a frame faster than 2B for staggering purposes. When using B normals in strings, you can mix up delay vs instant jump cancel, frametrap into your ridiculous 2C, end pressure on 5B in which you can redash with respect or shimmy outside abare or 9j range, etc. Remember to keep this option ambiguous to make the threat of 2C stronger.
5C
Rather nice 5C. Has good range and hits in an arc, meaning it can hit players as they rise fairly well. If you wish to autopilot into 236x to frametrap/confirm/space yourself further, you should do 236B to have the same frame adv as 5C (-7) with the benefit of being spaced further on block. However, visually hit-confirming 5C into 5AB > 214AB is more damage than 236x > 236AB and is desired.
2C
This is your best button and debatably the best pressure tool in the game. 2C is a surprising -2, meaning that Mikoto has a lot of flexibility with it as a string ender. She can easily fuzzyjump if she wishes, walkback and make space without worrying about getting clipped by a low out of blockstun, etc. 2C is also 5 total hits, making it insanely easy to hitconfirm and all of these hits also means that when it clashes with an impact skill, it wins in most cases. Keep in mind, that if you cancel into 5AB/2AB during 2C clashes, the timing of your AB can be messy and get you counter-hit. As such, learning which ABs your 2C beats without an AB cancel and the spacing required will be important, and it may be smarter to take advantage of the multiple clashes that 2C gives you to respond with 5AC/combo-blast easily. On hit, you should confirm into 5AB 214AB (236AB in corner) for the most damage. You should avoid autopilotting into 236x as a frequent frametrap, as the minus frames are much worse than just ending on 2C. 2C is also an anti-fuzzy monster as unlike other multi-hit normals, like Asuna/Yuuki 2C, all of its hits are near consecutive with little gap making it harder for a player to 171 without getting clipped leaving the [1] position. If 2C is reflect-guarded on the last hit, it becomes +0, and the multi-hit being easy to react reflect-guard means you can do things like 2C(1)/2c(2) > 4AB to catch players doing 1BC on reaction to it. Learn to love this tool and it will love you.
2[C]
Worth establishing at times. On a spaced dash 5B/2B, or after a string of staggers, you can go into 2[C] to automatically frametrap. In the corner this leads to some nice confirms due to its wallbounce and should be explored.
236x
A pitfall for newer Mikotos. 236x has its uses, such as checking antsy opponents that move too quick after reacting to your 5C on block, or to keep the opponent in blockstun as Rusian crosses/Kouko arrives/Mashiro starts up, etc. However, frequently using this as a string ender, especially after 2C, not only lowers your damage on hit but makes your pressure less ambiguous. Try not to over-rely on it.
Jump Canceling
An important tool for Mikoto in which she should remember to mess with delay jump cancel and instant jump cancel. As for jump cancel utilty, Mikoto benefits greatly from doing 8[4]j. Her jC and jB have great reach and as such she can take advantage of a nicer spacing to put herself at to wait out fuzzys more safely, as walkback after landing from 8[4]jX on a jc leaves her at a spacing to possibly 5C, to 7j[C], or to avoid blue trump > 2A/5A as well as 2ABs. Of course, Yuuki/Tatsuya 2AB will still be a problem.
j[C]
This move is seen as a pressure tool after 7j jump cancels. Keep in mind however that if you try to delay the j[C] for too long after your 7j an opponent who was already ready for this will get past its deadzone very fast. Some later layers with this tool includes airdashing after the 7j to continue pressure.
Trump-State Mikoto
Trump state Mikoto's pressure is genuinely terrifying. Her already insane 2C becomes even deadlier, as she is now able to jump cancel any hit that she pleases, destroying players looking to reflect-guard it on reaction. She can also instant air-dash at the opponent on early 2C hits if she pleases. If the opponent is aware of this layer, Mikoto alternatively can present things like 2C(1)/2C(2) > 2A~2A5C, where the 2C encourages players reacting to RG but the 2A rebeat blockstun is low enough that they'll get a 2C, allowing for the second 2A to frametrap them with 5C being an auto conversion. In the case of the player who is aware of the 2C(2-3) jc layer, 2A works as an ambiguous pressure reset option, as you can use it to establish grab, slight delay 4AB, delay jump cancel, etc. Alternatively, Mikoto in trump gains access to the ability to do more canned strings like 2A2B5C2[C] jc (> j[C] etc) as she waits for Mashiro/Rusian/Kouko 6S to begin, as well as jump cancelling 2[C] frametraps in general which she can IAD with, 7j~[C] with, 7j~j66 with, etc. Even if she gives up space, she can easily present 5[C] jc/5A(w)/2[C] to check opponents for moving making her a threat literally anywhere near the corner.
Defense
For better or worse, Mikoto's weakest area by far. Her just slightly slower than average A normals means against things like Kirino 236A RPS she doesn't have a great answer that doesn't involve trump, despite her 2A being an OK mashing tool in a game where mashing isn't great. 5B is not an AA and as such Mikoto may struggle with opponents jumping on her, and she may feel its necessary to try to jA them in which she could get led on and destroyed for. Mikoto is left to master reflect-guard and fuzzyjump, where she can whiff punish options with 5C or create space to move in.
However, whiffing a reflect-guard which is already bad for most characters can be worse for Mikoto if she does not do 4BC, as 1BC will whiff her multi-hitting 2C which has more recovery. This leaves Mikoto with one character specific tool: 214AB. Slightly expensive in the bigger picture but cheap for a reversal, 214AB goes into the air lightning fast in which she can attack, or move about. If she drops from it, she's able to block, double-jump, press jX, etc. 214AB is best done as a fuzzy option after a jump-in attack, where the opponent is forced to do very tight true blockstrings which become easier to reflect-guard on reaction. Ultimately, the strength in 214AB is not in its reward, but how it forces the opponent to either give you space and/or create room to jump, or makes them running tight strings that become easier to reflect-guard. ALSO, it is worth noting that when you go for 214AB, despite the fact it HAS an attack, you should not TREAT IT AS SUCH ON DEFENSE. Mix up instantly dropping out of it in which you can block, delay dj, airdash, jB, etc., or you mash [6] to get out of the corner/[4] when midscreen to make space, do [6][4][6]/various back and forth movements, etc. If you try to purely treat it as a way to hit the opponent without them whiffing a button when you go into 214AB, you risk getting rising A2A'd because rocks attack is fairly slow, or dashed-under in which the opponent has a spacing advantage on you, etc. Finally, sometimes it's best to stay patient as a layer 0 option and take some grabs. Outside of Tomoka okizeme and Iriya with fireworks, the reward on grab is more-so a wake-up call for you to act and as such keeping your composure is key.
Move List
L = Low, H = High, A = Air
JC = Jump Cancel, SC = Support Cancel, EX = EX Cancel
ISC = Impact Skill Cancel, TCC = Trump Card Cancel, CAC = Climax Art Cancel
Startup includes the first active frame.
Normal Moves
| 5A |
|---|
| 2A |
|---|
| 5B |
|---|
| 2B |
|---|
| 5C |
|---|
| 5[C] |
|---|
| 2C |
|---|
| 2[C] |
|---|
| j.A |
|---|
| j.B |
|---|
| j.C |
|---|
| j.[C] |
|---|
Special Moves
| Electro Shock 「電撃の槍-エレクトロショック-」 236X |
|---|
| Magnetic Move 「電磁機動-マグネティックブムーブ-」 214X Air O.K. |
|---|
Universal Mechanics
| Throw 6C or 4C |
|---|
| Impact Skill Electro Fencer 「砂鉄剣-エレクトロフェンサー-」 5A+B |
|---|
| Impact Skill Biri-Biri Earth 「電震脚打-ビリビリアース-」 2A+B |
|---|
| Impact Break 4A+B |
|---|
| Trump Card Chaser! 「ちぇいさー!」 5A+C |
|---|
Climax Arts
| Railgun 「超電磁砲-レールガン-」 41236B+C |
|---|
| Mikoto Special 「電装乱舞-ミコトスペシャル-」 63214B+C |
|---|
Combos
Midscreen
2C > 2AB
- This gives meterless HKD, but is unlikely to be used. However, it does exist.
Stuff > 2C/5C > 5AB
- Mikoto's only reliable "meterless" BnB. 2C is not a sweep that offers any knockdown so this is the best you get for combos.
jAjB > 7djBj[C]
- A2A confirm into j[C] ender, may not always give HKD.
Low Proration HKD > 5A2A5A5B2C OTG
- Go-to OTG string when possible, may not be possible with certain routes.
j[C] > (instant airdash) > jC5A2A5A5B2C OTG
- Hit-confirm for j[C]. Can also do dj[C] for worse oki but still good if you're running Rusian.
Stuff > 2C/5C > 5AB > 214AB~X~6X
- Go-to 1 bar BnB. Leaves Mikoto at a great spacing for a variety of assist calls. Much better damage than 236x > 236AB so try to hit-confirm your C normals properly.
Stuff > 2C/5C > 236x > 2236AB
- Alternative 1 bar BnB. MUCH LESS DAMAGE THAN THE PREVIOUS COMBO, but has some utility for if you're autopilotting dash 5C~236x in neutral etc. Awful knockdown for oki without an assist.
jAjB > 7djBj[C] > j214AB~X~6X
- 1 bar air hit-confirm for Mikoto.
4AB~X > jBjC > 7djB > j214AB~A~6A
- Using the A follow-ups for rocks makes it more stable. Should be no difference in damage.
Stuff > 5C > 236C > 426BC
- 2 bar combo to get some meter dumped/cash out on some damage. Does roughly 200~ more damage than 5C > 5AB > 426BC.
Stuff > 5C/2C > 5AB > 426BC
- Alternative 2 bar combo to above, easier to confirm but does less damage.
Stuff > 5C/2C > 5AB > 214AB~X~6X > 426BC
- May be tricky at first, but basically the railgun should be starting up as 6X rock hits the opponent. Can do 236AB instead of 214AB... for 200 less damage. Avoid 236x 236AB 426BC as it does 300 less damage.
Grab > 236AB > 236AB > 426BC
- Kill grab route.
Grab > 5AC
- Only universal trump install option.
Corner
A2A confirm > j214AB~X > [2] > j[C]
- 1 bar corner A2A confirm. Input [2] after hitting them with the in-place 214AB attack, and immediately do j[C] for HKD. More lenient than you think.
4AB~X > jBjC > 7djC > j214AB~X > [2] > j[C]
- 1 bar corner 4AB BnB. The midscreen one may not work in the corner, or will possibly give less damage.
Grab > 236AB > 2[C] > 7[C]OTG > 9dj~C
- 1 bar grab combo with "safejump" jC.
Stuff > 5AB > 236AB > 5AC
- 1 bar trump install.
Stuff > 5AB > 236AB > micro-dash > 5B/2B > 236C > 236AB > 5AC
- 2 bar trump install. Great damage. Choose 5B/2B based on if you've used one or the other leading up to it in the combo.
Grab > 236AB > 2[C] > 5AC
- 1 bar trump install in the corner. Worthwhile damage.
Stuff > 5AB > 236AB > dash > 5B/2B > 236x > 214AB~X~6X (> 426BC)
- Corner 2-4 bar BnB. 426BC cancel is hard but great damage. You can omit 214AB... for 236AB > 426BC if you can't get it.
Stuff > 5AB > 236AB > 236AB > 426BC
- Burst locked 4 bar BnB.
Assists
Rusian
(Stuff >) Wave 2 hits > j[C] > dj[C]
- Best meterless option for when wave 2 hits.
(Stuff >) Wave 2 hits > 2[C] > (236C > 426BC)
- Second best meterless option for when wave 2 hits. Can opt to do 236C > 426BC after to dump meter if needed in which this route is the best 2 bar option midscreen.
Wave 2 hits > 236AB > recover > 236AB > 426BC
- Burst lock meter-dump for after wave 2 hits. This is very important to know for kills, and its ridiculously strong as Mikoto can do it from far away to avoid escape blasts.
(Stuff >) Wave 2 hits > 2[C] > 9j[C] > (dj[C])...
- Best trump meterless Rusian confirm. I recommend doing dj[C] for more damage, but you can use your double-jump for "better" positioning you wish.
(Stuff >) Wave 2 hits > 2[C] > 9j[C] > j214AB~X~6X > (micro-dash) > 5[C]OTG > 2A(w) > (5[C])...
- Trump 1 bar confirm after 6S hits, often done after the grab left/right but should be possible at any time. If you do 5[C] again after 2A(w), it autotimes a 5[C] meaty you can jump cancel after, 2[C] after, 5A(w) after, etc. Pretty sweet.
Wave 2 hits (in corner) > 2[C] > ...
- Lots of freedom here. You can take the meterless HKD for a wallbounce micro-walk left/right, can trump install after 2[C] for meterless install, can do 5B > jA > air combo for meterless airtech situation, can do 5B/2B 236x 236AB 5AC for a metered trump install, etc.
Wave 1 hits > 5B > 5AB(3*) > 214AB~X > ...
- Near corner 1 bar BnB. Few moving parts here. Depending on your distance to the corner, Rusian comes back slower/faster and as such you may need to omit or keep more hits for 214AB~X to hit into Wave 2. When you get wave 2 hit, you can do j[C] dj[C] for standard KD, 2[C] > 236C > 426BC for meter-dump, 2[C] j[C] dj[C] for trump meterless, etc. You can also do the 236AB 236AB 426BC burst lock routing for a 5 bar meterdump to kill.
Wave 1 hits (near corner) > slight delay > 5B > 5AB > wave 2 hits...
- Simple confirm for wave 1 into wave 2, lets Mikoto trump install etc. Can do 2[C] 5AC if you are IN the corner.
(Sometime after Wave 1) > Stuff > 236AB > Wave 2 hits > ...
- Important to know for those grounded situations, 236AB is an insane combo tool with Rusian as it launches the opponent towards the opposite side of the screen so when that side of the screen is where wave 2 returns to, it is worth using.
(Roughly around the time wave 1 passes by opp) jAjB > 7djBj[C] > (Wave 2 hits) > slight delay > sj[C] > dj[C]
- Air-to-air confirm for when you successfully A2A the opponent around the time wave 1 passes through them.
Air combo after wave 1 has passed > 214AB~X(~6X) > Wave 2 hits > ...
- 1 bar air-to-air confirm, 214AB~X should usually combo them right into 6S wave 2 coming back around, but you can ~6X if you were early.
j214AB~X~6X > 5S Cancel > 5AC
- 2 bar trump install that uses 5S. Best used as a kill option, as Rusian's cooldown on 5S is kinda absurd and nearly double the 6S cooldown because kermoney.
Kouko
Grab > 5S Cancel > A+B+C
- Powerblast combo with Kouko.
Stuff > 5AB > 5S Cancel > A+B+C
- Powerblast combo with Kouko.
(Stuff >) 6S hits > (jC >) 5B > jBjC > djA+B+C
- 6S powerblast combo with Kouko.
6S hits > j[C] > dj[C] > j214x~X > [2]
- Meterless combo for 6S hitting midscreen.
6S hits > 2[C] > 5B > jBjC > djB~C
- Meterless combo for 6S hitting in the corner. Ends in airtech.
6S hits > 2[C] > 5AB(3) > 214AB~X~6X > 8j[C] > 9j~B (safejump)
- 1 bar combo for 6S hitting midscreen.
6S hits (near corner) > 5B/2B > 236x > 236AB > 7j[C] > 9dj[C] > j214A~x > [2]
- 1 bar combo for 6S hitting near the corner.
6S hits (in corner) > 5B/2B > 236x > 236AB > 2[C] > 5AB(3) > 214AB~X~6X
- 1 bar combo for 6S hitting in the corner.
Grab > 6S hits > 7j on final 6S hit > j[C] > instant air-dash > jC > (5B >) 5C > 426BC
- Combo for grab option on Kouko mixups.
Stuff > 5AB > 5S Cancel > 5AC
- 1 bar trump install with Kouko.
Air Combo > j214AB~X~6X > 5S Cancel > 5AC
- 2 bar trump install with Kouko.
Stuff (ie. jC>5A>5B>5C>2C) > 236C > 6S hits > 236B > 2[C]
- Meterless route for when the opponent disrespects on wakeup. The routing of "stuff" does not matter here, as long as you do 236C right before Kouko hits.
Setups (Okizeme)
Solo
214AB HKD > (recover) > 7/8j[C] > ...
- After 7j[C] OTG, you can delay an airdash for a "safejump", or 8[6]jB.
236AB ender (corner) > [6]9j...
- Depending on how long you hold [6] you can push them into the corner entirely or leave a gap for a left/right situation. Remember that if you take too long you could get 2A'd due to landing too late, or your A buttons being just barely too slow. Test this and see what timings work before trying to just mindlessly use it.
Rusian
7j > 7dj > j214x > 6S Cancel > ...
- Yeah. The entirety of the 214x state counts as an assist cancellable state and whether its meterless or metered, Mikoto can 6S cancel. Likewise, by doing j214x after 7dj, she goes higher up than she would with a grounded 214x call. You will need to learn how to move around the opponent in this state as non EX is not safe to mindlessly fall out of, and ideally you will time the non EX falling to be right before wave 1 hits to cover you. You can use the rocks as a weapon in this case to frametrap into wave 1 to drop and get goofy during wave 2's arrival.
236AB/426BC Ender OR after fullscreen 6S call > sj~[C] > dj[C] > ...
- After 236AB/426BC ender, or in some cases of a fullscreen 6S call and the opponent is at some sort of disadvantage (whiffs, landing), you can do superjump > slight delay > j[C] dj[C] to cover Rusian with little to no risk and the minions will protect you. Should a character like Kuroko/KYH ranbu, Rusian should be off-screen before then causing wave 2 to still happen.
214AB Ender > (recover) > 6S call > rising 7j[C]
- Standard, go-to 6S call. Doing 7j[C] while rising should allow you to cover them meaty, and if they blue trump you can steer clear of the slower ones. If you're worried about Shana or Tatsuya's blue trump, you can opt to not do j[C] and wait-and-see.
2C (6S cancel, or as Rusian is coming on screen) (hits) > 236x 236AB > dash-up > ...
- Used for when you call 6S in trump as you 2C, or if you cancel 2C into 6S, whatever. Using 236AB to purposely send them away from Wave 1 allows for you to use it as a mixup situation where you can tickthrow or 4AB to auto-confirm into Wave 1, or you can feint both by jumping and bait a blue trump out in which Wave 1 will protect you.
4AB > wave 1 hits > 8j~C2AA OTG > ...
- May take some practice to get the jC OTG to hit. After the OTG string you have a perfect amount of time to 2C/delay 2A to catch fuzzys, grab, tickthrow, or 4AB which will auto-confirm into Wave 2.
Opponent blocks wave 1, lands > dash-up 2C > ...
- Solid option after the opponent blocks wave 1 and lands, dash 2C is a way to catch a variety of fuzzy options due to the multi-hit property, and whether it hits or is blocked, you can go into 5AB as a frametrap or hit confirm into wave 2. While it seems convienent, remember 2C is only -2 and as such with 5AB established you can mix in dash > jump, 9j (land) rejump etc. to throwbait or 9jC (land) immediate 4AB.
Wave 1 hits > 2AAA(2B) OTG > ...
- With a simple OTG string after wave 1 hitting, you can create a window for you to establish a tick-throw situation, delay 2A/2C to answer fuzzies, delay/instant jump to bait out blue trumps, 2A4AB for an overhead option, etc. Lots of freedom. Throw should combo into wave 2.
Grab (back grab, right before Wave 1 hits) > sj > 8dj (right after swapping sides with opp) > ...
- Left/right setup that uses wave 2 of Rusian. Falling jC/2A for same-side (jC is MUCH better), airdash for cross-up.
Stuff > 2C (6S cancel first hit) > (236x)...
- Great way to skip all forms of interaction when you have a R2 winners side advantage situation going and want to dump some meter to play with and kill time. This is especially strong near the corner, where Rusian will pass by during the 2C being active. You may want to establish 236x to protect Rusian, BUT REMEMBER, you lose the advantage of 2C being only -2 when you do 236x and you may have to concede advantage to avoid getting hit and Rusian despawning because of that. If you do 236x and it hits airborne, and they airtech backwards to hit Rusian, it is best to be ready to superjump j[C] to cover and save him.
Kouko
6S Call > 2C > ~5AB
- Not really an oki setup but worth mentioning. 2C, your strong anti-fuzzy tool can be frametrapped into 5AB to catch players off-guard, and when timed right Kouko 6S will back you up or confirm it. I think this is important because 2C is only -2 and as such not doing 5AB becomes a real layer where you can 9j after/dash-up etc.
j[C] (hit) > instant air-dash > jC OTG > 6S Call
- Great way to get Kouko going and scary, takes a bit of practice to hit-confirm j[C] well. If you'd like, you can always buffer airdash, and sometimes mix in j214x cancel mid air-dash to bait 5Bs/2ABs reacting to airdash. After calling 6S, you can go for tickthrows, do a 2C to catch fuzzy options in which you can frametrap into 5AB on block or confirm into 5AB on hit for Kouko to pick-up, etc.
214AB Ender > 6S Call > 8[4]j[C] meaty > instant airdash > ...
- A fairly good layer 0 for Kouko oki. On the surface, the reward seems low on catching disrespect but it leads to a left/right on hit (see below). On block, you can do airdash into jX, into j214x to bait out 2ABs/5Bs, etc. After jX, you will have enough time to slight delay jump to throw bait, grab to have Kouko 6S pick up after, 4AB, 2A4AB/5A4AB/5A~2A4AB/2A~2C, dash 2A to slightly move them away for a tickthrow, etc.
214AB Ender > 6S Call > 8[4]j[C] meaty (hit) > instant airdash > jC OTG > 9j > ...
- Left/right setup. If you land from 9j, you can do 2A to crossup. If you do j214A, you go back to same-side and Kouko will hit same-side for you.
236AB Ender > 6S Call > slight dash > superjump > j[C] (immediately) > ...
- If sj[C] hits, you can do IAD jC OTG, 9j (land) 2A4AB, 2A~grab, etc. This setup is a little tricky though. If you dash for too long, sj[C] will not hit meaty and they could fuzzy superjump past you. If you dash for too little, superjump j[C] may not hit the opponent. You will need to practice how long to dash to not getting superjumped. On block, you can dj which you have the layers of j[C] again to catch disrespect, slight delay airdash in which you can jX vs j214x, land dash buttons/jump, etc.
Colors
| Color 1 | Color 2 | Color 3 | Color 4 |
|---|---|---|---|
| Color 5 | Color 6 | Color 7 | Color 8 |
| Color 9 | Color 10 | Color 11 | Color 12 |
| Color 13 | Color 14 | Color 15 | Color 16 |
| Color 17 | Color 18 | Color 19 | Color 20 |
| Color 21 | Color 22 | Color 23 | Color 24 |

