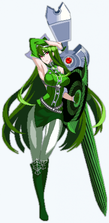
Dengeki Bunko: Fighting Climax/DFCI/Selvaria Bles
Players to Watch
JP:
- smr (Rank 1 Selvaria/Dokuro OR Rusian)
- SAT (Rank 2 Selvaria/Dokuro)
- Jiyamuwo (Rank 3 Selvaria/Dokuro OR Iriya)
NA:
- adct (Selvaria/Dokuro, Can be found in DFCI Discord)
Introduction
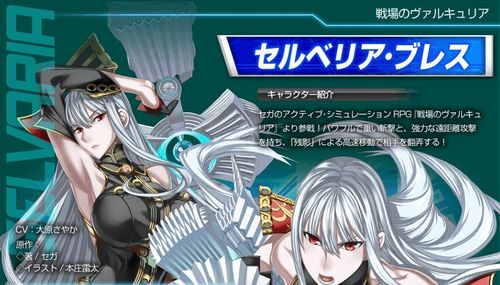
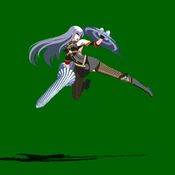
One of the Drei Stern and fiercely loyal to Maximillian. With the blood of ancient Valkyria and armed with her ragnite shield and lance, she is a warrior to be feared.
A guest character from the SEGA video game Valkyria Chronicles.
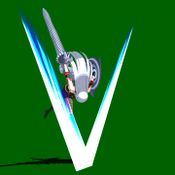
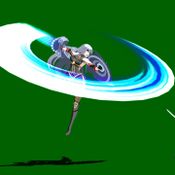
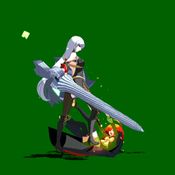
Selvaria is a heavy hitter character that oppresses her opponents with large normals into devastating damage. While not particularly quick, her teleports allow her to quickly traverse the battlefield and rush the opponent. Her 236X series has built-in teleport follow-ups and her 214X series are combo extenders as well as teleports with situational use and have a built-in high/low mix-up (214B/214C) to keep opponents on their toes. Unique to Selvaria is her 41236BC Climax Art has a surprise built-in homing function, meaning there is some potential to raw punish Blasts in this fashion.
Pros
- Excellent air normals such as her difficult to contest jC with good coverage of her surroundings
- Ability to convert into high-end damage with relative ease
- Red Trump Card is a full-screen machine gun barrage that can punish careless foes
- Simple gameplan and wincon makes her easy to pickup and see results with, despite being just above average tier.
Cons
- Poor escape options when under pressure
- Generally poor synergy with most assists that aren't Dokuro
- Character is very slow paced due to reliance on using Dokuro and jC to have prescence, MUs like Tatsuya, KYH and Mikoto are extremely unfavorable
- Despite her high damage floor (with Dokuro), she lacks good meterdump options and combo length means you may need to play an extra interaction to close out round 1
Recommended Assists
Dokuro - Dokuro single handedly allows for Selvaria to go from "bad" tier to pretty good. 5S makes up for her lack of anti-air abilities + slow movement speed that hinders her from dashing under. The threat behind 5S in neutral is very explosive damage. Dokuro 5S is also a combo tool that she can meterlessly use allowing for some ridiculous 2-3 touch damage. Dokuro's low skill floor and strong synergy with Selvaria makes this assist the one.
Rusian - Rusian can easily overwhelm opponents with 6S Monster Train and completely control the pace of the match. During Monster Train, Selvaria can run her teleport mix-up game with relative safety. 5S is a counter move with a huge trigger box in case the foe gets a little too close.
Iriya - Fairly unexplored assist for Selvaria which challenges the traditional approach for her wincon. Not too much to say other than Selvaria's keepaway game with jC allows for her to protect iriya 5S and possibly get something going. Her (free space) in the combo Stuff > 214A > (free space) > 5B allows you to set 5S, possibly giving you some room to get creative.
Potentials
Universal Potential: Increases damage dealt by 10% for 20 seconds when health falls under 30%. If behind in rounds won, increases damage dealt by 20% instead.
Character Potential: Use 1 Trump Card for Support Cast Level 2 for 20 seconds. Can be activated once a round.
Gameplan
This section is dedicated to showing unique elements in a characters gameplan, not necessarily defining it entirely (ie. explaining how Selvaria might play around jC in neutral but not exactly what spacings to be at).
Neutral
To put it bluntly, Selvaria's neutral is very lackluster and as such I will be writing this with the belief that you are running Dokuro as it helps complete her kit. With that established your most important neutral tools to keep track of are jB, jC, Dokuro 5S, some 5B/2B, some jA, and some rare trump movement punishes.
jB
jB has a niche neutral use where it has the ability to cross-up and vertically hits the lowest of all your air normals. It is overshadowed overall by jC but has some ocassional use where you find yourself directly over your opponent and they are whiffing a button, trying to dash under, etc.
jC
jC is your most important air tool by far. You can use this move to steal space on a forward jump, as a cross-up tool, an air-to-air tool, to retreat and maintain pressure against antsy dash button opponents, the potential is endless. Selvaria has multiple ways to convert into this tool if it lands ATG. If an opponent tries to grounded anti-air this button, they risk being too early or even too late as its giant hitbox allows you to easily manipulate when you want to put it out. This versus most grounded AA options only having 2 active frames gives you lots of control.
Dokuro 5S
I don't really believe there's a wrong way to use Dokuro 5S, but something we have to keep in mind it is a huge part of Selvaria's combo theory as the meterless 5S extension grants her massive damage. However, in struggle match-ups where opponents are absolutely all over you this tool really comes in handy. Shizuo, Yuuki, Shana, and Asuna all will have to respect Selvaria despite their superior buttons due to Dokuro's threat. Learning to take advantage of the threat of Dokuro not being on cooldown and what to expect when opponents begin their approach because she's on cooldown are two of the most important parts of running Dokuro.
5B
This button is very situational. More specifically an anti-air for after you dash-under. If you try to use this move heads on vs jumping in opponents you are practically giving up the game as to position yourself in a spot where this 5B works well is a spacing that is easy for your opponent to manipulate. Read the Anti-Air Concepts below for a better idea on how to answer jumpy opponents.
2B
Selvaria 2B is one of my favorite buttons in the game. 2B is a far reaching low that is jump cancellable and converts easily into 5C/2C. It's recovery isn't high for a B normal and really helps Selvaria's lack of A normal usage in neutral. This move is great for pinning landing opponents, protecting your space, or even checking your opponent if they fall asleep at the wheel. Great for getting aggressive along with jC after you establish Dokuro 5S threat.
jA
Apart of Selvaria's AA concepts, jA is decent at swatting opponents out of the sky. As you lack a good grounded AA this is a move you will have to get comfortable with.
Anti-Air Concepts
Selvaria's AA game is going to be where new players struggle the most. A slow walk speed and mediocre grounded AA options mean learning to take full advantage of game mechanics and spacing will be the key to not getting bullied by Yuuki/Shizuo/Asuna jC xN. One concept is air buttons vs. Air pushblock (RG/Reflect Guard). When an opponent is very aggressive and Dokuro is on CD/you aren't ready to put her out, simply jumping with the intention of scouting (while blocking) is a great start. If an opponent also goes airborne and starts attacking, you have a few options. You can fall normally after airblocking, you can slightly delay a double jump to get above them, or air pushblock them to push them out. After getting a hold of your opponent's decision making in the air, you can confront them by angling yourself above them (ie. 7j8dj) and then fall with jC, do an 8/9jA if they're doing it super close, or even stay grounded and dashblock to get yourself under them. If you choose dashblock and you find yourself under the opponent, you can 5B them if they whiffed an air button, or wait out what we'll call a 50/50 where they either land (you wait to pin their landing) or they delay a doublejump to fall with a button (you wait to rising jA this on reaction). Finally, sometimes the best thing to do is to simply lame it out and 7j away with jC a bunch to test your opponent. If they get super aggressive we can dash-under/Dokuro 5S, do an early rising jC, or simply nothing after landing from a 7j and punish them for whiffing an air button. Sometimes the best thing to do in neutral is nothing at all!
Trump Card Use
While the main use of your trump card is for its explosive damage you get with 1 bar + Dokuro, ocassionally situations may arise where an opponent has burned their air options and you can tripguard them with it to win the round. There's also round 3 situations where you have two trump cards and can afford to use one this way. Although people burning their air options carelessly is common, this isn't always worth doing due to trump card scarcity and the higher reward as a combo ender.
Offense
Selvaria's offense in DFCI is very "vanilla" in that you are taking advantage of tickthrow with 5A/2A and looking to blow up bad pushblocks, defensive OSes, and aggression. 2B is a nice far hitting low and 5B moves you back in making it a great jump cancel option. Something to note is 2C is -11 making it extremely punishable and as such I encourage you to end your strings with 5C instead. Also note that Selvaria's teleport blaster gimmicks are indeed gimmicks and as such shouldn't be relied on unless covered by Iriya plate or Rusian or Dokuro cancel. jB/jC both have cross-up potential and jC lets you maintain pressure at a fairly safe space. However Selvaria's slow dash speed eliminates the ability to do a re-dash a button so you may want to be careful if Dokuro 5S is on cooldown as a redash attempt may get mashed or hit by a falling air button.
Defense
Selvaria's weakest area by far. Slow a buttons, slow movement speed, committal ground buttons with 5B being subpar. Your best bet is learning to take advantage of reflect guard, fuzzy jump, fuzzy superjump, and other defensive OSes. Selvaria jB can also be used as a fuzzy rising button to blow-up 4ABs, grab attempts, standing/air buttons etc. Of course, much like neutral, sometimes the best bet is to do nothing and let the pressure end itself.
Move List
L = Low, H = High, A = Air
JC = Jump Cancel, SC = Support Cancel, EX = EX Cancel
ISC = Impact Skill Cancel, TCC = Trump Card Cancel, CAC = Climax Art Cancel
Startup includes the first active frame.
Normal Moves
| 5A |
|---|
| 2A |
|---|
| 5B |
|---|
| 2B |
|---|
| 5C |
|---|
| 5[C] |
|---|
| 2C |
|---|
| j.A |
|---|
| j.B |
|---|
| j.C |
|---|
Special Moves
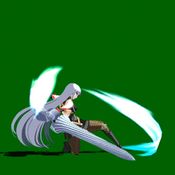
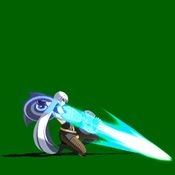
| Ream Beam 「連光線」 236X |
|---|
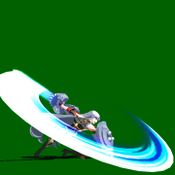
| Remaining Shadow 「残影」 214X |
|---|
| Remaining Shadow (MAX) 「残影 (MAX)」 214[X] |
|---|
| Remaining Shadow (Air Version) 「残影(空中可)」 j.214X |
|---|
| (In the air) Air Raid 「(空中で) 空襲」 j.236X |
|---|
| Self Destruct 「腹霧」 Hold 7A+C while knocked down in final round |
|---|
Universal Mechanics
| Throw 6C or 4C |
|---|
| Impact Skill Assault 「強襲」 5A+B |
|---|
| Impact Skill Pursuit 「追撃」 2A+B |
|---|
| Impact Break 4A+B |
|---|
| Trump Card Special Exclusive Gun Use: Ruhm 「専用特殊銃: Ruhm」 5A+C |
|---|
Climax Arts
| Flash Line 「閃光線」 41236B+C |
|---|
| War Dance of Valkyria 「ヴァルキュリアの戦舞」 63214B+C |
|---|
Combos
Solo
Midscreen Starter
NOTES:
- After 236[C], j236C, or 214B you can add j236AB if you aren't at peak double jump height.
- After any j236AB/236AB/214AB you can go into super or trump.
5A/2A
- 5A > 2A > 5B > 5C > 214B = 1679
- Basic meterless combo to knockdown using 214B.
- 5A > 2B > 2C > 214A > 5B > jA > jC > dj ABC = 1757
- Solo powerblast combo. Flexible route where most starters will work.
- 5A > 5B > 2C > dl.214A > 2B > jA > jC > j214A > jC > djC > j236C = 2327
- Standard selvaria 214A route. You can swap 5B and 2B. Delays and timing here are worth learning for assist combos.
- 5A > 5B > 5C > 214A > 2C > 236[C] = 2420
- Alternative higher damage routing that requires 5C 214A to be better damage than the above route. You need 2B from point blank 5A/2A instead of 5B.
- 5A > 5B > 5C > 214A > 2C > 236[C] > j236AB = 2720
- 1-bar 5A combo to EX Air Raid to get an advantageous knockdown or combo to super.
- 5A > 5B > 5C > 214A > 2C > 236[C] > j236AB > 426BC = 4226
- 3 bar super extension.
- 5A > 5B > 5C > 214A > 2C > 214B > A+C = 3006
- meterless trump activation combo.
- 5A > 5B > 5C > 214A > 2C > 236[C] > j236AB > A+C = 3740
- 1 bar trump activation combo. Tight, but a ton of damage for the resources.
- Trump Card Active
- 5A > 2C > 5C > jA > jB > djB > djC > j214C = 2203
- Basic meterless solo Trump Card route from 5A. Your solo midscreen Trump Card options are kinda crappy in terms of confirm options, so I would reccomend exploring combos with support cancel instead of putting a lot of time into these.
- 2A > 2B > 2C > 5[C] > dl.214[A] > 2C > 236[C] > j236AB= 2885
- Advanced meterless midscreen route.
- 5A > 5B > 2C > 5[C] > j214B > 2C > 236[C] > j236AB = 2986
- 1 bar trump route in the corner.
- 5A > 2C > 5[C] > dl.214[a] > 2C > 236[C] > j236C > j236A+B > 41236B+C = 4448
- DON'T DO THIS! This is just included as a benchmark to help you optimize much better combos with support cancels. If you have the time and ability to master this Trump Card combo, you have the time and ability to learn much better -- and probably easier -- combos using your assists.
5B
- 5B (anti-air) > jB > jC > djB > djC > j214C = 1831
- Meterless anti-air 5B BnB.
- 5B (anti-air) > jA > jB > djB > djC > j214C = 1709
- Alternate confirm for awkward high heights. Less damage but more consistent.
5B/2B
- 2B > 5C > 214C = 1705
- Basic combo from a close-range hit
- 2B > 5C > 214A > 5B > jB > jC > 214A > jC > djC > j236C = 2421
- Advanced 2B starter route. Substitute jA for jB if you start with 5B.
5C
- 5C > A+C = 3155
- Max damage combo to Trump Card activation. Any other normals (including 5[C]) will scale the damage to less than raw A+C (3009).
jC
- jC (air counter hit) > 5B > jB > jC > djB > djC > j214C = 1944
- Hit-confirm from random air-to-air counter jC.
4A+B
- 4A+B > A/B/C > jB > jC > djB > djC > j214C = 2197
- Meterless BnB from universal overhead.
- 4A+B > A/B/C > jB > jC > djB > djC > j214C > Combo Blast > 5[C] > 214C > j236A+B > 41236B+C A+C = 4674
- Requires Combo Blast, 3 stocks, 1 Trump. Solo meter dump from universal overhead.
Corner Starter
Ground Normal That Isn't 5C
- 2A > 2C > 214A > 5B > jC > j214B > 2C > 236[C] > j214AB
- Wallbounce combo that keeps corner. End on j236AB > super for more damage. You can do up to one button before 2C.
In Trump
- 2A > 5B > 2C > 5[C] > dl.jC > j214B > 2C > 236[C] > j214AB = 3059
trump mode version of earlier combo.
Throw Starter
- Throw(2) > (OTG) 2A > 2B > 2C = 1292
- OTG combo. Not worth it unless the opponent is pixels from death.
- Throw(2) > 214A+B = 1593
- Solo throw combo. Sel almost always has better 1-bar routes from a support cancel.
- Throw(2) > 214A+B > 41236B+C = 3099
- Solo throw combo to Flash Line. Like all solo throw combos, avoid unless you KNOW they'll kill the opponent.
Assists
With Dokuro
NOTES:
- Dokuro combos can have minor variance in damage depending on how many hits Dokuro gets. All of these routes can work off of better starters, i.e. B normals, jump-ins, 5[C]214[A], etc
5A/2A
- 5A > 2B > 5C > 214A > 5B > jA > jC > djB > djC > j236C > 5S > land > ABC = 2400
- basic dokuro 1 bar power up blast combo. Works with multiple a normals and any mix of a/b/c normals.
- 5A > 2B > 2C > 214A > jA > jB > jC > land > 5S > ABC = 2157
- easy meterless power up blast route. Needs 2C 214A.
- 5A > 2B > 5C > 214A > 5B > jA > jC > 214A > jC > land > 5S > ABC = 2349
- harder meterless powerup blast route, but worth learning. You can do this off of many different ground starters but you need delays to adjust for height.
- 5A > 2B > 5C > 214A > 5B > jA > jC > 214A > jC > land > 5S > 5[C] > 5AB > 236AB > 5AC/624BC
- standard dokuro routing. can end before spending meter.
- 5A > 2B > 5C > 214A > 5B > jA > jC > 214A > jC > land > 5S > 2C > 236[C] > 236AB (> 5AC/624BC)
- very slightly more optimal combo, but the timing to combo into 5AC or super is tigher.
- 5A > 2B > 2C > 214A > jA > jB > jC > land > 5S > 5[C] > 5AB(2) > 5AC/214AB/624BC = 3420/2781/3956
- Dokuro routes into hkd enders. The basic routing of 5S > 5[C] > 5AB > ender is fairly stable and tends to work off of most reasonable starters. 5AB(3) can work depending on hitcount and ender.
- 2A > 2B > 2C > 5[C] > 214[A] > 5B > 5C > 2AB > 5S > 5[C] > 5AB > 214AB = 3241
- Dokuro trump route. You can end on 5S for meterless hkd.
Throw
- Throw > long delay 6S > 66 > 2C > 236[C]> 214AB = 2352
Max damage Dokuro throw combo.
- Throw > long delay 6S > 5[C] > 5AB > 236AB > 5AC = 3291
236AB 5AB is significantly easier than going into 5AB off of either j236AB or 214AB, so you may want to do this route specifically for trump. It loses about 80 damage but gains a bit more carry and consistency.
5S
- 5S > 2C > 236[C] > j236AB = 2740
- basic dokuro combo into HKD.
- 5S > 29 landing jC > 5B > jB > jC > 214A > djB > jC > j236C > j236AB = 2744
- combo for when you want to advance under dokuro cover and get a hit.
- 5S > 2C > 214A > 5B > jA > jC> j214A > djC> j236C > j236AB = 2950
- dokuro combo using 214A 5B link.
- 5S > 5[C] > dl.214[A] 2C > 236[c] > j236AB > 426BC = 4656
- Optimized dokuro starter combo. Time 5[c] to hit right before they land. Damage number shown is for 4 hits of dokuro, but this works for any number.
- 5S > 5[C] > j9 long delay C > j214a > jB > j214B > (2C) > 236[C] > j236AB > 426AB = 5131
- optimized trump install/double character ignite combo off of raw dokuro, for example if you bait a throw tech. 2C is optional and requires perfect height control.
With Alicia
5A
- 5A > 2A > 5B > 5C > 5A+B(1) > 5S > dash > Power Up Blast = 2202
- 5A combo to Power Up Blast.
- 5A > 2A > 5B > 5C > 5A+B(1) > 5S > dash > jB > jC > djB > djC > j236C = 2770
- 1-bar 5A combo.
- 5A > 2A > 5B > 5C > 5A+B(1) > 5S > dash > jB > jC > djB > djC > j236C > j236A+B = 3070
- 2-bar 5A combo to EX Air Raid knockdown.
- 5A > 2A > 5B > 5C > 5A+B(1) > 5S > dash > jB > jC > djB > djC > j236C > j236A+B > 41236B+C = 4576
- Basic 4-bar meter dump combo if you need a non-Trump kill combo that won't drop.
- 5A > 2A > 5B > 5C > 5A+B(1) > 5S > dash > jB > jC > djB > djC > j236C > j236A+B > 41236B+C A+C = 4948
- Pops a Trump Card stock for extra damage from Flash Line.
- 5A (anti-air) > 5B > 2A+B(1) > 5S > dash > jB > jC > djB > djC > j236C > j236A+B > 41236B+C A+C = 4850
- Meter dump from 5A > 5B anti-air confirm. May be inconsistent if opponent is high up, in which case use 5[C] to continue your combo after the grenade.
5B
- 5B > 5C > 5A+B(1) > 5S > dash > jB > jC > djB > djC > j236C > j236A+B > 41236B+C A+C = 5136
- 4-bar + 1 Trump from 5B starter. Power punish combo.
- 5B (anti-air) > 5A+B(1) > 5S > dash > jB > jC > djB > djC > j236C > j236A+B > 41236B+C A+C = 4961
- 4-bar + 1 Trump conversion from anti-air 5B.
- 5B (anti-air) > 2A+B(1) > 5S > dash > jB > jC > djB > djC > j236C > j236A+B > 41236B+C A+C = 4948
- Alternate anti-air combo to the one above. Less damage, but may be easier to confirm at weird heights and distances.
2B
- 2B > 2C > 214A > 5A > 5B > 2A+B(1) > 5S > jB > jC > jB > jC > j214C = 2937
- Works at max 2B range. 214A > 5A link is very easy at that range.
- 2B > 2C > 214A > 5A > 5B > 2A+B(1) > 5S > jB > jC > jB > jC > j214C = 2980
- Alternate 1-bar combo. Slightly more damage, but less carry and a less ideal air tech position.
- 2B > 2C > 214A > 5A > 5B > 2A+B(1) > 5S > 5[C] > 214C > j236A+B > 41236B+C A+C = 5158
- 4 bars, 1 Trump stock.
jB
- jB > jC > 5B > 5C > 5A+B(1) > 5S > 5[C] > 214C > j236A+B > 41236B+C A+C = 5110
- 4-bar + 1 Trump combo from jB > jC on standing opponent. Superior damage and more consistent than doing jB > jC > etc after the grenade hit.
jC
- jC > 5B > 5C > 5A+B(1) > 5S > dash > jB > jC > jB > jC > j236C > j236A+B > 41236B+C A+C = 5198
- 4-bar + 1 Trump combo from jC. Works on standing or crouching. For slightly less damage (5186) and more consistency on smaller characters, you can do this alternate ender after 5S: 5[C] > 214C > j236A+B > 41236B+C A+C
4A+B
- 4A+B > A/B/C > 4/6S > jB > jC > djB > djC > j214C > (assist hits) > 5[C] > 214C = 2353
- No timing necessary, just pound 4/6S as soon as the overhead launcher hits.
- 4A+B > A/B/C > 4/6S > jB > jC > djB > djC > j214C > (assist hits) > 5[C] > 214C > j236A+B > 41236B+C A+C = 4636
- Dumping meter into the above combo. Not ideal, but it'll do.
5S
- 5S (hit) > 5B > jB > jC > djB > djC > j214C = 2816
- Basic combo from raw grenade hit.
4/6S
- 4/6S (hit) > jB > jC > djB > djC > j214C = 2685
- Basic combo from raw 4/6S hit.
Corner
- jC > j214B > 5B > 5C > 5A+B(1) > 5S > 5[C] > 214C > j236A+B > 41236B+C A+C = 5278
- 4-stock, 1-Trump corner conversion from B Remaining Shadow (air) wallbounce.
Throw
- Throw(1) > 5S > Power Up Blast = 1459
- Throw combo to Power Up Blast.
- Throw(1) > 5S > jB > jC > djB > djC > j236C = 1939
- 1-bar throw combo.
- Throw(1) > 5S > jB > jC > djB > djC > j236C > j236A+B = 2239
- 2-bar throw combo to EX Air Raid.
- Throw(1) > 5S > jB > jC > djB > djC > j236C > j236A+B > 41236B+C = 3745
- 4-bar throw combo.
With Iriya
NOTES:
- To combo off of fireworks, 5[C] > 5AB > 236AB should work at any hitcount. 236AB combos into supers and trump.
Normal starter, no plate out
- 2A > 2B > 2C > 214A > 5S~B > jA > jC > j214A > jC > j214AB > flick plate = 2336
- This sets up plate oki off of any grounded hit, just make sure to 5S after 214A and do this specific air sequence.
- 5B flick > 66 > 2A > 2B > small walk forward > plate hit > 2C > 236[A] > 5A > jA > jC > j236A > j236AB > flick plate = 2554
- Looping plate oki if you happen to hit them with it. the route following the plate hit should work regardless of the starter. j236A is important here because it helps you position correctly.
With Rusian
NOTES:
- To combo off of the big train hit, 5[C] > 5AB > 236AB should work at any hitcount. 236AB combos into supers and trump.
- 2A > 2B > 5C > 214A > 5B > jA > jC > j214A~6S > djB > jC > j236C > minions hit = 2365
- 1 bar (0 bars in trump) Consistent 6s combo. Sets up monster train oki.
- 6S(1) > 5B > jA > jC > j214A > jC > j214C > 6S(2) = 2077
- Pickup if you get a 6S hit.
- 6S(1) > 5B > 2AB > 6s(2) = 1777
- In the corner, the train comes too fast for a longer combo. Any button works here, the stronger the better.
Colors
| Color 1 | Color 2 | Color 3 | Color 4 |
|---|---|---|---|
| Color 5 | Color 6 | Color 7 | Color 8 |
| Color 9 | Color 10 | Color 11 | Color 12 |
| Color 13 | Color 14 | Color 15 | Color 16 |
| Color 17 | Color 18 | Color 19 | Color 20 |
| Color 21 | Color 22 | Color 23 | Color 24 |
Additional Resources
DFCIDiscord's Selvaria Character Page
