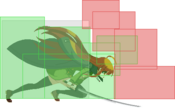
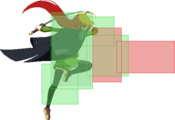
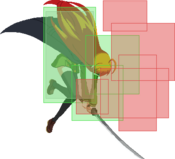
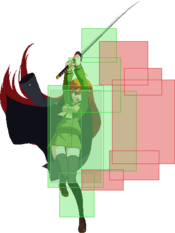
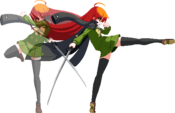
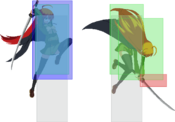
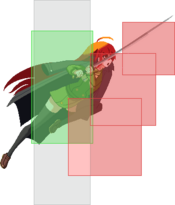
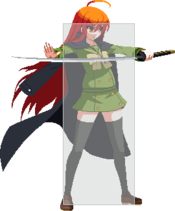
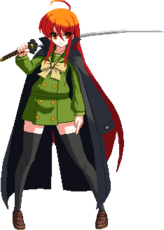
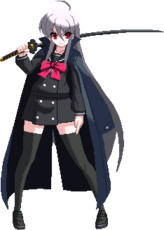
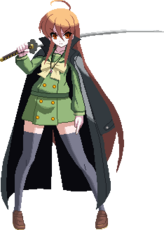
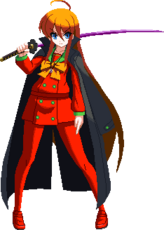
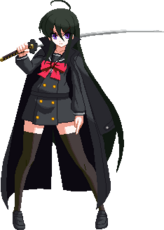
Dengeki Bunko: Fighting Climax/DFCI/Shana
Players to Watch
JP:
- T.I. (Rank 1 Shana/Tatsuya)
- Seiba- (Rank 3 Shana/Tatsuya)
- Timu (Rank 5 Shana/Tatsuya)
- GO1 (Rank 7 Shana/Tatsuya, God of Anime Poverty Games)*
- Niga (Strong Oldhead Shana/Tatsuya)
- Shikki (Rank ? Shana/Wilhelmina)
NA:
- Abister (Shana/Wilhelmina OR Tatsuya, Can be found in DFCI Discord)
- Inebriated Mage (Shana/Tatsuya, Can be found in DFCI Discord) (Also wrote this page! Shoutouts)
Additional Resources
DFCIDiscord's Shana Character Page
Timu, Top 6 JP Shana's YT Channel, Semi-Frequent PSN Streams
Introduction
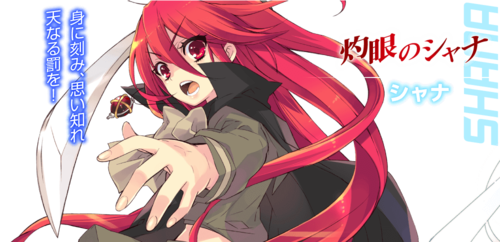
The Flame Haze of Alastor. Her title is the "Flame-Haired Burning-Eyed Hunter" and her mission is to destroy the Crimson Denizens who feed on humans. She wields the "Nietono no Shana" and loves melon bread.
Originally from the light novel series Shakugan no Shana.
Shana is a mid-range offensive powerhouse with versatile and far-reaching ground normals, an airdash, and oppressive air normals. While she is at her core a simplistic character, her average damage output and ease of access to truly explosive damage is unparalleled by every other character. Combined with a fierce dominance of the air with her airdash and jump normals, she is rivaled only by Yuuki and Kirino in terms of sheer fear factor. Shana's simple but deadly Blue Trump gives her meter and gives access to whiffed charged j.C into j.A or j.B pressure and spacing maneuvers.
Pros
- Amazing ground normals for pokes, including a far-reaching 5 frame 2A low
- In terms of overall coverage and function, she has among the best of the best air normals, especially once Trump is activated and charged j.C can be cancelled freely into other jump moves even on whiff
- Best resource use to damage output efficiency in the game, unmatched.
- Has tools for nearly every situation and is fairly independent. Even her dependency on Power Blast is less than that of other characters due to her Blue Trump effect.
Cons
- Relatively weak overall compatibility with assists outside of her established staples
- Impact Skills are generally only for combo purposes and have weak defensive use
- If on losers side of round 2, her meter game with Tatsuya/Wilhelmina can be easy to exploit for experienced players
Recommended Assists
Tatsuya - The infamous "Shana-Onii" combination. 5S is a huge counter field that when activated, paralyzes the opponent, forcing them to either block, throw tech, or Escape Blast. Use this during Trump to force struggling opponents to know their place. 6S is a combo extender that buffs your next Climax Art, guaranteeing typically over half an opponent's life bar off most conversions into Climax Art.
Wilhelmina - Wilhelmina is a strong setplay assist that also carries the threat of explosive damage behind every 6S. 5S is a quick projectile that can strike away other assists or whiff punish starter. 6S is a timed bandage bind for combo extensions and high-low/tick-throw set-ups. For Shana in particular, 6S allows for explosive routing similar to Tatsuya assist making for insanely high reward.
Celty - 5S is a giant hitbox in front of you that zooms across the screen with only 10 frame start-up. It’s great for scrambles, mid-screen stand-offs, and quick punishes into hard knockdown. 6S is a giant anti-air bike that hits twice to afford you two opportunities to run cross-ups or tick throws.
Potentials
Universal Potential: Increases damage dealt by 10% for 20 seconds when health falls under 30%. If behind in rounds won, increases damage dealt by 20% instead.
Character Potential: Hit the opponent with 10 attacks (in the case of multi-hitting moves only the first hit is counted) for Attack Level 1 for 20 seconds. Can be activated once a round.
Gameplan
This section is dedicated to showing unique elements in a characters' gameplan, not necessarily defining it entirely (ie. explaining how Shana might play around her jB or 214x in neutral but not exactly what spacings to be at).
Neutral
Shana's gameplan centers around her unparalleled dominance of the mid-range, applying her strong jump normals in tandem with her oppressive close and mid-range pokes to lock down the opponent and begin her dangerous combo and confirm game. Her kit is well-rounded and suited for offense, able to swap from a mid-range dominant "wait and see" playstyle to an aggressive "gorilla" that enforces her options and takes note of how her opponent responds. The following normals are taken into consideration when discussing Shana's neutral: 2B, 5C, 2A, 2C/5B, jA, and jB.
2B
We begin by establishing Shana's oppressive ground tools. 2B is a mid-range low that confirms into 5C at any range. While it struggles from not being jump-cancellable, it makes for a great defensive and offensive tool, able to whiff punish opponents, guard space against opponents trying to dash in, or chop at an opponent's legs while they are trying to walk away or jump away from you! This also makes for a great landing punish. It has great reward from hitconfirms and is a staple tool in Shana's arsenal.
5C
A massive mid-range mid that arcs upwards towards the end of the hitbox, while also moving Shana's hitbox a tiny bit lower to the ground. While boasting strength in defending Shana's space because of its reward from counterhit, converting into 2AB, it is also very strong at conditioning opponents to stay put on the ground, as 5C can catch opponents on rising with its unique rising hitbox.
2AB
This tool deserves consideration. It is a massive half-screen mid attack that, while punishable on block, can combo OR frametrap into a hit-grab followup that allows Shana to convert into an air combo. This tool is very strong at confirming counterhit 5Cs, but is also important in establishing answers to zoning and punishing opponents for recklessly powerblasting in neutral. You can also frametrap the first hit into combo-blast, which can snipe people trying to buffer microdash or 5AB to punish you.
jB
Solid air-to-ground and air-to-air hitbox. When opponents respect your ground game, j.B becomes a fantastic tool to take advantage of respect and establish your pressure. With its low vertical hitbox, you can destroy anti-airs and rising attempts to air-to-air Shana by double jumping or timing the j.B a little bit after jumping (at around the apex of your jump), which can establish not only a mind-game around when you will j.B, but also mix the opponent up by baiting them into blocking j.B at tall heights and falling into j.C, giving Shana a double overhead and further frame advantage to confirm her combo or start her pressure!
With your grounded dominance established, opponents may try to challenge you through air-scouting, using offensive movement such as forward jump or watching how you approach neutral using your grounded tools through neutral jump, drifting, and jumping back. We can now establish tools that will ensure Shana sticks to the opponent and either baits out the opponent, or enforces an option that catches the opponent off guard through primal fury!
2C, 5A and 5B
2C is Shana's prime anti-air and is used to snipe most aggressive jumpins. However, it can also be used offensively to check people trying to jump back against Shana's 2A/2B/5C dominance. While lowering Shana's hurtbox, it falls victim to jumpins with disjointed hitboxes or jumpins timed early to check for 2C's startup, such as Asuna j.C, Yuuki j.C and j.[C], and Kuroyukihime j.C. In these situations, 5B shows its dominance by not only being easily jump cancellable into a confirm from counterhit, but also having a taller hitbox to snipe opponents for trying to play around 2C. Additionally, 5B can be used in tandem with 5A to, like 2C, catch opponents jumping to scout Shana's neutral approach by hitting opponents out of their pre-jump vulnerability OR catch aerial opponents off guard through dashunders.
jA
You will notice that opponents will move around your anti-airs, bait them out, or even read your dashins by doublejumping and pinning your movement down. This is where Shana's jump normals truly shine. j.A is an insane horizontal air-to-air special that stands unrivaled against the casts' j.As. While this can be used in combination with drift to protect your space against forward advancing opponent, it can also snipe opponents trying to circumvent your strong grounded mid-range game or evade your potent j.B spacings. Additionally, it can be used as a quick forward advancing poke from superjumps to check opponents trying to jump away from you, double jump, and more!
214X Series
An incredibly versatile special series that can only be punished from forcing the last hit of 214X to whiff through pushblocking in the air. This can be a strong tool to catch opponents trying to anticipate anti-airs or air-to-airs and combos into a strong conversion provided the Shana has meter. While 214A is the safest because of its low-hitting hitbox, 214B and 214C are dominant at checking opponents in the air who are not wary of its hitbox. Should opponents block the last hit, Shana can cancel into 236AB to retain frame advantage. Be aware of how you use this though. Overreliance on this special can result in needlessly wasting frame advantage that could be spent on establishing j.A, j.B, 2C, dashunders, or scouting opponent air options and result in getting aerial pushblocked and subsequently punished!
j[C]
A situational neutral tool that can be used to check opponents trying to pin Shana's landing. Shana stalls her approach and performs a small hop while augmenting j.C's already enormous hitbox, causing HKD on hit.
Trump
Trump allows Shana to jump cancel her oppressive ground normals, which augments her stickiness in neutral to be even more scary through applying tools like airdash and reestablishing the dominance of 9/8 j.A/B. Additionally, Shana gains access to rebeats from j.[C], allowing her to convert her air stalls into pressure against grounded and aerial opponents. When used as a neutral tool, Shana can establish a threat of opponents whiffing normals or misspacing aerial trajectory by blue trumping and then reacting with a punishing option. While it is useful to conserve trump for damaging combos, understanding how to apply trump at any point of the game state, which may require you to use it in neutral or defensively as well, is an integral aspect of learning Shana.
Offense
Shana's offense applies very similar tools to her neutral gameplan, using her superior mid-range to lock opponents down. She is able to cancel her normals into 236X, which allows her to check opponents trying to jump out once she is pushed out of her mid-range. When opponents respect her, she can establish her strike throw, which gives her access to dangerous high low mixups that she can delay to catch people performing early DP and fuzzy guard (171) by using j.[C]. One of the most important tools in Shana's arsenal for her pressure is 2A. Comically large for its button strength, 2A is perfect for when opponents respect your grounded dominance. By establishing this tool, you will open up not only options for your own pressure, but opportunities for opponents to try and prevent you from dashing in, which engages opponents in a dangerous mindgame surrounding Shana's whiff punishing capabilities and rewards. When in trump, Shana is able to perform triple overheads using a properly timed j[C], rebeating it into jA and jB for a true string, or jB and jA for a frame trap that can be mixed up into a low through jB > 2A. Being able to jump cancel her normals empowers her tick throw game by allowing Shana to jump cancel 2B and 5C, ensuring she is always in a position to threaten dashin and 9jB.
Okizeme
Shana's okizeme revolves her ease of access to safejumps. Ending in 214AB/j.214AB and 426BC, or landing a throw, gives Shana access to a High-Low-Throw mixup. The following are her options from these safejumps:
- Dash8jB/jC: Safejump that will allow Shana to land and not be punished by opponents using 2AB or 624BC on defense.
- Dash 8jB/C (whiff) > 2A: Fakes a safejump to hit opponents low. Messes with opponent timing and can catch opponents trying to jump out of the mixup OR tech throws.
- Dash8jB/C (whiff) > Throw: Fakes a safejump to throw opponents. Loops into another safejump.
- Dash8 > anything > 4AB: Option to go into universal high. Strong with assist backing (be it to confirm the first hit (Wilh 6S) or to convert the followup (j.214X > Tatsuya/Wilh 6S)
- [In Trump]: Dash8j[C] jAB or jBA: Triple overhead route. While j.AB is a true string, j.BA has a gap between j.[C] and j.B, meaning it can be armored or 624BC'd. However, j.BA provides mixup strength as j.B has a lot of blockstun, meaning you can delay the j.A OR land into Low>throw. Additionally, j.[C] > j.B can be a lot more damaging than j.AB from hitconfirms.
These options get more interesting as opponents find different answers to the offense using layered option selects.
- Dash8j[C]: Delays overhead to check for fuzzy jumps (171) or delayed mashout options to counter throw. On counter hit, gives hard knockdown. Can be converted using CB/A+B+C or an assist.
- Dash 8[4] > dj7/8[4] jA/B: Fakes commitment to the H/L/T oki and gives it up to instead bait blue and red trumps OR scout out opponent challenges.
- Deep Dash 8jB~2A+B ~ 2A2B: This is a hitstop OS from a fake safejump. While you will be punished by 2ABs and 624BCs, this is intended to ONLY beat a certain option: wakeup powerblast/A+B+C. If you j.B whiffs, you will land and immediately 2A+B, the buffered 2A2B ensures the followup comes out as soon as possible. Should they block or get hit by the j.B, 2A+B does not come out and instead 2A and 2B confirm the hit, allowing you to go into a full combo. This is a potent mixup at any level when opponents are greedy with wakeup power blast.
- One astute observer might note that 236AB wall bounces in the corner. This DOES give Shana access to left-rights by dashing into opponents to make the gap between their character and the corner seem slim and jumping over them, thereby creating the L/R mixup. However, her reward for landing them varies. It is seen as more beneficial to keep opponents in the corner as Shana has access to her most flexible and damaging confirms when her opponent has their back to the corner through 236AB's wallbounce into powerblast and 2AB, or assist routes that make use of the corner. However, if the left right mixup can conclude the round, use your creativity to catch opponents off-guard!
Note that these options do NOT change with assists. While Wilhelmina provides Shanas with additional conversion strength from mixups, they remain the exact same.
Defense
Shana's defense is initially not remarkable. While your 2A and 5A are strong for mashout options, her 2B and 5C are considerably slow. Additionally, your 5AB has a shallow horizontal and vertical hitbox that can be jumped over at certain distances should the opponent jump cancel their normal. 2AB is also an underwhelming reversal as its startup is too slow, rendering it vulnerable to delay staggers and the opponent cancelling the armor clash into 2Bs and 5Cs for counterhit confirms. However, she still has some unique tools at her disposal.
214A
This is an incredibly annoying tool that Shanas can present. Because it goes into the air AND crushes lows, this effectively provides a risky albeit rewarding answer for Shanas to crush H/L/T mixups from jump cancelled normals. Its strong vertical hitbox is perfect for catching opponents that are trying to double jump and bait throw tech or 2A/5A mashouts. Additionally, this tool is perfect for destroying armored moves like Yuuki 214X series and should you not be confident, you can cancel into combo blast on any hit of 214A!
5A+C
-1 Blue trump. Because of its frame data, it can invuln through a lot of normals, specials, and even the most active of hitboxes. Once the Shana sees an opportunity to whiff punish, they can go into 214C starters while using their assist to convert after the final hit, leading into devastating combos. No matter what health percentage you are at, simply having this tool in your back pocket and presenting it is enough to force opponents into canning their pressure or being wary on offense, allowing you to establish basic defense concepts and answers against choices and decisions like opponents air scouting through drift and forward>back jump to bait your blue trump (using 8[4] or 9 > dj7) or using staggered/frame trapped normals and specials to bait 214A.
Move List
L = Low, H = High, A = Air
JC = Jump Cancel, SC = Support Cancel, EX = EX Cancel
ISC = Impact Skill Cancel, TCC = Trump Card Cancel, CAC = Climax Art Cancel
Startup includes the first active frame.
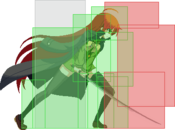
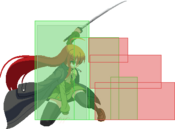
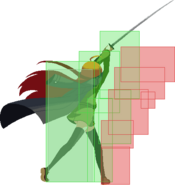
Normal Moves
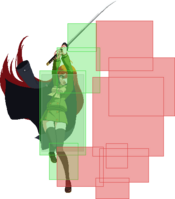
| 5A |
|---|
| 2A |
|---|
| 5B |
|---|
| 2B |
|---|
| 5C |
|---|
| 2C |
|---|
| j.A |
|---|
| j.B |
|---|
| j.C |
|---|
| j.[C] |
|---|
Special Moves
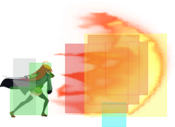
| Hien 「飛焔」 236X Air O.K. 236A/B/C 236AB j.236AB |
|---|
| Guren no Oodachi 「紅蓮の大太刀」 214X Air O.K. 214A/B/C 214AB j.214A/B/C j.214AB |
|---|
Universal Mechanics
| Throw 6C or 4C |
|---|
| Impact Skill Gouka 「劫火」 5A+B |
|---|
| Impact Skill Shinku 「真紅」 2A+B |
|---|
| Impact Break 4A+B 4AB 4AB~X |
|---|
| Trump Card Shinpan 「審判」 5A+C |
|---|
Climax Arts
| Guren no Souyoku 「紅蓮の双翼」 41236B+C |
|---|
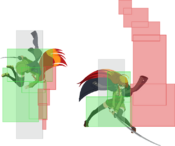
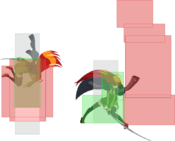
| Kessen Ougi 「決戦奥儀」 63214B+C Initial hit Follow-up 1 Follow-up 2 |
|---|
Combos
NOTES:
- Shana can end nearly any of her grounded routing into 426BC for damage. However, 624BC will depend on starter and combo length
- "Stuff" > refers to 5A/2A > 2B/5B > 5C/2C etc.', that prelude a confirm into the routing. Airdash is also considered "stuff."
- Because DFCI Operates under SMP, or 'same move proration,' it is advised to NOT use the same spin in one combo (i.e 214C), otherwise the last hit of the spin that allows Shana to end her combos will drop
- Buttons or specials in brackets, i.e (j.214X), are optional routing choices that the player will have to make
- When 2A+B are followed with "X," it implies that pressing ANY button will perform the followup
Solo
Powerblast Installs
Stuff > 5AB > 214AB > (recover) > 5A+B+C
- Simple way to combo into powerblast while still getting oki from OTG PB.
Stuff > 236C > j.214AB > (recover) > 5A+B+C
- Alternative PB combo routing, can be used in further confirms as 5A+B can drop at farther distances.
4AB~X > (slight delay) > jA+B+C
- Meterless PB install from universal overhead, can do jBC > 9jABC for additional damage/meter gain at the cost of further recovery.
(5A) > 5B > 9jBC > dj9A+B+C
- Anti-air PB install.
Stuff > 426BC > (recover) > 5A+B+C
- Powerblast after 426BC knockdown. While it will not OTG, you will have enough time to establish ~2B/5C distances. Alternatively, can set up powerblast as a meaty to throw the opponent off.
Stuff > 236AB > (recover) > 5A+B+C
- Corner only PUB combo. Using 236AB's wallbounce property, Shana can effectively install PB and get the additional 1-bar reward for hitting the opponent with PB.
Midscreen
Stuff > 5AB/236C
- Meterless routing for meter saving.
4AB~X > jBC > 9j(A)BC > (j214X)
- Meterless ender from universal overhead. You can forgo adding j.214X, which will sacrifice damage, and go for better landing+spacing+recovery by doing j.A~B~C.
(5A) > 5B > jBC > j(A)BC (j214X)
- Meterless anti-air routing from 5B.
jA > jB > 9djABC (j214X)
- Air-to-Air conversion from j.A. If you are completely out of reach for j.B to connect from j.A, look to convert into j.214B/C. Otherwise, land and use the opponent's tech height to your advantage.
2A+B > X > (dash) > 5A5B > 9jBC > dj9BC (j214X)
- Basic 2A+B conversion. If too far away, you can choose to instead do 5A+B rather than dashAB. Alternatively, dash5C>236C also works but requires proper timing and failure will result in air forward tech punishing you.
5C > 2A+B > X
- Counterhit conversion, this is an essential tool in whiff punishing or sniping move startup.
2A+B > X > jABC > dj9BC (j214X)
- Unless you have started with an airdash, this should be universally easy to confirm and provides you with the choice of saving meter or spending it for HKD.
Stuff > 5A+B > 214AB (426BC/624BC)
- Most basic ground ender. Sets up for safejumps and easy F-Shiki (double overhead) setups.
Stuff > 236A+B (426BC/624BC)
- Alternative ground ender that pushes opponent further towards the corner while sacrificing oki if used in isolation.
(Stuff) > 236C > j214AB
- Easy conversion from long range hits or punishing opponents using raw 236C.
Aerial launcher/Anti-air/Air-to-air > jA~B~C > j214AB > land2A 5B/2C > 214B (426BC)
- Air conversion into a relaunch combo. Very tricky because of height and proration. At better prorations (if a starter does not use 2C, for example) you can convert into 2A2C for better damage compared to 2A5B.
Stuff > A+B+C > 2A+B (whiff) > X
- Combo blast confirm. If you are not confident in timing the first hit of 2A+B, you can time the followup to hit by whiffing 2A+B and whiff cancelling into the followup. You are free to either 5B2C and j.A B C for confirm.
2A+B > X > 236A+B/214AB > 426BC
- If you are concerned about the opponent generating blast during your 214B > 426BC chain and using it to have another chance at winning and you have the extra bar, it is wise to spend the meter early for a burstless ender. 236A+B works at ALL prorations, while 214AB is specific to low hitcounts/non-IAD confirms.
Corner
- NOTE: Shana's midscreen meterless routes are the same for her corner meterless. What changes drastically is her metered conversion strength.
Stuff > 236A+B > 2A+B > X > (dash) > 5B > 9jABC dj9BC (j214X)
- Metered solo corner routing, does high damage.
Stuff > 236A+B > 2A+B > X > (dash) > 5B2C > 214C (214AB>426BC OR 426BC)
- Alternative meter dump routing.
OTGS
2A 2B 2C (5A+B OR 236A+B)
- Basic OTG routing. 5A+B can be added for better damage but is very proration dependent. 236A+B can be used to tack on additional chip damage to ensure a kill.
Trump
Installs
Stuff > 5A+B[1] > 5A+C > 2C > jABC > jBC > (j214X)
- Trump install, can pull off similar metered route endings (i.e j.ABC 214AB) with unique access to j.BC land214B!
Stuff > 236A+B > 5A+C > 2A+B > X > (dash) > 5A5B > j(A)BC > dj9BC > (j214X)
- 1-Bar trump install, very solid damage and freedom of conversion.
BnBs
2A > 2B > jB~C~A > 2A > 2B > 5C (236C/5A+B)
- Confirm from empty jump > low. Can easily land j.A > 214C for corner carry and meter spending strength. Standing confirm.
[Requires dash momentum OR corner] j[C] > jAB > 5B > 9jBC > dj9BC (j214X)
- Mixup from High-Low-Throw (H/L/T) using delay j.[C] to throw opponents off or bait opponent challenges.
OTGS
5C > 2C > 2B > 2AA
- Best case scenario for OTG in trump, requires decent proration prior.
5A > 2B > 2C > 2AA
- Universal trump OTG.
Assists
Tatsuya
Powerblast Installs
Stuff > 5A+B > 6S > (recover from 5AB) > A+B+C
- Route into PB, requires 1 bar.
214X/j214X > 6S > A+B+C
- Install from any spin! The multihit spin and groundbounce from aerial spin allows you to easily confirm hits into installs.
6S Confirms Without Trump
NOTE:
- Assist costs 1 Bar to cancel into from your normals and specials WITHOUT trump state. The combo notation considers this and makes the baseline for confirms 1 Bar. These combos are still applicable and OPTIMAL in trump state.
6S > 2A+B > X
- Confirm from raw 6S in neutral, you want to go for 2A+B the majority of times. If not, route into usual Shana ground starters/enders (i.e 2B5C, 662A2B5C, etc.)
Stuff > 5C (236C/5A+B) > 6S > 2A+B > X >( 665B (2C) ) 214B (426BC)
- Universal metered confirm from any hit. Allows you to route into 426BC OR j. ABC post 2A+B > X. If you had a heavily prorated starter (2AAA 2B 5C, airdash j.X) you can opt out of 5B2C and go straight into 214B. if your starter was moderately prorated (2AA2B5C) you can opt out of 2C and instead go into 5B 214B.
4AB X > j.214C > 6S > 2A+B > X > 66 (dash) > 5B2C > 214B > (426BC)
- UOH routing into 426BC.
(Stuff) > 214X OR j214X > 6S > (5B (2C)) > 214B > (426BC)
- Anything that you confirm into spin (j.A, j.B. 5B, 2C anti-airs, etc.) you can convert into Tatsuya for 1 bar.
Stuff > A+B+C/CB > 6S > 2A+B > X > (5B (2C) ) 214B (426BC)
- You can convert anything into 6S by using CB, which only costs your blast gauge. This is very helpful in meter+blast economy where you do not want to commit to spending meter but want to get your blast regenerating OR stall out for a better trump/metered confirm.
Stuff > 5A+B > 236A+B > 6S > 2A+B > X > (5B (2C) ) 214A/B > 426BC
- Corner confirm. Using the wallbounce, we can confirm into 6S without spending ADDITIONAL meter to summon him. This also helps with regards to blast economy, as burning meter to call assists does not affect blast percentage.
Trump Install Confirms
NOTE:
*Combos are organized by their HITCOUNT unless prefaced otherwise.
*Assuming you do not have the meter for 426BC, you could opt to end in j.214X via 2A+B > X j.ABC dj9BC j.214X. However, it is advised that you understand the intention of trump installing is to make the MOST out of your trump and not burn out your time in the state to ensure you two or three touch your opponent!
[1 Trump, 2 Bar, 3 hits prior to 5A+B] 2A > 2B > 5C > 5A+B > 5A+C > 214C > 6S > 2A+B > X > 2C5B > 214B > 426BC
[1 Trump, 2 Bar, 4 hits prior to 5A+B] 2AA > 2B > 5C > 5A+B > 5A+C > 214C > 6S > 2A+B > X > 5B > 214B > 426BC
[1 Trump, 2 Bar, 5 hits prior to 5A+B] 2AAA > 2B > 5C > 5A+B > 5A+C > 214C > 6S > 2A+B > X > 214A/214B 426BC
- These combos are Shana's bread and butter when using Tatsuya. You will want to confirm these hits to establish your 50% damage threat and also put opponents into okizeme and threaten the two-touch. Your routing will depend on hitcount prior to 5A+B and involves your post 2A+B followup.
- 3+ Hits: 2A+B > X > 2C5B is optimal.
- 4+ hits: 2A+B > X > 5B is optimal.
- 5+ hits: 2A+B > X > 214B is optimal.
[1 Trump, 2 Bar, < 2 hits, distance dependent] 2A > 2B > 214C > 5A+C > 214A > 6S > 2A+B > X > 2C5B > 214B > 426BC
- Distance dependent 'optimal' confirm. 2A 2B can be replaced with 2A5C, 2B5C, etc., it is dependent on your starter and distance. Very situational but leads to solid damage.
[1 Trump, 2 Bar, Anti-Air] 5B/2C > 214C > 5A+C > 214A > 6S > 2A+B > X > 5C2C > 214B > 426BC
- Anti-air hitconfirm into trump install. Leads into absurd damage.
[1 Trump, 2 Bar, Reversal] 5A+C > 214C > 6S > 2A+B > X > 5C2C > 214B > (236A+B) > 426BC
- Reversal trump. This is a crazy starter that deals a lot of damage, making it a threatening option to use on defense should you conserve trump as a reversal in round one or three!
[1 Trump, 2 Bar, Punisher] 2A+B > X > 5A+C > 66214C > 6S > 2A+B > X > 5C2C > 214B > 426BC
- 2A+B punisher midscreen, also works from 5C Counterhit! You be using this starter to occasionally punish powerblast in neutral OR during offense! This route still works without the first hit of 2A+B and does even more damage if the followup is the first hit.
[1 Trump, 3+ Bar, Poke/Punisher] 5C > 236A+B > 5A+C > 665A+B [First hit whiffs] > 6S > 2A+B > X > 66 (dash) > 5B2C > 214B > (236A+B)
- 70% damage combo. This confirm put fear into the heart of any opponent should the Shana be on point with their hitconfirms. Nothing else is to be said other than timing the 665A+B can be difficult because it is reliant on the Shana spacing for the last hit of 5A+B. Get a feel for when you will need to walk back OR dash forward to properly convert 5A+B into the 6S!
- Get a feel for 2A+B > X spacing. If you feel like you will be unable to confirm the 665B 2C, you still have some time to microdash 2A+B to further close the distance and make the combo more stable.
[1 Trump, 3+ Bar, Mixup] Throw > 236AB > 5A+C > 6S > 2A+B > X > 5C2C > 214B > 426BC
- Mixup from throw. Valuable if you can guarantee a kill OR have a surplus of meter to fall back on.
Trump Specific Confirms
[Requires dash momentum OR corner] j[C] > jAB > 5B > 7jA j214C > 6S > 2A+B > X > 5C2C > 214B > 426BC
- Confirm from j[C] mixups.
2A > 2B > jB~C~A > 214C > 6S > 2A+B > X > 2C5B > 214B > 426BC
- Confirm from standing opponents off of a high low mixup.
Wilhelmina
Powerblast Install
2B~6S > 5C > 5A+B (6S hits) > A+B+C
- Difficult to route into without 2A prior but is a possible confirm.
214B or 214C or j214X [Cancel first hit] > 6S > 6S Hit > A+B+C/PB
- The long duration of the 214X series, as well as its ground bounce property in the air, allows you to consistently confirm 214B/C and j.214X into Wilhelm 6S! This gives you the freedom of easily converting into powerblast.
Confirms Without Trump
NOTE:
- Assist costs 1 Bar to cancel into from your normals and specials WITHOUT trump state. The combo notation considers this and makes the baseline for confirms 1 Bar. These combos are still applicable and OPTIMAL in trump state.
6S > 2A+B > X > (5B/2C 214B) 214A > 426BC
- General conversion from any hit of 6S. These confirms include the following:
- [Okizeme] 6S > 4AB (6S hits)
- [Okizeme] 2AA (6S hits)
- [Hitconfirm] 214B/214C/j.214X [Cancel first hit] > 6S
5S > 66(2B) > 5C > 236C > (214A+B)
- General hitconfirm from 5S on grounded opponents.
5S > 66 (dash) > 5A5B > 9jBC > dj9BC > (j214X)
- General hitconfirm from 5S on aerial opponents, you will see this frequently should you apply 5S to pin landings.
Trump Installs
NOTE:
*Assuming you do not have the meter for 426BC, you could opt to end in j.214X via 2A+B > X j.ABC dj9BC j.214X or end on your ground spin (214A/B). However, it is advised that you understand the intention of trump installing is to make the MOST out of your trump and not burn out your time in the state to ensure you two (or more likely three) touch your opponent!
[1 Trump, 2 Bar, 3 hits prior to 5A+B] 2A > 2B > 5C > 5A+B > 5A+C > 214C(1) (6S Cancel) > 2A+B > X > 2C > 214B > 426BC
[1 Trump, 2 Bar, 4 hits prior to 5A+B] 2AA > 2B > 5C > 5A+B > 5A+C > 214C(1) (6S Cancel) > 2A+B > X > 5B > 214B > 426BC
[1 Trump, 2 Bar, 5 hits prior to 5A+B] 2AAA > 2B > 5C > 5A+B > 5A+C > 214C(1) (6S Cancel) > 2A+B > X > 214A/214B > 426BC
- These combos are Shana's bread and butter when using Wilhelmina and go into 50%. Like Tatsuya routing, your enders will depend on the hitcount prior to 5A+B.
[1 Trump, 2 Bar, Reversal] 5A+C > 214C(1) (6S Cancel) > 2A+B > X > 5C2C 214B (236A+B) 426BC
- Reversal trump combo.
[1 Trump, 2 Bar, Poke/Punisher] 5C > 236A+B > 5A+C > 66 (dash) > 2AB > 6S > X > 6S hits > 8/9j.[C] > 2A+B > X > 2C 214B 426BC
- Wilhelmina punisher combo from 5C. Using 8/9 j.[C], you can make this combo sideswap. Unlike the Shana+Tatsuya combo, this combo is more finnicky and relies on properly spacing both uses of 2A+B to ensure they hit. If you are not confident in the second 2A+B, simply route into 2C5B 214B.
Trump Specific Confirms
[Requires dash momentum OR corner] j.[C] > j.AB > 5B > 7j.A j214C(1) (6S Cancel) > 2A+B > X > 2C > 214B > 426BC
- Confirm from j[C] mixups.
2A > 2B > j.B~C~A > 214C(1) (6S Cancel) > 2A+B > X > 2C > 214B > 426BC
- Confirm from standing opponents off of a high low mixup.
Enju
Stuff > 5AB > 5S > jBC > djBC > j214C > j214AB
- Hit 5S immediately after inputting 5A+B; don't wait for 5A+B to hit.
Kino
5A > 5B > 5C > 6S > 5AB > (6S hits) > jBC > djBC > j214C > (j.214AB)
5A > 5B > 5C > 5A+B (1 hit) > Shinpan > 5A > 5B > j.B > j.BC > [j.214C > 6S] OR [j.214C > j.214A+B > 6S] > (6S hits) xx 5A+B 41236B+C
- 5A > 5B is a midair catch after Shinpan.
- Hit 6S 2 to 3 hits into j.214C (or j.214A+B, if you opt to spend three meter instead of two).
- After 6S hits, link 5A+B to hit them as they're falling.
Tomo
- Cancel into assist on the second hit of spin if you're in the corner.
5A > 5B > 5C > 5AB(1)> 5AC > 5C > 2C > jB > jC > j214C > 5[S] > 5ABC
5A > 5B > 5C > 5AB(1)> 5AC > 2C > jB > jC > j214C > 5[S] > 2AB + followup > 214B > 426BC
5A > 5B > 5C > 5AB > 236AB > 5[S] > 2AB + followup > 5B > 2C > 214B > 426BC
2C/5B (AA) > 214C > 5[S] > 2AB + followup > 5C > 2C > 214C > 426BC
Colors
Found in Pre-Patched PC version
Found in Pre-Patched PC version
Found in Pre-Patched PC version
Found in Pre-Patched PC version
Found in Pre-Patched PC version
Found in Pre-Patched PC version
Found in Pre-Patched PC version
Found in Pre-Patched PC version
