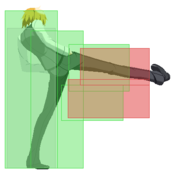
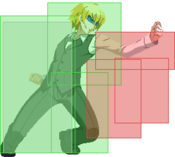
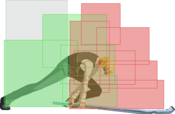
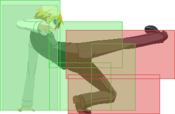
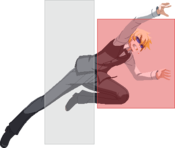
Dengeki Bunko: Fighting Climax/DFCI/Shizuo Heiwajima
Players to Watch
JP:
- Fuu (Rank 1 Shizuo/Dokuro)
- Raku (Rank 2 Shizuo/Celty)
- Ryuuji (Rank ? Shizuo/Dokuro), runs a few different assists and posts tech on twitter.
- Kitahara (Rank ? Shizuo/Dokuro), also plays Yuuki.
- Hashiboso (Rank ? Shizuo/Dokuro), speaks ENG and can be found in DFCI discord. Please be respectful to cultural barriers if you attempt to reach out.
NA:
- Tomuhawk (Shizuo/Dokuro), loves to clown around.
- Aces_High (Formerly Aodhan, Shizuo/Touma), retired. Appears sometimes in DFCI discord.
- Hyde (Shizuo/Celty OR Boogiepop), newer Shizuo player. Has some thoughts, possibly pertaining to Boogiepop.
Introduction
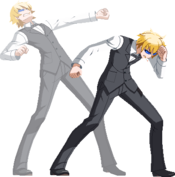
Shizuo Heiwajima is the notorious bodyguard for debt collector, Tom Tanaka. Armed with a short fuse, incredible strength, and barbaric fighting skills (namely through the use of unorthodox weapons like vending machines, road signs, etc.), Shizuo is acclaimed as the strongest fighter in the Ikebukuro district. Shizuo is surprisingly not a fan of violence, but when provoked, his body will instinctively resort to fighting. Underneath his rough exterior, Shizuo worries about his incredible power which stems from childhood experiences where people feared him for it, leading him to be alienated or mistakenly hurting those he cared for. Shizuo is often seen chasing his rival, Izaya Orihara, as they both share an unnaturally strong disdain for one another. This rivalry often ends with Izaya running away while Shizuo chases screaming the infamous “IZAYA!” while pursuing. They are such good roommates.
Originally from the light novel series Durarara!!
Shizuo is considered the grappler character of DFCI, which is valid if having a command grab makes a character a grappler. Shizuo shines at his brightest when he is played with a keepaway style. This is accomplished with his excellent air normals, such as jA, jB and charged jC, with jB and charged jC being contenders for the best jump normals in the game, he establishes respect with his deceptive reach and then has both command throws and universal mix-up options to run over his foes. He is unfortunately very slow on the ground and as such demands mastery over the players' understanding of air movement and landing advantage/disadvantage. With the right assist, both his damage can be explosive and his weaknesses can be covered up.
Pros
- Excellent jump normals, especially charged j.C. This really can't be stressed enough.
- Versatile specials, including 236X projectiles to check opponents from afar and j.236X divekicks to alter air trajectory and momentum or disrespect anti-airs. Needs resources to be safe however (assist cancel or combo-blast).
- Noteworthy amount of Escape Blast safe combo routes from command throw. EX j.236 divekick is also Blast invulnerable. This enables some great checkmate situations for Shizuo that are difficult to answer.
Cons
- Slow start-up on normals and mediocre Impact Skills means Shizuo has issues escaping pressure. His 2AB is seems nice as if an opponent clashes with their AB back vs it, he gets multiple guardpoint frames to react with, but it is among the weakest in the game.
- Lives and dies on an assist to cover his faults, such as poor A2A conversions without j[C], an unsafe divekick that is a risk without an assist to cover it, and very linear neutral on top of being a red trump character, which is already a cause to be linear.
- His slow movement, and linear approach options means that he requires great patience to answer defensive players. An impatient Shizuo will find themselves with their back in the corner very quickly.
Recommended Assists
Iriya - An unconvential assist for Shizuo, but not bad. He has decent means at protecting 5S in neutral, and the plate sets up some nice command grab situations. Fireworks is air unblockable, and as such the threat of command grab becomes that much scarier, forcing the opponent to attempt to mash and burn resources, which could be baited by j[C] etc. leading to unreal damage.
Dokuro - Dokuro is by far Shizuo's best assist. It gives him grounded presence and a grounded AA, a fullscreen blazing fast projectile, meterless routing and trump installs, an unblockable in the corner in trump, sets up burst invuln routing to checkmate, makes his divekick not only safe on block but gives it insane reward on hit+5S cancel, etc. Like Tomoka, Dokuro completes Shizuo as a character giving him little weaknesses outside defense.
Celty - A strong but more difficult assist for Shizuo to use than Dokuro. 5S makes his neutral genuinely terrifying, assuming he understands how to AA and control space without Dokuro. 6S oki enables an insane amount of 50/50 situations for Shizuo (meaty 2B/wait&block vs cmd grab). Meterless 214A with 6S does nearly BnB levels of damage.
Potentials
Universal Potential: Increases damage dealt by 10% for 20 seconds when health falls under 30%. If behind in rounds won, increases damage dealt by 20% instead.
Character Potential: Hit the opponent 2 times with either 214X or 63214BC for Attack Level 1 for 10 seconds. Can be activated twice a round.
Gameplan
This section is dedicated to showing unique elements in a characters gameplan, not necessarily defining it entirely (ie. explaining how Shizuo might play around his j[C] in neutral but not exactly what spacings to be at).
Neutral
A few elements worth highlighting in Shizuo's gameplan is his air normals, divekick, and 5B and how they all come together to make the opponent second guess their commitment.
5A/2A
These are unfortunately very underwhelming, due to both their startup speed and Shizuo's movement speed in neutral. They may appear every now and then to check the opponent's slight advantage/disadvantage however.
2B, 2C
2B does not have much neutral use over 5B. 2C however, may be useful for calling out an opponent's landing after a doublejump, or a high-commitment poke option.
5B
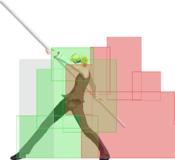
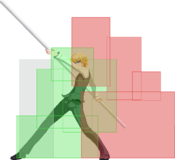
For better or worse, this is Shizuo's best grounded option. It goes a decent distance, can catch an opponent rising early, and can be staggered into 2C/5C on hit/block. Worth establishing so your neutral has more layers than just being airborne.
5C/5[C]
An interesting set of tools, where 5C is a decent grounded poke when the opponent is cornered, and 5[C] may find itself established at times in neutral, such as roundstart, or when an opponent is about to land. It nets a full combo on counter-hit with superjump j[C] (5[C]), and 5C is easily confirmable into 5AB. Explore with caution.
jA
A very nice situational ATG and abare A2A. Its downwards hitbox makes it great for catching people who are looking to run under j[C] on reaction and can call out standing AAs. Likewise, it can catch rising opponents in jump startup. However, as it is only an A strength normal it has low frame-advantage and Shizuo's 5A/2A are quite slow, so maintaining advantage vs fuzzy options can be hard. Be careful over-committing on block (ie dash-up).
jB
Quite similar to a maid's jB in a different FPan title, this move is insanely underrated in North American circles. It's ridiculous horizontal reach makes catching Shizuo's landings difficult, and punishes opponents who flail in the air trying to preemptively answer Shizuo. The point about landings lets Shizuo push his grounded disadvantage more by jumping again, calling his assist, etc., and can really push the opponent's buttons.
jC
Seeing j[C] may make you think there's no reason not to charge this normal, but it's a great way to change up the timing and callout players who can answer you when you go for j[C]. It also still crosses up, albeit less so.
j[C]
Often considered Shizuo's god button. This move nets him his best confirms by far and has an insane cross-up hitbox. The cross-up hitbox lets him intentionally go over the opponent to catch a grounded AA attempt or even avoid a rising button. This combined with jA to establish respect up close, as well as jB to scout in the air safely makes Shizuo a real problem in neutral.
j.236x
Occasional neutral tool which can save Shizuo when he falls from a dj in a bad spot or after an opponent dashes under, as well as catch the opponent off guard in a variety of situations. Unfortunately, all versions including EX are unsafe on block and as such you'll need to spend blast or a bar on assist cancel to make it safe.
236x
Shizuo's projectile which has some usage in various MUs, ie. vs Mikoto/Rusian. However, Shizuo is stuck in recovery until the projectile either hits, is blocked or whiffs and as such characters like Mikoto can 2AB punish on reaction, or characters may ranbu it.
5S
Ideally, you've picked either Dokuro/Celty/Iriya. These three all have 5S options in neutral that make Shizuo a more dynamic character. Even something like Boogiepop 5S can establish some utility in neutral. Counter assists, like Izaya, Tatsuya, Touma are all very weak for Shizuo as in neutral they accomplish nothing and the opponent can and will just upback.
Offense
5A
The basis of Shizuo pressure. Establishes respect vs wakeup fuzzys and lets him jump cancel to avoid reflect-guard, a huge problem for non-trump Shizuo.
2A
Decent low-poke but nothing crazy. 2B ends up being better even though it isn't chainable, as the slowness of 2A makes it easy to punish on reflect-guard. Still worth establishing as a quick low vs fuzzys.
2B, 2C
2B is a very nice low that is also jump cancellable, making Shizuo's pressure more dynamic. 2C works as a nice string ender to establish sometimes after 2B to catch antsy opponents, or after 5A/2A to catch people post reflect-guard who are hitting buttons without looking at the screen.
5C
Pretty nice option for Shizuo as it hits high, meaning if it comes out in tickthrows it's difficult to whiff-punish in the corner as it will either hit or be air blocked. Possibly jA-able on airblock however.
jc [4]jX
Great option as Shizuo's jump cancel pressure is fairly scary. jA has similar uses as described in neutral, it's fast and establishes respect. Driftback jB is hard to answer as he leaves the opponent's 9j range, and if he doesn't put out jB, the opponent will just whiff a grounded AA, and of course j[C] is j[C].
236A
For offense, this tool is a way to check opponents at times after your C normals. Just be aware of players reacting and blue trump > ranbuing. If they choose to 5AB the C normal > 236x gap, you can act via ranbu/trump/CB.
Being A Grappler
At the beginning of the page, I established that Shizuo is debatably a grappler. This is because I believe the reward on command grab is so low, and on whiff it is nearly 60 frames of recovery. Likewise, if you land a command grab midscreen, you send the opponent so far that your advantage is awful. A normal grab on the other hand, can be trump installed after meterlessly, is not burstable, gives assist oki options, AND if they fuzzy jump, which they will, 5C can catch them and keep you save and alive. Due to this, regular grab in MOST situations is better for Shizuo than command grab. It is inside trump state that Shizuo can become a grappler, with the ability to time things like Celty 6S/Dokuro 5S to beat jump startup and be 214AB-able, giving him true unblockables. The Celty one can be mashed to make her go away, so its more like a 50/50, but the Dokuro one is very problematic and high damage for Shizuo.
Defense
Likely one of the worst characters wrt. defense in the game. As such, you'll have to be patient and at times lose some interactions such as tick-throw situations. Looking to fuzzyjump (171), fuzzy superjump, and reflect-guard and whiff punish with 5C is your best bet at getting out. Due to his weak defense, Shizuo may find himself needing to double down on passivity in neutral to avoid scrambles that he struggles to win in.
Move List
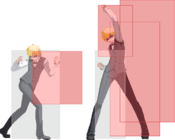
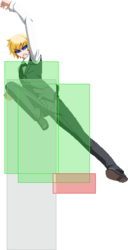
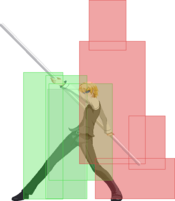
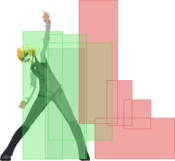
L = Low, H = High, A = Air
JC = Jump Cancel, SC = Support Cancel, EX = EX Cancel
ISC = Impact Skill Cancel, TCC = Trump Card Cancel, CAC = Climax Art Cancel
Startup includes the first active frame.
Normal Moves
| 5A |
|---|
| 2A |
|---|
| 5B |
|---|
| 2B |
|---|
| 5C |
|---|
| 5[C] |
|---|
| 2C |
|---|
| j.A |
|---|
| j.B |
|---|
| j.C |
|---|
| j.[C] |
|---|
Special Moves
| YOU CAN’T RUN! 「逃げんな!」 236X |
|---|
| WHAT WAS THAT! 「なんだそりゃあああ!」 214X 214A/B 214C 214AB |
|---|
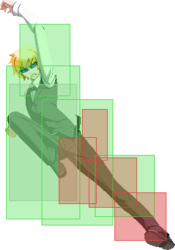
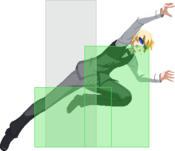
| YOU PEST! 「うぜええええええ!」 j.236X Same hitboxes for all versions, including EX. |
|---|
Universal Mechanics
| Throw 6/4C |
|---|
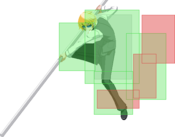
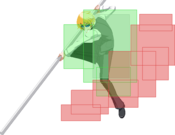
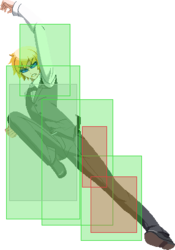
| Impact Skill I’LL SQUASH YOU! 「ぶっ潰れろ!」 5A+B Startup hurtbox. Active frame boxes, boxes on right are the final hit. |
|---|
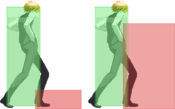
| Impact Skill COME ON...! 「来いよ……!」 2A+B Trigger box during active frames on the left. Pray they don't use throw on you. They didn't use throw on you. |
|---|
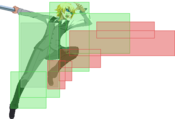
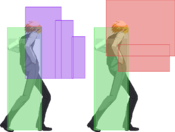
| Impact Break 4A+B(~X) Collision box extends to below the hop, making it normally impossible to cross under. Launcher follow-up. |
|---|
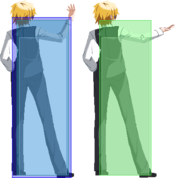
| Trump Card FLY AWAY! 「吹き飛べえっ!」 5A+C This is an overhead. |
|---|
Climax Arts
| PISSING ME OFF! 「うるせええええええ!」 41236B+C |
|---|
| KILL KILL KILL KILL! 「殺す殺す殺す殺す!」 63214B+C |
|---|
Combos
- Important Notation Info
- "X > Y" = X input is cancelled into input Y
- "X > delay Y" or "X > dl.Y" = Must wait for a short period before cancelling X input into Y.
- "X/Y" = Either the X or Y input can be used.
- "X~Y" = This notation has two meanings: "use attack X with Y follow-up input" or "input X then within a few frames, input Y."
- "j.X" = X input is done in the air, implies a jump/jump cancel if the previous move was done from the ground. The follow applies to all air chain sections: assume a forward jump cancel if no direction is given and air chains such as j.A > j.B > j.C can be shortened to j.ABC.
- "dj.X" = X input is done after a double jump.
- "(X)" = X is optional, typically the combo will be easier if omitted.
- "X(N)" = Attack X should only hit N times.
Meterless
- 2A > 5B > 2C (1101 DMG)
- Basic 1-2-3 chain, grants hard knockdown.
- 2A > 5B > 214A (1466 DMG)
- Short combo into hard knockdown for more damage, but harder to confirm. Not really worth it but it is possible.
- 2A > 5B > 5C > 5A+B (1759 DMG)
- Higher damage confirm, knocks the opponent away and leaves them open to air tech.
- 4AB~X > j[C] > dj[C] > 214C
- Meterless 4AB combo that can be 214AB cancelled for HKD. 214x means opponent cannot burst it without being punished if you go meterless.
- 4AB~X > j.AB > dj.AC > j.236A (2157 DMG)
- Easier 4AB combo than above.
- jB > 2C
- At tip spacings of jB, only 2C will connect (not 5C).
j[C] > delay > 5B > jB > delay > jC > land, 214C
- Meterless j[C] routing that ends in fullscreen airtech situation. Standard non-assist j[C] BnB.
- j[C] > land 236A > 5AC (2987 DMG)
- Meterless Trump Card combo that works anywhere on the screen. Probably difficult so don't be afraid to omit 236A.
- 2C > 5AB(3) > 5AC
- Meterless trump routing that works anywhere on the screen.
- (5C >) 5AB > 5AC (3045 DMG)
- Corner only meterless Trump Card combo.
- 4C/6C > 5AC (2090 DMG)
- After a throw with the opponent backed up in the corner, your Trump Card can hit them before they touch the ground.
Metered
- Stuff > 5C > 5A+B > 214AB [1 bar] (2200~ DMG)
- Quick, easy confirm into knockdown anywhere on the screen. Keep in mind you must cancel into the grab before the last hit of 5A+B depending on the distance.
- j[C] > delay > 5B > jB > delay > jC > land, (5C) 214C > 214AB
- Standard non-assist 1 bar BnB.
Stuff > 5AB > slight delay > 236AB > 214AB > combo-blast > 236A 214AB > 426BC
- Full meter dump routing for kills. 236A 214AB, if done right, should be unburstable. You can omit 236A if it is too difficult however.
- On j[C] starter, you can do (dj[C]) 214C > into 236AB... for same effect, likely similar damage.
Assists
With Dokuro
- 2A/5A > 5B > 5C > 5AB(4) > 5S > dl.j.[C] > land > j.[C] > dj.ABC (2707 DMG)
- Powerup blast route.
- 5S hit > 9j[C] > 9dj[C] > land, 5B > jAjC > djABC
- Powerup blast route for 5S starter.
- 2A/5A > 5B > 5C > 5AB(4) > 5S > dl.j[C] > dl.dj.[C] > 5C > 214C (> 214AB/624C) (3101/3458/4308/5085 DMG for 1-4 bars)
- Basic dokuro route for ground starter.
- 5S > dl.j.[C] > dl.dj.[C] > 5A > 5C > 214C > (optional meter spend) (2668 DMG)
- Routing to convert dokuro hit in neutral. You can do the same routing for j236X hit cancelled into 5S.
- j.A > j.C > dj.C > j.236A > 5S > j.[C] > dj.[C] > 5A > 214C > (optional meter spend) (2483 DMG)
- Air to air route. Can do fewer buttons before j.236A 5S if they would be too high.
- Air string > divekick > 5S cancel > 5AC
- Trump install on divekick.
- j[C] > delay 2B > 9jAjB~jC > land, 5S > trump
- Meterless trump install on j[C].
- 2A/5A > 5B > 5C > 5AB(4) > 5S > dl.j.[C] > 5AC [1 Bar, meterless with Trump Card active; 1 Trump Card] (3472 DMG)
- Trump install route.
Miyuki
- Stuff > j236x j6S > PUB/5AC
- Can powerblast off j6S, trump install, 214C, etc.
- j236x j6S > j[C] > 5AC
- Trump install on divekick + miyuki j6S cancel.
- 4/6C > 5S > sj[C] > djABC
- Powerblast install on grab.
- 214AB > 6S cancel last hit > 5AC (whiff) > dash-up 5[C] > 9j[C] > 5[C] > j[C]B > 214C > 426BC
- Expensive kill combo but definitely has its use. Corner only.
Izaya/Kouko
Both assists use the same combo theory of 214AB > 5S, the main difference lies in timing and when their launcher triggers: Izaya's 5S triggers after the opponent is launched away and gives you corner carry midscreen but you need to run up to the opponent to continue the combo while Kouko's 5S triggers before 214AB can launch the opponent away so all you need to do is properly time a 214X to continue your combo.
- 2A/5A > 5B > 5C > 5AB(4) > 214AB > 5S > 214A/C > 214AB > Combo Blast > 214A/C > 214AB > 426BC [5 Bars with Trump Card active, 6 otherwise; uses Combo Blast]
- High damage combo route, uses up a lot of resources. Works anywhere on the screen with both assists but you need to run up the opponent after Izaya's 5S midscreen (doing a 624 input for the command grab helps) and after the Combo Blast. (5412 DMG with Izaya, 5292 DMG with Kouko)
- j.[C] > (delay j.[C] >) 214A/C > 214AB > 5S > 214A/C > 214AB > Combo Blast > 214A/C > 214AB > 426BC [5 Bars with Trump Card active, 6 otherwise; uses Combo Blast] (4804 DNG with Izaya, 4680 DMG with Kouko)
- Resource intensive combo with charged j.C, double charged j.C route deals more damage (slightly above 5k with either assist) but requires slightly precise timing.
- j.[C] > (delay j.[C] >) 214A/C > 6S [1 Bar, meterless with Trump Card active] (Minimum Izaya 1880 DMG or 2211 DMG with two j.[C])
- Single bar (or meterless while Trump Card timer is active) Izaya combo, his 6S leaves opponent in an OTG state so only minimum damage is listed.
- j.[C] > delay j.[C] > 5C > 214A/C > 5S > microwalk 5C > 214A/C [1 Bar, meterless with Trump Card active] (Kouko only, 2677 DMG)
- Single bar (or meterless while Trump Card timer is active) j.[C] combo with Kouko.
- 214C > 5S > microwalk 5C > 214A/C [1 Bar, meterless with Trump Card active] (Kouko only, 1763 DMG)
- Basic single bar Kouko follow-up after a sucessful 214C hit.
- 214C > 214AB > 5S > 214A/C > 214AB > Combo Blast > 214A/C > 214AB > 426BC [5 Bars with Trump Card active, 6 otherwise; uses Combo Blast
- Higher damage, resource intensive anti-air grab route (4360 DMG)
Okizeme
Dokuro
- Not an oki assist, but after trump install, you can sj~5S at a timing where the opponent will get hit if they jump or grabbed by 214AB. Mashing shouldn't make Dokuro go away but they could mash > 5AB/CB/etc. and as such it's worth sometimes doing 4AB/~2B/dj[C] etc.
Celty
- This section roughly goes over Celty oki, and under External Links > Celty oki video there are some special setups, such as left/rights.
- After trump install, you can call 6S at a timing where it'll catch the opponent jumping, or they'll be grabbed by 214AB setting up an "unblockable". However, they can mash to make Celty go away if you mess up the timing and as such you have to establish land block/land rejump/land 2B etc.
- After 214AB ender/214A HKD ender you can dash up and call 5S as a meaty option to gain respect and make your advantage scarier.
- In the corner, after ranbu, or on 2C HKD, you can call 6S to setup a 50/50 with meaty vs cmd grab. Both options net great damage so don't forget to establish your buttons to not get mashed.
External Links
- Celty 6S oki video on niconico.
- Shizuo guide by DFCI discord.
Colors
| Color 1 | Color 2 | Color 3 | Color 4 |
|---|---|---|---|
| Color 5 | Color 6 | Color 7 | Color 8 |
| Color 9 | Color 10 | Color 11 | Color 12 |
| Color 13 | Color 14 | Color 15 | Color 16 |
| Color 17 | Color 18 | Color 19 | Color 20 |
| Color 21 | Color 22 | Color 23 | Color 24 |
