Dengeki Bunko: Fighting Climax/DFCI/Yukina Himeragi
Players to Watch
JP:
- Piza-ra (Rank 1 Yukina/Celty)
- Segawa (Former Rank 1 Yukina/Celty) Retired in 2016. Very strong despite the era being before the game was fleshed out.
- Sono (Rank 16 Yukina/Celty)
NA:
- The Spine (Can be found in DFCI Discord), runs the Grand Prix
Introduction
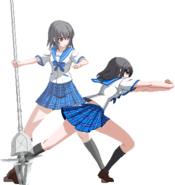
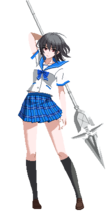
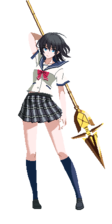
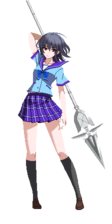
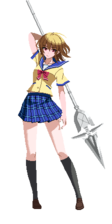
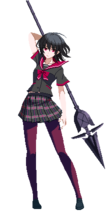
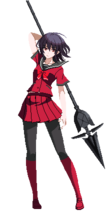
Sword Shaman and classmate of Kojou sent to observe the Fourth Progenitor. She wields a lance called Sekkarou that can destroy even an elder vampire.
Originally from the light novel series Strike the Blood.
Yukina is a lance wielder with impressive range and control of mid-range combat. In exchange, the start-up of her moves trend toward the slower end. Her air normals, combined with three available jumps and a Climax Art Super that can be activated in mid-air, give her commendable command of the air. Yukina's most unique ability is her Potential, which eliminates the pushblock effects of Reflection Guard for 20 seconds when active. In this state, Yukina can comfortably play in close quarters and frustrate the opponent.
Pros
- Excels at mid-range with her far-reaching ground normals, forcing most foes to take to the air to approach her, where she has parity or greater. In the right hands she's difficult to fight in neutral.
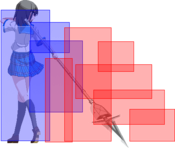
- Relatively reliable anti-air with 2C, checking how opponents approach past her lance as well as a great jA for A2A.
- Extremely powerful Potential ability that eliminates the opponent’s strongest defensive option
- Unique air-enabled Climax Art makes every stray air conversion a potentially devastating confirm.
- Has access to three jumps.
Cons
- Run speed and frame data are on the slower side, making her a passive character.
- Insanely linear even by red trump standards due to her gameflow and options.
- Special moves are overall mediocre without the threat of resources (Meter, Blast, Assist call).
- Can appear underwhelming without Potential active, where she is forced to make things happen in that window of time.
Recommended Assists
Celty - Celty completes Yukina as a character. 5S makes up for her slower movement speed, letting her play at further spacings and be a threat against opponents landing. 6S lets her take advantage of airtech enders more often to delay her potential and trump install, making her scarier later in the gameflow while not giving up momentum. On trump install, 5S lets her start pressure after as trump otherwise launches them too far with high recovery. Its reason for being strong with Yukina is simple but cannot be understated.
Dokuro - Dokuro is a very safe pick for Yukina that can help players who struggle to take advantage of her AA tools. 5S is an AA of course and it can cover airtech options on her airtech enders. 6S is an OK fullscreen projectile for some MUs.
Mashiro - Mashiro is a more technical assist for Yukina. 5S is an alright neutral option to change up the flow but Mashiro shines on 6S covering airtech enders, where Yukina not only gets access to some coverage for pinning an airtech but gets tickthrow/overhead setups going.
Potentials
Universal Potential: Increases damage dealt by 10% for 20 seconds when health falls under 30%. If behind in rounds won, increases damage dealt by 20% instead.
Character Potential: Use 2 EX Special Attacks to disable the opponent's use of Reflection Guard (while the pushback effect is negated, it is still possible for the opponent to use Reflection Guard to avoid air unblockable attacks) for 20 seconds. Can be activated once a round.
Gameplan
Neutral This section is dedicated to showing unique elements in a characters' gameplan, not necessarily defining it entirely (ie. explaining how Yukina might play around her 2C/jA or assist in neutral but not exactly what spacings to be at).
2A
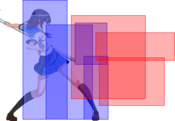
Despite Yukina's slower speed, micro-dash 2A can be a great way for Yukina to protect her space especially against an antsy opponent or faster character at times.
5B/2B
A nice counter-poke option, and after establishing 5C as a landing pinning tool you can use it after dash-up to get more ambiguous pressure going.
5C
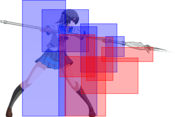
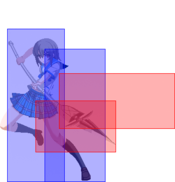
Massive 5C even for a sword normal. This move can pin landings, check space, etc., and is easy to hitconfirm into 5AB. Be careful swinging it around as it is easy to avoid C normals in this game via jump scouting.
2C
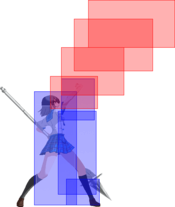
Yukina's grounded AA. This move is best after a dash-under or to check players who double-jump high up and are easy to call out.
jA
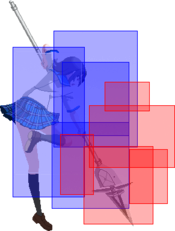
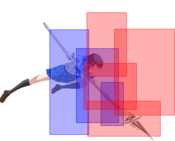
Likely Yukina's best button, it's great for air scrambles, as a close jump-in after 9j, as an AA, etc. jA is super strong and mastering it will greatly increase your Yukina's strength.
jB
Yukina's normal jump-in attack. Likely what will you fall with when scouting from double-jumps etc.
j236AB
A last second lifesaver which should be used WITH CAUTION. In checkmate situations, such as after triple jumps and the opponent dashes under, you can user j236AB to throw your opponent off-guard. The hitbox is large AND it is plus, but it also makes you go into character potential sooner. This is a problem for Yukina, as when your potential starts up you want to be in trump state to encourage the opponent to also trump and to stay on even terms even against top tiers. Use with caution.
Triple Jump
Yukina uniquely is the only character who gets a triple jump, other than Yuuki in trump state, and as such makes her air ambiguity stronger. You can use it to delay your landing even further, to circumvent AAs, etc. However you should keep in mind that the triple jump is more like a short air hop and Yukina can no longer block while in triple jump state. Triple jump does not affect proration unlike airdashes.
Character Potential
Yukina's wincon. Ideally, you trigger this around the time you go for a trump install as the combination of not being able to be pushblocked, with Yukina's massive normals, double overhead in trump, and free assist cancels to stay ambiguous on 236x pressure means that you push the opponent into a gambling position. After trump install, your opponent should be at around roughly <50% HP (in R3 if you have two trumps things are different) to where you can encourage them to pop blue trump while you have an assist to keep them pressured etc. Learning to optimize when you go into potential is key to obtaining success with Yukina.
Picking an Assist
Yukina unfortunately does not have a lot of synergy and as such Celty is HIGHLY recommended at least against the stronger characters in the roster. 5S makes Yukina's grounded presence terrifying and she has jA and 2C for AA purposes already. 5S also covers Yukina's 236x RPS in pressure allowing her to redash and punish disrespect for a decent amount of damage. On top of this, after trump install, 5S will allow you to cover your superjump in to get pressure started as Yukina's trump flings the opponent VERY far for a character as slow as her, and in trump she can use 5S to cover her triple jumps. 6S works to cover airtechs, something very important to Yukina as she often ends her combos until trump state in airtech and her HKD 6S oki is very fuzzyable anyway. Alternatively, Mashiro and Dokuro can work with similar utility, and there is some synergy with Kouko.
Offense
5A/2A
Standard A normals for pressure. 5A is an ambiguous pressure starter, in which you can frametrap into 2AA to check fuzzys and mashing, you can recover into grab, frametrap into 2C/5C on a reflect-guard read, or jump cancel instantly/with a delay to stay in.
5B/2B
Yukina's 5B and 2B are slightly above average. Both have good reach and work as ambiguous pressure tools. You can frametrap into your ridiculous C normals, end a blockstring and redash vs jump vs delay B normal again vs assist call etc., and of course instant vs delay jump cancel. Be sure to mix up your options and don't commit to redashing after too often as it is somewhat easy to answer if presented too much.
5C/2C
Incredible normals. In DFCI, single hit C normals are insanely easy to confirm into 5AB and CA/Ranbu. As such, abusing 5C/2C staggers, two normals that are very disjointed on Yukina, will grant you lots of momentum against antsy opponents who wish to act immediately on any gap. On block, you can end pressure and are put at a nice spacing where you can easily walk out of 9js, react to people double-jumping at you, can establish your assist, etc. With extra meter, establishing 236x~x~5s cancel pressure is good too!
236x
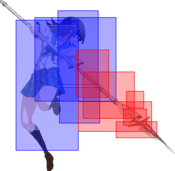
Not to be over-relied on but not to be ignored either. Yukina 236x is a spear thrusting special, which has a follow-up that drags the opponent in. You can frametrap into this follow-up, but keep in mind the initial attack is minus and they may ranbu the gap. After 236x~x, you can 5S cancel with Celty, or 6S with Dokuro, etc. to check the opponent for trying to take their turn and not respecting this game's massive stagger windows. A great tool that rounds Yukina's non trump pressure very well.
Jump Cancel
Yukina has a lot of freedom during jump cancel pressure. You can establish jA to catch people looking to 5B AA or rising button, or jB/C with more respect for more frame advantage. After jA on block, you should keep in mind that the advantage is not great and as such characters like Tatsuya/Yuuki will probably establish fuzzy 2AB in certain parts of the gameflow. As such, doing a driftback ([4]) before jA and walking back on landing will clear you of fuzzy 2A as well as possibly avoid the 2AB entirely, and at worse block it. If you aren't worried about 2AB being presented due to the gameflow/resources available, you can delay 2A/5A on landing as post jA block is also a common fuzzy jump spot. Besides just falling with a button, or drifting back with a delay button to outspace an AA, you can do a delayed dj to bait out throwtechs or fuzzy 5As, and Yukina also has a triple-jump on top of these to bait even further. However, remember that after double-jumping your triple jump state does not let you block and as such you lose the option to jump cancel your air normal vs 2AB clash to stay safe.
Defense
Yukina's defense is rather mediocre. Your impact skills are not to be used, as even with combo-blast utility you are probably better off looking to fuzzy mash with escape-blast as insurance instead. 2AB whiffs on crouchers and 5AB goes airborne meaning your CB frametrap advantage is probably closer to +0/-1. Yukina's A normals are also slightly slower than average due to their size. As such, learning to abuse the system mechanics is your key to success. The threat of Yukina reflect guarding and whiff punishing with 5C, or calling her assist means the opponent will be antsy to avoid it with wide staggers and jump cancels. As such, learning to late stand-guard, apply fuzzyjump (171) and fuzzy superjump, as well as establishing your jA at times on jump cancel reads is the key to success. Of course, defense as a whole is rather strong in DFCI and as such being patient is important. You can take a few grabs instead of gambling your life away.
Move List
L = Low, H = High, A = Air
JC = Jump Cancel, SC = Support Cancel, EX = EX Cancel
ISC = Impact Skill Cancel, TCC = Trump Card Cancel, CAC = Climax Art Cancel
Startup includes the first active frame.
Normal Moves
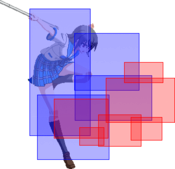
| 5A |
|---|
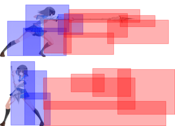
| 2A |
|---|
| 5B |
|---|
| 2B |
|---|
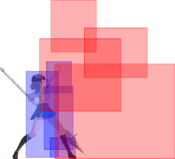
| 5C |
|---|
| 2C |
|---|
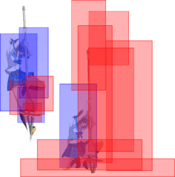
| j.A |
|---|
| j.B |
|---|
| j.C |
|---|
Special Moves
| Wild Strike 「牙撃 -ワイルドストライク-」 236X 236A/B/C 236AB |
|---|
| Hikiyoseru (Pull In) 「引き寄せる」 A, B, or C after Wild Strike |
|---|
| Arrow Strike 「空撃 -アローストライク-」 214X 214A/B/C 214AB |
|---|
| Zenpou Tosshin (Forward Charge) 「前方突進」 A After 214X Charged |
|---|
| Kahou Tosshin (Descending Rush) 「下方突進」 B or C After 214X Charged |
|---|
| Heavy Strike 「重撃 -ヘビーストライク-」 j.236X Charged j.236AB |
|---|
Universal Mechanics
| Throw 6C or 4C |
|---|
| Impact Skill Twin Strike 「双撃 -ツインストライク-」 5A+B |
|---|
| Impact Skill Young Thunder 「若雷」 2A+B |
|---|
| Impact Break 4A+B |
|---|
| Trump Card Howl of the Wolf 「狼の咆哮」 5A+C |
|---|
Climax Arts
| Strike the Blood 「神槍解放 -ストライク・ザ・ブラッド-」 41236B+C Air O.K. |
|---|
| Sacred Howling 「雪霞繚乱 -セイクリッド・ハウリング-」 63214B+C |
|---|
Combos
- Note: You can always trump after any of the 214/j.236EXs/5AB(1)/5AB(2) to either do extra damage and/or activate the trump+potential combo.
Stuff > 2C
- Meterless HKD for 0 bar Yukina.
Stuff > 5C/2C > 5AB
- Meterless soft KD for when Yukina does not want to spend meter.
Stuff > 5C/2C > 5AB(2) > slight delay > j236AB...
- Absolutely the basis of almost ALL Yukina routing. By slightly delaying your 236AB input after 5AB is done, you can get a j236AB which you can extend into a longer route, an air combo, stuff into 5AB again into trump, etc. Get this down to play Yukina.
- After j236AB, you can do 2B2C or 5B2C > 5AB(1)5AC/5AB(2)5AC/5AB(2)214AB5AC, you can do 5B jBjC djC tjB~C > land > assist call, etc.
Stuff > 5C/2C > 5AB(2) > slight delay > j236AB > 5B > jBjC > djC > tjB~C
- Your go-to BnB when it's not potential + trump time. Slightly delaying the final jC is for better advantage. You'll want to learn to answer airtechs to maintain momentum.
Stuff > 5C/2C > 5AB(2) > slight delay > j236AB > 5B/2B > 2C > 5AB...
- Go-to BnB when it's trump time. If you're ready to trump and still need one more EX move spent, you can do 214AB after 5AB. If the initial j236AB cancel put you into potential already, you can 5AC cancel with a slight delay after the first 5AB hit, or after the second 5AB hit depending on the proration.
jA > djBC > j236AB > (micro-dash) > 5B > 2C > 5AB...
- Like the route above, you can go into trump after this (or omit 2C > 5AB for air extension). Used for A2A conversions.
4AB~X > jBjC > djC > tjBC > j236A
- Standard 4AB route. Can do j236AB after j236A, or omit j236A for the usual airtech assist Yukina stuff.
Air Combo > j236A > j236AB
- HKD off of A2A routing.
Stuff > 5AB(2) > combo-blast > slight delay > j236[C] > dash > 5B > jAjB > djC > tjB~C
- Mostly seen in round 2 for Yukina to manage her resources, letting the blast cycle re-new and getting a bar for it.
Setups
Grab > recover > ...
- After recovering from a grab, you can superjump and if you microwalk, depending on the timing, you can get a pretty ambiguous l/r safejump going.
5AB(2) > j236AB > Air Combo > land > Assist Call
- This is your most common "setup". You don't want to go into potential too early, and just a single EX after 5AB is a lot lower damage than the 5B air extension post 5AB(2) j236AB. As such, learning to abuse the opponent's airtech decisions and lock them in with your assist is key.
Colors
| Color 1 | Color 2 | Color 3 | Color 4 |
|---|---|---|---|
| Color 5 | Color 6 | Color 7 | Color 8 |
| Color 9 | Color 10 | Color 11 | Color 12 |
| Color 13 | Color 14 | Color 15 | Color 16 |
| Color 17 | Color 18 | Color 19 | Color 20 |
| Color 21 | Color 22 | Color 23 | Color 24 |
