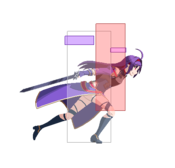
Dengeki Bunko: Fighting Climax/DFCI/Yuuki Konno
Players to Watch
JP:
- knit (Rank 1 World, Rank 1 Yuuki/Iriya)
- mashirosu (Top 5 World, Rank 2 Yuuki/Iriya)
- Shijou (Rank 4 Yuuki/Wilhelmina OR Celty OR Tomo)
- DK (Rank 8 Yuuki/Iriya)
- DAI (Rank 10 Yuuki/Celty OR Iriya)
NA:
SA:
- FS (Can be found in DFCI Discord)
Introduction
A lively and skilled Alfheim Online player. Known as "Zekken" for her unrivaled skill in battle. Beneath her masterful swordplay and cheerful smile lies a guarded secret. Originally from the light novel series Sword Art Online.
Yuuki excels at a bit of everything and particularly shines at lockdown and okizeme. Once there she can pick you apart with her oppressive normals. Her Trump Card is fairly unique in that it allows her to jump cancel any special move on hit or block. She requires a bit of technical prowess and knowledge to command making her difficult for new players, but is often considered Top1 to Top3 in most tier lists both NA and JP.
Pros
- Large sword normals, including one of the strongest jump moves in the game charged jC
- Overall best Blue Trump Card, allowing her to jump cancel all specials and gives her a third jump
- Amazing Potential Skill that allows you to extend Trump mode duration by using her Climax Art super
- Strong and big multi-hit 2AB that is lenient to hit-confirm and/or TCC/CB cancel
- Above average synergy with most assists in the game. The world is your oyster.
Cons
- Mediocre special moves without Trump Card or Combo Blast as potential threats, with 236 being very minus and having multiple punish methods.
- Resource hog without Iriya/Wil/Celty meaning players may find themselves struggling to close out rounds without her more meta assists.
- In the context of DFCI, she has a demanding technical execution requirement for most optimal set-ups and combos.
Recommended Assists
Iriya - Iriya is the perfect pairing for Yuuki's toolkit. 5S gives you a plate projectile to use for setplay that loops back into itself almost always or to help you close in on opponents. 6S is a moped that can be used to punish Blasts or whiffed attacks and force out air options from the foe. When Yuuki is in Trump mode, neither Yuuki nor Iriya appear to have any flaws.
Celty - Celty turns Yuuki into an unstoppable wall. 5S is a giant hitbox in front of you that zooms across the screen with only 10 frame start-up, encouraging opponents to go airborne where Yuuki wins in most matchups. It's a great tool for scrambles, mid-screen stand-offs, and quick punishes into hard knockdown. 6S is a giant anti-air bike that hits twice to afford you two opportunities to run cross-ups or tick throws, though it’s a bit slow to call out without hard knockdown. In trump, Yuuki has multiple ways to access left/right setups.
Wilhelmina - Wilhelmina is a strong setplay assist that also carries the threat of explosive damage behind every 6S. 5S gives her a way to fight Kuroyukihime, her only "losing" matchup and will trade in her favor for a full BnB often. In trump, Yuuki has multiple ways to access left/right setups.
Potentials
Universal Potential: Increases damage dealt by 10% for 20 seconds when health falls under 30%. If behind in rounds won, increases damage dealt by 20% instead.
Character Potential: While in Trump Card state, use 41236BC to recover a quarter of your Trump Card Gauge. Can be activated once a round.
Gameplan
This section is dedicated to showing unique elements in a characters gameplan, not necessarily defining it entirely (ie. explaining how Yuuki might play around her j[C] in neutral but not exactly what spacings to be at).
Neutral
A few elements worth highlighting in Yuuki's (non-trump) gameplan is jB, j[C], 5A, 5B, and how she uses each to be able to constantly switch between an aggressive style to a more active defensive style in neutral.
jB
Not the first move players who have dealt with Yuuki would expect to be introduced but one of her strongest tools. jB is a move that has a far horizontal reach allowing her to neutral jump drift slightly outside of her 5C spacing, keeping opponents out and being at a space where it's difficult to pin her landing without blocking jB, getting caught by a doublejump, etc. She can also jump forward with it to actively steal space and possibly counterpoke grounded AAs in certain situations.
jC/j[C]
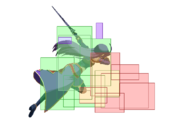
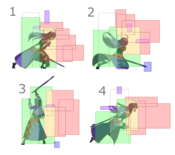
Yuuki's prized possession. jC is arguably one of the strongest ATGs in DFCI and she has the ability to put it out uncharged, partially charged, and fully charged. Uncharged and partial share the same properties while charged gives the move a ground bounce property allowing for simple and lenient high damage conversions. The reason it's important to note partial charge as an option as well is because what makes jC so terrifying for your opponents is the ability to choose exactly when that hitbox comes out. Meaning dash under attempts, grounded AA attempts, rising button attempts, and so forth can all be stuffed by you putting out your jC early, late, whatever fits the situation. With this respect established, j[C] now being a third option creates for oppressive, difficult to answer aerial neutral that Yuuki can nearly always manipulate in her favor.
5A and 5B
With your A2A and ATG established 5A and 5B are the next things to look at. Yuuki having the second fastest dash speed ignoring Tatsuya/Rentaro's trump state means you can put yourself easily behind airborne opponents looking to approach your jB/C head on where you can 5A/5AA (5A5B) them. Dash 5A can catch opponents going airborne (as well as dash 5B) and catch them attempting to dash into your space. All of this along with your assist of choice and the ocassional 2B and 5C goes to show why this character dominates in so many matchups.
2AB
While not necessarily a universal neutral tool it's worth noting Yuuki has a fairly unique property with 2AB where clashing vs "projectiles" (Tatsuya 236, Iriya 5S plate, Wilhelmina 5S, Mashiro 5S, etc.) causes the whiff recovery to reduce tremendously, making it difficult to punish and whiff and even harder on block.
Trump
For trump state, Yuuki now can play an extremely aggressive style as she gains a third jump to bait out decisions and can convert even random max range 5Cs into 236C on block to get her pressure started. Combine this with universal trump mechanics such as no startup assist calls and airborne assist calls and she takes full control over the match during her trump duration which she can extend by 25% with 2 bars alone once a round.
Offense
Yuuki's non-trump offense is among the most flexible in DFCI as far as no trump state goes. The ability to cancel her strings at any moment into a special that goes airborne (214x) that has guard point frames, a huge stagger window, launches her back in to answer pushblock, as well as a large 2B, multi-hit 2C that moves you forward, and a 5C to stagger into if the opponent is too antsy post pushblock situations. Her jB as discussed earlier has a bunch of horizontal coverage allowing her to always stay in at low commitment in the corner and her jC/j[C] timing flexibility allows for simple OS blowup without a single resource spent committing to it.
Yuuki's trump offense somehow becomes even more frustrating to answer. All of the pros she has outside of trump are now backed by the ability to frametrap into 236x, which moves her forward and she can jump cancel into her difficult to answer air normals, as well as airborne assist calls to set up tickthrows/throwbaits with assist call to keep them pinned or CH them. If they try to grounded AA, rising button, or dash out vs your jump canceled specials, you can just do an early air button, drift back late jB, drift back wait, etc. The universal trump ability to now rebeat (cancel stronger normals into weaker normals C>A, B>A, etc.) means she has access to things like 2C(1)2A, which she can jump cancel out of, throw out of, frametrap into 2B5C 236C, etc. The opponent is at a constant disadvantage and one slip up could, again, mean 25% gauge returned to you.
Defense
Yuuki doesn't have any extraordinary specials like KYH, Asuna, Kirino, etc. to force pressure with on defense but she has a few unique things to keep in mind.
2AB
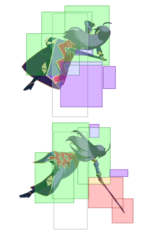
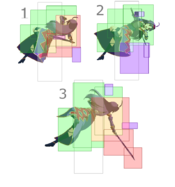
Yuuki's 2AB keeps her grounded throughout its total of two hits, which have a huge window to cancel into 214AB on hit. If blocked, you can combo-blast or spend trump and if it clashes you can choose to CB/TCC/ranbu. The reason her 2AB is worth noting despite 2AB not being a main defensive option in DFCI is her 2AB has so many pros and you are able to force checkmates, via ranbu-ing if the opponent clashes back, trumping and just overwhelming the opponent, etc. 2AB is also so massive that it is difficult to avoid even blocking it meaning she rarely whiffs it.
5AC (Trump)
Yuuki's trump card is -2 meaning she can be grabbed out of the startup, however it also tends to invuln through the active frames of A and sometimes B normals allowing for a full combo. As greedy opponents might try to grab you out of it this makes fuzzy jumping very strong (171 input). Behind fuzzy jump you can put out j[C] allowing for easy conversions on hit and pressure start on block. The next layer is then the opponent staggering to catch fuzzy jump opening up the door for pushblock (basic DFCI pressure structure).
Move List
L = Low, H = High, A = Air
JC = Jump Cancel, SC = Support Cancel, EX = EX Cancel
ISC = Impact Skill Cancel, TCC = Trump Card Cancel, CAC = Climax Art Cancel
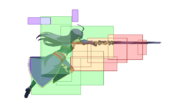
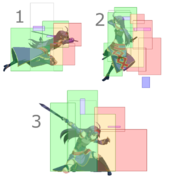
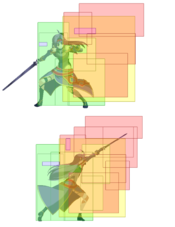
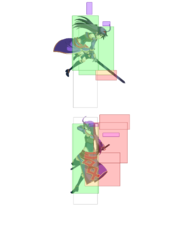
Startup includes the first active frame.
Normal Moves
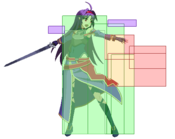
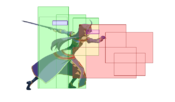
| 5A |
|---|
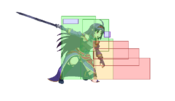
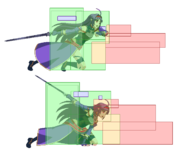
| 2A |
|---|
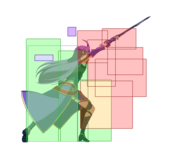
| 5B |
|---|
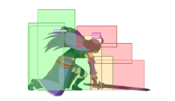
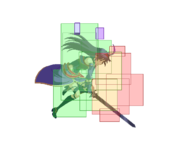
| 2B |
|---|
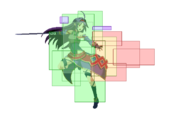
| 5C |
|---|
| 2C |
|---|
| j.A |
|---|
| j.B |
|---|
| j.C |
|---|
| j.[C] |
|---|
Special Moves
| Vertical Square 「バーチカル・スクエア」 236X |
|---|
| Blast Slash 「ブラストスラッシュ」 214X 214A/B/C 214AB |
|---|
| Vorpal Strike 「ヴォーパルストライク」 j.236X |
|---|
Universal Mechanics
| Throw 6C or 4C |
|---|
| Impact Skill Sword Rush 「ソード・ラッシュ」 5A+B |
|---|
| Impact Skill Banishing Strike 「バニシングストライク」 2A+B |
|---|
| Impact Break 4A+B |
|---|
| Equip: Black-Wing A+C |
|---|
Climax Arts
| OSS Mother's Rosario 「OSSマザーズ・ロザリオ」 41236B+C |
|---|
| Absolute Unrivaled Sword 「絶対無敵の剣」 63214B+C |
|---|
Combos
Solo
NOTES:
- All 236Xs can be charged to sideswap ONCE as needed (more than once causes opp. airtech)
- Stuff > refers to (jX) > 5A/2A > 2B/5B > 5C/2C etc., jc refers to "jump cancel" as Yuuki can jump cancel all charged specials
- 236X refers to any non-EX 236 input
- Meterless corner j236x HKD is a result of a low height hit. If you can't get it, it's likely a result of doing (jc > j[C]) too fast post j236[x].
- j236x HKD enders leave a gap in the corner, allowing you to either: (9j (land) 2A (cross-up low)) OR ((micro-walk) 9j (land) 2A (same side low))
Midscreen Combos
Stuff > 236X > 214AB > (recover) > (9j[C] 9dj) > 5ABC
- Most used PUB (power-up blast) combo. (9j[C] 9dj) is an optional extension for 2 hit starters for "Stuff". Requires 1 bar. (2028~ damage)
4AB~X > (slight delay) > (jC jc) > jABC
- 4AB PUB combo. Meterless. (JC jc) is an optional extension that adds slightly more damage. (1092~ damage)
j[C] > (land, dash) > 5B > jB[C] > djABC
- j[C] PUB combo. Meterless. (1669 damage)
5B (AA) > jB[C] > djABC
- 5B anti-air PUB combo. Meterless. (1149 damage)
6C/4C > 214AB > (recover) > 5ABC
- Grab PUB Combo. 1 bar. (1444 damage)
5C > 236X (OR 236[x] > 9j~[C] > 2AAA2B2C OTG)
- 1 hit into 236 meterless HKD which gives time for assist okizeme. 9j~[C] post 236[X] should be delayed enough to OTG. (1300~ damage)
Stuff > 236{X}
- {X} refers to partial charged 236, by partial charging 236 to a certain point you get a meterless KD with some plus frames but not enough for non-iriya 5S assist call. (1400~ damage)
4AB~X > j[C] (instantly after launcher) > dj[C] > (land) > 5A > 236{A}
- Partial charge KD like previous combo. If the first j[C] isn't instant, (land) 5A will not hit opp. (1446 damage)
j[C] > (land, dash) > 5B > jB[C] > (land) > jAC > dj[C] > 5A > 236{A}
- Partial charge KD like previous combo, could alternatively do j236A airtech ender after djX. (2331 damage)
Stuff > 236X > 236AB
- Standard non-trump BnB. Can OTG 2AAA2B2C if 2 hit "Stuff", 2AAA2B if 3+ hits "Stuff" if no assist call. (2100~ damage)
5B (AA) > jB[C] > (land) > jAC > dj[C] > (land) > 5A > 236A > 236AB/426BC/624BC
- Standard AA non-trump BnB. Can 2AAA2B OTG if no assist call. (236AB: 2364 damage)
Stuff -> 236C > 214AB > 236A/B > 236AB/426BC/624BC
- Standard 2 bar meterdump with 214AB extension. Can do (9j[C] > 5B >) after 214AB if stuff is less than 3-4 hits. (236AB: 2648 damage)
2AB > (slight delay) > 214AB > (236C > 236AB/426BC/624BC) OR (j[C] > 5B > 236A/B > 236AB/426BC/624BC)
- Combo for 2AB starter, can opt to do air string into land or j236 if you don't want to spend another bar on 236AB. (236AB: 2000~ damage)
214x (non-CH) > 5B > jBC > dj[C] > 5A > 236A > 236AB/426BC/624BC
- Non counter-hit combo for 214x. (236AB: 2543 damage)
214x (CH) > 5B > jB[C] > (land) > jAC > dj[C] > 5A > 236AB/426BC/624BC
- Counter-hit combo for 214x starter. The damage difference is notable enough that it's worth practicing (it isn't too demanding). (236AB: 2705 damage)
jC (A2A) > (land) > 5B > jB[C] > (land) > jAC > dj[C] > 5A > 236A > 236AB/426BC/624BC
- 1 of 2 jC A2A combos. Go-to for lower height A2A hits. (236AB: 2500 damage)
jC (A2A) > (land) > jB[C] > (land) > (dash) 5B > j[C] > dj[C] > 5A > 236A > 236AB/426BC/624BC
- 2 of 2 jC A2A combos. Go-to for when opp. is hit too high for 5B jB pickup. (236AB: 2360 damage)
jB (A2A) > j[C] > (land) > (jAC > dj[C] > 5A > 236A > 236AB/426BC/624BC) OR (5A5B > jC > dj[C] 5A 236A 236AB/426BC/624BC)
- 1 of 2 jB A2A combos. (236AB: 2242~ damage)
jB (A2A) > jC > dj[C] > (land) > (jAC > dj[C] > 5A > 236A > 236AB/426BC/624BC) OR (5A5B > jC > dj[C] 5A 236A 236AB/426BC/624BC)
- 2 of 2 jB A2A combos. (236AB: 2300~ damage)
jA (A2A) > jC > dj[C] > (5A > 236A > 236AB/426BC/624BC) OR (5A5B > jC > dj[C] 5A 236A 236AB/426BC/624BC)
- jA A2A combo. jA[C] only combos on CH so do not charge like you would via jB A2A. (236AB: 2100~ damage)
Corner Combos
Stuff > 236X > 214AB > (recover) > 9j[C] > j236[C] > 8djABC
- Corner PUB combo. Stuff cannot exceed 2-3 hits. Requires 1 bar. (2567 damage)
4AB~X > (slight delay) > j[C] > j66 (airdash) > jAC > j236[A] > jc > jABC
- 4AB corner PUB combo. Meterless. (1444 damage)
j[C] > (land, dash) > 5B > jB[C] > j236[C] > jc > jABC
- j[C] corner PUB combo. Meterless. (2055 damage)
5B (AA) > jB[C] > j236[C] > jc > jABC
- 5B anti-air corner PUB combo. Meterless. (1751 damage)
j[C] > 5B > jB[C] > j236[C] > jc > j~[C] > (slight delay) > j236A/B
- The basic meterless corner HKD routing. Likely will have some trouble getting this consistent. (2781~ damage)
5B (AA) > jB[C] > j236[C] > jc > j~[C] > (slight delay) > j236A/B
- Read notes under section for j236x HKD help. Corner combo. (2133~ damage)
4AB~X > j[C] > j66 > jAC > j236[A] > jc > j~[C] > j236A/B
- Read notes under section for j236x HKD help. Corner combo. (1534 damage)
j[C] > 5B > jB[C] > j236[C] > jc > j~[C] > (5AB > 236AB/426BC/624BC) OR ((micro-dash) > 5C > 236C > 236AB/426BC/624BC)
- Standard corner combo for j[C] starter, worth learning as it does a bit more damage than midscreen j[C] routing. (236AB: 2838~ damage)
5B > jB[C] > j236[C] > jc > j~[C] > (5AB > 236AB/426BC/624BC) OR ((micro-dash) > 5C > 236C > 236AB/426BC/624BC)
- Standard corner combo for 5B starter. (236AB: 2571~ damage)
Stuff > 236C > 214AB > 9j[C] > j236[C] > j66 (airdash) > j236A
- Stuff should not exceed 2 hit starter or else HKD will be drastically more difficult to achieve. Corner combo. (2732 damage)
Trump
Installs
5C > 236[C] > 5AC > 2A5B > 2AB > j[C]B > 5B > 236A/B > 236AB
- 1 hit starter trump install. Highest damage possible without assist/CA. 1 Bar. (3414 damage)
Stuff > 236C > 5AC > (microdash) > 5A 2AB > j[C]B > 5B > 236A > 236AB
- 2-4 hit starter trump install. 1 Bar. If micro-dash 5A isn't fast enough, 236A after 5B may whiff. Can slightly delay the 5AC after 236C to be close enough for no micro-dash but may be less consistent this way. (3036 damage)
Stuff > 236C > 5AC (Final 236C hit) > 5B > jAC > dj[C] > 5A > 236A(3) > jc
- Meterless HKD trump install route. Stuff cannot exceed 2 hits. Note that with trump giving rebeat, it may be harder to time (land) 5A links as the buffer "goes away" due to jA rebeat. (2482 damage)
BnBs
Stuff > 236C > jAC > dj[C]B > 5B > 236A > 236AB/426BC/624BC
- Standard trump BnB. Stuff cannot exceed four hits. If you delay the jB rebeat too long, 236A may whiff after (land) 5B. (236AB: 2964 damage)
Stuff > 236C > 214AB > (recover, delay) > 5B/2B > 236B(3) > jc
- Oki trump BnB. Usually used in conjunction with an assist as it doesn't serve her much without one unless conserving meter. (2534 damage)
5B (AA) > jB[C] > (dash) > 2AB > (j[C]B > 5B > 236A > 236AB/426BC/624BC) OR (j[C] > dj[C] > (land, slight delay) > 5B > 236A > 236AB/426BC/624BC)
- 5B AA trump BnB. j[C] dj[C] routing does slightly more damage but is more difficult. (236AB: 2975~ damage)
j[C] > (land, dash) > 5C > 2AB > (j[C]B 5B > 236A > 236AB/426BC/624BC) OR (j[C] > dj[C] > (land, slight delay) > 5B > 236A > 236AB/426BC/624BC)
- j[C] starter trump BnB. j[C] dj[C] routing does slightly more damage but is more difficult. (236AB: 3242~ damage)
Assists
Iriya
5A/jA Plate Flick Confirms
A plate flick hits > 5B > jB[C] > (land) > jAC > dj[C] > 5A > 236A > 236AB/426BC/624BC
- Metered BnB off of A flick, midscreen/universal combo.
A plate flick hits > 5B > jBC > j236[A] > jc > j~[C] > j236B
- Meterless corner BnB off of A flick. Sets up for left/right okizeme.
A plate flick hits > 5B > jB[C] > j236[C] > jc > j~[C] > (5AB > 236AB/426BC/624BC) OR ((micro-dash) > 5C > 236C > 236AB/426BC/624BC)
- Metered BnB off of A flick, corner combo.
A plate flick hits > 5C > 5B > jBC > dj[C] > 5A > 236A(3) > jc
- Meterless trump BnB off of A flick, for saving meter.
A plate flick hits > 5C/5B/2B > 2AB > j[C]B > 5B/2B > 236A/B > 236AB/426BC/624BC
- Metered trump BnB off of A flick.
5B/2B/5C/2C/jB/jC/5AB/2AB Plate Flick Confirms
Stuff > 5C/2C > (plate gets flicked) > 236C > (plate hit)
- Meterless HKD which requires the nromal before 236C to flick the plate.
j[C] > 5B > jB[C] > (land, recover) > 5S~5AB > 214AB > (micro-walk forward and delay) > 2B/5C > 236[C] ->
- -> (plate hit) 8jABC
- PUB install option.
- -> (plate hit) 8j~[C]2AA
- Plate grants HKD after 236[C] and you delay your j[C] to OTG afterwards.
- -> (plate hit) 8j[C] 5AB 236AB/426BC/624BC
- Do j[C] almost immediately after jcing 236[C] to continue the combo into a nice meter dump of your choice.
- -> (plate hit) 8jABC
B/C plate flick hits > 5B > jB[C] > (land) > jAC > dj[C] > 5A > 236A > 236AB/426BC/624BC
- Standard universal B/C flick confirm.
B/C plate flick hits > 5B > jB[C] > j236[C] > dj[C] > (5AB 236AB/426BC/624BC) OR (micro-dash 5C 236C 236AB/426BC/624BC)
- Metered corner 1 bar B/C flick confirm.
B/C plate flick hits > 5B > jB[C] > j236[C] > dj[C] > (5S~)5AB > 236AB/426BC/624BC
- Metered corner 1 bar B/C flick confirm. (5S~) is an optional plate set piano into 5AB.
B/C plate flick hits > 5B > jBC > j236[A] > jc > j~[C] > j236B
- Meterless left/right setup B/C flick confirm.
Fireworks (Iriya Level 3) Confirms
(firework hit) > 5B > jBC > dj[C] > 5A > 236A > 236AB/426BC/624BC
- Fireworks refer to iriya's final plate level (fullscreen aub explosion) hitting. Cannot do jB[C] after 5B due to firework proration.
(firework hit) > 5AB > 236AB/426BC/624BC
- Safer and faster alternative to combo above.
(firework hit) > 214AB > 236AB (COMBO-BLAST) > 426BC
- Burst locked meterdump after firework hit. Optional combo blast that can be placed anywhere.
(firework hit) > j[C] > j236[C] > dj[C] > 5AB > 236AB/426BC/624BC
- Corner specific firework confirm.
(firework hit) > 5C/5B > 2AB > j[C]B > 5B/2B > 236B > 236AB/426BC/624BC
- Trump firework confirm.
6S Scooter Confirms
6S (non-CH) > 5B > jBC > dj[C] > 5A > 236A > 236AB/426BC/624BC
- Metered non counter-hit routing for 6S starter.
6S (CH) > 5B > jB[C] > (land) > jAC > dj[C] > 5A > 236AB/426BC/624BC
- Metered counter-hit routing for 6S starter.
6S > 5C/5B > 2AB > j[C]B > 5B/2B > 236B > 236AB/426BC/624BC
- Metered trump Iriya 6S confirm.
Resource Dump Round2/Round3 Combos (Nobility Combos)
5C > 236[C] > 4ABC > 5AB > 5AC > 5B > 2AB > j[C] > dj[C] (6S Cancel) > jB (rebeat from dj[C] after 6S Call) > (land) > 7j~[C] > 5AB > 236AB > 426BC
- R3 first hit trump install "nobility" combo. Strict routing. (6000~ damage)
(5B)5C > 236C > 5AC > (micro-dash) > 5A2AB > j[C] > dj[C] (6S Cancel) > jB (rebeat from dj[C] after 6S Call) > (land) > 7j~[C] > 5AB > 214AB > 236B > 236AB > 5ABC > 426BC
- R3 first hit trump install "nobility" combo. Fairly strict routing. (5600~ damage)
5C > 236[C] > 5ABC > (5S Fireworks Set) > {4}(slight walk-back) > 84j[C] > 236[B] (fireworks hit) > 7j > (towards Iriya) > jB > 5C > 2AB > (plate hit, recover from 2AB) > 5AB > 214AB > 236B > 236AB > 426BC
- High damage combo-blast fireworks combo. (6800~ damage)
Wilhelmina
5S Confirms
(5S hits) > Stuff > 236C > 236AB/426BC/624BC
- Standard 5S hit BnB.
(5S hits) > 5B > jBC > dj[C] > 5A > 236A > 236AB
- Standard AA 5S hit BnB.
(5S hits) > 5C > 236C > jAC > dj[C]B > 5B > 236A > 236AB/426BC/624BC
- Standard 5S trump BnB, might rarely drop at full 5S hits.
6S Confirms
(6S hits) > j[C] > ((micro-dash) 5C 236C) OR (5AB) 236AB
- Standard non-trump 6S confirm. 6S starter is high proration so can't do too much with it flexibility wise.
(6S hits) > j[C] > j236[C] > jc > j~[C] > 5AB > 236AB
- Standard non-trump routing should work off raw 6S, 2A 6S hit, grab 6S hit, etc. You may be able to do micro-dash 5C 236C in place of 5AB on 2A or raw 6S in the corner, but 5AB is safe and works w/ grab/4AB proration as well.
(6S hits) > j[C] > 5C/5B > 2AB > (j[C] > dj[C] > 2B/5B > 236A > 236AB/426BC/624BC) OR (j[C]B > 2B/5B > 236A > 236AB/426BC/624BC)
- Standard trump BnB for 6S hit.
5B (AA hit) > (6S hits) > j[C] > 5C > 2AB > j[C] > dj[C] > 2B > 426BC
- Routing for AA 5B into 6S that extends trump gauge.
Resource Dump Round2/Round3 Combos (Nobility Combos)
j[C] > 236AB > 5AC > 236[C] > 6S > 4ABC > j236[C] > (land) > j236[B] > (land) > 5C > 2AB > j[C] > j236[A] > j236AB > 426BC
- 4 bar trump install CB combo. (6200~ damage)
5C > 236[C] > 4ABC > 5AB > 8jAC > dj[C]B > 5B > 236x(2) > 6S > j[C] > 214AB > 236x(3) > 236AB > 426BC
- 4 bar CB trump install route. (6300~ damage)
5C > 236[C] > 6ABC > 5AB(1) (6S Cancel) > (6S hits, releases) > 2AB > j[C]B > 5B > 236A > 214AB > 236B > 236AB > 426BC
- 4 bar (can omit 214AB for 3 bar, 400~ less damage) CB trump route. (6700~ damage)
5C > 4ABC > 5AB > 5AC > 236B(2) > 6S > (recover, 6S release) > 2AB > j[C] > (MAX DELAY) jB > 236[A] > 426BC
- 2 bar trump install CB combo. Max delay jB is a 2f link. (5800~ damage)
5C > 236C > 5AC > (micro-dash) > 5A2AB > j[C]B > 5B > 236[B](1) > 6S > (release, slight delay) > 9j[C] > 5AB > 236AB > 426BC
- 3 bar trump install combo. (5400~ damage)
5C > 236[C] > 5AC > 2A > 236B(2) > 6S > (release, delay) > 2AB > j[C]B > 5B > 236[A] > 426BC
- 2 bar trump install combo. 5B after j[C]B is a height-specific 1f link.
Celty
5S Confirms
(5S hits) > (dash) 2AAA2B2C
- Raw 5S hits are not convertible non-trump
(5S hits) > 2A5B > 2AB > (j[C]B > 2B/5B > 236A > 236AB/426BC/624BC) OR (j[C] > dj[C] > 5B/2B > 236A > 236AB/426BC/624BC)
- Raw 5S hit conversion in trump, 2A needs to hit as the final hit of 5S hits, any earlier/later and routing gets awkward.
(214x CH, j[C] starter, etc.) > 5B > jB[C] > dj[C] > (land, recover) > 5S
- 5S gives meterless HKD. Lose oki but save money. Possible R2 winners side option.
6S Confirms
(6S hits) > (j[C]) > 5B > jBC > dj[C] > 5A > 236A > 236AB/426BC/624BC
- Non trump 6S hit BnB, initial j[C] is optional.
4AB (Hit, no launcher follow-up) > (2nd hit of 6S hits) > 5B > jBC > dj[C] > 5A > 236A > 236AB/426BC/624BC
- 4AB 6S oki confirm.
2AA(A) > (6S hits) > 2B/5B > jAC > dj[C] > 5A > 236A > 236AB/426BC/624BC
- 2A 6S oki confirm.
(6S hit) > jC > j236[A] > 8dj~[C] > (land) > 5AB > 236AB
- 6S corner hit confirm. Necessary to note as 6S proration is rough for Celty.
2A > (2nd 6S hit hits) > j[C] > j236[A] > jc > j~[C] > (5AB or micro-dash 5C 236C) > 236AB/426BC/624BC
- Corner 6S oki 2A confirm.
(6S Hit) > 5C > 2AB > j[C] > dj[C] > (land, slight delay) > 5B > 236A/B > 236AB/426BC/624BC
- If j[C] dj[C] (land, slight delay) 5B is too difficult, 5C 2AB j[C]B 5B 236B should work just fine. Only slightly less optimal.
2A > (6S hit) > 8j[C] > 5C 2AB > j[C]B > 5B > 236A/B > 236AB/426BC/624BC
- Confirm for land 2A hyouri.
Resource Dump Round2/Round3 Combos (Nobility Combos)
5C > 236[C] > 4ABC > 5AB > 5AC > 5B > 236[B] > 236AB > (6S Cancel final hit) > j[C] > (6S hit) > dj[C] > (2nd 6S hit) > (walk-back) > 5AB > 236AB > 426BC
- 4 bar trump install CB nobility routing. (6200~ damage)
5C > 236[C] > 4ABC > 5AB > 5AC > 5B > 236B(2) > (6S Call) > (recover, 6S hits) > j[C] > 5AB > 236AB > 426BC
- 3 bar trump install CB nobility routing. (5500~ damage)
5C > 236C > (micro-dash) > 5A > 2AB > j[C]B > 2B/5B > 236[B] > 236AB > (slight delay) > 5S > 214AB > 236AB > 5ABC (CB) > 426BC
- 5 bar trump install CB nobility routing. (5800~ damage)
Setups (Okizeme)
Solo
...236AB Ender/Grab > (recover, IAD) ->
- jB (meaty)
- Meaty jB (high) option, can layer hitstop OSes behind it such as 5AB, ranbu, 214A, etc.
- jB (whiff)
- Intentional jB whiff into 2A (low) option. Susceptible to wakeup blue trump. Can also grab, 4AB, etc but are susceptible to fuzzy 5A.
- jB (meaty)
- (slight delay) 8j~[C]
- Meaty deep j[C] that allows you to layer hitstop OSes like prev. setup. j[C] has so much hitstun that you have plenty of time to visually confirm any situation.
- (slight delay) 8j~[C]
...j236x (airtech ender) > (land, recover) ->
- If opponent is airteching after wallbounce or near corner
- Best to 7j or backdash back a step to avoid cornering yourself/allowing opponent to get midscreen behind you. Look to pin bad doublejumps/landings.
- If opponent is airteching midscreen
- Can reaction dash-under high airtech as very few characters have cross-up normals to hit you.
- If opponent is airteching after wallbounce or near corner
Iriya
- 5S~2A can be inputted as 2S~2A. 5/2S~2A implies piano-ing 5S input into 2A as it can be done without assist cancel.
B Flick Setups
If Total Combo Hits Are Less Than or Equal To 11 (raw grab non EX route, non-j236 route) > 5S~2AAA2B2C (2nd of hit 2C flicks the plate)
- 5A2A, 2AA
- Meaty A normal into low, establishes that you can/will cover Iriya
- 5A4AB, 2A4AB
- Meaty A normal into OH
- 2A~6C, 5A~6C
- A meaty, recover, into grab
- 5A~jc
- A meaty, slight delay jump cancel to blow-up abare/throwtech etc.
- 4AB, 6C, 8j
- Misc no meaty options, 6C/8j avoid and can blowup blue trump
- 5A2A, 2AA
If Total Hits Are 12 or More (grab + EX cancel, j236 route) > 5S~2AAA2B > meaty B/C normal (plate flick)
- (recover) grab
- (recover) 5A/2A/2AA
- Opens up opp. expecting grab, beats abare/fuzzy jump
- 214A (cancelling from meaty normal)
- (recover) grab or 2A or block, plate will cover you if you get mashed after 214A
- jump cancel meaty 2B
- land 2A, grab, delay double jump, etc.
A Flick Setups
Stuff > 236AB Ender > (recover) > 5S~2AAA2B ->
- ->Meaty 5A
- Option that blows up PUB, beats abare and red trump, and forces opponent to block plate if they wakeup blue trump. Flicks the plate.
- ->5A(w) (before opp. wakes up but iriya finishes eating)
- 2A (low, plate hits after), 6C (grab, plate covers abare), 8j (avoids wakeup abare etc. and can convert A flick if it hits)
- ->7jA
- Done in the corner as opponent wakes up, avoids abare and power-up blast but loses to wakeup dashblock.
- ->Meaty 5A
Firework Setups
Stuff > 236AB Ender > (recover) > 5S~2AAA ->
- Same options as B flick setups. You're using the fireworks here not the plate for okizeme.
Trump Oki Routing > 236x(3) > (5S Cancel) > jc > (falling jC OTG) > rejump ->
- (land) 2A
- low option.
- (land) grab
- grab option.
- (land) 2A
Trump BnB Routing > 236AB(3) > (5S Cancel) > NO OTG > (recover, 9j) ->
- (land) 2A
- Same-side low option.
- 7dj
- Cross-up option.
- (land) 2A
Trump Plate Setups
- The OTG string you use to B flick the plate determines your options.
- Doing 5B2AA (3 hits) gives left/right and grab, 5B2A (2 hits) gives 4AB and grab, doing 5B2B2AA (4 hits) gives cross-up and meaty plate to beat abare.
Standard Trump BnB > 236AB(3) (5S Cancel) > (recover) > 5B2AA9jc OTG
- land 2A
- Same-side low option. Do b flick trump confirm on hit.
- 7dj back
- Cross-up option. Do b flick trump confirm on hit.
- land grab
- Third option for mix. Do 214AB (delay) 5B... oki trump routing if not teched. Cancel 5C into 5AB if opponent wakeup backdashes.
- land 2A
Trump Oki BnB > 236x(3) (5S Cancel) > 8jc > jC2A5B2AAjc OTG
- Similar options as above. Lots of ambiguity to run with.
5AC (Trump Install After 236x(3)) > 5S(1) (5S Cancel) > 236AB(3) > 8jc > (drift over knocked down opponent, falling jA to flick plate at apex height) > (land, 8j) ->
- ->9dj
- Cross-up option.
- ->falling jB
- Same-side high option.
- ->9dj
Wilhelmina
Non-Trump 6S Setups
HKD Ender (236AB, 4/6C) > 6S Call > dash ->
- 5A2A, 2AA
- Meaty A normal into low option, establishes you're covering Wilhelmina oki to cycle in grab/4AB.
- 5A4AB, 2A4AB
- Meaty A normal into UOH
- {6} > 7/8/9j OR 8[4]j
- {6}7j baits out trump OSes as well as throwtech, 8[4]j does the same as well as possibly PB
- 44
- Hard commit to answering wakeup PB for R1, loses to ranbu
- 5A2A, 2AA
Trump 6S Setups
Trump BnB > 236AB (max delay) (6S Cancel) > (recover, 9j) ->
- (land) 2A
- same-side low option
- 7dj
- cross-up option
- (land) 2A
Trump Oki BnB > 214AB > 236x(3) > 8[6]jc > (6S airborne call as you cross-over opponent) > (land, 8j) ->
- falling jB
- same-side high
- j236C
- cross-up option that avoids wakeup PUB. Loses to wakeup blue trump
- 9dj
- Alternative cross-up option
- falling jB
Trump BnB > 236AB > OTG String (6S Cancel final OTG hit) > jc
- Allows you to set up for low/throw oki, maybe even 4AB. Common for when Wilhelmina cooldown is just barely still recovering.
Celty
Non-Trump 6S Setups
HKD Ender (236AB, 4/6C) > 6S Call ->
- Grab
- "Meaty" grab that even when teched, opponent is forced to block second hit of Celty keeping you plus.
- 4AB
- Same as above where second hit will either convert 4AB or force them to block if 4AB is blocked.
- 5A2A, 2AA
- Meaty A normal into low option, establishes you're covering Celty oki to cycle in grab/4AB.
- 5A4AB, 2A4AB
- Meaty A normal into UOH
- 9jA...
- Opp standblocks 9jA, can do jC after for double OH
- If jA whiffs as intended, can land 2A for low, land grab for grab, land UOH. 9jA avoids abare/reversals (excluding PUB).
- {6} > 7/8/9j OR 8[4]j
- {6}7j baits out trump OSes as well as throwtech, 8[4]j does the same as well as possibly PB
- 44
- Hard commit to answering wakeup PB for R1, loses to ranbu
- Grab
Trump 6S Setups
Trump BnB > 236AB (max delay) (6S Cancel) > (recover, 9j) ->
- (land) 2A
- same-side low option
- 7dj
- cross-up option
- (land) 2A
Trump Oki BnB > 214AB > 236x(3) (6S Cancel) > 8[6]jc > (land, 8j) ->
- falling jB
- same-side high
- j236C
- cross-up option that avoids wakeup PUB. Loses to wakeup blue trump
- 9dj
- Alternative cross-up option
- falling late j[C](whiff) > (land) > 4AB
- same-side air normal whiff into UOH, sorta gimmicky but a check for the opponent
- falling jB
Trump Oki BnB > 236AB > (immediately 6S cancel when final 236AB hit connects) > IAD jA OTG > (land) > 8j ->
- falling jB
- same-side high
- j236C
- cross-up option that avoids wakeup PUB. Loses to wakeup blue trump
- 9dj
- Alternative cross-up option
- falling late j[C](whiff) > (land) > 4AB
- same-side air normal whiff into UOH, sorta gimmicky but a check for the opponent
- falling jB
j236x HKD corner ender > (6S call on j236x hit) > (recover) > IAD 8tj ->
- falling jB
- same-side high
- j236A/C
- cross-up option that avoids wakeup PUB (C ver.). Loses to wakeup blue trump
- falling jB
Colors
| Color 1 | Color 2 | Color 3 | Color 4 |
|---|---|---|---|
| Color 5 | Color 6 | Color 7 | Color 8 |
| Color 9 | Color 10 | Color 11 | Color 12 |
| Color 13 | Color 14 | Color 15 | Color 16 |
| Color 17 | Color 18 | Color 19 | Color 20 |
| Color 21 | Color 22 | Color 23 | Color 24 |
Additional Resources
- noddy's Yuuki MU Counterplay Guide, goes over Solo Yuuki + Top 3 assists
- YURIWARRIOR's Complete Yuuki Combo/Setup Evernote Compilation (Contains Assists Not Listed Here)
- YURIWARRIOR's catalogue of @josef_bear's Yuuki tech tweets
- DFCIDiscord's Yuuki Character Page
- Yuuki Match-up Video Archive (Google Sheet with thousands of catalogued JP sets from PSN streams to arcade VODs)
- Assorted @DumbPengin Yuuki Twitter Tech (Honk Advisory)

