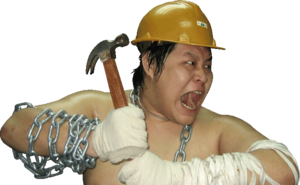
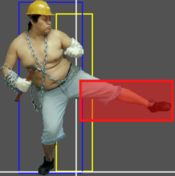
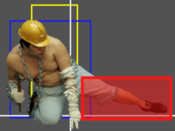
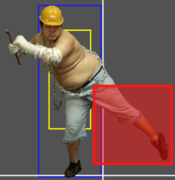
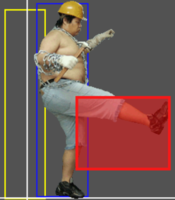
Dong Dong Never Die/Kenjiro
| Kenjiro | |||
|---|---|---|---|
| Character Type: Industrial-Grade Blender | |||
| Home Province: Shanxi | |||
| Age: 32 | |||
| Power: ⭐⭐⭐⭐ | |||
| Speed: ⭐ | |||
| Health: ⭐⭐⭐⭐ | |||
| Spirit: ⭐ |
Character Overview
Kenjiro (健次郎 jiàncìláng) is a powerful grappler-type character, boasting strong mid-range pokes and overwhelming close-range offense.
His long normals such as his 5B are great for keeping the opponent in check, with even his jabs boasting impressive range. Where Kenjiro really shines, though, is in the up-close game. Once he gets in close, either through careful movement and patience or by landing a far-ranged knockdown with his 2D, he can put his opponent in an inescapable blender with his unblockable DP, powerful tick throw game, and dangerous high-low mixup. What makes all of this even scarier is the range from which he can run his mixup game: his command grab goes farther than some of the cast's longest normals!
Despite these strengths, Kenjiro must earn his way in before he gets to reap the rewards. With slow movement speed, poor answers to fireballs, and a lack of good oki off his longer-ranged conversions, he can struggle until he gets within his desired range. Using Kenjiro properly requires patience and a good understanding of the game's universal movement options.
Play Kenjiro if you want a straightforward character with overwhelming offensive output that has a surprising amount of tech for advanced players.
| Strengths | Weaknesses |
|---|---|
|
|
Character Data
Health: 420
Meter Build per Hit: 12
Meter Build per Enemy Hit/Special Use: 9
Walk Speed: 2.2
Run Speed: 5.0
Prejump frames: 12 (forward/neutral), 24 (back)
Light Blockstun/Meter Gain: 34f/3
Heavy Blockstun/Meter Gain: 42f/6
Airspasm
Airspasm is a tech unique to Kenjiro that allows him to cancel air normals into each other and hit multiple times with the same air normal.
Activating the Airspasm
To activate the airspasm, simply dash and then jump out of the dash. That's it!
- It is possible to activate airspasm on a back/neutral jump, but the timing is a bit tricky.
- It is much easier to get a neutral or back jump airspasm out of a microdash. To do so, quickly tap 66 twice from a standing position, then immediately press 7/8. Make sure to release 6 before you press 7/8.
Airspasm Effects
- Airspasm allows you to cancel any air normal into any other air normal, at any point in the animation.
- Pressing a normal during its active frames will reactivate its hitbox, allowing you to hit an opponent with it multiple times in quick succession if the button is mashed.
Applications
First off, you might be tempted to just mash a single normal and just call it a day. And while mashing the same normal is the fastest way to deal damage in Airspasm, it isn't taking full advantage of everything this tech does. If you just input a single normal without canceling it, you won't be able to do anything else until you land: you can't actually cancel a normal into itself, only any other normal. To take full advantage of Airspasm, you need to utilize both the effects described above.
- Airspasm makes Kenjiro's jump-ins much more damaging. A deep j.B can hit 4 or more times on a standing opponent if perfectly mashed.
- It makes Kenjiro's jump-ins safer and his confirms more consistent, as it allows him to start a jumping attack early and still have a hitbox as he lands. Normally, characters have to decide whether to do an early jumping attack to deter potential anti-airs or a late jumping attack to get the most plus frames on landing. With Airspasm, Kenjiro can get the best of both worlds.
- It allows Kenjiro to combo off of rising jumping attacks, which normally would leave him vulnerable. The best normals to use while rising are j.C, which can hit crouching characters and hit multiple times on the way up, and j.A, which can hit most standing characters from far away. A strong sequence is to initiate an Airspasm forward jump at about the very end of 5A's range, then do j.A>j.C (mash)>j.D. If the j.A hits, the other hits should all combo if the opponent stays standing, dealing a ton of damage and building a huge amount of meter, as well as leading to a deep jump-in combo. The opponent can crouch mid-combo to avoid some of the hits, but they will be unable to block any other jumping attacks while crouching, so it's still very difficult to defend against.
- It gives him absurd looping juggles if he catches the opponent with an air-to-air. Being anywhere in the air is dangerous against a skilled Kenjiro.
- It gives Kenjiro relatively safe instant overheads that lead to further pressure. As mentioned previously, j.C can hit crouchers on the way up. With Airspasm, that j.C can be mashed for more damage and canceled to deter punishes on his landing. For maximum safety, you can use back jump Airspasm so you can cancel to j.A or j.B if the opponent tries to chase you (however, note that back jump has 12 extra startup frames compared to neutral/forward jump).
- It gives Kenjiro hard to defend left-right mixups. In the sequence starting from rising j.A described above, if the opponent blocks, it can turn into a crossup, as j.D and j.C can both crossup depending on how they are spaced. However, note that in DDND, you cannot be crossed up during a true blockstring: even if you get hit with a crossup hitbox, you will keep blocking as long as you keep holding the same direction. That means that to crossup with a cancel into j.C or j.D, you will have to intentionally leave a gap.
- Airspasm can be performed multiple times in a row with good execution, allowing Kenjiro to loop pressure strings and perform a pseudo-infinite off of any jump-in.
Normals
Note: Dong Dong Never Die's engine runs at 100 frames per second. Frame data and damage are taken directly from the game files.
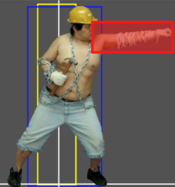
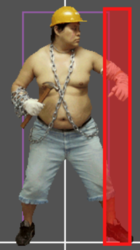
5A This outranges Dong Dong's 5D lol This outranges Dong Dong's 5D lol
|
|---|
2A
|
|---|
j.A Gateway to Airspasm shenanigans Gateway to Airspasm shenanigans
|
|---|
cl.B
|
|---|
5B
|
|---|
2B
|
|---|
j.B
|
|---|
5C
|
|---|
2C
|
|---|
j.C The stanky leg The stanky leg
|
|---|
5D
|
|---|
2D "Neutral" "Neutral"
|
|---|
j.D
|
|---|
Command Normals
Car Jack Head
千斤顶 (qiānjīndǐng) 6C |
|---|
Throws
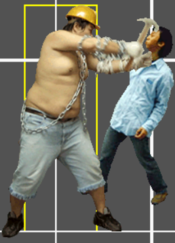
Forward Throw 6B Throw range (both throws have the same range) Throw range (both throws have the same range) bonk bonk
|
|---|
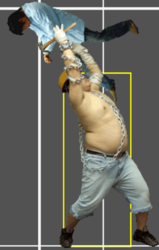
Back Throw 6D yeet yeet
|
|---|
Dead Angle Attack
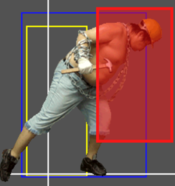
Dead Angle Attack Kneecapper Kneecapper
|
|---|
Specials
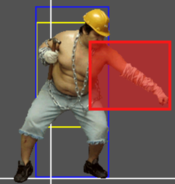
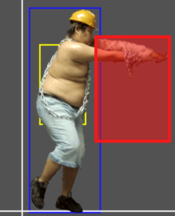
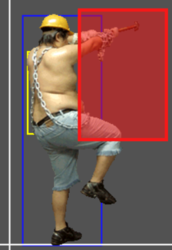
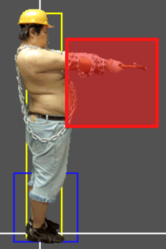
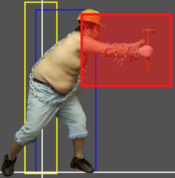
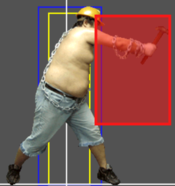
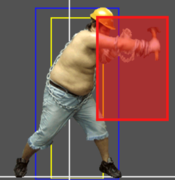
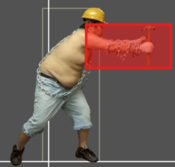
Ascending Hammer 升天锤 (shēngtiān chuí) 623A/B First active hitbox on B-DP First active hitbox on B-DP First active hitbox on A-DP, second on B-DP First active hitbox on A-DP, second on B-DP Second active hitbox on A-DP, third on B-DP Second active hitbox on A-DP, third on B-DP
|
|---|
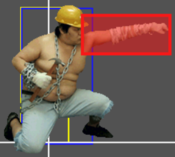
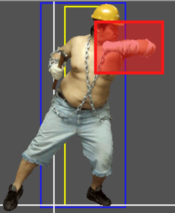
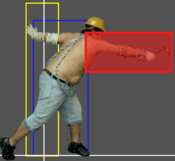
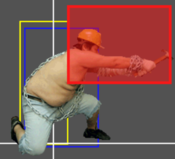
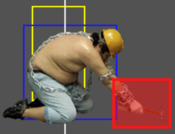
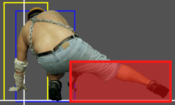
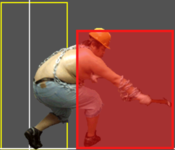
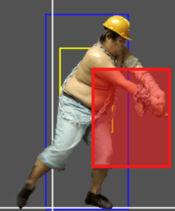
Whirlwind Hammer 旋风锤 (xuánfēng chuí) 214A/B Note that there is no active hurtbox (blue) from the knees up. Note that there is no active hurtbox (blue) from the knees up.
|
|---|
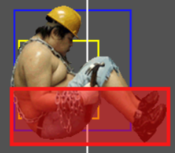
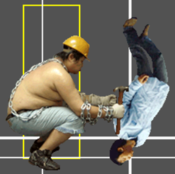
Whirlwind Sit 旋风坐 (xuánfēng zuò) 236C/D Actin' like you won't... Actin' like you won't...
|
|---|
Supers
Hundred-Crack Fist of the North Star 北斗百裂拳 (běidǒubǎilièquán) 236236B ATATATATATATA ATATATATATATA
|
|---|
Remorseful Fist of the North Star 北斗百裂拳 (běidǒucānhuìquán) 236236D 一!二!三! 一!二!三! 终止了! 终止了!
|
|---|
Combos
Grounded BnBs
Light starter
- 5A has the best range of Kenjiro's lights, but will whiff on crouchers and Mario
- 2A is Kenjiro's best mid for starting and continuing combos on crouchers, and is also his best microdash button in theory
- 2C is Kenjiro's best low combo starter
Any combo that works off a 5A starter should also work off of any other light starter!!!
Cl.B whiffs on crouchers so substitute 5D or 2B on crouching opponents. However, certain combos are only possible with Cl.B as it links into lights.
Meterless
5A>5B>236D (108 damage)
- Works even from max range
- Puts the opponent at 3/4 screen, or closer if they reach the corner
5A>5B>6C>236D (137 damage)
- 6C will connect after 5B from slightly closer than max range
5A>cl.B>2A>5B>236D (153 damage)
- Works off of a point-blank 5A
- Can work from slightly farther out if you incorporate microdashes in between the links
- Have to use 2A instead of 5A on third hit because the opponent can crouch at that point
5A>cl.B>6C>214B (141 damage)
- Gives better oki than a combo into 236D at midscreen
- Works farther out than the above combo
- Drops in the corner
1 bar
5A>5B>236236D (178 damage, 228 in rage)
- Works from max range
5A>cl.B>6C>214B>236236D (256 damage, 306 in rage)
- Cancel 214B on the third hit or the super will whiff
- Works at close range
- Drops in the corner
- ToD against 1⭐ health characters in rage
2 bars
5A>cl.B>6C>214B>236236B>236236D (362 damage, 479 in rage)
- ToD against 2⭐ health characters
- ToD against everyone except Bioman in rage
5B/2B/5D starter
All interchangeable for the purpose of starting combos, although 5B is generally the best.
Meterless
5B>236D (92 damage)
- Interestingly, this works even at ranges where raw 236D won't connect
5B>6C>236D (122 damage)
- Usable from slightly closer than max range
5B>214B (100 damage)
- Gives better oki than a combo into 236D at midscreen
Don't try to do 5B>6C into DP or spin!! At any range where this would work you would have gotten cl.B instead of 5B.
cl.B starter
All light starter combos that use cl.B should work from the point cl.B is used onward
Meterless
cl.B>5A>2A>5B>236D (153 damage)
- Works from point-blank cl.B
- Can work from slightly farther out if you incorporate microdashes in between the links
cl.B>5A>5B>236D
- Works off of a close range cl.B
cl.B>6C>214B
- Works off of a max range cl.B
- Drops in the corner
1 Bar
cl.B>6C>214B>236236B/236236D
- Works off of a max range cl.B
2D starter
At any range where 2C would hit, it (2C) gives more rewarding combos. Combos off of a far 2D are very dissapointing.
- From just outside 2C range, you can combo 2D>214A. You only get two hits max, so it's better to do 214A than 214B. Can get a partial juggle into 236236B.
- From slightly farther out, you can land the final hit of 623B.
- Kenjiro gets no combo off of 2D from anywhere farther than 2A distance.
- 2D combos are not improved by the corner, outside of better juggles into 236236B.
Jump-ins
Kenjiro can use Airspasm to make all his jump-ins hit multiple times, greatly improving his damage output and making it easier to land a deep jump-in. His jump ins, from most to least useful, are:
j.B
Leaves the opponent at approximately the tip of cl.B range on a deep connect at midscreen, and point-blank in the corner. Refer to Grounded BnBs for the appropriate follow-ups.
j.D
Leaves the opponent at similar ranges as j.B on front connect, but leaves them point-blank on crossup from any screen position. Refer to Grounded BnBs for the appropriate follow-ups.
j.C
Leaves the opponent point-blank if spaced properly. Can sometimes pass through the opponent on landing even if it does not appear to cross up. Can hit the opponent from very early on the way down in Airspasm making it difficult to anti-air.
j.A
Only worth using as a jump-in at max range, at which point the only followups are max range 5A stuff.
Anti-Airs
Kenjiro's main anti-airs, ordered from most to least useful, are:
Instant Airspasm j.A
j.A is a fast air-to-air with a great hitbox that can lead to followups if performed with Airspasm. Kenjiro's most rewarding anti-air if you can pull it off, as it leads to very freeform juggles. There is a huge variety of tricks you can pull between infinite air normal juggles, juggles to grounded moves and back to air normals, and resets into crossup situations. Because of Airspasm's versatility, the best way to learn how to use it is to get a feel for the hitboxes and hitstun animations for each jumping normal, as well as the kind of grounded tools you can use to extend Airspasm juggles (5A and 2A are the most useful).
5A
Has a long, high hitbox that can stuff jumps as they are starting up, or hit jump-ins from far away. 5A>microdash 5A>microdash 5A...
- Works from midscreen, but leads to loops/infinites in the corner
- Can cash out with 5B if you feel like the opponent is about to fall out
5A>623B
- Can consistently pick up 1 or 2 hits at decent ranges.
5A>instant Airspasm j.A>air normals
- Demanding in execution, but very rewarding if you can pull it off, as Airspasm juggles lead to some of Kenjiro's highest damage.
2B
Kenjiro's only grounded normal that is significantly disjointed above him. Also lowers his profile. Consistent, but has poor followups.
2B>214B
- Will land 2 hits if the opponent is close and relatively low to the ground when 2B connects.
- Will land 3 hits closer to the corner.
- Better option than 623B if you have meter because it's easier to save your super.
2B>623B
- Will land 2 hits at most midscreen and only if the opponent is very close.
- Can land all 3 hits and partially in the corner.
- Difficult to do with meter due to input overlap with 236236B.
2B>microdash 5A loops
- Corner only, but can be picked up from about half a jump's distance away from the corner due to Kenjiro's long 5A.
214A/B
Has upper-body invincibility starting from the first active frames, allowing it to beat most jump-ins clean. Only follow-up is a cancel to 236236B.
Airspasm Combos (not juggles)
Rising j.A starter (somewhat fake, read the notes)
Start at around the tip of 5A distance, dash, forward jump, and hit A immediately when you go into the air. Instant j.A will whiff on Mario but will hit most characters if timed right (needs further testing).
1 bar
j.A>j.C (mash, 5 hits)>j.D>5A>cl.B>6C>214B>236236D (332 damage, 382 in rage)
- Much harder or impossible to do on shorter characters like Mian Hua Tang due to the j.C whiffing or not comboing. The j.C needs to be pressed early enough so that it hits on the way up, but late enough that it is still active on the way down to pick up more hits. Full combo confirmed possible on Ken and Yin Yin.
- If the opponent reacts fast enough they can crouch to avoid some of the hits of j.C. An experienced player will probably crouch on reaction whenever they get hit, but if they crouch, it is more difficult for them to block further jumping normals. A savvy opponent can crouch to get out of the combo, then hold left/right and release down to instantly stand block, but j.C and j.D can both cross up so they will still have to guess. If they guess wrong, you only lose a couple j.C's and your combo scaling gets reset.
- Cancel the third hit of 214B, if the fourth hit lands 236236D won't connect.
- ToD on most 2⭐ health characters even outside of rage.
2 bars
j.A>j.C (mash, 5 hits)>j.D>5A>cl.B>6C>214B>236236B>236236D (400 damage, 499 in rage)
- Cancel the seventh hit of 236236B outside of rage and the eleventh hit in rage
- ToD outside of rage on everyone it works on except Terminator, Xiao Pan, Kenjiro, Da Lan, Violent Dong Dong, and Bioman.
- ToD in rage on everyone except Bioman (and the bonus round Car lol) provided the beginning section of the combo connects.
Can spend a third bar to make it a ToD on Bioman as well.
Pseudo-infinite
With perfect execution, it is possible to combo an instant rising Airspasm j.A off of a deep j.C or j.D. The hardest part is instantly dashing and jumping after landing the j.C/D, the most consistent way I've found to time it is to buffer the first 6 input as you're landing from the j.C/D, then press 9 right as the landing lag wears off. If you manage to combo the rising Airspasm j.A, you can lead into the j.A>j.C>j.D string described above, which can loop into another instant Airspasm j.A. The opponent can avoid the reset into j.A and most of the hits of j.C by crouching out of hitstun, however, this will make it more difficult for them to block subsequent jump-ins and will open them up to instant overhead j.C. The opponent can roll out if you leave a gap ̶b̶u̶t̶ ̶r̶o̶l̶l̶i̶n̶g̶ ̶i̶s̶ ̶b̶u̶s̶t̶e̶d̶ ̶a̶n̶y̶w̶a̶y̶ ̶a̶n̶d̶ ̶w̶o̶u̶l̶d̶ ̶b̶e̶ ̶r̶e̶s̶t̶r̶i̶c̶t̶e̶d̶ ̶i̶n̶ ̶a̶ ̶h̶y̶p̶o̶t̶h̶e̶t̶i̶c̶a̶l̶ ̶c̶o̶m̶p̶e̶t̶i̶t̶i̶v̶e̶ ̶s̶e̶t̶t̶i̶n̶g̶.
Throw Combos (Corner Only)
You need to be facing the corner to combo out of 6B throw, and facing away from the corner to combo out of 6D throw.
6B throw>5A>microdash 5A>microdash 5A etc.
- Standard DDND corner juggle infinite, but notable because Kenjiro lacks ways to set it up from his BnBs.
- Character specific, confirmed to work on Fei Fei, Ken, and Kenjiro, fails on high throw pushback characters like Mario and A Shuang.
Dash to clip into opponent>6B throw>5A>microdash 5A>microdash 5A etc.
- Works on more characters than the above method due to better spacing.
- It's easier to clip into the opponent when they're waking up or after an air reset. Walking can also work.
- You'll know that you've got the spacing right if the opponent's model is literally inside Kenjiro's bicep as he grabs them.
6B throw>microdash 5C>5B>623A (129 damage)
- Only use if you're too noble to go for infinites.
- Doesn't work on A Shuang or Mario due to higher throw pushback, 5B doesn't connect on Xiao Pan due to pushback. Probably more characters this doesn't work on, requires more testing.
- 623A is used instead of 623B because the heavy version only gets a single hit, which does less damage than single hit light version.
- Can be somewhat difficult to execute due to accidentally getting 6C instead of microdash 5C. 2A can be used instead on some characters, and larger characters don't require a microdash to link 5C.
- If you stop at 5C the opponent will be air reset and you can dash in for a cheeky throw reset. 2A has 2 less frames of recovery making it even better for this purpose if you can land it. This is more often than not a better option than the full combo!!
- No metered extensions afaik.
6D throw>5A>microdash 5A>microdash 5A etc.
- Another corner juggle infinite.
- Works on most characters, but not Mario.
6D throw>cl.B>6D throw reset
- Character specific, confirmed to work on Dong Dong.
- Requires a very specific spacing with your back to the wall.
- If timed correctly, can loop into itself. This seems to be a reset infinite as there are a few frames after the opponent lands from an air reset where they cannot roll but you can still start up a throw.
