| BiOS
|
|
|
| Health |
100
|
| Dash Time |
12 Frames
|
Story
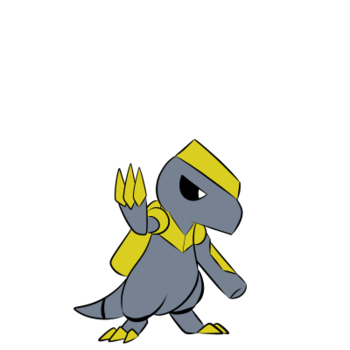
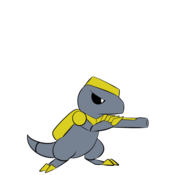
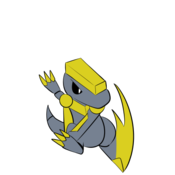
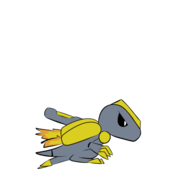
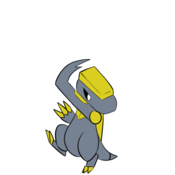
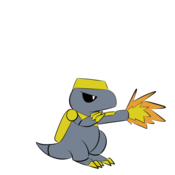
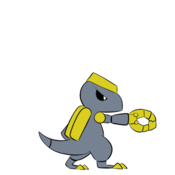
BiOS is a robot built by Cyrus for the purpose of protecting the facility and defeating Draco. Designed after the velociraptor, he is meant to be a quick and efficient killer. However, since Cyrus had too much free time with him hanging around, he installed multiple home appliances into BiOS' body for fun.
Gameplay Overview
BiOS is a rushdown character with the best movement in the game, allowing him to get in and out of a fight relatively easily, and stick to the opponent with multiple options once he does. However, his lack of range and mid-range options may require him to take some risks to get in.
| Strengths |
Weaknesses
|
- Mobility: Has the best ground speed in the game, good dashes, and a far-reaching jump
- Frame Data: Has very good frame data, with the fastest N-Attack in the game and very safe moves
- Close Range: Arguably the best close range in the game, due to his frame data and multiple options
|
- Range: Struggles at mid and far range, where he will often be forced to 50/50 a committal ground/air approach
- Disjoints: Lacks disjoints, and will be easily stuffed out by them
|
Move List
Normal Attacks
N-Attack
5A you will see this a lot you will see this a lot
|
| Damage
|
Startup
|
Active
|
FAF
|
Adv on Hit
|
Adv on Block
|
| 10
|
7
|
8
|
31
|
+1
|
-3
|
BiOS's fastest move and the fastest N-Attack in the game. Very safe, but as with all N-Attacks, can be stuffed out if the opponent blocks one -- otherwise very spammable. You will be using this mainly as a jab check or to continue close range pressure on the opponent. Since landing too many will put the opponent out of range, you must eventually mix up with an F-Attack, grab, or other move.
|
|
F-Attack
6A
|
| Damage
|
Startup
|
Active
|
FAF
|
Adv on Hit
|
Adv on Block
|
| 12
|
20
|
4
|
45
|
+1
|
+5
|
BiOS jumps forward a short distance and hits the opponent with an overhead cannon swing. This move is PLUS ON BLOCK and is vital for continuing your offense, especially to stick on an opponent that's drifting away (either due to N-Attack knockback or just walking back). Since it's +5, if the opponent buffers any move, it will ALWAYS start before BiOS' N-Attack stuffs it out. However, the tradeoff is F-Attack's very long startup -- if the opponent predicts an F-Attack, they will be able to N-Attack to hit you during the startup. Use these 2 moves to create your offense!
|
|
B-Attack
4A SHOOORYUKEN SHOOORYUKEN
|
| Damage
|
Startup
|
Active
|
FAF
|
Adv on Hit
|
Adv on Block
|
| 5, 9
|
12, 25
|
5, 8
|
60
|
+2 (Launch)
|
-36
|
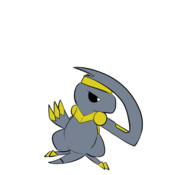
BiOS does a shoryuken (invincibility not included)! 2-hit launcher, one scooping the opponent off the ground before an aerial explosion. VERY unsafe on block, but is a great anti-air and one of the fastest launching attacks. Combos into itself, and works well as a high-risk close-range pressure option, especially after an F-Attack to increase the likelihood of stuffing out an opponent attack.
|
|
Specials
N-Special
5B
|
| Damage
|
Startup
|
Active
|
FAF
|
Adv on Hit
|
Adv on Block
|
| 10
|
35
|
72
|
50
|
~+15
|
~+3
|
BiOS shoots a laser out of his cannon arm. The laser moves very quickly, but in return BiOS' animation is very slow in comparison to other projectile moves. This is meant to give BiOS a safer option from far range, but won't do much other than possibly bait an opponent approach, or allow you a projectile to follow behind with a dash or jump. Due to the speed, it doesn't have followups other than possible niche situations.
|
|
F-Special
6B
|
| Damage
|
Startup
|
Active
|
FAF
|
Adv on Hit
|
Adv on Block
|
| 10
|
30
|
4
|
60
|
+8
|
-1
|
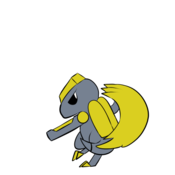
BiOS' jump move! Very quick, throws you out far, AND is safe on block. The only real downside is that it's a jump move with no disjoint -- with proper setup from the opponent, you will get stuffed out often since you're otherwise defenseless. However, once you're in, you get to play the best part as BiOS! Also guarantees a jab on hit.
|
|
Dash Moves
B-Special
4B he is approaching your location rapidly he is approaching your location rapidly
|
| Damage
|
Startup
|
Active
|
FAF
|
Adv on Hit
|
Adv on Block
|
| --
|
17
|
--
|
35
|
--
|
--
|
BiOS dashes forward, extending his hurtbox. This differs from his forward dash in a few ways (duration/trajectory/etc.), but primarily that it acts as a STANCE in the same way that Draco's jump gives him access to limited but unique moves! After being in your B-Special dash for 17+ frames, you can input A for his Dash-Attack, B for his Dash-Special, or C for his Dash-Grab.
|
|
Dash-Attack
4B > A
|
| Damage
|
Startup
|
Active
|
FAF
|
Adv on Hit
|
Adv on Block
|
| 4, 7
|
4, 14
|
4, 4
|
25
|
+8
|
+3
|
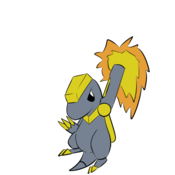
BiOS slashes before swinging his cannon arm into the air. This is an extremely quick 2-hit launcher that is PLUS ON BLOCK(!!!), with ludicrous frame data that is only balanced by the fact that it's locked behind BiOS' B-Special dash, which effectively adds at least 17 frames to the startup and extends his hurtbox dramatically. While you'll mainly be mixing this up with Dash-Grab, you'll rarely go wrong by using it out of a dash.
|
|
Dash-Special
4B > B the COWARD'S way out the COWARD'S way out
|
| Damage
|
Startup
|
Active
|
FAF
|
Adv on Hit
|
Adv on Block
|
| 10
|
8
|
4
|
30
|
+0
|
-5
|
BiOS blasts with his cannon, shooting him backwards. This is a safe move to fake out an approach, but also gives up your way in. Most likely a situational option at best.
|
|
Dash-Grab
4B > C
|
| Damage
|
Startup
|
Active
|
FAF
|
Adv on Hit
|
Adv on Block
|
| 5
|
12
|
8
|
40
|
--
|
--
|
BiOS does a grab out of his dash. The throw is identical to F-Grab, allowing him to get his highest damage grab combo.
|
|
Grabs
N-Grab
5C
|
| Damage
|
Startup
|
Active
|
FAF
|
Adv on Hit
|
Adv on Block
|
| 7, 7
|
12
|
8
|
40
|
+6
|
--
|
BiOS grabs the opponent and drills his arm into the opponent, hitting twice. This grab simply leaves the opponent on the floor next to BiOS at +6, with no guaranteed followups but allowing him to continue his pressure quickly. This can be used as a pressure mixup between N-Attacks and F-Attacks, but can also be a mix-up with F-Grab since the timing may throw off the opponent.
|
|
F-Grab
6C
|
| Damage
|
Startup
|
Active
|
FAF
|
Adv on Hit
|
Adv on Block
|
| 5
|
12
|
8
|
40
|
--
|
--
|
BiOS grabs the opponent and shoots them forward through the air. Your main combo grab, allowing either a Dash-Attack or F-Special as a followup, or even a B-Attack if you have the opponent next to a wall.
|
|
B-Grab
4C
|
| Damage
|
Startup
|
Active
|
FAF
|
Adv on Hit
|
Adv on Block
|
| 5
|
12
|
8
|
40
|
--
|
--
|
BiOS backflips the opponent behind him. Combos into B-Attack, mainly used to switch places with the opponent.
|
|
Combos
Resets refer to dropping combos early / using a lower damage move to end a combo faster in order to throw the opponent's defensive timing off. While more potent for Draco, BiOS can use them decently.
F-Grab
- F-Grab > (B-Special) > Dash-Attack > (B-Special) > Dash-Attack > (B-Special) > Dash-Attack > N-Attack - MAX Damage (48) ONLY at wall, buffer all attacks for consistency
- F-Grab > (B-Special) > Dash-Attack > B-Attack > N-Attack - (40)
- F-Grab > (B-Special) > Dash-Attack > B-Attack - More consistent between devices (30)
- F-Grab > F-Special > N-Attack (25) - Easy
B-Attack
- B-Attack > B-Attack - MAX Damage (28)
- B-Attack > N-Attack (24) - Generally not very helpful even as a reset
B-Grab
- B-Grab > B-Attack - MAX Damage (19)
- B-Grab > N-Attack - Reset? (15)
Dash-Attack
- Dash-Attack > B-Attack - MAX Damage (25)
- Dash-Attack > N-Attack - Reset? (21)
N-Special
Following closely behind a laser can lead to combos due to the hitstun. Being precise and dependent on positioning, practicality is unknown.
- N-Special > Dash-Attack > B-Attack - MAX Damage (35) - Start laser at about max B-Special distance
Strategy
BiOS' goal is to get in right next to his opponent. This can be done in multiple ways -- first is patiently, either by throwing out N-Special lasers, or walking up and blocking. The other two main approach options are B-Special and F-Special, which will usually force the opponent to choose to either defend with anti-airs or ground moves. Some characters can defend against both at once (e.g. Plexie with a projectile out), which will require you to practice more patient methods. Note that B-Special and F-Special are generally high risk high reward approaches -- choose when to use them carefully! They can also be unwieldy at mid range, so position accordingly.
Once you get in, you have multiple options. N-Attack is the quickest and safest, usually stuffing out whatever the opponent throws, and can keep the opponent in check by forcing them to block. Once they're stuck blocking, you can either throw out an F-Attack to get more plus frames while staying relatively safe, or a grab for when you're feeling confident. F-Grab will get you more damage, while N-Grab will keep up your pressure and keep the opponent close if they happen to be drifting away. If you're plus or have a read on the opponent using a slow move, B-Attack is your highest risk option which will also get good damage on the opponent. If things ever look dicey, you can always dash away with the universal backwards dash (44 / double tapping back)! Staying patient with your approaches and mastering your offense will make you a very threatening BiOS player.
