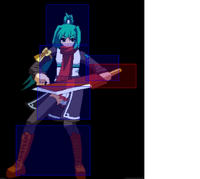
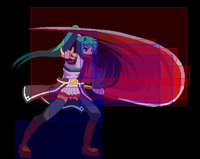
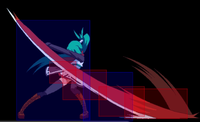
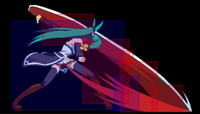
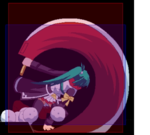
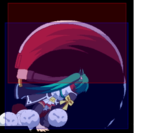
E's Laf/Serena A-Type
Introduction
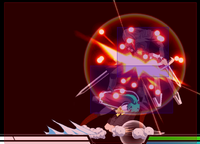
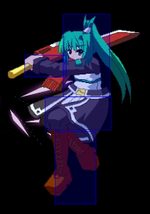
A-Serena is a lightning-fast rushdown character who utilizes her mobility, safe pressure, and mixups to open opponents up. She has a multitude of ground and air mobility options to outmaneuver her opponent and keep them guessing. Her pressure is likely the scariest in the entire game, especially in the corner, where she can set up a long series of 50/50s and eventually break the opponent's guard with her Eleven super move. Her weaknesses are typical for a fast 'pixie' character; mediocre reach on her normals mean she gets outpoked easily, and possessing the lowest health in the game means players can't afford to make many mistakes.
-Pros and Cons-
-Pros-
+ Strong, fast normals
+ Amazing mobility: Run speed, air options, fastfall, movement Specials
+ Excellent high-low mixup potential
+ Ambiguous pressure and strong pressure resets
-Cons-
- Poor reach on most moves
- Damage is low
- Extremely low health means Serena dies in 2 combos to most of the cast
Abilities and Movement options
Health Total: 6896
Dash
(66) - Quick forward dash, can hold (6) to keep running.
Backdash
(44) - Ludicrously good backdash that recovers in 12F. Nobody should ever have a backdash this good.
High Jump
(1) or (2) or (3) then (7) or (8) or (9) - A high-altitude jump into the air. Retains other air options.
Double Jump
(7) or (8) or (9) in the air - A second, shorter jump allowing for more air time or changes in aerial momentum. Serena can double jump and still retain one airdash.
Air Dash
(66) or (44) in the air - A burst of forward or backward aerial momentum. Serena is allowed two jumps and one airdash, or her regular jump and two airdashes. Airdashes can be done in either direction, such as two forward airdashes, one forward one back, etc.
Fastfall
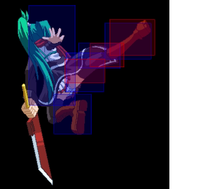
(2D) in the air - This will cause Serena to descend rapidly from the air. Can cancel into j.D, j.2C, or j.214A to attack while falling.
Move List
Normal Moves
| 【5A】
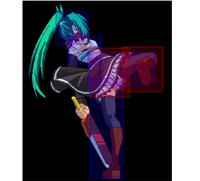
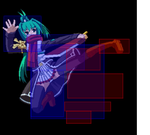
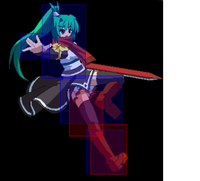
[Mid | Damage - 200 | Startup - 4f | Active - 4f | Recovery - 4f | Advantage - +2f | Jump cancelable]
A knee to the gut. Fast startup, almost no recovery, plus on block. A good move, but has the shortest reach of all Serena's grounded normals. |
| 【5B】
[Mid | Damage - 410 | Startup - 6f | Active - 2f | Recovery - 18f | Advantage - -6f | ]
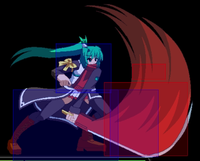
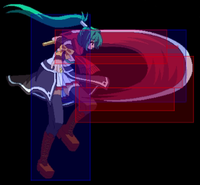
A fast vertical chop. Due to the slight step forward during startup, one of Serena's better-ranged standing normals. Gatlings and special-cancels well, however it isn't JCable. |
| 【cl.5B】
[Mid | Damage - 440 | Startup - 6f | Active - 4f | Recovery - 9f | Advantage - +1f | Jump cancelable]
A close-in elbow. Take everything good about Serena's 5B, then halve the recovery and make it JCable. A Close normal, so it has no use in neutral and is a combo/pressure tool only. |
| 【5C】
[Mid | Damage - 670 | Startup - 11f | Active - 2f | Recovery - 17f | Advantage - -3f | ]
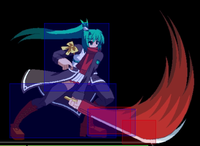
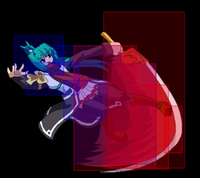
A heavy swing. Similar range to 5B though a tad shorter, this move has a generous hitbox that allows it to act as an antiair or catch jumpers. On air hit, causes hard knockdown. |
| 【5D】
[Mid/Mid | Damage - 690/720 | Startup - 24f/13f | Active - 2f/3f | Recovery - ?f/17f | Advantage - +11f | Jump/Dash cancelable]
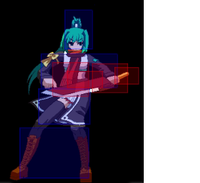
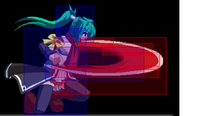
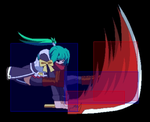
A double swing, aimed at the toes. Despite the animation, hits Mid. Slow startup, but every other part of this move is excellent. Far range, Chains reasonably well off of numerous normals, does high damage, deals a lot of guard damage, and allows for pressure resets if blocked. The second swing causes Float on CH/Fatal Shift. |
| 【2A】
[Mid/High | Damage - 360/430 | Startup - 8f/8f | Active - 2f/8f | Recovery - 6f/9f | Advantage - -11f/-1~2f| ]
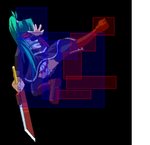
Serena hops forward and performs a double roundhouse. Goes over lows. The second kick is high, giving Serena a 'crouching overhead' of sorts. With one meter, you can T-cancel the startup into fastfall for a high/low/throw mixup. |
| 【2B】
[Low | Damage - 400 | Startup - 6f | Active - 2f | Recovery - 10f | Advantage - +2f | ]
A crouching horizontal swing. Serena's fastest Low normal. |
| 【2C】
[Mid/Mid/Mid | Damage - 280/320/350 | Startup - 12f/?f/?f | Active - ?f/?f/6f | Recovery - ?f/?f/21f | Advantage - -11f/-9f/-5f| Jump cancelable]
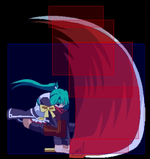
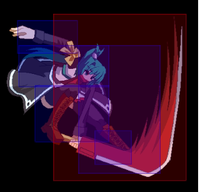
A wide, multi-hitting upward swing from a crouch. Massive hitbox, vacuums on hit, and effectively safe on block due to the JC property. Easy to hitconfirm. |
| 【2D】
[Low | Damage - 460 | Startup - 8f | Active - 4f | Recovery - 18f | Advantage - -8f | ]
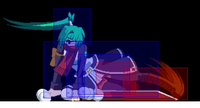
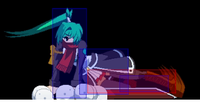
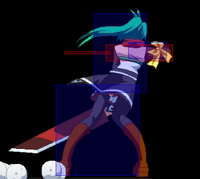
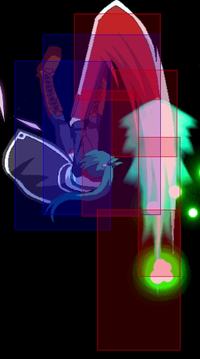
A sweeping slide. Reaches a bit beyond Serena's 5D range. Lower's Serena's hurtbox a bit as she moves forward. It's a great tool to get you in when you start suffering pushback during your pressure, and it can be special canceled into 214A or 214B to make it safe, as well as T-canceled during startup for throw setups. |
| 【j.A】
[Mid | Damage - 190 | Startup - 4f | Active - 3f | Recovery - 13f | Advantage - | ]
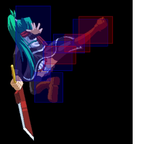
A steep, downward angled kick in midair. Unlike B-Serena's j.A, this (perplexingly) does not hit overhead. You can chain it into itself indefinitely to create a funny downward ladder and allow you to land with frame advantage, or create a mixup with chained j.D/land 2B. |
| 【j.B】
[High | Damage - 440 | Startup - 8f | Active - 2f | Recovery - 15f | Advantage - | Jump cancelable]
A horizontal swing, similar to Serena's 2B. The speed of does not match up to j.A, but it is your most flexible jump-in overhead, as it can be jump canceled or j.2D fastfall canceled into j.D/land 2B mixup. |
| 【j.C】
[High | Damage - 560 | Startup - 12f | Active - 4f | Recovery - 22f | Advantage - | ]
A double-handed overhead chop. The slowest of Serena's air normals. Shortens her hurtbox dramatically, especially during the latter portion of the move. |
| 【j.D】
[High | Damage - 830 | Startup - 10f | Active - 3f | Recovery - 11f | Advantage - | ]
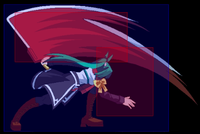
Serena kicks backwards off her own sword in midair, almost like a command backdash. Inflicts high knockback on hit. Surprisingly fast and has a good hitbox. The recovery is low even on whiff, allowing you to use your remaining air options freely to punish antiair attempts, follow up hits with a combo, or fastfall to gain ground. A very useful move that's highly important for Serena's air game.
|
Command Normals
| 【6A】
[Mid | Damage - 440 | Startup - 8f | Active - 5f | Recovery - 16f | Advantage - -7f | ]
A backturned elbow. Deceptive range on this, somewhere right in between 5A and 5B's reach. Like most 6As, there is some kind of antiair property despite the hurtbox, allowing Serena to antiair even deep jumpins with this. |
| 【6C】
[High | Damage - 650 | Startup - 26f | Active - 1f | Recovery - 30f | Advantage - -15f | ]
A telegraphed forward-flipping overhead. Good reward if it hits, but it doesn't gatling from anything and can't be canceled into anything on block, making it one of Serena's most punishable moves. Probably more useful when combined with T-cancels for the quick burst of momentum. |
| 【j6A】
[Mid/Mid | Damage - 350/380 | Startup - 6f/9f | Active - 2f/5f | Recovery - 6f/13f | Advantage - | ]
Double roundhouse, very close to Serena's 2A. Fast air-to-air, also good for keeping the opponent juggled during air combos. |
| 【j2C】
[High | Damage - 570 | Startup - 17f | Active - Until landing | Recovery - 30f | Advantage - | ]
A forward flip into a high-drop overhead, similar to Serena's 6C. May have uses as a surprise attack or anti-antiair, but like 6C, it's very risky. |
| 【66A】
[Low | Damage - 670 | Startup - 4f | Active - 17f | Recovery - 15f | Advantage - -7 ~ -16 | ]
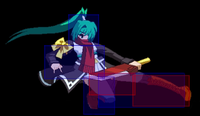
Performed only during Serena's forward dash. A full screen sliding low kick. |
| 【66C】
[High | Damage - 960 | Startup - 9f | Active - 2f | Recovery - 33f | Advantage - -17 ~ -18 | ]
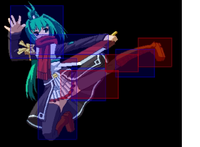
Performed only during Serena's forward dash. A running jump kick with decent untech time. Usable in certain combo paths. Can be TCed right in the opponent's face to bait a counterhit or follow up with pressure. Airdash immediately after the TC to retain your air options. |
Throws
| 【Ground Throw】
[Throw | Damage - 750 | Startup - 33f | Active - 1f | Recovery - 24f | Advantage - | Hard knockdown]
Serena flips over the opponent's head and dashes them on the floor. Causes Hard knockdown if not followed up with an OTG hit. Can be comboed after. |
| 【Air Throw】
[Throw | Damage - 830 | Startup - 32f | Active - 1f | Recovery - 7f | Advantage - | ]
Serena throws her opponent to the floor with one hand. The opponent can tech after bouncing off the floor once. It's possible to combo afterwards with a dash forward before if you're quick enough. |
Special Moves
| 【41236A - スライドブルー - Slide Blue】
[Mid | Damage - | Startup - 9f~ | Active - ~ | Recovery - ~ | Advantage - ~]
Cool little ground fireball, good for setting up your approach. You can TC right as the fireball comes out to cancel the recovery and dash in behind it. |
Blue Slide Charge - 41236B:
[Mid | Damage - | Startup - ~ | Active - ~ | Recovery - ~ | Advantage - ~]
|
| 【236C/D + 4D - バニティ + ソルフア】
[Mid | Damage - | Startup - ~ | Active - ~ | Recovery - ~ | Advantage - ~]
Serena quickly spins and performs a backspinning upslash. A combo tool, with few uses in neutral. The D version steps a bit forward and launches with decent untechable time for followups. |
Striker - 214A (air OK):
[Mid | Damage - | Startup - ~ | Active - ~ | Recovery - ~ | Advantage - ~]
|
Lead Star (C after Striker):
[Mid | Damage - | Startup - ~ | Active - ~ | Recovery - ~ | Advantage - ~]
|
| Lead Fly (D after Striker):
[Mid | Damage - | Startup - ~ | Active - ~ | Recovery - ~ | Advantage - ~]
|
| Lightning Rod - 214B/C:
[Mid | Damage - | Startup - ~ | Active - ~ | Recovery - ~ | Advantage - ~] Serena winds up, and dashes forward at a trajectory determined by the button pressed.
|
Supers
Eleven - 236236B:
|
Paint in Grey - 632146C
|
Combos
Note: You'll need to adapt Serena's air combos on the fly depending on your positioning and opponent's weight class. If they're too low for j.C > j.D, try j.C > j.6A or just j.D instead.
Serena's best corner carry is achieved by using air dashes after her jump cancels.
- Midscreen:
- Throw > 66C - 1147 damage
- 2B > 5C > 214A~C > A > (delay) > 5B > 2C > 236D > j.A > j.B > j.C > j.D > 214A > C - 3220 damage
- 2B > 5C > 214A~C > A > 5A > 5A > 236D > j.A > j.B > j.C > j.D > 214A > C - 2901 damage, side switch
- 2B > 5C > 214A > 5B > 2C > 214C~B > j.B > (land) > j.6A(2) > j.B > JC > j.A > j.B > j.C > j.D > 214A - 2531 damage, corner to corner carry
- 2B > 5C(FC) > 5D > 214A > 5B > 2C > 214C~B > j.B > (land) > j.6A(2) > j.B > JC > j.A > j.B > j.C > j.D > 214A - 3554 damage, 1 bar, corner to corner carry
- 2B > 5C(FC) > 5D > 6A > 236C > 236236B > 5B > 2C > j.A > j.B > j.C > j.D > 214A > C - 4413 damage, 3 bars
- 2D > 41236A > TC > 5B > 2C > 214C~B > 5B > 2C > j.B > j.C > j.D > 214A > C - 2578 damage, 1 bar
- Near Corner:
- 2D > 41236A > TC > 5B > 2C > 214C~B > 5A > 5A > 236D > j.A > j.B > j.C > j.D > 214A > C - 2879 damage, 1 bar
- AA j.B > j.C > j.D > 214A > C(FC) > (land) > 66 > 5D > 5B > 2C > j.B > j.C > j.C > 214A > C - 3788 damage, 1 bar
Profile
Name: Serena
Age: 18
Height: 149cm
Weight: 45kg
Weapon: The sword, 'Rush Chimera'
Birthday: Unknown (Main deemed it 11/28)
Blood Type: B
Graduate: Uppermost Floating City (number unknown)
Personality: Shy, withdrawn
Loves: Main
Hates: Coldness

