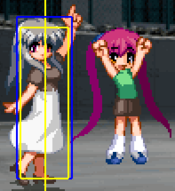
Eternal Fighter Zero/Minagi Tohno
Introduction
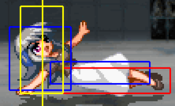
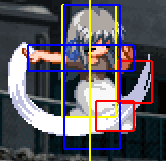
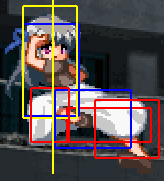
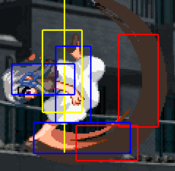
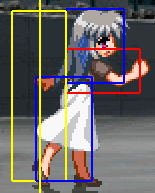
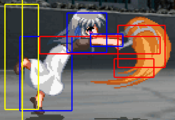
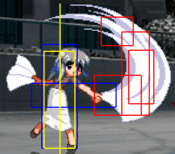
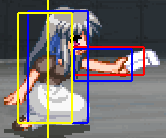
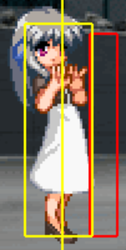
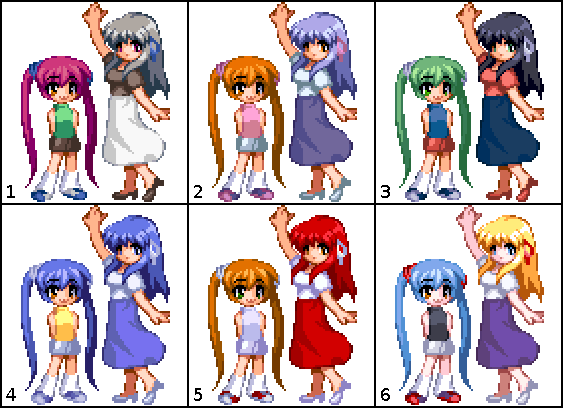
Tohno Minagi (遠野 美凪) is a puppet character who can effectively lock down opponents with the help of her best friend, Michiru. The vast majority of her special moves are tied to Michiru, commanding her to perform various actions such as moving, attacking, and switching stances. Michiru's stance mechanic gives Minagi access to safe and repeatable stance cancels but also forces her to choose between an immobile Michiru or a Michiru with slow attacks at any given time. The combination of Michiru's multihitting moves and Minagi’s normals allow the pair to safely pressure and mix up their opponents. Since Michiru is always present on the stage and is only ever vulnerable when attacking, she can easily "sandwich" the opponent into positions where they cannot easily deal with her as she attacks from behind. However, this also means that players will need to constantly be repositioning Michiru (unlike Mai who summons her puppet at-will) and if she gets hit then Minagi will be stuck with her mediocre solo moveset for several seconds.
Minagi is one of the heroines of AIR, a visual novel produced by Key in 2000. She is a top student of the school in the town where the story takes place. Her lack of expression gives people an enigmatic impression, though in reality, she is warm and loving. Minagi enjoys blowing bubbles, eating rice, and is the president of the astronomy club at school. Her best friend is Michiru, a bright and energetic girl who sees Yukito as a "rival" and usually greets him with a kick. During AIR, Yukito discovers Minagi's secret concerning her mother, and also learns the truth behind Michiru...
Minagi was added to EFZ's cast in Blue Sky Edition.
The in-game romanization of Minagi's surname is spelled as Toono instead of Tohno.
Stage: Abandoned Station (Day) (廃駅(昼))
BGM: Prism (虹)
Character-Specific Notes
- Minagi's puppet, Michiru, can switch between 2 stances with 5S. In Michiru's default stance, Unreadied, her move commands (4/6S) are available, she will automatically run towards Minagi if she is far away, and her attacks are generally weak and slow. In her Readied stance, Michiru cannot move at all, but most attacks done in the stance will be far improved. After a readied attack, Michiru will return to her Unreadied stance.
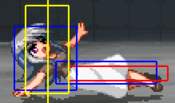
- Once Michiru starts attacking the opponent, she becomes vulnerable to attack herself. If Michiru is hit, she will fly up into the air and lie on the floor for 153 frames, unable to take any commands from Minagi. The launch Michiru takes when hit is consistent, but since she jumps in almost all of her moves the height at which she lands from can vary. When Michiru is hit on the ground she takes 48 frames to land, so at minimum Michiru will be uncontrollable for 201 frames (just over 3 seconds) whenever she takes a hit.
- Most Michiru commands can be done in the air, and while doing so Minagi will stop her air movement for the duration of her command animation. Minagi will be unable to double jump or airdash after issuing an air command.
- Minagi is one of a few characters who gain some throw invincibility after double jumping.
- Minagi has no moves which can counterhit nor does she have any which can be counterhit.
Normal Moves
| Frame Data Help | |
|---|---|
| The notation for the move lists can be found under Controls. | |
| Cells filled with a "-" indicate a placeholder. Cells filled by a "/" indicate a non-applicable field. | |
| Values separated by a "~" (X~Y) indicate a range or variance. A "~" preceding a single value (~X) may indicate approximation. A "-" separating frame values of a property (X-Y) indicate the duration of the property. | |
| Cell data accompanied by a ※ indicate properties unusual to the template. Explanations for such properties can be found at another ※ in the description. If a move requires multiple ※'s, subscripts will be attached to indicate relation (※1, ※2, ※3...). | |
| Frame data with decimal values .33 or .66 relate to subframes. | |
| Version | Used for moves with multiple special attacks on one motion. |
| Damage | The base damage value that the specific hit will do. See damage scaling for more information. |
| Guard | Indicates how the move must be blocked, if it can be blocked at all.
Low: Crouch Block |
| Property | Shows what properties the move has and the time (in frames) that these properties are active. Example: "I: 0.33-9", which means the move is invulnerable on the first subframe of the move until the 9th full frame (or 27th subframe).
I: Full Invincibility |
| Startup | Indicates where the move's first active hitbox is. |
| Active | Total frames the hitbox is active for. |
| Recovery | Total frames until the character can block. Note: After the recovery of any action, before any other action may occur, there exists 1 frame in which the only action you may take is to block. |
| Adv Hit | Frame advantage on hit. |
| Adv Block | Frame advantage on block. |
| Cancel | Possible cancel options.
N: Normals |
Standing
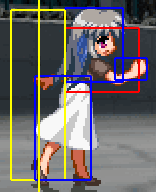
5A
5A
|
|---|
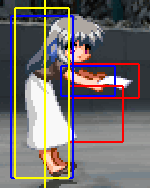
c5B
c5B
|
|---|
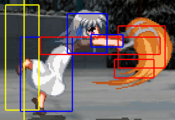
f5B
f5B
|
|---|
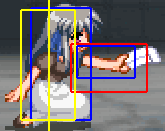
5C
5C
|
|---|
Crouching
2A
2A
|
|---|
2B
2B
|
|---|
2C
2C
|
|---|
Jumping
j5A
j5A
|
|---|
j5B
j5B
|
|---|
j5C
j5C
|
|---|
Dashing
66A
66A
|
|---|
66B
66B
|
|---|
66C
66C
|
|---|
662A
662A
|
|---|
662B
662B
|
|---|
662C
662C
|
|---|
Grabs
Ground Grab
Ground Grab
c6C/4C |
|---|
Air Grab
Air Grab
cj6C |
|---|
Special Moves
Specials
*S
Chiruchiru _____
4/5/6S |
|---|
236*
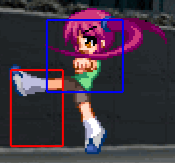
Chiruchiru Kick ちるちるキック (j)236* A/B A/B C (Unreadied) C (Unreadied) C (Readied) C (Readied)
|
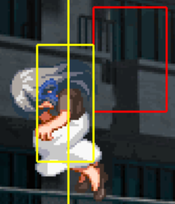
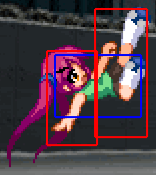
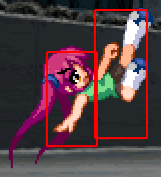
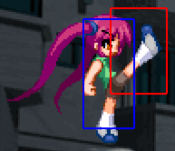
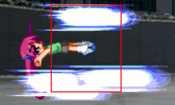
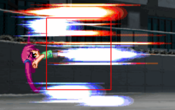
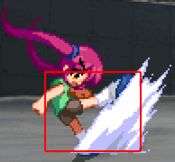
Michiru jumps forward while kicking. If she is not readied, Michiru will bounce off on contact with the opponent, resulting in a huge amount of recovery and displacement. When readied, she will launch the opponent and recover as normal, passing through the opponent instead of bouncing off. Distance traveled ascends with button strength. If this move is input while unreadied Michiru is automatically catching up to Minagi, her attack will have readied startup, yet still won't completely behave like the readied versions. 236A and 236B will start up and recover as if they were readied but still won't launch the opponent. 236C is a similar story, having readied startup but still doing the unreadied wallbounce. ※First value is on whiff, second is on hit/block. |
|---|
623*
Chiruchiru Drilling Bow Thigh ちるちる穿弓腿 623* A/B A/B C C
|
Michiru does a launching up-kick. This move is not particularly useful, and for whatever reason, it is the only attack command that cannot be issued from the air. If this move is input while unreadied Michiru is automatically catching up to Minagi, Minagi will go through the command animation (and even spend RF if 623C was input) but Michiru will not do anything. |
|---|
421*
Chiruchiru Iron Head Merit ちるちる鉄頭功 (j)421* Nerfed into obscurity. Nerfed into obscurity.
|
Michiru leaps into the air and comes crashing down head first. Has two hits, but they do not combo into each other very reliably. Michiru first hits on her way up, and the second hit is while she crashes down. The first hit's hitbox is only active if the opponent is airborne. This move is not particularly useful. |
|---|
214*
Chiruchiru Whirlwind Leg
ちるちる旋風脚 (j)214* |
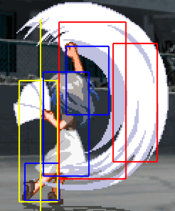
Michiru does a hurricane kick. By far the most useful assist. Crucial to Minagi's okizeme game as it allows Minagi to run high/lows while the opponent is in blockstun. You can also do left/right mixups on the opponent's wakeup by dashing above them. By default Michiru spins in place, while the readied version will slowly move towards Minagi. 3f gap between hits. |
|---|
41236*
Rice Ticket Presentation
お米券進呈 41236* |
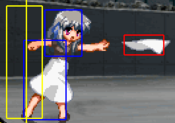
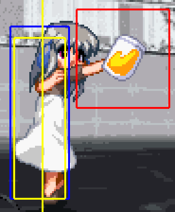
Minagi throws a ticket. |
|---|
Eternity Specials
236236*
Chiruchiru Kick Festival ちるちるキック祭り (j)236236* 236236A 236236A 236236B 236236B 236236C 236236C
|
No difference between unreadied and readied versions. |
|---|
214214*
Chiruchiru Solar Plexus Break
ちるちる鳩尾ブレイク (j)214214* |
Michiru does a powerful kick to the solar plexus. If Michiru is ready, she will roll towards the opponent until she is close enough to kick. |
|---|
214236*
Soap Bubbles しゃぼん玉 214236* Bubble hitboxes expand over time. Bubble hitboxes expand over time.
|
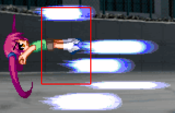
Michiru and Minagi both blow launching soap bubbles towards the opponent. Michiru blows bubbles for longer, giving Minagi time to move. Minagi blows her bubbles farther, getting more reach at higher levels. Bubbles travel at random trajectories and ※Michiru has random startup, subsequently blowing random amounts within the time she is allowed to blow bubbles. Minagi shoots bubbles at a faster rate with level, while Michiru keeps the same frequency (every 7 frames/6f gap) at all levels. If Michiru is not available, Minagi will blow bubbles by herself. |
|---|
Final Memory
FM
Star Sand
星の砂 222S |
|---|
Strategy
- A fair number of Minagi's normals actually have really good frame data, but due to their short reach or awkward hitboxes, are not as useful as they could be. You'll have to play around these shortcomings by using stance cancels and Michiru specials to lock down the opponent and run your mixup game. Michiru's positioning will also become extremely important during the course of the match. Finally, Minagi's mixups are quite good and fairly safe due to Minagi's ability to block during Michiru's attacks. A short insight on each of these items is presented below.
Stance Cancels
- Minagi can make use of Michiru's ready/unready ability to stance cancel her normals, cutting the recovery of her normals to 17 frames. This makes 5C(1), 2C, and 662C all go from punishable on block to plus. Buffering these cancels becomes very unsafe if the stance cancelled normal is RGed, so varying your timing and which normal you cancel on is extremely important to surviving and keeping your lockdown going.
Lockdown
- By abusing Minagi's ability to stance cancel and the great frame advantage provided by Michiru you can keep the opponent locked down for an extended amount of time. For example, you can 662B 5S 5C(1) 5S 662C 5S 5C(1) 236B IAD jAAAA... and continue on pressuring even further. Learn how to vary whether to stance cancel and use a Michiru special to keep the opponent guessing and preventing them from escaping your lockdown. It is also best if you learn how to convert off the random hits you may get during lockdown. There is no timer, so keeping the opponent blocking is only so helpful; you must get damage in somewhere to win the game.
Michiru's Positioning
- A good Minagi can work around any of Michiru's positionings, but a great Minagi will be able to manipulate her position with far less effort. Knowing how far each version of 236 and readied 214 will move Michiru, where she likes to position herself after correcting for long distances, and how far 4S and 6S move her will allow you to choose the correct positioning for the situation.
- Against characters with better normals, reach, or positioning, you will ideally want to place Michiru further away from you, and allow the opponent to close the distance. Since Michiru cannot be hit until she performs a special, the opponent will have to pass her and be vulnerable to any moves from behind. Ready her up at a good distance and either 236B or 236C when the opponent approaches. 236C will give you plenty of time to confirm a hit, even if the opponent hit you first. From here you are free to set up Michiru for okizeme.
- If the opponent must approach from the air (Akiko, Ayu, Neyu) you can play around a readied Michiru and use 421C as a homing anti-air that you can combo from, although this is a somewhat large commitment. Minagi also lacks good anti-air normals other than her 662C, which is also not ideal since as a dashing normal it requires Minagi to have specific positioning herself. Thankfully, Minagi has an above average air throw which usually gives her good oki.
- Michiru's distance from the corner dictates what oki you can use, and whether or not it will be safe. Minagi is generally good at carrying to the corner in her combos, but if she does a simple 2C knockdown she still gets to manipulate Michiru well with 4/5/6S cancels. If Michiru is not positioned ideally, 236* is a reliable oki tool. With better Michiru positioning, both unreadied and readied 214* (and sometimes 421*) will allow and more rewarding and varied mixups. If you wish to burn super for unconstestable oki, 236236A outside of the corner is an excellent choice.
Combos
| Notation Help | |
|---|---|
| Disclaimer: Combos are written by various contributors, some combo notations may deviate slightly from the notation listed below. For more information, see Controls | |
| IC | Input Instant Charge (22C) when you have the right amount of RF Meter. |
| FIC | Input Flicker Instant Charge (22C) when you have the right amount of RF Meter. |
| {X/Y/Z} | Move X or Y or Z can be used. |
| #* | Indicates that any of A, B and C may be used with #. Example: 214*. |
| [<- X] [-> X] | Side switch notation. All inputs grouped by the square brackets are performed facing the arrow's direction. They are still written as if they were done facing right, however. |
| [X]xN | Loop the inputs in the square brackets as many times as N. |
| c5B | Proximity normal only usable while close. |
| f5B | Proximity normal only usable outside of c5B range or when cancelled from another normal. Known as far 5B. |
| jX | Button X is input during your first jump. |
| djX | Button X is input during your double jump. |
| X(whiff) | Indicates that X is intended to whiff. |
| X(tech trap) | Indicates a combo ender intended to catch the opponent's air tech. The most common kind of tech trap is j6C, which will air throw early techs and jC later techs. Executionally identical to X(whiff) but different in purpose. |
| ~ | Indicates a followup for moves which have them. Example: 236A~236A. |
| .. | Indicates a short delay. |
| IAD | Indicates an Instant Air Dash. |
| IABD | Indicates an Instant Air Back Dash. |
| (X) | X move is omittable from the combo. |
| tk.X | Indicates the motion "X" is input immediately after leaving the ground. Stands for tiger knee. |
Replays for these combos can be found here.
No IC
No Michiru
Near corner 2A/B 5C jB 66 jAB land j.AAB~C land 5ABBC(1) 41236A
- When just outside of corner. Knockdown allows plenty of time to set up Michiru for mixups. (3386 DAMAGE)
With Michiru
Corner, Michiru near corner ... 2C 2141236A jB~C land 5ABBC(1) 41236A
- Damage and combo viability varies greatly on bubble RNG. You get good damage even if you can't follow up with 5B or jB. (3-4000 DAMAGE) [replay 1-4]
Red IC
No Michiru
2AA 5C (1) IC 662C jB 66 jA~B Land 662C jB~C djAABC 236A j6C
- This will work in at all ranges except from your own corner, so 3/4 and closer to the opposite corner. Does more damage and generally gives better Oki. To make 662C easier to land, make Sure you delay the j.B after 66 j.A to land as quickly as possible and get as much hitstun as you can. The j6C at the end is to catch techs. (3101 DAMAGE)
2AA 5C (1) IC 662C jB 66 jA~B Land 5BB 5C jB~C djAABC 236A j6C
- This only works midscreen or closer to the corner. On midscreen, you'll need to skip the c.B since it whiffs. A tiny microstep backwards into f.B works. It's more specific than the combo above, but it let's you deal more damage and retains the better Oki than 41236A. The j6C at the end is to catch techs. (3492 DAMAGE)
With Michiru
Blue IC
No Michiru
With Michiru
Corner throw BIC 2141236A 5BC jB~C land jAABC land 5ABBC(1) 41236A
- Most corner combos can go into a BIC 2141236A route. Bubble RNG plays a big role in damage numbers here. (6454 DAMAGE) [replay 1-8]
Corner, Michiru near corner, readied 214B hit 662C jB~C land 5BC(1) BIC 2141236A 5BC jB~C land jAABC land 5ABBC(1) 41236A
- Example of adding bubble super into a normal combo for a big damage upgrade. (6500-7200 DAMAGE) [replay 1-9]
Okizeme
236
- Corner
- For the most part, 236* will be your go to oki when you expect the opponent to mash or reversal, as it allows you to be block while Michiru will usually trade with the opponent and let you combo afterward. You can also use j236 on oki to go for a high low with jA/B or land 2B.
Readied 214
- Midscreen
- After a 2C 5S, you can 214B and go for a left/right mixup by jumping over the opponent and air backdashing for a sameside or not. Both options allow you plenty of time to combo into 662C. You can also do a late IAD over the opponent for a crossup.
- There is also the option for a high/low mixup with 662B/2B or 66C. If done early enough, you can combo into 662C without needing to IC.
- Corner
- You can use j214* to do a high/low mixup in the same manner described for j236*. Normal 66C/2B mix is still available as well. If blocked, you can do a second mixup and IC the overhead/low to confirm into a combo. Readied 214 in the corner will pull the opponent outside of the corner, allowing additional options after. Do be aware that the opponent can not be crossed up during uninterrupted blockstun, so doing a left right while the 214* is still going will be ineffective.
Unreadied 214B
- Corner
- Unreadied 214B will stay in place and make Michiru spin slightly higher. Due to the additional height, most characters will be able to crouch under the first few hits. With good timing you can throw the opponent for a combo. The opponent can block high to avoid this but then they are open to 2B. Since 66C is not needed for this mixup, it is harder to react to.
Win Quotes
| Japanese | English |
|---|---|
|
ハイカマーン… |
Yes, come on... |
|
(くいくい |
*tug tug* |
|
今日も元気だ |
You're spirited today too. |
|
……ガッツ… |
.......GUTS... |
|
進呈… |
I present, to you... |
|
進呈… |
I present, to you... |
|
進呈… |
I present, to you... |
|
進呈… |
I present, to you... |
|
…日本人は手篭め族 |
...The Japanese are rice-y people. ...blush |
|
(To UNKNOWN) |
(To UNKNOWN) |
|
(To Mai) |
(To Mai) |
|
(To Rumi) |
(To Rumi) |
|
(To Minagi) |
(To Minagi) |
|
(To Kanna) |
(To Kanna) |
|
(To Kanna) |
(To Kanna) |
Colors
In-game References
AIR References
- The train station in the background is where Minagi and Michiru usually hang out during AIR.
- The pieces of paper and and envelopes that Minagi constantly uses in her attacks are rice tickets. In AIR, she always hands out rice tickets to Yukito, and always carries at least 80 around.
- Minagi's "Soap Bubbles" move is a reference to her and Michiru's hobby of blowing soap bubbles in the game.
- Miangi's "Star Sand" move is a reference to the star sand that she gave to Michiru and Yukito during the game. It is one of her most treasured items.

