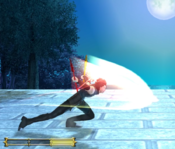
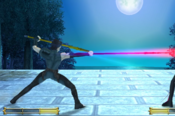
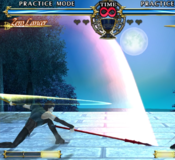
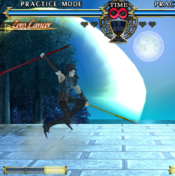
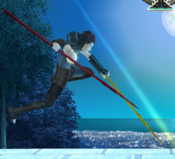
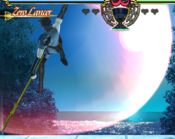
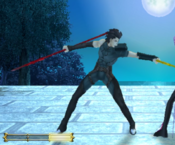
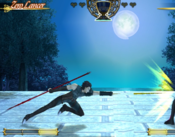
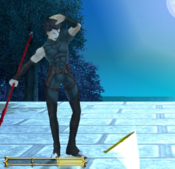
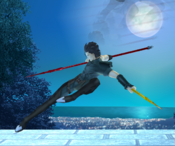
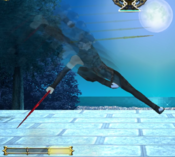
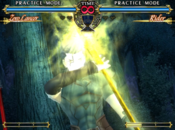
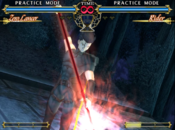
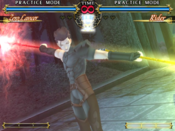
Fate Unlimited Codes/Zero Lancer
| Zero Lancer | |
|---|---|
| Health | 9,300 |
| Prejump | 4 |
| Backdash | 30F (Invulnerable 1-20) |
| Backdash Distance | 1.9062 |
| Sidestep Type | Aggressive Inward Spiral |
| Weight | Medium |
Introduction
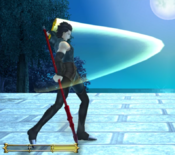
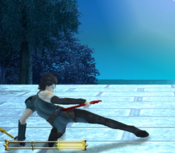
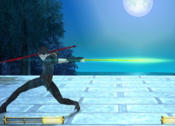
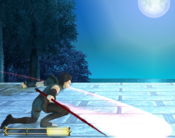
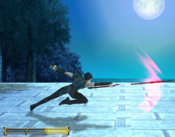
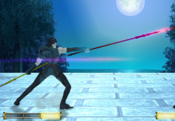
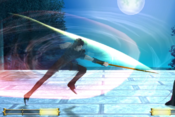
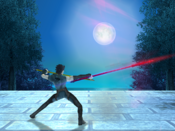
Zero Lancer is a console only character, only appear in the PS2 and PSP versions of the game.
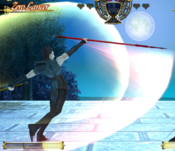
He is similar to Lancer in that he abuses his long range to poke at opponents, but while Lancer is able to apply consistent safe pressure, Zero Lancer is given the tools to leave pressure safely with his command backdash (214A/B) and go for mixups on block when up close (6C>j.236C). Zero lancer has a powerful overhead divekick and has unique properties on his supers that allow him to debuff his opponents through either high meter drain or by halting their ability to heal.
His gameplay revolves around staying safe while chipping away at his opponent, then, when he has the opportunity, go in and rob his opponent of their entire meter, regardless of how much they have prior to his combo, while Zero Lancer himself usually keeps his own meter. This gives him the best setup for Okizeme in the entire game. He also has strong mixup, which works extremely well with this strategy.
| Strengths | Weaknesses |
|---|---|
|
|
Normals
5A
|
|---|
2A
|
|---|
5B
|
|---|
2B
|
|---|
6B
|
|---|
5[C]
|
|---|
2[C]
|
|---|
6C
|
|---|
j.A
|
|---|
j.B
|
|---|
j.C
|
|---|
6A+B
|
|---|
Specials
Halvan Murder/Prologue
236A |
|---|
Halvan Murder/Destroy
236B |
|---|
Halvan Murder/Swift
236C |
|---|
Millstone Drop
646X |
|---|
Galva's Three Murders
623A |
|---|
Galva's Six Murders
623B |
|---|
Galva's Nine Murders
623C |
|---|
Backstep
214X |
|---|
Seven Gate Barrier
214C |
|---|
Aphorism for Ducos
j.236A |
|---|
Aphorism for Fincos
j.236B |
|---|
Aphorism for Trencos
j.236C |
|---|
Supers (WIP)
Gae Buidhe: Yellow Rose of Mortality
236236A |
|---|
Gae Dearg: Crimson Rose of Exorcism
236236B |
|---|
Tale of Tragic Love: Devotion to Grainne
236236C (Grail Super) |
|---|
Gameplan/Tips&Tricks
Zero Lancers gameplan revolves around pressure that you can safely leave on a whim, or extend with either meter or mix-ups. Zero Lancer is quite elusive due to his command back-step, allowing you to bait and punish your opponent, both in neutral and block-strings. Zero Lancers pressure is unfortunately not the best to open people up however, the downside to how safe and oppressive he is allowed to be. This will force you to really learn how to mind-game your opponent in order to exploit any gaps in their defense or to bait a punish. Below are a few tips on what to do with Zero Lancer in a match.
- While this applies to everyone, always mix up the amount and order of your normals in block strings, you don't want to get predictable, you will inevitably get punished for it by any competent player, especially if they know to properly punish the gaps between your on block normals.
- Get used to not using your A normals very much, his 5A is only 7 frames and will whiff in most circumstances, and his 2A is 10 frames, meaning it will get beaten by the 2A of everyone not named Berserker, Leysritt, or Saber Alter.
- Speaking of moves you wont want to use, 623B, you will literally never use it unless you do a 623C and don't have enough meter, or get a miss input.
- Speaking of moves you wont want to use 2:Electric Boogaloo, 236236A, a super that has no actual use other than to look cool if it will kill your opponent, always go for 236236B over this move. Stopping their health from recovering is never better then just killing meter with 236236B, they can't recover health if they don't have meter to activate in the first place.
- Many of Zero Lancers normals and specials are multi hit, make sure to know when you are canceling them as to not lose out on damage
- Zero Lancers 236A/B/C rekka series has a multitude of uses. You can do a full rekka series even on whiff, it can low profile certain projectiles, travels a very long distance when you do the full rekka, and does a good amount of chip damage on block, allowing you to close gaps and deal a fair amount of chip damage, just be sure not to always do the full rekka as you will inevitably be punished for it
- Zero Lancer has the ability to simply run away if he really wants to, with his command backdash being fast enough to avoid a large amount of moves, normals, specials, and some supers included. Combine this with his long range normals and ability to enter and leave pressure on a whim. Zero Lancer can essentially zone by simply existing once he has a life lead
- When you cross up your opponent you will need to reverse your J.236A/B/C input, however the direction of the A and C version wont change, C will still send Zero Lancer in the direction he is facing and the A version will do the opposite
- Zero Lancers 236236B super is extremely versatile, each hit of it will remove 1 bar of your opponents meter, when done on a standing opponent the first hit will leave both players relatively neutral(needs testing as to who has advantage if any), and the second hit will leave the opponent in a crumple state, allowing you to combo off of it with a 623A
- When done immediately after an activate during a combo, there is only a 1 frame window to burst Zero Lancers 236236B super, meaning you will 99.99% of the time get the hit and be able to combo
Neutral
Zero Lancer is quite the threat in neutral due to the absurd abundance of tools at his disposal that fulfill both offensive and defensive roles quite well. In neutral your goal will vary based o the current game state, although the one constant is from round start your main goal is to get a hit in order to get combo which normally leaves both players with no meter. When you have the life lead Zero Lancer turns to a very hit and run character, spending alot of his time backing off and trying to bait and punish your opponents mistakes. Your back dash is your best friend as it can cancel into your 4 main neutral tools, your command back dash, your parry, your 236A, and your 646A. 646A is notable as it has auto guard properties against non lows and destroys projectiles, making most trades end up in you getting free hits. While in neutral your main anti-airs are your 2C and 6C, as your 623A/C are normaly not worth the risk. Your main pokes are 5B, 5C, 236A, and 646A is notable for being a great counter poke.
Offence
Zero Lancer's offence isn't as air tight as you would hope unfortunately, though he does have a multitude of options once he starts to get his pressure going. There are gaps between 5B into 5/2C on block that the opponent can DP through so 214A/B has to be thrown in as a back to neutral option every now and then. Alternatively your 236A > RG is your normal mixup on block as it leads to a 33/33/33 with 2A Low, TK j.236C Overhead, and grab. You also have 6C on block that, while not a true block string so it can be DP'ed through, lets you cancel into j.236A/B/C on the first hit as you are airborne, allowing for a respectable amount of plus frames with j.236B, and overhead with j.236C or the ability to back off with j.236A.
On hit it becomes a lot simpler as you optimally will want to just go into the 623A loops immediately, and if you have the meter to get 2 hits of 236236B after an activate then you instead just do the optimal combo. After a standard combo leaving both players with no or next to no meter, and the opponent in a HKD state your oki is for the most part the same as your 236A > RG mixup, however due to your dive kick and how large j.C is you also have side swap mixups based on how far away you are from the corner.
When not up close Zero Lancer has a few ways of approaching while keeping his offence going. 236A can cancel into the rest of his rekka series even on whiff, allowing you to punish from far distances. Alternatively, 6C goes very far, tracks very hard, and reaches high in the air, along with being able to cancel into 646A/B/C even on whiff, allowing you to cover alot of space and somewhat safely approach once you can 646A. Finally if you find none of your approach options are really working effectively simply running up to your opponent and throwing out a 2A or grabbing them is always an effective strategy if they whiff a keep out button.
Defense
Defensively Zero Lancer has some extraordinarily good options, albiet somewhat specialized. His main defensive options are Backdash, 214A/B, 214C, 646A, 623C, and Guard Cancel.
- Backdash
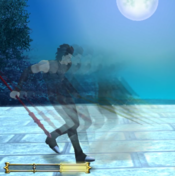
The most universal defensive option that isn't activate, Zero Lancer's comes with the benefit that it has some phenomenal options to cancel into, like his other defensive tools for more safety/offence, and specials such as 236A for whiff punishing. In the context of a solo defensive option it's just as good as just about every other back dash and better then a few others, being 30 frames in total with invulnerability on frames 1-20.
- 214A/B
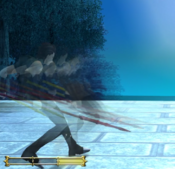
Zero Lancer's command back dash. Though invulnerable only on frame 6 and onward the speed of the back dash and the space it lets you cover, combined with how many moves you have that can cancel into it make command back dash one of Zero Lancer's best options for defense. Another plus of the command back dash is that it uses the Z Axis as well, moving into the foreground or background based on version, allowing you to dodge projectiles and just about anything that doesn't track with ease.
- 214C
Zero Lancer's parry, specifically an animation based parry which is more important and makes the move much better then one would first expect. Having about the same amount of startup as his command back dash, Zero Lancer's parry is used mostly when you think the opponent will put out a hit box that will clip a back dash, or more importantly when they use a jump in aerial. Due to being an animation parry Zero Lancer will drag the opponent to him if it is activated even if the opponent is far away or in the air and the use a large hitbox normal. This allows you to easily get a punish against an air normal you may normally not be able to punish, due to being safe on block or whiff for example.
- 646A
The most interesting of Zero Lancer's kit, 646A is a multi hitting spin that cancels into either 646B or 646C. 646A has the unique property to, after a few frames, guard point anything that isn't a low, even supers like Shirou's Excalibur, and destroy projectiles like Kirei's Black Keys. This lets you brute force your way through a multitude of situations like frame traps or reversals. Unfortunately neither 646B nor 646C lets you get a real combo afterwards without meter, but you still get some solid damage and meter build due the the amount of multi hits from your 646X series.
- 623C
Zero Lancer's DP. A true DP, that is the only thing that makes this on par or better then a few other 623C's like Archer's 623C which is only armored. Besides that this DP acts as it should; it costs meter, is invulnerable on startup, kills some of the opponents meter on the last hit, and is unsafe on block. You will only really see or use this as a get our of jail option or a lack luster combo ender if you have nothing better to go for. As your standard combos will end in activate supers this isn't something you will use too often but it still comes up.
- Guard Cancel
Zero Lancer's guard cancel has some solid range due to lance but besides that its just a normal guard cancel, costs 100 meter and is your get off me button when you don't want to think about how to get them off.
Match-ups(WIP)
Listed will be Match Up spreads for Zero Lancer vs the rest of the cast as well as notes for each match up
Section goes Zero Lancer - Opponent | X-X
Match up tips
Zero Lancer - Archer | 6-4
- Archer dosen't have many defensive options out side of universal mechanics to deal with your pressure. While he has a dp input it is armored instead of being a true dp, and can be hit low or grabbed depending on which version Archer uses.
- Archer has some very telegraphed moves that you can easily counter with 214C or at the very least dodge with 214A/B
- Due to needing meter for pressure, defense, and high damaging combos with unscales, Archer loses out on quite alot after you finish a normal Zero Lancer combo
- Though Archers bow mode is specialized for zoning, Zero Lancer is a character that can 100% still play the runaway game from archer, and due to any real combo from Zero Lancer leaving both party's with no meter you don't even have to worry about supers.
Zero Lancer - Leysritt | 6-4
- Leysritt's main gimmick is utilizing armor through certain normals and her 236236B super, which is an install super that gives Leysritt super armor. She makes best use of this by being close to you to pressure you, play a midrange keep away style and when she installs use grabs and in this specific matchup, use your parry as her meter drains when you hit her. 236C is another good move to chip away at her armor
- Her armor install will not stop supers, don't be afraid to use a raw 236236B super in her pressure gaps. If you have 200 meter you can use the super twice to then begin a combo. Her armor install will however stop the knockback from activation, so don't activate to try and out her pressure when she is installed
- Leysritt's 5C and J.C both have armor and are far reaching dodge these and punish accordingly
- Leysritt's 623B and 623C reversals while not true are armored, and she will still take damage but will beat you if she uses them during a gap in your pressure
- Leysritt's best option of approaching you is her 421X series, as a mixup she can vary whether or not it hits low first or second, note your distance to her and punish her approach attempt. Her 214 also gives her a solid air approach option that can be beaten with a prediction parry or dp.
- Due to her lack of viable approach options and slow speed she has a very hard time of doing much after a Zero Lancer combo, leaving her much in the same position as other slow characters, across the screen without meter trying to catch a back dashing Zero Lancer.
Zero Lancer - Saber Alter | 7-3
- What Alter lacks in overall speed she makes up for it with very safe blockstrings, easy and high damage, a gap closer when using her 214X and RG, and projectiles. Unfortunately for Alter all of these pros can be countered by Zero Lancer with proper spacing, proper pushblocking, and proper usage of his movement options
- Alter's 623C is one of the better ones in the game, know when she has the ability to out your blockstrings and reset attempts and alter them accordingly
- When in the air Alter will normally use either J.C or J.236X(UsuallyJ.236A) to approach and pressure, as J.C and J.236A are quite plus on block, however Zero Lancer can just use the second hit of 2C to swat Alter our of the air, either counter hitting her for a combo or clashing with Alters move. In the event of a clash you can either 2C her next option and see the outcome, or simply back away and reset to neutral
- While this applies for any character vs Alter watch for Alter's 412C command grab during blockstrings, punish or avoid accordingly
- Due to Alter's lack of speed and inability to really approach this is another match up where you can get a life lead and literally just run away with it. Any attempt to shoot you with fireballs is moot as they aren't fast enough to matter at mid to full screen, and her ways to approach are just as slow and predictable, and even more punishable. One of her few options is to use her 236236A super as it is full-screen in order to try to catch you or chip away at you, but due to Zero Lancers absurd meter kill she will most likely be stuck on the opposite side of the screen with next to no meter, begging you to please approach, even though the answer is no.
Zero Lancer - Bazett | 8-2
- The first thing to do vs Bazett is to pause the game and inform your opponent they have picked Bazett, and to go back to character select to rectify this error
- All jokes aside the Bazett match up is quite favorable for Zero Lancer, with Bazett not having many options at most points in a match
- Bazett is best right in your face, due to how short range her normals are utilize the range and speed of your normals and movement to win neutral.
- Avoid trying to reset your pressure while right in Bazett's face, her 5A is 4 frames, being the fastest in the game along with Rin's, and will usually force your turn to end lest you eat a counter hit
- Your 214A/B, backdash, and sidestep are some of your best friends in this match up, due to your range and Bazett's lack there of you can play a very bait and punish play style
- Bazett lacks any real way to approach, and her options to approach can be punished effortlessly if you can properly predict and dodge
- Bazett's 623C, while not the best one, is still a true reversal, and can be used when you have a gap in pressure. Note if she has enough meter to use it and alter your pressure and reset attempts accordingly
- Bazett with install is the rare instance when you have an issue as Zero Lancer, due to the fact that you cannot push block certain normals while she is installed and her access to unblockables her pressure and upclose game becomes an actual threat that you have to be wary of. Don't lose neutral if she is installed, pressure and safe reset until the install runs out
Combos (WIP)
Zero Lancers combos, while straightforward to an extent can require quite the technical skill to optimize. Here are a few tips about Zero Lancers combos
- 5B and his rekka series starting with 236A are the ground moves you will most of the time start your combos with
- 2B will rarely ever be used in combos that don't start with it due to how it messes them up, you will only really use 2B in a combo if you throw a 2B into a block-string and it catches your opponent and for specific combos. Don't let this dissuade you from using any combos that want to use 2B, just don't mindlessly throw it into everything
- j.B, j.C, and j.236A/B/C are your usual attacks to start a combo from the air as they can be followed by 5B
- Some combos need to be changed to accommodate certain characters weights, for example, against Rin you would want more multi hit moves than if you fought Berserker, whom you would want less hits against
- Due to the vast amount of Zero Lancers moves that are multi hit, damage of combos may and will be different then listed when done in practice and in game
- After 646A~636C > activate in a combo, if you aren't close enough to the wall/corner for a j.C > j.236C to connect your best option is to just use 236236B as many times as you can as most of the time in midscreen it will still hit twice
No Meter Start Combos
These are combos that don't require any meter to start, as they will all build the amount they need regardless of starting amount as long as the full combo connects
====Universal====
Basic. BnB 5B Start | 3463 DMG (Video Demonstration)
- 5B > 6B > 5C > 2C > 623A > j.236C > j.C > j.236C > 5B > 5C > 6C > 646A~646C > activate > 236236B
Basic. 2B Start SJ Hop Combo | 4333 DMG (Video Demonstration)
- 2B > 5B > 623A > j.236C > 623A > s. jump > ff j.C > 5B > 5C > 6C > 646A~646C > activate > 236236B
Casual. 2B Start SJ Hop Combo | 4739 DMG (Video Demonstration)
- 2B > 5B > 623A > j.236C > {62369A > jump (8/9) > ff j.C}x3 > 62369A > 6469A~646C > activate > 236236B~236B
Intermediate. Divekick Start | 4898 - 5055 (Video Demonstration)
- j.236A/B/C > 5B > 5C > 2C > 623A > j.236C > jump (8/9) > j.C > j.236C > {623A > jump (9) > ff j.C}x3 > 623A > tkc 646A~646C > activate > 236236B
Intermediate. Optimal Combo | 5617 DMG (Video Demonstration)
- j.236X > 5B > 6B > 2C > 5C > 623A > j.236C > 6C > [62369A > (delay) > j.C > j.236B]x2 > 5B > 6B > 623A > 646A > 646C > activate > 2C > 5C > 623C > 236236B~236B
Intermediate. Meter Gain Combo | 3978 DMG (Video Demonstration)
- (j.C) > j.236X > 5B > 6B > 2C > 5C > 623A > j.C > j.236C > 6C > [62369A > j.C > j.236B]x2 > 5B > 2C > 236236B
Intermediate. Meter Gain Combo - 5 Dive Kicks variation| 4207 DMG (Video Demonstration)
- (j.C) > j.236X > 5B > 6B > 2C > 5C > 623A > j.236C > j.C > j.236C > j.C > j.236B > (5B) > 623A > j.C > j.236B > (5B) > 623A > sj.C > j.236B > 5B > 2C > 236236B
- the (5B)s are optional, you can omit them if it helps you do the combo more consistently
Intermediate. 2B Start Hop Combo vs Rin | 3675 DMG
- 2B > 6B > 5C > 2C > {623A > jump (8/9) > ff j.C}x3 > 5A > 5B > 5C > 646A~646C > activate > 236236B
- Variation of the 623A > ff j.C loop combo from a 2B start for Rin. Due to Rin being the lightest character in the game you get to add an extra 5A > 5B > 5C in the combo. Will leave the opponent with about 1/3 of a bar of meter less then what they started with.
Corner
Corner Combo Extension | DMG Will Vary
- the rest of the combo > 646A~646C > activate > jump (8/9) > j.C > j.236C > 2C > 623A > 8 2C > 623C > 236236B
- If your combo that will end in 646A~646C > activate > 236236B is done close enough to a wall or corner, for example one of your {623A > jump (8/9) > ff j.C}xN loop combos, you can use this ender instead of going straight into the 236236B
100+ Meter Start Combos
These are all combos that require at the very least 1 full bar of meter to perform
You will notice a few of these combos are the meterless ones with meter using extensions or enders added
Universal
Basic. Simple 5B Start Combo | 4858 DMG
- 5B > 6B > 5C > 2C > 236A~236B~236C > RG > 5B > 6B > 5C > 2C > 623A > j.236C > j.c > j.236C > 5B > 5C > 6C > 646A~646C > activate > 236236B~236236B
Intermediate. 646A~646B Starter | 3439 DMG | 3170 DMG if first hit is 646b's low hit
- 646A~646B > activate > {623A > 8 2C}x2 > 623C > 236236B
Intermediate. Long Range 5C Starter | 3834 DMG
- 2nd hit of 5C > 6C > 646A~646B > activate > {623A > 8 2C}x3 > 646A~646C > 236236B
- A hit confirm off of 5C's second hit, needs 1 full bar to start, will leave the opponent with 1/3 of a bar less than what they started with
- A hit confirm off of 5C's second hit, needs 1 full bar to start, will leave the opponent with 1/3 of a bar less than what they started with
Basic. Simple 5B Start Combo | 4795 DMG/ 4852 - 5252 DMG (Video Demonstration)
- 5B > 6B > 5C > 2C > 236A~236B~236C > RG > 5B > 6B > 5C > 2C > 623A > j.236C > j.C > j.236C > 5B > 5C > 6C > 646A~646C > activate > j.C > j.236C > 2C > 623A > 8 2C > 623C > 236236B
- A simple combo that deals solid damage. being close to the corner by the time you activate makes it easier for j.C to connect. If you aren't then you can simply use 236236B~236B after the 646C > activate
Intermediate. Optimal Combo | 6061 DMG (Video Demonstration)
- 236A~236B~236C > activate > 236B > 236236B~236B > 623A > j.236C > {623A > jump (8/9) > ff j.C}x3 > 623A > tkc 646A~646C > activate > jump (9) > j.C > j.236C > 2C > 623A > 8 2C > 623C > 236236B
- The old optimal combo for Zero Lancer, requires only 1 full bar of meter to perform and leaves both players with no meter and the opponent next to the wall/in the corner. Must be started close enough to a wall in order for the j.C to not whiff after the second activation, starting positions will work perfectly fine. If the opponent has enough to burst and they let you get the first activation omit the second 236A and go straight into the super, there is only a 1 frame window for the opponent to successfully burst your super and if they mess it up you get to continue your combo.
• Do keep in mind you can easily deal more damage (up to almost 7k from 100% meter), but you have to factor in their meter after you finish this combo. You don't want them to have 30% or more meter, or it becomes possible for them to use 623C reversal. The key is too check the opponent meter after you activated for the 2nd time, you can combo until they meter become up to 125% or less, then finish with 236236B to make sure they won't be able to reversal on wake up
Intermediate. Grab/Parry Optimal Combo Midscreen Version | 5417 DMG (Video Demonstration)
- grab/parry > 623A > j.C > j.236C > {623A > jump (8/9) > ff j.C}x3 > 623A > tkc 646A~646C > activate > 236236B~236B~236B
Intermediate. New Optimal Combo | 7800 DMG (Video Demonstration)
j.C > j.236B/C > 5B > 6B > 2C > 236A~236B > RC > j.C > j.236B/C > 5B > 6B > 2C > 5C > 236A~236B~236C(7~8 hits) > Activate > 236B > 236236B~236B > 623A > (delay) > j.C > (delay) > j.236X > 6C > {62369A > sj. > j.C > j.236B}x2 > 5B > 623A > 6469A~646C > activate > 2C > 236236B~236B
• If you start with 5B, add 5C before the first 236A~236B
• against crouching Saber and Sakura, if you reach corner; use 5C > 2C instead because 2C > 5C will cause 5C to whiff. and after the first activation, use 236A instead of 236B (Video Demonstration)
• against Berserker, do super jump before the last j.C > j.236B
Intermediate. Grail Combo | 7633 DMG
- with grail + 300 meter 236A > 236B > 236C > activate > 236A > 236236B~236B > 623A > j.236C > 6C > 646C > 236236C
Infinites (Video Demonstration)
This infinite works until you reach corner
{j.C > j.236B}xn
• The opponent must be standing, with a few exceptions
 1. Always work on Kirei
 2. Gilgamesh must be crouching instead of standing
 3. Does not work on another Zero Lancer, Lancer, Saber and Saber Alter

