Immaterial and Missing Power/Alice Margatroid
Introduction
- More info: Touhou Wiki
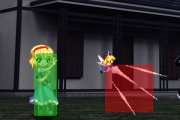
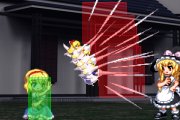
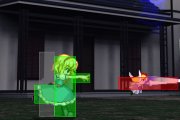
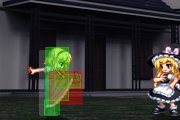
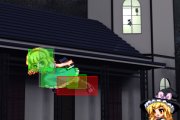
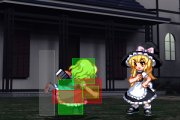
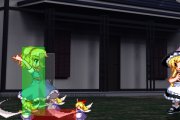
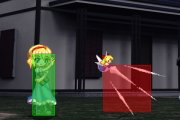
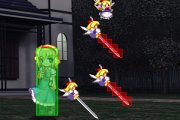
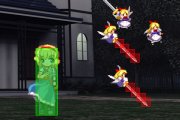
Alice Margatroid: the seven-colored puppeteer. A loner at heart, she treats her dolls as her friends and keeps a wary attitude around others. Upon first glance Alice seems to be one of the weaker characters, with slow bullets and oddly-spaced attacks that have problems hitting at times. On the other hand, Alice also possesses several tools which allow her to take complete control of the match when used properly. As time has passed, Alice's offensive setplay potential has proven to more than make up for her weaker conventional fighting abilities, and she is currently seen as one of IaMP's strongest characters.
Pros:
- Very effective long ranged melee attacks w/ generous hitboxes and frame data
- Her pressure is bomb and reversal resistant
- Possesses strong delayed bullets which make her hard to approach
- High okizeme and setplay potential
- Extremely safe, spammable graze attack in 6DB
Cons:
- Limited bullet options outside of slow delay bullets and okizeme specialized bullets
- Limited reactionary anti-air options
- No reversals without bombs
- Struggles to force significant damage without successful tech followups and blockstrings
- Requires knowledge of pre-planned, character specific sequences for maximum effectiveness
- Pretty weak against airblock outside of specific situations
Moves
Melee
| 5A
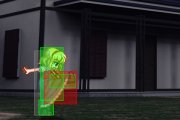
[ Mid | Damage: 150*5 | Startup: 15 | Active: | Hit: +2 | Block: +1 ] This is the first of Alice's very long ranged A normals. Despite its massive range and potential to combo into a knockdown, this move is usually overshadowed in neutral/punish situations by Alice's 2A for a few reasons. For one, it does not guarantee knockdowns on hit like Alice's 2A does. This is because like all of Alice's multihit A moves, its exact frame advantage when cancelled into normals or bullets is variable depending on when the last 'hit' occured. Punctuated by hitstop, these hits occur once every 3 frames, so a 6A input 2F after a hit will have less advantage than a 6A input 1F after a hit. Since Alice's 6A is 16F startup and 5A's advantage on hit is sometimes less than 16F, it won't always combo into the 6A knockdowns Alice probably wants in neutral. It's also 2F slower, doesn't low profile like 2A, doesn't cover air approaches like 2A, and at 41F total duration is basically just as punishable by the same things as her 45 duration 2A is. Where this move shines in in Alice's blockstrings. Once Alice has managed to trap an opponent in her web of bullets, frequently the last thing she wants is for the opponent to go airborne and be able to airtech/groundtech to safety. Unlike 2A and 6A, 5A will allow Alice to prevent many dash/jump escapes from going airborne, instead forcing the opponent into grounded hit/blockstun which Alice is more likely able to continue to build damage/pressure off of. It also does not whiff any hits on crouchblock like 2A does, meaning Alice can use this move to keep a crouchblocking opponent in blockstun much longer than she could with 2A while waiting for her delay bullets to catch up and cover her next bullet's startup. 5A also tends to push Alice back a bit further on hit/block than 2A does, which is important for keeping Alice in the proper range for some blockstrings, but can also sometimes push her out of the range she wants to be in. 5A can combo and absolute blockstring out of j.A and j.B, but the timing is frame perfect for either, requiring Alice to land immediately after hitstop (no descending frames) and input 5A 1F after landing. If you need to combo or absolute blockstring out of aerials, you are better off using 66B or 2A. | |
| 5B
[ Low | Damage: 200 | Startup: 7 | Active: 3 | Hit: 0 | Block: -1 ] Since Alice's hands are reserved for manipulating her dolls, her jab is this low shin kick instead of a punch. First, at 7F startup, this move is fast enough to function as a quick jab to contest frame neutral situations, but its short range and low height really prevent it from being used when the opponent is not both next to Alice and even/behind on frames. Second, since this move hits cleanly low and does not inflict knockdowns, it is Alice's most convenient means of forcing damage on a crushed opponent. If delay bullets like 214A or 5C are set up, she can chain 5Bs until the bullets arrive then dash back in range to continue the combo, or simply hitconfirm into 6B/6B 22C if no bullets are set up. Third, if the opponent is airborne you can link about 20 of these in a single combo before going into 6B 22C iabd j.B finisher, but chaining air 5B hits is significantly harder on opponents with high falling speed/inconvenient tumble hurtboxes, so it's not worth attempting against some characters. | |
| 2A
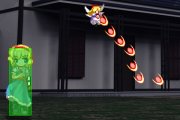
[ Mid | Damage: 150*6 | Startup: 13 | Active: | Hit: D | Block: * ] (click thumbnail for animation) An obscenely-ranged upwards swipe with Alice's pointy doll stick. Compared with 5A, 2A is better for use in neutral and punishes than in blockstrings. This is mainly because it has 13F startup, can hit aerial approaches, and reliably combos into 6A for ~1k non-airtechable or ~1.5k sometimes airtechable damage. Floaty characters can airtech the 1.5k+ 2A 6A more often than the fast fallers. Since 6A both cancels into bullets and pushes an opponent very far back on hit, hitting an opponent with 2A 6A lets Alice set up very favorable okizeme situations much more dangerous for the opponent than the immediate 1-1.5k combo damage would suggest. As such, opponents will prioritize not getting hit by this move, and try to play around it by baiting it out, approaching from high above, approaching with bullet coverage, using quick burst movement options, etc. When it comes to Alice's blockstring game, 2A has a few important uses. At 13F startup compared to 5A's 15F, 2A will combo and absolute blockstring off of j.A and j.B much more reliably. It is also generally better against airblock, since its later hits will lift an airblocking opponent upwards where 5A's later hits would simply start whiffing. After airblocked 2A, Alice can simply 2A again afterwards to tack on more spirit damage against characters with poor airdashes, or cancel into bullets/specials like 236A to attempt an air crush. It will also lift escaping grounded opponents up on hit, which can be useful if Alice's incoming bullets will let her combo in the air. 2A is not recommended for general blockstring use since crouchblock limits 2A's maximum blockstun severely, meaning it can't stall as long for trailing bullets to arrive, and will lose the ability to cancel into things once the multihits start whiffing. It is also not recommended if your trailing bullets do not work well in aerial combos (like 2C or 214A) since on hit 2A could put them into a position where they can airtech or groundtech, while 5A might not. | |
| 2B
[ Low | Damage: 600 | Startup: 8 | Active: 5 | Hit: -3 | Block: -4 ] A low kick. This move has slightly more range than 5B, but not much more, and is just as susceptible to high profiling. It's also -4 on block, making it disadvantageous to use in situations where you do not have the upper hand. Generally, you would use this after a blocked 6DB/3DB as a frame trap, or when the opponent is already blocking a doll rushdown to throw a low hit into the mix. When close, you are best off comboing into 6B for a quick knockdown or a very fast low-high mixup string; at slightly farther distances, combo into 6A instead for the same result. Be careful, as there is a range where neither 6A nor 6B will connect, leaving Alice open for a moment. For these situations, you can choose to use 236A, 5C, or whiff a 6B to cut down on recovery and possibly punish bad mashing attempts. This move can be used to inflict low staggers against crushed opponents to start 214 pressure, but its vulnerability to high profiling and disadvantage frames on hit/block make it a much riskier option than the 6B high stagger. Alice wants to avoid relying on 2B as a stagger if possible. | |
| 6A
[ High | Damage: 900 | Startup: 16 | Active: 3 | Hit: D | Block: -6 ] A long-ranged doll stab with pointy stick. This hits high but is -6 on block; you never want to use this move without canceling into something, whether it's 236, 214, or a simple 5C. In neutral, you almost always want to use this move after blocked 2A/5A, since it adds damage on hit, forces closer proximity to the corner on hit, and is safer when cancelling to bullets than 2A/5A since it's a type C which gives it more blockstun. It can also be used as a counterpoke against a recovering opponent that's just barely spaced themselves outside of 2A range. This move can be useful for adding stall time for trailing bullets in Alice's blockstrings. However, the lag and pushback it introduces can also ruin blockstrings. Blocking this move from 2A or 5A is also voluntary, since the variable blockstun from 5A/6A is never enough to string tight enough for absolute guard to take over. Also, while it's usually easier to continue blockstrings by holding out 2A/5A longer and cancelling into bullets from those moves immediately, 5C's random dispersion makes this inconsistent against crouchblocking opponents. As such 6A's added pushback, blockstun, and spirit damage on lowblock all serve as deterrents against someone trying to crouch under 5C bullets, by giving 5C more time/distance to reach lower crouch heights, and adding an immediate spirit penalty for lowblocking. | |
| 6B
[ High | Damage: 800 | Startup: 9 | Active: 3 | Hit: D | Block: +1 ] A boot to the nuts. This move is +1 on block, comes out just as fast as her graze attack (9F), and hits high; use it after 5B for a quick knockdown combo and high-low mixup. This move also wallslams on CH, allowing you to tack on damage afterwards. This move is best used in the corner; outside, you're better off using 6DB as it adds a bit more range due to the dash. When you've got the enemy guard crushed, you can alternate between 2B, 3DB and 6B at random intervals to keep them staggered, and if you land a 5B you can do a 6B for a knockdown. You can also go into her IABD j.B loop off a 22C (see combos section). This move has the convenient property of ignoring a lot of high/low profile shenanigans. It option selects both of Reimu's 623s, ignores Suika/Sakuya 2B low profile, and can ignore Sakuya/Suika high profile if input early enough. Its major shortcoming is that, despite being Alice's most practical guardbreak move (along with 6DB), it's just too low to guardbreak an opponent who is above Alice, while also putting her at risk of a CH. Since 2A doesn't guardbreak, and her aerials do very little spirit damage on airblock, this accounts for Alice's general weakness against airblock | |
| j.5A
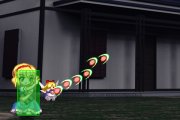
[ High | Damage: 150*4 | Startup: 16 | Active: | Hit: | Block: +5 ] (click thumbnail for animation) An aerial version of Alice's 5A. This is one of Alice's most versatile tools for its ability to approach, stuff approaches, chain strings together safely, cover escapes, and outrange melee/bullets/bombs in general. Though extremely versatile, and vital to Alice's game, there are a few weaknesses to keep in mind when attacking with it with hj.9 or j.6d. First, its 16F startup is slow for an aerial. Combine this with lag from moving in the air with j.6D, the same close range blindspot of Alice's grounded A normals, and the fact that a whiffed j.6D > j.A will move Alice and her massive j.A blindspot toward the opponent waiting to punish it, can make attacking with this move risky. The move has greater reach than Alice's 2A and 5A, and is capable to pushing blocking opponents out of 2A/5A range by the time Alice has landed, limiting the time Alice can lock the opponent in blockstun and chain blockstrings together. It also reaches further horizontally than it does downward, meaning that opponents can easily slip under it if Alice uses it from higher altitudes. Its exact advantage on block or hit varies depending on when the last hit of the multihit occured, which combined with the somewhat slow startup of Alice's A moves, means that you can't always expect j.A to combo or string into them the same way every time. Several moves can also pre-emptively beat it, such as Reimu f.6A, Marisa f.6A, Patchouli 6A, Alice 2A, Youmu f.2A, among others. It is therefore vital to use j.4d and j.6d to quickly alter the height and spacing of Alice's air movement to maximize j.A's effectiveness. By quickly adjusting the approach vector and timing, the Alice player can make their approaches much more difficult to stop. In terms of combo potential, it's possible to combo j.6D or hj.9 j.a into 2A or 6DB, although the spacing and timing for either to occur is quite specific and not likely to happen in most situations. If a 236A is already set up, iabd j.A can knock an airborne opponent into it, which will launch them airborne long enough for Alice to hit another j.B for a ~1.7k combo; or push a grounded opponent into the 236A long enough for Alice to combo 3DA for a ~1.7k and knockdown. If it pushes the opponent into any pre-placed 214 or C bullet, Alice has any number of options to choose from to continue her pressure, depending on the situation. It's also possible for Alice to combo j.A anywhere against an airborne opponent into her laser spellcards with no pre-placed bullets necessary, as long as they are low enough and far enough away. | |
| j.5B
[ High | Damage: 950 | Startup: 10 | Active: 4 | Hit: | Block: -7 ] A downwards-angled kick. Its angle and speed make it great for air-to-ground combat, safejumps, and as a reaction okizeme meaty. It doesn't hit on both sides like Yuyuko, Patchouli, or Marisa's air-to-ground attacks, but comes out faster to make up for this. Its downward angle, slowish startup, and terrible recovery make it very poor at air-to-air combat. Unfortunately for Alice, it's Alice's only air melee move other than her j.A, so Alice is forced to use this move against opponents who are expected to move within j.A range. While Alice can use this move for aerial situations, it's best used when Alice is at frame advantage, or as a last resort. While this move can't outspace bombs or reversals, its quicker startup and potential to safejump wakeup options give it lots of potential as an okizeme meaty. The main reason Alice wants to use this move for okizeme is that it almost always puts Alice at the perfect range for stalling with 5A/6A after landing, meaning Alice can usually do a lot more after getting someone to block it than she could with j.A. It also inflicts CH while j.A does not, so mashing against it is also riskier. | |
| 22A
[ High | Damage: 1000 | Startup: 28 | Active: 3 | Hit: -5 | Block: -6 ] Alice winds up and throws a punch for a high guard crush. This move isn't that great since you have much more effective ways of guard crushing opponents. The armswinging telegraphs it very clearly, making it easily blockable along with its 28F startup. It will reel on CH. You might consider using this move as a means of stalling for delayed bullets after 2B/6B, like you would with 6A after 5A/2A, but 22A is nowhere near as safe. Avoid most of the time. | |
| 22B
[ Low | Damage: 900 | Startup: 27 | Active: 26 | Hit: D | Block: +3 ] Alice doesn't move, and instead sends out dolls spinning low to the ground for a low guard crush. While this is the only guard crush in the game that can be grazed, it's also the only guard crush that deals spirit damage. It's like a worse version of Yukari's tombstones. Its main use is when you've got the opponent in blockstun and need a little bit of spirit damage to crush their bar; if you do it right, due to IaMP's absolute guard they will be unable to avoid a crush. If they release block, they'll block high; if they block low, it'll chip the last bit off anyways. Afterwards you will be able to dash in and begin high-low mixups off 5B and 6B. Try not to use this move on its own too often as its 27F startup is very slow and susceptible to graze attacks. Since it also takes 0 spirit to do, it's good for when you're running low and need a pause to recoup some spirit. It's also +3 on block, allowing you to continue attacking afterwards. | |
| 6DA
[ High | Damage: 150*5 | Startup: 18 | Active: | Hit: +2 | Block: +1 ] A dashing, grazing version of 5A. Unlike 5A, this move hits high even though it looks identical. This move is way more useful than it has any right to be. The typical usage scenario is to deal with j.A's aforementioned issue of pushing opponents out of 5A range and letting them escape Alice's trailing bullets. If this happens, Alice can use 66A instead of 5A to prevent them from trying to escape. If they dash, they get stuck in Alice's trailing bullets, if they jump they get hit into them, and if they try to crouchblock the 5C they take some spirit damage since this hits high. Ideally, an opponent starts to fear this move in that j.A situation, allowing Alice to mix in dash up 5A 6A instead sometimes and potentially get the same advantage she would off of an optimal landing j.A or j.B. While Alice seldom has followups when they block 66A in this situation, they still will generally be at frame disadvantage from Alice's trailing bullets, and declared Alice can also supercancel this into any of her cards, which all benefit from the bullet coverage this move helps enforce. As such, this move is much more threatening after Alice declares. | |
| 6DB
[ High | Damage: 800 | Startup: 9 | Active: 3 | Hit: D | Block: +1 ] One of the best graze attacks in the game. Alice does a sliding version of her 6B, which will wallslam on CH and knockdown normally. It's 9F to come out (rivaling some normal attacks from other characters) and +1 on block, meaning you can frametrap people who try to punish her after blocking it with a 5B or 2B. To counter this, simply walk back, don't attack, or HJ out of it if you're far enough. It also hits high, meaning you can dash in and kick off a chunk of spirit meter against someone blocking low against your doll rushdown. This move is very abusable because of its speed. Off a CH 6DB against a wall, IABD j.B into 2A/6A and continue setting up doll rushdown. This is the preferred move for going into her IABD j.B loop and 236A rebounce combos (see combos section). | |
| 3DA
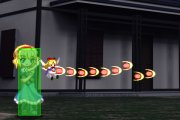
[ Mid | Damage: 150*5 | Startup: 15 | Active: | Hit: D | Block: * ] (click thumbnail for animation) A dashing, grazing version of her 2A. This move is Alice's immediate threat against people who use grounded bullets outside of Alice's A range. Its long, uncancellable recovery make it pretty bad on block, and means the knockdown it generates is not as advantageous as 2A, 6A or 6B, but still workable. It can be tempting to use this move a lot since literally the entire cast fights Alice by shooting her with bullets outside of 2A range, but sniping opponents with this move still shouldn't be Alice's primary gameplan. It is just too disadvantageous on whiff/crouchblock, so it tends to just give up all of Alice's momentum when it doesn't score a knockdown, and unlike 2A its knockdowns aren't even that rewarding. You would mostly use this move on reaction to an opponent's grounded/low aerial bullets when you can reach them with it before they can recover, and when you have an opponent in delay bullet hitstun, but are better off getting a knockdown for points/momentum than trying to build more immediate bullet pressure. | |
| 3DB
[ Low | Damage: 450 | Startup: 13 | Active: 3 | Hit: +3 | Block: +2 ] A dashing, grazing version of her 5B. This move only looks superficially similar to 5B; it is much slower to come out (almost twice as slow at 13F), but is +2 on block and hits low. Initially it just looks like a worse version of Alice's 66B, with worse startup, a smaller hitbox, no knockdown/CH potential on hit, and fewer graze frames. This move's saving grace is its property of sticking Alice right on top of the opponent on hit and block, while 66B tends to push them away from Alice. Since 33B sticks Alice and her 2/3 frames of advantage right next to the opponent, she can safely mash 5B and beat any non-reversal mash attempt, or 6B and beat any jump. This move is safest used as an okizeme meaty, after which Alice pretty safely can mash her B moves and hopefully stall long enough for the delay bullets to connect. She can also use 3DB after landing j.A or j.B, which could be useful whether she has trailing bullets to connect to or not. Least safe of all, she could just throw it out in neutral in a bullish effort to gain advantage. It's pretty safe on whiff, so attempts to punish it may even lose to Alice mashing 6B/66B after missing. Just keep in mind that the less cover Alice has for this move's startup, the more likely it is to lose to high profile moves, superior hitboxes, or bullets. |
Bullets
| 5C
Alice sends a doll out, which shoots seven red bullets straight out after about a second and a half. The bullets disperse slightly in random directions as they fly across the screen. This is one of Alice's best pressure options when she's not in range of using her 236 or 214. When blocked, the bullets generate substantial pushback, sending the opponent into the corner which is where Alice's strongest game is. The move may seem subpar at first due to the delay of the bullets, but it is exactly the delay that makes this move good. At full screen, you can finish a 2A 6A (blocked or not) with 5C, mounting additional pressure once they get up; even if the 6A is blocked, opponents will generally not be able to punish you because of the range they are at. You can HJC this move in three ways depending on your position on the screen, covering open vectors with Alice's j.A while allowing the 5C bullets to fly beneath you to force the opponent to graze or block (and get pushed back). This move cancels only 10 frames earlier than it ends, so Alice is by no means forced to hj cancel it every time she uses it. Jumping may just put Alice at risk of counterhits or limit her attack timing/vectors, so jump/stay grounded as you see fit. While 5C is easily overwhelmed by other bullets and can be grazed through, if Alice grazes projectiles ahead of the 5C she can cancel them out herself, and beat graze attacks with her A moves, or simply block them and allow the trailing 5C to punish for her. This move's main downside is that the bullets' random dispersion will go over crouching opponents, meaning they can frequently graze out of it even after Alice has forced them to block the leading bullets with a melee move. This can be mitigated by distance, since more distance gives the bullets more time to potentially reach further down, but even at mid-long ranges it will not always be tight. For this reason, Alice is advised to either discourage crouchblock through other means, or use other bullets for pressure when possible. 6A, j.B, 6DB, j.A and 66A for instance all add pushback and spirit damage, and 214A, 214C, j.C, j.2C, and 236A can be used for more crouchblock resistant pressure once the opponent is cornered. This is still by far Alice's best midscreen okizeme pressure option and cover fire bullet, so Alice is ultimately going to be using move a lot, even if it has some weaknesses. | |
| 2C
Alice sends out a doll hovering slightly above the ground about three character widths away from her, and the doll fires seven yellow bullets that fly straight out and disperse slightly as they fly across the screen. The trick to this move is that the doll fires the bullets toward Alice; they shoot backwards. If this connects with the opponent after crossup, the opponent will be carried far across the screen like 5C, and without crossup, the opponent will be carried backwards into the hits and eat them all very quickly. Not so useful in neutral. This is the first of Alice's main corner okizeme tools. Its primary effects are pushing the opponent across the screen on crossup, and causing slight stun and pushback on hit/block when not crossed up. On crossup, It's generally only possible for Alice to go into a opposite corner blockstring if her meaty was 33B, j.B, or 5B and quickly cancelled into 5C. When not crossed up, this can be combined with 214A to push opponents further into the stabbers and potentially out of bomb range, or into stabber range if their tech would normally avoid the stabbers. It can also push opponents out of stabbers and let them escape. It also provides just enough hitstun that it can cover the startup of 214A hj.7 j.6D j.A on standing wakeup. | |
| 6C
Alice swirls around and lifts an arm, sending a doll in the air that shoots seven indigo bullets downwards at a shallow angle. The bullets disperse slightly in random directions as they fly across the screen. This move could be exceptionally useful as a replacement for 5C in corner situations, since it can't be crouched under when used in the range when 5C can be crouched and 214A/236A won't reach in time. However, since it cancels so slowly (Alice's slowest cancelling move at 27F) you will need a lot of blockstun to cover its startup and hj into j.A/j.B, which means you will need a very high quality setup. You may find yourself using this move more as your setups become more refined. | |
| j.5C
Alice sends a doll out about three character widths away from her that shoots seven orange bullets downwards at a steep angle. This move is fantastic in blockstrings, but only somehwat useful for okizeme and netural. In neutral, this move can stall Alice's air movement and help her cover area unpredictably with her j.A/B. It's duration is pretty short, so she doesn't always need to cancel it with j.6/4D. For okizeme, it covers a narrow area with a bullet which can't be crouched under, and can be used after setting up a special like 214A or 236A, but the range it covers is extremely small compared to Alice's other options. In blockstrings, Alice can use blocked specials like 236A and 214A to cover j.5C's startup and airdash cancel, and use its bullets after landing melee move to set up even more bullets, but mostly just in the corner. As such, this move is featured prominently in Alice's 236A loop, and in her near corner declare punish setup. It's also used in aerial blockstrings. Since this move can be cancelled from j.A, and keeps Alice in j.A range, Alice can also use j.A to force an opponent to block 5C, then use the 5C bullets to cover j.5C's startup and airdash cancel, then stall with melee moves until j.C covers her 236A/214A blockstring. This is a move you will probably be using a lot in pressure strings, so learning to start the 236A loop with a j.5C is probably a good idea. | |
| j.2C
Alice throws a doll down that hovers along the ground directly in front of where she did the move, bouncing up in the air and flying backwards to land three character widths from where she started. The doll then fires seven green bullets that scatter in completely randomized directions. This move is Alice's other air mobility option, as she is free to cancel her bounce trajectory almost immediately. Because the bounce sends her slightly upwards, you can use this move to prolong your time in the air if needed, or come down with a j.A from a height at which it would be difficult for the opponent to counter. The bounce also sends Alice backwards slightly, allowing you to readjust your positioning for airdashing back in with j.A. Doing this move low off a IAD allows you to airdash forward for a well-angled j.B. This move can be used in corner blockstrings and okizeme. Its dispersion is random, but since it gets positioned so near the opponent, enough bullets can usually connect to keep things tight if they are forced to block it. It tends to move Alice close to the opponent, allowing Alice to easily transition into B move pressure, but also putting her into range of bombs and reversals. | |
| f.5A
Alice holds up a doll and fires nine yellow bullets forward that disperse slightly in randomized directions as they fly across the screen. While the dispersion makes the coverage better than her 5C, the fact that you have to be somewhat far from the opponent limits its use. Also, this move puts Alice in a primarily aggressive role in which she needs to HJC immediately in order to take advantage of the coverage the move offers. For this reason, it is better to use 5C due to the delay of that move which allows Alice more movement options for the same coverage. This move has some niche uses for cancelling certain bullets (Marisa f.B, Suika 214A), dotsies against characters with weak bullet presence (Youmu, Meiling, Yuyuko) and in Alice's midscreen artful declare punish. It's not a staple of Alice's general gameplay. Note: With all of Alice's f.A attacks, it is possible to HJC or cancel them very quickly, even before any bullets are released. It will drain the same amount of spirit either way. | |
| f.2A
Alice sends a doll out that fires six green bullets that fly up at a 45 degree angle, dispersing slightly in randomized directions as they fly across the screen. This move can sort of be used as an antiair, but it's a poor antiair by the standards of any character other than Alice. | |
| fj.5A
Alice hovers in the air and uses her doll to fire six orange bullets forward that disperse slightly in randomized directions as they fly across the screen. As with most of Alice's f.A attacks, you will usually get this when you misjudge the distance of her normal j.A. The move is relatively fast and allows you to do more afterwards but isn't a particularly strong attack, so if you see this coming out try to cancel it as soon as possible to get back in proper range for Alice's zoning. | |
| fj.2A
Alice hovers in the air and uses her doll to fire six purple bullets downwards that disperse slightly in randomized directions as they fly across the screen. As with most of Alice's f.A attacks, you will usually get this when you misjudge the distance of her normal j.A. The move covers a rather wide angle downwards, but isn't great for approach or anything, so try to avoid getting it. | |
| f.5B
Alice lobs three dolls that fly through the air in a parabola and explode on contact with the ground from back to front. The dolls have no hitbox until the explosions, which can be grazed. This move is pretty bad; it's slow, easy to see coming, easily avoided, and doesn't help her rushdown game at all. This move can be used in conjunction with artful sacrifice for a crush setup on a declaring opponent, but f.6B is a bit better for that. | |
| f.2B
Alice lobs three dolls that fly through the air in a high parabola and explode on contact with the ground from back to front. This is the same move as f.5B and f.6B, but the dolls fly very high and explode about 2 character widths away from her (barely half-screen). You generally will never see this move used. | |
| f.6B
Alice lobs three dolls that fly through the air in a parabola and explode on contact with the ground from back to front. The dolls have no hitbox until the explosions, which can be grazed. This is the same move as f.5B, but she throws the dolls a bit farther. This is the ideal bullet for Alice's declare punish string using Artful Sacrifice. 5A, 5C, and 214A can also work, but f.B is quicker and more lenient than the other options, as long as Alice is in a good range for it (opponent isn't too close). More on that in the spellcard combos section. As an actual move for use in dotsies or anything else, it is hard to find uses for. | |
| fj.5B
Alice lobs three dolls that go just shy of half-screen, exploding on contact with the ground from back to front. This is the same move as her f.5B, but has fewer cancel options afterward since it's airborne. Possibly better for killing Suika's 214B babies on reaction than Alice's grounded f.Bs, but 33A and j.A are better options for dealing with babies than any of her f.B moves. |
Specials
Doll Creation/Manipulation - 236ABC
| |
Doll Placement/Control - 214ABC
| |
Doll Uncommanding - 623AB
|
Spell Cards
| Bomb 1 - Magic Sign "Artful Sacrifice"
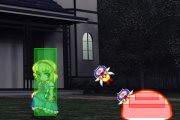
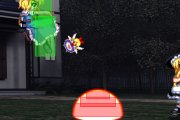
Alice lobs a doll that explodes in a fiery red ball of flames. This move will deal 50% spirit damage on block, and is very easy to implement since it can be done off a blocked 6B, 6DB, or 6A without fear of reprisal. The opponent has a small window during which they can walk or normal jump, but if the timing is correct the opponent will not be able to HJ or backdash out of the explosion radius, and attempting to do so will result in a CH. The super will launch them into the air upon hit and be juggleable into itself until you run out of levels or spirit. You can also combo into this super off a high altitude anti-air 2A or 3DA in the corner. Fundamentally, since this card lets Alice do a lot of chip and spirit damage on blocked heavies, it makes pressuring without fancy setups much easier, and thus rounds out Alice as a character very well. It should be noted that some characters can avoid, and even punish the 6A trap. Remi can backdash/reversal spellcard after 6A, Yuyuko can flip the explosion after 6A, Suika can punish after blocked 6A with her rock throw supers, Marisa can Masterspark it, etc. It's a bit safer cancelled off of 6B/6DB, allowing her to block the Masterspark, hit Suika in her super startup, and probably avoid some other things. But that's not all there is to this spell. Alice can also use artful in her fancy setups and make them that much better. All Alice needs to get a crush is a blocked 6A artful, connected by another bullet like 5C, f.6B, or 214A into another artful. The second artful should then inflict a crush stagger which should be pretty easy for Alice to follow up on. When doing this off of 5C, you will want to time throwing the artful around the time they block the last 2 or 3 bullets of the 5C so that they don't get pushed out of range. f.6B artful is mainly used as a declare punish. Since Artful Sacrifice is ungrazeable, Alice can also use it for okizeme. As long as Alice reacts correctly she can usually guarantee chip and spirit damage on a knocked down opponent even if she can't trap them in oki bullets, which could be helpful against characters with extremely long tech rolls like Patchouli or Alice. Against an opponent coming out of declare invulnerability, Alice can f.6B 236D 236D for a guaranteed crush or artful hit on opponents who can't avoid heavies cancelled into artful. This move's ability give her easy chip damage in neutral, simplify blockstrings, and hard punish declares makes it a pretty easy choice for her L1 spellcard, even against characters who can avoid the 6A artful trap. |
||
| Bomb 2 - Magipulation "Return Inanimateness"
Alice lobs a doll that explodes in a towering blue pillar of flame that reaches all the way up to the top of the screen. This move differs from Artful Sacrifice in a few vital ways. First, its horizontal radius is reduced so that you cannot trap with it like with level 1. Second, its vertical range is increased so that you cannot HJ out of harm's way if someone lobs a bomb at you full screen trying to punish a move you threw out. Third, its release is slower so you cannot combo it from an anti-air 2A or 3DA. Its spirit consumption is much higher; you can only do two without draining yourself, but it also launches and allows you to combo into itself for equivalent damage as twice as many level 1 bombs. Return Inanimateness is generally only useful in the corner because of its reduced width, and as far as spirit damage goes it deals quite a bit but doesn't completely outclass level 2 laser, making it somewhat of a dubious choice. |
||
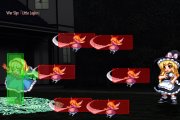
| War 1 - War Sign "Little Legion"
Alice throws out a ring of spinner dolls that occupy a fixed area in front of her. This move is the hardest spellcard for Alice to use as there is no simple, guaranteed setup for it; rather, all of its setups are off situationals, primarily blocked bullets or specials with long blockstun time. Also, because of this move's primary application, you won't be using it to deal damage directly the majority of the time; instead, you will use it to guard crush the opponent so you can continue to press your advantage. This move is best used near the corner where you can occupy the entire space an opponent has to escape, making it a very large 236A in terms of application. You would typically hit confirm off a blocked 5C, 2C (against forward techers), 236A, or 214A before throwing this move, although its not limited to these by any means. For Little Legion, Alice throws a ring of six spinning dolls that make almost one complete rotation before disappearing. The move scores 27 hits if it connects, deals roughly 30% spirit damage on block, and will consume about 40% of Alice's spirit. The primary use of this move is a guaranteed guard crush setup. If an opponent blocks this move, you will have enough time to connect two 22B's, which in conjunction with the existing spirit damage from the Little Legion will leave the opponent with roughly 10% spirit left. If you set Legion up off of a 2C 236A (against a cornered opponent teching forward) then that is essentially a guaranteed guard crush; off of 5C it may leave them with 1-2% spirit left, but Alice will be in a better position as she will have recovered from her own spirit usage as 22B's take no spirit to use. |
||
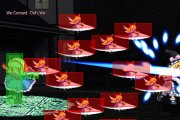
| War 2 - War Command "Doll's War"
Alice throws two rings of twelve spinning dolls, the inner ring moving counterclockwise and the exterior rotating clockwise. The move lasts one and a half rotations and will score anywhere from 57-66 hits if it connects (depending on spacing). It will deal about 65% spirit damage while consuming the same 40% as Little Legion. The area that this move covers is truly ridiculous, occupying the entire half of the screen in front of Alice. Its optimal usage is when Alice is at max range of her 6A, and because of its added coverage, you do not necessarily need to set this move up in the same way as you would with Legion. Against many characters, if they are cornered, you can throw this move out and even if they roll forward on wakeup the move will have enough coverage to hit them as they stand up. The downside to this setup is that you sacrifice doll time for guaranteed coverage. You can still set it up in the traditional ways, and because of its extra spirit damage two 22B's will be enough to guarantee the guard crush every single time. |
||
| Laser 1 - Curse Sign "Shanghai Doll"
A simple yellow beam, summoned by Alice from one of her dolls. This move is easily comboable off 2A, 6B, 6DB, and 6A except in the corner, as it has a blind spot very similar to those of her A attacks. You can even combo this move off air to air j.A if you time it tight enough. It doesn't hit very hard, lifebar or spiritbar wise, but it's easy to spam and hit confirm. For guaranteed damage you can use this card and connect it whenever you land a 2A 6A (as opposed to Artful Sacrifice, which you would use on a blocked 2A 6A only). If you can manage it you can hit them in the air with this move off a blocked anti-air 2A to deal more spirit damage and potentially lead into an aerial guard crush, but the level 2 laser is better for this. |
||
| Laser 2 - Curse Sign "Hourai Doll"
Probably her best level 2 super. It deals good damage, roughly 70% spirit damage, and is basically unpunishable as long as you do not use it by itself. Once in a while you can also use this move in the same way you would throw Return Inanimateness at full screen to catch people trying to declare or throw bullets out, but you obviously won't get the juggle like you would with the bomb. You can also do this move after a corner 6DB combo for good damage. This move can be used after 6A and 6DB just like artful, except it's unavoidable, highly damaging on hit, but doesn't have neary as much followup potential. Still, it's ability to easily chip out health and spirit is helpful in neuralizing characters with stronger spellcards and helps Alice secure wins when lifebars are close to even. Comboing this move off of anti-air 2A and 3DA is character dependent, since some characters will bounce off the laser if they contact it in tumble any time after its first active frame. Marisa, Patchouli, Yuyuko, Youmu, Remilia, and Meiling will always bounce off; and Alice, Sakuya, Yukari, and Suika will always get stuck. Reimu usually bounces, but is inconsistent. It can still be used to combo the bounce characters, but it's significantly harder since you either need to time it to hit their fall with the first active frame, or in the case of 2A combo a 6A before lasering. If possible, using 6A first is less risky. Alice has a 100% unescapable declare punish blockstring with this card. It needs some setup so not it's not very useful against characters with quick declares. It can also be set up mid corner blockstring, but risks whiffing if the opponent eats 5A in the air. |
Combos
General
Alice has only a few combos that are actually obvious. The further down you go on the list, the harder the combos become due to how situational everything is. Because you will be positioning dolls quite often as Alice, it is imperative to recognize what allows you to extend your hits and when you have an opportunity to land them.
- 2A 6A, or 5A 6A - The basic Alice BnB. 2A 6A (or 5A 6A) is relatively fast, long-ranged, and scores a quick knockdown that sends them across the screen towards the corner, where you want them. Usually after a knockdown, you will want to do 5C if you're farther away as it provides cover for you to move in afterwards. When you're closer to the corner, it's debatable what move you can use; 236 for zoning is good, and 214 is workable so as long as you're within the move's range. If this string is blocked, you can still go into your typical options and then HJC to move to safety or continue pressure as you see fit.
- 5B 6B, 2B 6B, or 2B 6A - This is basically the close version of the 2A 6A BnB, with one notable change: you will be using 5C a lot less after 6B due to the close proximity at which this combo must be done. 5C is more or less an unsafe option on block, as you will be using her 236A mixups (see below) from it.
- 214A/C iad 5B/j.A/j.B 5BBB 6D 5BBB (6B 22C j.B) - Alice's post crush grounded stabber pressure. To use 214A, Alice typically needs to confirm a stagger, while 214C can just be used immediately after Alice has crushed with the 214C loop. Can do up to 3.5k if all the hits connect and Alice goes for a 6B 22C ender, but Alice can also cut it short at any point, reset, and try to get more hits on the crushed opponent. They are going to want to dbomb, backdash, or mash to get out, so Alice needs to take care to avoid these countermeasures.
- (opponent is stuck in bullets) 33A, 66B, or 2A 6A - Usually Alice wants to use the time an opponent is stuck in bullets to set up a longer blockstring, but if there is no way to keep the pressure going, you can also just take the free knockdown for the point items and chance to set up a new okizeme string.
- (counterhit 6B/6DB against cornered opponent) iad/iabd j.B 6A - If you land a CH 6B or 6DB close to the wall, you will recover long before the enemy's wallslam stops. To capitalize, you can either turn around and iad j.B 6A, or continue facing the corner and iabd j.B 6A. This will let you deal a quick ~2k into a very favorable groundtech scenario. You can also laser after the 6A if you are declared.
- (counterhit 6DB against opponent near corner) 236A hj.8 j.B j.C/j.2C j.6D j.B 6B 22C iabd j.B - Further away from the corner, in the range where the spinner will rest squarely in the corner and not go offscreen, this is the better CH combo to go for since it lets you deal high damage easily (easier than 5B chain) and without bombs (like the IABD j.B and 5B chain do). This combo is used against Sakuya, Alice, Yukari, and Suika since they do not bounce off the spinner when they contact it in tumble. If the CH occurs in a range where 236A will not reach the corner, you have a bit of time to move forward before cancelling to hj.8 j.B. This will often be necessary if the initial CH is with 6B instead of 6DB.
- It does about 3.6k if stopped at the 6B, and 4.3K if done all the way to the j.B, and leaves Alice in a suboptimal point blank okizeme situation with no o-bomb, and a favorable airtech situation when o-bombbed and ended with iabd j.B. If you don't plan on o-bombing, you will want to time the j.B and 6B to both be kind of late so that the ending 6B isn't airtechable.
- (counterhit 6DB against opponent near corner) 236A hj.8 j.B j.C j.6D j.B j.C j.4D j.B - This combo is used against Reimu, Marisa, Patchouli, Yuyuko, Youmu, Remilia, and Meiling since they bounce off the spinner when they contact it in tumble (though Reimu is inconsistent). This does around 3.8k and lets the opponent airtech, but puts Alice in a very comfortable range to deal with anything they try doing after teching.
Loops
- IABD j.B loop - Alice can land this combo off a 6B or 6DB in the corner by using a bomb to cancel the move. Once you hit them with the bomb, jump forward then airdash back j.B and 6DB as soon as you land. You can cancel the 6DB with a second bomb if it will confirm the win for the round, but other than that conserve your bombs and end the combo there; if you have one more, you can do another IABD j.B followed by a j.B2C. The j.B2C must be done a bit slower after the bomb; if not, the opponent will be able to airtech above you to get initiative.
- 5B loop - Alice can juggle an airborne opponent with 5B up to 20 times by itself. If you are in a situation to hit an opponent with this (such as a deep j.B against someone just jumping up), you can do this for easy, bombless damage. The timing is fairly strict but not too difficult; simply tap 5B rhythmically until you want to end the combo, preferably with a 6B.
Spell Card Combos
For the most part, Alice's spellcards are just used to get some easy chip + spirit damage on opponents who block her A moves midscreen so that she doesn't have to do difficult blockstrings to deal damage. That said, there are some situations where you can instantly chain them together and secure crushes. Some of these setups even guarantee crush stagger, air crush, or crushing with frame advantage off of 214C, making them even more favorable than regular crushes.
- Artful Sacrifice Loop: 236D 236D 236D 236D etc.
- Alice can loop Artful until she runs out of spirit or stocks. It's usually a good idea to save some stocks for use in 6A traps and to make blockstrings easier. This combo is pretty easy to land if hitconfirmed off an opponent stuck in stabber hitstun.
- Long Range Artful Sacrifice Declare Crush Setup: f.6B 236D 236D (236D)
- Far 6B supercancelled into 2 Artfuls. They block artful, it strings tight into f.6B, which leaves a 4-ish frame gap before the next artful lands. Characters that can avoid 6A artful traps can also avoid this. For this to work consistently midscreen, you want to set this up in absolute minimum range that 6B becomes f.6B, since if they get pushed too far by the f.6B bombs, the second artful won't be able to catch up in time. This doesn't matter if they declared in the corner - it will work as long they block any bomb after the Artful. Since the second artful is either going to crush or hit, you can sort of option select both by throwing a third artful. This will do a double artful combo on hit, or guaranteed chip during crush stagger if they block, but will miss if they get counterhit by the bomb.
- Point Blank/Absolute Artful Sacrifice Declare Crush Setup: 236A hj.8 j.4D 236D 236D (236D)
- You dash right up to the opponent, set up a 236A spinner behind them, iabd, then use artful to push them into it, which will barely give you enough time to string into another artful before 236A blockstun ends. Used against point blank declares, and against characters with reversal spellcards that can beat artful (Spark, for instance). Just like the f.6B setup, this will often result in a crush stagger which you can choose to throw another artful at, or try to press advantage on. The timing to make this an absolute blockstring is somewhat tight, so try to keep your iabd as quick and low as possible.
- Hourai Laser Declare Crush Setup: 214C (wait a bit) 236D 236D
- 214C supercancelled into 2 lasers. Requires about as much setup time as the artful string, but is airtight once initiated, at the cost of being grazeable at the beginning if Alice doesn't get the invulnerability timing quite right. It's probably wise to cancel into laser a little while before you expect them to come out of invulnerability, just to ensure they can't escape. The spacing for setting up the 214C is just outside of bomb range if opponent declared midscreen, and it's at the same spacing used for the 214C loop if they declared in the corner.
- Hourai Laser Blockstring Setup: (in corner, from 5A or 6A, when opponent is about to block j.C or 214C) 6C/214C 236D 236D
- 214C supercancelled into 2 lasers...again. But this time during a blockstring. Alice may not have enough spirit to use the second laser in a real match without draining herself. 6C is safer, more reliable, and works at at long ranges, while 214C works at close ranges and gives you the option of going directly into kicks after crushing with 1 laser.
Strategy
General
?
Declaration and Spell Card Usage
Relative to the rest of the cast, Alice's spellcards are of average power, her declare itself is terrible since it has the longest duration in the game, and the power spike between her undeclared and declared state is also smaller than it is for most other characters. This is matchup dependent, but Alice's spellcards mostly just help her to win the games that she is supposed to win, and can help her neutralize the danger posed by declared characters with more gamebreaking spellcards, but she may have trouble declaring in the first place due to her long declare duration and limited options for defending herself post-declare.
One option is for Alice to declare first. This lets Alice potentially use her spellcard enhanced declare punish strings, and avoid an opponent's spellcard enhanced declare punish strings. Unfortunately this strategy is also pretty at odds with how most of Alice's spellcards work. Alice's spellcards mainly allow her to easily force chip damage on opponents who block her A's a lot midscreen, but if Alice declares and the opponent doesn't, that chip damage doesn't really add up to much; they can just recover the chip unless Alice manages to get a crush or win the round first. Voluntarily declaring first may still be advisable against characters with strong cards but slow declares like Remilia, Yukari, and Alice, but it's usually not in Alice's favor to declare first.
The other option is for Alice to declare after the opponent, either after the their spell trance has worn off or during it. If Alice declares against a declared opponent, Alice's long declare duration pretty much guarantees she will have to deal with the most potent pressure the opponent is capable of producing and takes Alice's declare punish setups off the table, but it at least gives her the option of neutralizing their spellcards with her own. Declaring after the opponent's spell trance has ended is the ideal scenario, but requires surviving against a likely stronger character long enough to do that. This strategy usually requires a shift in Alice's playstyle, since she is playing at a disadvantage. This could mean trying to keep an opponent locked in blockstun as long as possible, or playing as safe as possible to avoid taking any clean, unrecoverable damage.
In either event, Alice probably wants to cover her declare somehow if she can so that she can cover her extremely long declare duration. Probably most convenient is declaring after a 'poor' knockdown which Alice doesn't gain significant advantage off of, and maybe throwing out a 5C 214 or 236 to protect her a bit when declare invulnerability runs out. She could also declare after trapping an opponent in bullet blockstun or scoring a crush, but these are also situations Alice normally wants to press her advantage in, so the decision to declare or not will depend on a number of factors like HP totals, how strong the setup was, how strong the opponent's spellcard is, etc. Lastly, Alice can just declare in neutral if she finds an opening, and this is probably safe enough if Alice has enough bombs and the opponent isn't in a great position to punish the declare.
Blockstrings
Alice is known for her insane corner pressure. She has two primary patterns in the corner, both initiated at approximately 3 widths away, from which she can go into a 100% spirit blockstring. Both of these strings are escapable at the very beginning point -- that is, when she is performing 236A or 214, so you will want to try and cover this initial gap with a 5C in progress or some other form of bullet. Once the strings begin, however, escape options require reversal spellcards or taking damage.
214 Trap:
- 214A HJC7 j.6D j.A (land) 5A 6A x 10
This trap does not have the spirit efficiency required to crush. What it does, is it allows Alice to keep the opponent in blockstun from 5A and 6A while she transitions into other loops. This is helpful since the other loops have strict cancel timings from 5A which are hard to set up in matches, while the 214A trap has extremely generous timings which let you stall much longer as you wait for trailing bullets. A 5C, j.C, or 214A is typically used to cover the initial 214A, and then some fiddling with the exact hj type will be necessary to keep the opponent in blockstun. After a few reps of working out the range and bullet coverage, Alice will simply be able to transition into either loop with j.A 5A 236A/214C. At longer ranges, Alice will want to transition from the 214A trap into a rep of 5A 6A 6C iad j.A to safely close the distance to initiate the other loops.
It should be noted that, of all of the situations where Alice uses her 214 moves, the 214A trap is probably the most obviously affected by the weird 'fluttering' property of the stabber hitboxes where they phase in and out unpredictably near the end of its duration, simply because Alice is relying so heavily here on the lattermost hits of the move to cover her bullet cancels. Even disregarding the invisible ending fluttering hitboxes which could make or break a string, stabber #2 for instance could disappear and ruin the string right before it was going to hit, but if the loop was set up a bit further away stabber #3 and connected to #4 to keep the string tight. This sort of thing means that while the 214A loop will generally give more reliable blockstun at closer ranges, it can randomly be just as or more effective at long ranges. Because the active stabber hitboxes are so unpredictable near the end of the move, it is frequently impossible for either the Alice or the opponent to know whether its blockstun will cover Alice's next move or not. Using the 214A trap is still a good idea since it extends the range at which Alice can set up her 236A and 214C loops, but it should be recognized that it's very difficult to make it 100% consistent.
236A Loop:
- 236A HJC7 j.C j.6D j.A (land) 5A x 3
Assuming this loop was started with some leading bullet before 236A, both Alice and the opponent will run very low on spirit after 2 cycles, allowing Alice to end with 236A hj.7 j.C j.6D j.A 5A 22B for a 100% spirit crush. The 22B is needed since, assuming both players started at 100% spirit, trying to continue the loop without 22B would result in a mutual crush. Alice can also transition into 6DB after landing from j.A to perform kick pressure or 22B under the cover of j.C, or iad j.B after 236A or j.C to commence kick pressure, but these options are bombable. Using 2A instead of 5A will not stall a crouchblocking opponent long enough for the j.C bullets to cover 236A startup, and Remilia can cleanly escape this loop by hitting Alice between j.A and 5A with her 623B
214C Loop:
- 214C HJC7 j.6D j.A (land) 5A x 10
This loop is more easily escapable initially and requires more reps to crush, but does not require an ending 22B to crush due to its better spirit efficiency. Starting the sequence with 214C itself is not advised due to 214C's long startup; the optimal way to segue into it is during the blockstun of a 214A string already in progress. This segue usually requires some sleight of hand to pull off without leaving an area where the opponent can escape for trivial damage, but Alice has a lot of freedom in deciding when and how to make this transition. 2A can sometimes be used instead of 5A for this loop, but it's usually a bad idea. Remilia cannot hit Alice with her 623B between j.A and 5A, but it is still a very safe escape strategy
So how do you know when to use one or the other?
Both loops fundamentally allow Alice, with some setup, to perform a crush on a cornered opponent which is immune to bombs and typical reversals (other than Remilia 623B), and inescapable without taking damage or using a reversal spellcards. On paper the 214C loop is clearly superior since it has greater spirit efficiency. For one, this means Alice can secure crushes even when in situations where she starts loop with less spirit than the opponent. But most importantly, since Alice can crush with the 214C loop without needing 22B, she can end the loop with a final 214C into hj.9 j.6D j.B to immediately begin post crush stabber pressure. Normally, a 22B crush requires Alice to confirm a stagger and cancel that into 214A, or gamble with an immediate j.C or 214A from the 22B crush stagger and hope the opponent doesn't bomb or mash out before Alice can hit them. The opponent can still bomb the 214C while Alice is moving in for B moves, so it's not wholly in the 214C loop's favor, but not needing a stagger removes one point of failure.
But things get ambiguous in how both loops deal with escape attempts players can make in their gaps
Dealing With Blockstring Escape Attempts
236A Loop Escapes Typically, someone trying to escape the 236A loop between j.A and 5A will either get hit while staying grounded, get hit in the air, or airblock. When grounded, Alice can simply 236A as normal into whatever followup she wants, be it a simple 2A 6A, or a more damaging iad j.B 2B 6B. If they get hit in the air or airblock, Alice can 236A as normal into hj.9 or iad j.B into a a combo or air crush. The typical result of a 236A escape attempt is that the opponent takes 2-3k damage into an airtech or groundtech situation, often at a spacing where it's hard for Alice to cover a groundtech. But there are specific escape strategies which are much harder for Alice to deal with. For instance:
- The entire cast except for Suika can backdash into the last 5A before the ending 22B of the loop. The means eat the 5A airborne, and can then airtech off of the j.C bullets, and punish Alice while she is finishing her 22B, or simply groundtech to safety. They will take about 700 damage for this, but Alice will be too low on spirit and too far behind on frames to meaningfully punish most characters' groundtechs, and unable to punish the airtech if she input 22B. They can also try to hj or airblock, but these options risk being hit on the ground into 22B if Alice inputs quickly enough, or getting aircrushed. Non-aircrush chickenblock over 22B could be considered the higher risk, higher reward variant of this escape.
- Alice's main method of dealing with this escape is to not end the loop with j.A 5.A 22B, instead ending with j.C j.6D j.A 6DB. This will cleanly hit an opponent who doesn't groundblock into the j.C, after which Alice can j.7 j.B for 2k bombless damage, or 6B 22C j.B for 2.7k with 1 bomb. If the opponent blocks the 6DB, Alice can still crush with 22B since the j.C will cover the startup, but the opponent can bomb Alice off after blocking the j.A or as soon as they block the 6DB. Youmu can't use her backdash to do this, but can use her 623A to go airborne for the same effect. Without spellcards, Suika has no escape options other than risking a jump.
- When initiated with 5C, the entire cast can frequently crouch under the 5C while Alice uses it to cover the startup of 236A, and dash or hj out. Against characters like Sakuya, this means eating a painful air-to-air loop since they are able to hit Alice while she is setting up j.C. This is somewhat dependent on the range the 5C was initially placed at and the dispersion RNG, but short characters especially will frequently be able to escape at any range. Alice's primary methods of preventing this are by mixing in 6A after 5A, or iad j.B or j.A after 236A to punish grazes, but these are both reads and cannot be done on reaction. Ideally Alice just uses other bullets like 214A, j.C, or 6C to start the 236A loop since they can't be crouched under, but this isn't always an option.
- Patchouli and Remilia can escape with their 623s at any point between j.A and 5A. Both of Patchouli's 623s will avoid Alice 5A entirely, let her airtech off of a few of the j.C bullets for a bit of damage, and push Alice out of range to do anything about it. Remilia's 623B lets her go straight through Alice's 5A and inflict 800 damage on Alice while taking none herself. Alice doesn't have great options against either. She can bait out either option by not using 5A after landing, but this is obviously escapable if they don't 623, or use j.A 6DB 22B as soon as possible to keep them stuck in absolute guard but this is bombable and won't lead to a crush without some more escapable pressure. Ultimately, the loops just aren't very effective against Patchouli or Remilia.
- The entire cast other than Alice posses at least one spellcard with enough melee invincibility and range that they can hit Alice between any j.A and 5A used during the loop. Since these cards consume spirit, they may want to use them earlier in the loop than later so they don't self drain, but even with self drain it's a good trade. However, many of these cards are niche, and no card is worrisome unless it's actually picked. Limiting the list to spells which will commonly be picked would look more like Marisa (spark), Patchouli (gears, selena), Youmu (runpast), Remilia (cradle, cross), Yuyuko (ring), Suika (dunk, giant), Meiling (spin). Most of these spells are quite punishable so Alice can just bait them out, or simply play less aggressively and wait for spell trance to end. Still, the damage these spells do is usually something Alice does not want to mess around with, so opponents will be expecting Alice to bait them out, and use that inactivity as their opportunity to escape.
214C Loop Escapes The typical 214C escape attempt is between j.A and 5A, and sees the opponent stuck in grounded stabber hitstun, aerial stabber hitstun, or airblock. Like with the 236A loop, Alice can do pretty much whatever she wants in the case of grounded hitstun, with the added possibility of going directly into 214C hj.9 j.6D j.B 5BB into the 214A/B pseudoinfinites. On air hit, Alice will deal 700-1.5k damage depending on how long she holds 5A, up to 2k if she reacts with 5A 6A, and the opponent will be knocked down in a very favorable groundtech situation. But there are better times to escape:
- When transitioning between the 214A loop and the 214C loop, the entire cast can frequently escape on the leading j.A of the 214C loop, especially when Alice tries to start the 214A loop at the most extreme ranges. It is very easy for Alice to 'safely' transition between the 214A and 214C loops, but 214A will frequently not provide enough blockstun to keep them blocking after Alice cancels her first 214C, meaning they are free to move before Alice can hit them with j.A. If they jump into this j.A, Alice will usually not have time to hit them with 5A before they hit the ground, so they only take 200 damage for a chance to tech out. Alice can try to prevent this by using 2A when transitioning between the loops so that she can catch opponents from j.A hitstun faster, or use 5A 6A 6C as an intermediary step between the loops to help set up a closer 214A to start the 214C loop with, but neither is very consistent. 5A 6A 6C is very reliable for starting the 236A loop from the 214A trap, but the 214C loop never gets such an easy start. Alice can also try using j.B when transitioning between the loops, which will instantly put her in good range to start using 214C and give her more options if she catches an opponent trying to jump with it, but is also bombable.
- At no point does the 214C loop have a consistent punish for airblocked 5A. When a player airblocks the 5A in the 236A loop, it carries them into the j.C which gives Alice enough time to comfortably 236A iad j.B into another j.B or 6B into an aircrush, rebounce combo, or guardbreak 6B 22C combo at her discretion. The 214C has no aerial bullets for an airblocking opponent to be carried into, 5A will stop being cancellable, and Alice won't be pushed back into the range she needs to be in to continue the loop, so Alice has to act quickly to salvage the situation. If Alice has already input 214C by the time she realizes the opponent is airblocking, she can try to hj.7 j.4D j.6D j.A to put herself back in range to continue the loop, or hj.9 j.4d j.A 2A/6DA/3DA to set up a potential aerial crush situation. If she reacted quickly enough, she can try to 236A iad j.B or j.A into a guardbreak 6B/6DB or try to air crush with j.B or 2A 6A. None of these will be consistent. Ideally, Alice just inputs 5A quickly enough after j.A that they never airblock, but this timing is too difficult to be performed consistently.
- The 214C loop is just as vulnerable to the same reversals and reversal spellcards as the 236A loop
Conclusion
The 214C loop is harder to start, but is also harder to escape once initiated as long as Alice executes it well enough to prevent airblock from ever happening. It has better spirit efficiency, easier post crush followups, and punishes escapes with 700-2k damage while leaving Alice in a good position to follow groundtechs. The 236A loop is easier to start, but has lower spirit efficiency, requires a potentially bombable mixup on the ending 22B/6DB, requires confirming a stagger to begin post crush 214A pressure, and lets Alice punish poor escape attempts with 2-3k damage while leaving Alice in a not-so-great position to cover airtechs or groundtechs.
The 236A loop gives both players about half as many spell stocks which is usually better for Alice, and the 214C loop is probably objectively better when the opponent is on 1hp remaining since they can't risk taking 200 dmg to escape the start, and have to eventually contend with the easy 214C post crush pressure. Most Alices prefer to use the 236A loop.
Corner Doll Okizeme
Alice's strength lies in her okizeme and her doll rushdown sequences in the corner, as she can effectively cover an area of up to half the screen -- but only in a certain order of events. The easiest and most practical way is to start this chain of events from a knockdown, as the substantial wakeup time in IaMP offsets the startup of the moves required.
NOTE: The following strings are for a 236A-centric Alice style. It is possible to use 214A instead of 236A to consume less spirit, but the tradeoff is that you also will not be dealing massive spirit damage.
- Against Forward Roll
- The first instinct of a player fighting Alice is to get out of the corner, because all of her best setups work in the corner only. The experienced Alice player will be able to read this and set sequences that directly counter the forward roll into a massive blockstring that sends them back into the corner with no spirit remaining. This string will also work outside the corner but they will be able to backdash to escape it, so you should conserve your spirit for the corner instead.
- 2C 236A HJC7 j.4D j.6D j.B 5B 236A HJC7 j.C j.6D j.A. This is the basic anti-forward roll blockstring. Variations include adding a j.2C after the j.4D for more bullet coverage to create blockstun as well as assist in timing the j.B to hit meaty on wakeup. Alternatively, you can also use 6B if your opponent prefers to block low on wakeup (both 2B and 5B, her combo options into 236A, hit low; the main purpose of utilizing 5B here is that it comes out the fastest). The timing of this string is very particular. For it to begin, your opponent needs to block the j.B, which can be beaten by DP-type moves on wakeup (though it is possible to bait these by doing empty j.6D and landing). The 5B (or whatever you use) must connect seamlessly after the j.B, and after that is blocked, if you did a 2C it will hit the opponent from behind. Use this blockstun to throw 236A HJC7; the spinner will be blocked and give you good frame advantage to do j.C j.6D j.A and continue poking your opponent into the second spinner, at which point if their spirit was depleted and you had a j.2C out in addition, they should be either guard crushed or close to it. Upon landing, if you have bullet coverage and initiative you can use 22B for a free spirit hit or simply continue your rushdown with you having spirit advantage.
- Against No Roll
- The second level of fighting against Alice is understanding that she has massive initiative if you roll forward on wakeup and the Alice player reads it. This is when no-rolling comes into play. Since the anti-forward roll setup is very specific, no-rolling messes up the spacing of the string and potentially allows the opponent to escape via HJ8. Knowing when to use the anti-no roll strings is, as with anything Alice has, a matter of reading your opponent.
- 2C 236A HJC7 j.2C j.6D j.A. This is a version of the same blockstring for anti-forward roll, but also has the ability to fight no-rolls. While it doesn't deal anywhere close to the massive spirit damage the anti-forward roll string does, this string is almost impossible to counter due to the height that Alice achieves off of HJC7 j.2C. When using this string, it is important to observe what the opponent does and to adjust the j.6D accordingly. If the opponent remains blocking, cancel j.2C into j.6D fast and use j.A to reset your corner pressure. If they HJ8 to try and escape or gain height advantage, back off, land, and throw 236B/C to counter that instead of trying to meet them in the air. If they graze forward, use j.4D instead and control space below you with j.A. An important thing to remember is that you have two full airdashes after j.2C, so you can control your positioning very well if need be.
- j.C -> 236A rushdown. This is the most obvious answer to when someone doesn't roll and is in the corner: use the delay to throw a j.C to begin 236A rushdown. The j.C is somewhat optional; while you can throw 236A and have it hit meaty, it is possible for an opponent to 1F graze the 236A on wakeup during your HJC7 j.C and escape the string entirely. Having a j.C already out means that you're already in the air with a j.A to stop the 1F wakeup graze and use 236A during j.C's blockstun to perpetuate the string. The reason that this option is not commonly used is because it is a commitment; if you guess wrong and they roll or back-roll to mess up your timing, you have very few recovery options and essentially lose your momentum, whereas with other oki strings you still have options to recover your pressure.
- Against Back Roll
- This option is typically done outside of the corner to get away from Alice's zoning and to regain breathing room and range for using your own bullet attacks. However, it also has the effect of pushing the opponent into their own corner, which you can utilize to your advantage. Generally if you know an opponent will roll back after a midscreen knockdown, approach carefully because there are ways to counter an incoming attack. Instead of trying to rush them dead-on, cover your approach with 236s and 5C first (or even 6C).
- Inside the corner, back rolling is done to delay the timing of wakeup by a few frames and thus mess up timing for meaty attacks. Use it sparingly unless your opponent is fond of meaties, as it offers no positional benefit since it is equivalent to a no-roll in the corner.
50/50 Mixups Off Doll Rushdown
When playing against Alice at the first level, players are intimidated by her offensive and turtle up because they don't understand how to beat her. This is actually more difficult for the Alice player to handle as her normals are good for zoning but not very good at stagger games during guard crush. When the player approaches the second level, he will understand the junctures during which he can escape Alice's lockdown and will attempt to do so on every opportunity. This is when you would utilize these mixups. The proper way to fight Alice is to take a conservative approach and not try to escape every 50/50 mixup, just enough to keep the Alice player on his toes about anticipating your game too heavily.
When you throw 236A or 214A, there is a substantial gap during which an opponent is free to escape if you do not have cover fire from a j.C or a 5C. Once you have sufficiently trained your opponent to stand still you can proceed into the guard crush string as normal (see above section). Until then, you will want to use one of the following anticipatory options. If you are not in either range for these options, well, you shouldn't be doing Alice's rushdown strings to begin with.
- At point blank to one width
- HJC8 j.4D j.A. This option works for people with shorter-ranged graze attacks. You basically give them just enough of an opening to move forward, and then punish with a IABD j.A which will push them back into the 236A.
- HJC8 j.B. Very similar to HJC9 j.B, but this option accomplishes the same basic goal and leaves you open to airdash back or do a j.C or j.2C on whiff. You will have to be a bit closer for this to work than HJC9 j.B because of j.B's short range.
- HJC9 j.B. This is a great option because of the number of escapes it covers. It will destroy people trying to HJ8 out and hit them for a wallslam on CH. Against people who block high, you can cancel the j.B into j.C on reaction and j.6D j.A to cover your backdash. If they block low instead, doing the j.B fast enough will allow you to airdash back out of trouble before landing, and even if you don't, due to the blockstun of 236A you're more or less safe on landing though you will be in bomb range of the opponent.
- HJC9 j.4D j.A. More or less the same option as the first, but using HJC9 instead of HJC8 to adjust for distance depending on where Alice is.
- At one to two widths
- HJC7 j.4D j.A. This option is good against characters with longer-ranged graze attacks. You will HJC7 out of the way of the graze attack and come down with j.A to punish the attempt.
- HJC7 j.6D j.A. This is exactly like the first option but using a forward dash to keep them in blockstun or to punish. Utilized for mid-ranged graze attacks.
- HJC8 j.A. For people who love to HJ8 out of Alice pressure. You will meet them on their way up and j.A will be in their face to hit them out of whatever they're doing. If they manage to block you should be able to land first and respond with HJ8 j.B if they try to airdash out or 2A if they let themselves drop, and the 2A will obviously lead into aerial guard crush.
- HJC8 j.4D j.A. Same as HJC7 j.6D j.A, but with a different HJC for distance adjustment.
- HJC9 j.B. More or less same as the first option but it lacks the potential to hit standing characters due to the distance. Still good, but be careful to learn the ranges on it so you don't use this instead of HJC8 j.A at the wrong times.
Alice's Blind Spots (And How to Compensate For Them)
A attack blind spot: All of Alice's A attacks involve her sending out a doll to do the work for her. While this allows her to have the longest-ranged melee moveset of any character in the game, it also comes with a drawback: within the range of her arm and right at the base of the stabby stick Alice uses, there is no active attack hitbox at all, while Alice herself is still vulnerable. Also because the A attacks are generally slow, if she whiffs an attack against an opponent who's in her blind spot, the opponent is pretty much guaranteed a free counter. This blind spot applies in many situations. At the beginning levels, players must learn to get accustomed to distinguish when to use A attacks and B attacks. The rule of thumb here is: when in doubt, use a B attack. A whiffed 5B will not get you killed. A whiffed 5A or 2A, on the other hand, will cost you rounds if you're not careful; so as long as you make sure you're not trying to whiff 5B when you're in f.5B range (should be a non-issue), you'll be fine. Once players move beyond this level, the next step will be to distinguish which counters you want to use during your mixups off HJC'd 236 or 214 sequences. At certain points, the range will be ambiguous as to whether you will be able to punish opponents; HJC9 j.B looks like it'll whiff but HJC9 j.A also appears unsafe. Depending on your style, you can pick a couple ways around this. HJC7 and HJC8 and play conservative instead of going for the punish will ensure you don't get countered if you've misjudged range. Going for HJC9 j.B is almost always safer than HJC9 j.A as well. The most important thing is to remember not to panic and mash on A and you'll be halfway there.
General blind spot: Alice can control a large amount of space when played properly. However, she cannot control certain spaces at all without resorting to workarounds. The space directly above Alice's head (which, to be fair, is a blind spot for a lot of characters) and point blank in the air above her is space Alice cannot control very well. An extension of this is that Alice has problems fighting delayed jump ins (using j.2C or an airdash to throw timing off before going in, etc) because her 2A requires a read and if it whiffs, an opponent will usually be able to punish it. Since Alice has no real direct solution to this, learning to cover these vectors of approach is critical to your defense. Your primary form of defense will be 236B/C. Due to its high angle and long duration, it not only deters jumpers but also people who airtech, as they have a tendency to airtech directly into a spinner. 236B works better at closer ranges, and 236C for afar. 236C also deters people who like to HJ8, and due to her dash trajectory, is a slightly better counter against Remilia. After you throw a 236B/C out you can walk forward slightly, which will place the spinner directly in the space where Alice can't reach. Smart opponents will nullify your spinner with their own bullets, but play patiently and do not allow them to approach on their terms and you will be fine.
Other Gimmicks
Stagger Game: Once Alice has the opponent guard crushed, the interesting part is actually dealing damage. A large portion of Alice's game is dedicated to guard crushing and punishing certain movement options; as far as actually dealing damage goes once an opponent is vulnerable, this is a little trickier. You will want to be as close as you can be to use her graze attacks without being in range of a move that can hit you out of them. When blocked incorrectly, 6DA and 6B will stagger as high hits, while 2B and 3DB will stagger as low hits. 5B will obviously not be autoblockable, and 6DB will knock down. These will be your main moves to use when an opponent cannot autoblock. Because of the speed of 5B, 6B, and 6DB, an opponent who cannot autoblock and is cornered against Alice is going to take damage unless the Alice is extremely predictable. Once you score a knockdown, you can play your standard okizeme games and throw in mixup B attacks instead of the usual A attacks.
Glitched Spinner: Releasing 236A so that its fringe hits a cornered opponent will change its hit properties. Normally 236A hits four times in rapid succession, giving substantial hit or blockstun advantage. A glitched spinner will hit the opponent four times separately and, depending on the exact distance, either combo or not combo. Because the separated hits allow for more time, you can set up a fairly damaging combo off of it. In certain situations you can even use j.B to kick your opponent onto a glitched spinner and repeatedly j.B them each time they bounce off of it. While using the glitched spinner is more or less impossible to do consistently, it does happen in real matches and recognizing it is important to maximize your damage output. Using a glitched spinner right before Doll's War ends close enough to combo will give you enough time to use another Doll's War. You can repeat this until you run out of spirit or spell cards.
214B Pseudo-infinite: (point blank corner only) [214B HJC9 j.6D j.B 5B]. You can only do this loop 6 times, as the 7th will drain your spirit fully. The j.B 5B must connect during the release time of 214B, and you must release another 214B during the first hit of the previous 214B. The timing for the j.B and 5B are fairly strict but not extremely difficult. Since you need to be at Alice's suboptimal range using a suboptimal 214 to do this, it's not highly practical... but if you get a chance to do this you know what to do.
Boot Spam: Because Alice's D6B "Boot" gives +1F frame advantage, is really fast, and moves Alice forward, it can be rather tempting to spam in rapid succession. Indeed, it's not the best strategy at all, but some characters have only very specific ways of escaping it while other characters can't get out at all. For example, the jump-type needed to escape with Marisa is entirely different from Suika's, while Sakuya can't jump out at all. So, the chart below will list what characters can and can't jump out, and what jump-type they need to use to get out.
 Character        D6B*2      D6B, 6B
 -----------------------------------
 Reimu            HJ8        X
 Marisa           HJ8        X
 Sakuya           X          X
 Alice            HJ8        X
 Patchouli        X          X
 Youmu            HJ8/9      X
 Remilia          HJ8        X
 Yuyuko           HJ8/7      HJ8
 Yukari           HJ8        X
 Suika            J7         X
 Hong             HJ8        X
Generally, 6DB followed by 6B only connects in the corner. But in that situation, Yuyuko is the only one who can avoid it with a jump.
Both D6B and 6B only have 3 active frames each, so all characters can backdash through a boot if they time it right, but in most cases Alice will recover before the opponent and Alice can hit them during their backdash recovery. Becuase D6B is +1F, it means if Alice jumps then she leaves the ground before the opponent after one is blocked, so if Alice anticipates a jumpout attempt she can use j.B to CH an opponent attempting to use an HJ to jump out.
Marisa, Patchouli, Youmu, and Remilia can use their 623A moves (and Patchouli/Remilia's 623B) to counter it, Yuyuko has 6B, and all characters can use bombs, but obviously Alice can bait these attempts and punish them on block or whiff with a combo. And burning a bomb every time Alice gets within melee range isn't a particularly good idea, especially when the bomb might not even work.
Matchups
| vs Reimu:
Reimu can hold her own against Alice's zoning in a number of ways. Her f.6A is good for stopping IAD pressure and her j.2C can bait out bait 2A and 3DA attempts. However, Reimu's damage is on equal footing with Alice's, so the matchup is determined by whoever gets initiative and can pressure effectively. Neither character can really do much when under pressure, and at full screen Reimu has a slight advantage by being able to handle Alice's 236 with j.C and 5C with f.A. Play around Reimu's f.A attacks and don't let her snipe you out of setting dolls for pressure. Use 236 to cut off her various approaches and absorb her bullets. |
| vs Marisa:
Marisa has a clear damage advantage in this matchup but Alice has all the tools she needs to keep her at bay. Be careful using 3DA and 2A carelessly, as Marisa can bait with her fj.2B and j.2C. Use 236 to kill Marisa's puffballs, set 5C and work your way in. Marisa has no fast bullets to look out aside from f.A, so you can set what you need to without too much fear of counterattack. When pressured, the only moves you need to worry about from her are 623B and 3DB, which will blow through careless rushdown strings but will lose easily otherwise. Marisa's other graze attacks don't really graze, so she has a difficult time escaping pressure once Alice gets the initiative. |
| vs Sakuya:
Sakuya's primary tools against Alice are her f.A, which keeps Alice on her toes at full screen, and her 6B and 6DB which counter poorly spaced 2A and 3DA attempts. Switch to 236 which can be HJC'd faster than 5C for coverage to avoid getting hit by f.A. Stay solid and don't abuse 2A/3DA too much unless you have the clear advantage to use them, as cutting off 6DB usage will essentially handicap Sakuya a fair bit in this matchup. Alice is one of the few characters who can punish a turned-around Sakuya, so in those situations there is no need to back off like everyone else has to do. |
| vs Alice:
Alice mirror matches can be pretty lame since neither character has anything solid to work with until a knockdown. In this matchup, that knockdown can be obtained by randomly tagging the opposing Alice with a 2A, forcing her to deal with the resulting momentum. Because Alice utilizes a lot of IAD and IABDs for her rushdown, switching your offensive up for this matchup is recommended in order to bait out 2A. Whoever can play around 2A/3DA and get the pressure first in this matchup usually wins. |
| vs Patchouli:
Patchouli is a character that works similarly to Alice, but has a bit more damage and speed than she does at the cost of weaker melee. She has quite a number of tools to fight Alice. Her bubble can stop 5C as well as trade on Alice's IAD, as can her 6A. Patchouli's f.B and 236C keep Alice moving at fullscreen and unable to set 5C. Her 623 wind attacks will also mess up Alice's spacing. To defeat Patchouli, you must observe her bullet tendencies carefully and use 3DA and 6DB through careless attacks. Stay on top of Patchouli and use superior melee speed with 5B and 6B to stop her from attacking. Once Patchouli is at a disadvantage it is difficult for her to regain momentum without a 623 or a bomb, and since bombs are ineffective against most of Alice's pressure, you simply have to play around Patch's situational anti-airs and 623 to maintain the pressure. |
| vs Youmu:
Youmu is primarily a close range character. As such, Alice has a distinct advantage: as long as she plays carefully, she can keep Youmu out of the game entirely and unable to use her high-damage corner combos. The prime moves you want to look out for will be her 623A, her f.B and f.2A. 623A can stop Alice's rushdown if she's too close, so it may be best to guard crush Youmu before approaching within B range. Youmu's f.B can't be nullified, so against an IADing Alice it's effectively as an anti-air as it will ignore her 5C entirely. Youmu can also attempt to knock Alice IADs out of the air with f.2A, although that move is easily baited due to its slowness. |
| vs Remilia:
Remilia has many tools to handle Alice. Her three airdashes allow her to escape the corner 2A guard crush loop. Her fast aerial movement can throw off your sense of spacing and cause you to get moves you don't want such as fj.A/B. Remilia's j.B can hit Alice directly in the blind spot off a 6D or a j.6D due to her speed, and she can even utilize 2B to get directly within Alice's ineffective range with relatively little room for punishment. Alice must play very solid in this matchup by controlling airspace with 236B/C and being very careful not to whiff 2A/3DA, as both can be punished by 2B on reaction. Save the bombs to get pressure off and try to corner Remilia, as her lack of a dash makes it very difficult for her to handle Alice pressure once it gets going. |
| vs Yuyuko:
Yuyuko has major problems fighting Alice, mostly because Alice's effective range on IAD j.A is exactly where Yuyuko cannot control apart from a random 6DB. Her main tool against pressure, the 6B flip, is nullified in this matchup almost entirely since Alice doesn't work within that range most of the time. Her other situational anti-airs, like f.2B, won't come out at the range Alice IADs in. The only things you really need to look out for are 6DB out of corner pressure as it has a fairly wide hitbox that can tag Alice out of IADs, and to not get randomly hit by a j.A as a counterhit combo from Yuyuko will quickly even the match up. |
| vs Yukari:
Yukari has a lot of the same problems with Alice that Yuyuko does. In Alice's effective IAD range, Yukari has no real anti-air or reversal options, so Alice has a fair amount of free reign to rush Yukari down as she pleases. Your primary situationals to look out for will be 6B stopsign to anti-air bad jumpins from afar, and 236A/B tombstone to catch Alice jumping in. Once Yukari declares, keep a wary lookout on your lifebar so that you don't declare too late and get pressured into losing because of Ran. |
| vs Suika:
Suika is a bad matchup for Alice, being that she has the highest burst damage in the game and can even out a match easily within a few seconds of bad guessing. Her 214 pressure is difficult for Alice to deal with; you can neutralize 214A with 236A HJ8 j.2C, but Suika's 214B will go straight under 236A. Suika's vortexes also completely throw off Alice's spacing, making it difficult for her to zone properly. Alice also has no answer for Suika's Giant spellcards aside from reacting correctly. One of the few advantages Alice has is that Suika's airdash is shorter than others and she lacks a j.2C to bait Alice's 2A/3DA with, so if Suika moves carelessly into the air Alice can punish that fairly easily. Apart from that, she will have to work much harder to stay ahead in life totals to avoid getting randomed out. |
| vs Meiling:
Meirin's frametrap will work on Alice due to lack of a reversal, but low damage on both sides means this matchup is usually prolonged and a war of attrition. It is very difficult for Meirin to get in on Alice due to all the tools she has, and once Alice is cornered it is nearly impossible for her to escape without taking damage. Utilize spinners to limit Meirin's aerial movement and f.B attacks. Avoid fighting her air to air when closer than j.A range and use j.2C to keep your air movement unpredictable. |
Frame Data
                                                              Block   Hit     CH
Motion     Damage     Proration   Startup  Active  Duration   Adv     Adv     Adv   Untech  Guard   Type
------------------------------------------------------------------------------------------------------------
 5A         150*5      98%*5        15               41        +1      +2      X     35*5    Mid     B
 2A         150*6      98%*6        13               45        *       D       X     40*6    Mid     B
 6A         900        85%          16       3       44        -6      D       D     30      High    C
 5B         200        98%          7        3       17        -1      0       X     25      Low     A
 2B         600        92%          8        5       27        -4      -3      +4    35      Low     B
 6B         800        92%          9        3       30        +1      D       D     40      High    C
 6DA        150*5      98%*5        18               44        +1      +2      X     35*5    High    B
 6DB        800        92%          9        3       30        +1      D       D     40      High    C
 3DA        150*5      98%*5        15               47        *       D       X     40*5    Mid     B
 3DB        450        92%          13       3       26        +2      +3      X     35      Low     B
 22A        1000       75%          28       3       56        -6      -5      +6    40      High    C
 22B        900        75%          27       26      46        +3      D       D     40      Low     C
 j.5A       150*4      97%*4        16               39        +5              X     35*4    High    B
 j.5B       950        90%          10       4       36        -7                    40      High    B
 22C (N)    0          80%          12       3       42        -8      D       X     oo      Mid     C
 22C (O)    500        80%          12       3       38        -4      D       D     oo      Mid     C
 22C (D)    0          80%          12       3       58        -24     D       D     oo      Mid     C
 22D        x          x            26       x       133       x       x       x             x       x
- Properties
- 5A: 2F hitstop
- 2A: 2F hitstop, -5F on standing guard and -14F on crouching guard
- 6DA: 1-20F graze
- 6DB: 1-11F graze
- 3DA: 1-17F graze, 2F hitstop, -5F on standing guard and -14F on crouching guard
- j.A: 2F hitstop
- 22C (N/D): 1-14F invincible
                                                              Block   Hit     CH
Motion     Damage     Proration   Startup  Active  Duration   Adv     Adv     Adv   Untech  Cancel  Type
------------------------------------------------------------------------------------------------------------
 5C         100*7      97%*7        91       oo      35                        X     15      25      B
 6C         100*7      97%*7        101      oo      49                        X     15      27      B
 2C         100*7      97%*7        91       oo      44                        X     15      21      B
 j.5C       100*7      97%*7        96       oo      25                        X     15      23      B
 j.2C       100*7      97%*7        *        oo      35                        X     15      21      B
 f.5A       100*9      97%*9        13       oo      59                        X     15      9       B
 f.2A       100*6      97%*6        13       oo      45                        X     15      15      B
 fj.5A      100*6      97%*6        14       oo      39                        X     15      12      B
 fj.2A      100*6      97%*6        14       oo      39                        X     15      12      B
 f.5B       450*3      90%*3        62       3       55                D       D     40      22      C
 f.2B       450*3      90%*3        77       3       55                D       D     40      22      C
 f.6B       450*3      90%*3        66       3       55                D       D     40      22      C
 fj.5B      450*3      90%*3        *        3       45F+-12F          D       D     40      20      C
- Properties
- 5C: 13F doll appears, 42F doll positioned, 90-108F discharge
- 6C: 23F doll appears, 52F doll positioned, 100-118F discharge
- 2C: 13F doll appears, 42F doll positioned, 90-108F discharge
- j.C: 18F doll appears, 47F doll positioned, 95-113F discharge
- j.2C: Startup frames situational, 16F doll appears, 25F doll positioned, 72F+ discharge, if done during fall height is limited
- f.5A: 5F spirit consumption, 12-36F discharge
- f.2A: 5F spirit consumption, 12-27F discharge
- fj.A: 6F spirit consumption, 13-38F discharge
- fj.2A: 6F spirit consumption, 13-38F discharge
- f.5B: 17F discharge
- f.2B: 17F discharge
- f.6B: 17F discharge
- fj.B: 14F discharge
                                                              Block   Hit     CH
Motion     Damage     Proration   Startup  Active  Duration   Adv     Adv     Adv   Untech  Cancel  Type
------------------------------------------------------------------------------------------------------------
 236AB      200*4      98%*4        40               39        +34     +35     X     30      15      B
 236C       200*4      98%*4        50               39                        X     30      15      B
 623A       450*3      90%*3        41               49                D       D     40              C
 623B       450*4      90%*4        26               62                D       D     40              C
 214A       300*4      90%*4        90               41                        X     40      17      C
 214BC      300*4      90%*4        99               54                        X     40      26      C
- Properties
- 236AB: Partner 9F hitstop, 11F discharge, 3F attack decision up to 4 times
- 236C: Partner 9F histop, 11F discharge, 3F attack decision up to 4 times
- 623A: 10-37F airborne, 11F discharge
- 623B: 10-50F airborne, 15F 23F 31F 39F discharge
- 214A: Partner 9F hitstop, 16F doll discharge 55F positioned
- 214BC: Partner 9F hitstop, 25F doll discharge 64F positioned
                                                                     Block   Hit     CH
Card         Damage       Proration     Startup     Active  Total    Adv     Adv     Adv   Untech  Type
------------------------------------------------------------------------------------------------------------
 Bomb Lv1     2000       55%             4,26(30)            44       +8      D       D     oo      C
 Bomb Lv2     2600       50%             4,32(36)            44       +14     D       D     oo      C
 War Lv1      50*n       99%*n           5,33(38)            56       *       *       X     30      B
 War Lv2      50*n       99%*n           5,33(38)            56       *       *       X     30      B
 Laser Lv1    175*10     98%*10          8,11(19)    X       104      -7      D       X     oo      C
 Laser Lv2    120*25     98.5%*10        8,10(18)    X       108      -11     D       X     oo      C
- Properties:
- Bomb Lv1: 4F discharge
- Bomb Lv2: 4F discharge
- War Lv1: Partner 9F hitstop, 5-8F invincible, 18F discharge, can be hit 12F after dolls end, significant block and hit advantage
- War Lv2: Partner 9F hitstop, 5-8F invincible, 18F discharge, can be hit 12F after dolls end, significant block and hit advantage
- Laser Lv1: Partner 9F hitstop
- Laser Lv2: Partner 9F hitstop
Motion    Startup   Active   Recovery  Graze      Cancel   Guard   Invulnerable
------------------------------------------------------------------------------------------------------------
 7/8/9     5         x        x         x          6+       6+      x
 7D/8D/9D  5         x        x         1-20       6+       21+     x
 6D        3         9~45     16        1-(12~48)  1+       14+     x
 4D        5         21       6         1-26       x        x       1-8
 j.6D      9         17       x         1-26       10+      27+     x
 j.4D      3         20       x         1-22       4+       23+     x
- Properties:
- 4D: Lower body invulnerability during recovery period.

