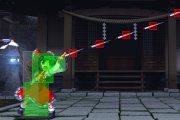
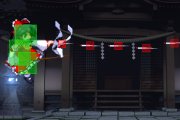
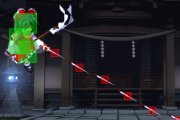
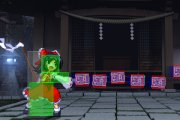
Immaterial and Missing Power/Reimu Hakurei
Introduction
- More info: Touhou Wiki
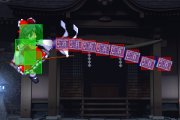
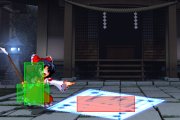
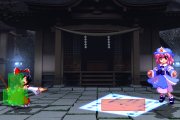
Reimu Hakurei is an ordinary shrine maiden and the main character of the Touhou series. In IaMP, she's a very versatile character, but is lacking in damage. She needs to work for her hits, and can't expect much to come of random strikes. However, she makes up for this by having some of the best HJC rushdown strings and bullets, and a very strong air crush game. A lot of tenacity is required to play her, however.
Pros:
- Strong neutral game, excellent zoning.
- Long, safe pressure.
- Builds a lot of meter, for her above-average spellcards.
Cons:
- Her versatility requires a lot of familiarity with her moves.
- Low overall damage.
- Weak reversal game makes for a difficult time defending.
- Opponent tends to build a lot of meter.
Moves
Melee
| 5A
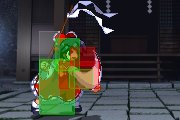
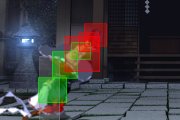
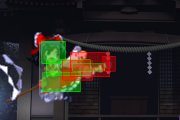
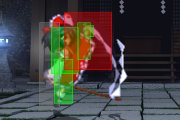
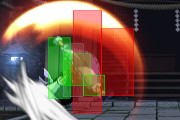
[ Mid | Damage: 200 | Startup: 6 | Active: 2 | Hit: 0 | Block: -1 ] Downwards slap. It doesn't have much range, but it's very quick and recovers almost instantly. Good solid poke for interrupting the opponent, but doesn't combo into anything other than itself on the ground. As it hits up fairly far, and can combo into 6B on antiair hits, this is a sound choice for guard breaks anywhere on the screen. | |
| 5B
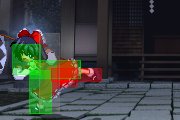
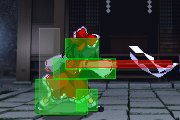
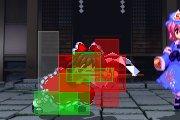
[ Stagger High | Damage: 620 | Startup: 8 | Active: 5 | Hit: 0 | Block: -1 ] Side kick. Reasonably fast, can counterhit, and will do about 30% spirit to anyone blocking low, but the range is not much better than 5A and it is slightly disadvantageous on block so you'll probably want to cancel it immediately. This is going to be your primary stagger move after crushing the opponent, so get used to walking up and kicking them in the face. Combos into 6A and 6B. Never airtight with 5C unless it's a counterhit, but opponents aren't likely to challenge it. | |
| 2A
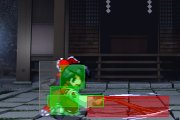
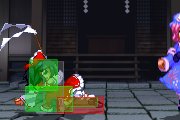
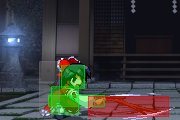
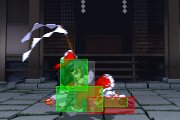
[ Clean Low | Damage: 100*6 | Startup: 8 | Active: 18 | Hit: 0 | Block: -1 ] Long range low attack. Starts up fast and it's easy to combo from, making it a prime punishment tool, but it can't counterhit and the opponent can block it quickly so it's not very good for spirit damage. Be careful about using this move in certain matchups, like against Sakuya or Suika, who can get huge damage easily if they read you doing it. Combos into 6A and 6B. As this hits clean, this and 5B are going to be your primary mixup when the opponent is crushed, as they will not want to block high. Because it's a long attack, if they block correctly you can cancel to 6B at random times to cause them to stagger again. | |
| 2B
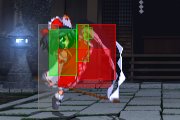
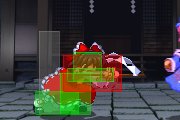
[ Stagger High | Damage: 900/600 | Startup: 11 | Active: 9 | Hit: D | Block: -13 ] Self-launching upwards kick. Reimu leans far back early in the move, making this easily evade upper body attacks, and she doesn't become hittable high up until the active frames come out, making it likely to trade on anything with long active frames. Does more damage if it hits immediately rather than when Reimu is higher up. Because of this, it will do huge spirit damage if used on a grounded opponent. This move is not cancelable at any time and is extremely punishable on block, so don't use it carelessly. Works well as an antiair against normals that don't strike downwards too far, but it can be airblocked. It tends to be difficult for the opponent to follow up from in that case, however. | |
| 6A
[ Mid | Damage: 850 | Startup: 12 | Active: 2 | Hit: -7 | Block: -8 ] Forward-leaning stick stab, which has the very unique property of grazing. That and the sheer range work to make this move excellent for halting the opponent's forward movement and guard breaking them when they fall to the ground near you. However, this move leaves you wide open on whiff and is very bad when blocked if it's not canceled, so you should use it with care and always have a followup plan in mind. When pressuring the opponent this cancels well into any of Reimu's bullets, particularly 236A and any of her C bullets. Be careful of the opponent grazing forward reactively after blocking it. Combos with either of her 623 moves if canceled immediately from close range. On antiair hits you can also go into 22B against some characters. | |
| 6B
[ Stagger High | Damage: 850 | Startup: 11 | Active: 8 | Hit: D | Block: -10 ] Forwards moving high kick. Hits from surprisingly far away, has foot-level invincibility late in the motion, launches high on counterhit, and is her primary combo launcher. When the opponent is crushed this move is great for mixups off of a blocked 2A. The main problem with it is that you can't cancel the move until Reimu lands. If they block at closest range an immediate cancel is effectively neutral with the opponent. As this move has a long active period, if you space it correctly it is effectively unpunishable and you can frame trap with any of her followups, so it's a good idea to learn the right spacing on this move. This is not a good attack for antiairing the opponent, because it has limited vertical range and can be airblocked. Use with care. | |
| j.5A
[ Clean High | Damage: 150*3 | Startup: 7 | Active: 24 | Hit: | Block: +4 ] Holds her stick forwards, hits up to three times far away and slightly downwards. This move is going to be Reimu's primary zoning tool, since it both has an extremely long active time and hits very far away from where she can be hit. Any time you need to push in safely, this move is your answer. As whiffing this means you will be wide open for a long period of time, this is best to use when you either will definitely connect safely or when falling, so that landing can cancel it. An important thing to be very careful about is that if you connect with one hit and then the next one misses, you can no longer cancel it. Against a grounded opponent, it has almost no blockstun so it's difficult to follow up safely, and its multiple hits make it very easy to bomb off on reaction. Use with care. | |
| j.5B
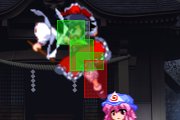
[ Clean High | Damage: 700 | Startup: 7 | Active: 5 | Hit: | Block: -8 ] Mid-air kick and punch. Hits higher up than j.5A does, but with less range and fewer active frames. The most important thing is that this move will wallbounce on counterhit, making it one of her primary combo starters. Since it recovers fast it can be used more freely in air to air encounters and traps. This attack shines the most in air to ground encounters, as it confers a lot of blockstun, allowing you to follow it up tightly with any j.C/j.2C bullet or continue with a grounded string. Since it's angled upwards it can't be used effectively on short characters, such as Suika and Youmu, so use caution. | |
| 22A
[ High Guard Crush | Damage: 1000 | Startup: 22 | Active: 5 | Hit: D | Block: -6 ] Forward shove. Startup is slow, but subtle, so it's harder to react to than you'd expect. Plus, it does a lot of damage, hits far both forwards and up, wallbounces on any hit, and is a guard crush if blocked wrong. Unfortunately, it has huge pushback and can only be canceled by an O-Bomb or a card, which means the opponent will get out free if they can block correctly. Reimu has better ways of pressuring and keeping the opponent locked down, so it's best used as a frame trap when the opponent is too freely grazing your bullets after blocking something. That it's a clean high attack makes it a strong counterpart to 2A/5B mixups when the opponent is crushed, so don't forget about it. | |
| 22B
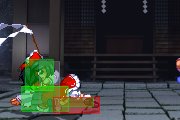
[ Low Guard Crush | Damage: 1000 | Startup: 21 | Active: 8 | Hit: D | Block: -6 ] Hops into a slide kick. It's slow, disadvantageous on block, and leaves you at point blank. Worse, since it starts up very slow and is active for a long time, many characters can deal with it on reaction very easily. Still, it's hard to punish, and it is a low guard crush, for whatever that's worth. Overall, not a very useful move when you have 3DB around. | |
| 6DA
[ Stagger High | Damage: 850 | Startup: 15 | Active: 3 | Hit: D | Block: -2 ] Forward shove, very similar to 22A. Starts up faster, grazes, wallbounces on counterhit, and is safe on block at any range. Good all-purpose long range grazing move. As antiair, it does guard break, but its weak vertical range hurts. Still, it grazes and Reimu leans forward along with it, so any of the opponent's normals that hit mid or high, like Reimu's own j.5B, can be ducked under with this. | |
| 6DB
[ Stagger High | Damage: 1000 | Startup: 11 | Active: 7 | Hit: D | Block: -22 ] Dashing upwards kick. Grazes and has enormous vertical range, making it a good option for counterhitting people out of the air at the right angle, but can be airblocked and is ridiculously punishable when that happens. If you need a grazing antiair move, you might consider using 623B instead. This move is actually spellcard cancelable in the air, so if you have Balls out you can cancel to that safely. | |
| 3DA
[ Stagger Low | Damage: 100*8 | Startup: 8 | Active: 18 | Hit: X | Block: +3 ] Dashing version of 2A. Starts up fast, hits far, and is actually advantageous on block so you can use the pushback to give you room to setup more bullets and strings. Unlike 2A, this is a stagger and not a clean hit, which means a crushed opponent will only block the first couple hits wrong at most. Not a good choice to fish for damage when the opponent is crushed. It doesn't combo into anything but level 1 Orb anyway This doesn't actually graze. | |
| 3DB
[ Clean Low | Damage: 1000 | Startup: 12 | Active: 16 | Hit: D | Block: -11 ] Quick long range slide kick. Starts up very quickly, grazes, hits low cleanly, moves very fast, and does great damage. With a late hit, O-Bomb, or a card you can combo off of it easily, too. To make up for this, it is hilariously punishable on block, so you should always keep a bomb or card in stock if you intend on using this move. At range it also has all the same caveats as 22B: Easy to react to and get out of the way or punish. This move is really good for mobility, since Reimu goes really far quickly. With good use of this you can get under an opponent's aerial strings safely, and back out to where you can get things started again. |
Bullets
| 5C
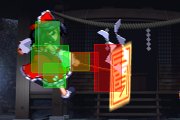
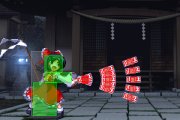
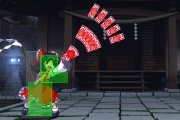
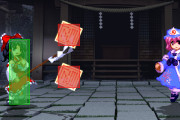
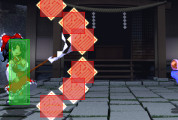
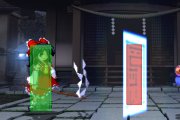
Throws up to 3 waves of 5 cards in a wide arc. Holding the button down causes more waves to be thrown. The cards are extremely cheap on spirit use and cover a wide area, but they're easily beat out by other bullets so don't expect to be winning any bullet wars directly with them. There is a large blind spot in-between Reimu and where the cards come out, so be careful about the spacing on them. As far as 5C goes, because of how low to the ground it starts this won't see much use for zoning, and you're much better off using 236A or 236B for that. Although the startup is pretty slow, it's a great cancel option for blockstrings, and if you manage to get the opponent to block the first wave they are forced to block the rest, giving you time to HJC and setup more stuff. Try to mix up your melee attacks with this so they don't try to graze it on reaction. | |
| 6C
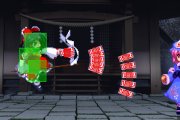
Similar to 5C, but throws cards diagonally upwards. Because of how long it takes to start up, the blind spot before the cards appear, and the fact that the cards are easily defeated by other bullets, this is not a good reactionary anti-air. What it does work well for is preemptive aerial denial. The wide arc means it restricts their movement a lot and forces them to nullify or move through it, which gives you plenty of time to get better positioning. | |
| j.5C
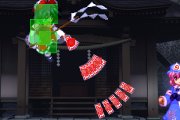
It's 5C in the air! This is one of Reimu's most useful air to air bullets, because it covers an extremely wide area and forces them to deal with it somehow. As usual the cards do not have much puncturing property, so you're not going to be winning any direct bullet battles with them. But unlike her other air moves, this changes her momentum, moving her backwards and upwards, and thus can be used to control height. This property is very very important and a core of Reimu's air to air game. Even if you don't need the bullets, you need the height control, as a lot of playing Reimu is about getting above a slight height advantage on the opponent. When you need to gain height quickly you can airdash cancel this move and use j.5C or j.2C again. The huge blind spot still exists, so don't expect to stop someone barging in on you with this. Keep it at a range and watch their height, using j.A, j.236A or j.236B instead when you need closer ranged stuff. | |
| j.2C
Throws cards diagonally downwards. Easily the best of Reimu's C bullets, this is good for both against both aerial and grounded opponents. The primary use of this move is halting the opponent's forward momentum, by forcing them to fall forwards into it or to dash forwards through on the ground. At the right spacing not only will they be forced to deal with it, you can easily react to their movement and adjust your followup accordingly. Much of your air game will be centered around this move, so get used to using it. The huge blind spot is still there, as is the height change from j.5C. While being pushed up is a good thing against other airborne opponents, you should be very careful about your height against grounded opponents, since you don't want them to escape under you or to get into a good position for antiairing you. Fast characters like Marisa can get away easily if you're spaced wrong. | |
| f.5A
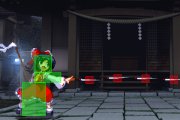
Throws up to 10 needles in a straight line. As with the C bullets, holding the button down causes more of them to be thrown. They travel extremely fast and cost very little spirit, making them Reimu's ideal move for halting the opponent's ground game, but they aren't good at puncturing other bullets, and shouldn't be used to win against other bullets. The primary use of this move is either to prevent them from landing safely or to stop them from starting up their own strings, forcing them to graze or block. | |
| f.6A
Throws needles diagonally upwards. This has a slightly lower angle than 6C and comes out substantially faster, making this a great anti-air move. While the space covered is very limited, the low cost of the bullets, quick movement, and ease of HJCing make it great for forcing the opponent to use up one of their airdashes, severely limiting their options in the air. The range where 6A stops and f.6A starts is very important for Reimu, because it's basically her ideal range to start up strings. More importantly, you can option select against the opponent's movement by standing at that range and hitting 6A: if they dash forward you get the stick poke towards their face, otherwise you do f.6A and can easily quickly HJC it. | |
| fj.5A
Airborne needle tossing. As with f.5A, better for preventing the opponent's motion than winning any sort of bullet battle. The low payoff and limited options afterwards make it less than ideal for that, so you'll probably want to use f.5B or jf.5B instead. | |
| fj.2A
Throws needles downwards. Good at interrupting ground strings and annoying T-Grazers, but nothing else really. As it can only be used at very far range, this move is easily forgotten about, both by you and the opponent, and that's really the primary benefit of this move. | |
| f.5B
Throws up to 8 blue cards that have a slight homing property, one every 4 frames, so you have to hold about half a second for a full volley. The cards themselves are fairly slow, but have good strength and puncture other opponent's bullets well, which make this your workhorse for beating the opponent's bullet games directly. The long duration and slight homing property essentially forces them to move if they are on the ground. This is a great starter against pretty much the entire cast. Because the cards are so slow, they can actually juggle the opponent for a long period of time, enough for Reimu to follow it up. If they airblock a full set of cards in the corner, you can follow up with a full set of f.6A to cause even more spirit damage. | |
| fj.5B
Air blue cards. These fire slightly faster, at 3 frames per card, causing them to be more densely packed and take less time to get out. This is a great tool to plow through any bullets the opponent put up to cover his own motion, but the limited vertical range means you won't be getting bullets that go around easily. Still, it's a great move for halting the opponent's advance. | |
| 2C
Reimu sets a large blue card on the ground directly in front of her. The bullet itself doesn't become active for a little while, but you can cancel this extremely early, making it a great choice for setting up anti-movement blockstrings on the ground. For example, A common use is 2C HJC9 j.5B, which will catch them if they dash forward or jump up, and force them to block if they don't. | |
| f.2B
Like 2C, except about half a screen away. This isn't very useful since it's very easy to graze, you can't set up anything with it, and uses up way too much spirit. The primary use is stopping the opponent from starting something up when there's too many bullets coming at you to use f.5A. | |
| f.2A
Exactly the same as f.2B, except really far away. Just like f.2B, the primary use of this is interrupting the opponent when you're not free to use f.5A. |
Specials
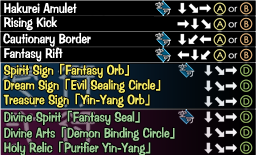
Hakurei Amulet - 236AB (air)
| |
| Rising Kick - 623AB
Flash kick!
| |
Cautionary Border - 214AB (air)
| |
Fantasy Rift - 421AB (air)
|
Spell Cards
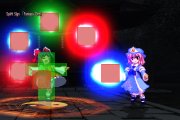
| Balls 1 - Spirit Sign "Fantasy Orb" (air)
Reimu strikes a pose and then summons 8 homing balls, one at a time. Each ball can hit up to two times, with the first only happening when it hits close to Reimu. The startup is fast enough to blockstring seamlessly off of any blocked heavy attack or jumping attack, for about 40-50% spirit damage. This card has a small(7f) invulnerability period at start, then grazes until she starts falling back down, so it's a good answer to long bullet strings or if the opponent has boxed himself in the air. This card is not recommended, because while it does have good combo potential, its slow startup makes it hard to justify picking over Orb. It also functions poorly as a reversal due to the small invincibility period, slow startup, and generally just being an inferior choice to 623 or a bomb. |
||
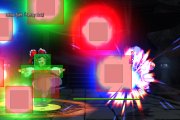
| Balls 2 - Divine Spirit "Fantasy Seal" (air)
Same as above, but now each ball can hit up to 4 times over a wider area now for much higher damage. Everything else is the same, but this is good enough to propel it to being one of the more powerful cards of the game, as its spirit damage and chip strengthens Reimu's pressure game immensely. On block it will do about 60-80% spirit damage, almost ensuring a guard crush if it wasn't full to begin with. It even gives frame advantage afterwards, so you can keep right on them. Against an airblock this is effectively a guaranteed crush and damage. Even better: If the opponent has jumped high and spent an airdash, doing this will almost assuredly prevent her from landing safely. It still starts slowly, so don't be careless. Comboing into it midscreen will usually need an O-Bomb. If it hits cleanly on the ground from no starter, Reimu can follow it up with another for massive damage. |
||
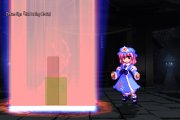
| Column 1 - Dream Sign "Evil Sealing Circle"
Reimu places the card on the ground, which then creates a very tall pillar that hits all around her. Has melee invincibility and graze all the way through to the active frames, making it a viable reversal move, but it will still lose to Type 3 attacks like Marisa's Master Spark and Meiling's stomp. Startup is very slow, so it'll be really hard to catch any moves that are already out at the time of activation. Since it goes up very high it can be used to catch people moving carelessly in the air, but because it's so slow they can often airblock it in time if they aren't being careless. The worst part of this move is that if gets blocked from outside of the corner then the opponent will actually be pushed out of the pillar, instead of staying in it, allowing her to punish it with ease. The damage is very disappointing at around 1.4k and only really combos off of 6B/623 launchers, which can combo into every other card anyway, so it's a poor choice for... Well, pretty much anything. Easily her worst card. |
||
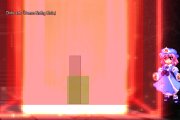
| Column 2 - Divine Arts "Omnidirectional Demon Binding Circle"
Similar to above but much wider, does about 2.5k damage, and it's red now. Every else is the same, so it's still not very useful. It barely even does any chip on block. At the very least, its wider region makes it easier to punish bad jumps. Given that Reimu's other two cards are amazingly good, there is no reason to ever pick this. |
||
| Orb 1 - Treasure Sign "Ying-Yang Orb"
Holds out a red orb slightly larger than Reimu is for up to 14 hits. For a first level card it does great damage at 1.8k and even knocks down for free, and on block it'll do about 55% spirit damage. It uses 50% of Reimu's spirit initially, but most of that will recover while it's out anyway. Best of all, this card is fast enough that it strings tightly off of 2A, 6A, 5B, and 3DA, enhancing Reimu's melee and combo game dramatically. It's also far enough away that opponents generally can't safely D-Bomb out of it once they're blocking it. Despite all that, it is slightly disadvantageous on block, so be careful about continuing afterwards. There is really no reason to pick anything else. It is great in pretty much every matchup and strengthens Reimu's game in a way that is incredibly obnoxious for the opponent to deal with. |
||
| Orb 2 - Holy Relic "Purifier Ying-Yang"
Summons an enormous blue orb in front of her that accelerates across the screen while consuming Reimu's spirit continuously. Fortunately, it stops short of crushing her, but it's still not good to use when she doesn't have much left. When it contacts the opponent it slows down dramatically and hits repeatedly until it either pushes her out or gets past her. Depending on how it hits, the orb can sometimes do completely ridiculous amounts of damage. The startup on this is fairly long and can only string tightly off of a heavy attack. Because of how it connects, this card functions uniquely outside of combos. As it consumes most bullets in its path, opponents will be forced to evade or block it depending on where they are. On a midscreen block, it will just push her out immediately and is generally a bad idea. Near the corner you'll generally recover about even and do most of their spirit on damage. Ideally, you want to opponents to block it from a short distance away from the corner, since they'll eat the full brunt of the orb, guaranteeing a crush and pushing her into the corner. Since the orb is moving slowly and takes up so much space, Reimu can actually move in behind it and get a free invisible high/low on them. This has more straight up power than Balls 2 but less versatility. A very viable choice in some matchups. |
Combos
General
Most of Reimu's combos require good execution and timing, but once you master them they enhance Reimu's game into a competitive level.
- 5B or 2A, 6B 623B 22C j.B j.C - This is her BnB out of corner. It does around 3.1k damage, which is nice, but it burns a bomb.
- 5B or 2A, 6B 623B 22C walk forward 5B 623B - Replacement of her BnB; does 3.2k damage, timing is a bit harder.
- 5B or 2A, 6B 623B 22C hj8 j.B j.236A j.4D j.B - Replacement of her BnB in the corner; timing is pretty hard.
- 5B or 2A, 6B 236A hjc9 j.A j.236A j.4D j.B j.C - Corner BnB, does 3k damage and leaves you with momentum advantage; timing for hjc9 j.A is pretty tight.
- 22A, walk to the opposite side, 6A 22B 22C j.B j.C - Corner; if you need to add more damage than regular 22A j.B j.C use this, but it burns a bomb. Timing is a bit hard.
- j.A land hj9 j.B j.A land hj9 j.A(1 hit) j.236A j.6D j.B 236B j.4D j.B j.C - Air-to-air. If you didn't reach the corner on the third jump, go for j.C instead of j.236A etc. This is the basic air-to-air comb., It requires quite some execution; have in mind that the first j.A must be on the way down or you won't be able to connect hj9 j.B. Also have in mind that all the re-jump attacks must be done as soon as Reimu leaves the ground.
- j.A land hj9 j.B j.A land 5B 236A hjc9 j.B j.236B j.4D j.B - You must reach the corner when you land for the second time, otherwise do either of the options above.
- j.A(2 hits) or j.B, j.236A j.6D j.B 236B j.4D j.B j.C - Corner air-to-air; use the first j.A (or j.B) on the way up for better results.
- j.A(1 or 2 hits) j.236A j.6D j.B land 5B 236A hjc9 j.B j.236B j.4D j.B - Corner air-to-air; must be done near the ground level (on the way down).
- j.B land 5B 5B 236A hjc9 j.B j.236B j.4D j.B j.C - Corner air-to-air; if you find the timing too difficult to connect the second 5B, skip it. The first j.B must me done on peak normal jump or on the way down so you land first.
Loops
Use this after a successful air guard crush or guard break in the corner.
- 5Ax10 236A hjc9 j.B 236B j.4D j.B j.C - 3.7K damage.
- 5Bx3 236A hjc9 j.B 236B j.4D j.B j.C - 3.5K damage.
Spell Card Combos
Lvl1 Orb combos from pretty much anything – 5B, 6A, 2A, 33A, 33B, 66B, 22A – but what about more elaborate combos? Here are some you can try.
- 5B 6B 623A 236D(Orb) - Out of corner only; either Orb works.
- 22A 22A(facing the other side) 236D(Orb) - Corner; either Orb works.
- 5B 6B 623A 236D(Balls or Column) - Corner only; either level of these spell cards work; if done with Balls level 2, you can follow up with hj8 j.B j.C.
- 5B 6B 623B 236D(Column) - Anywhere on screen; either level of Column works.
- 5B 6B 623B 22C 22A 236D(Orb) - Out of corner; does some heavy damage (3.6K for LVL1 Orb, 4.2K for LVL2 Orb). If done with level 2 and near midscreen you can follow up with hj9 j.B cross under 2A 22C(spirit refill) 236D 421A 421A it adds around .4K damage for a total of 4.6K.
- 5B 6B 236A hjc9 j.A 236A j.4D j.B 236D(Balls) - Uses balls instead of j.C on her corner BnB for good damage.
- 33B or 22B or 66B, 236D hj9 236D(lvl2 Balls) - Easier on corner; success or failure of this depends on how the spell card hits the enemy.
Strategies
General
Reimu is one of the weakest characters damage-wise. Unlike other characters, such as Yuyuko and Suika, she relies on identifying situational combos to deal decent damage. These openings are not frequent against good players and for them you must be very patient; playing safely, throwing projectiles, zoning the enemy, and staying away until you see an opportunity to land a good combo.
Blockstrings
Another fundamental part of Reimu's game. You are not always striking to connect a clean hit; forcing the opponnent to block puts Reimu in an advantageous position. Reimu's game is very rich on block.
*5B or 2A or 5B 6A or 2A 6A or 5AxN This are the basic ground setups for Reimu; after this you can:
- ...22B (Not recommended unless opponent is afraid to jump out)
- ...22A (Punishes jump-outs and guard crushes if blocked low)
- ...5C(3 waves)
- ...hjc9 j.4D(iadb) j.A j.5C j.6D j.A land, * (TR's special blockstring)
- ...hjc9 j.2C(3 waves) j.6D j.A
- ...j.C(3 waves) j.6D j.B land, * (Use j.2C instead if you are too close to the enemy)
- ...land, *
- ...hjc7 j.6D
- ...j.2C(1 or 2 waves) j.6D j.A, *
- ...j.A, land, *
- ...hjc9 j.A (1 hit) j.2C(3 waves)... (Reimu needs to have good distance or j.2C won't hit and they will be able to escape)
- ...j.6D j.A, land, *
- ...j.A j.C j.6D j.A, land, *
- ...2C (Its long blockstun makes the following strings harder to escape)
- ...hjc9 j.6D j.B land, *
- ...wait, walk forward, * (Use only if you already know the opponent won't try to graze the 2C)
- ...hjc7 j.6D
- ...j.2C(1 or 2 waves) j.6D j.A, *
- ...j.A, land, *
- ...hjc9 j.2C(3 waves) j.6D j.A
- ...land, *
- ...j.C(3 waves) j.6D j.B land, * (Use j.2C instead if you are too close to the enemy)
- ...236A hjc9 j.2C(3 waves) j.6D j.B (Don't use it often as it is punishable and easy to escape if predicted)
- ...land, *
- ...j.C(3 waves) j.6D j.B land, * (Use j.2C instead if you are too close to the enemy)
- ...hjc9 j.B j.B land, * (Works best in the corner; first kick punishes jump outs, second kick keeps pressure if the opponent stays down. The only way to avoid this lockdown is dashing forward)
- ...hjc9 j.A (1 hit) j.2C(3 waves)... (Reimu needs to have good distance or j.2C won't hit and they will be able to escape)
- ...j.6D j.A, land, *
- ...j.A j.C j.6D j.A, land, *
- ...623A, * (If they try to graze forward or use a graze attack, this move will nail them; if they block, you have advantage because 2C holds them in place)
Other Gimmicks
5B 623A 236D(lvl2 Orb) Use this near the corner; if it connects, that's 3.6K damage on the fly. If it is blocked, it causes roughly 1K worth of chip damage + guaranteed guard crush + free high/low game. NOTE: This must be done at point blank or 623A will whiff. If you don't feel like being fancy, you can set up a blocked 22 or 66 or 33B. Again, do this near the corner or your opponent will get pushed out of the ball, taking only minor chip damage.
2A 6B or 2A 22B? After you successfully crush your opponent, you have a lot of options – 5B and 6B for high stun, 33B bomb for a surprising low attack, and, of course 2A. 2A is an amazing option – you can cancel it on any one of its 6 hits, so it's hard to block the following attack. Not only that, but you can cancel it into 2 different attacks that actually look similar on their initial frames (little hop) – 6B, which hits high and 22B, which hits low, so abuse this. If you have a bomb or spell card, you can follow up 22B with either of these. 6B stuns the opponent and opens your high-low game again.
421A Crossup You can't switch directions in IaMP when you are in the air. Because of this, sometimes Reimu will be facing defenselessly away from the enemy. Reimu doesn't really have a normal that hits behind her in the air. j.A and j.B both have a chance to hit an enemy right behind her if they try to attack her because some air normals widen the enemy's hitbox on their initial frames. But this is very unreliable and dangerous and should not be tried unless there's no time for anything else.
So what can you do? 421A. Reimu always teleports and appears facing the same side she started her teleport, this will make you then appear on the enemy's back for a surprise attack. Of course, it's dangerous to abuse it, especially against characters that have long range attacks as they can evade and still punish you. Most of the time, however, it is safe to do. Just be aware of what the opponent is doing. If they are throwing projectiles, for example, you can teleport behind them and hit them as they recover.
Wakeup 66B/33B 236D(lvl1 Orb) 66B and 33B are moves that can't be blocked correctly on reaction, meaning that if you guess correctly this is a perfect guard crush – 50% for the high/low attacks and 50% for the Orb. This also means that you get a free high-low game since perfect guard crushes induce stagger.
Matchups
| vs Reimu:
War of bullets. Pretty much anything goes here as far as tactics go. j.C's blindspot is going to be a favorite to abuse, and your other bullets will basically be a game of RPS midscreen: f.A kills startup, f.B punches through j.C/5C, and j.C overwhelms f.A/melee approaches. 236A goes through pretty much everything except j.C and basically forces the opponent to move, but doesn't usually lead to damage much on its own. When you run low air strings, watch out for 6DB and 623B, they both hit deceptively high up. |
| vs Marisa:
This one requires some careful use of projectiles to deal with puffballs. j.C is generally not a good idea because one explosion takes it all out and you're back to square one. f.A/f.6A/f.B/236A will help a lot in going around the puffs without popping them. As Marisa can't hit above her in the air, you can fairly safely j.2C her off without too much trouble, but make sure nothing explodes in your face. When Marisa is grounded, make sure to watch your range on your air approaches, as Marisa 6DA(low air) and 623B(high air) will swat you out if you're not careful. Try to stay close to the ground and aim for lots of j.A to keep her out. The only moves of her that graze are 3DB, 214, and Broomride, so you can keep her from abusing her ground game if you play your cards right. This is important, as you need to keep yourself out of the corner, since you're basically screwed if Marisa gets you there. 623B will trade in your favor against incoming j.A/j.B rushdown, so if you don't want to take the chance against her melee pressure you can go for that, just hope it doesn't get baited. In melee, she has a decent reversals and a move that dodges mid-low attacks(6A), so be careful once you start your main offense. Random 6A stabs can actually be useful midscreen to stop broom shenanigans, especially if spaces such that if Marisa moves forwards you get the poke, otherwise you get f.6A which can be quickly HJC'd into more pressure. |
| vs Sakuya:
Sakuya is not a matchup you want to play defensively on. She can and will overwhelm your bullets, her melee can and will outrange/outhitbox yours, and she can even escape damage in some air strings with j.623. In air battles, you should try to avoid direct confrontations with her j.C whenever possible, as not only will your bullets not survive but it helps drain Sakuya's spirit. Try to get her to airdash with them so you can jump back and j.2C on her head as she's coming down. She moves considerably faster and grazes longer in the air than you, so don't hesitate to fall back or take advantage of her inability to block, so don't just sit there and hope she respects your bullets, because she doesn't really have any reason to. Once you get her cornered, it's very important to NOT spam 2A/3DA in melee pressure because 6b will CH you. However, Sakuya does not have a real invulnerable reversal besides Slashy, and this works to your advantage here. Rely more on bullets and random point blank 5a/5b. Don't worry about wasting bombs here, as Sakuya gives tons of point items. |
| vs Alice:
One of the few matchups where you've got the upper hand. Most of the matchup is fairly standard bullet momentum, trying to keep yourself from getting boxed in by Alice's 5C/j.2C moves while not getting tagged by j.A/2A/3DA. The main tool of yours that stands out here is f.6A, which throws all sorts of wrenches into Alice's pressure game, preventing her from following up many strings with obvious j.A approaches. f.[B] 236A is also very solid, since it keeps her from starting any strings and lets you move in safely with HJC rush. 236A by itself will actually go completely around 5C's bullets, which is somewhat useful for nullifying Alice's advantage with them. Just play patiently and try to keep her from starting up any major strings and you should be safe, since she can do very little about your corner pressure once it gets rolling. Beware of 6DB, and remember that you can HJ8 midscreen boot strings. |
| vs Patchouli:
Your bullets are pretty much useless here, so playing defensively is right out. The instant Patchouli gets a tornado out you basically can't do a thing other than try to keep her at bay. j.C is practically useless except for stopping f.A walls. f.A has its uses, f.B not so much unless you can actively get her to block them. Patchouli's j.C will even stop many of your melee approaches cold, because it comes out quickly and starts right next to her. 6DB/3DB will cause headaches for your approaches since she'll mix them up somewhat randomly. Whatever you do, do not give chase if she backs off and gives you room, because it's almost assuredly a bait. Try to tag her when she tries to advance, because this is when she's vulnerable. Her only melee in air confrontrations is j.B, which can't hit above her, so if she advances without a lot of coverage you can get a free j.2C string possibly into guard break. Just watch out for your grazing, as Reimu has a very short graze period on her airdash which is a big liability in this matchup. |
| vs Youmu:
Youmu's bullets kind of stink, but you have basically nothing on her corner game or damage. So you can pin her down for a long while and she can turn it around in one or two combos. You might want to conserve your spirit somewhat in this matchup. If you get her cornered, beware of her short crouching height and 623A. Also, be very aware of your j.2C blindspot(which she can and will elbow if you're not careful about it). It's generally better to run lower air strings than you usually do against Youmu, because of this reason. Just be patient and don't rush in on this matchup, her speed is better than yours and her range is deceptive, but she can't do anything about your bullets. On the ground, watch out for her 3DB(Knee of Justice) and try to avoid HJing out of 5C pressure. Of special note is her air techs, which are slightly faster than everyone else's, so many of your tech punishes will not work as well. |
| vs Remilia:
Remilia HATES your 236A, your f.B, and your j.A. Really. 236A stops her 6D shenanigans cold, and she can't really approach for midair confrontration safely because of j.A's range. j.C is not very useful here except for countering Remilia's own j.C/f.A, as Remilia doesn't really care too much about the density and loves the blindspot on it. f.B density and homing, on the other hand, when used after she's stopped climbing in the air, forces her to move, so be ready to catch her. In melee, she does have a melee invulnerable reversal, so be careful of that. However, unlike the rest of the cast, her only effective grazing move for escaping the corner is her 236A, which is very baitable. If she gets you cornered there's not a lot you can do, unfortunately, and midscreen she can push you back with her mixups. Her midscreen mixups are substantially weakened without o-bombs available, so try to keep your bullet quantity low. |
| vs Yuyuko:
This matchup requires a lot of patience to play, and needs strong defense. Yuyuko needs to play around Reimu's dense projectiles and j.A, which basically nullifies her air offense, and Reimu needs to play around 6DB/3DA, which basically nullifies Reimu's low air shenanigans. Basically if either character gets cornered, they don't really have anything that lets them get out easily, so you need to play the midscreen game where you have the advantage overall. Try to mix in 214 barriers to halt Yuyuko's progress. Once the advantage is pretty clear, Reimu can keep Yuyuko pinned down for quite awhile since her bullet pressure can shut down 6B, and 6DB/3DA can be baited out. Yuyuko, on the other hand, can keep Reimu down all day with 5A and butterflies, and 2B/3DB will be problems for starting ground projectile strings. Keep pressure on but don't be hasty as Yuyuko does a lot more damage for every hit she gets in. You might want to horde your bombs for this one, and try to deprive her of them. |
| vs Yukari:
Both of you have similar bullet zoning games and tricks, the difference is that Yukari's are stronger but cost much more spirit. If you play defensively you can outlast her, but her range is often too great to push in: gambling on j.A won't get you enough damage to make up for what she will get in return. At about half screen range don't bother trying to setup bullet strings on or near the ground, as her 3DA will cause you headaches. Yukari has no invulnerable reversals, so she can't do much about your pressure once you get her locked down. Unfortunately, neither do you, so you can't stop hers! Her 6B will not be stopped by your 623A. And with Ran about she gets a lot more damage and mixups off of it than you will. Another matchup where you need to watch the bomb stocks. Note that many of your air to air strings will be less effective as she recovers from air blocking slightly faster than anyone else. |
| vs Suika:
Suika's small height, especially when crouching, will give you headaches. If you can keep her locked down she's not going to be a problem, but one of her random counterhits will basically equal two of your combos, so be careful. Because you can't trade with her C bullets, neither of you can control space very well. j.C coverage pretty much nullifies Suika's bullet advantage, and a properly angled f.B basically completely prevents her from approaching from the air. 236A is very solid here, too. On the ground, it's a different story: Suika out-ranges and out-grazes you all while hanging underneath your usual angle of approach. Even more annoying, she can 3DB underneath your backdash j.236A. Her moves have very slow startup, though, and you have to abuse this. Be quick, stay very low, and don't give her an opening and you should be able to wear her down. |
| vs Meiling:
There's not much in this matchup that isn't in your advantage. 2a/5a mixup is beat by 623a/623b, and Meiling needs to get through your bullet walls somehow. You need to watch out for two things: Meiling's f.B, and Meiling's ridiculous air movement speed. In the air, you won't be outranging her much, but she grazes about as badly as you do, which is to your advantage. Her f.B will halt your approach, but she can't follow it up against your pressure very well either. When pressured she only has an upper body invulnerability move and relatively weak graze attacks, so you should be able to keep her pinned down effectively. If you can handle the tools needed for other matchups, this one's fairly straightforward. |
Frame Data
                                                              Block   Hit     CH
Motion     Damage     Proration   Startup  Active  Duration   Adv     Adv     Adv   Untech  Guard   Type
------------------------------------------------------------------------------------------------------------
 5A         200        98%          6        2       16        -1      0       X     25      Mid     A
 2A         100*6      98.5%*6      8        18      35        -1      0       X     20      Low     B
 6A         850        85%          12       2       35        -8      -7      0     40      Mid     B
 5B         620        92%          8        5       24        -1      0       +7    35      High    B
 2B         900/600    85/92%       11       9       46        -13     D       D     40      High    C
 6B         850        85%          11       8       43        -10     D       D     40      High    C
 6DA        850        85%          15       3       39        -2      D       D     40      High    C
 6DB        1000       85%          11       7       55        -22     D       D     40      High    C
 3DA        100*8      98.5%*8      8        18      35        +3      X       X     20      Low     B
 3DB        1000       85%          12       16      45        -11     D       D     40      Low     C
 22A        1000       75%          22       5       50        -6      D       D     60      High    C
 22B        1000       75%          21       8       49        -6      D       D     40      Low     C
 j.5A       150*3      96%*3        7        24      38        +4              X     30      High    A
 j.5B       700        85%          7        5       32        -8                    40      High    B
 22C (N)    0          80%          12       2       45        -11     D       X     oo      Mid     C
 22C (O)    500        80%          12       2       37        -3      D       D     oo      Mid     C
 22C (D)    0          80%          12       2       61        -27     D       D     oo      Mid     C
 22D        x          x            31       x       107       x       x       x             x       x
- Properties
- 2A: 2F hitstop
- 6A: 1-13F graze
- 2B: First value is close hit, second value is far hit
- 6B: When it connects, 33F+ cancellable, 11-31F airborne
- 66A: 1-17F graze
- 66B: 11F+ cancellable, 1-17F graze, 11-41F airborne
- 33A: 2F hitstop
- 33B: 1-11F graze
- 22B: 6-20F airborne
- 22C (N/D): 1-13F invincible
                                                              Block   Hit     CH
Motion     Damage     Proration   Startup  Active  Duration   Adv     Adv     Adv   Untech  Cancel  Type
------------------------------------------------------------------------------------------------------------
 5C         80*5-15    98%*5-15     17       oo      38        -5      -4      X     20      18      B
 6C         80*5-15    98%*5-15     17       oo      38        -5      -4      X     20      18      B
 2C         150*3      94%*3        32       oo      57                        X     30      12      B
 j.5C       80*5-15    98%*5-15     11       oo      31                X       X     25      12      B
 j.2C       80*5-15    98%*5-15     11       oo      31                X       X     25      12      B
 f.5A       100*1-10   98%*1-10     11       oo      32                        X     20      12      B
 f.2A       150*3      94%*3        32       oo      57                        X     30      16      B
 f.6A       100*1-10   98%*1-10     11       oo      32                        X     20      12      B
 fj.5A      100*1-10   98%*1-10     13       oo      33                        X     20      12      B
 fj.2A      100*1-10   98%*1-10     13       oo      33                        X     40      14      B
 f.5B       150*5      94%*5        18       oo      37                        X     35      22      B
 f.2B       150*3      94%*3        32       oo      57                        X     30      12      B
 fj.5B      150*5      94%*5        14       oo      37                        X     35      24      B
- Properties
- 5C: Up to 3 waves
- 6C: Up to 3 waves
- j.C: Up to 3 waves
- j.2C: Up to 3 waves
- f.5A: Up to 5 waves
- f.6A: Up to 5 waves
- fj.A: Up to 5 waves
- fj.2A: Up to 5 waves
- f.5B: Up to 4 waves
- fj.B: Up to 4 waves
                                                              Block   Hit     CH
Motion     Damage     Proration   Startup  Active  Duration   Adv     Adv     Adv   Untech  Cancel  Type
------------------------------------------------------------------------------------------------------------
 236A       200*2      95%*2        13       oo      38        -9      -8      X     30      15      B
 236B       200*6      95%*6        20       oo      50                        X     30      22      B
 j.236A     200*2      95%*2        15       oo      38                        X     30      16      B
 j.236B     200*6      95%*6        22       oo      51                        X     30      23      B
 623A       1000       85%          14       3       45        -9      D       D     40      14      C
 623B       1000       85%          14       6       54        -18     D       D     40      14      C
 214AB      850        85%          47       120     47                D       X     40      28      C
 j.214AB    850        85%          45       120     48                D       X     40      26      C
 421A       750        85%          43       10      68        -2/+1   D       D     40              C
 421B       900        85%          45       15      74        -7      D       D     40              C
- Properties
- 623A: 14-33F airborne, 1-?F attack decision at foot
- 623B: 1-19F graze, 14-42F airborne, 1-?F attack decision at head
- 214AB: Partner 30F hitstop on hit, 10F hitstop on block, 27F discharge
- j.214AB: Partner 30F hitstop on hit, 10F hitstop on block, 25F discharge
- 421A: 12-36F invincible, 37-53F airborne
- 421B: 12-36F invincible, 37-44F airborne, attacks low
                                                                     Block   Hit     CH
Card         Damage       Proration     Startup     Active  Total    Adv     Adv     Adv   Untech  Type
------------------------------------------------------------------------------------------------------------
 Balls Lv1    100*8+200*8  96%*8+95%*8   8,10(18)    oo      125      +2      D       D     80      C
 Balls Lv2    100*8+120*24 96%*8+98.5%*8 8,10(18)    oo      125      +6      D       D     80*8    C
                                                                                            +60*24  C
 Column Lv1   50*36        99%*36        13,7(20)            204      -57     D       X     oo      C
 Column Lv2   80*36        99.5%*36      13,7(20)            204      -57     D       X     oo      C
 Orb Lv1      150*14       98%*14        1,13(14)            127      -3      D       X     90      C
 Orb Lv2      100*n        98%*n         1,20(21)    *       102      +       D       X     oo      C
- Note: Startup is Preflash,Postflash(Actual)
- Properties
- Balls Lv1: Partner 9F hitstop, 1-7F invincible, 8-100F graze
- Balls Lv2: Partner 9F hitstop, 1-7F invincible, 8-100F graze
- Column Lv1: Partner 9F hitstop when it connects, 1-?F melee invincible + graze
- Column Lv2: Partner 9F hitstop when it connects, 1-?F melee invincible + graze
- Orb Lv1: Partner 9F hitstop
- Orb Lv2: Partner 9F hitstop when it connects, 5F discharge, active time depends on spirit consumption
Motion    Startup   Active   Recovery  Graze      Cancel   Guard   Invulnerable
------------------------------------------------------------------------------------------------------------
 7/8/9     5         x        x         x          7+       7+      x
 7D/8D/9D  5         x        x         1-20       6+       21+     x
 6D        5         12~36    18        1-(20~44)  1+       19+     x
 4D        4         17       4         1-21       7-21     x       1-6
 j.6D      9         14       x         1-23       10+      18+     x
 j.4D      3         12       x         1-15       4+       16+     x

