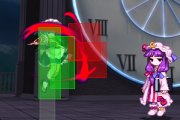
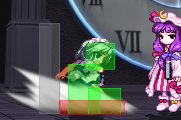
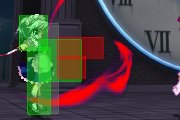
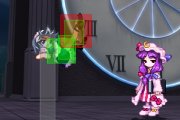
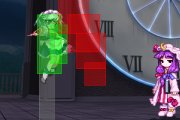
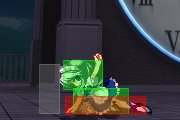
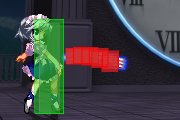
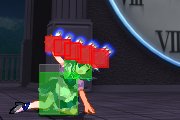
Immaterial and Missing Power/Sakuya Izayoi
Introduction
- More info: Touhou Wiki
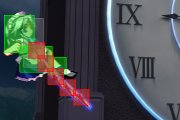
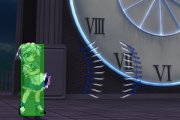
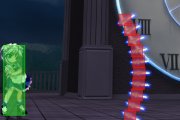
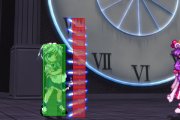
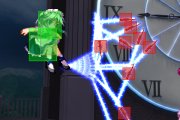
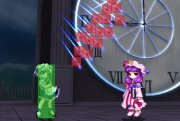
Sakuya Izayoi is the faithful head maid of Remilia despite being a human (or possibly Lunarian) and an extremely skilled knife user: countless knives are carried on her in 'pocket dimensions'. Stopping time, either on everything or in localized areas, is her trademark time magic. She picks up all the knives she's thrown after freezing time and hence never runs out. She is also capable of speeding up time and other spells (but not in IaMP).
Many new players of the game are drawn to her smooth, sleek fighting style which is reminiscent of Ciel's from Melty Blood. Sakuya is one of the few characters in the game that can be played in a number of different styles ranging from defensive to offensive, all of them effective in the right hands. A very versatile character, she's well-rounded in every aspect and has no true weaknesses.
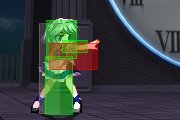
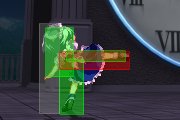
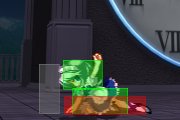
Moves
Melee
| 5A
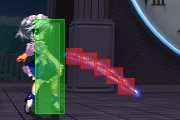
[ Mid | Damage: 200 | Startup: 6 | Active: 2 | Hit: +1 | Block: 0 ] A quick jab attack. This move has more uses than one would initially believe; it chains into 6A easily, it can be used to guard break and link into a j.A loop, and it's +1 on block which basically means you can spam them relatively safely. You can also spam this move at variable intervals up close, and against people who try to jump out you can link into a 6A loop in the corner, or a j.A loop outside the corner. | |
| 5B
[ Stagger High | Damage: 580 | Startup: 8 | Active: 3 | Hit: 0 | Block: -1 ] A side kick attack. At 8F this move is relatively fast. Its main use is being the high attack in Sakuya's HJC rushdown string. You can also use this move in her 6A loops if you need the opponent to drop down instead of get juggled upwards. Also, on midscreen guard breaks, chain into 6B 214B for an instant knockdown and 214B oki. In the corner you can guard break off this but you're better off using 6A as it can do everything this move does but with better range. | |
| 2A
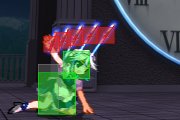
[ Mid | Damage: 950 | Startup: 12 | Active: 2 | Hit: +6 | Block: +5 ] A swiping attack that actually hits mid. This attack has a fair bit of startup time, and because it can be blocked either way its uses are limited. However, it does have a large amount of frame advantage (+5 on block, +6 on hit, +17 on CH) and a lot of range. Usually, you can punish whiffed ground attacks with a 2A 22B, followed by 214B oki. You can also land a 2A 6B after a 22C, though the timing is very tight on it and generally not worth it. Use this move primarily at max range and meaty, and mix between going into 5C (difficult to counter because of the blockstun) or a guard crush. | |
| 2B
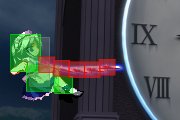
[ Low | Damage: 620 | Startup: 8 | Active: 3 | Hit: -1 | Block: -2 ] A very quick low sweep. This move does not trip but it does hit low. Sakuya also moves forward quite a bit when doing this move, making her hittable area lower than normal. This move hits clean during guard crush and is a prime threat for opponents during that time. Outside of that, you can use it to complement her rushdown or to poke people out of blockstrings when they don't have lower body invincibility. | |
| 6A
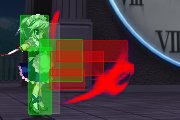
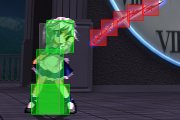
[ Mid | Damage: 650 | Startup: 9 | Active: 3 | Hit: 0 | Block: -1 ] A very fast, very long-ranged knife slice. This move is excellent. Not only is it fast, it has extremely long range and is air unblockable, allowing you to use it in many situations. While it's not advantageous on block (-1), the disadvantage is negligible. The real power of this move is integrating it into your HJC rushdown as well as your corner loops. Because it chains from 5A, you can catch people trying to jump out with this move or her 5A 6A chain into her 6A corner loop for good damage. You also use this move to guard break people in the air and to combo after a connected 22A. The only real drawback is that it hits mid. | |
| 6B
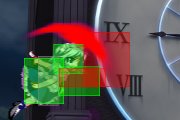
[ Stagger High | Damage: 950 | Startup: 20 | Active: 2 | Hit: X | Block: -3 ] An overhead flip kick. Slow (20F startup), but this move will avoid low attacks and knock down right away. Despite its -3 on block it's fairly difficult to punish, so if you use this move once in a while in a blockstring such as 2B 6B, you'll be alright. If you combo into her guard crushes from this move, they can poke you in between and hit you during startup; however, you can use her 2C to counter this. Off of 2A, the 6B will not be counterable in between due to hit/blockstun. The primary use of this move is during stagger games, as its lower body invincibility will allow you to counterhit a lot of pokes and go into a j.A loop, as well as stagger opponents who block low too often. This move will move Sakuya forward when you need better range for her rushdown. Keep in mind that many opponents will be able to backdash in between moves if you don't chain 6B from a 2A. | |
| j.5A
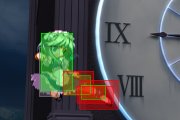
[ High | Damage: 550 | Startup: 8 | Active: 2 | Hit: | Block: +1 ] This is Sakuya's main air attack, a relatively fast air swipe that has a hitbox located towards her front and above her. This is not a good move for attacking air to ground, but is ideal for air to air situations. It is +1 on block and allows you to set up guard breaks if it gets blocked air to air. Because of the long hitstun and the relatively short recovery time of this move, you can connect up to six of these in a single j.A loop, although most of the time you should not be doing more than two or three before going into the more damaging 6A corner loop. | |
| j.5B
[ High | Damage: 700 | Startup: 10 | Active: 4 | Hit: | Block: -6 ] This move is reserved mostly for air to ground situations, as j.A is a far better move to use air to air. The only time you would really use this move in the air is to end a j.A loop with j.BC, as it deals slightly more damage. Because this move does not recover as quickly, you can't really use it to zone and anticipate air attacks as effectively. This is, however, the primary move to use for Sakuya's rushdown. | |
| 22A
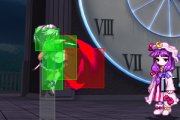
[ High | Damage: 450+450 | Startup: 22 | Active: 2, 3 | Hit: D | Block: -3 ] A two-hit high guard crush. This move, along with Sakuya's 22B, is very good, being the only two-hit guard crush in the game. Either hit can launch and guard crush. You primarily use this in the corners in order to stop people from jumping out of your HJC rush. When you connect with it, your optimal damage solution will be the 6A corner loop. Outside of the corner this move is only good for a surprise tactic, as you can really only land one or two j.A's off of it. The move has surprisingly long forward range, which must be utilized so Sakuya doesn't get hit out of its slow startup. | |
| 22B
[ Low | Damage: 800 | Startup: 20 | Active: 3 | Hit: D | Block: -2 ] A very fast and deceptively low-hitting low guard crush. This move has greater speed than 22A, and is more or less safe on block; you can even do some pseudo frametrapping off of it. The primary use of this move is as a part of your HJC rushdown, as it will stop graze attacks cold. It will also do well against people blocking high against 22A. Certain characters with slower jumps will also not be able to jump out of a basic 5B 22B attack. 22B also moves Sakuya forward by quite a bit, so certain moves will whiff her if the opponent attempts to punish. | |
| 6DA
[ Mid | Damage: 650 | Startup: 11 | Active: 3 | Hit: 0 | Block: -1 ] This is, for all intents and purposes, a grazing, dashing version of her 6A. You can go into her 6A loop off of this the same way you could off a 6A, if you are slightly farther from the corner. This move can only be comboed into supers; it's good for an easy hit confirm into her Slashy. Aside from that, you are usually better off using this move than 6DB, as it comes out faster and is slightly safer on block. | |
| 6DB
[Stagger High | Damage: 500+500 | Startup: 18+20 | Active: 2, 2 | Hit: D | Block: -3 ] A very long-ranged two-hit attack that grazes. It is, for all intents and purposes, her 6B on crack. Keep in mind, however, that the first hit will whiff on certain characters (Reimu), and that it does not graze all the way through; Sakuya has about 11F of time when she is still airborne but not grazing towards the end. This move is good against people who haven't dealt with it before. Against experienced players, spamming this move will cause your death as it leaves Sakuya at a slight disadvantage on block and can be countered if you are predictable with it. Primary uses for this move include tagging jumpers at a certain height and blowing through bullet patterns to get out of the corner. The second hit of this move will groundslam on CH. | |
| 3DA
[Stagger High | Damage: 950 | Startup: 20 | Active: 3 | Hit: D | Block: -4 ] This move is the second hit of her 22A with a huge jump trajectory and graze frames. While it's the most unsafe of her graze attacks, it has a wide anti-air angle and is also unblockable in the air, despite not being a grounded move. It is primarily used for countering people throwing projectiles down at you from the air, e.g. incoming j.2C with a melee aerial follow-up. 3DA will usually stuff the attack while grazing the projectiles. Think of it as why you'd use Sakuya's 623B, except this move a bit safer. Off a sufficiently high enough hit in the corner or a counterhit, you can go into a j.A loop or a 6A loop depending on your positioning. This move will whiff crouchers, though, so use it judiciously in the proper situations. | |
| 3DB
[ Low | Damage: 620 | Startup: 10 | Active: 3 | Hit: D | Block: -7 ] A grazing, dashing version of her 2B. This version differs from 2B as it not only knocks down but can be comboed into moves. This move is typically used to punish ground moves with a small amount of vulnerable time when 2A takes too long to be used effectively. Outside of that it doesn't see too much use. |
Bullets
| 5C
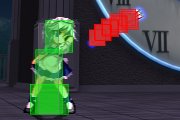
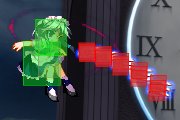
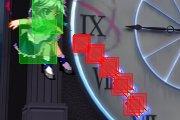
Throws fifteen knives in five volleys of three each forward. This move has good coverage and Sakuya is generally not punishable if they block it... however, this move is easily beaten by graze attacks, slow to come out, and slow to be HJC'd. Generally, you do not want the full volley to come out because of how much spirit it consumes and the speed of it; the quickest you can cut this move off is 3 knives, or 1 volley, which is fairly difficult to time. 6 knives (2 volleys) is fairly easy once you get the timing down. You do not want to do this move when you are point-blank to the opponent because they can stick out fast moves and beat you out easily. Switch between 5C and 2C depending on range and the speed you need. All of Sakuya's C's have a property of being able to be HJC'd at five different intervals, regulating spirit consumption according to the number of knives released. | |
| 2C
A choice move in Sakuya's arsenal. This move serves many purposes. Its primary function is usage as a part of her rushdown strings; because of how quick you can HJC it in comparison to 5C, it is preferred in some situations. It has good frame advantage up close. This move can be also used as anticipatory anti-air in certain situations. You will be able to control a space directly in front of Sakuya for a brief period of time that she is normally unable to defend, tightening your overall defense. When you anticipate and connect, you can HJC into a partial j.A loop for extra damage as well. | |
| 6C
An angled up version of her 5C. This move is very similar to her f.6B, but without the range limitation and more knives for about the same cost. While you don't get the bounce property, you don't really need it to begin with. This move is useful for anticipatory anti-air in limited situations; 2C goes more above you and 6C goes farther out. Generally doesn't see too much use either. | |
| j.5C
Aerial version of her 5C, but considerably faster. You can cut off the release of knives by airdash canceling at any point of the five waves. This move is great for covering air to air situations when you are facing someone with faster or longer ranged melee. You will want to airdash cancel at different times depending on how the opponent reacts; slower so your angle of approach is better if they block, and faster to stuff them in the air if they graze. | |
| j.2C
Sakuya's primary air weapon, an angled-down version of j.C which can be cut short like all her C attacks by airdashing. You will want to use this move as the main weapon in her rushdown, as the angle of this move makes it deals for air to ground approach, especially against people with anti-airs. However, it's easy to abuse this move out of habit; just understand that when approaching someone you have to vary between melee and this attack or else they will eventually HJ up and graze through it to hit you. One thing to keep in mind is that Sakuya bounces backwards and up in the air as she releases the knives, followed by a descent to the ground in which she has the time to perform one more move. You will want to airdash cancel at different times depending on how the opponent reacts; slower so your angle of approach is better if they block, and faster to stuff them in the air if they graze. | |
| f.5A
Standing knife toss. This move is slightly slower than f.2A, but the speed of the knives themselves is still extremely fast. The area it covers is also higher than f.2A obviously, so it's a tradeoff between the faster initial discharge of f.2A and the somewhat better coverage this move offers. Generally f.2A sees more use because Sakuya isn't as vulnerable from the quicker startup. | |
| f.2A
A crouching version of f.5A. This move has faster startup and can be HJC'd faster, with the tradeoff being that it flies lower and thus doesn't cover area as effectively. Due to its speed, you primarily use this move to keep opponents moving when at mid to full screen so they don't have time to set up bullet coverage. | |
| f.6A
A version of f.5A that's angled upwards. Good for catching people who like to set up aerial bullets from full screen, as it has a surprise value for not being used often. | |
| fj.5A
An aerial version of her f.2A, as it is not as slow as f.5A. This move comes out as fast as all of her f.A's, but has massive recovery in the air. You will want to cancel it with either a special move (preferably 236) or an airdash. You can juggle someone from full screen with these if you do cancel quickly enough, and it's an excellent tool to control space and prevent the enemy from building up a bullet offense at full screen. | |
| fj.2A
Aerial version of her f.2A, angled downwards. Since Sakuya spends a fair amount of time in the air, this move is good as it can keep people at full screen on the lookout instead of being able to set up bullets at their leisure. Best used when you cancel it with an airdash or a special move such as 236. | |
| f.5B
Throws five knives forward that bounce off the ground, then back upwards into the air. This move sucks: the coverage is small and it doesn't do anything that her other moves can do better. Keep in mind all of Sakuya's f.B's have a bouncing property that cause them to bounce off of one of the four edges of the screen and change trajectory halfway through their flight. | |
| f.2B
Throws five knives upwards, which bounce off the ceiling and back down to the ground. While the vertical coverage is good, Sakuya's 214 move essentially duplicates the function of this move but with the ability to be done anywhere instead of being restricted to f.B's range. Doesn't see too much use generally. | |
| f.6B
A version of f.5B that's angled almost exactly like her 6C, except she throws five knives which glance downwards after hitting the ceiling. Eminently useless as 6C offers more coverage if you need it for that. | |
| fj.5B
Throws out five knives which fly forward, bounce off the opposite wall, and fly back towards Sakuya. This is the one of the few f.B moves she has worth using, because it controls the entire horizontal field for a very long period of time. The recovery of this move is fairly short, and the move itself has a slight upwards bounce upon discharge. Generally, you will want to cancel this move with a forward airdash or a 236 into forward airdash. Because of the range limitation, you will only be able to use it near or at full screen, and once you have the space controlled you will want to move in to take advantage of your cover fire. Keep in mind that this move has a hefty spirit cost equivalent to a full j.C, so you have to use it sparingly. | |
| fj.2B
Aerial version that's similar to her f.2B, but the knives go down first, then bounce up off the floor. Not bad for vertical space control in front of you and the recovery's relatively quick, but the spirit consumption and range requirements make it only semi-useful. The main thing is that Sakuya generally won't need to control that space in such a fashion because at that range she's not going to be able to follow it up with anything. |
Specials
Sense of Thrown Edge - 236AB (air)
| |
| Ambitious Jack - 236C (air)
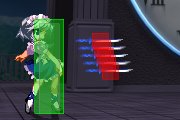
Sakuya throws out a lot of knives with trails behind them, clustered tightly at first and gradually zigzagging further apart as they fly across the screen. The trajectory of the knives is random, but because of the density and speed you can use this move to extend an air combo until you land. This move is also excellent for cover fire in the air as it's released substantially faster; the ground version is very slow and generally not worth using. Like with Sakuya's C and 236 moves, this move has a slight upwards bounce which allows you to perform additional moves without airdash canceling, and delaying your airdash cancel slightly before moving back in will give you a better angle of approach from the air. | |
Bounce/No-Bounce - 214AB
| |
Cross-Up Magic - 623AB (air)
| |
| Vanishing Everything - 421ABC
A teleport move. Does no damage, obviously. A version sends you 1/2 the screen back, B version sends you 1/3rd of the screen forward, and C version sends you 3/4th of the screen forward. This move has a fair bit of startup and recovery, making it generally not too useful. You basically use it for limited situations such as getting out of the corner or to try for Timestop crossups. |
Spell Cards
| Knives 1 - Illusion Sign "Killing Doll"
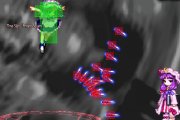
Sakuya throws out a bunch of blue and white knives that spin around in the air briefly before homing in on the opponent. Sakuya is able to move right before the knives home in, allowing her to follow behind them and attack more or less with impunity, as opponents will be knocked out of their attacks by the knives. However, this works both ways as any combos you may want to do will also be interrupted by the knives. Smart opponents will block during the duration of the attack, allowing you to get a free mixup on them; some will try to graze, allowing you to catch them with a j.A or 5B or some such to knock them out of their dash and repeat the process. Lv1 Knives is essentially a powered-up version of Sakuya's 214B without the flexibility or combo potential of Timestop; use it cautiously as invincible spellcards will both hit Sakuya out of her offensive and blow through the knives easily. This card is very potent if you can get the opponent to stand still as a fully blocked Lv1 Knives is a guaranteed guard crush. |
||
| Knives 2 - Burial Illusion "Phantomic Killer in Night Mist"
Sakuya throws out a bunch of violet and crimson knives that spin around in the air and go offscreen for approximately two seconds before homing in on the enemy. The increased gap makes Sakuya more susceptible to being hit and knocked down, but whatever momentum the opponent gains is only temporary as they will be forced into a defensive mode once the knives target them. The knives last longer than Lv1 and deal just as much spirit damage if blocked fully; you can actually fire off another barrage during the delay of the first one and have pretty continual coverage, provided you have an opening to do so. Once again, this spellcard is susceptible to spellcards with invincibility, so use cautiously when opponents are declared; otherwise, you pretty much have free reign to use it upon every knockdown or airtech situation. |
||
| Timestop 1 - Time Sign "Private Square" (Stop)
This is Sakuya's best spellcard hands down, and one of the best spellcards in the game. Not only can Sakuya timestop off a ridiculous number of moves in her moveset (2A, 6A, 22A, 22B, f.2A, nothing at all, 5C, 214A, 214B...), but she can throw it out almost anytime she wants to get in on the opponent with no effort. In addition, she is also free to reposition herself anywhere she wants. These two factors alone are extremely potent; but in addition to these, Lv1 timestop can lead into a j.AB loop for roughly 4400 damage if fully connected, and Lv2 timestop can be used to deal upwards of 4700 damage in certain situations and force an unstoppable 100% spirit block situation. However, timestop is not easy to use, and improper use makes it far less effective than either of her other spellcards. Using timestop is only recommended if you have an especially solid defense to compensate for Sakuya's lack of a decent reversal option, which she gets with the slashy spellcard. During timestop, Sakuya is completely free to move about the screen as she pleases, and any bullet on-screen will be grazed if she moves past it. Type-3 bullets will actually knock Sakuya down, however. She has only six moves available during this phase: pressing A/B/C on the ground will make Sakuya throw a set of knives that fly forward and stop, pressing 2A/B/C will make Sakuya throw a set of knives that fly upwards at a 45 degree angle and stop, pressing 6A/B/C on the ground will make Sakuya throw a set of knives that fly forward and are aimed upwards, pressing j.A/B/C will make Sakuya throw knives forward that fly forward and stop, pressing j.2A/B/C will make Sakuya throw knives that fly downwards at a 45 degree angle and stop. Finally, Sakuya still has her 421 teleport move which can be used for crossups if the opponent tries to block. Timestop 1 - Time Sign "Private Square" (Slow) Timeslow is the less useful variant of Sakuya's timestop spellcard. During this phase, Sakuya is allowed to move at normal speed while the opponent is moving at roughly half normal speed, a change that applies to all aspects of movement including hitstun and gravity. Pushback is also greatly decreased, allowing for some combos to work that normally would not (such as 5A x 12). This super lasts as long as Sakuya has spirit in her bar, ending once spirit reaches 1% (it does not drain her). You can prolong the duration by hitting the opponent with a bomb. All spirit moves will still cost the same amount of spirit in this mode, but due to her greatly increased relative melee speed and decreased pushback you basically have no reason to use bullets. This variant is not as strong as timestop due to numerous weaknesses: the startup is extremely long, the opponent can still move, you cannot do easy guard crush and must land a hit to get damage in, and the damage isn't as high as it would be off a successful timestop combo. |
||
| Timestop 2 - Sakuya's World (Stop)
Sakuya's World is the more powerful version of Private Square. For this spellcard, you throw out twice as many knives and the duration of the stop is about twice as long. Because of the number of knives released, Sakuya's World cannot be effectively used to set up a good j.A loop, though you can follow up with a j.B for knockdown. However, if the knives hit it deals good damage, and if the knives are blocked in the air it is a guaranteed guard crush plus extra damage after they are unable to airblock. If you make your opponent block this you can repeatedly cast this spellcard to force an uncounterable guard crush by simply draining spirit with the knives. Timestop 2 - Sakuya's World (Slow) A longer-lasting version of Private Square's timeslow. This is generally not a great move to use, try to avoid it. |
||
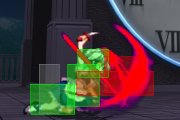
| Slashy 1 - Wound Sign "Inscribe Red Soul"
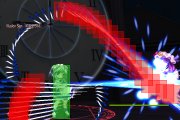
Sakuya does a series of rapid slashes that juggles the opponent high up in the air as she hits. Slashy is considered the simplest of the three spellcards to use, as its purpose and application are both very obvious: the move deals damage in a fixed fashion and can be used as a reversal. The Lv1 version has almost half a screen range while the Lv2 version has full screen range but is inconsistent at hitting properly at that distance. This move can be used as a counter for people sticking moves out (Sakuya has a small invincibility window) as well as a way to end combos with guaranteed damage; however, Sakuya is committed to the attack and has no invincibility past the initial frame, and if she whiffs the attack she will be punished for it. Also, the attack itself has no physical hits; it's strictly a bullet-type attack, meaning you can graze it post-superflash. Use the move wisely and only during guaranteed situations. For the level 1 card, Sakuya slashes 29 times with blue ripples of energy. This move can be used in a number of places, but to put it simply: any combo where you would normally do Sakuya's 2C HJC9 j.AC 236B ender can be substituted with this move. You can also use it after her 6B, 6DB, 6A, and both 22s on block as a frame trap. You can also combo into this move from both 22s (though in the corner you would want to do a combo first before going into it). Not much else to say, it's a very simple move. |
||
| Slashy 2 - Scarred Soul "Soul Sculpture"
Same as Lv1, but with two exceptions: one, the slashes become crimson, and two, they occupy the whole screen. Despite the animation, however, the slashes only have a small hit area behind Sakuya, so if an opponent gets behind her they can pretty much punish as they see fit. Due to the extended range of this move you can use it to punish stuff you normally would not be able to; keep in mind, however, that the slashes take a few frames to travel across the screen before connecting, so it is not instantaneous. Also, Lv2 Slashy is more or less safe on block because of the pushback it generates -- however, due to the randomized patterns of the ripples, there will sometimes be gaps in which an opponent can graze through easily and reduce spirit/block damage. This move is actually annoyingly safe to throw out randomly since you can't be punished for it beyond a certain range and is not a bad choice to run for your second spellcard. |
Combos
General
Insignificant Combos: These are little incidental combos you should know for certain situations.
- 2A 22B: Very simple staple combo for when you don't have time or positioning to set up a j.A loop or a 22A.
- 2A 22B 22C j.BC 236 or 623: Never 22C a 22B outside the corner; the damage you get off from it is not worth the bomb, and this is really only good as a killing combo.
- 5B 6B 214B: Use this when you have a guard break opportunity outside the corner. Guaranteed knockdown into okizeme. Go for 6A loop in the corner.
- 3DB 214B: Quick guaranteed knockdown into okizeme.
- 2B 6A 22C (walk forward) 2A 6B: This combo has one use: for when you have no spirit and can kill them within 2600 damage.
- 2B 6A 22C 5A 6A 2C HJC9 j.A j.C j.236B or j.623B: A corner-only variant of the above combo. This is primarily used when you land a clean hit off stagger pressure with 2B. It's not bad for one bomb, but use cautiously if you need to keep bombs for getting pressure off of you.
Loops
Sakuya's primary combos are listed below in order of potential damage from lowest to highest. You must adjust these combos according to your height, the opponent's height, the distance you are from the corner, and how you began the combo. You can also mix and match some of these combos to freestyle new ones as the situation arises.
j.A loop: This is a staple of Sakuya's combo arsenal. j.A causes a fair bit of hitstun but recovers before they do, so you can combo up to six of them sequentially in the proper circumstances. j.A loop must be adjusted depending on height and distance from the corner. The basic execution is to do two j.A's during a single jump, one on the way up and one on the way down; obviously, this combo can only be initiated air-to-air. Repeat this cycle up until six hits, making sure to HJ9 after the first jump, otherwise you will not be able to reach them horizontally. Most of the time you will only land five hits (two jumps, plus a third rejump); six hits is possible if you hit someone very low to the ground as you are coming down from a jump. To finish the j.A loop, use j.C into either j.623B for some extra damage (corner-only, and usually only if you want a kill) or j.236B for further momentum setup.
j.A loop variants: Depending on how far Sakuya is away from the corner, you can do various moves that will deal more damage instead of simply repeating j.A, such as the j.AB loop below. The strength of Sakuya's j.A loop is that she can carry the enemy into the corner almost anywhere on the screen; even if she is cornered, she can push them well past the halfway point towards the enemy's corner. If you corner your enemy you can finish with a j.B j.C j.236B or j.623B instead of a j.A, as j.B deals slightly more damage. Slightly farther from the corner, you can rejump into j.B j.2C, allowing the 2C to hit as they fall against the corner, followed by j.6D j.B j.2C j.236B or j.623B. Off a counterhit j.A, make sure you walk forward to compensate for horizontal spacing before starting the j.A loop with HJ9; alternatively if you are a fair distance away when you connect CH j.A, you can also dash into jump, which achieves the same effect. The same rule applies to CH 6B and 6DB (2nd hit), although with CH 6DB (2nd hit) you're more likely to go into 6A loop due to the amount of distance it covers and how close the enemy usually ends up to the corner.
j.AB loop: This loop is a variant of j.A loop that is to be done when you are close to the corner. The name is something of a misnomer as you only do the j.AB once before going into the 6A loop detailed below. j.AB can only be done when the enemy is at your height or below, with Sakuya slightly past the halfway point of the screen pushing the enemy into the corner. Because j.B does not juggle the enemy up at all, you will land after the j.B and go into a standing normal to continue the combo, preferably 5A or 6A. There are multiple enders for this combo. For the execution-impaired, you can land after j.B to do 5B 6A 22C j.B j.C j.236B or j.623B. Note that this combo utilizes a bomb where it is not strictly necessary and will not deal more damage than proper enders. The correct ender is 6A 5A 6A 2C HJC9 j.A j.C j.236B or j.623B, or if the enemy is slightly higher up, waiting a few moments after landing to do 5A 6A 5A 6A 2C HJC9 j.A j.C j.236B or j.623B.
6A loop: Sakuya's most damaging combo that isn't a gimmick. In its base form, 6A loop consists of doing [5A 6A] x 4 while the opponent is midair and cornered, followed by the traditional 2C HJC9 j.A j.C j.236B or j.623B ender. This combo needs to be varied in order to connect fully, depending on how you launch your enemy. The easiest and most traditional way is off an unblocked 22A. You can also go into this combo from j.A loop variants, ground to air 3DA near the corner, and guard break setups. After that, do a 6A to keep the enemy juggled and in hitstun (this move must be slightly delayed against Sakuya, Yukari, and Suika), followed by 5A 6A 5A 6A and the ender. This works off either or both hits of 22A. You can also go into the 6A 5A 6A 5A 6A into ender after connected a j.A or j.B close to the corner, depending on height. You can also go into this off a successful guard break with 6A in the corner (and doing this allows up to 3 reps instead of 2). Keep in mind that the timing of the next 5A is slightly delayed, and doing the loop too fast will keep them too high up for the subsequent hits to continue. Also, if the opponent is too high up, do not do 5A 6A; instead, simply do another 6A or a 5B, which will give them time to drop further, and connect the 5A once they're sufficiently low to the ground.
Combos in Writing:
When in doubt as to whether your combo is "correct", keep these numbers as a rough estimate.
- Maximum BnB Damage: ~3500
- Average 6A Loop Damage: ~3200-3400
- Average j.A Loop Damage: ~2200-2900 depending on the number of j.A's and if the ender landed (range is 4-6)
- Max j.A Loop: (falling) j.A (land, jump) j.A j.A (HJ9) j.A j.A (land, HJ8) j.A j.236B
- For this combo, remove j.A's as appropriate to height. Use j.A j.C j.236B as an ender if you get less than six.
- Near-Corner j.A Loop Ender Variant: (air to air) j.A j.A (land, jump back) j.B j.2C j.6D j.B j.2C j.236B j.4D
- Extra damage from j.A loop if you're near the corner but don't have the opponent low enough to get a 6A loop.
- Max 6A Corner Loop: (ground to air, corner) (5A 6A) x 4 2C HJC9 j.A j.C j.236B j.4D
- Off a guard break, or a backdash/jump punish with 5A or 6A. If you need the opponent to drop lower, use just 6A or 5B instead as 5A 6A pushes the opponent upwards.
- j.AB 6A Loop Hybrid: (near corner, air to air) j.A j.B 5A 6A 5A 6A 2C HJC9 j.A j.C j.236B j.4D
- For opponents who are lower and near the corner, since j.B will whiff if they are too high in the air.
- 22A 6A Loop Variant: 22A (non-CH) 6A 5B 5A 6A 2C HJC9 j.A j.C j.236B j.4D
- For a launcher, you can only do about half the loop before running out of juggle time. This works on either hit of 22A. 5B is utilized to drop the enemy down a bit so they don't become too high to get juggled.
- 22A j.A Midscreen Variant: 22A (non-CH) HJ9 j.A [...] 2C HJC9 j.A j.C j.236B j.4D
- Many possible variants from this depending on where you are. If Sakuya cannot reach the corner with HJ9, use j.A loop. If she can reach the corner, you can either go for the j.B j.2C variant ender or j.AB ender depending on height.
- 22A CH Loop Variant: 22A (CH on HJ8) HJ8 j.A j.B 5A 6A 2C HJC9 j.A j.C j.236B j.4D
- This is the combo used when a single hit of 22A hits an opponent trying to HJ8 out. 6A won't reach because they get launched extremely high.
Spell Card Combos
?
Strategies
General
?
Blockstrings
j.b and its variants
A simple corner string, open up with j.b. From there, you can do j.236C or j.5c. If doing j.236C you should airdash cancel and continue with another j.5b. If doing j.5c you can either airdash cancel and continue or j.236C and cancel.
Corner Crush: j.b j.5c j.6d j.b j5.c j.6d j.b j.5c j.236c
For this, it is recommended to not cancel any C bullets, and if you do cancel only the last set. This is because 236c's random trajectory makes the spirit damage vary slightly.
There are many variations, since j.5c and j.236c are pretty much interchangable, (except you can't cancel 236c into C) and if you're extremely low to the ground you can use j.a instead of j.b. You may also want to cut it short if you are low on spirit. You may HAVE to cut it short if you only have one or no airdashes.
HJC rush sequence
Sakuya's HJC rush is another tool to play her effectively, mixing up spirit-draining HJCable bullet attacks with her very quick guard crushes and melees for a complicated, unpredictable offensive. Note that there is an escape for every option of the string, and you must react and adapt to your opponent's movement. The key to landing attacks is to condition your enemy to block or move one way and then find a counter for it. Keep in mind, however, that every counter also has a counter.
Previously, this section contained a flowchart of possible moves. That has now been removed in favor of a list of all potential moves. It is up to the player to determine the appropriate move for the situation; this is merely a guide to facilitate understanding what purpose each move serves. Remember that the basic formula for HJC rushdown consists of:
Normal -> Command Normal -> Bullet -> HJC
From the HJC, you can exercise Sakuya's full array of options in the air. You can also eschew some of the moves in the chain in favor of other moves that can punish a predictable opponent.
Opener
5A: A quick attack that can lead to a guard break in the corner against a careless jump or backdash. This move can be rapidfired or delayed to catch people attempting to move in between them. Once blocked, you can seamlessly chain into 6A or continue further.
2A: A slow attack with good frame advantage. This move also tucks Sakuya down closer to the ground, giving it slight anti-air ability. Using 2A allows you to go seamlessly into either guard crush and 5C at close ranges, but it can be countered due to slower startup if you're predictable with it.
5B: A decently fast high attacking. Good for poking opponents and can go seamlessly into 6A. This move can guard break and allow for a corner juggle if you react with 6A quickly enough, or knockdown with 6B. 5B should be used at closer ranges due to potential spirit damage from wrongblock, with 6A reserved for when range is required.
2B: The equivalent of 5B, but low. This move is extremely good as it stops ground-based graze attacks cold and also moves Sakuya's hitbox forward, making some things whiff her when they normally would not. You would use this for low wrongblock spirit damage and it also seamlessly moves into 6A.
6A: Great range on this move. It guard breaks a careless jump/backdash and is easily hit confirmed into her 6A loop. Unfortunately it doesn't net any damage midscreen. Space this move out so you can throw 5C or 236 after it without too much fear of punishment. Chain into this move to space Sakuya out from pushback, and delay your blockstrings into this move to counterhit opponents to are too anxious to move.
Junction Moves (Escape Points)
6B: An overhead flip kick. This move is only airtight off 2A, but using from that negates its frame advantage. This move can be backdashed by most of the cast, so use carefully. It's best in the corner for moving Sakuya forward back into pressure range, and can be made "safe" by using 2C. You can punish escape attempts after this move with bombs or guard crushes. Avoid using this move too frequently in rushdown because it's easy to escape and you can insert delay into Sakuya's blockstrings manually.
22A: Sakuya's high guard crush is best used at max range when it only hits once. At this range, it's safe on block and largely unpunishable and still can guard crush or launch. This move punishes HJ8 escapes and can be easily hit confirmed into a combo in the corner. It's not too great midscreen since it's easy to move back out of range of it.
22B: Sakuya's low guard crush is one of the best in the game. It's fast and moves Sakuya forward, letting moves whiff past her when they normally would hit. This move is the prime candidate for stopping people who want to dash forward through pressure. It's basically unpunishable on block and difficult to react to even off a 5B or 2B.
2C: This is Sakuya's main anti-air move but can also function as part of her rushdown when close. While it isn't airtight and doesn't grant a lot of frame advantage from midscreen, it's good in the corner and can reset into further corner pressure if blocked. It's HJCable faster than 5C, but has less coverage so make sure you are at the correct range before throwing this out.
5C: This move has a slower HJC point than 2C but grants far more frame advantage on block. Once your opponent is afraid of dashing due to 22B, you can begin throwing these in and HJCing them early so you can take advantage of the blockstun by rushing in with low airdash pressure. This move is not great when not HJC'd, but it can be used against an opponent who is scared into blocking for good spirit damage.
HJC
HJC7: HJC7 is Sakuya's overall best choice. It gives Sakuya room to position herself at the best angle for subsequent attacks and out of range of bombs. You would primarily do this when rushing an opponent down close to the corner or around half-screen. If the opponent has the tendency to back off, you can use HJC8 instead for an approach that leaves Sakuya closer. For opponents who try to counter with HJC9 attacks, you can switch to not HJCing, guard crushes, or your own HJC9.
HJC8: HJC8 is primarily used when the opponent is backing off and HJC7 would put you too far away to effectively pressure further. It's not too great by itself because of the height Sakuya acheives, so generally you would use an airdash to stop her vertical ascent. HJC8 is used in limited combo situations for some of her combos when counterhit or repeated j.A sends them too high for HJ9 or normal jump to reach.
HJC9: HJC9 is an aggressive option best paired with j.A to counter an opponent's approach or j.2C to keep your opponent in blockstun so you can continue pressuring. The j.2C option is not seamless and only works on a scared enemy, so you must mix it up with airdash j.B for it to work. While Sakuya has air dominance with her j.A, HJC9 is oddly not a particularly good move for her as she cannot cover the space beneath her effectively from the trajectory she achieves, so use cautiously.
Air Options
Normal Jump: Sakuya's normal jump is not as good as Youmu's, but it is effective for her game because of her j.B. You can use this to bait bombs and reversals as well as reset j.2C pressure or punish attempts to escape without having to spend time to airdash in.
j.4D: Airdash back. For Sakuya it's mostly a defensive option as she does not have a particularly strong back airdash. Keep in mind that if you want to keep her close to the ground (which you should, as Sakuya is strongest when lower) it's faster to do a normal jump back into fj.A instead of an airdash back, since fj.A stops vertical movement. You can potentially use this as part of a clean high hit during stagger pressure. Another prime use is to airdash back j.A against opponents trying to approach with a high-risk HJ9.
j.6D: Sakuya's airdash is excellent. It's an integral part of her blockstrings and air to ground combos (j.2C j.6D j.2C j.6D j.2C) and allows you pressure, move in, and perform combos. Not much else to say about it really.
j.A: Your all-purpose air to air tool. This is a combo move and a zoning tool. j.A can loop into itself or other moves for BnBs, and can stop opponents trying to approach you as well as punish those airdashing in bad places. The hitbox for this move is deceptively small given how much space it controls.
j.B: Your all-purpose air to ground tool. The angle of this move is just low enough that, when combined with Sakuya's airdash, makes it impossible for opponents to walk under Sakuya to escape her pressure. This move is not too great air to air because j.A gives frame advantage as well as other benefits on hit, so use this mostly to apply pressure to a grounded opponent.
j.C: Sakuya controls large chunks of space with this move. Airdash cancel it to regulate the number of knives she throws out. More knives makes it more difficult and riskier for opponents to airdash through, while fewer knives give you more initiative but also increase their chances of blowing through and countering you. This move should be kept air to air only as j.2C is far superior for air to ground.
j.2C: j.2C is a pressure move, ground to air combo move, and bomb bait all in one. It is seamless when chained from j.B at close range, making it usable for pressure and a combo without having to hit confirm. When used at normal jump or HJ heights it can punish bombs and reversals on whiff as well as cause blockstun for Sakuya to move in further. Adjust to j.C if opponent moves to the air, as j.2C's angle isn't suitable for air to air.
j.236A/B: j.236 is primarily used to hover Sakuya when you want to keep her in the air for ambiguous pressure. It's also good for gaining initiative when you are neutral as well as maintain pressure after a BnB (j.236B ender), although the grounded versions of 236 are preferred if you simply need future coverage. This is best used when you have an airdash left as the recovery is quite hefty if not airdash canceled, so use this cautiously.
j.236C: One of Sakuya's best moves, this ensures you can get free bullet pressure for no effort. This move's actual hitbox is nowhere as big as the animation looks, but because it's difficult to discern which knives are actually active, it's easy to psych opponents out into making them graze or block. This move is farther better in the air than on the ground; it's actually about the same speed to perform this move off a jump as it is from standing, and in the air Sakuya has an entire arsenal of options. Since this move hovers her, you can use it to keep her ambiguously floating before going into further pressure or to alter your trajectory to avoid an opponent's counterattack.
J.623A/B: Sakuya's infamous asshole move, which basically ensures she's safe even when turned around. This move makes punishing Sakuya in the air extremely difficult as it can be used anytime before landing as long as she has the option to act. When done low to the ground it's effectively impossible to punish even on block. This move can save Sakuya from being guard broken, punished when turned around, as well as hit by a bullet air guardcrush string when she's out of airdashes. While it can be punished when abused, it's yet another tool in her well-rounded arsenal.
Momentum
214B: 214B is an excellent okizeme tool due to the time it stays on the screen and the doublebounce angle. It essentially covers large chunks of the playing field in a single move, allowing you to follow behind and not do anything to draw out bombs, and attack with impunity once they begin playing defensively. Generally you only use this move when you knock the opponent down because it takes a little bit of time to come out; at certain positions you can HJC it and cut off the number of knives you release, as well as come in with an aerial attack against an opponent without an anti-air option. Play this move according to your opponent, more aggressively as they become more defensive and more defensive if they are prone to try wakeup tricks.
236AB:
- (A version) 236A is excellent for approach. Due to the time limit of the knives, you are basically limiting the time that they have available before you are allowed one free attack on them. To explain: as long as you do not hit the ground, the timeknives will "activate". Once they activate, you can follow behind them and decide whether you want to attack or not. This is not possible with Sakuya's other projectiles as you have to HJC them and are thus directly behind them, leaving you open to a graze attack or anti-air. Once you follow behind 236A, the opponent is forced to block or graze; in this circumstance, your attack options become highly favorable to you because both of their choices are directly countered by your attack. If they try to block and bomb, you simply have to alter your timing slightly so that you block the bomb before continuing your attack. If they block and do nothing, then you've still got the upper hand. Also, because it's so easy to graze projectiles at full screen, using 236A to help limit the time your opponent is allowed to stall helps you control the pace of the match and limit their movement options, forcing them to work around the time that the knives have left to activate.
- (B version) 236B is excellent for defense. You primarily use it in two situations: after a j.A loop in the corner where you throw it offscreen (this allows them to activate and fly out from seemingly nowhere), and when you're just below 40% towards your corner. Reason for this is that 236B flies backwards after a certain time; if you're getting rushed down into your corner, the activation time of 236B will force the opponent to either stop attacking or be hit, with the second option potentially leading into a counter-combo from you. So as long as you don't run out of spirit or get knocked down, you can use 236B to pretty much stop yourself from being stuck too long in a corner.
j.623A Crossunder: In IaMP, once you are in the air, your character will not turn around if your opponent switches sides. This leads to the ability to exploit most characters who do not have an attack that hits both ways. However, because Sakuya's j.623 not only hits both ways but is very fast (as fast as Youmu's j.A at 6F, and with better range), people who try to tech punish you in the air or from behind can be baited into this attack. Just execute j.623A if they come close, and as long as you are relatively close to the ground you will recover long before they do upon knockdown.
Tech Punish
Before continuing, here is a disclaimer: Sakuya should not attempt tech punishing Marisa, Sakuya herself, or Youmu on a regular basis. The reason for this is that these characters all have moves that are faster than Sakuya's j.A, which is her primary tech punish tool (Marisa j.B, Sakuya j.623A, Youmu j.anything), and you will more than likely eat a CH while trying to tech punish. Alternatively, don't attack or use j.C anti-anti-tech punish instead.
For Sakuya, "tech punish" is a slight misnomer as what she's really doing is airtech punishing. After a j.A loop of any kind, the opponent is free to airtech, resetting their damage and combo counter but not resetting their airdash count. Against opponents who airtech predictably and/or have slow air normals, you can chase after them and j.A again. If it connects, you are free to do another j.A loop; if it doesn't and they block, you repeat until they are guard crushed, at which point you will be in the corner free to do a 6A loop.
This concept is very broad and you can apply it in many situations:
- Midscreen after a j.A loop. Jump straight up and see what the opponent does. If they tech forward, j.A and follow through. If they airtech back, throw j.C, airdash and go into j.A loop. Be careful when you try to tech punish midscreen, as if you follow too closely and the opponent airtechs behind you, you will be forced to use j.623A if they come close and be at a disadvantage if they decide to use bullets.
- Corner after a j.A loop. Assuming you throw 236B to end it, airdash back and j.A, which will catch people airteching forward (this is what they will do 90% of the time). If they block the j.A, combo into j.C and follow behind it to push them back in the corner.
- After a connected timestop. When you connect with timestop, you usually go into j.A loop of some kind. Assuming they airtech this, timestop again, force them to block the knives for an air guard crush, or force them to graze into your waiting j.A.
- If they block a j.A tech punish attempt, you should be able to use a combination of j.C 6D and repeated j.A's to carry them in the air until they're guard broken. Once you do, you should be in the corner to do a 6A loop; if you're not there, just do a normal j.A loop as according to the position on the screen you're at.
If the opponent has an airdash left or if they are too close, throw j.C instead; this is the "anti-anti-airtech punish" as it will force them to block or graze, at which point your j.A has initiative again. If they block j.C, follow behind it with j.A. This concept applies to most of the situations you can tech punish, provided you are not too close.
Other Gimmicks
This is a list of stupid shit you can do occasionally that will work to get some damage, but nothing you should do consistently because it's very easy to decipher against good players.
22 Ghetto Frame Trap: After a blocked 22, you can stick out 5B and it will CH many people trying to stick an attack out because of its speed. Do not do this in a mirror match. This can be countered by simply not attacking, walking backwards, or outside of the corner, SJ8 up.
6DA/6DB Frame Trap: If you are using Slashy spellcard, after a blocked 6DA or 6DB you can do Slashy and catch any counterattack attempts. This is recommended more after a blocked 6DB because it "seems" more vulnerable, and while it normally is -3 on block, Slashy is 1F to start after the flash, making it probably the fastest super in the game. Nobody has a move fast enough to counter this technique if you do it properly, however, be careful not to guess wrong as it will leave you very vulnerable. This tactic is countered by any high jump (preferably SJ7 or SJ8) as you will graze the Slashy.
Matchups
| vs Reimu:
Reimu's strength lies in coverage and relentless offensive. However, her damage is lower than yours so she must play more solid to compensate. Sakuya's 6B will beat almost every one of Reimu's melee attacks, and her bullets overwhelm Reimu's easily. Use both of these factors to your advantage, play patiently when she begins to rush you down and rely on f.A to tag her out of the air and j.C to blow through her bullet cover. |
| vs Marisa:
Her j.B, at 7F, is faster than both your j.A (8F) and j.B (10F). Avoid air to air battles without bullet cover and tech punish carefully. Throw fj.A to cancel her f.B and fj.B's. Be careful about being predictable in your rushdown as Marisa can 623B to punish both bullet and 22 options, and once she has Master Spark she has a powerful counter to reckless attacks. To counter her 22s midscreen, simply walk back, which will make you block 22A and avoid 22B. In the corner, you can backdash to avoid 22s if they're comboed immediately; however, Marisa can stagger the timing to hit you as you come out of backdash. |
| vs Sakuya:
Look out for timing on j.A tech punishes in the air, as she can crank them out faster if you're not careful. Play around j.A and 6DB in this matchup as they will be the bane of careless play. Remember that Sakuya is still able to attack even if she's turned around, so be careful when attempting to tech punish or chase in the air. Note, Sakuya is one of the three characters who requires special timing off a connected 22A for 6A to connect; delay the 6A slightly instead of doing it immediately. |
| vs Alice:
Be careful using j.2C in this matchup, as Alice can 3DA through it if you're too low and you do not want to be knocked down. Stay close on her. Be careful with air to air combat since her j.A will outrange you most of the time. Stay on the ground and whore out her 6B and 6DB to beat bad 2A/5A attempts. Don't bother trying to counter blocked 6DB as she's got frame advantage on that. Throw f.A's to stop her from setting 5C at mid to full screen. Play patient and block until Alice starts running low on spirit, keeping a lookout for openings where she can be hit by 6DB. |
| vs Patchouli:
Patchouli's bullets will overwhelm pretty much anyone's. Play patient, and don't charge headfirst into them. You will have to work your graze but at a distance there is nothing she can do that you cannot come out of unscathed. Once she approaches you, you have faster normals with which to dominate her; as long as you stay on her and she's burning bombs, you will come out the victor. Be careful about using 6DB; use it judiciously and stick mostly with 6DA. Stay low to the ground when rushing down so you don't get tagged by her 3DB, as it's ungrazeable. From afar, if you get hit by Patch's f.5A, do not airtech as it will lead into further damage and a guard crush. |
| vs Youmu:
Youmu's distance game sucks, but her damage will destroy careless opponents. Make her work to get in on you with 236A, 214B, and j.C. Fighting her air to air is risky because of her faster air normals. Use j.C to counter her air melee at a range and always approach her at arm's length. She can 623A in between your segments of HJC rushdown if you get careless, as well as for 22 attempts; however, 22B will go under 623A, which is useful to throw out to deter 623A usage. Youmu's 6A grazes, so be careful of it up close when doing 2C HJC. 236B will do well to deter her once she's on you, so as long as you can block her 22s in time. |
| vs Remilia:
Remilia can safely backdash through your 2C or 5C rushdown, so mix it up with delayed normals and guard crushes. Most Remilias play defensively and look for openings in your gameflow; don't give it to them. Since she needs to be up close to do anything, keep her at j.A distance and use that to tag her out of predictable airdashes. Her 623 will counter your rushdown at key moments so stay alert not to get repetitive. Block high for most of this matchup and be on the lookout for 22B (slow and obvious), and be ready to absorb 5B (hits low). |
| vs Yuyuko:
You will want to use j.2C more when approaching air-to-ground against Yuyuko], as this will deter use of her 6B as anti-air. Once you stop her 6B, make sure you stay on her. She has weak options up close, limited to 5A and 6B, and shutting down 6B will be integral to getting into the enemy's head. Use delayed blockstrings and guard crushes to stop her from using 6DB through your rushdown. Be careful of j.A range and block if you aren't in a position to do anything without being counterhit. |
| vs Yukari:
All of your normals are faster than hers close up, but she has greater damage. Yukari's high-low mixup is incredibly strong and her blockstrings can lead into good damage and a corner mixup if you're not careful. When cornered, you can use HJ8 as an escape more than usual as Yukari's counter for that is a bit weaker than normal since you can walk under her and she can't attack efficiently while turned around. Block low to avoid getting hit by 6B (stopsign), and declare early so that Yukari can't shut you out from a round by keeping you locked down with Ran. Note, Yukari is one of the three characters who requires special timing off a connected 22A for 6A to connect; delay the 6A slightly instead of doing it immediately. |
| vs Suika:
Suika's strength lays in burst damage, so play carefully and don't move recklessly out of situations where she has the advantage. 6B will go over almost every move she can do, so abusing it within reasonable limit is a valid strategy. Suika's 2B will go under the majority of Sakuya's pokes if you're too close, so space yourself out to avoid that. Be very careful once Suika has her Dunk spellcard as it can be thrown out randomly in non-seamless blockstrings with little room for punishment. Note, Suika is one of the three characters who requires special timing off a connected 22A for 6A to connect; delay the 6A slightly instead of doing it immediately. |
| vs Meiling:
Meirin has a frame trap sequence that specifically counters Sakuya. Block high and be on the lookout for her 214B and 22B. Stay out of the corner if possible and do not approach her without cover fire as her normals are as fast as yours and in the case of 5A, faster. Let superior damage output decide the game. Keep in mind Meirin is going to take every opportunity to approach, so throw 236B to stop her rushdown. Since she has no real bullet initiative fullscreen, you can use fj.B, 236, and j.C a bit more liberally for cover in this match to approach and mid range. |
Frame Data
                                                              Block   Hit     CH
Motion     Damage     Proration   Startup  Active  Duration   Adv     Adv     Adv   Untech  Guard   Type
------------------------------------------------------------------------------------------------------------
 5A         200        98%          6        2       15        0       +1      X     25      Mid     A
 2A         950        85%          12       2       29        +5      +6      +17   35      Mid     C
 6A         650        90%          9        3       25        -1      0       +7    35      Mid     B
 5B         580        90%          8        3       24        -1      0       +7    35      High    B
 2B         620        90%          8        3       25        -2      -1      +6    35      Low     B
 6B         950        90%          20       2       45        -3      X       X     40      High    C
 6DA        650        90%          11       3       27        -1      0       +7    35      Mid     B
 6DB        500+500    95%+95%      18+20    2, 2    45        -3      D       D     40+40   High,   C
                                                                                             High    C
 3DA        950        85%          20       3       46        -4      D       D     40      High    C
 3DB        620        90%          10       3       32        -7      D       D     35      Low     B
 22A        450+450    92%+92%      22       2, 3    44        -3      D       D     40+40   High,   B
                                                                                             High    B
 22B        800        85%          20       3       44        -2      D       D     40      Low     C
 j.5A       550        90%          8        2       26        +1                    40      High    B
 j.5B       700        85%          10       4       35        -6                    40      High    B
 22C (N)    0          80%          12       3       44        -10     D       X     oo      Mid     C
 22C (O)    500        80%          12       3       37        -3      D       D     oo      Mid     C
 22C (D)    0          80%          12       3       61        -27     D       D     oo      Mid     C
 22D        x          x            25       x       96        x       x       x             x       x
- Properties
- 6B: 5-31F airborne, 33F+ cancellable
- 6DA: 1-13F graze
- 6DB: 1-21F graze, 5-33F airborne
- 3DA: 1-22F graze, 12-36F airborne, 38F+ cancellable
- 22A: 18-36F airborne, 38F+ cancellable
- 22B: 11-19F airborne
- 22C (N/D): 1-14F invincible
                                                              Block   Hit     CH
Motion     Damage     Proration   Startup  Active  Duration   Adv     Adv     Adv   Untech  Cancel  Type
------------------------------------------------------------------------------------------------------------
 5C         80*15      98%*15       19       oo      43        -1      0       X     25      22      B
 6C         80*15      98%*15       16       oo      39        0       +1      X     25      19      B
 2C         80*15      98%*15       11       oo      37        -3      -2      X     25      14      B
 j.5C       80*15      98%*15       14       oo      38                        X     25      16      B
 j.2C       80*15      98%*15       14       oo      38                        X     25      16      B
 f.5A       200*5      98%*5        18       oo      39                        X     40      19      C
 f.2A       200*5      98%*5        13       oo      39                        X     40      14      C
 f.6A       200*5      98%*5        16       oo      39                        X     40      19      C
 fj.5A      200*5      98%*5        13       oo      34                        X     40      14      C
 fj.2A      200*5      98%*5        13       oo      34                        X     40      14      C
 f.5B       150*5      94%*5        18       oo      37                        X     35      22      B
 f.2B       150*5      94%*5        14       oo      37                        X     35      24      B
 f.6B       150*5      94%*5        16       oo      37                        X     35      22      B
 fj.5B      150*5      94%*5        14       oo      37                        X     35      24      B
 fj.2B      150*5      94%*5        14       oo      37                        X     35      14      B
- Properties
- f.5B: Move properties renew when bullets bounce off wall
- f.2B: Move properties renew when bullets bounce off ceiling
- f.6B: Move properties renew when bullets bounce off ceiling
- fj.B: Move properties renew when bullets bounce off wall
- fj.2B: Move properties renew when bullets bounce off wall
                                                              Block   Hit     CH
Motion     Damage     Proration   Startup  Active  Duration   Adv     Adv     Adv   Untech  Cancel  Type
------------------------------------------------------------------------------------------------------------
 236AB      150*10     95%*10       200      oo      33                        X     40      13      B
 j.236AB    150*10     95%*10       196      oo      39                        X     40      13      B
 236C       120*9      92%*9        27       oo      56        -14     -4      X     15      28      B
 j.236C     120*9      92%*9        16       oo      48                        X     15      21      B
 623A       230*3      96.5%*3      10               56        -17     D       D     50              B
 j.623A     230*4      96.5%*4      6                29+15*    *       D       D     30              C
 623B       200*5      96.5%*5      15               73        -29     D       D     40              C
 j.623B     200*6      96.5%*6      6                45+15*    *       D       D     30              C
 214AB      100*15     96%*15       19       oo      42                        X     35      22      B
 421ABC     X          X            X        X       67        X       X       X     X       X       B
- Properties
- 236AB: 12F discharge
- j.236AB: 8F discharge
- 236C: 5F discharge then randomized paths, 10F hitstop when it connects
- j.236C: 5F discharge then randomized paths, 10F hitstop when it connects
- 623A: 2F hitstop, 1-25F graze, 7F attack decision up to 3 times, 8-39F airborne
- j.623A: 2F hitstop, 1-29F graze, 7F attack decision up to 4 times, duration is 29F + 15F after landing, block adv situational
- 623B: 2F hitstop, 1-48F graze, 7F attack decision up to 5 times, 13-65F airborne
- j.623B: 2F hitstop, 1-45F graze, 7F attack decision up to 6 times, duration is 45F + 15F after landing, block adv situational
- 214AB: Move properties renew when bullets bounce off ceiling
- 421ABC: 24-55F invincible
                                                                     Block   Hit     CH
Card         Damage       Proration     Startup     Active  Total    Adv     Adv     Adv   Untech  Type
------------------------------------------------------------------------------------------------------------
 Knives Lv1   80*72        96%*72        9,56(65)    oo      80       *       D       D     X       C
 Knives Lv1   100*102      98.5%*102     9,213(222)  oo      80       *       D       D     X       C
 Timestop Lv1 X            X             31,X(31)    X       X        X       X       X     X       X
  Lv1 Knives  100*5        99%*5         X,X(*)      oo               X       D       X     40      C
 Timeslow Lv1 X            X             55,X(55)    X       126      X       X       X     X       X
 Timestop Lv2 X            X             31,X(31)    X       X        X       X       X     X       X
  Lv2 Knives  100*8        99%*8         X,X(*)      oo               X       D       X     40      C
  (st/j)      100*8        99%*8         X,X(*)      oo               X       D       X     40      C
  Lv2 Knives  100*5        99%*5         X,X(*)      oo               X       D       X     40      C
  (cr)        100*5        99%*5         X,X(*)      oo               X       D       X     40      C
 Timeslow Lv2 X            X             55,X(55)    X       126      X       X       X     X       X
 Slashy Lv1   75*29        99%*29        12,1(13)    X       166      -31     D       X     60      A
 Slashy Lv2   75*29        99%*29        12,1(13)    X       166      -31     D       X     60      A
- Note: Startup is Preflash,Postflash(Actual)
- Properties
- Knives Lv1: 10-45F discharge
- Knives Lv2: 10-60F discharge
- Timestop Lv1: 31F-end melee invincible + graze
- toss Lv1: Partner 9f hitstop, hits 2F after end of timestop
- Timeslow Lv1: 55-126F invincible, opponent and projectiles at half speed
- Timestop Lv2: 31F-end melee invincible + graze
- toss Lv2(stand, air): Partner 9F hitstop, hits 2F after end of timestop
- toss Lv2(crouch): Partner 9F hitstop, hits 2F after end of timestop
- Timeslow Lv2: 55-126F invincible, opponent and projectiles at half speed
- Slashy Lv1: Partner 2F hitstop, 1-18F melee invincible, 12-150F airborne, 4F between each hit
- Slashy Lv2: Partner 2F hitstop, 1-28F melee invincible, 12-217F airborne, 4F between each hit
Motion    Startup   Active   Recovery  Graze      Cancel   Guard   Invulnerable
------------------------------------------------------------------------------------------------------------
 7/8       4         x        x         x          6+       6+      x
 9         5         x        x         x          6+       6+      x
 7D/8D     4         x        x         x          6+       21+     x
 9D        5         x        x         x          6+       21+     x
 6D        4         11~26    16        1-(16~32)  1+       16+     x
 4D        7         14       12        1-21       x        x       1-8
 j.6D      9         23       x         1-31       10+      32+     x
 j.4D      7         24       x         1-31       8+       32+     x

