Immaterial and Missing Power/Suika Ibuki
Introduction
- More info: Touhou Wiki
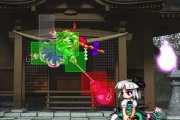
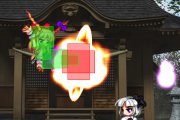
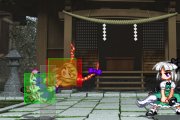
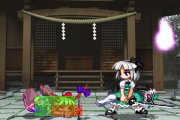
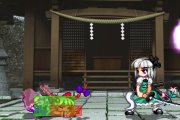
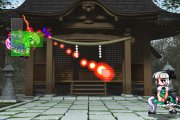
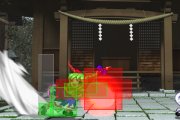
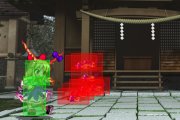
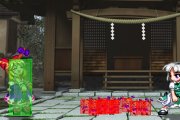
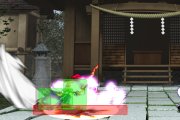
Forgathering dream, illusion, and pandemonium: Suika Ibuki is the final boss of Immaterial and Missing Power, an oni with the ability to manipulate density. Because of this she supposedly packs a tremendous amount of power in a small amount of space. In the game, this manifests itself as a character with a deceptively small hitbox that hits extremely hard, packing some of the most powerful situational combos in the game and many heavy attacks that can make short work of an opponent if they're not careful.
Moves
Melee
| 5A
[ Stagger High | Damage: 650 | Startup: 11 | Active: 2 | Hit: +1 | Block: 0 ] A simple straight jab. This move hits high, so it can be used during close stagger game as well as guard break in lieu of 2A. It's slower than 2A by 1F, doesn't place her as low as 2B, and has limited range compared to the rest of her moveset, so it doesn't see too much use in Suika's typical gameflow. | |
| 5B
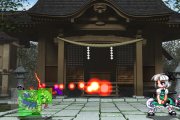
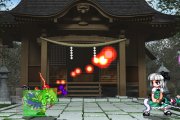
[ Mid | Damage: 1000 | Startup: 20 | Active: 32 | Hit: D | Block: -30 ] A deceptively long range flamethrower attack. This move counts as a projectile and thus can be grazed, but costs no spirit to use and can deal spirit damage. It also has the best range of Suika's standing attacks. Use this move when the opponent adjusts to your 2A and 6B ranges, as it can catch them off-guard. The recovery of this move is fairly bad so try to cancel it whenever you can. Since this move can be chained into a command normal, you can use 6A to stop opponents who react with a late graze. 6B can also accomplish this, or move Suika forward into range for further pressure. You can also cancel this move into any of her bullets or specials; see Strategies section for more details. 5B will juggle the opponent on hit, allowing you to combo into 6A if it's delayed or 6B for a juggle. | |
| 2A
[ Stagger High | Damage: 1200 | Startup: 10 | Active: 2 | Hit: -4 | Block: -5 ] Suika slams her sake bottle on the ground. This is one of Suika's primary pokes, dealing good damage and being relatively fast. It knocks down in the air, groundslams on counterhit, and actually hits high despite its animation. This move is great for many situations. It sets up Suika's pressure game, her stagger game, and can guard break opponents too close to the ground near her. It can even be hit confirmed into a BnB for a chunk of damage on counterhit. Since this move has a fair amount of pushback, you will have to be somewhat closer than normal to use 2A 6A, and almost point blank for 2A 6B. This move deals a massive 70% spirit on wrongblock. Long recovery so don't whiff it. | |
| 2B
[ Stagger Low | Damage: 600 | Startup: 8 | Active: 7 | Hit: -5 | Block: -6 ] Suika slides forward on the ground while sticking her foot out. More priority than it looks. When she does this move, her hittable box is fairly low to the ground, making it possible for her to go under attacks and counterhit them. This move sets up Suika's pressure when she doesn't want as much pushback and also staggers high-blocking opponents. Due to Suika's small crouching sprite, it is actually possible for her to duck under jump attacks and 2B to regain initiative. This move deals about 30% spirit damage on wrongblock. | |
| 6A
[ Mid | Damage: 1000 | Startup: 16 | Active: 4 | Hit: 0 | Block: -1 ] Suika swings her sake bottle forward. The range on this move is good but it's a little on the slow side. Generally, this move is not used by itself as 5B can punish whiffs at a distance quicker. However, this move sets up a number of situations for her and is the prime move utilized in delayed blockstrings. Its pushback also allows Suika some room to set up her bullets so she can begin to move in for pressure, allowing it to be used alternately with 6B which lets her close in. | |
| 6B
[ Clean Low | Damage: 1200 | Startup: 26 | Active: 4 | Hit: X | Block: 0 ] Suika does a little hop that creates a shockwave where she lands. This attack not only moves her forward but has an extremely deceptive animation as it actually hits low and is one of the few attacks that will not stagger a guard crushed opponent. It will knock down on a normal hit and groundslam on conterhit, allows you to juggle for more damage. You can use this move to go over low attacks as Suika is considered airborne during the stomp. Since this move has startup, you generally use it to force "built-in delay" into a blockstring. It deals a tremendous amount of spirit damage on wrongblock much like 2A, around 70% spirit. | |
| j.5A
[ Clean High | Damage: 750 | Startup: 8 | Active: 20 | Hit: | Block: -14 ] Suika sticks out her elbow in the air. Has insane active frames and a decieving amount of priority, letting her shut down uncovered air approaches from characters like Youmu or Remi. One frame faster than j.B which might come handy after a whiffed rising j.B but the lack of reward going up means you'll still use j.B for intercepting higher up. | |
| j.2A
[ Clean High | Damage: 1200 | Startup: 15 | Active: 3 | Hit: | Block: -5 ] Suika swings her sake bottle diagonally downwards from the air. This move has surprising range and hits at an angle that's very difficult for many characters to counter. The best trajectory for this move is off her normal jump, as it covers almost all of her air time with an active attack. As with all air attacks it hits as a high clean hit, so it can be utilized during guard crush for a surprise attack. The recovery on this move is a bit bad, but since you can cancel it into other moves, you can go with j.236A to try and punish graze attempts and j.C to give Suika airdash options to move into a better position. Fully disjointed during the actives but gets a big hittable hurtbox during the recovery preventing you from baiting reversals using it. | |
| j.5B
[ Clean High | Damage: 1200 | Startup: 9 | Active: 5 | Hit: | Block: -2 ] Suika kicks and her foot explodes. This is her trademark all purpose air attack and the one that sees the most use. Since it's angled downwards, it's great for attacking air to ground but its hitbox also makes it a good air to air attack. The lower recovery means it can be linked into itself for her BnB. While it is possible for Suika to exercise airdash options by canceling j.B into j.C, the gap is usually big enough for characters to mash out their own j.B and win no matter the option you picked. Don't expect air blockstrings without projectile cover or a really low j.B for a rejump. | |
| 22A
[ Clean High | Damage: 1200 | Startup: 25 | Active: 10 | Hit: X | Block: -18 ] Suika throws herself headfirst at the opponent. This move is not too safe on block but wallslams for a followup hit. Neither of Suika's guardcrushes see much use because they are both somewhat unsafe and irrelevant since she has easier and safer ways to set up a guard crush, but this can be used on occasion against an opponent who is blocking excessively out of fear. Keep in mind that an opponent can airblock this move without needing to HJ and it's basically impossible for Suika to punish this even with a bomb, so use this move carefully. | |
| 22B
[ Clean Low | Damage: 1200 | Startup: 25 | Active: 8 | Hit: X | Block: -13 ] Suika tackles the opponent headfirst with a low slide. This move is a bit faster and safer than 22A but can also be beaten out by normal jumping out of the way or lower-body invulnerable attacks such as Sakuya's 6B. It's not as bad on block as 22A and can stop overeager opponents from dashing, so there are uses for this move. It's possible to set up safe situations for 22B on block by using 2C, but it's not recommended for regular usage. | |
| 6DA
[ Mid, Stagger High | Damage: 450+700 | Startup: 13+31 | Active: 2,3 | Hit: D | Block: +1 ] A two-hit dashing punch. Either hit can be canceled, and the second hit launches the opponent with a short juggle time, making it difficult to do anything except 236B afterwards in the corner. Not used too often, this move's primary use is when 6B is too slow and you need Suika to advance forward to get proper positioning. Canceling the first hit of this move is the most common usage and it can go into 236A to punish grazes. The graze frames for this move are low, making it a bad choice to move through bullets. | |
| 6DB
[ Stagger High | Damage: 900 | Startup: 16 | Active: | Hit: D | Block: -21 ] Suika's infamous loliball, where she tucks herself into a ball and rolls through the air. She will bounce off the opponent on contact, and during that brief aerial time she can cancel into j.236A/B. The recovery of this move can be difficult for some characters to punish. This move has no graze frames at the beginning until Suika's rolled up, so it's a poor choice for reactionary grazing. However, Suika has graze frames all the way until she lands and is pretty much safe on whiff, so along with her small hittable box this move is fairly powerful once it gets going. Primarily, loliball is used to catch opponents trying to HJs out of awkward bullet use or trying to do bullet approaches low to the ground. Careless attacks will be counterhit, which causes wallslam that Suika can followup on. Avoid abusing it against grounded targets as you will be consistently punished against most characters still. | |
| 3DA
[ Mid | Damage: 170*6 | Startup: 13 | Active: | Hit: +2 | Block: +1 ] Suika swings her chain above her head. This move has quite a lot of graze frames, is +1 if fully blocked, a very short recovery and has a great anti-air hitbox. It's used to counter opponents who are approaching with bullets from too high up in the air, as you can blow through many characters' j.2C attacks and still hit them, but also as a regular anti-air due to its disjointed hitbox and as a stationary way to graze bullets. When hitting an airborne opponent, Suika can followup with a j.B and go into a loop if she's near the corner. Outside, she can use 2A for a guaranteed knockdown and run whatever okizeme she wishes. Depending on how the move hits it is not always guaranteed and it might be safer to block and observe against Youmu as her airtech can be deadly. | |
| 3DB
[ Clean Low | Damage: 300*3 | Startup: 15 | Active: 6,6,8 | Hit: +1 | Block: 0 ] Suika slides along the ground at the opponent with massive graze frames. Its speed is too slow for mid-long range uses for a move like this but the amount of graze during actives, lack of disadvantage on block, ease of hitconfirm and ridiculous low proile makes it a very powerful defensive tool, both for getting away and for direspecting strings that'd be safe against other characters. |
Bullets
| 5C
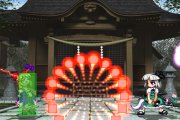
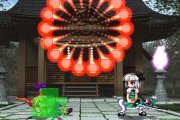
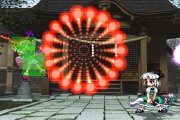
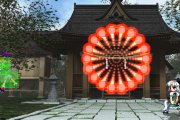
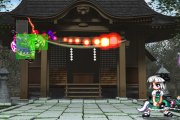
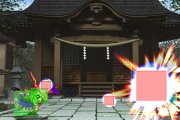
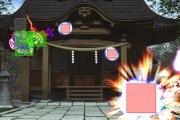
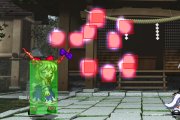
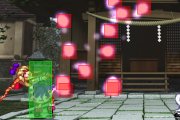
Suika's C bullets all start off as a small cluster that explodes into an array of orange dots. They cannot be nullified by graze until the dots are on-screen and cannot interact with other projectiles period. While they can be nullified easily individually, the circular arrangement makes it difficult for most characters to deal with. All of Suika's C bullets deal tremendous damage if the dots detonate in the center of an opponent's sprite; this is called a "center hit", e.g. "5C center". Suika's 5C is used in many situations for her; see the Strategies section for details. | |
| 6C
Suika's C move, thrown towards the opponent. If 6C reaches the wall before detonation, it will bounce off the wall first before exploding, meaning you cannot "offscreen" the bullets. This move is not used very much on the ground as Suika's j.6C serves the exact same purpose but grants her much more options from the air. See j.6C for explanation. | |
| 2C
Suika's C move, thrown from a crouch and upwards into the air. This move is one of Suika's most heavily-used bullets for a few reasons. First, it covers the area directly above her, both slightly to the front and behind her, making it difficult to directly approach her. Second, it lingers on-screen for a fairly long time, so the opponent cannot simply graze past it and ignore it. Third, the HJC point for 2C is faster than her other C moves, meaning she can use this move as a form of bullet pressure from her normals. The lower half reaches low enough to disrupt a grounded opponent. | |
| j.5C
Suika's C move, done in the air at normal range. You can cancel into j.C from her air normals to change her trajectory and have the option to airdash out of potential counters or back in for more pressure. Suika floats for a very long time when using this move so it completely changes her jump trajectory, which is good as her jump and airdash are short and somewhat predictable when not coupled with other moves. Done very low to the ground Suika will enter a gliding stage that can be cancelled into grounded specials. | |
| j.6C
Suika's C move, done in the air at 6C range. This move has the same property as her 6C, where it will bounce off a wall before detonating if the wall is in range. Since Suika has full air movement options after this, you can actually use j.6C close to the ground and have all the coverage of 6C with more choices to followup. You can throw j.6C after a B vortex to cover the entire area the opponent is at, as both moves cover the same area. You can also use this after a corner BnB and bounce it off the wall, which will cover both opponents who don't roll and those who do. | |
| f.2A
Suika throws a blackhole on the screen close to herself, pulling the opponent towards it. Her vortex moves are extremely good as they control the opponent's movement, hindering it and preventing them from doing what they need to. They also can help Suika close in on an opponent. Since Suika's strongest game is in the corner, A vortex does not see as much use as B vortex, but this move has a few uses, primarily Kai's blockswitch. | |
| f.2B
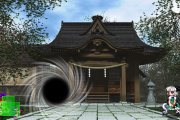
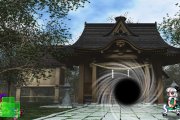
Suika throws a blackhole a bit farther on the screen, which will typically pull the opponent away from her. This move is one of Suika's main zoning tools as it greatly restricts the opponent's mobility. Since she does not have a normal rushdown game as other characters in IaMP, she can rely upon this move to corner an opponent where she can exert her most powerful mixups. This move can also severely hinder some characters who rely more heavily upon proper spacing, and is a good option for midscreen okizeme as a vortex in the corner will keep the opponent in place even if they roll forward. | |
| f.5A
Suika's f.A bullets are all fireball clusters that hit multiple times and can counterhit (with no practical usability). They are fast and generally utilized to tag opponents not used to seeing them as well as catching opponents trying to declare or set up cover fire from mid to full screen range. f.5A goes straight forward and because it's grounded, does not offer Suika air mobility options, so its use is somewhat limited. | |
| f.6A
Suika's f.A move, thrown upwards at a 45 degree angle. It's used occasionally against someone full-screen in the air, but not too often beyond that. The primary advantage of this move is that it covers an angle that her air f.A's cannot cover, so there is actually a reason to use this on the ground. | |
| fj.5A
Suika's f.A move, thrown horizontally in the air. Because Suika's f.A attacks are overwhelmed by other bullets easily, it is not a prime move to wage bullet wars with another character. Use this mostly for tagging opponents out of careless actions mid to fullscreen, and airdash cancel it to lower recovery. | |
| fj.2A
Suika's f.A move, thrown downwards at a 45 degree angle in the air. The same rules apply to this move as with all of her other f.A moves. Use this primarily for air to ground tagging, and airdash cancel to lower recovery. | |
| f.5B
Suika's f.B bullets are commonly known as the bouncyball, as she throws a white ball that bounces on the ground before arcing upwards into the air. These bullets all have good frame advantage on block and cover a wider area than they appear. In addition to that, you can push the B button twice more to get two more bouncyballs, and they have a bit of juggle ability as the untechable time on hit is higher than her other moves. The arc of this move makes it somewhat difficult to use effectively, and as always the grounded version does not offer Suika air mobility so this move is not seen often. | |
| fj.5B
Suika's f.B move, utilized in the air so the bounce arc is a bit more pronounced. The bouncyball will bounce to the same height as it had when it was shot. This move actually gives frame advantage and has quite a bit of juggle time on hit, so you can use it to keep someone blocking long enough for Suika to attack from the air or to do a quick air to air combo. Note that Suika maintains jump velocity when doing this move, so it's possible for her to fly up very high if you begin this move from a HJ. Hard to predict for the enemy and tends to be her best bullet for getting a random hit in. |
Specials
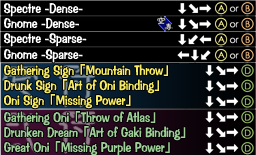
Spectre 'Dense' - 236AB
| |
| Spectre 'Dense' - j.236AB
A dive with two parts, a melee low hit and a bullet stalagmite. This move is typically an ender for her j.B loop or to make a blocked 6DB "safe". It's fairly telegraphed and easy to counter by itself, so use cautiously. You can also use this move from an air normal if you're high in the air to punish opponents who attempt to graze under her.
| |
| Spectre 'Sparse' - 214AB
"Babies". Suika throws out a bunch of miniature versions of herself. This move keeps the opponent in extremely long stun on block or hit. Usage of this move is character and situation specific. Some characters have an extremely hard time countering the A version, making it the choice against them, while others cannot find counters for the B version. The A version offers more coverage overall while the B version incurs extremely long blockstun if the opponent actually blocks it.
| |
| Gnome 'Sparse' - 421AB
"Spermpunch". A punch that sends wisps flying up into the air. There's two portions to this move as well: the punch itself is a low melee hit while the wisps are bullets. The B version The wisps resulting from this attack are random. Use this move primarily when pressuring an opponent blocking high in the corner, as the low hit can catch them off-guard since it's a clean hit.
|
Spellcards
| Dunk 1 - Gather Sign "Mountain Throw"
Suika rolls forward in loliball animation, and if the opponent isn't blocking then she will catch them and throw them into the ground. This move has a fixed duration, and as a result it can be either completely punishable on block or completely safe, depending on when in the move the opponent blocked. Suika also has both graze frames and melee invincibility, making the move essentially unpunishable until she lands. Keep in mind, however, that this move does not hit anything in the air so it is easily baited by jumping, avoided by grounded moves with airborne frames or even low profiled. Dunk is primarily a reversal spellcard, but it can be comboed from her normals at close range. |
||
| Dunk 2 - Gathering Oni "Throwing of Atlas"
Level 2 Dunk deals more damage than Level 1 Dunk and groundslams the opponent off the screen, allowing for numerous followups. The horizontal speed of Level 2 Dunk is also much faster than Level 1's. This is an extremely dangerous spellcard for the opponent as she can mount a massive comeback by connecting even one. All of the same rules of Level 1 Dunk apply to Level 2: Suika has a fixed duration for this move which can lead to it being either disadvantageous or neutral on block, as well as graze and melee-invincible frames for the duration of the animation. |
||
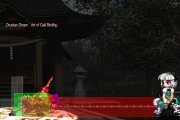
| Chain 1 - Drunk Sign "Art of Oni Binding"
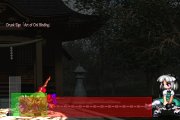
Suika binds the opponent with a chain that drains spirit from the opponent for roughly 7 seconds, leaving them guard crushed until it regenerates. Note that if an opponent is already guard crushed and the draining becomes active before their bar regenerates, they will be forced back to 0 spirit immediately. This move has half screen range but is extremely punishable on whiff, so it's best to combo into it. While this move deals no damage by itself, Suika has a very long time to hit the opponent with almost anything she wants. This is probably the SC of choice for Level 1 as in the end-round game, being guard crushed by Suika can lead to extremely dangerous mixups. Can combo and reground juggled enemies and has longer range so is more versatile than dunk. |
||
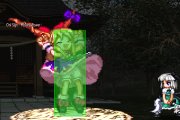
| Chain 2 - Drunken Dream "Art of Gaki Binding"
This is the same move as Level 1 Chain but with one key difference: the spirit drained from the opponent goes to Suika, boosting her own spirit regeneration rate. All of the other rules for Level 1 Chain apply. Because the comeback and damage factor of Level 2 Dunk is so high, this card is not used often; however, it does have uses in certain matchups where Suika cannot find easy openings for Dunks and can turn the match around with a single Chain loop. |
||
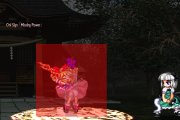
| Giant 1 - Oni Sign "Missing Power"
Giant is used mostly for specific matchups. This move has startup but can be used as a bootleg reversal, as Suika herself counts as a Type-3 attack when growing. While big, Suika's moveset is reduced down to six attacks. A is a straight punch (hits high), B is a low punch (hits low), C is an uppercut (hits high), j.A is jump kick (hits high), j.B is a jump stomp (hits low), and if Suika turns around, the horn in her idle animation is an unblockable. The grounded attacks deal 33% spirit on rightblock and 100% spirit if wrongblocked (except the horn obviously), while the air attacks deal 50% on rightblock and 100% on wrongblock. This move allows Suika to barge through an opponent's zoning and basically get a free 50/50 with each attack. Against some characters who have methods of escape, it is useless, while against others it is extremely powerful. Suika takes half damage while in giant form, and has hyperarmor that lets her plow through attacks. |
||
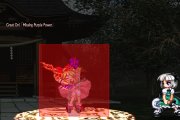
| Giant 2 - Great Oni "Missing Purple Power"
A powered-up version of Level 1 Giant. All the same rules still apply, but Suika's attacks now deal more spirit damage on rightblock: 45% spirit for grounded and 70% for air. Her sprite is also larger, making it actually impossible to fly over her head to escape. This spellcard can be extremely difficult for certain characters to deal with who have no means of pushing her back or teleporting through her, as it allows Suika to blow through their defenses for massive spirit and chip damage even when correctly blocked. [5A] [5B] [5C] [j.5A] [j.5B] [Horn]
|
Combos
Midscreen
- (2A or 2B) ...
- ... 6A Dunk
- Amazing damage and reach. Check below for followups.
- ... 6A Chain (Loop)
- Loop into itself until they're spirit drained. Followup with a strong mixup.
- 3DB ...
- ... (Dunk, Chain or Giant)
- Connecting giant is characther specific. Crouching hitboxes will also effect this.
- ... 22C O-bomb ender
- See below for the rest of the combo.
- 5B ...
- ... 6A
- Very far reaching combo with good knockback. Delay 6A slightly. Simple.
- ... 6B
- A decent punisher with close knockdown. It doesn't get more basic than this.
- falling j.A land ...
- Used to catch jumpouts
- ... rejump j.A j.236A
- Easy damage. j.B can work here too if you're unsure about their height.
- 2B (22C O-bomb ender or Giant)
- You can tag on a little extra damage if you have the resources to burn.
Corner
- (2A or 2B) 6A 421A
- Good damage in corner. Be prepared for possible airtechs. 2B starter will work midscreen too.
- (j.B loops)
- rising j.B ...
- ... falling j.B rejump j.B j.236
- Easiest variant of her j.B loop. Best used when approaching the corner, but not started from it.
- rising j.B ...
- ... falling (j.B or j.A) IABD j.B rejump j.B j.236A
- Very high damage without spending bombs or spellcards.
Dunk 2 enders
- ... 5B
- Simple midscreen extender.
- ... 2C (j.B or 236B)
- Corner only. Position yourself so the 2C hits them right in their center. Usually by taking a slight step back.
O-Bomb enders
- ... 22C j.A j.236A
- Works in most situations and leads to knockdown
- ... 22C j.2A j.236A
- Best in corner. It can connect with Youmu and Meiling midscreen. Use j9 instead of hj9 for Meiling.
- ... 22C 236B
- High damage ender. Difficult to land fully midscreen.
- ... 22C Giant (Giant5A or 5C)
- The followup Giant5A/5C will only connect in the corner.
- ... 22C Chain
- Timing can be a bit tricky.
- ... 22C (j.B loop)
- Works only off of clean O-Bomb hits which gives you enough extra juggle time.
Strategies
Suika deals massive damage with normal attacks as well as C center hits. However, she does not have forward-moving bullets like most of the cast. Her bullets are relatively slow and tend to follow unconventional trajectories, and she has very few truly seamless blockstrings. Because of this, Suika's game plan revolves around getting damage in bursts by punishing bad movement from your opponent. To accomplish the goal of punishing movement, two things must be realized: first, you must make the opponent want to move, and then, you must punish them for it.
Blockstrings
To construct blockstrings, let's examine Suika's moveset and piece things together according to the situation we need.
Opener
5A: Not used often since 2B does the same thing and is better all-around. 2B can even guard break in the corner like 5A
2A: Suika's primary poke. This move scares your opponent into blocking high. It guard breaks low airborne opponents. It can beat careless dash attempts. This move has more pushback than 2B, so take that into consideration before using it. Remember you do not always need to cancel into a command normal, so feel free to skip to another move if you feel they are out of range. 2A can go seamlessly into 6A, and while it is not seamless into 6B it also cannot be escaped without getting hit.
5B: This move is primarily a punisher for whiffed pokes, but it can be used as an opener in some situations. Make sure you can figure your opponent's anxiety level before using this. Someone who grazes or HJs a lot will either not get hit by this move at all and may in fact punish you for trying it. This move is similar to 2A in range, but not in blockstun. For those who try to move prematurely, use a delayed 6A punish. Otherwise, this move can be used in the same way a 2A would to set up further pressure.
2B: Best used when close to push an opponent into ideal range for 5C. Since this move doesn't incur as much pushback as 2A, you can use it at more ranges than 2A. Punish movement with delayed 6A, and capitalize on blocking with a reset into 2A blockstring, 2C, 236A for pushback, 6A 214A for pushback and baby coverage, or 6A 421A if you want a seamless corner string.
Junction Moves (Escape Points)
6A: Suika's primary anti-flinch move. When canceled immediately from another move, 6A is airtight off everything she can do off the ground except for 5B. When delayed, it will counterhit attempts to escape or punish. Use this move when you want some space for pressure, or to adjust distance for optimal 5C center range. Delay it to stop overanxious opponents and to train them into sitting still.
6B: This move serves two functions, both as an opener and as a junction move. When used as an opener, you usually expect the opponent to either utilize a low attack or to block, typically upon wakeup. It's good for someone conditioned to block 2A high as this will deal massive spirit damage. When used as a junction move, remember that nothing cancels seamlessly into 6B so it can be escaped unless you use 2A, which generates enough blockstun so that all escape attempts are hit. Since this is a command normal, your options for canceling it are limited. 236A is the preferred move as it will punish all escape attempts and cause pushback towards the corner. For opponents who are beginning to block, you can throw in 2C or 214A to start pressuring further. 6B 5C is semi-workable midscreen but will not give enough pushback for a perfect center hit.
22A: 22A is not a good move for Suika to use. Her only two options to continue pressure from here are a bomb or a super (Giant, basically). Since Suika's all about ambiguous and confusing pressure, hard-defining the end to her blockstring is the last thing you want. Avoid using this most of the time.
22B: 22B is slightly better than 22A mostly because it's faster and safer, but as with 22A it clearly defines the point where pressure ends. This move is really only used when Suika is guard crushed or conserving spirit and wants something relatively safe to throw out. Other than that, there are more efficient ways to attack with her.
2C: 2C is fast and opponents scared of being punished by 236A and delayed blockstrings will let you do this move often. It establishes pressure on-screen and once the dots are out, Suika has more reign to move around in the air by HJCing and advancing. This move can also be used in conjunction with a 236A in the corner, which allows Suika to continue pressure by using the frame advantage off the bottom-most dot of 2C which keeps an opponent blocking after 236A recovers. Against graze attacks cancelling into236B will armor through and give you a nice 2k+ combo. With enough range it is possible to react to the graze against characters making this a very safe options but against characters with extremely fast graze attacks like Marisa you will have to guess on both the attack but the timing of it too.
5C: This move is slow and requires proper spacing for best usage. For guidelines on that, see the specific 5C Range section below. Simply put, adding 5C in the middle of your blockstrings before a 236A will cause 100% spirit damage or approximately 3000 damage if it connects. However, both 2C and 5C are countered by graze attacks and HJs, so they will only work once the opponent has been trained to block. You will be using this move primarily in 100% spirit blockstrings on a scared opponent and during guard crush to land fuzzy guard setups (also explained further below).
236A: Firepunch is Suika's prime blockstring ender. It punishes movement when canceled from a normal, and on block it causes half a screen of pushback which is exactly what Suika wants. Remember that the melee portion of this move is up close, so if you cancel into firepunch from too far away, your opponent will be able to graze attack through it. Blocking the bullet portion of this move can sometimes place Suika in an advantageous position, so you can capitalize by rejumping into continued pressure.
214A/B: Babies is very slow to come out, so this move is reserved strictly for opponents backing away from Suika. Make sure you get max pushback by using a 6A if possible to minimize being hit by graze attacks. Once the babies are on-screen, react to your opponent according to what they do and punish HJs with HJ8 j.B or corner them and begin pressuring.
HJC
HJC7: Suika does not function well when she is high in the air, due to her short airdash. HJC7 is not used often with her and is primarily utilized for defense, in which case it is best to immediately use an air backdash so she can get back onto the ground. Occasionally you will be in the range to tag the opponent with a j.2A, but this will not occur often.
HJC8: HJ8 is excellent for Suika to punish airdash attempts out of the corner due to the hitbox of her j.B. Apart from that it does not serve too much purpose as Suika is strongest when groundbound. You will occasionally use this to combo j.B loop and to go into j.6C from midscreen. HJC8 can also be used when you need a bit more distance to punish a forward dashing opponent with j.2A. Keep in mind to use j.C to change Suika's descent speed if the opponent is waiting to punish.
HJC9: This will be Suika's most often-used HJ as she has enough time to do two attacks before landing. In the corner, HJC9 j.B is her prime method of punishing HJ escapes, and she can come down with a j.A to continue pressure. HJ9 j.B is also obnoxiously good for countering blockstrings with HJCs in them as Suika's j.B comes out fairly fast, as well as careless approaches from airdashes or attacks without cover fire. Due to the lack of vertical range you might sometimes need to go for 66~8 if you need to get to something that isn't in HJC8 range.
Air Options
j.A: Not used too often. j.A's got a lot of active time so it's good for tagging people out of air attacks when you do it early, but it doesn't lead into major damage off a hit and Suika has to cancel into j.C to get any mobility options. The prime usage for this is the corner HJC9 j.B j.A anti-HJ blockstring, since j.A comes out faster and is more active than j.B.
j.B: All-purpose air attack. It's air to ground, anti-airdash, and a combo loop move. Jump in with this move. Use HJC8 j.B to kill airdash attempts out of the corner with 2C covering you. Cancel into j.236A to stop opponents from graze attacking or jumping out. Use j.B j.C if they're cornered and scared to pressure further. Most importantly, this move will be used in Suika's fuzzy guard strings as your clean high hit.
j.2A: This move is either going to be canceled into j.C or j.236A 99% of the time because it's too unsafe to use by itself usually. With its range, this is going to be the best (and only) mid-range jump-in for Suika. Since she has no way to capitalize at the max range of this move aside from j.236A (which won't combo), your best bet is going to be to cancel into j.C and then react accordingly to your opponent. Backing off is really the safest option, since it's difficult to counter Suika at the range she's allowed to use this move.
j.C: Primarily used for movement options instead of actually attacking. As previously mentioned you can cancel all of her air normals with this so she isn't stuck on landing if she attacked too high. You can also float Suika up in the air for very long periods of time to avoid dealing with things beneath her, though this is risky against characters with strong air to air options. j.C can also be used for limited okizeme options against wakeup graze, as you can throw it out and punish with j.B. This isn't too reliable as it can easily be countered by reversals, however.
j.6C: This move is both pressure and okizeme. Done midscreen, it creates coverage for a third of the screen, limiting your opponent's options. When done while Suika is cornered, it covers both the area behind her so she can land safely while turned around as well as the area beneath her so she can attack on wakeup. As with all C attacks, the startup is high on this move so be on the lookout for your opponent's fast-moving bullets that can hit her out of this, and switch to 2C to inch forward if you have no breathing room.
j.236A/B: Typically utilized as a combo ender for j.B loop, or to hit people trying to graze out of a blocked loliball or j.2A. You can also utilize this off a low air attack to get frame advantage for corner pressure, and the attack itself deals a bit of spirit damage as well. Aside from that it sees limited usage as it is not safe to throw out on its own.
5C Range
To fully utilize 5C's power, you must find the perfect range for it to hit center. Here's some default blockstrings that will get you close (32-34 hits, 90% spirit). Once you have an opponent scared to move, you can begin throwing 5C 236A or 5C HJC9 j.B into your blockstrings to get that 100% guard crush. Remember that these will not work unless the opponent hesitates with their movement or blocks. If they expect the string and graze attack, Suika will get hit. On the other hand, if the opponent does hesitate with their counter, they are going to take major damage for trying.
2A (5C ...): Midscreen. For optimal 2A range, be close to the opponent but not overlapping their sprite, and the pushback on 2A will be perfect for 5C center. Remember that midscreen, 5C 236A or 5C HJC9 j.B is not too effective as it can be avoided by backdashing or HJ7. However, this becomes better the closer you are to the corner. Once guard crushed, you can perform a fuzzy guard by staggering the opponent with 2A and using HJC9 j.B to clean hit and combo into the 5C center hit.
2B (5C ...): Midscreen. For optimal 2B range, hit with the tip of 2B. The same rules for 2B 5C apply as 2A 5C, but 2B is actually too slow to fuzzy from unlike 2A.
2A 6A (5C ...): Corner. For the correct range, your sprite must be overlapping with the opponent's, i.e. no further room to move forward. Immediately canceling into 6A 5C will give you the range needed for 85-90% of the dots.
2B (delay) 6A (5C ...): Corner. The more you delay, the more dots you get, though there's not too much variance from the different delays. Dot hit rate is about 90-95% depending on how it works. This string is risky because it requires uncomboing the 6A for the full pushback effect to work.
2B 2C 2B 2C 2A (5C ...): Corner. Correct range is dead in the corner with overlapping sprites. 2C's are optional since they don't cause horizontal movement, but are recommended as coverage for Suika. This sort of pressure is risky but ambiguous as Suika can segue into so many options, and by the time the opponent realizes they could've escaped, they are stuck in blockstun from 2C. The third attack in this blockstring, the 2A, will give proper range for 90-95% of the 5C center.
2A 2C 2B (5C ...): Corner. Works similarly to the previous string but starts differently so that you do not get predictable. This string will position Suika for 90-95% of the 5C center.
Momentum
f.2B j.6C: This string is good for midscreen, particularly when Suika is slightly past the halfway point on-screen. f.2B's vortex effect will corner the opponent and j.6C will cover the area exactly around them with dots. Airdash cancel to react to the opponent's response.
f.2B 214A/B: If you have slightly more time, you can use this string which offers superior coverage than j.6C with more startup. The entire ground area is covered with 214A, making it difficult for the opponent to act without being punished by Suika j.B. It's possible to use f.2B 214B as okizeme if your opponent gets knocked away at a distance, as f.2B will keep them cornered even if they roll forward.
2C: The default answer when Suika is neutral and needs to move in. Since Suika's game is strongest when she is grounded or low to the ground, 2C is a good way of quickly getting cover on the screen so opponents cannot approach her in the air easily. Inching forward under the cover of 2C, with the assistance of f.2B, can sometimes be the best answer if your opponent is intent upon zoning her away.
(j.B Loop), j.6C in corner: One of Suika's best options after a j.B loop is to do a j.6C off the wall. When the opponent is knocked down right in front of her, it is difficult for Suika to capitalize because most of her attacks don't hit behind her. Since j.6C bounces, it can offer cover for her to maintain pressure even on an opponent rolling out of the corner and behind her.
Defense
236A/B 236A's graze frames can be used to power through puffballs and other dangerous projectiles if you have overextended with your backdash, and if you have the time to get past the first vulnerable frames 236B will kill both bullets and melee, something other characters can't without spellcards.
66 Her forward dash can be held, cancelled into a high jump or go into one of her exceptional graze attacks, making her unpredictable and a lot harder to catch than other characters. Both her dashes also go over lows during the hop part of the animation for some cursed reason.
44 Suika's backdash is by far her best defensive tool due to its length and ability to be cancelled. Using the invicibility frames you can make most melee attacks whiff and punish the recovery with 2B for a small combo or a momentum-reversing spellcard confirm. It however lacks the ability to be cancelled into jumps and you have to let go of 4 to stop it so it's more vulnerable to being chased by bullets.
Tech Punish
2C HJ8 j.B: Suika's airtech punish game is honestly not very strong due to her lack of bullets at close range. In certain situations, however, she can use 2C's center to punish an immediate airtech. To set this up, do 2C HJ8 j.B and make sure j.B juggles the opponent upwards by hitting under them. When spaced properly at approximately one character width away, j.B will either hit the opponent into 2C center for damage, or guard crush instantly as 2C center deals 95% and airblocked j.B deals 25%. This is most effective in corner due to less strict spacing requirements, but can be done midscreen as well. This string can also be used without 2C, or to punish opponents who airtech and then attempt to airdash out of the corner. Make sure you backdash to just before midscreen with Suika so she can space herself at optimum range.
j.B j.C j.4D: Air to air, Suika is not effective since she has no bullet options besides j.C and j.6C, both of which are extremely slow. Your first choice should be to keep Suika low so she doesn't have the chance to get hit after doing an airblocked j.B. Barring this, you can use j.C to get access to your airdash so you can escape. While this string is effective for pressure, it is not good for airtech encounters, and will be punished if you use it too often.
Stupid Gimmicks
f.2A 2B: Kai's blockswitch. For this to work you need Suika inside the vortex and doing 2B as the vortex is tugging the opponent. Done right, Suika will switch sides and allow you to attack in an unconventional manner.
2B Level 2 Dunk: Originally seen in Bullet Action 5 Game X-01 and performed by Mikajiki, meaty 2B canceled early into dunk will cross up a crouch blocking opponent. Delaying the cancel will uncrossup. The opponent can not change to standing guard midway, they must reverse their block midway. They can however reverse guard on reaction to the super flash. Works on everyone except Suika and Patchouli, and on Suika 2B 6B Level 2 Dunk will cross up. Note that this may only be done midscreen.
chain j.2A/33B: After hitting with chain the opponent is at the perfect range for an instant overhead 8j.2A if crushed, to mix with 33B as your low option. While both options will lose to a bomb, it's still a great way to sneak in damage to close out a round.
Giant vs Timestop: Giant's timer counts down during the timestop period, which lets Suika avoid setups as she goes into her invulnerable deactivation animation immediately at the end of the timestop.
Matchups AMAZINGLY OUTDATED
Reimu: Reimu's bullets control Suika's movement well, as it is difficult for her to get around them effectively. Use backdashes liberally to graze instead of low airdashing, which runs the risk of having Suika get caught by Reimu's air to air blockstrings. 6DB can be countered by Reimu's barriers as well as early j.A, so don't abuse it too much. Staying low in this matchup is of extreme importance. Reimu j.A and j.C can both lead into a corner-to-corner air to air blockstring, so getting caught in the air at any time can lead to damage. Use the air only when Suika has initiative and cover fire. Since Suika has a damage advantage, she always has the chance of mounting a comeback but playing patient is mandatory.
Marisa: Suika has two large advantages in this matchup: first, Marisa's puffballs aren't as effective in this matchup provided you don't rely too much on 214, and second, Marisa's j.B loop is more difficult to connect on her. Marisa's lack of good graze attacks also makes it difficult for her to counter 5C center strings, and while Suika is at a slight damage disadvantage she isn't severely handicapped in that regard. The main thing to look out for is Marisa's 623 and her air to air ability, which is essentially guaranteed damage if Suika is caught.
Sakuya: Difficult matchup for Suika. The density of Sakuya's bullets as well as her j.A dominance make it near impossible for Suika to challenge her in the air. Sakuya's 6B and 6DB will also counterhit almost all of Suika's ground normals if she uses them carelessly. Stay low to the ground in this matchup and use lots of delayed blockstrings to stop Sakuya from graze attacking out. Both characters deal roughly the same damage, but Suika is a bit faster about it so ride out any momentum you get to try and solidify your lead before Sakuya resumes her zoning.
Alice: This matchup is highly favorable for Suika. Her vortexes completely destroy Alice's zoning ability, rendering her space control moot as well as throwing off distance-judging for Alice which can result in her getting unwanted far A or B attacks. Suika has a damage advantage and Alice is hard-pressed to get initiative once Suika gets going. However, it is also difficult for Suika to stop Alice once she gains momentum. It is important not to try and challenge Alice air to ground in this matchup as Alice can punish Suika's short airdash very easily. This is one of the few matchups where Giant is recommended for both spellcards as Alice has no effective counters for it.
Patchouli: Fighting Patchouli is similar to Alice, as both characters have strong zoning capabilities and bullet coverage. The same rule of staying low applies in this matchup, as Patchouli can also catch Suika air to air for major punishment if she's careless. Backdash, 3DA, and 3DB are all good to blow through Patch's bullet-heavy blockstrings; 6DB not so much because it's easily punished on block. Once Suika gets in on Patch she has very few defenses to stop her, so it's easy to even out a life disadvantage. Be careful not to use Giant against Patch as her 623 can easily blow Suika backwards.
Youmu: Another matchup with two close-quarters characters. Youmu has a damage advantage by a small amount, but Suika's bullet game is a bit stronger. Use vortexes and 214 to stop Youmu from approaching you and stay low to the ground to avoid being caught by Youmu's air to air blockstrings. Delaying blockstrings is not quite as good in this matchup because of the threat of 623A and Runpast Lv1/Lv2. Control her air approach with 2C and bait out 623A with a short backdash or pause during your pressure. Either Giant or Dunk will work in this matchup depending on your preference.
Remilia: Remilia has the ability to control the tempo of this matchup very easily due to far superior movement. She has difficulty countering Suika's pressure up close due to lack of graze attacks; make sure to look out for her 236A/B used in their place. Don't airtech Remilia's attacks carelessly as she can set up guard break or 6DB loop situations with her superior airdash speed. One advantage Suika has in this matchup is that it is very difficult for Remilia to attack Suika air to ground when Suika crouches, so it is possible to use a crouch to stop certain pressure strings by making her whiff attacks. Remember that Remilia can airdash or 236B through Giant easily, so avoid using that card in this matchup.
Yuyuko: Both characters in this matchup function similarly, in that they have no j.2C move or forward-moving bullets. You will be engaging Yuyuko mostly at mid to close range, and since Suika has to fight close Yuyuko has access to using 6B to stop careless rushdown. Using j.2A's startup can be effective in baiting out bad 6B's from Yuyuko. While she has an advantage in cover fire with her 236, it is easier for Suika to deal damage as she can force openings easier than Yuyuko can. Since neither character has strong air to air options, you can engage Yuyuko in limited air to air with j.B so as long as you don't remain airborne very long.
Yukari: Yukari has superior bullets, so approaching her in the air at a distance is risky since Suika can get caught airblocking. On the other hand, Suika's pressure at point blank to close range is superior as she shuts down all of Yukari's options except 2A with her 2B. At max range of Yukari's 6B, Suika has to back off like everyone else but as long as she remains low to the ground. Neither side has a real damage advantage in this matchup, as Yukari has to adjust her j.A loop for Suika since the full combo does not connect normally. Remember to declare earlier in preparation for Ran pressure and to use Dunk to counter Yukari's delayed blockstring tricks.
Suika: When playing against Suika herself, her low airdashes are countered by HJ9 j.B so be careful about airdashing to graze or pressure. Vortexes don't affect her as much as she doesn't rely upon her far-ranged moves as much as some other characters; simply use 2C and inch forward as needed. Use j.C to float Suika in the air when 214 is onscreen. While Suika has difficulties stopping Giant, the opposing Suika player is more or less guaranteed a guard crush on recovery by using 5B, so be careful. Bait out Dunks by normal jumping into j.2A pressure and look out for using delayed blockstrings as it is possible to 236 through them.
Meirin: Completely in Suika's favor. Her 2B goes under many of Meirin's moves and Suika has a massive damage advantage. Meirin's advantage in close quarters is nullified as Suika also specializes in this area. Play her as normal, making sure to note that Meirin's f.2A and f.B can easily stop Suika's 214. Using Giant will be effective against her as she has no real counters for it.
Frame Data
                                                              Block   Hit     CH
Motion     Damage     Proration   Startup  Active  Duration   Adv     Adv     Adv   Untech  Guard   Type
------------------------------------------------------------------------------------------------------------
 5A         650        94%          11       2       26        0       +1      +8    25      High    B
 2A         1200       85%          10       2       37        -5      -4      +6    40      High    C
 6A         1000       85%          16       4       39        -1      0       +10   35      Mid     C
 5B         1000       90%          20       32      72        -30     D       D     40      Mid     C
 2B         600        94%          8        7       29        -6      -5      +2    25      Low     B
 6B         1200       80%          26       4       48        0       X       X     X       Low     C
 6DA        450+700    90%+80%      13+31    2,3     52        +1      D       D     40+40   Mid,    C
                                                                                             High    C
 6DB        900        75%          16       land    48        -21     D       D     40      High    C
 3DA        170*6      98%*6        13       18      42        +1      +2      X     40*6    Mid     B
 3DB        300*3      93%*3        15       6,6,8   49        0       +1      +1    40      Low     C
 22A        1200       75%          25       10      65        -18     X       X     60      High    C
 22B        1200       75%          25       8       60        -13     X       X     60      Low     C
 j.5A       750        90%          8        20      41        -14                   40      High    B
 j.2A       1200       90%          15       3       39        -5                    40      High    B
 j.5B       1200       85%          9        5       30        -2                    40      High    B
 22C (N)    0          80%          12       3       44        -10     D       X     oo      Mid     C
 22C (O)    500        80%          12       3       37        -3      D       D     oo      Mid     C
 22C (D)    0          80%          12       3       60        -26     D       D     oo      Mid     C
 22D        x          x            26       x       111       x       x       x             x       x
- Properties
- 5B: 29F+ cancellable
- 6B: 7-25F airborne
- 2A: 13F+ cancellable
- 66B: 8-43F graze and airborne, other stuff
- 33A: 2F hitstop, 1-30F graze
- 33B: 1-34F graze
- 22A: 21-35F airborne, 35F+ cancellable
- 22B: 12-24F airborne
- 22C (N/D): 1-14F invincible
                                                              Block   Hit     CH
Motion     Damage     Proration   Startup  Active  Duration   Adv     Adv     Adv   Untech  Cancel  Type
------------------------------------------------------------------------------------------------------------
 5C         200*18     96%*18       52       X        79                              25             B
 6C         200*18     96%*18       57       X        26                              25*36          B
 2C         200*18     96%*18       57       X        16                              25*36          B
 j.5C       200*18     96%*18       50       X        79                              25             B
 j.6C       200*18     96%*18       55       50       26                              25*36          B
 f.5A       200*2+400*390%*2+93%*3  21       50       26                X       X     35*2+40*3      C
 f.2A       0          X            X        34       16        X       X       X     16             X
 f.6A       200*2+400*390%*2+93%*3  21       50       26                X       X     35*2+40*3      C
 fj.5A      200*2+400*390%*2+93%*3  18       50       26                X       X     35*2+40*       C
 fj.2A      200*2+400*390%*2+93%*3  18       50       26                X       X     35*2+40*3      C
 f.5B       100+400    95%+90%      12       34       15                              40+40          B
 f.2B       0          X            X        34       16        X       X       X     16             X
 fj.5B      100+400    95%+90%      11       34       16                              40+40          B
- Properties
- 5C: 21F discharge, 51F separate
- 6C: 21F discharge, 56F separate
- 2C: 11F discharge, 56F separate
- j.C: 18F discharge, 48F separate
- j.6C: 21F discharge, 53F separate
- f.5A: A hit will cause bullet to explode and attack ?F afterwards
- f.2A: 11F discharge, ?F-?F vortex
- f.6A: A hit will cause bullet to explode and attack ?F afterwards
- fj.A: A hit will cause bullet to explode and attack ?F afterwards
- fj.2A: A hit will cause bullet to explode and attack ?F afterwards
- f.5B: A hit will cause bullet to explode and attack 3F afterwards
- f.2B: 11F discharge, ?F-?F vortex
- fj.B: A hit will cause bullet to explode and attack 3F afterwards
                                                              Block   Hit     CH
Motion     Damage     Proration   Startup  Active  Duration   Adv     Adv     Adv   Untech  Cancel  Type
------------------------------------------------------------------------------------------------------------
 236A (h)    1200       80%          24      3        47        *       D       D     40              C
 236B (h)    1000       80%          20      6        65        -23     D       D     40              C
 236A (b)    200*7      95%*7        27      1x7      X         *       D       D     40*7            C
 236B (b)    200*7      95%*7        25      1x7      X         *       D       D     40*7            C
 j.236A (h)  750        92%          19      land     18+glide  X       X       X     oo              C
 j.236B (h)  1000       92%          30      land     29+glide  X       X       X     oo              C
 j.236A (b)  500        85%          7       2        31        -2      D       X     40              C
 j.236B (b)  500        85%          7       2        26        +3      D       X     40              C
 214A        100*8      95%*8        26               50                        X     30      27      B
 214B        60*16      95%*16       50-              50                        X     30      27      B
 421A (h)    500        80%          22      3        63        *       D       D     oo              C
 421A (b)    100*12     98%*12       20-              X         X               X     40              C
 421B        100*12     98%*12       78-              49                        X     40      31      C
- Properties
- 236A (h): 1-3F and 10-26F graze, 4-9F super armor, 22F bullet portion, block adv situational
- 236B (h): 5-20F super armor, 20F bullet portion
- 236A (b): Block adv situational
- 236B (b): Block adv situational
- j.236A (h): 19F spirit consumption, can be cancelled at low heights
- j.236B (h): 30F spirit consumption, can be cancelled at low heights
- j.236A (b): Appears when j.236A (h) lands, 1F discharge
- j.236B (b): Appears when j.236B (h) lands, 1F discharge
- 214A: 23F discharge
- 214B: 23F discharge, randomized paths
- 421A (h): 19F bullet portion, block adv situational
- 421B (b): Randomized paths
- 421B: 19F seeded, randomized paths
                                                                     Block   Hit     CH
Card         Damage       Proration     Startup     Active  Total    Adv     Adv     Adv   Untech  Type
------------------------------------------------------------------------------------------------------------
 Dunk Lv1     2000       100%            8,2(10)     35      64       -32     D       X     oo      C
 Dunk Lv2     3000       50%             8,2(10)     35      64       -32     D       X     oo      C
 Chain Lv1    0          70%             10,9(19)    3       74       -40     +22     +22   X       C
 Chain Lv2    0          70%             10,9(19)    3       74       -40     +22     +22   X       C
 Giant Lv1    1500       80%             8,11(19)    3       67       -26     D       D     oo      C
  (grow)      1500       80%             8,11(19)    3       67       -26     D       D     oo      C
 Giant Lv1    1500       50%             X,X(24)     2       62       -15     D       D     60      C
  (5A)        1500       50%             X,X(24)     2       62       -15     D       D     60      C
 Giant Lv1    1500       0.5%            X,X(22)     3       76       -31     D       D     60      C
  (5B)        1500       0.5%            X,X(22)     3       76       -31     D       D     60      C
 Giant Lv1    1500       50%             X,X(25)     3       66       -18     D       D     60      C
  (5C)        1500       50%             X,X(25)     3       66       -18     D       D     60      C
 Giant Lv1    2000       50%             X,X(22)     20      *                D       D     60      C
  (j.A)       2000       50%             X,X(22)     20      *                D       D     60      C
 Giant Lv1    2000       50%             X,X(27~)    5       *        -18     D       D     60      C
  (j.B)       2000       50%             X,X(27~)    5       *        -18     D       D     60      C
 Giant Lv1    1500       50%             X,X(28)     14      X        X       D       X     60      C
  (horn)      1500       50%             X,X(28)     14      X        X       D       X     60      C
 Giant Lv2    1500       80%             8,11(19)    3       67       -26     D       D     oo      C
  (grow)      1500       80%             8,11(19)    3       67       -26     D       D     oo      C
 Giant Lv2    2000       50%             X,X(24)     2       62       -15     D       D     60      C
  (5A)        2000       50%             X,X(24)     2       62       -15     D       D     60      C
 Giant Lv2    2000       0.5%            X,X(22)     3       76       -31     D       D     60      C
  (5B)        2000       0.5%            X,X(22)     3       76       -31     D       D     60      C
 Giant Lv2    2000       50%             X,X(25)     3       66       -18     D       D     60      C
  (5C)        2000       50%             X,X(25)     3       66       -18     D       D     60      C
 Giant Lv2    2500       50%             X,X(22)     20      *                D       D     60      C
  (j.A)       2500       50%             X,X(22)     20      *                D       D     60      C
 Giant Lv2    2500       50%             X,X(27~)    5       *        -18     D       D     60      C
  (j.B)       2500       50%             X,X(27~)    5       *        -18     D       D     60      C
 Giant Lv2    1500       50%             X,X(28)     14      X        X       D       X     60      C
  (horn)      1500       50%             X,X(28)     14      X        X       D       X     60      C
- Properties:
- Dunk Lv1: 0F hitstop, invincible till end on hit, 1-7F invincible, 8-44F melee invincible + graze + airborne
- Dunk Lv2: 0F hitstop, invincible till end on hit, 1-7F invincible, 8-44F melee invincible + graze + airborne
- Chain Lv1: Invincible till end on hit, 10-31F graze
- Chain Lv2: Invincible till end on hit, 10-74F graze
- Giant Lv1 (grow): 0F hitstop, 1-57F invincible, 58-67F super armor
- Giant Lv1 (5A): 9F hitstop
- Giant Lv1 (5B): 9F hitstop
- Giant Lv1 (5C): 9F hitstop
- Giant Lv1 (j.A): Duration is until landing, 9F hitstop
- Giant Lv1 (j.B): Duration is until landing + 45F, 4F attack decision after landing
- Giant Lv1 (horn): not block/grazeable
- Giant Lv2 (grow): 0F hitstop, 1-57F invincible, 58-67F super armor
- Giant Lv2 (5A):
- Giant Lv2 (5B):
- Giant Lv2 (5C):
- Giant Lv2 (j.A): Duration is until landing
- Giant Lv2 (j.B): Duration is until landing + 45F, 4F attack decision after landing
- Giant Lv2 (horn): not block/grazeable
Motion    Startup   Active   Recovery  Graze      Cancel   Guard   Invulnerable
------------------------------------------------------------------------------------------------------------
 7/8/9     5         x        x         x          6+       6+      x
 8D        5         x        x         1-17       6+       18+     x
 7D/9D     5         x        x         1-20       6+       21+     x
 6D        x         12~79    14        1-(12~79)  14+      13+     x
 4D        6         7~66     14        1-(12~71)  1+       13+     1-6
 j.6D      9         8        x         1-17       10+      18+     x
 j.4D      5         9        x         1-14       7+       15+     x

