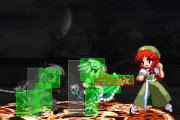
Immaterial and Missing Power/Youmu Konpaku
Introduction
- More info: Touhou Wiki
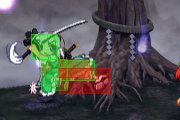
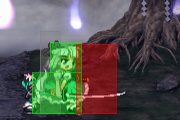
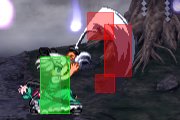
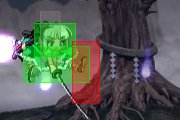
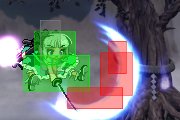
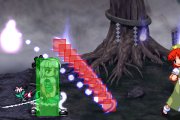
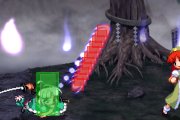
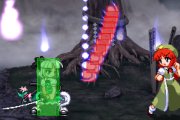
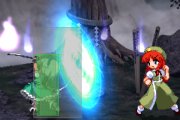
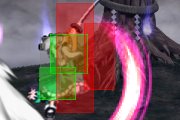
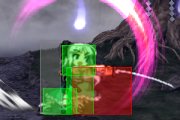
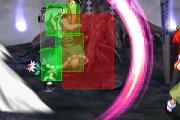
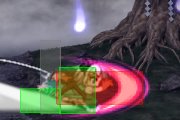
Youmu is a young girl who serves under Yuyuko as her gardener and swordsmanship teacher. She is featured with quick movements and refined sword technique, which is complimented by her straightforward nature.
Moves
Melee
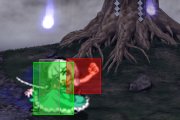
| 5A
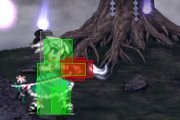
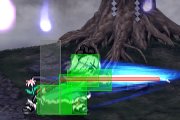
[ Mid | Damage: 200 | Startup: 6 | Active: 3 | Hit: -1 | Block: -2 ] A hilt jab used to pressure people once you've got a hold of them. Very good for tick throws and guard breaks. Staggering them in the corner can catch people jumping (expecting a throw or a 2b), which can be hit-confirmed into ~4k combos. Canceling into 6a/b does not combo, but it can be used as a frame-trap. | |
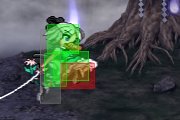
| 5B
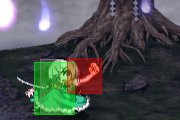
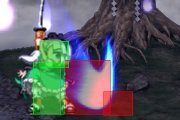
[ High | Damage: 400 | Startup: 8 | Active: 2 | Hit: +2 | Block: +1 ] A snap kick that hits high. Good for applying pressure. At point blank, it pushes you back the perfect distance for fuzzy setups. Canceling right into 22b/a (22b usually) can catch your opponent with their pants down, since they can still be worried about 6b and 5c. | |
| 2A
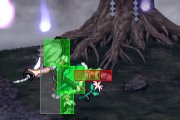
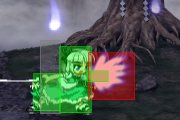
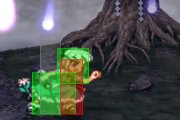
[ Mid | Damage: 550 | Startup: 9 | Active: 5 | Hit: +3 | Block: +2 ] A back-fist slightly slower than 5b that hits mid. Excellent for guard breaks. Can lead into outrageous damage. | |
| 2B
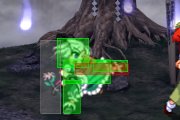
[ Low | Damage: 200 | Startup: 6 | Active: 3 | Hit: -2 | Block: -3 ] A short toe poke that hits low. Youmu crouches extremely low for this attack. You can use it to go right under many high pokes (notably Yuyuko and Remilia 5a). A good use of the move is in the place of a graze attack. Dash forward, and use the momentum from the dash to slide along the floor. As a general rule, use 2b to approach and 5a to continue with momentum (so as to not allow them to jump out from 2b). | |
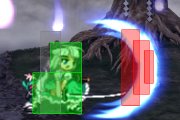
| 6A
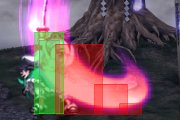
[ Mid | Damage: 900 | Startup: 14 | Active: 2 | Hit: -3 | Block: -4 ] A somewhat slow sword slash that hits mid. The preferred move to use once you've already opened someone up from 5b/2a. Deceptively long reach, and has a strange property that grants it graze frames (1-15f). You can use this to shake people up who are applying j.2c pressure up close. To make it hurt, you can buffer 214 and press a or b depending on if it hit or was blocked. It pushes you back very far when you are applying pressure, so you can use it to create a fake opening or trick your opponents into reacting by going into a whiffed 5c (which can be canceled far earlier than a blocked one). | |
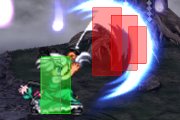
| 6B
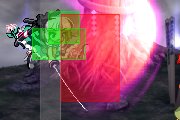
[ High | Damage: 800 | Startup: 12 | Active: 4 | Hit: +2 | Block: +1 ] A standard roundhouse that hits high. Has a huge horizontal and vertical hit-box, so you can use it in your footsies if you expect a poke or dash->attack or you can swat people out of the air who have blocked a bullet fairly close to the ground. Where this attack shines, though, is in your pressure. It has this interesting displacement property that starts during its recovery that can be used to increase the range on your attacks. You can throw during this to create a makeshift karathrow in a game where kara doesn't exist. Staggering into 5c or canceling immediately into a crush are also good options from this move. Be warned, though. This move whiffs on certain crouchers at certain ranges, so be careful as to not hang yourself. | |
| j.5A
[ High | Damage: 650 | Startup: 6 | Active: 16 | Hit: x | Block: -8 ] An absurdly fast flying elbow. Youmu compacts herself pretty tight, and sticks her elbow out slightly below her. It can be used to snipe people out of tight zoning, punish blocked air normals, and beat out lazy tech punishes. With this move, Youmu dominates air to air. Block or hit, you can cancel into j.c, land, and continue laying down the law. On the ground, you can use normal jump to get into certain characters blind spots and harass them with j.ac pressure, which usually leads into your opponent being pushed all the way to the corner. | |
| j.5B
[ High | Damage: 950 | Startup: 8 | Active: 5 | Hit: x | Block: -6 ] A leaping kick. Use it in place of j.a in air to air situations where you need a bit more range. On block, this move does a very significant amount of spirit damage. Wall-slams on CH, which can lead into 5k combos. | |
| 5C
[ High | Damage: 800 | Startup: 12 | Active: 4 | Hit: -15 | Block: -16 ] On overhead sword slash that hits clean during crush. Serves as decent anti-air when they're in the 2c blindspot. Can be canceled like a bullet. | |
| 2C
[ Mid | Damage: 900 | Startup: 12 | Active: 3 | Hit: -4 | Block: -5 ] An upward sword slash excellent for footsies and anti-air. The slash has a very tall hitbox about 1 and a half character widths in front of Youmu. Use it to stuff graze attacks, poor jump-ins, long range ground attacks, jump-outs, and for tech punishing. Since its considered a bullet, it can be canceled appropriately. | |
| j.5C
[ High | Damage: 700 | Startup: 16 | Active: 3 | Hit: x | Block: -2 ] A downward slash that, despite being an aerial move, hits mid. Its somewhat slow, but if you use it anticipating particular attacks, it does a very good job of outright stuffing a lot of approaches and graze attacks. Because of the active frames of j.b and j.a, this is a good replacement for cross-up harassment. | |
| 22A
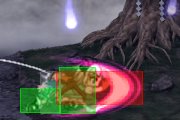
[ High | Damage: 1200 | Startup: 22 | Active: 2 | Hit: D | Block: -1 ] A long range sword poke that crushes high and wall-slams on hit. Youmu's crushes are both very excellent. You can also use it to shake people up while their dashing through bullets. | |
| 22B
[ Low | Damage: 1200 | Startup: 20 | Active: 2 | Hit: D | Block: -3 ] A sword sweep with a deceptively long reach that crushes low. Since Youmu has so many good high attacks, tossing it randomly in your pressure can yield good results. Off of 5b, 6b, 5a, jump-in j.c, etc. Keep them guessing. | |
| 6DA
[ Mid | Damage: 750 | Startup: 13 | Active: 8 | Hit: D | Block: -5 ] A ghostly palm attack that deals spirit damage and can be grazed. The second the hand makes any sort of contact with your opponent (whether it be block, hit, or grazed) it can be canceled. An ideal punish move, as it combos big from pretty much anywhere on the screen. It will wall-slam on CH and using it meaty will stuff melee invulnerable wake-up moves. | |
| 6DB
[ High | Damage: 450 | Startup: 10 | Active: 3 | Hit: -1 | Block: -2 ] A fast dashing snap kick that hits high. Use it to stuff someone before they try anything. Good for stopping people from jumping away too. On block, you can get someone anxious by o-bombing it. That way, they'll think twice about taking momentum if they see you have bombs in stock. | |
| 3DA
[ Low | Damage: 550 | Startup: 10 | Active: 2 | Hit: -2 | Block: -3 ] A sliding back-fist that hits low. Its main purpose is staggering low after a guard crush, though not really much else. | |
| 3DB
[ High | Damage: 800 | Startup: 10 | Active: 7 | Hit: D | Block: -8 ] A slightly airborne grazing (1-16F) knee kick, hits high and is very disadvantageous on blocks (-8). You'll want to be cautious and only use this when you're sure it will work out. Knockdown on hit and wall-slam on counter. An annoying gimmick is to do this at max range making it safe on block, but more importantly, bait for your 623a. |
Bullets
| f.A
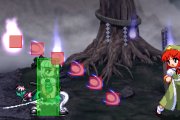
A wind slash that starts up fast and then slows down near the end of its duration. It cannot be negated and persists after knockdown. Use it to snipe people out of their actions. If you're chasing someone trying to clear room to declare, this can interrupt their attempts and put them back into a poor position. Direction is based on input. 5a launches straight forward, 2a diagonally up, and j.a diagonally down. | |
| f.B
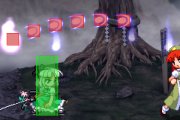
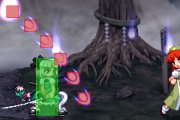
Slow moving bullets spawn from Myon (the ghost following you around) that move in an arcing fashion. Arc is determined by input. 5b moves low and forward. 2b moves high and forward, and j.b shoots to the ground. The strength of this move comes from the fact that you can control where the bullets spawn with your own movements. High-jumping and then landing causes Myon to be higher then if you had just been idle, which allows the bullets to cover more of the stage. The bullets themselves are hard to negate, and lethal when blocked, particularly in the air. The opponents remains in block-stun until all bullets have landed, giving you plenty of time to do whatever you want. You can guard break them out of the air, or go for an air crush string, or get up in their face for some ground mix-ups. | |
| C
Bullets that spawn from c attacks. They are fairly dense, and are generally your go to bullet. Use them to negate problematic bullets and give you cover for you aerials. Hitstun and Blockstun is very short, so you'll often see your opponent get tagged by a random c bullet, ruining your combo. Do your best to make sure your melee hits slightly after the bullets land. On the other hand, c bullets can be used to fill in the gaps in otherwise impossible links, and the short blockstun can be utilized for tick setups. |
Specials
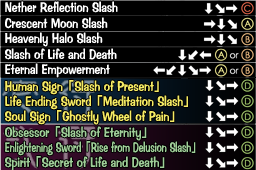
| Nether Reflection Slash - 236C
Youmu creates a bullet reflecting barrier, reflecting mostly smaller bullets like Sakuya's knives, Youmu's bullets (except the f.A type), Yuyuko's butterflies, Alice's doll bullets, Patchouli's C bullets, Marisa C bullets, Remilia C bullets, Yukari C and f.A bullets, and some of Reimu's bullets. The bullets turn into the small blue bullets Youmu uses after colliding with the reflector, and randomly go on their way. Lasts for about a second. | |
| Crescent Moon Slash - 623A
A diagonally upward slash with melee invincible frames (1-18F), this is the perfect attack to counter any close range melee hit. Not safe on block, a quite punishable hit. Can't be cancelled into anything. | |
| Heavenly Halo Slash - 623B
Two slashes diagonally upwards with grazing frames (1-35F), also airborne from 29 to 74F. This attack by itself is rarely useful; it can act as a longer range melee counter or maybe an anti-air with the second hit, but to use this effectively just by itself needs luck and anticipation and it's very punishable. The best uses for 623B are in combos, following up 5A or 2B hits, in corners following up the second 214A or following up 66A hits. Can be bomb and super cancelled in the middle after the first slash hit. Better "stand-alone" grazing substitutes are 6A and 33B. | |
Slash of Life and Death - 214AB
| |
Eternal Empowerment - 41236AB
|
Spell Cards
| Runpast 1 - Human Sign "Slash of Present"
This super looks like a 214 attack, going forward a bit with high speed, cutting through people. Can be used after 5B, 2A, 6A, 66A, 6B, 66B, 214A first hit, 214B if you're not TOO close, both grabs, and 623B can be cancelld into it after the first slash hit (although if your opponent is airborne while getting hit by 623B, you'll want to bomb it first and then hit) to combo. It hits somewhat upwards as well like the 214B, so if you bomb a 623B hit for instance, you can get in a hit with this super right before they hit the ground if you time it right. Deals around 1.5k damage in a single hit. Deals chip damage on block but no spirit damage, can be hard to punish depending on positions. Cannot be grazed. |
||
| Runpast 2 - Obsessor "Slash of Eternity"
Same as lv1 but it goes forward a lot more, very fast and can combo off the second 214A hit outside corners (however, you have to delay it a bit so it can hit), but not very practical with 214B (have to bomb it). If this hits, it will cut people in the air 17 times for about 2.6k damage without any combo starter. Deals chip damage on block but no spirit damage, can be hard to punish depending on positions. Cannot be grazed. Has invulnerable startup. |
||
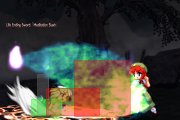
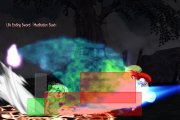
| Giant Sword 1 - Life Ending Sword "Meditation Slash"
Youmu extends her sword a bit and slashes your opponent. Hits 6 times for about 1.7k damage without any combo starter. Can be used after 5B, 2A, 6a, 66A, 6B, 66B, 214A first and second hit, 214B, both grabs and 623B can be cancelled into it after the first slash hit. This is the stronger level 1 spell to use, but can get hit in the startup. Deals both chip and spirit damage, harder to punish because of the faster recovery. This faster recovery also leaves you with more options in corners; the sword slashes wallslam your opponent, and the recovery is usually fast enough to combo more lv1 Giant Swords. Sometimes the tip will just barely hit them, and sometimes you can get almost an extra 6 hits in with one, it depends on the positions. Cannot be grazed, grazes while active. |
||
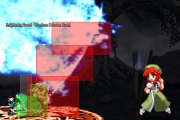
| Giant Sword 2 - Enlightening Sword "Rise from Delusion Slash"
Youmu extends her sword a lot and slashes your opponent once, dealing around 2.4k damage (not sure but definitely weaker than Runpast lv2). Same applies to this as level 1 version, except it only hits once and is easy to punish with the slower recovery. Wallslams opponent on hit, but the slower recovery does not let you combo any more lv2 Giant Swords under normal circumstances. Cannot be grazed, grazes while active. |
||
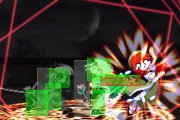
| Clones 1 - Soul Sign "Ghostly Wheel of Pain"
Youmu creates a clone of herself which follows your movements with a bit of delay. You can use this super to cancel hits and your clone when coming out will immediately follow the hit you cancelled. This has the highest damage potential out of all lv1 spells, but is really only useful in corners, since outside your opponent will get pushed away too much. It eats your spirit as long as it's out, ends in 3 seconds. If you use a combo where you can bomb in time then the spirit gauge will be refilled and it gets extended for another 3 seconds, otherwise it eats up all your spirit (read: you will lose ALL your spirit, essentially getting "guard crushed"). Generates more pushback than the lv2 version, so not all combos can be done with this. If done right after an attack it will copy previous attack. |
||
| Clones 2 - Spirit "Secret of Life and Death"
Looks the same as the level 1 version, except with this you can complete more combos because it doesn't generate too much pushback when coming out. |
Combos
General
Youmu has a ludicrous amount of combo potential. What will be listed here will be solid, relatively simple variations that do decent damage.
Midscreen BnBs
Any launcher that occurs midscreen that reaches the corner can be used for corner oki by hitting j.4d j.a/b.
- 2b 623b 22c hj9 j.b j.c - 2b/5a combo into themselves, so you can do 3 or so to give you room to hitconfirm into 623b. This is an extremely important combo, though it can be difficult. 2621 damage
- 66a 623b 22c hj9 j.b j.c d6 j.b - Delay 22c a bit to make sure it lands. 3237 damage.
- 2a 6a 214a 214a 214a - Depending on distance, the last 214a can whiff. 2607 damage.
- Counterhit 6b/a 214b 22c j.b j.c - If you feel you can outfootsie a poke and hit it with your command normal, then buffer 214 after 6a/b and hit b on hit and a on block.
Corner BnBs:
- 2a 6a 214a 214a 623b 22c j.b j.c j.4d j.b - Your standard bnb. You can also 5c hj7 j.b in place of j.b j.c j.4d j.b for a better tech punish setup. 3872 damage.
- 2a 6a 214a 214a 2a 6a 5c j.b - bombless version of the above combo. 214a -> 2a is a 2f link. 4125 damage.
- 2a 6a 214a 214a 5b 6a 5c j.b - easier version of the bombless combo 4008 damage.
- 2b 623b 22c j.b j.c (land)j.b j.c j.4d j.b - You can hitconfirm a few extra 2b's or 5a's. 3763 damage.
- 66a 214a 214a 2a 5c hj9 j.b j.c - After successfully baiting a reversal, this will be your go to combo. 3961 damage.
- 22b 22c j.b j.c (land) j.b j.c j.4d j.b - Your most common clean low hit after a crush. 3743 damage.
- 22a hj7 j.6d j.b 2a 5c j.b j.c j.4d j.b - Highest damage high hit from corner. Great for punishing bombs. Shit hurts.
Corner Juggles
Many of Youmu's juggles are interchangeable, so experiment and find what you're comfortable with.
- [j.b j.c]*X j.4d j.b - Standard air to air juggle. Can be done for as long as you have spirit. If your opponent is about to be caught by j.c bullets, land j.b a frame or two after the c bullets finish hitting, and do the j.4d j.b ender. Look out for Counterhit j.b's. You can get a potential 5k if you follow up the wallslam fast enough.
- 2a 2a 2a 2a 6a 5c hj9 j.b j.c j.4d j.b - The standard guard break ground juggle. Can be started from air to air j.a/b, guard break 6b, 6a, and CH f.2a.
- (Guard Break)5a 6a 22b, 2a 5c hj9 j.b j.c j.4d j.a - This can be landed on its own, after a CH 623a, after the second rekka, and off of air to air j.a/b if you don't have enough room to 2a.
Grab Combos
Midscreen
- 41236a 66a 623b 22c hj9 j.b j.c (j.4d j.b if it reaches the corner)
- 41236b 214a 214a 214a: - First 214a has to be input as 236a.
Corner
- 41236a j9 j.b j.c 2b 6a 214a 214a 623b 22c 5c hj7 j.b - Never works on Suika, Remilia, or Youmu. Will whiff on Reimu if you ticked it from 6b or two 5a's.
- 41236a j9 j.b j.c j.6d j.a j.c 2a 6a 214a 214a 214a - Higher damage version that is easiest on Sakuya, but will land on Yuyuko, Patch, Alice, and Yukari if you do the first j.c as late as possible, but I recommend sticking to the previous combo.
- 41236a 66a 214a 214a j8 j.b j.c j.4d j.b - For the shorties.
- 41236a 6a 214a 214a 214a - If you're not confident you can land the previous three, this is an easy free knockdown.
Loops
?
Spell Card Combos
?
Strategies
General
?
Blockstrings
Midscreen Blockstrings
5C 214A- If blocked midscreen, it will take some characters very far. Others can crouch or wiggle out of the c bullets. Beats forward dash and some jumpouts. If someone backdashes and then graze attacks, doing another 214a should shake them up a bit. If people are backdashing your 5c too much, 214b instead of 214a.
5C iad j.c - Serves a similar purpose to the above string. This allows for more continued pressure, but gives your opponent a bigger chance to escape via grazing the initial c bullets.
[9 (on the way up) j.a j.c j.4d j.a (land)] x3 - This will whiff on certain characters crouching hitbox, but you can easily make people stand up by threatening them with 6b 5c, which does a ludicrous amount of spirit damage when blocked wrong.
[j.c (on grounded opponent) 9 (on the way up) j.b (pause, allowing the c bullets to hit) j.c] x3 - This serves the same purpose as the last string, but is for a slightly different range. You'll have to scare your opponent into blocking high, though. This and the previous string will combo if your opponent drops guard for one reason or another, though you'll have to have a good feeling for which one to do when.
5C Giant Sword. - Safe excellent spirit damage. C bullets push the opponent away while youmu is recovering, making it safe. Don't do it in the corner, however, as the bullets will all hit too fast, thus leaving you open for punishment.
Corner Blockstrings
j7 j.a j.c(whiff) j.6d j.c (blocked) j.4d (land) 66a, 66a/Bluesword Guardcrush sequence. People like to freak out when you do this. Bait bombs with 4d and j7.
5c hj7 j.6d j.c (place it right in the center of the player) 4d 66a Bluesword - Guardcrush sequence.
Other Gimmicks
6b Crossthrough As an opponent is waking up, you can use the displacement of 6b to cross to the other side, creating a left-right mix up. You can adjust distance to make it ambiguous. You can also place a j.c and time it so they block the bullets meaty, and depending on the timing of your 6b, will hit left or right.
Matchups
| vs Reimu:
Youmu gets outzoned heavily and Reimu has an upper hand in almost every situation, but youmu's damage and threat of dealing high damage are much higher than those of Reimu's so Reimu can't afford to make any mistakes in this matchup. Overall it's an uphill battle for Youmu, but not one of her worst matchups. Approach with patience, wait for the right moment and outdamage Reimu with Youmu's superior pressure and damage. Youmu can use her 41236a j.b j.c 2b 6a 214a 214a 214a against Reimu. Make sure to use it to make Reimu hesitant to block. |
| vs Marisa:
Marisa matches Youmu's damage in every situation, and on top of that she's got puffballs which are very hard to deal with when used properly. All in all it's a pretty difficult matchup for Youmu. Extremely defensive Marisas are the hardest ones to deal with. You need to buy time to plant some f.b, since Marisa's f.b doesn't nullify those. Sadly though, Marisa can tag you out of f.b with her f.a laser very easily, so be aware of that. Play as safe as possible, while doing your best not to lose against Marisa's passive-aggressive f.b zoning. Avoid unnecessary jumping when marisa can tag you with 66a, since getting counterhit by that hurts a lot. Marisa is just tall enough to be hit with rising j.b after a corner throw, so make sure to use it. |
| vs Sakuya:
Youmu gets outzoned just as heavily as she gets against Reimu, if not even harder. On top of that Sakuya can do slightly more damage and force crushes easier. On the other hand, because of Sakuya's huge hitbox and lack of DP youmu's pressure and damage are increased to a very threatening level should she manage to close in, this matchup isn't as imbalanced as some other matchups are for Youmu. Watch out for Sakuya's anti-air 2c. Try to avoid going too high from the ground in this matchup, Youmu is much stronger on the ground and in the iad height. Make good use of her tall hitbox - you can throw Sakuya for 3100 damage with the 41236a j.bc D6 j.ac 2a 6a 214a 214a 214a combo. I suggest setting up 5c hj7 j.b for your ender, as j.bc tags her on the way up, causing her to tech far too high to punish. Sakuya isn't a very good character to 5c 214a against, as her hitbox allows her to wiggle out of the 5c pushback. Don't j.c within Sakuya's 6db range, or you will eat 3k+ damage. |
| vs Alice:
Very hard matchup for Youmu. Although Youmu outdamages Alice very heavily, a good Alice player won't give Youmu a single chance to close in. Getting in requires multiple correct reads, and Youmu's bullets won't put much pressure on Alice. In the rare case of managing to close in, you'll still need to deal with Alice's unlimited amount of bombs she'll get in this matchup. This matchup is still winnable with really good reads at the right times, but zoningwise it's the hardest matchup for Youmu. To win this matchup, you need to play extremely patient and bait Alice out of her bombs. She has no DP, and you can do the lower damage variant of Youmu's throw into j.b combo. Don't be afraid of burning bombs for further momentum and damage, they won't do much good as defensive bombs in this matchup. You can poke out of iad pressure with f.2a, and using reflector on spinners puts an absurd amount of bullets on the screen. |
| vs Patchouli:
Similar to Alice and Reimu matchups, you get outzoned quite heavily. Youmu has a huge advantage in corner pressure and going into clean damage, and being heavily dependant on projectiles, Patchouli does run out of steam while zoning. Patchouli also has a tall hitbox, allowing Youmu to do her best strings and combos, and no real DP to deal with Youmu's pressure. Start working your way in when Patchouli is low on spirit, but you still need to be careful of her tornadoes as they are free. Also watch out for Patchouli's j.book, it comes out faster than it looks like. Trying to hj9 after her strings will most likely result in a counterhit j.b and 3000+ damage. |
| vs Youmu:
? |
| vs Remilia:
I like to call this youmu's hardest matchup along with youmu vs alice for various reasons. First off, Youmu can't catch remilia without massive luck. Remilia can escape a lot of guardbreak situations other characters cant. Remilia's bullets are perfect for keeping Youmu from doing her own cover. Remilia's shallow hitbox cuts down the throw damage a lot. Overall Remilia seems to be at advantage in every range, and on top of better zoning, having a really strong counter against Youmu's bullet's, Remilia is also one of the few characters with better corner pressure than Youmu. Remilia doesn't lose out on damage, either. Remilia can tag Youmu out of her bullets very easily, so you need to find the right timing to toss in cover. Remilia shouldn't be able to corner you that easily with her bullets as long as you don't make a mistake and get hit by them. Having Youmu's bluesword spellcard out will shut down Remilia's bullet harrasing a lot. Don't be afraid to fish for 2bbb 623b hit confirms, as Youmu 2b goes under remi 5a. |
| vs Yuyuko:
Youmu's lack of hjc rushdown, which is Yuyuko's primary weakness, tilts this matchup slightly in Yuyuko's favour. Youmu has no fast bullets besides f.a that could keep yuyuko from building good bullet cover from mid and long range. Yuyuko can't be careless in the air though, due to Youmu's much faster air vs air melee and antair 2c. Stick to the ground. f.2b and grounded c bullets are great if Yuyuko starts going in the air more than she should. Reflector and f.2a also work very well against Yuyuko's who like to hj8 and j.[c]d6 j.a approach. Be careful with her flip, you can bait it with backdash and 66a to punish it for 3-4k damage. You can option select 2b/block when you're getting stagger pressured. If she 6a's, you poke out. If she does another 5a, you poke out. If she does something airtight, you're still blocking. Just watch the spacing and don't get too obvious with it as to get tagged by well-spaced stagger 2b. |
| vs Yukari:
Overall quite balanced matchup. Yukari outzones Youmu with her superior bullets, but Youmu gains that back with the extra power she gains due to yukari's hitbox that allows better strings than normal, and 3.1k damage off throws. Also be careful of antiair 2b and 6b which might break some of your strings. Out damage Yukari with Youmu's superior damage output, and keep throwing her with the best throw combo. Hj9 j.b tags her out of j.2a pressure. |
| vs Suika:
Suika can't approach carelessly from the air without having good cover to deal with youmu's antiair 2C. Overall Suika outzones youmu with her babies, c-bullets and vortexes though, and Suika's hitbox is very bad for youmu's strings and combos. Youmu can't score much off a throw either. Overall, the damage output is about the same. Suika has a terrible time dealing with f.b. |
| vs Meiling:
I'd like to say Youmu gets slighlty outzoned in this matchup too. With skillful use of j.C to control spacing, Meiling can approach well avoiding Youmu's antiair, and Meiling f.b is good for keeping youmu at range, but she can only use it when she's not in Youmu's f.2a range. This hardly matter's though, due to the difference in damage output and Youmu having much better corner pressure. Finally a matchup that is in youmu's favour. |
Frame Data
                                                              Block   Hit     CH
Motion     Damage     Proration   Startup  Active  Duration   Adv     Adv     Adv   Untech  Guard   Type
------------------------------------------------------------------------------------------------------------
 5A         200        98%          6        3       17        -2      -1      X     25      Mid     A
 2A         550        93%          9        5       22        +2      +3      +10   35      Mid     B
 6A         900        92%          14       2       40        -4      -3      +8    35      Mid     C
 5B         400        93%          8        2       22        +1      +2      +9    25      High    B
 2B         200        98%          6        3       18        -3      -2      X     25      Low     A
 6B         800        90%          12       4       33        +1      +2      +13   35      High    C
 6DA        750        90%          13       8       40        -5      D       D     30      Mid     C
 6DB        450        92%          10       3       27        -2      -1      +6    25      High    B
 3DA        550        85%          10       2       28        -3      -2      +5    40      Low     B
 3DB        800        85%          10       7       40        -8      D       D     40      High    C
 22A        1200       75%          22       2       45        -1      D       D     60      High    C
 22B        1200       85%          20       2       45        -3      D       D     60      Low     C
 j.5A       650        90%          6        16      33        -8                    40      High    B
 j.5B       950        90%          8        5       33        -6                    40      High    B
 22C (N)    0          80%          12       3       45        -11     D       X     oo      Mid     C
 22C (O)    500        80%          12       3       37        -3      D       D     oo      Mid     C
 22C (D)    0          80%          12       3       61        -27     D       D     oo      Mid     C
 22D        x          x            26       x       107       x       x       x             x       x
- Properties
- 6A: 1-15F graze
- 66A: When it connects, guards, or grazes an attack, it is cancellable
- 33B: 1-16F graze, 8-27F airborne
- 22C (N/D): 1-14F invincible
                                                              Block   Hit     CH
Motion     Damage     Proration   Startup  Active  Duration   Adv     Adv     Adv   Untech  Cancel  Type
------------------------------------------------------------------------------------------------------------
 5C (h)     850        85%          12       4       50        -16     -15     -4    120     25      C
 2C (h)     900        85%          12       3       39        -5      -4      +7    40      24      C
 j.C (h)    700        85%          16       3       37        -2                    40      22      C
 5C         80*11      97%*11       45-55    oo      43                        X     15      22      A
 2C         80*11      97%*11       45-55    oo      37                        X     15      14      A
 j.5C       80*11      97%*11       49-59    oo      38                        X     15      16      A
 f.5A       650        80%          7        33      45                        X     40      X       C
 f.2A       650        80%          8        33      34                        X     40      X       C
 fj.5A      650        80%          13       33      34                        X     40      36      C
 f.5B       100*6      98%*6        11       oo      35                        X     40      29      B
 f.2B       100*6      98%*6        11       oo      35                        X     15      29      B
 fj.5B      100*6      98%*6        19       oo      35                        X     15      33      B
- Properties
- 5C: 12-22F discharge
- 2C: 12-22F discharge
- j.C: 16-26F discharge
                                                              Block   Hit     CH
Motion     Damage     Proration   Startup  Active  Duration   Adv     Adv     Adv   Untech  Cancel  Type
------------------------------------------------------------------------------------------------------------
 236C       X          X            11       30      48        X       X       X     X       X       X
 236C (r)   (150*3)*n  (2*3)*n               oo                                X     25      X       B
 623A       650        90%          10       2       55        -23     D       D     50      X       C
 623B       600+600    93%+93%      9, 31    1, 5    93        -40     D       D     50+50   10-28   C
 214A (1)   500        90%          18       4       43        -3      -9      -2    35      19      B
 214A (2)   400        90%          7        2       30        -1      D       D     120     8       C
 214A (3)   800        85%          18       1       54        -14     -3      X     oo      X       C
 214B       1200       85%          29       10      61        -10     D       D     50              C
 41236A     X          75%          12       1       41        X       +17     X     X               A
 41236B     X          75%          14       1       44        X       +19     X     X               A
- Properties
- 236C: Barrier that reflects bullets
- 236C (r.): ?
- 623A: 1-18F melee invincible, 8-36F airborne
- 623B: 1-35F graze, 29-74F airborne
- 214A (1): ?
- 214A (3): 5-34F airborne, High guard crush
- 214B: Low guard crush
- 41236A: Reels if connects
- 41236B: Reels if connects
                                                                     Block   Hit     CH
Card         Damage       Proration     Startup     Active  Total    Adv     Adv     Adv   Untech  Type
------------------------------------------------------------------------------------------------------------
 Runpast Lv1  1500       65%             10,0(10)     15     70       -38     D       D     oo      C
 Runpast Lv2  500+150*15 0%+96%*15       10,0(10)     15     64       -32     D       D     oo      C
              +1000      +65%            10,0(10)            64       -32     D       D     oo      C
 Sword Lv1    350*6      93%*8           6,8(14)      12     80       -34     D       D     oo      C
 Sword Lv2    2400       70%             6,8(14)      20     88       -52     D       D     oo      C
 Clones Lv1   X          X               4,X(X)              18       X       X       X     X       X
 Clones Lv2   X          X               4,X(X)              4        X       X       X     X       X
- Properties:
- Runpast Lv1: ???, 0F hitstop when blocking, 10-46F invincible
- Runpast Lv2: ???, 0F hitstop when blocking, 1-40F invincible, when it connects invincible until end
- Sword Lv1: 2F hitstop when it connects, 9F hitstop when blocking, 6-?F graze
- Sword Lv2: 2F hitstop when it connects, 9F hitstop when blocking, 6-33F graze
- Clones Lv1: During clones damage is halved, clone copies your moves 10F later, no hitstop on clone
- Clones Lv2: During clones damage is halved, clone copies your moves 10F later, no hitstop on clone, ???
Motion    Startup   Active   Recovery  Graze      Cancel   Guard   Invulnerable
------------------------------------------------------------------------------------------------------------
 7/8/9     5         x        x         x          6+       6+      x
 7D/8D/9D  5         x        x         1-20       6+       21+     x
 6D        6         8~32     21        1-(18~41)  1+       15+     x
 4D        x         18       x         1-18       x        x       1-6
 j.6D      9         19       x         1-28       10+      29+     x
 j.4D      3         9        x         1-17       4+       13+     x
Errata
- When on the 2P side, Youmu is capable of throwing an opponent during the 1F suki period following a connected hit. This effectively allows Youmu to infinitely rethrow her opponent provided that they are in the category of characters who can be hit by a jumping attack after a throw. This technique is banned in tournament regulation play.
- Youmu's airtechs are both three frames faster than everyone else's.

