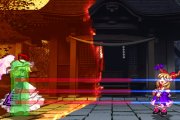
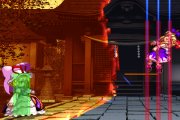
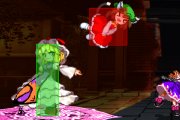
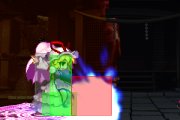
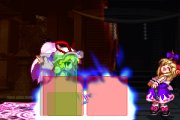
Immaterial and Missing Power/Yukari Yakumo
Introduction
- More info: Touhou Wiki
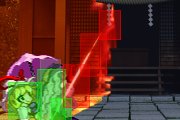
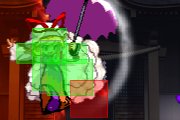
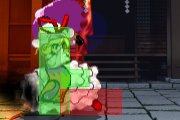
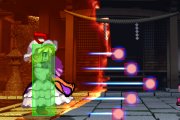
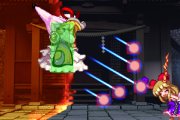
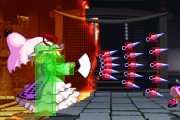
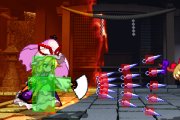
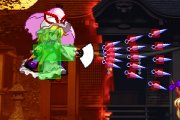
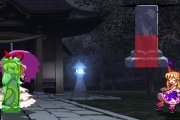
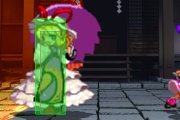
Wave and particle, form and emptiness, life and death, peanut butter and chocolate... Yukari is the youkai of boundaries in the world of Touhou, characterized by a whimsical nature and extreme laziness. In the game of IaMP, she's one of the stranger characters both to play as and to fight against, with quite a number of powerful tricks up her sleeve and a heavy hand to counteract her somewhat slower moveset.
Moves
Melee
| 5A
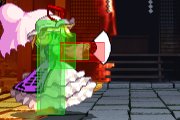
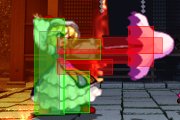
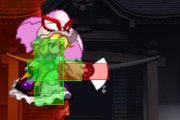
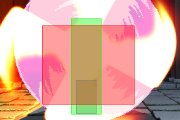
[ Mid | Damage: 200 | Startup: 6 | Active: 3 | Hit: 0 | Block: -1 ] Fan slap, it's a good move, range is shorter than what it looks, the good thing about this move is that it combos into itself and into 6A, canceling this move into 6B is a safe blockstring and adds a lot to Yukari's overall game, some strong mind games involve this move (covered in Strategies section). This move hits mid. | |
| 5B
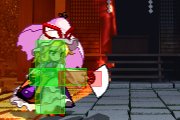
[ Low | Damage: 600 | Startup: 10 | Active: 3 | Hit: +2 | Block: +1 ] Yukari does a kick to the ankle with added black mist that enhances it's range. Much better range than 5A, at 10F it's a medium speed which is good enough for the range it has. Combos into 6B which means at least 2.2K damage if it connects. It hits low and does around 30% spirit damage if blocked wrong. Also essential for Yukari's stagger game. | |
| 2A
[ Low | Damage: 200 | Startup: 7 | Active: 2 | Hit: -3 | Block: -4 ] Same as 5A but with Yukari crouching, the range may look the same but this move has slightly less range than 5A, and is 1F slower. On the bright side, it still has the same combo and string properties and hits low. It doesn't do that much spirit damage when blocked wrong, only 10%, but it's main strength is after a guardcrush since this move doesn't stagger, this gives the opponent yet one more thing to think about, after all, since they don't want to eat 2A 5A 5A 6A 236D. | |
| 2B
[ Mid | Damage: 900 | Startup: 12 | Active: 2 | Hit: D | Block: +5 ] Yukari lays on her back while throwing a fast kick upwards that somehow generates a slash enhancing it's range, this move can work as an anti-air if placed correctly, you can follow up with 6A 236A/B/C. You will have to experiment with it's weird range before you can use it successfully, but even then this move doesn't have that much priority and you will be constantly trading with some attacks, don't overuse this move. Hits mid. | |
| 6A
[ High | Damage: 450 | Startup: 10 | Active: 2 | Hit: -5 | Block: -6 ] Umbrella poke, range is a bit shorter than what it looks, but it's still very good. This move has a lot of uses, most of them are strictly situational though, check out the Strategies section for more in depth information about this move. It doesn't really combo into anything but spellcards, unless you hit an airbone enemy or on CH(reel). Hits high and does around 22% spirit damage if blocked wrong. Also a fundamental move for Yukari's stagger game. | |
| 6B
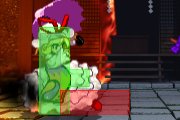
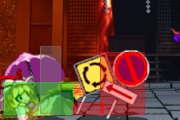
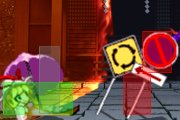
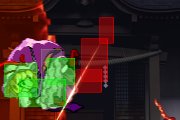
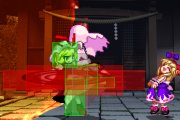
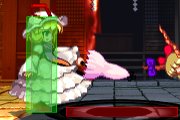
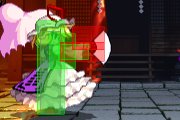
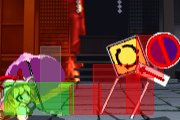
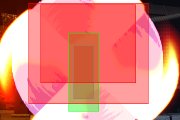
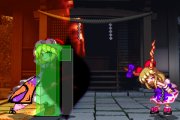
[ Mid/Low | Damage: 950 | Startup: 12 | Active: 6 | Hit: -4 | Block: -5 ] Yukari makes half of her body go through the ground replacing it with 2 stopsigns that hit diagonally forwards. This move is excellent, Yukari's hitbox is greatly reduced and will evade some attacks as low as Alice's 236A spinners and Yuyuko's 5A. The stopsigns are not part of Yukari's hitbox so they wont trade, this attack also has some sick range. If done close enough it strings (block or not) into 5C, but have in mind that even at max range you can combo this move into the corresponding tombstone, which is normally 236B. This move hits LOW if done near the enemy, dealing 50% spirit damage if blocked wrong, and it hits MID at long range. Along with 2A, this move doesn't stagger, so it adds a lot to her guardcrush game and is a potential finisher. If the opponent stand blocks 6B from far range there will be a 1F suki between 6B and tomb, so the opponent will not be able to graze. If the opponent crouch blocks 6B or blocks at close range there is a larger gap between sign and tomb, allowing them to graze the tomb. the exceptions being crouching Yukari, Patchouli, and Meirin, who can't crouch block it then graze, because they are too tall (there will be a 1F suki between 6B and tomb if they block it while crouching or standing). | |
| j.5A
[ High | Damage: 450 | Startup: 8 | Active: 3 | Hit: | Block: +2 ] Air fan-slap, good startup and good recovery. This will start all of Yukari's air to ground combos covered on the Combos section. It's also essential for the Yukari's corner air to air combo which is often named "j.A loop", but it is not exactly a loop though. Overall good move, it lacks a bit of range compared to other character's air game, so make sure to be close when you use this. | |
| j.5B
[ High | Damage: 900 | Startup: 8 | Active: 2 | Hit: | Block: -8 ] Great air to air, think of an aerial version of 2B, it's fast and it has good vertical range. Very useful after a j.4D when someone chases you in the air, easily one of the air moves with the most priority. Sadly, this pushes the opponent too high when connected so you won't be able to combo after it most of the time. Basically, use this move to win aerial battles and gain momentum. It's also used in certain combos covered in the Strategies section. | |
| j.2A
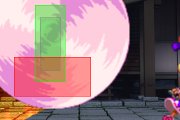
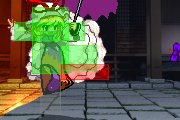
[ Mid | Damage: 500 | Startup: 16 La | Active: nd Var | Hit: cum Ci | Block: rcum Cir ] Yukari makes her umbrella spin towards the camera and starts descending at a diagonal angle as a slow red circle until she hits the ground. The hitbox of this move is big, meaning if you perform this move above your enemy you will end up with a crossup attack even if they crouch. The sweet thing about this move is that if you manage to connect this, block or not, you can cancel the recovery time when you land with any ground move except 5A/B or 2A/B. This is great to pin the enemy, especially in the corner. Have in mind that if this move hits the enemy when Yukari is still high in the air then no canceling will save you from getting punished. This move is slow and should only be used very near to the enemy and near to the ground. | |
| j.2B
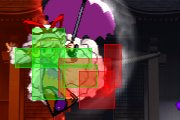
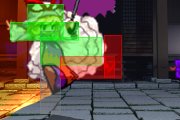
[ High | Damage: 900 | Startup: 13 | Active: 6 | Hit: | Block: +3 ] Yukari does a flip kick that will throw and airborne enemy directly into the ground. Because of this, j.2B is the best air combo finisher as it gives you a guaranteed wake up game. It's not the fastest move in the air but it has good hitbox that hits in front and below Yukari. Other than in combos you should aim to CH with this move, it groundslams on CH and opens a free j.a loop or other powerful combo. Because of it's hitbox and hitstun, this move is Yukari's main jump in attack. This move is also an amazing addition to Yukari's block strings and stagger game, if you jump and immediately use j.2B, it will hit the enemy even on crouch block and Yukari can come down with yet another air move or bullet attack to keep the pressure. Check out the Strategies section for more information about this. | |
| 22A
[ High | Damage: 1000 | Startup: 24 | Active: 3 | Hit: X | Block: -6 ] Yukari performs a spin kick that generates black waves around her, this move hits on both sides of Yukari's position. The range of this move is nowhere nearly as big as it appears, only the nearest wave hits which is quite disappointing. This move wallbounces the enemy on hit or CH near the corner. However, on normal hit you can't it follow up. It doesn't stagger so it's a potential finisher, but instant j.2B normally does this job better (covered on the Strategies section). Like all 22A's this move hits high and is instant crush if blocked wrong, so obviously use this when the opponent is likely to expect a low attack. | |
| 22B
[ Low | Damage: 1000 | Startup: 30 | Active: 3 | Hit: X | Block: -5 ] Yukari holds her closed umbrella up for a little while and proceeds to lower it near the ground generating black waves. Again, only the first wave hits. But even so, this moves has some sick range, about the same as Alice's 5A, which is even a bit more than stopsign! On the bad side, this move takes half a second before hitting. Works okay on retreating or backwalking opponents, but don't abuse it. Hits low and is instant guardcrush if blocked wrong. It knocks the opponent down if it connects. | |
| 6DA
[ Mid | Damage: 450 | Startup: 10 | Active: 3 | Hit: +4 | Block: +3 ] Dash fan-slap, very good move. Think of it as 5A but with a small dash to enhance it's range. The good thing about this move is that it leaves you with frame advantage on both hit and block, meaning that if you follow up with 5A or 2A you will counter anything thrown at you, even Meirin's 5A. It is also cancelable into SCs and at 10F is a great surprise move. Don't overuse it when you don't need it. On the downside it hits mid so it doesn't add anything to Yukari's stagger game. | |
| 6DB
[ Low | Damage: 700 | Startup: 10 | Active: 6 | Hit: -1 | Block: -2 ] Think of 5B but with added dash for even more range. It staggers and has the same startup as 5B so it's an awesome move for Yukari's stagger game. Other than that, use sporadically to surprise the enemy with it's range. Does 1/3 spirit damage if blocked wrong. | |
| 3DA
[ Mid | Damage: 950 | Startup: 16 | Active: 2 | Hit: D | Block: -10 ] Dashing stopsign. Sounds better than what it really is, it's slower than 6B and leaves you with frame disadvantage. Still a very good move, it hits mid always though so never use it to apply pressure, it is strictly a counter move that breaks through projectile sequences. If used correctly you should CH with this move quite a lot. Especially good when done near corner as you can follow up with the j.A loop. | |
| 3DB
[ High | Damage: 550 | Startup: 13 | Active: 4 | Hit: +1 | Block: 0 ] A.K.A. the "Yukari Flip". A cool looking flip that looks like Yukari's j.2B, but without the mist. It has some wicked good properties: it hits high, it is somewhat fast, it juggles (extends combos, covered on Strategies section), it staggers, it evades low attacks, it grazes, it's safe on block -- great move. However you can't combo out of it or into it so you will be using this move on very specific situations, breaking through projectile sequences and adding to Yukari's stagger game are the most important ones. It can be used to juggle airborne opponents which can sometimes be useful in certain situations. It deals around 30% spirit damage if blocked wrong. |
Bullets
| 5C
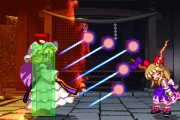
Yukari puts her closed umbrella forward and shoots 5 little light orbs that start accelerating and turning into comet-like projectiles. Because these orbs start accelerating at different times, this move hits in 3 or more phases so it provides great hitstun and good blockstun. Yukari's 5A is more useful for projectile battles most of the time, so you will be using this move for blockstrings generally, 6B 5C to be more specific. | |
| 2C
Yukari swings her umbrella while crouching to set 5 light orbs that appear horizontally in succession. They start accelerating upwards as they appear, so the closest to Yukari will be the one to hit first. Because of this, this move has some very long blockstun and hitstun, which means that if this move connects you can follow up with advantage. On the bad side, this move has quite a bit of startup for it to be guaranteed on any blockstring, so you will have to force your opponent block this using mind games. | |
| 6C
Same as 5C but Yukari shoots the light spheres diagonally up-forward. Has it's use on certain ground to air combos, you won't be using this outside of that though as you normally have better options. | |
| j.5C
Think of 5C but with faster startup and without the delay before you can cancel it into a dash, generally a great projectile. Though fj.A is better for screen clearing or bullet wras, but this move is what you need to approach an airborne enemy with advantage. Yukari's j.C 6D j.C 6D sounds very simple, but it's one of the strongest approach sequences in the game. | |
| j.2C
Same as j.C, but you shoot the light orbs diagonally down-forward. The use is similar than that of j.C, to approach a grounded enemy. Have in mind that the higher you are in the air when you use this move, the easier is for the opponent to escape or even try to counter, so keep Yukari closer to the ground when using this. | |
| f.5A
Looks just like close 5A, but 5 ninja darts (called "kunai") comes out of the fan spreading and covering a lot of area. If you keep holding A then Yukari will throw a max of 3 sets of these darts. Very very good move, it has very short start up and wins most projectile battles. On the bad side, you have to wait a bit before you can HJC, putting you in disadvantage if they try to counter and you are not spaced enough. The first set darts consumes 10% of the spirit bar while the following 2 sets consumes 2.5% each. | |
| f.2A
Same as f.5A except slower and with less area coverage. This move has absolutely no use, use f.5A instead. | |
| fj.5A
Same as f.5A, though a bit slower. However, you are already in the air so you can get advantage easier after casting this move. Even if it's slower than f.5A, it is still a projectile with fast startup, so use this to make your opponent move before they can cast too much stuff. Be aware of your position at all times so you don't get a j.A instead and lose momentum. In this situation use j.5C or j.2C in case you are too close. | |
| f.5B
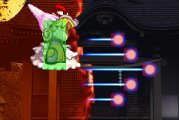
Yukari stays still for a moment and three horizontal light beams appear on the screen and then fade away, but these beams won't hit until they disappear. Useful if you time it so it hits just as they are waking up or arriving to the ground. Don't even try to abuse this move, it has very long start up which you can't HJC until the lasers appear. Use it once in a while for the surprise factor, but f.2B is much better in most instances. | |
| f.2B
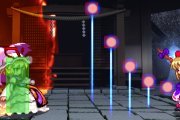
Yukari stays in a crouch position and casts 3 vertical light beams that appear where the enemy is. This move is more subtle than f.5B because Yukari does a crouching animation. Also this hits faster than f.5B as it hits almost immediately after the lasers appear. Still has a long start up, so again don't even try to abuse this move. | |
| fj.5B
Similar to f.5B, but with even longer start up. Using this move once in a while (only when you know the opponent can't punish you) will give the opponent something to think about and will break a pattern if it involved being on that horizontal layer. Just don't use it much, you normally have better options. |
Specials
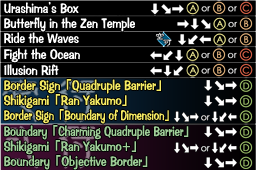
| Urashima's Box - 236ABC
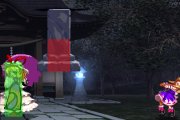
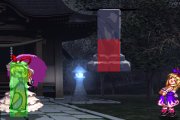
Gravestone falls various distances for 1000 damage. Cannot be cancelled by other projectiles. High guard crush. | |
| Butterfly in the Zen Temple - 623AB
Umbrella spin, 3 hits. A version moves horizontally, B version moves vertically with graze. | |
| Ride the Waves - 214AB (air)
Cancels any destructible projectile. B version has longer startup but is longer. Also can potentially keep Yukari airborne for infinite amounts of time. | |
| Fight the Ocean - 412ABC
A sends projectiles out from in front of Yukari, B sends them out from above the opponent, C from the floor under the opponent. Absorbing bullets with 214 adds to the amount of bullets sent out. 3 bullets default. | |
| Illusion Rift - 421ABC
A teleports forward, B backwards, C forward and above. |
Spell Cards
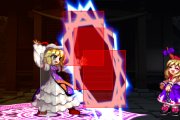
| Barrier 1 - Border Sign "Quadruple Barrier"
Yukari casts a barrier around her height in front of her. Hits 12 times and does around 1.6k. Generally not a very good spellcard but can be used against overaggressive opponents. Drains around 50% of enemy's spirit on block. Consumes 50% of Yukari's spirit bar. |
||
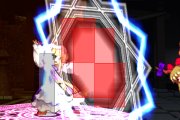
| Barrier 2 - Boundary "Charming Quadruple Barrier"
Yukari casts a blackhole-like barrier around the height of the screen in front of her and starts sucking your opponent towards the barrier. Hits 29 times for a total of 2.7k damage. This spellcard is pretty good against overaggressive opponents because it covers almost the entire screen in front of Yukari. It's unsafe on block but drains roughly 90% of opponent's spirit bar most likely guardcrushing them. Consumes 50% of Yukari's spirit bar. |
||
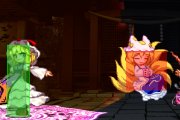
| Ran 1 - Shikigami "Ran Yakumo"
Yukari sends out Ran flying towards the opponent, upon hitting the opponent, Ran starts spinning for a total of 20 hits. This spellcard doesn't do much damage but it combos from alot of moves(see Spellcard combos). Very good for guardcrushes and chip damage, does around 40% spirit damage and Yukari is free to do anything during this spellcard making this easily the best spellcard for Yukari. Consumes 50% of Yukari's spirit bar. |
||
| 236D - Ran 2 - Shikigami "Ran Yakumo+"
Same as lv1 but this time Ran spins for a total of 30 hits making the spellcard lasting a bit longer. Because of this you have more time to go into Yukari's high/low mixups to set up for the guard crush. 214D - Chen - Shikigami "Ran Yakumo+ (Chen)" Yukari sends out Chen bouncing across the whole screen and back. Generally not useful because it's easily grazeable and is much inferior to Ran but can be used for pressure and luring opponent to graze. Chen can combo from the same moves as Ran. Consumes 50% of Yukari's spirit bar. |
||
| 236D - Flames 1 - Border Sign "Boundary of Dimension" (Forward)
Yukari sends a blue flame slowly crawling around the edges of the screen. Can only hit once per direction change each doing around 30% of spirit damage. Not very useful but can be used for pressure. Consumes 50% of Yukari's spirit bar. 214D - Flames 1 - Border Sign "Boundary of Dimension" (Backward) Same as above but only backwards. |
||
| Flames 2 - Boundary "Objective Border"
Yukari sends 2 flames this time, one forward and one backward. Flames' speed is a bit faster but otherwise it's pretty much the same. |
Combos
General
- 5B 6B 5C 236C Midscreen and point-blank, this doesn't work against Yukari. NOTE: On certain characters you can make it work on corner using 236A instead.
- 5B 6B 236B Midscreen not point-blank, this is her true BnB, have in mind that there's a certain position where neither 6B 5C 236C or 6B 236B combo.
- 2B 6A 236A/B/C What tombstone you should use is dependant on how close you are to the corner. This combo works on grounded opponents and on incoming airborne opponents, you can go straight from 6A 236A/B/C when an opponent is in the air, specially nice after they have crossed you up and they are landing.
- j.5A j.5A land 6A 236A/B/C Same as he combo above, the tombstone you need to use depends on how close you are to the corner.
- j.5A land j9 j.5A j.5A land j7 j.A j.C 6D j.A j.C 4D j.2B The infamous Yukari j.A loop, you must have the opponent cornered by the second rejump. NOTE: There is a variant for Suika and Yukari, who have slightly different hitboxes and make this combo impossible to land.
- j.5A land j9 j.5A j.5A land j7 j.A j.C 6D j.2B The Suika/Yukari variant of the infamous Yukari j.A loop. Deals a little less damage, but gets you the same knockdown.
- j.5A j.5A land 33B j7 j.5A j.C 6D j.A j.C 4D j.2B The infamous variation of the Yukari j.A loop, useful because 33B helps you reach the corner, its possible to add a second 33B, its quite hard though.
- j.2B j.2C 4D j.2A 6B 5C 236A Corner only, this combo does quite some damage, doesn't work on a few characters, the hardest thing of this combo is doing j.2A as soon as possible, if you do it later some parts of the combo won't work, you can add a j.2C 6D in the beginning of the combo, another cool variation is 6B CH 2C hjc9 j.6D and start the combo.
Loops
?
More Stuff
These are some other combos you can try, however, neither of these are fundamental or indispensable for Yukari's game.
- 6A 623A 22C hj8/9 j.2A 6A 623B DAXCOMBO !L!O!L! only possible near corner against an airborne enemy, 6A guard breaks, this might be a Dax combo, but its pretty useful if you want to go for that extra damage.
- j.2B j.2C 4D j.2A 6B 5C hjc9 6D j.A j.2C 4D j.2A 6B 236A The super loop, only works on a cornered Sakuya, the hjc9 6D part is very hard, but if you have good execution, give it a go, 4.6K bombless is quite cool. There are some better (and harder) variations. VIDEO
Spell Card Combos
Ran can combo from any ground normal attack except for 5A and 2A, it also combos after 623A so its a very useful SC. Here are some basic and harder combos for Yukari.
- 2B 6A 22A 236D(Barrier) Corner only, either Barrier works.
- 5B 6B 236D(Ran) Yukari's most basic Ran combo, can follow up with 6B 236A/B. Lv2 Ran lasts longer so you can add an extra 2B or 5B for more damage.
- 5B 6B 236D 6D 2B 6A/B 623A(1 hit) 22C 236D 2B 6B 236A(Lv2 Ran) Using 6A in the first follow up is much easier than 6B because it comes out faster, 6B requires a more strict timing. You also have to wait a bit before using the second 236D, perfect timing for it is a bit hard.
Strategies
General
?
Blockstrings
?
Mind Games
Ah, probably the most rewarding aspect of a fighting game, playing with the opponents mind is priceless, Yukari has quite a lot mind games in her sleeve, but it's ultimately dependent on the player on how to utilize / improvise.
Tombstone Power
Tombstone is a very special move, at 21f start-up it ranks up there with the fastest 22s; however this move is for sure much more subtle and surprising than any other 1 hit spirit crushers in the game, so let's find out some great uses for this.
5A(x2 on point blank) 6B is a very useful blockstring on when you are close to the enemy -- if you're close enough, you can throw in a guaranteed blocked 5C. Blocking high will drain about 70% of your opponent's spirit damage, and you can even follow it up with "HJC9 6D j.2B j.2C" or just "j.2C". Eventually, though, your opponent will be guarding low to avoid the 50% spirit damage that 6B (stopsign) deals, so instead of 6B (which hits "low" [at a certain distance]), throw in 236 (tombstone), which hits "high" for an instant guard crush.
That's the basic premise for the usage of Tombstone -- that is, use it in lieu of 6B when you train your opponent to block low. Another blockstring where you can utilize 236 is the corner blockstring "j.2B j.2C 4D j.2A 6B 5C HJC repeat." Just use 236 instead of 6B, and you have a guardcrush.
Another property of Tombstones are that they won't convert to spirit items even if Yukari gets knocked down (e.g. by a bomb or another attack), meaning they'll continue falling as an offensive projectile. This has a variety of potential uses that are pretty much situational / improvisational, but the most important thing is that it can be used to fish out bombs: whenever you're using an offensive sequence, there's usually a gap between practically every individual attack where your opponent can use a bomb. So if you anticipate an enemy readying a bomb at a certain point, just use 236. Most opponents will want to bomb as early as possible, though, so it's best if you 236 as early as possible as well (after the first attack, usually), even if you've already overused that type of sequence (because if they expect it, they just won't bomb, and you can continue the momentum again; if they don't expect it, then even better -- they'll get hit by a Tombstone while burning a bomb).
Other Gimmicks
Yukari's 214 series can freeze her in the air if accompanied by any aerial attack. This has a few uses, such as waiting out spellcards.
Frame Data
                                                              Block   Hit     CH
Motion     Damage     Proration   Startup  Active  Duration   Adv     Adv     Adv   Untech  Guard   Type
------------------------------------------------------------------------------------------------------------
 5A         200        98%          6        3       16        -1      0       X     15      Mid     A
 2A         200        98%          7        2       20        -4      -3      X     15      Low     A
 6A         450        92%          10       2       31        -6      -5      +2    35      High    B
 5B         600        93%          10       3       24        +1      +2      +9    35      Low     B
 2B         900        90%          12       2       29        +5      D       D     20      Mid     B
 6B         950        90%          12       6       39        -5      -4      +7    40      Mid/Low C
 6DA        450        92%          10       3       22        +3      +4      X     10      Mid     B
 6DB        700        91%          10       6       27        -2      -1      +6    35      Low     B
 3DA        950        90%          16       2       48        -10     D       D     40      Mid     C
 3DB        550        90%          13       4       28        0       +1      +8    40      High    B
 22A        1000       75%          24       3       52        -6      X       X     40      High    C
 22B        1000       75%          30       3       57        -5      X       X     45      Low     C
 j.5A       450        90%          8        3       25        +2                    35      High    B
 j.2A       500        90%          16      Land    Variable   Var.    Var.    Var.  40      Mid     C
 j.5B       900        90%          8        2       35        -8                    20      High    B
 j.2B       900        90%          13       6       29        +3                    40      High    B
 22C (N)    0          80%          12       2       43        -9      D       X     oo      Mid     C
 22C (O)    500        80%          12       2       37        -3      D       D     oo      Mid     C
 22C (D)    0          80%          12       2       65        -31     D       D     oo      Mid     C
 22D        x          x            26       x       126       x       x       x             x       x
- Properties
- 6B: First 2 active frames hit low, the 4 frames after that hit mid
- 66A: 1-12F graze
- 66B: 1-15F graze
- 33A: 1-17F graze
- 33B: 1-14F graze
- j.2A: 15F suki on landing, 1F+ upon landing special cancellable
- 22C (N/D): 1-13F invincible
                                                              Block   Hit     CH
Motion     Damage     Proration   Startup  Active  Duration   Adv     Adv     Adv   Untech  Cancel  Type
------------------------------------------------------------------------------------------------------------
 5C         200*5      97%*5        19       oo      44        -2      -1      X     25      28      B
 6C         200*5      97%*5        19       oo      44        -2      -1      X     25      28      B
 2C         200*5      97%*5        25       oo      44                        X     25      17      B
 j.5C       200*5      97%*5        15       oo      50                        X     25      17      B
 j.2C       200*5      97%*5        15       oo      50                        X     25      17      B
 f.5A       150*5-15   98%*5-15     10       oo      34                        X     20      16      B
 f.2A       150*5-15   98%*5-15     15       oo      44                        X     20      21      B
 fj.5A      150*5-15   98%*5-15     13       oo      47                        X     20      19      B
 f.5B       400*3      94%*3                 oo      60                D       X     40      30      C
 f.2B       400*3      94%*3                 oo      61                D       X     40      31      C
 fj.5B      400*3      94%*3                 oo      67                D       X     40      33      C
- Properties
- 2C: 15F discharge
- f.5A: Up to 3 waves
- f.2A: Up to 3 waves
- fj.A: Up to 3 waves
- f.5B: 26F discharge
- f.2B: 26F discharge
- fj.B: 29F discharge
                                                              Block   Hit     CH
Motion     Damage     Proration   Startup  Active  Duration   Adv     Adv     Adv   Untech  Cancel  Type
------------------------------------------------------------------------------------------------------------
 236ABC     1000       70%          21       7       46        -3      D       X     oo      28      C
 623A       350*3      93%*3        18               75        -19     D       D     40              C
 623B       350*3      93%*3        16               54        -37     D       D     40              C
 214A       X          X                             41        X       X       X     X               X
 214B       X          X                             50        X       X       X     X               X
 412A       200*3-13   97%*3-13              oo      50                        X     25      32      B
 412B       100*6-26   96%*3-13              oo      53                        X     20      40      B
 412C       150*3-13   95%*3-13     27       oo      46                D       X     40      32      B
 421A       X          X            X        X       78        X       X       X     X       X       X
 421B       X          X            X        X       78        X       X       X     X       X       X
 421C       X          X            X        X       69        X       X       X     X       X       X
- Properties
- 236ABC: Guard crushes if blocked low
- 623B: 1-39F graze, 1-?F attack decision at head, 8F attack decision up to 3 times
- 214AB: Can be done in air
- 412A: 21F discharge
- 412B: 24F discharge
- 412C: 18F discharge
- 421AB: CH state till 11F, 17-69F invincible
- 421C: CH state till 11F, 17-69F invincible, jump state after move ends
                                                                     Block   Hit     CH
Card         Damage       Proration     Startup     Active  Total    Adv     Adv     Adv   Untech  Type
------------------------------------------------------------------------------------------------------------
 Barrier Lv1  150*12      98.5%*12       1,7(8)      oo      98       -14     D       X     oo      C
 Barrier Lv2  120*29      98.5%*29       1,16(17)    oo      219      -26     D       X     oo      C
 Ran Lv1      60*20       98%*20         8,3(11)             36       +58     D       X     40      C
 Ran Lv2      45*30       99%*30         8,3(11)             36       +88     D       X     40      C
 Chen Lv2     600*n       90%*n          8,12(20)            36       *       D       X     60      C
 Flames Lv1   1000*n      60%*n          8,7(15)             59       *       D       X     40      C
 Flames Lv2   (700,1000)  (70,60%)*n     8,7(15)             59       *       D       X     40      C
              *n           70,60%)*n     8,7(15)             59       *       D       X     40      C
- Properties
- Barrier Lv1: Partner 9F hitstop, 1-53F invincible, 4F between each hit
- Barrier Lv2: Partner 9F hitstop, 1-?F invincible, 5F between each hit
- Ran Lv1: Partner 4F hitstop, 3F between each hit
- Ran Lv2: Partner 4F hitstop, 3F between each hit
- Chen Lv2: Hits only once per bounce
- Flames Lv1: Hits only once per direction change
- Flames Lv2: Hits only once per direction change, flames moving vertically do greater damage
Motion    Startup   Active   Recovery  Graze      Cancel   Guard   Invulnerable
------------------------------------------------------------------------------------------------------------
 7/8/9     5         x        x         x          6+       6+      x
 7D/8D/9D  5         x        x         1-20       6+       21+     x
 6D        5         10~34    19        1-(12~48)  1+       17+     x
 4D        6         17       6         6-22       6+       x       1-6
 j.6D      9         27       x         1-36       10+      34+     x
 j.4D      3         19       x         1-26       4+       23+     x
- Properties
- 6D: lower body invulnerability 5F after start to 10F before end.
Errata
- Yukari's air blockstun is 2F shorter than other characters, allowing her to react in situations where normally a counterattack would not be possible or be beaten cleanly.
