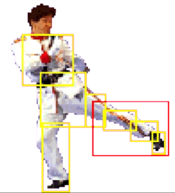
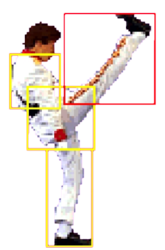
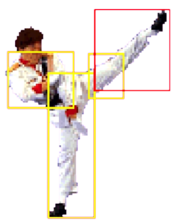
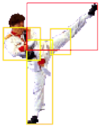
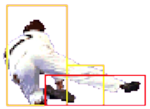
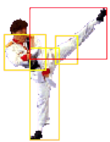
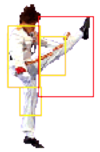
Intro
JP Name: 八卦掌ジャッキー
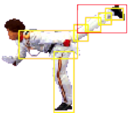
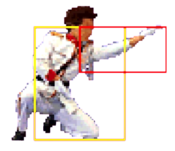
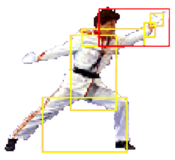
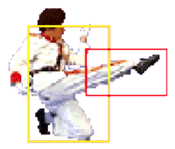
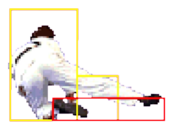
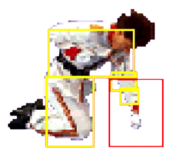
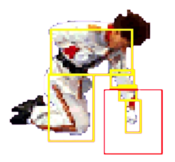
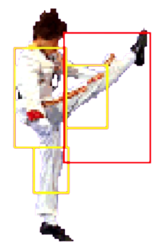
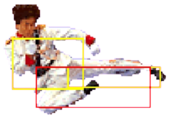
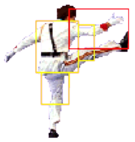
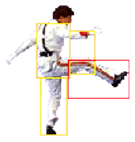
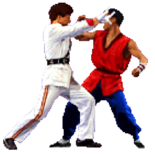
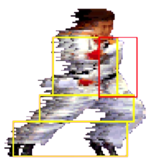
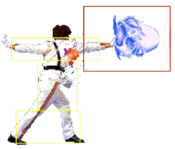
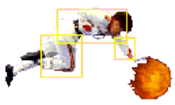
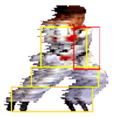
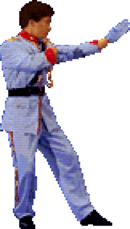
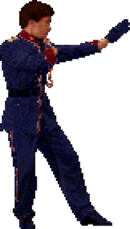
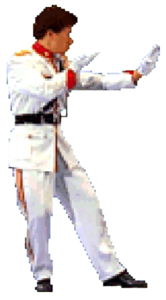
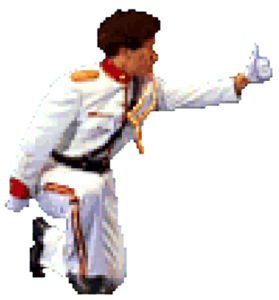
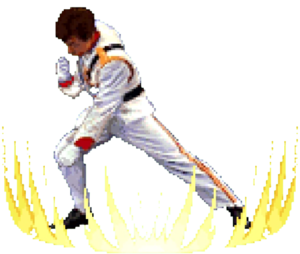
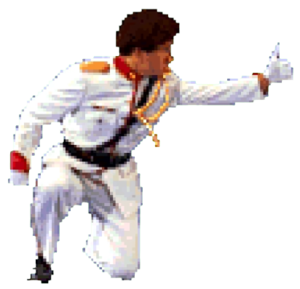
Also known as Baguazhang Jackie or Project A Jackie (less commonly: Drip Jackie, White Jackie). In Project A, Jackie Chan plays "Dragon Ma", a sergeant in the late-1800s Hong Kong Marine Police who takes on both pirates and a corrupt government officials trying to sabotage his efforts.
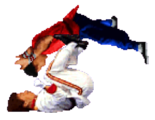
Admiral Jackie is a very strong rushdown character who can easily win a round off one or two openings. His crouching light normals have great range and frame advantage, and his excellent forward dash allows him to safely maintain pressure for long periods of time. Admiral Jackie's throw is the most rewarding in the game, as it leads to juggles anywhere on the screen while most characters can only juggle near the corner. He is also very strong defensively, as he is one of only two characters with an invincible reversal and his backdash recovers very quickly.
| Strengths |
Weaknesses
|
- Throw leads to a full juggle into knockdown/reset anywhere on the screen
- Strong pressure thanks to his fast forward dash and advantageous light normals
- Fast, invincible reversal/anti-air (623K)
- Fast backdash sets him up nicely for whiff punishes
- Super is hard to punish, and is great for chip damage KOs
- Strong resets that can often lead to stun
- Many juggles are inconsistent or impossible vs. Admiral, especially in the corner
|
- His main bufferable poke (2HK) is unsafe, with long whiff recovery
- Overhead (6HK) is very slow and reactable
- His strongest hitconfirms (into 623K) only work from close range, so he struggles to use this against characters with strong neutral
|
To get the most out of Admiral Jackie, the most important thing is to learn when to hitconfirm into 623K or 41236P. The Strategy page details how many chained light normals are possible before ending a string with his DP if you begin the combo from point blank range. From longer ranges or after longer hitconfirms, combos must end in 41236P or Super, which is generally less rewarding. Since Super is always better than 41236P in a combo, hitting both LP and HP when buffering the move will allow you to confirm into Super if Admiral builds the meter during the previous hit of the combo.
The combination of Admiral's fast dash and his advantageous light normals allows him to dash in for pressure in a way that few other characters can match. By making the opponent block a 2LP, 2LK, or cl.5LK, he can get into throw range or stop early and use another light normal. If done perfectly, this even gives Admiral an infinite combo, or more realistically an extended hitconfirm window.
Admiral's 6HK overhead can be chained into, which may catch an unaware opponent off guard. On hit you can convert this into a full combo, and on block he has enough frame advantage to push for another mixup. This move shouldn't be overly relied on, however, since the opponent can easily backdash and whiff punish or hit Admiral out of the air on reaction, putting him in a juggle state.
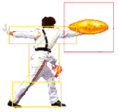
While the air approach is almost always a poor option in Fists of Fire, Admiral Jackie has a moderately effective air game in some matchups where the opponent has a slow dash and no invincible anti-air attack. By neutral jumping at around 2/3 screen, he can mix between his Air LP Fireball or j.HK to punish an opponent that tries to dash under the fireball. The fireball isn't particularly strong, so this is mostly a strategy to run out the clock against an opponent who doesn't know how to counter it.
Character Stats
General Stats
| Base Defense
|
Stun Defense
|
Throw Range
|
| 238 (Above Average)
|
10240 (Average)
|
58 (C+)
|
Wakeup Data
| Neutral Rise
|
Forward Roll
|
Backward Roll
|
| 32f
|
45f
|
50f
|
Meter Data
| Charge Rate
|
Charge Recovery
|
| 23.1% /sec
|
5f
|
| Taunt Meter Drain
|
Taunt Duration
|
| 38.7%
|
105f
|
Movement Data
| Weight
|
Prejump Frames
|
Jump Frames
|
| Average
|
3f
|
58f (Floaty)
|
| Backdash Duration
|
Backdash Distance
|
Back Walkspeed
|
| 14f (Very Fast)
|
116 (Short)
|
Average
|
| Forward Dash Speed
|
Forward Walkspeed
|
| 5.0 (S)
|
Above Average
|
| Frame Data Info (click to expand)
|
| Startup
|
The number of frames it takes for a move to become active.
If this value is lower than the opponent's Hit Adv or Block Adv, it can be used to punish that move if it is in range.
If a second value is listed in (parentheses), the move hits later during its active frames (i.e. a 2-hit overhead where the first hit whiffs vs. crouching).
|
| Active
|
The number of frames that an attack's hitbox remains active. The first active frame overlaps with the final startup frame.
Attacks with multiple hits are separated by an asterisk (*) if there is no gap between hits, or by a number in (parentheses) denoting the number of frames between active hitboxes.
--Example 1: 3*5 = 3 active frames (1st hit), 5 active frames (2nd hit)
--Example 2: 2(5)4 = 2 active frames, 5f gap, 4 active frames
For attacks with long, complex sets of active frames, the description will explain the details and the Active column will simply display the total number of active frames.
Attacks with more active frames are more effective as pokes and anti-airs.
|
| Recovery
|
The number of frames that a character cannot act after startup and active frames have passed.
For airborne attacks, recovery may be listed as 'X + Y land', where X+Y is the total recovery and Y is the number of grounded recovery frames (which allows the character to be thrown or punished with a grounded combo).
|
| Guard
|
The way a move must be guarded against.
High = Can be blocked standing, whiffs against crouching.
Mid = Can be blocked both standing and crouching.
Low = Must be blocked crouching.
Overhead = Must be blocked standing
Throw = Cannot be blocked
|
| Hit Adv
|
The frame advantage of an attack on hit. 0 means the attacker and defender recover at the same time.
A positive number means the attacker recovers before the defender.
--Example: A move listed as +4 on Hit may link into a move with 4f Startup.
A negative number means the defender recovers before the attacker, and the attack may be punishable.
--Example: A move listed as -6 on Hit may be punished by a move with 6f Startup, if it is in range.
KD means the attack knocks down if it hits.
May also be displayed as a range of values for attacks with significantly different frame advantage when used at different spacing.
--Example: A move with '-5 to 3' advantage on hit can be anywhere from -5 to +3 depending on which active frame hits the opponent.
|
| Block Adv
|
The frame advantage of an attack on block.
This includes the final Guard Cancel frame (see the 'reversal' section of the Basic System page for more details)
0 means the attacker and defender recover at the same time.
A positive number means the attacker recovers before the defender.
A negative number means the defender recovers before the attacker, and the attack may be punishable.
--Example: A move listed as -6 on Block may be punished by a move with 6f Startup, if it is in range.
Throws cannot be blocked, so the column is left empty in this case.
May also be displayed as a range of values for attacks with significantly different frame advantage when used at different spacing.
--Example: A move with '-5 to 3' advantage on block can be anywhere from -5 to +3 depending on which active frame hits the opponent.
|
| Damage
|
Base Damage of the attack, not accounting for scaling or opponent's defense value.
Damage for each hit is separated by an asterisk (*)
If there are several hits in a row with identical damage, it will be listed as A x B to save space
--Example: 4*5x3*8 = 4 damage + 5 damage (3 hits) + 8 damage
See Basic System page for details on damage scaling and defense.
|
| Stun
|
Stun damage of the attack, not accounting for any scaling (light normals do not have any stun scaling). Throws never deal stun.
Most characters have a maximum stun threshold of 10240, while Thorsten has 11520 and M. Lion has 12800.
Stun damage for each hit is separated by an asterisk (*)
If there are several hits in a row with identical stun, it will be listed as A x B to save space
--Example: 256*128x3*512 = 256 stun + 128 stun (x3 hits) + 512 stun
See Basic System page for details on stun.
|
| Knockdown Timer
|
KD Timer damage of the attack, not accounting for any scaling (follows normal damage scaling rules).
The higher a character's KD Timer value, the longer it takes to wake up after a knockdown.
See "Damage" for more information on how to read the values.
See Advanced System page for details on KD Timer.
|
| Special Cancel
|
The ability to cancel the animation of a normal attack into a special/super move. Command normals can never be special cancelled. Specials cannot be cancelled into supers like in some other games. The only special cancellable air normal is Admiral Jackie's j.LP (into Air Dragon Shot).
|
| Attribute
|
Self = Light normal that can be rapidly chained into itself on hit, block, or whiff.
By default, self chains can be input very quickly (after the first active frame, whether it connects or not)
- (slow) means the self-chain must be delayed until the move's recovery (cannot chain during active frames or hitstop)
No-Chain = Normal attack that cannot be chained into another normal
OTG = Off The Ground; Attack will connect vs. a knocked down opponent for 25% of its usual damage.
Airborne = Attack puts the user in the air, making them immune to throws, and hits will put them into a juggle state.
Invincible/Invulnerable = Attack has no hurtbox and cannot be interrupted during these invincibility frames
Mashable = Rapidly input buttons/directions for extra hits. For throws, defender can also mash to reduce damage.
KD0/Spike = Knockdown Timer set to 0 -- opponent will be knocked down and immediately stand up
Backturn = Causes juggled opponent to face the opposite direction, preventing backdash upon landing
Crossup = Attack must be blocked in the opposite direction if it connects behind the opponent
Squish = Move has a visual effect that flattens and stretches the opponent (no known gameplay effect)
|
| Hitstun Type
|
Against standing opponents, attacks can inflict two types of reeling animations.
They are referred to as High and Mid hitstun because it usually (but not always) correlates with High attacks vs. Mid/Low attacks.
The hitstun reeling animation can affect combo routes due to different hurtbox widths.
Crouching opponents always have the same reeling animation regardless of attack.
|
Normals
Standing Normals
5LP
|
| Startup
|
Active
|
Recovery
|
Guard
|
Hit Adv
|
Block Adv
|
| 6
|
4
|
6
|
High
|
+9
|
+7
|
| Damage
|
Stun
|
KD Timer
|
Special Cancel
|
Attribute
|
Hitstun Type
|
| 7
|
512
|
112
|
Y
|
-
|
Mid
|
- Start of Normal Autocombo (LP>LP>LP>LP>LP)
|
|
cl.5HP
|
| Startup
|
Active
|
Recovery
|
Guard
|
Hit Adv
|
Block Adv
|
| 3
|
5(3)9
|
15
|
High / High
|
+2
|
-1
|
| Damage
|
Stun
|
KD Timer
|
Special Cancel
|
Attribute
|
Hitstun Type
|
| 8*16
|
512*1024
|
128*256
|
Y (1st hit)
|
-
|
High / High
|
- 2 Hits
- Proximity range: ≤ 65
|
|
far.5HP
|
| Startup
|
Active
|
Recovery
|
Guard
|
Hit Adv
|
Block Adv
|
| 7
|
9
|
18
|
High
|
+1
|
-4
|
| Damage
|
Stun
|
KD Timer
|
Special Cancel
|
Attribute
|
Hitstun Type
|
| 24
|
1536
|
384
|
Y
|
-
|
High
|
|
|
|
cl.5LK
|
| Startup
|
Active
|
Recovery
|
Guard
|
Hit Adv
|
Block Adv
|
| 4
|
5
|
6
|
Low
|
+8
|
+6
|
| Damage
|
Stun
|
KD Timer
|
Special Cancel
|
Attribute
|
Hitstun Type
|
| 9
|
768
|
144
|
Y
|
-
|
Mid
|
- Standing Low attack
- Can hit OTG against M. Lion only
- Frame advantage when chained into whiffed 5LP: +3/+1
- Proximity range: ≤ 65
|
|
far.5LK
|
| Startup
|
Active
|
Recovery
|
Guard
|
Hit Adv
|
Block Adv
|
| 4
|
6
|
6
|
High
|
+7
|
+5
|
| Damage
|
Stun
|
KD Timer
|
Special Cancel
|
Attribute
|
Hitstun Type
|
| 9
|
768
|
144
|
N
|
-
|
High
|
- Good anti-air hitbox
- Proximity range: ≥ 66
|
|
cl.5HK
|
| Startup
|
Active
|
Recovery
|
Guard
|
Hit Adv
|
Block Adv
|
| 8
|
9
|
21
|
High
|
-4
|
-7
|
| Damage
|
Stun
|
KD Timer
|
Special Cancel
|
Attribute
|
Hitstun Type
|
| 28
|
1792
|
448
|
N
|
-
|
High
|
- Best button to chain into for resets into dash-under mixups because it juggles the opponent high and close
- Proximity range: ≤ 86
|
|
far.5HK
|
| Startup
|
Active
|
Recovery
|
Guard
|
Hit Adv
|
Block Adv
|
| 4 (7)
|
3*9
|
22
|
Mid / High
|
-5 (-8)
|
-8 (-10)
|
| Damage
|
Stun
|
KD Timer
|
Special Cancel
|
Attribute
|
Hitstun Type
|
| 12*16
|
768*1024
|
192*256
|
N
|
-
|
Mid / High
|
- (refers to data vs crouching when only the first hit connects)
- Can hit twice at specific range on standing opponents
- Proximity range: ≥ 87
|
|
Crouching Normals
2LP
|
| Startup
|
Active
|
Recovery
|
Guard
|
Hit Adv
|
Block Adv
|
| 4
|
5
|
6
|
Mid
|
+8
|
+6
|
| Damage
|
Stun
|
KD Timer
|
Special Cancel
|
Attribute
|
Hitstun Type
|
| 4
|
512
|
64
|
Y
|
Self-chain
|
Mid
|
- Amazing button for offense and defense
- Can be looped into itself with 4f dashes for extended combos and pressure
- Frame advantage when chained into whiffed 5LP: +3/+1
|
|
2HP
|
| Startup
|
Active
|
Recovery
|
Guard
|
Hit Adv
|
Block Adv
|
| 7
|
9
|
18
|
High
|
-1
|
-4
|
| Damage
|
Stun
|
KD Timer
|
Special Cancel
|
Attribute
|
Hitstun Type
|
| 24
|
1536
|
384
|
Y
|
-
|
High
|
- Decent poke to buffer from far range in neutral
- This move can combo against crouching Yeung on hit if chained into, despite being a high
- In corner juggles, chaining 2HK > 2HP xx Double Dutch is optimal damage. This is easier on heavy characters, and difficult on Sam, Yeung, Drunk, and especially Admiral.
- Fastest heavy button to whiff after 2HK OTG (33f total whiff recovery); also makes 2HK safer in neutral
- Causes a different hitstun reeling animation than 2HK; this can affect combo routes (for example, allowing more light normals before 623K vs. standing Drunk Jackie)
|
|
2LK
|
| Startup
|
Active
|
Recovery
|
Guard
|
Hit Adv
|
Block Adv
|
| 4
|
5
|
6
|
Low
|
+8
|
+6
|
| Damage
|
Stun
|
KD Timer
|
Special Cancel
|
Attribute
|
Hitstun Type
|
| 4
|
512
|
64
|
Y
|
Self-chain
|
Mid
|
- Great hitbox priority, but less range than 2LP
- Chaining into 2LK will punish an opponent who tries to backdash during pressure strings
- Frame advantage when chained into whiffed 5LP: +3/+1
- Can hit OTG against M. Lion only
|
|
2HK
|
| Startup
|
Active
|
Recovery
|
Guard
|
Hit Adv
|
Block Adv
|
| 7
|
9
|
27
|
Low
|
-10
|
-13
|
| Damage
|
Stun
|
KD Timer
|
Special Cancel
|
Attribute
|
Hitstun Type
|
| 24
|
1024
|
384
|
Y
|
OTG
|
Mid
|
- Moves Admiral forward slightly, allowing for more consistent grounded combos
- Unsafe on hit, block, or after any special cancel, and also quite whiff punishable
- If chained into a whiffed 2HP or far.5HP, becomes -8 on hit, -11 on block
- Chain into far.5HP on block is harder to punish, but less rewarding. 2HP extends the hurtbox for a longer time making the punish easier, but is potentially more rewarding if it hits.
- 24f window to reaction cancel on hit; 16f window on block. If your opponent can't reliably punish this button at max range, it can be confirmed into 41236HP on hit quite easily, but otherwise Super is his only somewhat-safe cancel option on block.
|
|
Air Normals
j.LP Neutral/Diagonal Neutral/Diagonal
|
| Startup
|
Active
|
Recovery
|
Guard
|
Hit Adv
|
Block Adv
|
| 6
|
6
|
-
|
Overhead
|
-
|
-
|
| Damage
|
Stun
|
KD Timer
|
Special Cancel
|
Attribute
|
Hitstun Type
|
| 9
|
768
|
144
|
Y
|
-
|
Mid
|
- Can cancel into air fireball
- this cancel is 100% useless; only combos from air-to-air j.LP, consuming both juggle points
- Instead, chain into j.HP (knockdown) or j.HK (potential followup after landing)
|
|
j.HP Neutral/Diagonal Neutral/Diagonal
|
| Startup
|
Active
|
Recovery
|
Guard
|
Hit Adv
|
Block Adv
|
| 6
|
11
|
-
|
Overhead
|
-
|
-
|
| Damage
|
Stun
|
KD Timer
|
Special Cancel
|
Attribute
|
Hitstun Type
|
| 24
|
1024
|
384
|
N
|
Spike, Squish
|
Mid
|
- Great hitbox against anti-airs with a small horizontal hitbox
|
|
j.LK Neutral/Diagonal Neutral/Diagonal
|
| Startup
|
Active
|
Recovery
|
Guard
|
Hit Adv
|
Block Adv
|
| 8
|
7
|
-
|
Overhead
|
-
|
-
|
| Damage
|
Stun
|
KD Timer
|
Special Cancel
|
Attribute
|
Hitstun Type
|
| 10
|
512
|
160
|
N
|
-
|
High
|
|
|
|
j.HK Neutral/Diagonal Neutral/Diagonal
|
| Startup
|
Active
|
Recovery
|
Guard
|
Hit Adv
|
Block Adv
|
| 6
|
9
|
-
|
Overhead
|
-
|
-
|
| Damage
|
Stun
|
KD Timer
|
Special Cancel
|
Attribute
|
Hitstun Type
|
| 24
|
1024
|
384
|
N
|
Crossup
|
High
|
|
|
|
Command Normals
6HK Universal Overhead Universal Overhead
|
| Startup
|
Active
|
Recovery
|
Guard
|
Hit Adv
|
Block Adv
|
| 23 (27)
|
4*1
|
15
|
High / Overhead
|
+10
|
+7
|
| Damage
|
Stun
|
KD Timer
|
Special Cancel
|
Attribute
|
Hitstun Type
|
| 4*16
|
512*1024
|
64*256
|
-
|
KD0 (2nd hit), Airborne 14-25f
|
High / Mid
|
- Avoids low attacks
- 2 hits against standing opponent, one hit against crouching; can't gain extra frame advantage if used as a meaty
- Start of Special Autocombo (6HK > HP > HK > HK > LK+HK)
|
|
Throws
HK Throw
HK Throw
|
| Startup
|
Active
|
Recovery
|
Guard
|
Hit Adv
|
Block Adv
|
| 1
|
-
|
-
|
Throw
|
KD
|
-
|
| Damage
|
Stun
|
KD Timer
|
Special Cancel
|
Attribute
|
Hitstun Type
|
| 36
|
0
|
576
|
-
|
-
|
-
|
- Consumes one hit of juggle potential
- Allows for followup juggle anywhere on the screen, making it the best throw in the game
- Followups vary depending on opponent's weight, hurtbox, and screen position
- Range: 58
|
|
Special Moves
Double Dutch (Uppercut)
623K
623K Input Priority:
above 41236P Input Priority:
above 41236P
|
| LK
|
Startup
|
Active
|
Recovery
|
Guard
|
Hit Adv
|
Block Adv
|
| 4
|
8(11)3
|
9 + 11 land
|
Mid
|
KD
|
-17 (-19)
|
| Damage
|
Stun
|
KD Timer
|
Special Cancel
|
Attribute
|
Hitstun Type
|
| 20*4*8
|
1280*512*1024
|
320*64*128
|
-
|
Invincible 1-5f, airborne 17-34f
|
-
|
- (refers to crouch block data)
- LK version recovers faster, making it safer and the follow-up juggles easier
|
| HK
|
Startup
|
Active
|
Recovery
|
Guard
|
Hit Adv
|
Block Adv
|
| 4
|
10(11)6
|
13 + 15 land
|
Mid
|
KD
|
-30 (-32)
|
| Damage
|
Stun
|
KD Timer
|
Special Cancel
|
Attribute
|
Hitstun Type
|
| 22*6*10
|
1536*512*1024
|
352*96*160
|
-
|
Invincible 1-5f, airborne 18-43f
|
-
|
- (refers to crouch block data)
- HK version reaches higher, which makes it worse on block or whiff in exchange for more damage.
- Also more likely to get all 3 hits when used in a juggle, making it better as a combo ender.
|
|
Dragon Palm (Exalted Palm)
41236P
41236P Input Priority:
below 623K Input Priority:
below 623K
|
| LP
|
Startup
|
Active
|
Recovery
|
Guard
|
Hit Adv
|
Block Adv
|
| 14
|
9
|
14
|
Mid
|
KD
|
-21
|
| Damage
|
Stun
|
KD Timer
|
Special Cancel
|
Attribute
|
Hitstun Type
|
| 12*16
|
768x2
|
192*256
|
-
|
-
|
-
|
- LP version has less damage and range, so should only be used if intentionally whiffing to gain space
- Example: after midscreen OTG 2HK to chase the opponent's body for more OTGs
- 2nd hit whiffs on block vs crouching Dragonball Jackie (-29 oB), making it weaker as a chip damage tool and much more unsafe
- 2nd hit whiffs on hit vs crouching Sam (-27 oH), so it can't be used in combos
|
| HP
|
Startup
|
Active
|
Recovery
|
Guard
|
Hit Adv
|
Block Adv
|
| 14
|
13
|
14
|
Mid
|
KD
|
-26
|
| Damage
|
Stun
|
KD Timer
|
Special Cancel
|
Attribute
|
Hitstun Type
|
| 16*20
|
1024x2
|
256*320
|
-
|
-
|
-
|
- Main combo ender at mid to long range (ex: after long hitconfirms or whiff punishing with 2HK)
- 2nd hit whiffs on block vs crouching Dragonball Jackie (-34 oB), making it weaker as a chip damage tool and much more unsafe
- 2nd hit whiffs on hit vs crouching Sam (-32 oH), so it can't be used in combos
|
|
Dragon Shot (Fire Dragon)
Air 41236P
Air 41236P Input Priority: N/A
(no other air specials) Input Priority: N/A
(no other air specials)
|
| LP
|
Startup
|
Active
|
Recovery
|
Guard
|
Hit Adv
|
Block Adv
|
| 17
|
until ground
|
1 land + 8
|
Mid
|
-4*
|
-9*
|
| Damage
|
Stun
|
KD Timer
|
Special Cancel
|
Attribute
|
Hitstun Type
|
| 12
|
1536
|
192
|
-
|
OTG
|
-
|
- Lands for 1 frame, then becomes airborne again for the rest of recovery. Punish with something that juggles.
- Frame data refers to worst-case scenario. Actual frame advantage varies significantly based on spacing.
- The input for this move could technically be described as 423P
-The down + back input is unnecessary, but the down + forward input is required (and you don't need to end in forward)
|
| HP
|
Startup
|
Active
|
Recovery
|
Guard
|
Hit Adv
|
Block Adv
|
| 22
|
until ground
|
1 land + 13
|
Mid
|
-19*
|
-24*
|
| Damage
|
Stun
|
KD Timer
|
Special Cancel
|
Attribute
|
Hitstun Type
|
| 16
|
2048
|
256
|
-
|
OTG
|
-
|
- Lands for 1 frame, then becomes airborne again for the rest of recovery. Punish with something that juggles.
- Frame data refers to worst-case scenario. Actual frame advantage varies significantly based on spacing.
- The input for this move could technically be described as 423P
-The down + back input is unnecessary, but the down + forward input is required (and you don't need to end in forward)
|
|
Super
Super Dragon Palm
41236LP+HP
41236LP+HP
|
| Startup
|
Active
|
Recovery
|
Guard
|
Hit Adv
|
Block Adv
|
| 0+13
|
14
|
38
|
Mid
|
KD
|
-14
|
| Damage
|
Stun
|
KD Timer
|
Special Cancel
|
Attribute
|
Hitstun Type
|
10*10*
6x5*24
|
512x7*
1536
|
160*160*
96x5*384
|
-
|
Invincible 1-9f
|
-
|
- 19f super flash
- Chip Damage: ~9%
- Will lose to most attacks post-flash
- After scaling, Damage is ~64 base dmg
- 2nd hit whiffs vs. crouch blocking Dragonball Jackie, allowing him to interrupt after one hit. Very risky to use to chip him out.
|
|
Wakeup/Knockdown
Getup Attack Detailed Info (click to expand)
- Getup LK or HK must be input within a specific 16 frame window during the wakeup animation.
- The exact timing of this window varies by character and by whether it was a neutral wakeup or forward/back roll.
- During these 16 frames, the final LK or HK input will decide which version comes out. If LK and HK are input simultaneously, Getup LK takes priority.
- The Getup Attack will always come out on the first frame after the 16 frame input window, regardless of when it was input.
- For some characters, there is very little time between the end of the 16 frame Getup Attack window and the end of recovery, making it difficult to input a reversal move with LK or HK, so be mindful of this if you get accidental Getup Attacks.
- After inputting a Getup Attack, any special move input that occurs afterward will automatically be buffered until the attack animation has ended. This means that it's important to stop mashing directions on wakeup once the Getup Attack window is active, as you may get an unexpected special move way after it was input.
Getup LK
|
| Startup
|
Active
|
Recovery
|
Guard
|
Hit Adv
|
Block Adv
|
| 6
|
2*2
|
30
|
Overhead / Mid
|
KD
|
-7
|
| Damage
|
Stun
|
KD Timer
|
Special Cancel
|
Attribute
|
Hitstun Type
|
| 16*8
|
1024*512
|
256*128
|
-
|
Invincible 1-5f
|
-
|
- 2 hits
- Near the corner, can juggle 623HK, 2HK xx Special, or dash up 2LK afterward on hit
- The first hit (overhead) has less range than the second, so crouch blocking at a distance is safe from both Getup options
|
|
Getup HK
|
| Startup
|
Active
|
Recovery
|
Guard
|
Hit Adv
|
Block Adv
|
| 8
|
2
|
34
|
Low
|
KD
|
-11
|
| Damage
|
Stun
|
KD Timer
|
Special Cancel
|
Attribute
|
Hitstun Type
|
| 24
|
1536
|
384
|
-
|
Invincible 1-7f, OTG
|
-
|
- One of the more unsafe getup attacks, acts similarly to his regular 2HK
- Recovers in a crouching state, so it must be punished with moves that work against crouchers
|
|
Pursuit Attack
8LP or 8HP
|
| Startup
|
Active
|
Recovery
|
Guard
|
Hit Adv
|
Block Adv
|
| 52
|
5
|
(Self-KD)
|
Overhead
|
[-29]
|
[-24]
|
| Damage
|
Stun
|
KD Timer
|
Special Cancel
|
Attribute
|
Hitstun Type
|
| 14 * 6 * (3 each)
|
768
|
-
|
-
|
OTG, Mashable
|
-
|
- Only usable on a knocked down opponent; knocks himself down if it doesn't connect
- First two hits do 14 + 6 damage, then all mashed followups do 3 damage each
- Damage scales as though it is part of a combo (rather than OTG scaling)
- Auto-tracks to the opponent's position at the time the Pursuit Attack is input
- If the opponent recovers from knockdown before the Pursuit Attack connects:
-[Frame Advantage] on standing/crouching opponents
|
|
Pursuit Counter
Any 2 Buttons
|
| Startup
|
Active
|
Recovery
|
Guard
|
Hit Adv
|
Block Adv
|
| -
|
-
|
-
|
-
|
KD
|
-
|
| Damage
|
Stun
|
KD Timer
|
Special Cancel
|
Attribute
|
Hitstun Type
|
| 8*7
|
768
|
240
|
-
|
-
|
-
|
- 2f window to counter an opponent's pursuit attack; can counter against any hit of the pursuit attack
- Admiral Jackie will take damage before the Counter happens, so it cannot save him from a KO
- Counter can only be performed while knocked down
-If Admiral Jackie wakes up before the Pursuit Attack connects, he cannot use Pursuit Counter against it
- Because this counter is 2 hits, there is no remaining juggle potential afterward
|
|
Auto Combos
Normal Autocombo - LP > LP > LP > LP > LP
|
|
> LP
(2)
|
Startup
|
Active
|
Recovery
|
Guard
|
Hit Adv
|
Block Adv
|
| 8
|
2
|
12
|
High
|
+5
|
+3
|
| Damage
|
Stun
|
KD Timer
|
Special Cancel
|
Attribute
|
Hitstun Type
|
| 6
|
512
|
96
|
N
|
-
|
-
|
- Same animation as cl.5LP from Kung-Fu Master
|
|
|
|
> LP
(3)
|
Startup
|
Active
|
Recovery
|
Guard
|
Hit Adv
|
Block Adv
|
| 8
|
2(5)2
|
22
|
High
|
+2
|
-1
|
| Damage
|
Stun
|
KD Timer
|
Special Cancel
|
Attribute
|
Hitstun Type
|
| 6*8
|
512x2
|
96*128
|
N
|
-
|
-
|
- 2 hits, same animation as cl.5HP
|
|
|
|
> LP
(4)
|
Startup
|
Active
|
Recovery
|
Guard
|
Hit Adv
|
Block Adv
|
| 9
|
3
|
14
|
High
|
+2
|
0
|
| Damage
|
Stun
|
KD Timer
|
Special Cancel
|
Attribute
|
Hitstun Type
|
| 6
|
512
|
96
|
N
|
-
|
-
|
- Same animation as far.5LK
|
|
|
|
> LP
(5)
|
Startup
|
Active
|
Recovery
|
Guard
|
Hit Adv
|
Block Adv
|
| 9
|
2
|
28
|
High
|
-4
|
-7
|
| Damage
|
Stun
|
KD Timer
|
Special Cancel
|
Attribute
|
Hitstun Type
|
| 12
|
1024
|
192
|
N
|
-
|
-
|
|
|
|
Special Autocombo - 6HK > HP > HK > HK > LK+HK
Special Autocombo
|
|
> HP
(2)
|
Startup
|
Active
|
Recovery
|
Guard
|
Hit Adv
|
Block Adv
|
| 9
|
3(4)3
|
21
|
High
|
+2
|
-1
|
| Damage
|
Stun
|
KD Timer
|
Special Cancel
|
Attribute
|
Hitstun Type
|
| 6*8
|
512x2
|
96*128
|
N
|
-
|
-
|
- 2 hits, same animation as cl.5HP
|
|
|
|
> HK
(3)
|
Startup
|
Active
|
Recovery
|
Guard
|
Hit Adv
|
Block Adv
|
| 16
|
2
|
35
|
Low
|
-11
|
-13
|
| Damage
|
Stun
|
KD Timer
|
Special Cancel
|
Attribute
|
Hitstun Type
|
| 10
|
512
|
160
|
N
|
-
|
-
|
- Same animation as 2HK; OTG
|
|
|
|
> HK
(4)
|
Startup
|
Active
|
Recovery
|
Guard
|
Hit Adv
|
Block Adv
|
| 14
|
3
|
27
|
High
|
-4
|
-7
|
| Damage
|
Stun
|
KD Timer
|
Special Cancel
|
Attribute
|
Hitstun Type
|
| 10
|
512
|
160
|
N
|
-
|
-
|
|
|
|
|
|
> LK+HK
(5)
|
Startup
|
Active
|
Recovery
|
Guard
|
Hit Adv
|
Block Adv
|
| 19
|
5
|
17
|
Overhead
|
KD
|
+8
|
| Damage
|
Stun
|
KD Timer
|
Special Cancel
|
Attribute
|
Hitstun Type
|
| 16
|
1024
|
256
|
N
|
-
|
-
|
- Doesn't combo; same animation as 8LK
- Airborne 8-33f
|
|
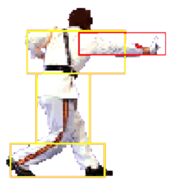
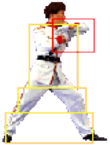
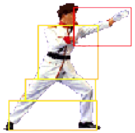
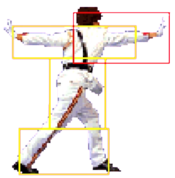
Hurtboxes/Hitstun
| Standing (L High) |
Standing (H High) |
Crouching
|
|
|
|
| Standing (L Mid) |
Standing (H Mid) |
Juggle State
|
|
|
|
| Standing Blockstun |
Crouching Blockstun |
OTG State
|
|
|
|
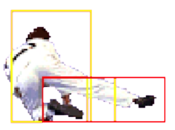
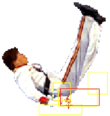
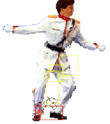
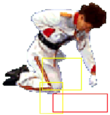
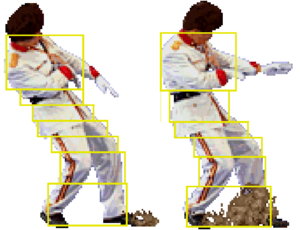
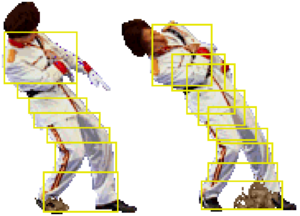
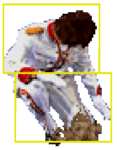
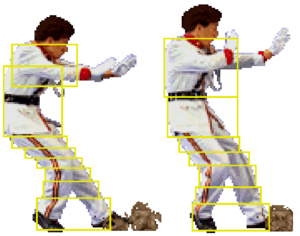
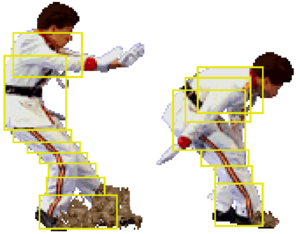
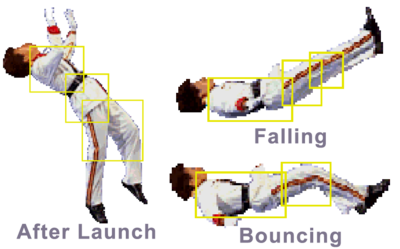
"High" and "Mid" hitstun types do not always correspond to the attack's Guard Level (i.e. how it must be blocked). Low attacks on standing characters generally fall under the "Mid" category for example. The purpose of this table is to understand where the hurtboxes are when a character is reeling from an attack, which helps understand why certain sequences will hit or whiff. Attacks have 2 main types of hitstun they can do to grounded opponents, with further slight differences between light/heavy attacks.
Note: The lua console lists the following memory values for hitstun types:
L High = 26, H High = 27, L Mid = 29, H Mid = 30, Crouching = 32
Colors
Default Colors
Boss Version Colors
Select Boss variant with Start+Button on character select screen
Character Poses
| Taunt |
Win |
Time Loss/Draw
|
|
|
|
| Charge |
Perfect |
Loss (KO)
|
|
|
|
Stages
External Links
