Intro
JP Name: サム
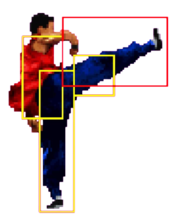
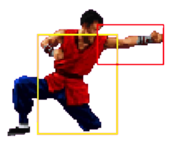
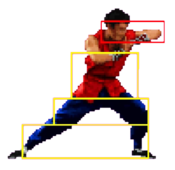
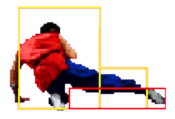
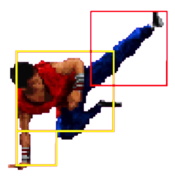
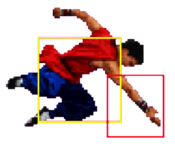
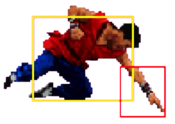
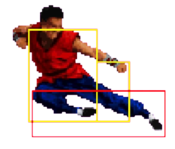
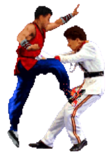
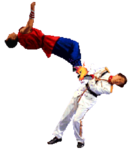
Sam Wong, also known as Ming-Sing Wong, was the coordinator for Jackie Chan's stunt team for several years. He worked with Jackie in films such as The Legend of Drunken Master, Thunderbolt, City Hunter, and more. In Fists of Fire he fights using Kung-Fu.
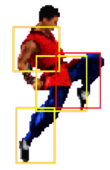
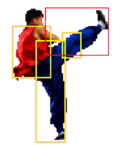
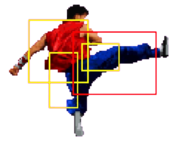
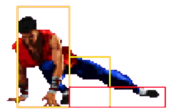
Sam has a rushdown playstyle, using his quick dash to mix up with his advantageous standing LP and throw. He struggles to land significant damage on crouching opponents, which forces him to open up the opponent far more often than most characters in order to win a round. If he does land a standing hit, he has the option to use high-execution combo extensions that can kill some opponents in a single sequence.
| Strengths |
Weaknesses
|
- High damage potential vs. cornered or standing opponents
- Rekkas give safe chip damage and a decent mixup
- Strong jab pressure into tick throws
- Rekkas and Super are good for punishing many attacks that are usually harder to punish
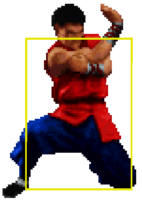
- Sam's hurtbox during crouching hitstun shrinks, making some combos drop
(i.e. Admiral 41236P, Thorsten 46K)
|
- Very few options against crouching characters
- Poor range on his normals and his main combo special
- Buttons have few active frames, so his anti-airs and counterpokes are weak
- Difficult and highly situational combos
- Terrible wakeup game--no reversal options; Getup LK whiffs against crouchers, while Getup HK is very unsafe
- Overhead is incredibly slow to hit crouchers, giving little incentive for Sam's opponent to ever stop crouching
|
Character Stats
General Stats
| Base Defense
|
Stun Defense
|
Throw Range
|
| 240 (Average)
|
10240 (Average)
|
56 (C)
|
Wakeup Data
| Neutral Rise
|
Forward Roll
|
Backward Roll
|
| 32f
|
45f
|
44f
|
Meter Data
| Charge Rate
|
Charge Recovery
|
| 24.9% /sec
|
5f
|
| Taunt Meter Drain
|
Taunt Duration
|
| 36.2%
|
98f
|
Movement Data
| Weight
|
Prejump Frames
|
Jump Frames
|
| Light
|
5f
|
56f (OK)
|
| Backdash Duration
|
Backdash Distance
|
Back Walkspeed
|
| 16f (Fast)
|
129 (Average)
|
Fast
|
| Forward Dash Speed
|
Forward Walkspeed
|
| 4.8 (A)
|
Fastest
|
| Frame Data Info (click to expand)
|
| Startup
|
The number of frames it takes for a move to become active.
If this value is lower than the opponent's Hit Adv or Block Adv, it can be used to punish that move if it is in range.
If a second value is listed in (parentheses), the move hits later during its active frames (i.e. a 2-hit overhead where the first hit whiffs vs. crouching).
|
| Active
|
The number of frames that an attack's hitbox remains active. The first active frame overlaps with the final startup frame.
Attacks with multiple hits are separated by an asterisk (*) if there is no gap between hits, or by a number in (parentheses) denoting the number of frames between active hitboxes.
--Example 1: 3*5 = 3 active frames (1st hit), 5 active frames (2nd hit)
--Example 2: 2(5)4 = 2 active frames, 5f gap, 4 active frames
For attacks with long, complex sets of active frames, the description will explain the details and the Active column will simply display the total number of active frames.
Attacks with more active frames are more effective as pokes and anti-airs.
|
| Recovery
|
The number of frames that a character cannot act after startup and active frames have passed.
For airborne attacks, recovery may be listed as 'X + Y land', where X+Y is the total recovery and Y is the number of grounded recovery frames (which allows the character to be thrown or punished with a grounded combo).
|
| Guard
|
The way a move must be guarded against.
High = Can be blocked standing, whiffs against crouching.
Mid = Can be blocked both standing and crouching.
Low = Must be blocked crouching.
Overhead = Must be blocked standing
Throw = Cannot be blocked
|
| Hit Adv
|
The frame advantage of an attack on hit. 0 means the attacker and defender recover at the same time.
A positive number means the attacker recovers before the defender.
--Example: A move listed as +4 on Hit may link into a move with 4f Startup.
A negative number means the defender recovers before the attacker, and the attack may be punishable.
--Example: A move listed as -6 on Hit may be punished by a move with 6f Startup, if it is in range.
KD means the attack knocks down if it hits.
May also be displayed as a range of values for attacks with significantly different frame advantage when used at different spacing.
--Example: A move with '-5 to 3' advantage on hit can be anywhere from -5 to +3 depending on which active frame hits the opponent.
|
| Block Adv
|
The frame advantage of an attack on block.
This includes the final Guard Cancel frame (see the 'reversal' section of the Basic System page for more details)
0 means the attacker and defender recover at the same time.
A positive number means the attacker recovers before the defender.
A negative number means the defender recovers before the attacker, and the attack may be punishable.
--Example: A move listed as -6 on Block may be punished by a move with 6f Startup, if it is in range.
Throws cannot be blocked, so the column is left empty in this case.
May also be displayed as a range of values for attacks with significantly different frame advantage when used at different spacing.
--Example: A move with '-5 to 3' advantage on block can be anywhere from -5 to +3 depending on which active frame hits the opponent.
|
| Damage
|
Base Damage of the attack, not accounting for scaling or opponent's defense value.
Damage for each hit is separated by an asterisk (*)
If there are several hits in a row with identical damage, it will be listed as A x B to save space
--Example: 4*5x3*8 = 4 damage + 5 damage (3 hits) + 8 damage
See Basic System page for details on damage scaling and defense.
|
| Stun
|
Stun damage of the attack, not accounting for any scaling (light normals do not have any stun scaling). Throws never deal stun.
Most characters have a maximum stun threshold of 10240, while Thorsten has 11520 and M. Lion has 12800.
Stun damage for each hit is separated by an asterisk (*)
If there are several hits in a row with identical stun, it will be listed as A x B to save space
--Example: 256*128x3*512 = 256 stun + 128 stun (x3 hits) + 512 stun
See Basic System page for details on stun.
|
| Knockdown Timer
|
KD Timer damage of the attack, not accounting for any scaling (follows normal damage scaling rules).
The higher a character's KD Timer value, the longer it takes to wake up after a knockdown.
See "Damage" for more information on how to read the values.
See Advanced System page for details on KD Timer.
|
| Special Cancel
|
The ability to cancel the animation of a normal attack into a special/super move. Command normals can never be special cancelled. Specials cannot be cancelled into supers like in some other games. The only special cancellable air normal is Admiral Jackie's j.LP (into Air Dragon Shot).
|
| Attribute
|
Self = Light normal that can be rapidly chained into itself on hit, block, or whiff.
By default, self chains can be input very quickly (after the first active frame, whether it connects or not)
- (slow) means the self-chain must be delayed until the move's recovery (cannot chain during active frames or hitstop)
No-Chain = Normal attack that cannot be chained into another normal
OTG = Off The Ground; Attack will connect vs. a knocked down opponent for 25% of its usual damage.
Airborne = Attack puts the user in the air, making them immune to throws, and hits will put them into a juggle state.
Invincible/Invulnerable = Attack has no hurtbox and cannot be interrupted during these invincibility frames
Mashable = Rapidly input buttons/directions for extra hits. For throws, defender can also mash to reduce damage.
KD0/Spike = Knockdown Timer set to 0 -- opponent will be knocked down and immediately stand up
Backturn = Causes juggled opponent to face the opposite direction, preventing backdash upon landing
Crossup = Attack must be blocked in the opposite direction if it connects behind the opponent
Squish = Move has a visual effect that flattens and stretches the opponent (no known gameplay effect)
|
| Hitstun Type
|
Against standing opponents, attacks can inflict two types of reeling animations.
They are referred to as High and Mid hitstun because it usually (but not always) correlates with High attacks vs. Mid/Low attacks.
The hitstun reeling animation can affect combo routes due to different hurtbox widths.
Crouching opponents always have the same reeling animation regardless of attack.
|
Normals
Standing Normals
5LP
|
| Startup
|
Active
|
Recovery
|
Guard
|
Hit Adv
|
Block Adv
|
| 4
|
3
|
8
|
Mid
|
+8
|
+6
|
| Damage
|
Stun
|
KD Timer
|
Special Cancel
|
Attribute
|
Hitstun Type
|
| 6
|
512
|
96
|
Y
|
-
|
Mid
|
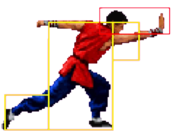
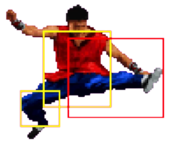
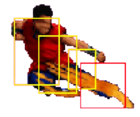
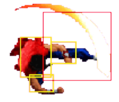
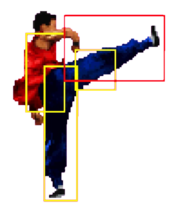
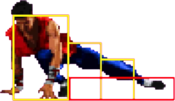
- Start of Normal Autocombo (LP>LP>LP>LP>LP)
- Start of Special Autocombo (LP>HP>HK>HK>8LK+HK)
- Incredible button for dash 5LP pressure mixed with throws; can start a high-execution infinite on hit
|
|
cl.5HP
|
| Startup
|
Active
|
Recovery
|
Guard
|
Hit Adv
|
Block Adv
|
| 4
|
3(7)2
|
23
|
High / High
|
+1
|
-2
|
| Damage
|
Stun
|
KD Timer
|
Special Cancel
|
Attribute
|
Hitstun Type
|
| 12*8
|
1024*512
|
192*128
|
Y (1st Hit)
|
-
|
High / High
|
- 2 hits
- Proximity range: ≤ 70
|
|
far.5HP
|
| Startup
|
Active
|
Recovery
|
Guard
|
Hit Adv
|
Block Adv
|
| 6
|
2
|
23
|
High
|
+1
|
-2
|
| Damage
|
Stun
|
KD Timer
|
Special Cancel
|
Attribute
|
Hitstun Type
|
| 20
|
1280
|
320
|
Y
|
-
|
Mid
|
|
|
|
cl.5LK
|
| Startup
|
Active
|
Recovery
|
Guard
|
Hit Adv
|
Block Adv
|
| 7
|
2
|
14
|
Mid
|
+3
|
+1
|
| Damage
|
Stun
|
KD Timer
|
Special Cancel
|
Attribute
|
Hitstun Type
|
| 8
|
512
|
128
|
N
|
-
|
Mid
|
|
|
|
far.5LK
|
| Startup
|
Active
|
Recovery
|
Guard
|
Hit Adv
|
Block Adv
|
| 6
|
2
|
11
|
High
|
+6
|
+4
|
| Damage
|
Stun
|
KD Timer
|
Special Cancel
|
Attribute
|
Hitstun Type
|
| 8
|
512
|
128
|
N
|
-
|
High
|
|
|
|
cl.5HK
|
| Startup
|
Active
|
Recovery
|
Guard
|
Hit Adv
|
Block Adv
|
| 8 (17)
|
2(7)3
|
19
|
High / Mid
|
+4
|
+1
|
| Damage
|
Stun
|
KD Timer
|
Special Cancel
|
Attribute
|
Hitstun Type
|
| 8*16
|
512*1280
|
128*256
|
N
|
KD0 (2nd hit)
|
High / Mid
|
- 2 hits
- Proximity range: ≤ 82
|
|
far.5HK
|
| Startup
|
Active
|
Recovery
|
Guard
|
Hit Adv
|
Block Adv
|
| 6
|
2
|
16
|
High
|
+8
|
+5
|
| Damage
|
Stun
|
KD Timer
|
Special Cancel
|
Attribute
|
Hitstun Type
|
| 24
|
1536
|
384
|
N
|
-
|
High
|
|
|
|
Crouching Normals
2LP
|
| Startup
|
Active
|
Recovery
|
Guard
|
Hit Adv
|
Block Adv
|
| 4
|
3
|
8
|
Mid
|
+8
|
+6
|
| Damage
|
Stun
|
KD Timer
|
Special Cancel
|
Attribute
|
Hitstun Type
|
| 4
|
512
|
64
|
Y
|
Self-chain
|
Mid
|
- Lowest pushback combo normal, important for hitconfirming
|
|
2HP
|
| Startup
|
Active
|
Recovery
|
Guard
|
Hit Adv
|
Block Adv
|
| 6
|
2
|
23
|
High
|
+1
|
-2
|
| Damage
|
Stun
|
KD Timer
|
Special Cancel
|
Attribute
|
Hitstun Type
|
| 20
|
1280
|
320
|
Y
|
-
|
Mid
|
- Useful for combos against standing opponents, but very short range
|
|
2LK
|
| Startup
|
Active
|
Recovery
|
Guard
|
Hit Adv
|
Block Adv
|
| 6
|
2
|
17
|
Low
|
0
|
-2
|
| Damage
|
Stun
|
KD Timer
|
Special Cancel
|
Attribute
|
Hitstun Type
|
| 12
|
768
|
192
|
Y
|
OTG
|
Mid
|
- Has a lot of pushback for a 2LK, making it hard to use effectively in pressure
- Compared to most light attacks, it has a bit more range and damage but much more recovery
|
|
2HK
|
| Startup
|
Active
|
Recovery
|
Guard
|
Hit Adv
|
Block Adv
|
| 10
|
2
|
23
|
Mid
|
+1
|
-2
|
| Damage
|
Stun
|
KD Timer
|
Special Cancel
|
Attribute
|
Hitstun Type
|
| 24
|
1536
|
384
|
N
|
-
|
Mid
|
- Awful move with a ton of pushback, no range, and no special cancel.
- Has a decent AA hitbox for mid-far range jumps, but has few active frames, hits too far forward for close jumps, and is very unrewarding on hit
|
|
Air Normals
j.LP Neutral/Diagonal Neutral/Diagonal
|
| Startup
|
Active
|
Recovery
|
Guard
|
Hit Adv
|
Block Adv
|
| 6
|
9
|
-
|
Overhead
|
-
|
-
|
| Damage
|
Stun
|
KD Timer
|
Special Cancel
|
Attribute
|
Hitstun Type
|
| 8
|
512
|
128
|
-
|
-
|
Mid
|
- Decent hitbox; best followup chain is usually j.HP
|
|
j.HP Neutral/Diagonal Neutral/Diagonal
|
| Startup
|
Active
|
Recovery
|
Guard
|
Hit Adv
|
Block Adv
|
| 6
|
6
|
-
|
Overhead
|
-
|
-
|
| Damage
|
Stun
|
KD Timer
|
Special Cancel
|
Attribute
|
Hitstun Type
|
| 24
|
1024
|
384
|
-
|
Spike, Squish
|
Mid
|
- Similar hitbox to j.LP
- Chains into j.HK whiff, so there is no mixup between double overhead and overhead-low
|
|
j.LK Diagonal Diagonal
|
| Startup
|
Active
|
Recovery
|
Guard
|
Hit Adv
|
Block Adv
|
| 6
|
9
|
-
|
Overhead
|
-
|
-
|
| Damage
|
Stun
|
KD Timer
|
Special Cancel
|
Attribute
|
Hitstun Type
|
| 9
|
768
|
144
|
-
|
Crossup
|
High
|
- Fairly small crossup hitbox combined with a very floaty jump
- Niche application as an ambiguous back jump crossup when the opponent rolls out of the corner
|
|
nj.LK Neutral Neutral
|
| Startup
|
Active
|
Recovery
|
Guard
|
Hit Adv
|
Block Adv
|
| 6
|
9
|
-
|
Overhead
|
-
|
-
|
| Damage
|
Stun
|
KD Timer
|
Special Cancel
|
Attribute
|
Hitstun Type
|
| 9
|
768
|
144
|
-
|
-
|
High
|
- No practical application, other jump normals are more useful in any relevant context
|
|
j.HK Diagonal Diagonal
|
| Startup
|
Active
|
Recovery
|
Guard
|
Hit Adv
|
Block Adv
|
| 10
|
7
|
-
|
Overhead
|
-
|
-
|
| Damage
|
Stun
|
KD Timer
|
Special Cancel
|
Attribute
|
Hitstun Type
|
| 28
|
1024
|
448
|
-
|
Crossup, Spike, Squish
|
Mid
|
- Slow startup and doesn't reach very far downward, making it hard to land close to the ground
- As a result, it's not very useful in jump chains
|
|
nj.HK Neutral Neutral
|
| Startup
|
Active
|
Recovery
|
Guard
|
Hit Adv
|
Block Adv
|
| 6
|
6
|
-
|
Overhead
|
-
|
-
|
| Damage
|
Stun
|
KD Timer
|
Special Cancel
|
Attribute
|
Hitstun Type
|
| 28
|
1792
|
448
|
-
|
-
|
High
|
- Hitbox is an okay air-to-air, but usually can't be followed up; Sam's slow jump makes it risky to use like this
|
|
Command Normals
6HK Universal Overhead Universal Overhead
|
| Startup
|
Active
|
Recovery
|
Guard
|
Hit Adv
|
Block Adv
|
| 11 (30)
|
3(16)2
|
14
|
High / Overhead
|
+10
|
+7
|
| Damage
|
Stun
|
KD Timer
|
Special Cancel
|
Attribute
|
Hitstun Type
|
| 8*16
|
512*1024
|
128*256
|
-
|
KD0 (2nd hit)
|
High / Mid
|
- 2 hits against standing opponent (no gap in between hits)
- 1 hit against crouching opponent (only the 2nd hit is overhead)
- Can lead to a dash up combo vs crouching opponents, but it is difficult to convert to anything besides the dash 5LP infinite
|
|
Throws
HP Throw
HP Throw
|
| Startup
|
Active
|
Recovery
|
Guard
|
Hit Adv
|
Block Adv
|
| 1
|
-
|
-
|
Throw
|
KD
|
-
|
| Damage
|
Stun
|
KD Timer
|
Special Cancel
|
Attribute
|
Hitstun Type
|
| 32
|
0
|
512
|
-
|
-
|
-
|
- Can lead to juggle near the corner and is easier to dash up for OTGs, making it the preferred option generally
- Because Sam has two throws, he can plink 6HP~6HK (or 4HP~4HK) to increase the timing window for a reversal throw
- Range: 56
|
|
HK Throw
|
| Startup
|
Active
|
Recovery
|
Guard
|
Hit Adv
|
Block Adv
|
| 1
|
-
|
-
|
Throw
|
KD
|
-
|
| Damage
|
Stun
|
KD Timer
|
Special Cancel
|
Attribute
|
Hitstun Type
|
| 32
|
0
|
512
|
-
|
-
|
-
|
- Animation bounces Sam backward for a long distance, making followups worse with no other advantages
- Because Sam has two throws, he can plink 6HP~6HK (or 4HP~4HK) to increase the timing window for a reversal throw
- Range: 56
|
|
Special Moves
Spiral Kick (Rekka)
236K
236K Input Priority:
above 236P and 214K Input Priority:
above 236P and 214K
|
| LK
|
Startup
|
Active
|
Recovery
|
Guard
|
Hit Adv
|
Block Adv
|
| 6
|
5
|
16
|
High
|
+5
|
+2
|
| Damage
|
Stun
|
KD Timer
|
Special Cancel
|
Attribute
|
Hitstun Type
|
| 14
|
1792
|
224
|
-
|
-
|
High
|
- Can input either LK or HK followup at any point until the move has fully recovered
- LK followups have better frame advantage, while HK followups have more damage and range
|
| HK
|
Startup
|
Active
|
Recovery
|
Guard
|
Hit Adv
|
Block Adv
|
| 6
|
5
|
21
|
High
|
0
|
-3
|
| Damage
|
Stun
|
KD Timer
|
Special Cancel
|
Attribute
|
Hitstun Type
|
| 16
|
2048
|
256
|
-
|
-
|
High
|
- Can input either LK or HK followup at any point until the move has fully recovered
- LK followups have better frame advantage, while HK followups have more damage and range
|
|
+LK or HK
(2nd Rekka)
|
| LK
|
Startup
|
Active
|
Recovery
|
Guard
|
Hit Adv
|
Block Adv
|
| 9
|
6
|
16
|
Mid
|
+4
|
+1
|
| Damage
|
Stun
|
KD Timer
|
Special Cancel
|
Attribute
|
Hitstun Type
|
| 14
|
1792
|
224
|
-
|
Airborne 4-13f
|
Mid
|
- Performed by hitting LK after 236K
- This is the preferred option for 2nd Rekka since it can lead to extended combos on hit and is safe on block
|
| HK
|
Startup
|
Active
|
Recovery
|
Guard
|
Hit Adv
|
Block Adv
|
| 9
|
6
|
21
|
Mid
|
-1
|
-4
|
| Damage
|
Stun
|
KD Timer
|
Special Cancel
|
Attribute
|
Hitstun Type
|
| 16
|
2048
|
256
|
-
|
Airborne 4-13f
|
Mid
|
- Performed by hitting HK after 236K
- If going for a Rekka knockdown, use this for slightly more damage
|
|
+LK or HK
(3rd Rekka)
|
| LK
|
Startup
|
Active
|
Recovery
|
Guard
|
Hit Adv
|
Block Adv
|
| 9
|
1*7
|
18
|
Overhead
|
KD
|
-1
|
| Damage
|
Stun
|
KD Timer
|
Special Cancel
|
Attribute
|
Hitstun Type
|
| (14)/16
|
2048
|
256
|
-
|
KD0, airborne 4-15f
|
-
|
- Performed by hitting LK after 2nd Rekka
- The LK ender is preferred for overhead mixups on block, since it is safe against everything except Kim's Super
- First active frame hits behind Sam for less damage; in combos, the higher damage hit will connect
|
| HK
|
Startup
|
Active
|
Recovery
|
Guard
|
Hit Adv
|
Block Adv
|
| 9
|
1*7
|
23
|
Overhead
|
KD
|
-6
|
| Damage
|
Stun
|
KD Timer
|
Special Cancel
|
Attribute
|
Hitstun Type
|
| (16)/20
|
2560
|
320
|
-
|
KD0, airborne 4-15f
|
-
|
- Performed by hitting HK after 2nd Rekka
- While unsafe, it is visually almost identical to the safe LK ender; likely to go unpunished
- First active frame hits behind Sam for less damage; in combos, the higher damage hit will connect
|
|
Thousand Spears (Hundred Hands)
236P
236P Input Priority:
below 236K
(214K: can't overlap) Input Priority:
below 236K
(214K: can't overlap)
|
| LP
|
Startup
|
Active
|
Recovery
|
Guard
|
Hit Adv
|
Block Adv
|
| 8
|
28 *see notes
|
20 whiff, 28 followup
|
Mid
|
KD
|
-51* (+1 followup)
|
| Damage
|
Stun
|
KD Timer
|
Special Cancel
|
Attribute
|
Hitstun Type
|
| 3x7*16
|
1536
|
48x7*256
|
-
|
-
|
-
|
- If any hit connects (hit or block), a followup strike will come out. This followup hits High and is +1 if blocked. Can be avoided by dashing during the gap and crouching, or using a jump normal after initial blockstun ends.
- -51 on Block is best case scenario vs. wide cornered crouching opponent, counting from the first frame the opponent is able to move after being pushed out of blockstun. It will be much worse from farther range or midscreen. Sam will still throw out a followup attack afterward, which is not factored into this number.
- Damage assumes all hits connect; there is a slight suction effect on hit, but on block there is significant pushback. Stun occurs only on the final followup hit.
- Active frame distribution (whiff): [1(1) 1(1) 2(1) 1(1) 1(1) 1(2) 1(1)]x3 * 2
- 54f from start to finish of active window, 28 actual active frames; if followup hit comes out, add 39 more total frames, the final 2 of which are active frames
|
| HP
|
Startup
|
Active
|
Recovery
|
Guard
|
Hit Adv
|
Block Adv
|
| 9
|
41 *see notes
|
25 whiff, 35 followup
|
Mid
|
KD
|
-86* (-6 followup)
|
| Damage
|
Stun
|
KD Timer
|
Special Cancel
|
Attribute
|
Hitstun Type
|
| 3x13*20
|
2048
|
48x13*320
|
-
|
-
|
-
|
- If any hit connects (hit or block), a followup strike will come out. This followup hits High and is -6 if blocked. Can be avoided by dashing during the gap and crouching, or using a jump normal after initial blockstun ends.
- -86 on Block is best case scenario vs. wide cornered crouching opponent, counting from the first frame the opponent is able to move after being pushed out of blockstun. It will be much worse from farther range or midscreen. Sam will still throw out a followup attack afterward, which is not factored into this number.
- Damage assumes all hits connect; there is a slight suction effect on hit, but on block there is significant pushback. Stun occurs only on the final followup hit.
- Active frame distribution (whiff): [1(1) 1(2) 1(1) 1(1) 1(1) 2(1) 1(1)]x5 * 1
- 81f from start to finish of active window, 41 actual active frames; if followup hit comes out, add 39 more total frames, the final 2 of which are active frames
|
|
Diving Kick
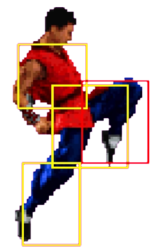
214K
214K Input Priority:
below 236K
(236P: can't overlap) Input Priority:
below 236K
(236P: can't overlap)
|
| LK
|
Startup
|
Active
|
Recovery
|
Guard
|
Hit Adv
|
Block Adv
|
| 25*
|
12
|
18 land
|
Mid
|
KD
|
-16
|
| Damage
|
Stun
|
KD Timer
|
Special Cancel
|
Attribute
|
Hitstun Type
|
| 28
|
1792
|
448
|
-
|
OTG, airborne 6-37f
|
-
|
- From farther distances, startup is slower and the move becomes safer on block
- On whiff, all recovery frames are considered grounded
- On block, there are 7 landing recovery frames
|
| HK
|
Startup
|
Active
|
Recovery
|
Guard
|
Hit Adv
|
Block Adv
|
| 41*
|
23
|
1 + 27 land
|
Mid
|
KD
|
-21
|
| Damage
|
Stun
|
KD Timer
|
Special Cancel
|
Attribute
|
Hitstun Type
|
| 36
|
2304
|
576
|
-
|
OTG, airborne 6-63f
|
-
|
- From farther distances, startup is slower and the move becomes safer on block
- On block, there are 10 landing recovery frames
|
|
Super
Flurry Combination
236LK+HK
236LK+HK
|
| Startup
|
Active
|
Recovery
|
Guard
|
Hit Adv
|
Block Adv
|
| 0+6
|
5(14)6(10)6(14)5(14)8(8)5
|
39 + 14 land
|
H/M/H/M/OH/OH
|
KD
|
-35
|
| Damage
|
Stun
|
KD Timer
|
Special Cancel
|
Attribute
|
Hitstun Type
|
| 12x5*20
|
1024x5*1280
|
192x5*320
|
-
|
Invincible 1-10f, Airborne*
|
-
|
- 20f super flash
- Chip Damage: ~14% (all hits), ~10% (duck 1st/3rd hits), ~2% (block 2nd hit only then interrupt)
- Crouching normals will punish this super during the 1st or 3rd hits
- Airborne frames: 21-30f, 56-65f, 75-86f, 96-139f
- Active frame distribution: 95 frames start to finish, 35 actual active frames
|
|
Wakeup/Knockdown
Getup Attack Detailed Info (click to expand)
- Getup LK or HK must be input within a specific 16 frame window during the wakeup animation.
- The exact timing of this window varies by character and by whether it was a neutral wakeup or forward/back roll.
- During these 16 frames, the final LK or HK input will decide which version comes out. If LK and HK are input simultaneously, Getup LK takes priority.
- The Getup Attack will always come out on the first frame after the 16 frame input window, regardless of when it was input.
- For some characters, there is very little time between the end of the 16 frame Getup Attack window and the end of recovery, making it difficult to input a reversal move with LK or HK, so be mindful of this if you get accidental Getup Attacks.
- After inputting a Getup Attack, any special move input that occurs afterward will automatically be buffered until the attack animation has ended. This means that it's important to stop mashing directions on wakeup once the Getup Attack window is active, as you may get an unexpected special move way after it was input.
Getup LK
|
| Startup
|
Active
|
Recovery
|
Guard
|
Hit Adv
|
Block Adv
|
| 6
|
9
|
19
|
High
|
KD
|
-5
|
| Damage
|
Stun
|
KD Timer
|
Special Cancel
|
Attribute
|
Hitstun Type
|
| 32
|
2048
|
512
|
-
|
Invincible 1-5f
|
-
|
- Not very useful, as crouching beats both getup attacks
|
|
Getup HK
|
| Startup
|
Active
|
Recovery
|
Guard
|
Hit Adv
|
Block Adv
|
| 3
|
9
|
26
|
Low
|
KD
|
-12
|
| Damage
|
Stun
|
KD Timer
|
Special Cancel
|
Attribute
|
Hitstun Type
|
| 32
|
2048
|
512
|
-
|
Invincible 1-2f, OTG
|
-
|
- Since a knowledgeable opponent is likely to low block, this isn't very useful unless they go for meaties
- Recovery starts in a crouching state, but the last 7 frames of recovery are standing
|
|
Pursuit Attack
8LP or 8HP
|
| Startup
|
Active
|
Recovery
|
Guard
|
Hit Adv
|
Block Adv
|
| 43
|
4
|
30
|
Overhead
|
[-43] / (-12)
|
[-38] / (-8)
|
| Damage
|
Stun
|
KD Timer
|
Special Cancel
|
Attribute
|
Hitstun Type
|
| 6 * (12 each)
|
512
|
-
|
-
|
OTG, Mashable
|
-
|
- Only usable on a knocked down opponent
- First hit does 6 damage, all mashed followups do 12 damage each
- Damage scales as though it is part of a combo (rather than OTG scaling)
- Auto-tracks to the opponent's position at the time the Pursuit Attack is input
- If the opponent recovers from knockdown before the Pursuit Attack connects:
-[Frame Advantage] on standing/crouching opponents
-(Frame Advantage) only if the final active frame connects, causing Sam to not bounce away
|
|
Pursuit Counter
Any 2 Buttons
|
| Startup
|
Active
|
Recovery
|
Guard
|
Hit Adv
|
Block Adv
|
| -
|
-
|
-
|
-
|
KD
|
-
|
| Damage
|
Stun
|
KD Timer
|
Special Cancel
|
Attribute
|
Hitstun Type
|
| 16
|
0
|
256
|
-
|
-
|
-
|
- 2f window to counter an opponent's pursuit attack; can counter against any hit of the pursuit attack
- Sam will take damage before the Counter happens, so it cannot save him from a KO
- Counter can only be performed while knocked down
-If Sam wakes up before the Pursuit Attack connects, he cannot use Pursuit Counter against it
- Can juggle afterward from anywhere on screen
|
|
Auto Combos
Normal Autocombo - LP > LP > LP > LP > LP
|
|
> LP
(2)
|
Startup
|
Active
|
Recovery
|
Guard
|
Hit Adv
|
Block Adv
|
| 10
|
13
|
13
|
Mid
|
-6
|
-9
|
| Damage
|
Stun
|
KD Timer
|
Special Cancel
|
Attribute
|
Hitstun Type
|
| 6
|
768
|
96
|
N
|
-
|
-
|
- Hops forward with the same animation as cl.5LK
- Airborne 10-21f
|
|
|
|
> LP
(3)
|
Startup
|
Active
|
Recovery
|
Guard
|
Hit Adv
|
Block Adv
|
| 8
|
2(8)3
|
27
|
High
|
-4
|
-7
|
| Damage
|
Stun
|
KD Timer
|
Special Cancel
|
Attribute
|
Hitstun Type
|
| 6*8
|
768*1024
|
96*128
|
N
|
-
|
-
|
- 2 hits, doesn't combo; animation is cl.5HP (first hit) combined with far.5HP
|
|
|
|
> LP
(4)
|
Startup
|
Active
|
Recovery
|
Guard
|
Hit Adv
|
Block Adv
|
| 10
|
6
|
21
|
High
|
0
|
-4
|
| Damage
|
Stun
|
KD Timer
|
Special Cancel
|
Attribute
|
Hitstun Type
|
| 8
|
1024
|
128
|
N
|
-
|
-
|
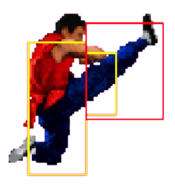
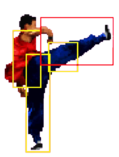
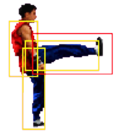
- Same animation as 236K (first hit)
|
|
|
|
> LP
(5)
|
Startup
|
Active
|
Recovery
|
Guard
|
Hit Adv
|
Block Adv
|
| 12
|
6
|
21
|
Mid
|
-1
|
-4
|
| Damage
|
Stun
|
KD Timer
|
Special Cancel
|
Attribute
|
Hitstun Type
|
| 8
|
1024
|
128
|
N
|
-
|
-
|
- Same animation as 236K+K (second hit)
- Airborne 8-17f
|
|
Special Autocombo - LP > HP > HK > HK > 8LK+HK
|
|
> HP
(2)
|
Startup
|
Active
|
Recovery
|
Guard
|
Hit Adv
|
Block Adv
|
| 12
|
2(7)2
|
32
|
High
|
-8
|
-11
|
| Damage
|
Stun
|
KD Timer
|
Special Cancel
|
Attribute
|
Hitstun Type
|
| 4*8
|
512*1024
|
64*128
|
N
|
-
|
-
|
- 2 hits, same animation as cl.5HP but slides forward
|
|
|
|
> HK
(3)
|
Startup
|
Active
|
Recovery
|
Guard
|
Hit Adv
|
Block Adv
|
| 19
|
2
|
27
|
Mid
|
-3
|
-6
|
| Damage
|
Stun
|
KD Timer
|
Special Cancel
|
Attribute
|
Hitstun Type
|
| 10
|
1280
|
160
|
N
|
-
|
-
|
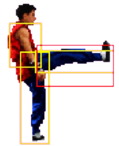
- Animation is like his 2LK, but spinning the opposite direction and following through like a traditional sweep
- Looks like a low, but hits mid because this is Sam; hits OTG
|
|
|
|
> HK
(4)
|
Startup
|
Active
|
Recovery
|
Guard
|
Hit Adv
|
Block Adv
|
| 12
|
7
|
22
|
Mid
|
-3
|
-6
|
| Damage
|
Stun
|
KD Timer
|
Special Cancel
|
Attribute
|
Hitstun Type
|
| 12
|
1536
|
192
|
N
|
-
|
-
|
- Same animation as 236K+K+K (third hit).
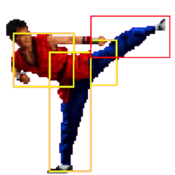
- KD0, Airborne 6-17f; looks like an overhead, but also hits mid because this is Sam
|
|
|
|
> 8LK+HK
(5)
|
Startup
|
Active
|
Recovery
|
Guard
|
Hit Adv
|
Block Adv
|
| 11
|
4
|
40 + 8 land
|
Mid
|
KD
|
-29
|
| Damage
|
Stun
|
KD Timer
|
Special Cancel
|
Attribute
|
Hitstun Type
|
| 16
|
2048
|
256
|
N
|
-
|
-
|
- Same animation as the last hit of Super
- Airborne 11-54f; has a 10f window to combo successfully
|
|
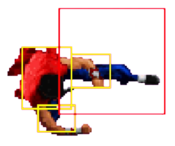
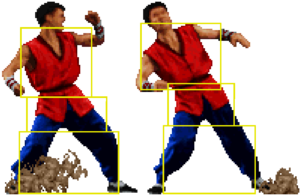
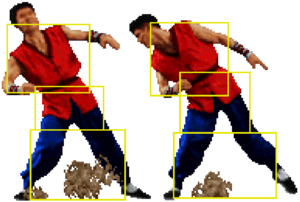
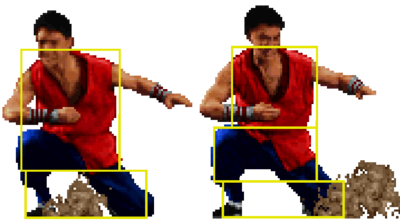
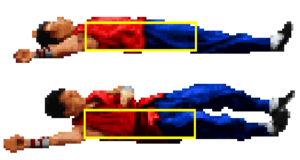
Hurtboxes/Hitstun
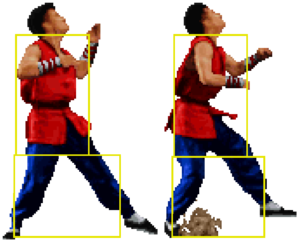
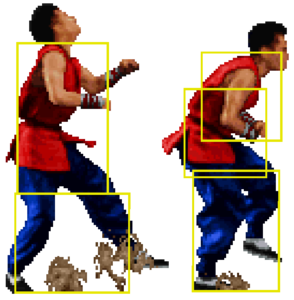
| Standing (L High) |
Standing (H High) |
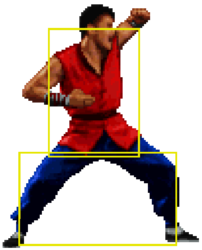
Crouching
|
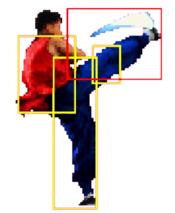
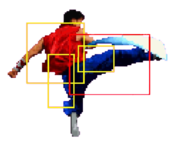
|
|
|
| Standing (L Mid) |
Standing (H Mid) |
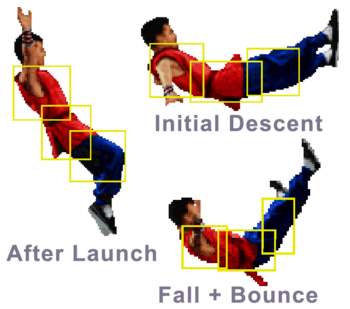
Juggle State
|
|
|
|
| Standing Blockstun |
Crouching Blockstun |
OTG State
|
|
|
|
"High" and "Mid" hitstun types do not always correspond to the attack's Guard Level (i.e. how it must be blocked). Low attacks on standing characters generally fall under the "Mid" category for example. The purpose of this table is to understand where the hurtboxes are when a character is reeling from an attack, which helps understand why certain sequences will hit or whiff. Attacks have 2 main types of hitstun they can do to grounded opponents, with further slight differences between light/heavy attacks.
Note: The lua console lists the following memory values for hitstun types:
L High = 26, H High = 27, L Mid = 29, H Mid = 30, Crouching = 32
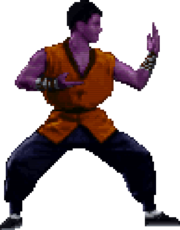
Colors
Default Colors
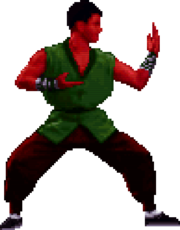
Boss Version Colors
Select Boss variant with Start+Button on character select screen
Character Poses
| Taunt |
Win |
Time Loss/Draw
|
|
|
|
| Charge |
Perfect |
Loss (KO)
|
|
|
|
Stages
External Links
