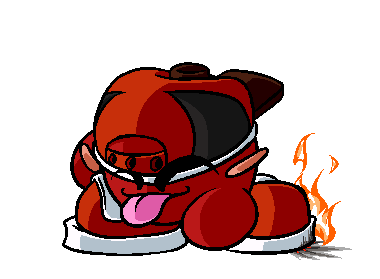
Kirby Battle Blitz/Jay

From Mizuumi Wiki
Jump to navigation Jump to search

Backstory

At first, he was a simple puffball who wasn't good at fighting. One day he finds some powerful baddies and gets bested by them easily. But he was determined to take them down one day. He eventually finds a temple in a forest that has a Fire Spirit within it, which converses with Jay and they come to an agreement where they merge and Jay gains his fire abilities. From there, he feels confident and goes to challenge the baddies again, but it still wasn't enough even with his fire abilities.

Then he meets Yoru, who just happened to be in the same area that Jay was, and he takes him under his wing and gives him a new hat and eye makeup, which gives him the new design that he has now. Not only that, but Yoru gifts him a sword to use in battle, which the fire spirit within him envelops, giving it fire properties. With this new look and sword in hand, Jay tries again to face the baddies and then prevails. Now with these newfound powers and personality, he goes on adventures to find powerful foes to fight, and evil to take down with his friends helping him out along the way.

Gameplay

Jay, in standard terms, is a fire character. Jay's main mechanic in his toolkit is his Heat Gauge that is located above his meter bar, which is filled up by holding power charge or is gained passively when the opponent is hit by certain normals that apply burn, which gives Jay heat passively and damages the opponent overtime. This Heat Gauge powers up a lot of Jay's moveset, from his C buttons to some of his supers which give him the potential to be an absolute menace if allowed to snowball hard enough. His install, 236C, gives Jay infinite heat for a certain amount of time, giving Jay insanely aggressive capabilities. Combined with his great normals, he can run an absolute train on opponents.

However, "Can" is a word you should be keeping in mind. Although his Heat Gauge gives him access to great moves that help him in many situations, he is very reliant on it being somewhat filled to get in on opponents as well as dealing damage. Jay sometimes has to sacrifice potential damage output for his neutral, which can be a hard trade to make. Without heat, Jay can suffer a decent amount by being locked out of his heat 5C/2C and missing damage opportunities with heat buttons.

If you want to play a character that with the required resources is versatile in almost any situation, Jay is the character you want to play.

Playstyle
KBB Jay Icon.png Jay is a versatile all-rounder that uses his Heat Gauge to enhance moves that either improve his aggressive capabilities or let him play a potent keep-away game.
Pick if you like Avoid if you dislike
  • Great neutral with heat C buttons. - Jay's C moves become exponentially better in neutral once he has the heat for it.
  • Jay's Install. Jay's 236C install temporarily turns him into an even scarier character to fight, giving him infinite access to his heat C buttons for a short time.
  • Great normals. Most of Jay's buttons have good range and are relatively safe on block.
  • High potential damage. Jay's heat enhances his supers massively, giving him potentially great damage with appropriate resources.
  • A safer charge. Jay's unique charge has a much faster startup and lower recovery, potentially letting him charge in situations where other characters can't.
  • An extreme reliance on having resources. Jay often relies heavily on his heat gauge for his entire gameplan, from neutral to combos. Along with this, he needs tons of meter for things like his best damaging combos.
  • Having a slow meter charge speed. Because of his unique charge that gives him heat gauge, it thus has a lower charge speed than any other charge in the game.
  • Poor meterless damage. Even with Heat Gauge, Jay's meterless damage is modest compared to most of the cast.

Stats

Life Meter Prejump Walk Speed Run Speed Owned by
1000 3000 5 2.4 / -2.2 6 Hypertiger

Command List

Normal Moves

5A
5A Damage Guard Cancel Invul Property Cost
- M - - - -
Startup Active Recovery Advantage Proration Juggle
- - - - - -

-

5AA Damage Guard Cancel Invul Property Cost
- - - - - -
Startup Active Recovery Advantage Proration Juggle
- - - - - -

-

5AAA Damage Guard Cancel Invul Property Cost
- - - - - -
Startup Active Recovery Advantage Proration Juggle
- - - - - -

-


5B
5B Damage Guard Cancel Invul Property Cost
- - - - - -
Startup Active Recovery Advantage Proration Juggle
- - - - - -

-

5BB Damage Guard Cancel Invul Property Cost
- - - - - -
Startup Active Recovery Advantage Proration Juggle
- - - - - -

-

5BBB Damage Guard Cancel Invul Property Cost
- - - - - -
Startup Active Recovery Advantage Proration Juggle
- - - - - -

-


j5A
Damage Guard Cancel Invul Property Cost
- - - - - -
Startup Active Recovery Advantage Proration Juggle
- - - - - -

-


j5B
Damage Guard Cancel Invul Property Cost
- - - - - -
Startup Active Recovery Advantage Proration Juggle
- - - - - -

-

Universal Mechanics

Low Attack
Damage Guard Cancel Invul Property Cost
- LA - - - -
Startup Active Recovery Advantage Proration Juggle
- - - - - -

-


Overhead
Damage Guard Cancel Invul Property Cost
- HA - - - -
Startup Active Recovery Advantage Proration Juggle
- - - - - -

-


Grab
Grab
Grab (Y)
Damage Guard Cancel Invul Property Cost
- - - - Throw -
Startup Active Recovery Advantage Proration Juggle
- - - - - -

-

EX Moves

EX Attack 1
Damage Guard Cancel Invul Property Cost
- - - - - -
Startup Active Recovery Advantage Proration Juggle
- - - - - -

-


EX Attack 2
Damage Guard Cancel Invul Property Cost
- - - - - -
Startup Active Recovery Advantage Proration Juggle
- - - - - -

-


EX Attack 3
Damage Guard Cancel Invul Property Cost
- - - - - -
Startup Active Recovery Advantage Proration Juggle
- - - - - -

-

Grab
Active Charge
Power Charge (S)
Damage Guard Cancel Invul Property Cost
0 - - - - +75 Heat
Startup Active Recovery Advantage Proration Juggle
- - - - - -
  • Only works when canceled from 5AAA/4A or 2C.
  • Jay gains back 75 heat when this is used, refunding some of what was spent on the last move he did.
  • Very useful, especially when burn is stacked on the opponent for faster heat gain.

Star Strikes

Star Strike 1
Damage Guard Cancel Invul Property Cost
- - - - - -
Startup Active Recovery Advantage Proration Juggle
- - - - - -

-


Star Strike 2
Damage Guard Cancel Invul Property Cost
- - - - - -
Startup Active Recovery Advantage Proration Juggle
- - - - - -

-


Star Strike 3
Damage Guard Cancel Invul Property Cost
- - - - - -
Startup Active Recovery Advantage Proration Juggle
- - - - - -

-


Star Strike 4
Damage Guard Cancel Invul Property Cost
- - - - - -
Startup Active Recovery Advantage Proration Juggle
- - - - - -

-


Star Strike 5
Damage Guard Cancel Invul Property Cost
- - - - - -
Startup Active Recovery Advantage Proration Juggle
- - - - - -

-


Cancel Table

Cancel Table
A B C Star Strike Unique
PLACEHOLDER - - - - -

X: On Contact

X[+]: Available on Whiff

X[-]: On Hit only

X[/]: On Block only


Combos

Combo Damage Cost Meter Gain Location
  • Basic setup combo into special state.

Long combo

Color Gallery

Roadmap

17% complete
In Progress / Completed To-do
  • Basic stuff like the landing page and navbox is in, along with some system pages.
  • System page is complete.
  • Clean up and finish the rest of the character pages. Every page needs to be updated to account for changes in updates 2.0 to 2.4.
  • Create netplay page.
  • Update FAQ
  • Add patch-notes from 2.1 to 2.4.
  • Finish adding frame data to every page, and begin adding hit-boxes to every page. Glitch is currently the gold standard in the gameplay section, hitboxes aside. (Avoid doing Violet's at all costs however!)
  • When Adding Hitboxes: Only take images from Fighter Factory. This is to keep the look of the hitboxes clean!
  • Ensure that this chart is updated over time.


General
FAQ
Controls
HUD
Netplay
Menus
System
Glossary
Patch Notes
Characters
Glitch
Aege
Fly
Max
Yoru
Stray
Jodie
Clutch
Saito
Noll
Sareo
Hiryo
Vivienne
Bill
Violet
Jay
Leon