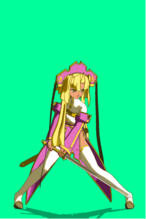
 |
Outdated Version
- This page is for an outdated version of the game (RyoRaiRai). To see Sonken's character page for the latest version (RyoRaiRai V3), click here.
|
Profile
Name: 孫権 仲謀 (Sonken Chūbō)
Real Name: Renfa
Historical Counterpart: Sun Quan - Zhongmou
Voice Actress: Harumi Sakurai
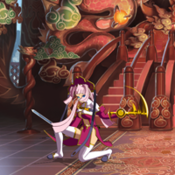
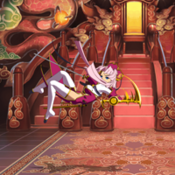
The second sister of the Son family, she is very serious and brooks no compromise.
Driven to fulfill her task of keeping her kingdom safe, she heads for the battlefield with her trusty weapon, Conqueror of the South Seas.
Gameplan
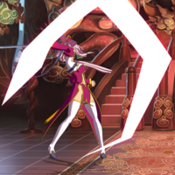
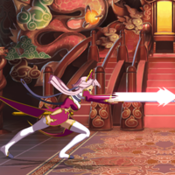
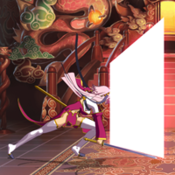
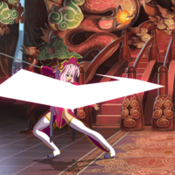
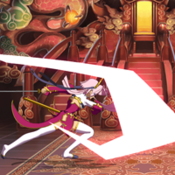
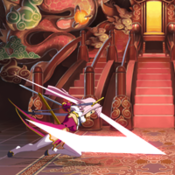
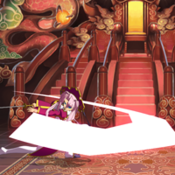
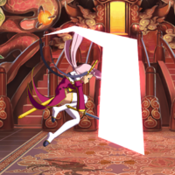
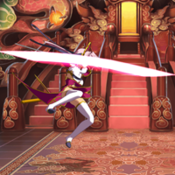
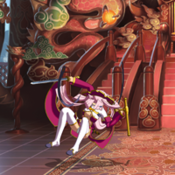
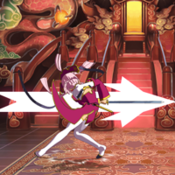
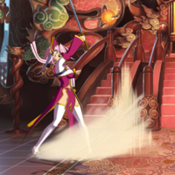
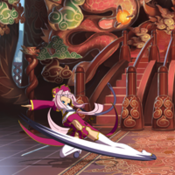
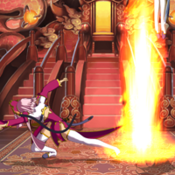
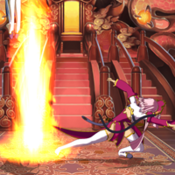
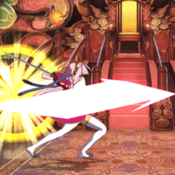
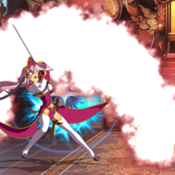
Straightforward yet deceptive footsies character. Desk drop (214X) aka table chop allows Sonken to immediately get on your face, through projectiles, from the other side of the screen with an overhead. Her normals are decent, with 5A and 5B having better-than-average range within the cast. Her throw does little damage but can be combo’d into. 22X is air-invincible on frame 1, which a good alternative if you miss a 3B window. Her moves have very strange animations, like her 6B overhead, 2A (which is not a low!) and j.A. Her unique counter moves let her interrupt and punish predictable pressure strings without meter.
Recommended Strategists
- Shuuyu (Fire) - Decent neutralcheck, reaches further than f.5C. Combo into 66 5B on hit.
- Jun'iku (Pit) - Strong aggressive assist to strengthen midrange/close range options. Good against characters like Ryofu's 2b on block > 2b or rekka(1) on block > 2b. Since there's no superflash on pit startup, after blocking ryofu 2b, pit deals with the followup 2b well.
Normal Moves
5A
5A
|
| Damage
|
Guard
|
Startup
|
Active
|
Recovery
|
Adv on Hit
|
Adv on Block
|
Counter-hit Attribute
|
| 300
|
Mid
|
5
|
2
|
10
|
±0
|
-2
|
Knockback
|
|
c.B
c.B
|
| Damage
|
Guard
|
Startup
|
Active
|
Recovery
|
Adv on Hit
|
Adv on Block
|
Counter-hit Attribute
|
| 800
|
Mid
|
6
|
4
|
19
|
+7
|
-3
|
Knockback
|
Fast, with a good upper hitbox, making a good situational anti-air (e.g. when being crossed up). Links into 5A on hit.
|
|
f.B
f.B
|
| Damage
|
Guard
|
Startup
|
Active
|
Recovery
|
Adv on Hit
|
Adv on Block
|
Counter-hit Attribute
|
| 1100
|
Mid
|
10
|
3
|
26
|
+3
|
-7
|
Knockback
|
|
c.C
c.C
|
| Version
|
Damage
|
Guard
|
Startup
|
Active
|
Recovery
|
Adv on Hit
|
Adv on Block
|
Counter-hit Attribute
|
| Normal
|
1000
|
Mid
|
16
|
2
|
30
|
+2
|
-12
|
Collapse
|
Causes Hougeki on counter-hit.
|
| Followup
|
1000
|
Mid
|
6
|
3
|
34
|
+2
|
-12
|
Wall Bounce - Knockdown
|
Can be delayed to frametrap after the first hit. Sends them flying on counter-hit, confirm into c.B 236A if that happens.
Can also 3C 236A midscreen for more damage(distance-dependent) or 6C in the corner for oki.
|
|
f.C
f.C
|
| Damage
|
Guard
|
Startup
|
Active
|
Recovery
|
Adv on Hit
|
Adv on Block
|
Counter-hit Attribute
|
| 1400
|
Mid
|
16
|
3
|
37
|
±0
|
-19
|
Knockback
|
|
2A
2A
|
| Damage
|
Guard
|
Startup
|
Active
|
Recovery
|
Adv on Hit
|
Adv on Block
|
Counter-hit Attribute
|
| 300
|
Mid
|
5
|
2
|
9
|
+1
|
-1
|
Knockback
|
|
2B
2B
|
| Damage
|
Guard
|
Startup
|
Active
|
Recovery
|
Adv on Hit
|
Adv on Block
|
Counter-hit Attribute
|
| 900
|
Low
|
11
|
2
|
29
|
+1
|
-9
|
Knockback
|
|
2C
2C
|
| Damage
|
Guard
|
Startup
|
Active
|
Recovery
|
Adv on Hit
|
Adv on Block
|
Counter-hit Attribute
|
| 1600
|
Low
|
22
|
2
|
37
|
+2
|
-12
|
Hard Knockdown
|
|
j.A
j.A
|
| Damage
|
Guard
|
Startup
|
Active
|
Recovery
|
Adv on Hit
|
Adv on Block
|
Counter-hit Attribute
|
| 300 x3
|
High
|
5
|
3, 3, 6
|
-
|
+15
|
+7
|
Knockback
|
|
j.B
j.B
|
| Damage
|
Guard
|
Startup
|
Active
|
Recovery
|
Adv on Hit
|
Adv on Block
|
Counter-hit Attribute
|
| 1000
|
High
|
8
|
5
|
-
|
+20
|
+8
|
Knockback
|
Crossup, rising j.B will hit standing opponents(except for Chohi sometimes)
|
|
j.C
j.C
|
| Damage
|
Guard
|
Startup
|
Active
|
Recovery
|
Adv on Hit
|
Adv on Block
|
Counter-hit Attribute
|
| 800 x2
|
High
|
11
|
2, (5), 2
|
-
|
+26
|
+8
|
Knockback
|
Air-to-air button that covers horizontally in front in case you misspaced/they backdashed.
|
|
Hougeki Moves
6B
6B
|
| Damage
|
Guard
|
Startup
|
Active
|
Recovery
|
Adv on Hit
|
Adv on Block
|
Counter-hit Attribute
|
| 900
|
High
|
22
|
2
|
24
|
±0
|
-12
|
Collapse
|
- Lower-body invul on frames 17-24.
- Floor bounces during a Hougeki.
Universal overhead with an obvious animation.
|
|
6C
6C
|
| Damage
|
Guard
|
Startup
|
Active
|
Recovery
|
Adv on Hit
|
Adv on Block
|
Counter-hit Attribute
|
| 1200
|
Mid
|
18
|
3
|
35
|
+2
|
-12
|
Collapse
|
- Airborne on frames 11-18
- Wall bounces during a Hougeki.
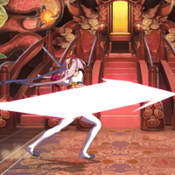
Universal lunge move.
|
|
3B
3B
|
| Damage
|
Guard
|
Startup
|
Active
|
Recovery
|
Adv on Hit
|
Adv on Block
|
Counter-hit Attribute
|
| 1000
|
Mid
|
12
|
3
|
31
|
+2
|
-12
|
Blow away
|
- Areial invul on frames 13-15.
- Launches during a Hougeki.
Universal anti-air.
|
|
3C
3C
|
| Damage
|
Guard
|
Startup
|
Active
|
Recovery
|
Adv on Hit
|
Adv on Block
|
Counter-hit Attribute
|
| 1100
|
Low
|
13
|
2
|
29
|
+48
|
-15
|
Collapse
|
Universal sweep. Special cancelable.
|
|
Throws
Forward Throw
Forward Throw
5D/6D
|
| Damage
|
Guard
|
Startup
|
Active
|
Recovery
|
Adv on Hit
|
Adv on Block
|
Counter-hit Attribute
|
| 600
|
Throw
|
7
|
1
|
24
|
+102
|
-
|
Throw
|
Initial hit causes proration, leading to 480 actual damage.
One of the few characters to have a throw that allows a combo afterwards.
|
|
Back Throw
Back Throw
4D
|
| Damage
|
Guard
|
Startup
|
Active
|
Recovery
|
Adv on Hit
|
Adv on Block
|
Counter-hit Attribute
|
| 600
|
Throw
|
7
|
1
|
24
|
+102
|
-
|
Throw
|
Initial hit causes proration, leading to 480 actual damage.
One of the few characters to have a throw that allows a combo afterwards.
|
|
Special Moves
236X
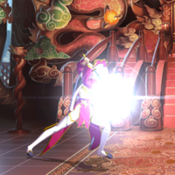
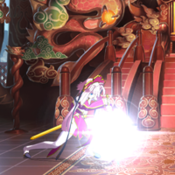
Slash of Faith
Ishinzan
236A/B/C
|
| Version
|
Damage
|
Guard
|
Startup
|
Active
|
Recovery
|
Adv on Hit
|
Adv on Block
|
Counter-hit Attribute
|
| A
|
750 x2
|
Mid
|
14
|
3, (11), 3
|
27
|
+1
|
-10
|
Knockback
|
| B Catch
|
-
|
-
|
0
|
20
|
23
|
-
|
-
|
-
|
- Parries mid and aerial attacks.
|
| C Catch
|
-
|
-
|
0
|
20
|
23
|
-
|
-
|
-
|
- Parries low and high attacks.
|
| Attack
|
800, 800
|
Mid
|
19
|
4, (10), 4
|
27
|
+6
|
-
|
Knockback
|
- On successful parry, fully invul until attack ends.
- Successful parries always hit grounded opponents.
|
| EX
|
650 x4
|
Mid
|
10
|
4, (10), 4, (13), 4, (10), 4
|
33
|
+2
|
-14
|
Knockback
|
- Fully invul on frames 1-11.
|
|
214X
Desk Drop
Gyokuankō
214A/B/C
|
| Version
|
Damage
|
Guard
|
Startup
|
Active
|
Recovery
|
Adv on Hit
|
Adv on Block
|
Counter-hit Attribute
|
| A
|
900
|
High
|
24
|
3
|
36
|
+7
|
-13
|
Knockback
|
| B
|
900
|
High
|
26
|
2
|
36
|
+7
|
-13
|
Knockback
|
- Projectile invul on frames 1-21.
- Airborne on frames 14-25.
|
| C
|
900
|
High
|
30
|
2
|
36
|
+7
|
-13
|
Knockback
|
- Projectile invul on frames 1-21.
- Airborne on frames 14-29.
|
| Desk
|
600
|
Mid
|
-
|
-
|
-
|
+7?
|
-13?
|
Knockback
|
| EX
|
1200
|
High
|
25
|
3
|
40
|
+55
|
-24
|
Knockback
|
- Fully invul on frames 1-13.
Does a long lunge like 214C, at cl.C range turns into a 214A-like slash.
Close version has a good vertical hitbox for stopping approaches. Both versions give extra damage and a knockdown off c.B/2B.
|
| EX Desk
|
800
|
Mid
|
-
|
-
|
-
|
+55?
|
-24?
|
Blow away
|
|
22X
Tiger Roar
Kohōkō
22A/B/C (Air OK)
|
| Version
|
Damage
|
Guard
|
Startup
|
Active
|
Recovery
|
Adv on Hit
|
Adv on Block
|
Counter-hit Attribute
|
| A
|
100
|
Mid
|
6
|
5
|
36
|
+3
|
-11
|
Knockback
|
- Aerial invul on frames 1-11.
|
| B
|
1100
|
Mid
|
7
|
5
|
36
|
+3
|
-12
|
Knockback
|
- Aerial invul on frames 1-12.
LaunchHard Knockdown
|
| C
|
1200
|
Mid
|
8
|
5
|
36
|
+3
|
-13
|
Knockback
|
- Aerial invul on frames 1-13.
LaunchHard Knockdown
|
| EX
|
1800
|
Mid
|
16
|
5
|
47
|
+70
|
-14
|
Blow away
|
- Fully invul on frames 1-17.
- Launches during a Hougeki.
|
| Air
|
1000 / 1100 / 1200
|
Mid
|
1, (Until landing)
|
4
|
33
|
+7
|
-12 / -13 / -14
|
Knockback
|
Damage and Adv on Block listed as A/B/C.
|
| Air EX
|
1800
|
Mid
|
1, (Until landing)
|
4
|
50
|
+57
|
-16
|
Blow away
|
|
Ougi
The Oath to Heroes
Eirei e no Tikai
2363214D
|
| Damage
|
Guard
|
Startup
|
Active
|
Recovery
|
Adv on Hit
|
Adv on Block
|
Counter-hit Attribute
|
| 2000
|
-
|
21
|
3
|
45
|
+131
|
+4
|
Unique Hard Knockdown
|
- Fully invul on frames 1-24
|
|
Hiougi
The Seal of Sun Wu
Songo no Shōin
236BC
|
| Damage
|
Guard
|
Startup
|
Active
|
Recovery
|
Adv on Hit
|
Adv on Block
|
Counter-hit Attribute
|
| 300, 3700
|
-
|
30
|
5
|
24
|
+108
|
-
|
Unique Hard Knockdown
|
- Fully invul on frames 1-58.
- Minimum damage: 3000.
Only available during Hougeki, uses 4 bars.
|
|
Combos
General
- c.B is the fastest starter, 2B is your poke starter, and 3C is generally used only for jump-in combos.
- 2B CH > 214B (22A/5A > 236AB if crouching)
- [5A/2A]*n > 236AB
- Only 236AB is fast enough to combo from her A normals
- 5B CH > 5A > 236AB
- Throw > 236A/5C/j.C
- Using 236A is easier, but does slightly less damage than using 5C or j.C. Also, if 236A is done quickly, the opponent will be able to air-tech afterwards. It's actually possible to force a hard knockdown off of Throw 236A, but that requires them to be specifically low. A useful timing trick for this is to hold 4 (backwards) during the throw animation and then follow up with half-circle A for the 236A.
- Best oki in the corner. Enough frame advantage to go for another throw/throw bait with 6B or c.C
- 236B/C > Successful Parry > 5A > 236AB
- 22B/C Anti-Air CH > 3C > 236A
- 214A/C CH > 5A > 236AB/(corner)c.B > 236A
- (crouching)214X > 22A/5A > 236AB/(corner)c.B > 236A
- 9j.B > j.22X > 5A > 236AB
- 2363214D > j.B > 3C > 22C
Hougeki Combos
Midscreen
The easy near-universal ones, learn these when starting out:
- FC(3C) 6B > j.C > 6C > j.C > 3B > j.C > runup c.B > 236A (4060)
- Anti-air FC(3B) > j.C > 6C > j.C > 6B > j.C > runup c.B > 236A (3780)
- A 3B starter doesn't allow using 3B in the middle of a combo, but you should end up with 4000~ damage and a corner regardless.
- A throw after an FC offers more corner carry and is easier on timing and spacing, but scales down the combo by exactly 100.
Corner-to-corner:
- FC(3C) > runup throw > 9j.B > land >[delay] 9j.B j.22C > runup c.B > 236A > 6C > j.A > 3B > c.B 22C > 3C > 236A (4700)
- Use 3C > 236A as the ender if you're deep enough into the corner, or 2B > 236A if you're not.
Midscreen-to-corner:
- FC(3C) > [runup throw > 9j.B] > [delay] 9j.B j.22C > runup c.B > 236A > 3B > c.B 22C > 5CC > c.B 22C > 2B > 236A (5040)
3B Variations:
- Anti-air FC(3B) > j.C > runup c.B 214B > 2B 214C > 6B > 9j.B j.22C > 5CC > c.B 22C > 3C > 236A (5050)
- Anti-air FC(3B) > j.C > runup c.B 214C > 6B > 9j.B j.22C > 5CC > c.B 22C > 3C > 236A (4450)
- Very range-dependent. The 6B won't land if youre too close to the corner, use 6C in ranges where you're too far for 6B.
1 Bar Combo
- FC(3C) > jump over j.22AB > 22C > 214C > 214C > 214B > 6B > 9j.B j.22C > 5CC > c.B 22C > 3C > 236A (5900)
- Go for this when you have at least 1 bar of meter! Again, very range-dependent, but even with adjusting and omitting a 214x, you'll end up with over 5000 regardless.
Corner
- FC(3C) > 3C 214B/C > 3C 214B > 3B > j.C > 5CC > c.B 22C > 6B > 9j.B j.22C > 3C > 236A (5540)
- Also works a bit further from the corner.
- FC(3C) > 3C 214B/C > 3C 214B > 3B > j.C > 5CC > c.B 22C > 3C > 2363214D > 9j.B > j.B j.22C > 2B > 236A (6940)
Hiougi(236BC) is best done off of huge launchers like 3B or 6B.
Videos
Koihime Enbu
Koihime Enbu RyoRaiRai
Colors
| A Button
|
B Button
|
C Button
|
|
|
|
|
| D Button
|
A+B Button
|
B+C Button
|
|
|
|
|
External Links


