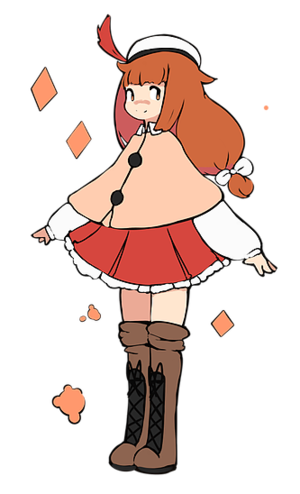
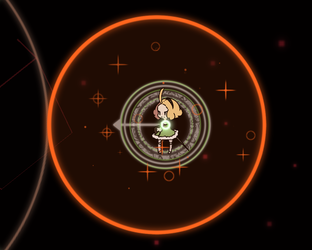
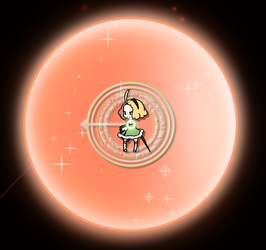
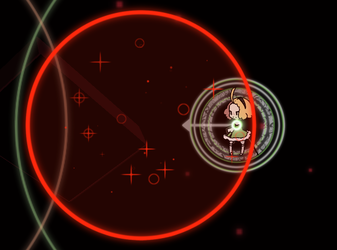
Maiden and Spell/Sun Priestess
Profile
A priestess hailing from the Kingdom of Sand, to the south. With mysterious powers and secretive past, she supports the other adventurers in their travels.
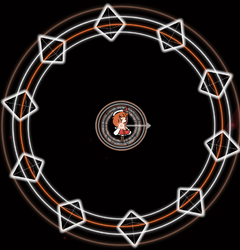
Her style focuses on bullets that teleport directly to the opponent's position, having a number of attacks with long charge times and powerful effects.
Overview
This is the zoning character. when playing her, you wanna not be near your opponent. But if you can't help it then you wanna be RIGHT on them because that way its way harder to dodge sunburst and lat holy combos
Move Speed: 10.5px/frame
Focus Speed: 4px/frame
| Strengths | Weaknesses |
|---|---|
|
WIP |
WIP |
Movelist
Basic Shot (Unfocused)
Basic Shot (Focused)
Wide Shot
Offensive Special
Defensive Special
Strategy
WIP, to be updated
Matchup Guides
(WIP) For each matchup, it is important to ask yourself certain questions in order to improve in the matchup and also to see any player habits you can capitalize on.
Sun Priestess
Strategy
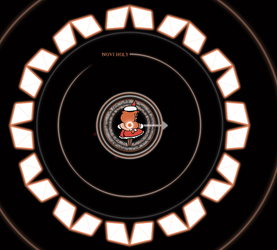
Mirror allows you to fully play close range. Aggression mirror allows you to dictate the tempo of the match. If you are aggressive and confident versus the opposing Sun, then this playstyle can snowball hits and positioning. When the tempo is on your side, the opposing Sun will do their best to wall you our with hard-casted Diamonds and reinforced Waffle Walls. Casted Diamonds can be Diamond Dashed through with proper timing (it's important that you practice dodging Diamonds and knowing how to Diamond Dash through them). Diamond Dash approach into tap Waffle is a really good way to obtain a hit if they're attempting to wall you out. Keep having them guess in melee with proper mix-ups and react accordingly. Mid-range Offense/Defense is also good if the Sun isn't confident with their dodging. Maintaining control of center, providing pressure with reinforced Walls and Diamonds can dominate a retreated Sun player.
Silent Redhood
Questions
- What is your weakness vs this character?
- Are you able to redirect Kunais?
- Do you find opportunistic positions and attacks to punish Redhood's DS cooldown?
Basic (Sniper Shot)
Redhood's Basic either: wants you to avoid it completely or force you to stay in its box (the area in between the lasers). It is imperative to know where you're safe to be, and when it is time to avoid it completely by repositioning yourself. Semi-charged Basics are easy to find the safe spots for. Depending on how you approach, Sun can get hit by an ambiguous Basic if Redhood reads your positioning.
Wide (Bind)
Wholly dependent on ping. Actually quite frustrating at higher ping. Be mindful of when Redhood wants to do a wide (usually it is when they're pressuring you with Basics + Kunais, conditioning you to move to bonk into a Wide, or they expect to snipe your movement with a Wide).
Offensive Special (Knife Juggle)
An OS that one needs to also redirect because poor positioning can easily allow Kunais to snowball. Her focused Kunai is almost always used as an anti-melee/anti-approach tool since Sun excels at close range in this matchup. Unfocused kunai is used as additional support to:
- Redhood's Basic pressure (ambiguous semi-charged lasers).
- Focused Kunai (2x unfocused + 1x focused kunais are a really strong bread-and-butter setup for pressure).
Defensive Special (Vanish)
Arguably the worst DS. Any character can abuse it, but Sun has great tools to abuse. Applying pressure to burn their Vanish allows you to play aggressively if one knows how to also abused the deadzone of Redhood's Basic.
Strategy
Sun can initially play mid-range to establish control of the match. In this position, Redhood will always try to establish control with Basic/Kunai pressure. Pay attention to the Basic animation, as the shape of it helps you gauge the safe spots within its box. Once tempo is established, you can play a bit more aggressive (only play aggressive if you absolutely know how to dodge her kit in close-range) and force Vanish. Once Vanish is down, continue to play aggressive -- abuse Basic deadzone, and redirect Kunais. Want to keep applying pressure before their Vanish is back up.
Royal Arcanist
Questions:
- What is your weakness vs this character?
- Can you manage dodging when debuffed?
- Which part of her kit gives you the most trouble?
Basic (Dimi Dark)
A way for Arc to create/keep pressure during neutral; also has the potential to snipe your exists when Sun is pressured into a wall/corner (if you're in this position, Arc will more than likely do Moon -> hold Wide -> and attempt to hit you with Basic). Be careful in melee because of how her Basic can hit or shift in its directional lock, causing wonky hits when you try to do cross-up.
Wide (Lat Dark)
Arcanist can approach you via spamming Wide and maintain that pressure to place you towards a wall/corner so they can use Moon to cover your vertical escape. Get familiar with her wide because these are the main bullets you will be dodging during this matchup. You do not want Wide to condition your movement, making you always retreat to dodge. Need to learn how to dodge with approach. Once they have you against a wall/corner (ideally you do not want to be in this position), she can:
- Wait to debuff you when you pass horizontally to them
- Cover the bottom exist with Wide and an expected Basic
- Clock you, forcing debuffs and halting your exist entirely. If you don't have Dispel up for this, this can surely cost you card/game.
Offensive Special (Novi Starfall)
Covers your vertical once pressed so always have to be mindful of positioning. At late-game, her OS can easily become a win condition. If you find yourself nearing late-game, proceed to redirect the Moon on each wall to give yourself a safe spot on the opposing end (when you do these redirections, be mindful of her Basic and Wide).
Defensive Special (Arcane Magic/Time Stop)
There is a fixed rotation for debuffs, which is:
- Paralyze
- Confuse
- Slow
- Toxic
- Miniature
- Death Toll
However, against Sun, there is a priority of effectiveness (most deadly to least deadly):
- Paralyze: This one can and will gimp your movement especially if you get Clocked and attempt to raw-escape from it afterwards (if you don't have your DS up). Have very small bouts of movement, and use tap Diamonds to cancel the the paralysis when it procs.
- Miniature: Gimps your pressure. Without pressure, Arc has no fear of playing closer to you.
- Death Toll: Gimps your positioning by covering a portion of the map, kind of like Lich's OS. Advantageous positioning of it can lead to hits on Sun when paired with Moon and Wide.
- Slow: Being slow doesn't always mean a bad thing. It can actually help with micro-dodging Wide; also Diamond Dashing speed boost can supplement any additional speed modifier needed when debuffed. But slow also increases cooldown and casts, which means less pressure from Sun.
- Toxic: Easy to dodge, but can snipe haphazard movement or unintentional blindness.
- Confuse: Reverses the directional trajectory of Sun's Basic, so even if confused, Sun is still able to provide pressure with Diamond, Waffles and wonky Basic positioning. You can adjust your positioning relative to your opponent so the confusion can play into your favor. Can actually act as a Basic mix-up.
Strategy
A good Arc will always find opportunities to debuff to punish your poor position. Refrain from being horizontal to her when you are casting Waffles. Stay diagonal and play mid-range/long-range defensively. Once you build enough walls to momentarily force Arc to keep distance, continue to pressure with Basic mix-up (Focused/Unfocused depending on their approach/retreat) into semi-charged Waffles. At higher level, most top players will be dodging Sun's kit by going forward. It is imperative that you also do tap Waffles to cover the approach. Arc wants to take it to late-game so you want to apply as much pressure as possible early/mid-game.
Hero of Frost
Questions:
- What is your weakness vs this character?
- Is your defense strong enough for Frost's aggression?
- Which part of her kit gives you the most trouble?
Basic (Swordplay/Swordstorm)
An oppressive tool against Sun, especially when paired with her Roll; Frost can roll into Basic to consistently apply pressure to Sun from close/mid-range. Sun has to constantly move with Diamond Dash to safely dodge this, without having to worry about grazing and reacting to Frost's focused Basic. No matter what, at some point, Sun has to deal with the Basic head-on, so practicing its patterns is important!
Wide (Steel Sweep)
Conditions any haphazard movement coming from Sun. Has great coverage on Sun's exits when met against a corner/wall. Sun has to move forward or dodge effectively. Be mindful of moving forward because Frost can Stunwave you. However, you can use Diamond Dash to avoid Stunwave.
Offensive Special (Dodge roll)
She can roll right through Waffles and Diamonds, and with a low cooldown to compliment it. Sun has to be mindful of the roll-ins, and even roll-outs. If the roll-in is expected, then setting up focused Basic and slightly charged Waffles can help catch a hit. If the roll-out is expected, then regular Basics and more charged Waffles can help catch a hit, either with lingered Basic, or a Wide-Snipe.
Defensive Special (Stun Wave)
She can erase bullets, which means....Sun slightly loses pressure, giving Frost ample opportunity to approach. Her OS and DS are on such low cooldown, that paired with good dodging, Frost can take this to late-game and hope to apply more effective pressure.
Strategy
A good Frost will tend to be aggro on Sun, knowing our weaknesses. This can feel kind of hopeless. Ideally, Sun should take this to late-game because our kit will be much more effective with shorter space to move. Always pay attention to how the Frost dodge's your kit. Catch roll-ins and roll-outs with varied Waffles and good reads, and keep applying pressure with decent Waffle Walls to force their OS/DS to be on cooldown.
Dreadwyrm Heir
Questions
- What is your weakness vs this character?
- Is your defense strong enough for Wyrm's aggression?
- Do you often get punished by their DS?
Basic (Claw Swipe)
This is super dangerous in close range, hence once a Wyrm has a handle on Sun's kit, effectively dodging by moving towards Sun, she can completely control the tempo of the matchup. This is definitely a pattern you want to practice as much as possible.
Wide (Lat Fire)
This is a huge killer at beginner/intermediate levels, but becomes less scary as your skill advances enough to dictate the safe positions. Try not to take any haphazard movement; be mindful of what steps you take, especially when accompanied by her Basic and OS. Wyrm will constantly be moving in order to obtain better angles with Wide.
Offensive Special (Garnet Flare)
This OS forces you to move, so Wyrm can OS into Wide as a bread-and-butter combo to catch any sloppy positioning and movement.
Defensive Special (Novi Fire)
A DS with such a low cooldown. If you Dispel, Wyrm can fit in 3 Novifires by the time your Dispel is back up. Always be mindful of its cooldown timer because Wyrm will always attempt to punish you with it. Here are a few instances where Sun can get punished by Novifire:
- If Sun decides to play close-range to get gimpy Basic + tap Waffle hits; she has to absolutely save her Diamond in order to Diamond Dash when Novifire's cast is expected (you can tell if it's coming by noticing how Wyrm moves relative to you; if it's haphazardly or an aggressive approach, then she is desperately seeking the Novifire).
- If Wyrm's Basic conditioned you enough to be against a wall/corner and had you burn DS to avoid a hit.
- Wyrm can sometimes go for a yolo DS post-hit if you're not paying attention to her movement and positioning. With the minor invulnerability, she can disrespect Sun's kit enough to get a good position to DS.
Strategy
This is one of the harder matchups for Sun because of how Wyrm can easily dodge Sun's kit due to her movement speed. She can just move forward when you're playing mid/long-range. When you witness her moving forward, you want to do focused Basic, accompanied by tap Waffles to slow her approach. Diamonds should be used very mindfully for this matchup. It should be used for:
- Escapes in order to reset neutral (and get away from potential Novifire)
- Diamond snipes when she approaches
- Establishing pressure with casted Diamonds when she retreats.
Lich of Flowers
Questions
- What is your weakness vs this character?
- Is your offense strong enough to deter the match from going to end-game?
- Do you often get punished by Butterflies? Are you able to redirect them?
Basic (Dimi Life)
When she is in close range, you do have to be attentive of it shot-gunning you. Lich will always be on the move for better positioning to use her Basic to pressure you when accompanied with her Butterflies and Wide.
Wide (Lat Life)
Can land you in sketchy situations and increases the prospect of you getting hit by Lich. It is imperative that you learn how to micro-step in between its rings because there will be certain instances mid/late-game where you have to inevitably move through it. Wide hits can also be affected by ping.
Offensive Special (Butterfly Thrall)
Depending on the Lich, Butterfly positioning can make-or-break the match since it's such a great conditioning tool. Always be attentive to their positioning in order to redirect their bullet trajectory. It is imperative to always redirect while you're also establishing pressure onto Lich.
Defensive Special (Butterfly Shot)
A DS that also acts as an OS. Allowing Lich to set up a Flower sets the stage control, and now you are forced to play around it, all while redirecting Butterflies. If you can expect the DS, do not use your Diamonds, as her Flower also deletes bullets.
Strategy
This isn't too bad of a matchup, but if you allow Lich to snowball off hits, then it can be. At round start, bait the Flower with Basic and Waffles. Allow those to get erased by Flower. You do not want to use Diamond at round start because it will go on cooldown (and eaten), losing your primary pressure tool in this matchup. Once they Flower, then you can use Diamonds to apply pressure and force a hit before their next Flower is off cooldown. You also want to learn how to redirect Butterflies in order to create as much space as possible so you can reinforce your Waffle Walls and layered Diamonds.
Depth's Secret
Questions
- What is your weakness vs this character?
- Do you allow Depth to condition you to wall?
Basic (Whirlpool)
Attempts to condition your positioning so you would have to redirect it for the entire matchup. A good way to redirect is is by placing yourself at the mid-top or mid-bottom of the walls. What this does is allow it to not trap you onto one of the side walls.
Wide (Lat Water)
It's a great anti-melee tool with early active frames that can be combo'd from Shotgun (Wide cancels the Shotgun end-lag). Stops any close range aggression from Sun.
Offensive Special (Sapphire Flare)
Her Shotgun. A scary OS when it is in the right hands. OS is so fast, at decent range and with proper dodging from Depth, it will be difficult to deal with this.
Defensive Special (Hydra Head)
When accompanied with an enlarged Basic and proper positioning to use their OS, this can close off a lot of potential exits if you manage to get pushed into a side wall. It is a DS, but can also act as a horizontal Moon that just covers space.
Strategy
You want to always redirect Basic, and attempt to bait their shotgun at mid-range. You can Diamond Dash to react-dodge it with proper timing, but this may be more than difficult. While you're redirecting Basic, you can hard-cast Diamonds to apply pressure to Depth, forcing them to burn DS defensively, which rules out one tool from momentarily trapping you. It's imperative that you redirect and continue to wall them out with your own kit. At higher level play, Players will for sure know how to raw-dodge Diamonds (without burning DS). Once they are close to you, you have to be mindful of Shotguns. If you get hit, and you reactively try to go for a revenge-hit, don't. Depth will have wide ready for that, or at least a new Basic. You do not want this matchup to get to late-game; that is where Depth strives. Have to end the match by mid-game, or at least early late-game (before min walls).
Stormbeast
Questions
- What is your weakness vs this character?
- Do you allow Storm to condition you to wall with their charged Basic?
Basic (Bolt Strike)
Charged version is the go to tool to condition you to wall. You will have to redirect them to weaken their presence. Its focused variant (Railgun) can also be used as a mix-up tool to catch you off guard when you are redirecting/dodging charged Basic.
Wide (Discharge)
The tool to snipe your sloppy movement. It is imperative to learn how to dodge this, and find the safe spots. Be careful when Storm is moving as they can get a gimpy Wide hit in close-range.
Offensive Special (Doppelganger)
Her clone. Very important to pay attention to.
Defensive Special (Flash Step)
Mostly used defensively. Can sometimes be used for offensive repositioning when they have decent wall setups.
Strategy
Sun's best matchup. Strategy will be split into two parts because Storm's have different playstyles based around their Basic usage -- Uncharged and Charged.
- Uncharged -- Weakest of the two styles. You do not have to move much to dodge a barrage of uncharged Basics. Sun has an easier time to wall against this playstyle. Just pay attention to Wide (mostly) and keep an eye out for Basic usage. Players who use Uncharged, tend to be aggro and attempt to go for cheeky hits with Wide or Charged Basics. If they are in melee, Sun can punish them with Basic/Waffle | Basic/Diamond combos. You can also use a lot of tap Waffles and Diamonds to punish aggression.
- Charged -- Stronger vs Sun. With this playstyle, Sun and Storm play the same where both characters are going for walling, and if in melee, attempt to hit each other with Basic mix-ups or cheeky Wide hits. Charged playstyle has effective checkmates, if you do not redirect the Basics well. You have to approach Storm in order to not get walled in, so when you approach, focus on their Wide placements; approach with care. You can do tap Diamonds and tap Waffles as you approach to give you a protective layer.
As Sun, you will find yourself doing the same punishes for both playstyles. The difference really is mostly for knowing what you will be focusing on the most. In Uncharged, Wide is more scary than their Basic; and in Charged, Basic is more scary than their wide.
