Matrimelee/Lynn
Jump to navigation
Jump to search
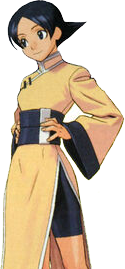

Lynn Baker

Introduction
Lynn is a cross-over character from Noise Factory's previous game, Rage of The Dragons. She is a Chinese American that had to leave China due to war. She learned the ways of the dragon from her Grandfather. Even though her mother taught her to enjoy martial arts and hard training, she prefers to visit the malls.
Lynn is the granddaughter and student of one of Chinnen's friends, and Chinnen brought her along with him to the tournament. She fights in the Matrimelee tournament replacing Chinnen after he falls asleep after a large meal.
Overview
Lynn is a multi-tool. She can easily zone, rushdown, play defensively, and easily play neutral. However, with all of these tools, she is difficult to use efficiently.
| Strengths | Weaknesses |
|---|---|
|
|
Strategy
Building...
Normal moves
Far Standing Normals
5.A  |
|---|
5.B  |
|---|
5.C  |
|---|
5.D  |
|---|
5.CD  |
|---|
Close Standing Normals
cl.5A  |
|---|
cl.5B  |
|---|
cl.5C  |
|---|
cl.5D  |
|---|
Crouching Normals
2.A  |
|---|
2.B  |
|---|
2.C  |
|---|
2.D  |
|---|
2.CD  |
|---|
Jumping Normals
8.A  |
|---|
8.B  |
|---|
8.C  |
|---|
8.D  |
|---|
7/9.C  |
|---|
7/9.D  |
|---|
Dash Normals
66.A/C |
|---|
66.B/D |
|---|
Command Normals
6.A  |
|---|
j.4B  |
|---|
Grabs & Misc Normals
Grab  4/6.C OR j.6C 4/6.C OR j.6C  |
|---|
Guard Cancel 5.CD On Block 5.CD On Block
|
|---|
Rage Explosion  |
|---|
Special Moves
Kouryuu Shouzan Ha
236.A/C  Kouryuu Shouzen Ha (Dragon Flame Cannon) Kouryuu Shouzen Ha
(Dragon Flame Cannon) |
|---|
Ryuu'en Hou
623.A/C  Ryuu'en Hou (Yellow Dragon Rising Wave) Ryuu'en Hou
(Yellow Dragon Rising Wave) |
|---|
> 236.B/D  |
|---|
> B/D  |
|---|
Enren Ken
63214.A/C  Enren Ken (Flame Gloss Fist) Enren Ken (Flame Gloss Fist)  2nd on heavy version 2nd on heavy version
|
(Can also be dash enhanced) |
|---|
Kouryuu Kyaku
[2]8.B/D  Koryuu Kyaku (Dragon Kick) Koryuu Kyaku
(Dragon Kick) |
|---|
Super Moves
Stress Shot & Ippatsu Ougi
214-1236.B/D  Kouryuu Ken Ougi: Hiryuu (Shin Roaring Dragon Fist) Kouryuu Ken Ougi: Hiryuu
(Shin Roaring Dragon Fist) |
|---|
Combos
| Combo | Total Damage | Permanent Damage | Notes | |
| Basic Combos | ||||
| 9.B >> 2.B > 2.B > 2.B > 2.D | 44T | 22P | Excellent knockdown string. | |
| 9.B >> 2.B > 2.B > 2.B xx 623.A > 236.P > P | 39T | 19P | ||
| 9.B >> 2.B > 2.C xx 623.A > 236.P > P | 39T | 19P | ||
| 9.B >> 2.B > 2.B xx [2]8.D | 30T | 15P | ||
| 9.B >> cl.D > D xx 236.C | 37T | 18P | ||
| 9.B >> cl.5C > C xx 236.C | 36T | 18P | ||
| 9.B >> cl.5C > C xx 63214.C | 39T | 19P | ||
| 9.B >> cl.5D > D xx 63214.C | 35T | 17P | First hit of 63214.C whiffs. Second connects. | |
| 9.C >> 66.P > 6.A xx 236.A | 45T | 22P | ||
| 9.C >> 66.P > 6.A xx 623.A > 236.K > K | 50T | 25P | ||
| 9.C >> 66.P > 6.A xx 63214.C | 47T | 23P | ||
| 9.C >> 66.P > 6.A xx 214-1236.B | 57T | 28P | Requires 1 Stress Meter. May whiff on smaller crouching characters if you don't immediately cancel 6.A on hit. | |
| 9.C >> 66.P > 6.A xx 214-1236.D | 64T | 32P | Requires 2 Stress Meter. May whiff on smaller crouching characters if you don't immediately cancel 6.A on hit. | |
| 9.B >> 2.C xx 214-1236.B | 51T | 25P | Requires 1 Stress Meter | |
| 9.B >> 2.C xx 214-1236.D | 62T | 31P | Requires 2 Stress Meter | |
| (juggle) 66.P xx 63214.P | 36T | 18P | Very hard to time all 4 hits of special. | |
| (juggle) cl.5D > D x 236.C | 36T | 18P | ||
| (juggle) cl.5D > D xx 63214.A | 36T | 18P | ||
| (juggle) cl.5C > C xx 623.A + 236.K + K | 38T | 19P | ||
| (juggle) cl.5D > D xx 214-1236.B | 54T | 27P | Requires 2 Stress Meter. | |
| (juggle) cl.5D > D xx 214-1236.D | 65T | 33P | Requires 2 Stress Meter. | |
| (juggle) cl.5C > C xx 214-1236.B | 59T | 29P | Requires 1 Stress Meter. | |
| (juggle) cl.5C > C xx 214-1236.D | 63T | 31P | Requires 2 Stress Meter. | |
| Intermediate Combos | ||||
| (cross-up) 9.B > j.4B >> 2.C > 2.B xx 63214.C | 42T | 21P | ||
| (cross-up) 9.B > j.4B >> 2.C > 2.B > 2.D | 43T | 22P | ||
| (cross-up) 9.B > j.4B >> 2.B > 2.B xx 623.A > 236K > K | 35T | 18P | ||
| (cross-up) 9.B > j.4B >> 2.B > 2.B xx [2]8.D | 37T | 18P | ||
| (cross-up) 9.B > j.4B >> 2.B > 2.C xx [2]8.D | 40T | 20P | [2]8.D struggles to hit crouching characters. | |
| (cross-up) 9.B > j.4B >> 2.B > 2.B > 2.C xx 63214.C | 46T | 23P | 2.B > 2.B > 2.C must be point blank. | |
| (cross-up) 9.B > j.4B >> 66.P xx 63214.C | 45T | 23P | ||
| (cross-up) 9.B > j.4B >> 66.P > 6.A xx 63214.C | 50T | 25P | ||
| (cross-up) 9.B > j.4B >> 66.P > 6.A xx 236.A | 48T | 24P | ||
| (cross-up) 9.B > j.4B >> 66.P > 6.A xx 63214.C | 50T | 25P | ||
| (cross-up) 9.B > j.4B >> 66.P xx 623.A > 236.K > K | 44T | 22P | ||
| (cross-up) 9.B > j.4B >> 2.B > 2.B xx 214-1236.B | 49T | 24P | Requires 1 Stress Meter. | |
| (cross-up) 9.B > j.4B >> 2.B > 2.B xx 214-1236.D | 57T | 28P | Requires 2 Stress Meter. | |
| (cross-up) 9.B > j.4B >> 2.B > 2.C xx 214-1236.B | 55T | 27P | Requires 1 Stress Meter. Must cancel 2.C immediately or spuer will whiff. | |
| (cross-up) 9.B > j.4B >> 2.B > 2.C xx 214-1236.D | 59T | 29P | Requires 2 Stress Meter. Must cancel 2.C immediately or super will whiff. | |
| 9.C >> 2.CD > 6.A xx 236.A | 45T | 22P | ||
| 9.C >> 2.CD > 6.A xx 623.A | 42T | 21P | Can only use 623.A's follow-ups in the corner. | |
| 9.C >> 2.CD xx 623.A > 236.K > K | 40T | 20P | ||
| 9.C >> 2.CD xx [2]8.D | 37T | 18P | ||
| 9.C >> 2.CD xx 213-1236.B | 55T | 27P | Costs 1 Stress Meter | |
| Advanced Combos | ||||
| 6.A xx 236.A > cl.D > D xx 236.A > 66.P xx 63214A | 37P/73R | 95M | Only works on Crouching Keith/Reiji. | |
| 9.c >> 66.A > 6.A xx 236.A xx 214-1236.B | 65T | 32P | Requires 1 Stress Meter. Only works on crouching Keith/Reiji. | |
| 66.P xx 236.A >> 66.A xx 623.A > 236.K > K | 52T | 26P | Only works on crouching Keith/Reiji. 66.P xx 236.A can be looped but requires proper spacing. | |
| 6.A xx 236.A > 2.B xx 623.A > 236.K > K | 47T | 23P | Only works on crouching Keith/Reiji. | |


