Paul
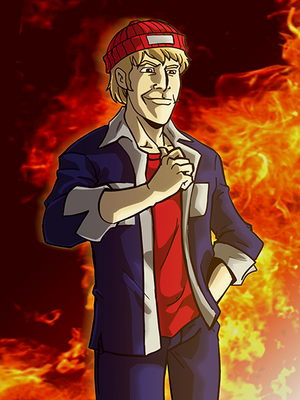
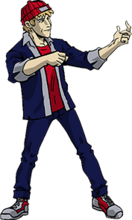
Shotokan Artist Paul
|
| Playstyle
|
All-rounder, Zoning
|
| HP
|
1500
|
| Unique Traits
|
Shotokan Style
Gets an invincible uppercut and a fireball.
|
|
Introduction
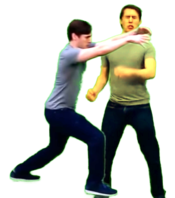
Shotokan Artist Paul fulfills the traditional fighting game role of "shoto," controlling space with a projectile and an invincible anti-air dragon punch.
Gameplan
Paul is comfortable at just about any range. You can poke with fireballs and mid- to long-range or go for a predictive anti-air instead. Up close, a well timed Paulcano can give you the upper hand, but beware: it is an extremely unsafe move. If they bait your DPs too hard, just throw them.
| "Why don't you step into the PAUL ZONE and say that to my face, tough guy?!" |
| Lore: | Paul may not have been training as hard as the other competitors, but he has natural talent, a hot streak and a yellow belt in Shotokan karate. He may seem relaxed, but if you get in his way, be careful, or you may find yourself on the receiving end of one-way ticket... to the Paul Zone. |
Pros and Cons
| Strengths |
Weaknesses
|
- Strong projectile - Full screen projectile that defines Paul's gameplan. Does high chip damage and knocks down on hit.
- Paulcano - Privileged reversal option that'll blow right through most pressure.
- Jack Of All Trades - Paul doesn't really have big weaknesses, he's just fine in most scenarios.
|
- No 10f Normal - Paul lacks a 10f normal, which does slightly weaken his offense and defense.
|
Normal Moves
A
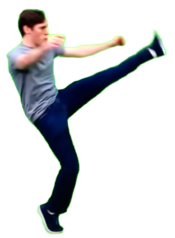
[4A/6A]
|
| Version
|
Damage
|
Startup
|
Ground/Air Range
|
Guard
|
Block Advantage
|
On Hit
|
Push
|
Chip Damage
|
Attributes
|
| Normal
|
100
|
10
|
1/1
|
All
|
10
|
Combo A
|
1
|
-
|
-
|
Paul can only jab after walking, so this move is effectively 20f. A good option to start some pressure or make an aggressive approach.
|
| Combo A
|
300
|
-
|
-
|
-
|
-
|
-
|
1
|
-
|
-
|
Three-hit follow up combo. Automatically triggers on a clean A hit.
|
|
B
[4B/5B/6B]
|
| Version
|
Damage
|
Startup
|
Ground/Air Range
|
Guard
|
Block Advantage
|
On Hit
|
Push
|
Chip Damage
|
Attributes
|
| Normal
|
100
|
20
|
2/2
|
All
|
Unsafe (close) -> -20 (far)
|
Combo B
|
1
|
-
|
-
|
B is a powerful space control option that covers both the air and the ground. B normals are only unsafe at point blank range and cannot be whiff punished, so they have the least risk at range 2. Doing 4B on the opponent's wakeup is safe on block (although minus) and beats most wakeup options, like Paulcano, mash, throw, and jump, however, be aware of what it trades with and loses to.
|
| Combo B
|
200
|
-
|
-
|
-
|
-
|
-
|
-
|
-
|
-
|
Two-hit follow up combo. Automatically triggers on a clean B hit.
|
|
C
[4C/5C]
|
| Damage
|
Startup
|
Ground/Air Range
|
Guard
|
Block Advantage
|
On Hit
|
Push
|
Chip Damage
|
Attributes
|
| 200
|
30
|
2/0
|
Low
|
Unsafe
|
KD
|
-
|
-
|
-
|
Punishable unless done meaty, but can't be blocked while moving. This sweep is used to call out grounded "walk+block" approaches. Loses to jump-ins, forming a 2-part strategy with B normals.
|
|
j.A
[8A]
|
| Version
|
Damage
|
Startup
|
Ground/Air Range
|
Guard
|
Block Advantage
|
On Hit
|
Push
|
Chip Damage
|
Attributes
|
| Normal
|
200
|
30
|
0/1
|
All
|
-
|
Combo A
|
1
|
-
|
-
|
Dedicated air-to-air. Jump forward up to two spaces and punch a jumping opponent. Whiffs grounded opponents. More damage and easier to land than an air throw, but doesn't knock down.
|
| Combo A
|
300
|
-
|
-
|
-
|
-
|
-
|
1
|
-
|
-
|
Three-hit follow up combo. Automatically triggers on a clean j.A hit.
|
|
j.B
[8B]
|
| Version
|
Damage
|
Startup
|
Ground/Air Range
|
Guard
|
Block Advantage
|
On Hit
|
Push
|
Chip Damage
|
Attributes
|
| Normal
|
200
|
40
|
2/2
|
All
|
10
|
Combo B
|
1
|
-
|
-
|
Reliable jump-in option. Jump forward up to two spaces and do a drop kick. Gains ground quickly and has a long reach, but will be interrupted by most ground attacks. Plus on block. Good for challenging long-range zoning, sweeps, or punishing throw attempts.
|
| Combo B
|
200
|
-
|
-
|
-
|
-
|
-
|
-
|
-
|
-
|
Two-hit follow up combo. Automatically triggers on a clean j.B hit.
|
|
j.C
[8C]
|
| Version
|
Damage
|
Startup
|
Ground/Air Range
|
Guard
|
Block Advantage
|
On Hit
|
Push
|
Chip Damage
|
Attributes
|
| Normal
|
300
|
50
|
2/0
|
All
|
-10
|
KD, Side Switch (if close)
|
-
|
-
|
-
|
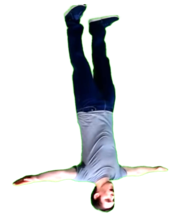
Jump forward and do an inverted lariat that can KD on hit, and side switch on hit or block. Beats a lot of the same options that a j.B can, but it's even slower and won't hit most jumping attacks--except another j.C.
|
|
Universal Mechanics
Throw
[Any+T]
|
| Version
|
Damage
|
Startup
|
Ground/Air Range
|
Guard
|
Block Advantage
|
On Hit
|
Push
|
Chip Damage
|
Attributes
|
| Neutral Throw (5T)
|
300
|
-
|
1/0
|
Unblockable
|
-
|
KD
|
-
|
-
|
-
|
Stand still and throw. Opens up a blocking opponent. This type of throw also beats attacks, as it is effectively "0 frames." Hence it is a universal reversal option, but only at point blank range.
|
| Forward Throw (6T)
|
300
|
-
|
1/0
|
Unblockable
|
-
|
KD
|
-
|
-
|
-
|
Step forward and throw. Opens up a blocking opponent, but loses to attacks. Use this if you're confident they will block.
|
| Back Throw (4T)
|
300
|
-
|
1/0
|
Unblockable
|
-
|
KD, Side Switch
|
-
|
-
|
-
|
Stand still and throw an opponent behind you. Opens up a blocking opponent, but loses to attacks. A risky way to switch sides.
|
| Air Throw (8T)
|
400
|
-
|
0/1
|
-
|
-
|
KD
|
2
|
-
|
-
|
Jump forward up to two spaces and attempt to throw an opponent. Can only connect if players started their jumps fairly close to one another (distance or ~3 squares or less). If it does connect, beats any air attack. Flashy hard read option to call out jumping. Can KD jumping opponents.
|
|
Block
[Any+G] Resist your urge to Paulcano and actually block for once. Resist your urge to Paulcano and actually block for once.
|
| Version
|
Damage
|
Startup
|
Ground/Air Range
|
Guard
|
Block Advantage
|
On Hit
|
Push
|
Chip Damage
|
Attributes
|
| Neutral Block (5G)
|
-
|
-
|
-
|
-
|
-
|
-
|
-
|
-
|
-
|
Stand still and autoguard high or low, if attacked. A passive option that defends against everything but throws.
|
| Walk and Block (4G/6G)
|
-
|
-
|
-
|
-
|
-
|
-
|
-
|
-
|
-
|
Walk and then block high, if attacked. Lows will still hit you. Generally the safest way to gain ground or reposition yourself.
|
| Backflip (8G)
|
-
|
-
|
-
|
-
|
-
|
-
|
-
|
-
|
-
|
Quickly jump back up to 2 squares. Doesn't actually "block" anything, but evades most attacks.
|
|
Special Moves
Paulcano
[5A] Nothing beats rock Nothing beats rock
|
| Damage
|
Startup
|
Ground/Air Range
|
Guard
|
Block Advantage
|
On Hit
|
Push
|
Chip Damage
|
Attributes
|
| 300
|
1
|
1/2
|
All
|
Unsafe
|
KD
|
1
|
100
|
Invulnerable
|
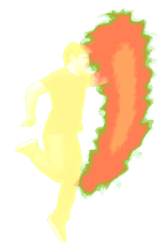
Invincible dragon punch. Useful as an anti-air, reversal or abare option. Can beat just about anything up close, but it's very unsafe: it can be punished not only on block, but also on whiff. Can be used as a pretty risky okizeme option that, while unsafe on block, beats most other wakeup options. 4B is usually better at this as it's safe on block, though Paulcano does knock down and doesn't give up space like 4B does. If the opponent is point blank in chip KO range and in the corner or knocked down, you can Paulcano for a guaranteed KO.
|
|
Firepaul
[6C] Welcome to the Paul Zone Welcome to the Paul Zone
|
| Damage
|
Startup
|
Ground/Air Range
|
Guard
|
Block Advantage
|
On Hit
|
Push
|
Chip Damage
|
Attributes
|
| 250
|
40
|
9/0
|
All
|
Unsafe (point blank) -> -10 (close) -> 10 (far)
|
KD
|
-
|
150
|
Projectile
|
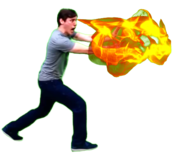
Fireball. Can hit any square on the ground. Does a large amount of chip damage on block, knocks down on hit. Dominates the far range in most matchups. The opponent might be encouraged to jump over this, so you may want to mix in some anti-airs instead of throwing these too predictably. Fortunately Paulcano and your A and B normals can stop most jump approaches cold.
|
|
Unique Traits
Shotokan Style
Paul gets an invincible uppercut and a fireball. That's just how this works, okay?
Strategy
General
Paul is comfortable anywhere in the stage. Use the threat of Firepaul (6C) to keep opponents uncomfortable at a range. Due to the general slowness of Firepaul, you'll need to rely on 5B and 6A to control space when the opponent gets to Range 2. Lack of 5A means you have to commit harder on wakeup or at major disadvantage than normal. Don't neglect backwards moving attacks as a means to retain space control.
Opponent's blocking far Firepaul or getting hit will give you a chance to go on the offensive. On knockdown they can't jump at you, so this is a safe time to use fireballs. If they are jumping too much then catch them with a 6B. When they are playing to passively with the walk and block, Paul's throw game is above average thanks to being in neutral throw range and having Paulcano (5A) as an extra layer.
Fireball Trap
If you find yourself long range you might find opponents jumping fireballs. You can set up a safe Paulcano (5A) at Range 4. You will beat any jump attempts and you are out of range of any standard grounded attacks.
Matchups
Paul
(Even)
|
| Nothing beats Rock.
|
Billy
(Slight Advantage)
|
| Generally you want to force Billy to block on the way in.
Don't get thrown. You can use Paulcano (5A) to beat Billy's Big Billy Buster (5T) okizeme.
|
Lewis
(Even)
|
| Play patiently and don't get too caught up in his nonsense. Remember that his back moving specials will make Paulcano (5A) whiff. At major advantage you can use Firepaul to catch even Fist of Euphoria (4A) if Lewis is trying to abuse it.
|
Marv
(Even)
|
| His Blazing Ent (6B) beats up your Firepaul (6C). You can choose to either tackle this match by moving in to rushdown or by backing off and forcing Marv to guess between alternating fireballs or jumping attacks.
Paul can control the fireball war he gets advantage and trading Blazing Ent with Firepaul gets you a knockdown! If Marv falls behind on zoning it can be hard for him to regain advantage without resorting to coming to you.
|
Noel
(Slight Advantage)
|
| Firepaul (6C) means you never have to come to her to stop Unusual Botanical (6C). This puts her at a disadvantage by forcing her into the offensive.
If she has vines up, the vine attack will negate your projectiles.
|
Nick
(Slight Advantage)
|
| He has to come to you and doesn't get any fancy tricks to get around your specials. Pretty straightforward fight, watch out for his jump attacks and don't get cornered.
|
Colors
