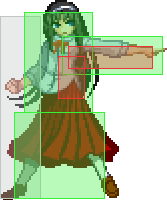
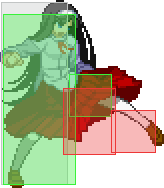
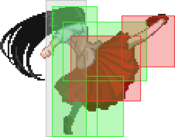
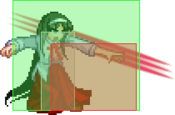
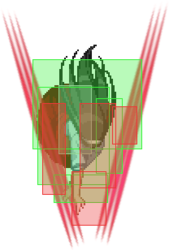
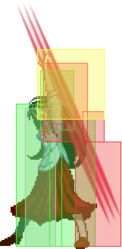
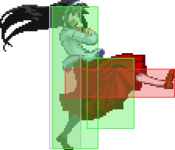
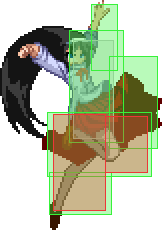
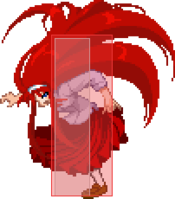
Melty Blood/MBAACC/Akiha Tohno/Full Moon

From Mizuumi Wiki
Jump to navigation Jump to search

Character Page Progress

This page is mostly complete, consider joining as an editor to help finish it up. Please update this character's roadmap page when one of the editing goals have been reached.

In Progress To-do
  • Combos:
    • Add damage, meter gain/given numbers and video links to pre-existing combos.
  • Move Descriptions:
    • Expand upon the pre-existing move descriptions, cite their uses, add captions where helpful, etc.


Additional resources

F-Akiha Match Video Database
F-Akiha combo compilations not shown on wiki
F-akiha Essential combos

Notable Players

Name Color Region Common Venues Status Details
GO1

Color

Japan A-cho Inactive Grandfather of Melty. Inactive....
KFL

Color

North America Netplay Active Veteran Player. Found in Meltycord under a different user name: "it's me f6zQYGeTi2YqlrU3#0705 "
MakotoFox

Color

North America Next Level, Netplay Active AKA F O X. Veteran player who still plays somewhat actively casually, but can mostly be seen doing commentary. Also a VTuber.
Manabe
(眞鍋#0927)

Color

North America Netplay Inactive Found in Meltycord and the Melty Blood Community Server. Veteran player.
nigo
(にごー)

Color

Japan A-cho, Port 24 Yagoto Active One of the two best active Akiha players in Japan. Plays both F & C-Akiha.
Pluot

Color

North America Netplay Inactive Veteran player. Current owner of Meltycord.
Ryuzlin

Color

Brazil Netplay Inactive
Yume (夢)

Color

Japan A-cho Active One of the two best active Akiha players in Japan.
Zay

Color

North America Netplay Active Strongest active F-Akiha player in North America.

Players to ask in the community

Opinions may differ between players and not all may agree on the same topic.

Name Discord username Languages Servers
Zay isaiaerz English Meltycord, MBCS
Cadenza spicat. English, Spanish Melty Sud, Reverse Beat Brasil

Overview

Strengths Weaknesses
Strengths
  • Strong corner pressure.
  • High health.
  • Good grounded and aerial normals.
  • Good zoning.
  • Can instantly block out of dash.
  • Plenty of Initiative Heat options.
  • Good strike/throw game.
  • Standing low 5B.
  • Good setplay.
  • Has fuzzy overhead set ups.
Weaknesses
  • Slow ground speed.
  • Can be meter-hungry at times for her better pressure/mixup options.
  • Low midscreen damage.
  • Requires attention to spacing when combo routing for her set ups to work.
  • Needs pit to convert off of her fuzzy overheads.
  • A lot of her specials go away on hit/block.
  • Requires a competent level of button holding when playing her.
  • Poor reversals.
  • Noticeable recovery frames on 214X specials.

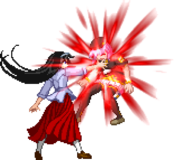
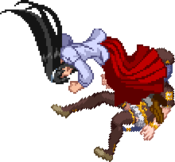
F-Akiha, a character known primarily because of GO1, is one of the main protagonists of Melty Blood. F-Akiha specializes in controlling space with her usage of 214B for the ground approaches, 22A/B/C for the air approach and j.236B/[B] for the aerial portion of the game. What you may see her for is the ability to lock down the opponent and condition them into doing what the Akiha player wants them to do. Akiha can fight at multiple ranges thanks to her blessed close range buttons such as j.A, j.B, j.C, 5A, 4C, 2C and her mid-range to full screen tools such as 22X, 421X, 214B. While she doesn't deal high damage midscreen, the same could be said to opponents that hit her since she has the highest health in the game. On top of that, when reaching the 25% Health damage modifier, if she Initiative Heats during a combo, she gains all red health back and has an even better time maintaining the lead thanks to this increased defense, to the point where she can even set up a checkmate situation.

In the corner it's a much different game when she gets you there as you are now subjected to a simple yet strong strike/throw game as she enforces her presence with 22A pit. Her block strings are ambiguous and can be rather long, making the opponent have to take a risk or else they'll face fuzzy overheads that chip away at the opponent's health along with Pit. She is indeed a strong character that rewards players for managing their space, health and most importantly, time as it will factor into a lot of the F-Akiha's decisions at every point in the match. Truly a character that one can start with, and as one goes through the basics they can uncover the more intricate parts of the character and grow with them.

General Gameplan

As F-Akiha, you are slow both on ground and in the air, however what you have at your disposal is the ability to control the pace and space of the match via your specials to dictate how you want your opponent to approach. In a lot of matchups F-Akiha gains a lot of incentive to sit back, find space and 22[A] since you now weaved a negative edge fire pit to protect you from direct frontal approaches. 22B and 22C usually are just strictly quick released to quickly check opponents approaching the pits' ranges, but there is merit to it being held if they respect the space enough as 22A/B/C grow taller over time and even after a certain point, becomes air unblockable.
From there you can now throw out 214B more safely to cover the ground vector that opponents will try to invade. You can also use 214B to approach safely if the situation calls for it. F-Akiha's air movement is spectacular in the fact that j.236B and j.236[B] stall her air movement and cover the space below her like a wall. She can air dash after doing either of those respective specials which is excellent again for covering her airdash j.C approaches. If you feel as though you cannot safely approach whether its due to the opponent not committing to anything or j.236B didn't make them block then you are free to airdash back or use your second jump if you kept it. Scouting the pace of the match via jump, jump drift and sdj to hover above the opponent is greatly encouraged in conjunction with these tools.

F-Akiha meter wise always want to be at a spot where she can be at MAX at a short notice so she can take advantage of IH'ing her red health back and by extension stealing by rounds via time out by life leads. Fortunately there are plenty of reasons to use meter and ways to build meter.

Neutral

F-Akiha can operate at a lot of spaces and it depends on the match up on which you need to do in order to make the match go in your favor. If the opponent lets you gain a decent amount of space you can aim to set a 22A like so.
Otherwise in many situations you will be in the air aiming to be above your opponent looking to airdash j.C and if there isn't a safe point to do so then using j.236[B] to scout out the situation before committing to an aggressive approach is also one of F-Akiha's best options to do.

Other than being in the air she can force approaches by doing 214B, if they jump back you can now set 22A to deter aggressive players. Versus more competent patient players, you want jump, super double jump and play around your j.236[B] and j.236B as they stall your air momentum while also producing a hitbox this is usually around midrange. Upclose you then use your tools such as j.A which is a quick A, air normal that goes in front of her and is perfect for air counter hit fishing with. If the opponent is above you or getting too aggressive for you to set 22A reliably then rising j.B is another tool to use. Afterwards on an air CH you generally pick up with 2C > 4C into the corner carry(3rd) combo found in Normal Combos.

With F-Akiha you want to carefully choose between using both your jumps or your airdash, but rarely both. It's important to understand this because after j.236B and j.236[B], you can act out of it but you cannot use movement that you've already used up. So be sure to have it just in case you need to retreat or go on the offense in the event you have them block ribbon (j.236X). Aside from using ribbons and such let me explain the movement options that F-Akiha has at her disposal:

Jumps
You have forward jump, neutral jump, back jump, super jump, double jump, Super double jump and Drift. Most of these are simple to understand except for super double jump and drift which are vital to a lot of the melty cast, but are extremely important for F-Akiha.
Forward jump is of course to invade the opponent's space, it's a fundamental tool to move forward, while super jumping is augmented aerial momentum while moving forward, essentially a more aggressive form of forward jumping that is useful for F-Akiha especially since she has slow ground and air speed .
Neutral jump is as it implies, you do not invade space nor do you gain space by retreating with back jump, it is normally used to monitor the situation before determining the next action.
Back jump is to gain space when things are a bit too heated up close.
The fascinating thing about Melty is that although you've committed to a specific direction for your initial jump, you can still rewrite the purpose of your aerial movement by using double jump in either of the following ways:

  • Forward
  • Back
  • Neutral

Now that the basic explanations of those movements are covered, we can now move on to super double jump and drift.

Double Super jump
Here under the Movement and Metagame sections explains how to do it. This movement option is important for F-Akiha because under Normal Moves, if you take a look at j.C and examine its hitbox it's really easy to understand exactly how good it is as a jump-in button, and it is extremely effective when you're right on top of them. Super Double jump allows you to get that elevation over the opponent to use it. It's also a good spot when you want to use j.236[B] if the opponent is attempting to pursue you.

Drift
This move is also Here under Neutral jumps which tells you how to do perform drift during neutral jump. This movement allows you to subtly move forward or backwards, think of it as a soft decision to move forward or backwards as opposed to forward jump or backward jump which are easier to determine. Since you won't have the momentum of a forward/back jump, you can air dash forward or backwards in a more precise minute way in case you need it. This can also be done during a neutral double jump which is nice for monitoring the pace of the match in a safe fashion.

Ground mobility
Now just because F-Akiha has sluggish ground speed doesn't mean that she's terrible on the ground. On the contrary she has a decent 5A, 2C and 4C that allows her to play the ground game a bit. If you look under Normal Moves and take a look at 5A, 4C, and 2C you will see that 2C low profiles which makes it excellent to dash under opponent aerial approaches and hit 2C. You can even punish poor jump-ins with 2C as well. The same can be done with 5A, but you have to put out 5A preemptively, not reactively in order to stuff or trade favorably with aerial jump-ins. 4C is a fast command normal that is active on frame 8, a command normal that as fast as a B normal and launches on 1st hit. It's a button commonly used for many situations and dash 4C is one of them to deter ground approaches and ultimately lets you corner carry into F-Akiha's best position in a match.

Pressure/Okizeme

F-Akiha is unique in that, not only does she have really good frame data on her normals (thanks to being an F-Moon character), she also has access to multi-purpose tools such as j.236A/B, 22A, 214C, and on some occasions 421A, but let's talk about 22A and the importance of it.

22A

22A, nicknamed "Pit", is a special that can either be pressed or held. When you hold 22[A], you can release the button to activate the pit and have more frame advantage. This in turn makes the opponent wary of being put into F-Akiha pressure, as the mindgame revolves around when she will release the pit. The longer she holds it, the higher the level it achieves and the more + frames she will have to continue her offense.

Her most commonly used pits are level 1 and 2: level 1 is for traditional pressure, while level 2 is generally seen after a 22A > 623C OTG pick up, or when you do a j.2C ender, 22A~[C], and grabbed and still held the pit. Level 2 pit is used for fuzzy overhead mix ups. At the core, F-Akiha is mostly a low/throw character, with fuzzy overheads once a set up has been conducted, or when enough respect has been made through establishing ambiguous pressure thanks to 22{A}, 22[A], and 22A. Start with the following blockstring for pressure:

  • 2A, stagger 2A, 5B > 22{A}
  • 2A, stagger 2A, 5B > 5B > 22{A}
  • 2A, stagger 5A, stagger 5A
  • 2A, stagger 5A, stagger 5B > 22{A}

This simple little sequence allows Akiha to run back in after a half-charged 22{A}, and do 2A > 2A. You want to make the most out of your 2A staggers (as they are +3 on block) and 5B, a standing low that is -1 on block which is important to keep in mind. Once you established pressure that they will block long enough, you can now attempt to do grabs after 22A.
Once you get a grab, the post grab options are;

  • grab, 22A setup
  • grab empty jump low/grab/airdash high
  • grab 421A into empty jump low/high or grab

More ideas include doing an IAD after 2A, so here's a few examples you can do:

  • 2A, IAD j.B/j.B, 2A
  • 2AA, dash IAD j.C, IAD j.C/dash 2A
  • 2A, IAD j.C, dash grab
  • 2A, 2A, TK j.2368A
  • 2A, IAD j.B > dj.C > j.236B, falling j.A

The concept to doing these is that 2A into grab is what leads into those situations. People may try to mash or OS, so depending on how you stagger, you may catch the mash with your stagger 2A's. If they are patient and look for a redash, that's where your IAD j.C comes into play, and you can collect your CH jump-in reward. Again, these are just some of the basic pressure ideas and some of the more advanced ones will be covered in #Advanced techniques. The important parts is that your main source of pressure comes from placements stagger 2A, stagger 5B, 22A and grabs.

Pressure extensions

Typically with F-Akiha you normally keep your pressure around your usage of B normals, but there are times where you may use delay 5C to catch jump-outs. Normally, this would halt your pressure and give your opponent a chance to escape unless you have meter, and that's where 214C comes in. 214C is AUB, multi-hit, and induces full untech on the last hit. So in case you need to extend pressure because you used 5C, it would go something like this:

  • 2A > 2A > 5B > delay 5C > 22[A] > 214C

From there, you can still pretty much use whatever you would like, since you are still holding pit underneath them. The pressure examples are decent starters, but this is Melty Blood, so make sure to lab out some more ideas with what to do with your normals and specials, since she has a lot of room to be ambiguous.

Mix ups

Aside from what I listed as the post-grab options, there is one thing I would like to mention. F-Akiha after a j.2C ender into 22[A] is only the start of wonders for her mixup, since, again, the primary mix ups are when she releases, and expanding upon that, let me list the options for post j.2C enders:

  • super jump empty low/ airdash j.C for delayed high
  • 22A~[C], grab
  • 22A~[C], dash jump to beat mashing and OS-ing
  • 22A~[C], meaty ]C[
  • 22A~[C] airdash j.[B]~]C[ > dj.C~]B[
  • Airdash j.A(w) into low

The one bullet point bolded is something that needs to be expanded on a bit further.

After j.2C ender into 22[A], if you manage to grab you have two options:
You release the pit near the end of the grab animation. This is to get damage and from there after that sequence you can either do 22[A] again to loop the sequence again. (Careful, some chars can wake up throw you because pit is not positioned on top of them like this)
Or if you want to be safer, you can do 421A into a meaty 2A for pressure or 421A and do either a empty jump low or an airdash for a delayed high mix up. The interesting part is when you choose to keep 22A~[C] held. It then allows you to do the following mix up:

  • Super jump, j.[B]~]C[ > dj.C~]release[ (requires pit to be level 2)
  • Super jump j.B, 2B
  • Empty Super jump ]C[ 2A
  • Super jump ]C[ airdash j.C
  • Empty super jump grab

One is a fuzzy overhead and the second is an overhead into low. Once you conditioned them to block the fuzzy overhead, you can now use the second option to yield more damage than the first option. The rest are self-explanatory.

Another way to set up this just-mentioned mix-up is using the following OTG pick up:

  • 22[A] > 623C (during the animation, [B]~]C[) j.A > dj.A > j.2C

Advanced Techniques

There are some things that as F-Akiha you may want to learn. One of them is being able to switch buttons to hold when you do 22A.

What I mean is that you can hold the pit with any button, for example:

  • 22A~[C]
  • 22A~[B]
  • 22[A]

These are the three valid ways to hold the pit but you can do more with by switching which button you hold in the middle of your string, such as in these examples:

  • 22A~[C], 214[B]~]C[
  • 22A~[C], 2AA 2[B]~]C[

These are basic notations but it should illustrate how you can switch the button used to hold Pit by holding a different attack and releasing your previous button, giving back access to your C moves in this case. The reasons why you do this will be covered shortly but it's important to keep this concept in mind because it then opens up more mix up opportunities that are now meterless and don’t need a grab once you have your pressure established. This concept will also give you more expansive pressure as you move along with the character.

Advanced blockstrings

Now that you’re at this point, it's time that we go over something that once again is unique regarding 22A and projectiles overall. 22A negates pushback on your normals when you release it at the same time as you attack. So regularly, when you do something like 2AA > 5B, you get pushed out, however say you have 22[A] set, try doing this for proof of concept or watch:

  • (with 22A~[C] already set) 2AA > 5B~]C[

An even easier example is to do the following:

  • Grab meaty 5B
  • Grab, 421A, 5B

If done right you will notice that after 5B you’re still close to them.It's because the game detects pushback by the nature of the attack, and normals are part of the character while projectiles are independent and won't push you back. So if your normal attack is then followed by a projectile such as 22A/421A, the initial pushback will be overwritten and you end up not moving away from the opponent.

What this then means for pressure is that once you have set down 22[A] you can something like this:

(with 22A~[C] set)

  • 2AA > 2[B]~]C[ > 4C~]B[ > 22[A]
  • 2AA > 5B~]C[ > 22[A]

This is just a few of these examples but one can picture the concept for what F-Akiha can do and be creative with her block strings to make it near seamless. That’s not all you can do, if you got pit set you can even convert off of your mix ups without meter now. Typically respect is needed for this to work and fortunately, after j.2C ender into 22A they may already be in fear of pit being released as a meaty so now you can do the following:

(with 22A~[C] set)

  • Airdash j.[B]~]C[ > dj.C~]B[

One last thing that’s unrelated to the topic of 22A is using the following starters

  • 5A > 3C

This is used to counter jump outs. On hit you do:

  • 5A > 3C > j8.AC > dj.AA > j.2C, land 22A

The problem is what if it's blocked? You can actually OS the scenario by doing either:

  • 5A > 3C > 8~22~A
  • 5A > 3C > 8~214B > 214C

The first one lets you keep pressure and checks for mashing and then you can check the again with 4C which combos if it counter hits. The second one you do not get to set down pit, but this catches jump outs 100% guaranteed and gives a combo if it hits you can still do pressure afterwards.

Defense

In the corner:

Ok, so you’re in the corner as F-Akiha. To be frank, you don’t have as many reversals as you would like to have, but you have the following on wakeup:

  • Shield
  • 623C
  • Backdash

Every single one of those choices are rather specific for the course and 623C while it is a DP, you can OS it easily if you are H and F moons. That’s not to completely void the usage of it on wakeup, but know that most times you are better off blocking instead. This now brings to defensive ideas, while her wake up options aren’t that good, her abare is pretty robust for the course. Since you’re F moon you can also ex guard to create enough space and use your 8f command normal named 4C to challenge a redash that’s one option you can do along with 1A~D since she has a 2A that is active on the 5th frame that can also challenge dash ins as well. These are direct challenges that are options to F-Akiha. One thing you can aim to do ex guard or guard till the opponent has exhausted their options for offense and attempt the jump out and the super double jump out. There’s really not much to it other than that.

In neutral:

If someone is approaching from the ground and you cannot get a 22A or 214B out in time then use 4C to stop ground approaches, if it hits carry on to the corner carry route if need be. If someone is IAD-ing towards you, you can also 22A and quickly release to get a trade in your favor, use 2C > 4C on an air CH and proceed to use the corner carry route to put them in a position where they subjected to 22A after j.2C ender. If 22A will not work then you can also use rising j.A for a CH fish, you can use rising j.B if they are clearly above you or you can dash under 2C > 4C as long as they don't have a cross up jump in normal.

That should cover general defensive ideas F-Akiha can practically use if need be.

Combos

Combo Notation Help
Disclaimer: Combos are written by various writers, so the actual notation used in pages can differ from the standard one.

For more information, see Glossary and Controls.

X > Y X input is cancelled into Y.
X > delay Y Must wait for a short period before cancelling X input into Y.
X, Y X input is linked into Y, meaning Y is done after X's recovery period.
X+Y Buttons X and Y must be input simultaneously.
X/Y Either the X or Y input can be used.
X~Y This notation has two meanings.
  1. Use attack X with Y follow-up input.
  2. Input X then within a few frames, input Y. Usually used for option selects.
X(w) X input must not hit the opponent (Whiff).
j.X X input is done in the air, implies a jump/jump cancel if the previous move was done from the ground.

Applies to all air chain sections:

  • Assume a forward jump cancel if no direction is given.
  • Air chains such as j.A > j.B > j.C can be shortened to j.ABC.
sj.X X input is done after a super jump. Notated as sj8.X and sj9.X for neutral and forward super jumps respectively.
dj.X X input is done after a double jump.
sdj.X X input is done after a double super jump.
tk.X Stands for Tiger Knee. X motion must be buffered before jumping, inputting the move as close to the ground as possible. (ex. tk.236A)
(X) X is optional. Typically the combo will be easier if omitted.
[X] Input X is held down. Also referred to as Blowback Edge (BE). Depending on the character, this can indicate that this button is held down and not released until indicated by the release notation.
]X[ Input X is released. Will only appear if a button is previously held down. This type of input is referred to as Negative Edge.
{X} Button X should only be held down briefly to get a partially charged version instead of the fully charged one.
X(N) Attack "X" should only hit N times.
(XYZ)xN XYZ string must be performed N times. Combos using this notation are usually referred to as loops.
(XYZ^) A pre-existing combo labelled XYZ is inserted here for shortening purposes.
CH The first attack must be a Counter Hit.
Air CH The first attack must be a Counter Hit on an airborne opponent.
66 Performs a ground forward dash.
j.66 Performs an aerial forward dash, used as a cancel for certain characters' air strings.
IAD/IABD Performs an Instant AirDash.
AT Performs an Air Throw. (j.6/4A+D)
IH Performs an Initiative Heat.
AD Performs an Arc Drive.
AAD Performs an Another Arc Drive.

Starters

Condition Notation Damage
vs V.Sion
Notes
Normal starter, grounded opponent
  • (2A/5A) > 5B > 5C > 4C
???


Meter Gained:  ??? Meter Given (vs C-Moon): ???
Generally your main starter; if the opponent is on the ground and you get a ground poke, you can always go along this route. From max range you may have to adjust the combos.
Corner starter, grounded opponent
  • (2A/5A) > 5B > 5C > 6C
???


Meter Gained:  ??? Meter Given (vs C-Moon): ???
This is the corner starter route to use.
Normal starter, grounded/airborne opponent
  • 4C
???


Meter Gained:  ??? Meter Given (vs C-Moon): ???
Generally your main starter; if the opponent is on the ground or if the opponent was jumping out, you can always go along this route. From max range you may have to adjust the combos.
Normal starter, grounded/Air CH opponent
  • 2C > 4C
???


Meter Gained:  ??? Meter Given (vs C-Moon): ???
Generally your main starter; if the opponent is on the ground or if the opponent was jumping out, you can always go along this route. This starter is also used generally if you scored an air counter hit. You might want to delay the 4C.

Normal Combos

Condition Notation Damage
vs V.Sion
Notes
Normal starter, grounded opponent
  • 2A > 5B > 5C > 4C > j.(AA/B)C > dj.BC > AT
3570
Meter Gained: 52.2 Meter Given (vs C-Moon): 17.4 (Video)
Basic midscreen combo ending with an airthrow. This ender isn't actually used much thanks to j.2C, but if you really need the damage to win the round, you may want to use the airthrow. Some characters require hitting with j.A once or twice instead of the first j.B due to odd hurtboxes or distance.
Normal starter, grounded opponent
  • 2A > 5B > 5C > 4C > j.AC > (s)dj.C > j.2C
3068
Meter Gained: 50.4 Meter Given (vs C-Moon): 16.8 (Video)
Mostly the same as above, but ending with j.2C allows a knockdown where you can set up 22A.
Normal starter, grounded opponent
  • 2A > 5B > 5C > 4C > j.AA > j.66 > j.AA > (s)dj.A > slight delay j.A > j.2C
2862
Meter Gained: 49.5 Meter Given (vs C-Moon): 16.5 (Video)
One of F-Akiha's most important combos to learn because it carries her and the opponent to F-Akiha's best position, the corner. This combo has situational changes based on getting the most optimal position to set down a pit (22A). This particular combo carries about 80% of the screen. Sometimes if you want/need to tailor the combo you omit the slight delay part and simply press j.AA > j.2C in order to position correctly for 22A.
Normal starter, grounded opponent
  • 2A > 5B > 5C > 4C > j.A > j.66 > j.A > (s)dj.C > j.2C
2798
Meter Gained: 45.9 Meter Given (vs C-Moon): 15.3 (Video)
Another One of F-Akiha's most important combos to learn because it carries her and the opponent to F-Akiha's best position, the corner. This combo has situational changes based on getting the most optimal position to set down a pit (22A). This particular combo is used if you're midscreen to corner.
Raw Air Throw Starter
  • Raw AT > slight delay j.236B, 4C > j.A > j.66 > j.A > (s)dj.C > j.2C
2494
Meter Gained: 36.0 Meter Given (vs C-Moon): 12.0 (Video)
Combo from raw airthrow.
Shield Counter starter
  • 5D~236D, 2B(1) > 5C > 4C > j.BC > sdj.C > j.2C
2244
Meter Gained: 57.0 Meter Given (vs C-Moon): 17.8 (Video)
Shield counter combo. Higher damage but less corner carry.
Shield Counter starter
  • 5D~236D, 2B > 4C > j.AA > j.66 > j.A > dj.A > j.2C
1591
Meter Gained: 34.3 Meter Given (vs C-Moon): 12.6 (Video)
Shield counter combo. Less damage but more corner carry.
Normal starter, grounded/Airborne opponent
  • 5A > 3C > j.AC > dj.AA > j.2C
2535
Meter Gained: 34.2 Meter Given (vs C-Moon): 11.4 (Video)
This is particularly common to use when in the corner, which is explained in the "Pressure" section. This is to guarantee time to set up 22A after j.2C.

OTG Pickups

Condition Notation Damage
vs V.Sion
Notes
Corner or near the opponent
  • 623C, j.A > dj8.AA > j.2C, land 22A~[C]
???
Meter Gained: -97.5 Meter Given (vs C-Moon): 7.8 (Video)
this OTG is rather important for F-Akiha as it salvages the corner for pit set ups.
Corner OTG
  • 22[A] > 623C~[B]~]A[, j.A > dj8.A > j.2C~[A]~]B[
???
Meter Gained: -98 Meter Given (vs C-Moon): 6.9 (Video)
A bit advanced since it requires you to quickly set 22[A] and quickly EX cancel to 623C and then switching your button hold but it allows F-Akiha to set up her double overhead vs delayed overhead vs empty low mix up.
Corner OTG
  • 2A > 5AAA > 5B > 2B(1) > 2C (> 421A/22A, 236C)
???
Meter Gained: 27.9 Meter Given (vs C-Moon): 9.3 (Video)
This is an OTG that F-Akiha uses, you use 421A in case they neutral tech to keep them in check, you used 22A, 236C as that catches all techs. If you don't want to spend the meter you can stop at 2C and if they forward tech you can punish with 5B into corner carry.
Corner OTG
  • 2A > 5AAA > 4C(1) > 623C, j.A > dj8.A > j.2C, 22A~[C]
???
Meter Gained: -80.9 Meter Given (vs C-Moon): 12.6 (Video)
Similar to the first one except you're tacking on a few hits for meter gain and damage.
Midscreen OTG
  • 22B > 214C, (66 2C)/(66 5C > 623B), 22A~[C]
???
Meter Gained: -93.3 Meter Given (vs C-Moon): 7.5 (Video)
This OTG is used after j.2C ender when you haven't fully corner carried or you absolutely want to be right next to the opponent to set 22A. Dash 2C is when you have them fully in the corner and want to be in the best position to set pit, while dash 5C > 623B will push them in the corner.

Corner Combos

Condition Notation Damage
vs V.Sion
Notes
Corner Specific, grounded opponent
  • 5B > (5C >) 6C > 214B, (2A/2B(1) >) 5C > 6C > TK j.236[B], j.AC > 8dj.AA > j.2C, land 22A~[C]
4259
Meter Gained: 68.4 Meter Given (vs C-Moon): 22.8 (Video)
The usual corner combo route that F-Akiha will be using whenever you land a solid hit via stagger or IAD. 2B is a tighter link than 2A and yields more damage if you can link it reliably. 5C may whiff depending on your distance, if you are not sure then omit the 5C and do 5B > 6C instead. Her highest damaging meterless corner combo that gives set up for 22A.
Corner Specific, grounded opponent
  • 5A > 3C > j8.AC > dj8.A > j.2C, land 22A~[C]
2385
Meter Gained: 31.5 Meter Given (vs C-Moon): 10.5 (Video)
A combo that is used if you used 5A > 3C to counter a jump out attempt.
Corner Specific, grounded opponent
  • 2A > 5B > 5C > 4C > j.AA > j.66 j.AA > dj8.A > j.2C, land 22A~[C]
2759
Meter Gained: 46.8 Meter Given (vs C-Moon): 15.6 (Video)
Corner combo to make sure they are in the corner while ensuring you get 22A set up.
Corner Specific, grounded opponent, MAX mode
  • 2A > 5B > 5C > 6C > 214B, 2A/2B > 5C > 6C > TK j.236[B], j.BC > sdj.C > j.2C > IH > slight delay j.C, land j.AC > sdj.C > j.2C > land 421A > 41236C
4779
Meter Gained:  ??? Meter Given (vs C-Moon): ??? (Video)
Initiative Heat combo for when you're at MAX. 41236C will catch jump startup. If you hit the j.C after IH very low to the ground, you can do j.AAC to have enough height to hit the sdj.C.
Corner Specific, grounded opponent, 100% meter
  • 2A > 5B > 5C > 6C > 214B, 2C > 214C, slight delay 5B > 5C > (6C) > TK j.236[B], j.AC > 8dj.AA > j.2C, land 22[A]
4872
Meter Gained: -35.0 Meter Given (vs C-Moon): 31.6 (Video)
A route that involves using 214C, the 2C is a link and most times you will find yourself using this combo when your staggers hits the opponent or and IAD gets the opponent. Omitting the second 6C makes the delay 5B more lenient, but results in less damage.
Corner Specific, grounded opponent, 200% meter
  • 2A > 5B > 5C > 6C > 214B, 2C > 214C, delay 2C > 214C, slight delay 5C > (6C) > TK j.236[B], j.AC > 8dj.AA > j.2C, land 22A~[C]
5526
Meter Gained: -130.8 Meter Given (vs C-Moon): 33.7 (Video)
A route that involves using 214C two times. Basically a combo you can use if you are somehow in max and don't need to IH so you can keep 100% meter by end of the combo route, one of her highest damaging combos in the corner.
Needs level 2 Pit
  • j.B > dj.C~]Pit[, land j.AC > dj8.AA > j.2C, land 22A~[C]
2902
Meter Gained: 43.6 Meter Given (vs C-Moon): 14.5 (Video)
Fuzzy overhead route. Generally a setup after a throw while holding pit. Technically possible midscreen, but getting level 2 pit and enough time to setup the fuzzy overhead is very unlikely.
Shield Counter starter
  • D~236D, 2C > 6C > TK j.236[B], j.AC > dj8.C > j.2C, land 22A~[C]
2580
Meter Gained: 53.7 Meter Given (vs C-Moon): 17.4 (Video)
A little more damaging than the midscreen shield counter combo. You can sideswap if your back is to the corner by dashing under the opponent after the 236D. You need to hit 2C very low, or else j.2C will not connect.
Raw Air Throw Starter
  • Raw AT, 2A > 5C > 6C > TK j.236[B], j.AC > dj8.A > j.2C, land 22A~[C]
2754
Meter Gained: 45.9 Meter Given (vs C-Moon): 15.3 (Video)
Nets a bit more damage than the midscreen airthrow combo.

Move Descriptions

Frame Data Help
Header Tooltip
Move Box Colors

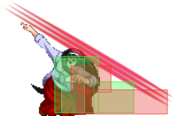
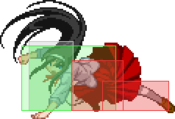
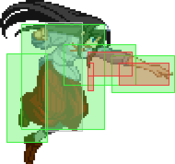
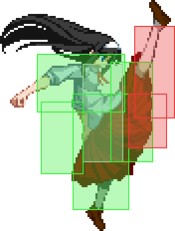
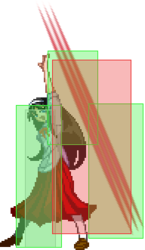
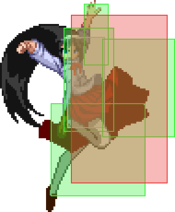
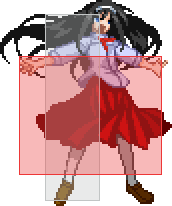
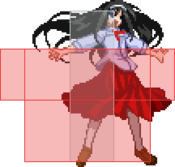
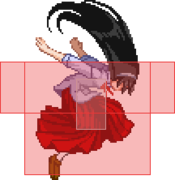
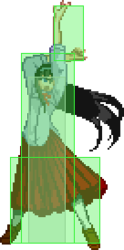
Light gray = Collision Box (A move lacking one means it can go through the opponent's own collision box).
Green: Hurt Boxes.
Red: Hit(/Grab) Boxes.
Yellow: Clash Boxes (When an active hitbox strikes a clash box, the active hitbox stops being active. Multi-hit attacks can beat clash since they will still progress to the next hitbox.)
Magenta: Projectile-reflecting boxes OR Non-hit attack trigger boxes (usually).
Blue: Reflectable Projectile Boxes.

Damage Base damage done by this attack.

(X) denotes combined and scaled damage tested against standing V. Sion.

Red Damage Damage done to the recoverable red health bar by this attack. The values are inherently scaled and tested against standing V. Sion.

(X) denotes combined damage.

Proration The correction value set by this attack and the way it modifies the scaling during a string. See this page for more details.

X% (O) means X% Overrides the previous correction value in a combo if X is of a lower percentage.
X% (M) means the current correction value in a combo will be Multiplied by X%. This can also be referred to as relative proration.

Circuit Meter gained by this attack on hit.

(X%) denotes combined meter gain.
-X% denotes a meter cost.

Cancel Actions this move can be cancelled into.

SE = Self cancelable.
N = Normal cancelable.
SP = Special cancelable.
CH = Cancelable into the next part of the same attack (Chain in case of specials).
EX = EX cancelable.
J = Jump cancelable.
(X) = Cancelable only on hit.
-X- = Cancelable on whiff.

Guard The way this move must be blocked.

L = Can block crouching
H = Can block standing.
A = Can block in the air.
U = Unblockable.

Startup Amount of frames that must pass prior to reaching the active frames. Also referred to as "True Startup".
Active The amount of frames that this move will have a hitbox.

(x) denotes frame gaps where there are no hitboxes is present. Due to varied blockstuns, (x) frames are difficult to use to determine punish windows. Generally the larger the numbers, the more time you have to punish.
X denotes active frames with a duration separate from its origin move's frame data, such as projectile attacks. In this case, the total length of the move is startup+recovery only.

Recovery Frames that this move has after the active frames if not canceled. The character goes into one frame where they can block but not act afterwards, which is not counted here.
Advantage The difference in frames where you can act before your opponent when this move is blocked (assuming the move isn't canceled and the first active frame is blocked).

If the opponent uses a move with startup that is at least 2 frames less than this move's negative advantage, it will result in the opponent hitting that move.
±x~±y denotes a range of possible advantages.

Invul Lists any defensive properties this move has.

X y~z denotes X property happening between the y to z frames of the animations. If no frames are noted, it means the invincibility lasts through the entire move.

Invicibility:

Strike = Strike invincible.
Throw = Throw invincible.

Hurtbox-Based Properties:

Full = No hurtboxes are present.
High = Upper body lacks a hurtbox.
Low = Lower body lacks a hurtbox.

Miscellaneous Properties

Clash = Frames in which clash boxes are active.
Reflect = Frames in which projectile-reflecting boxes are active.
Super Armor = Frames in which the character can take hits without going into hit stun.

Normal Moves

Standing Normals

5A
Fakiha 5a.png
Damage Red Damage Proration Cancel Guard
300 121 70% (O) -SE-, -N-, -SP-, -EX-, (J) LH
First Active Active Recovery Frame Adv Circuit Invuln
5 4 6 2 2.7% -

Standing jab. Reaches roughly about the same height as her Crescent/Half moon 5A.

5B
Fakiha 5b.png
Damage Red Damage Proration Cancel Guard
600 353 90% (O) N, SP, EX (J) L
First Active Active Recovery Frame Adv Circuit Invuln
8 5 11 -1 5.4% -

Totally different move, she hits low with a shin kick. -1 on block. Although it hits low, it must be shielded high.

5C
C-Akiha5C.png
Damage Red Damage Proration Cancel Guard
1000 707 90% (M) N, SP, EX (J) LH
First Active Active Recovery Frame Adv Circuit Invuln
11 6 15 -3 7.2% -

Moves her forward momentum and wallslams airborne opponents.

Crouching Normals

2A
Fakiha 2a.png
Damage Red Damage Proration Cancel Guard
300 151 70% (O) -SE-, -N-, -SP-, -EX-, (J) L
First Active Active Recovery Frame Adv Circuit Invuln
5 4 5 3 2.7% -

Standard low jab with a different animation. Has less recovery than a regular 2A and is actually +3 on block.

2B
C-Akiha2B.png
C-Akiha2BB.png
Damage Red Damage Proration Cancel Guard
500, 400 (828) (427) 85% (O) N, SP, EX (J) L
First Active Active Recovery Frame Adv Circuit Invuln
7 4 (6) 4 9 -8, 2 4.5%, 3.6% (8.1%) -

Crescent/Half 2B and 2BB into a single attack. Both hits are low, +2 on second hit blocked.

2C
Fakiha 2c.png
Damage Red Damage Proration Cancel Guard
1000 606 55% (O) N, SP, EX (J) L
First Active Active Recovery Frame Adv Circuit Invuln
8 5 14 -1 7.2% -

Has a different animation from her Crescent/Half moon with a shorter hitbox. It's possible to still anti-air with it but it's very risky.

Jumping Normals

j.A
Fakiha-ja.png
Damage Red Damage Proration Cancel Guard
350 151 75% (O) SE, N, SP, EX, J HA
First Active Active Recovery Frame Adv Circuit Invuln
5 4 11 - 2.7% -

Jump jab, this attack angles upwards/forwards.

j.B
Fakiha jb.png
Damage Red Damage Proration Cancel Guard
550 404 90% (O) N, SP, EX, J HA
First Active Active Recovery Frame Adv Circuit Invuln
7 5 - - 4.9% -

A jump kick, this attack also angles upwards. Also looks like it can cross-up in some situations. A good move to air-to-air with.

j.C
Fakiha jc.png
Damage Red Damage Proration Cancel Guard
900 505 90% (O) / 50% (O) N, SP, EX, J HA
First Active Active Recovery Frame Adv Circuit Invuln
10 4 - - 7.2% -

The amazing j.C, nice priority and huge cross-up hitboxes. Angles downwards

Command Normals

3C
Fakiha 3c.png
Damage Red Damage Proration Cancel Guard
1200 707 70% (O) SP, EX, J LH
First Active Active Recovery Frame Adv Circuit Invuln
11 4 18 -4 10.8% Clash 11-14

Once again this move is borrowed from her Crescent and Half-Moon counterparts, it's the animation from the follow-up portion of 5BB. Has some excellent vertical range. Can be super jump canceled.

4C
Akiha 4c.png
Damage Red Damage Proration Cancel Guard
500*2 (840) (592) 80% (O) SP, EX, (J) LH
First Active Active Recovery Frame Adv Circuit Invuln
8 4 26 -10 6.3%*2 (12.6%) -

Has the same hitbox as her other moons but in Full her 4C will launch grounded opponents. It can also be used to beat pokes if timed correctly.

6C
Akiha 6c.png
Damage Red Damage Proration Cancel Guard
600 404 80% (O) SP, EX, (J) LH
First Active Active Recovery Frame Adv Circuit Invuln
8 4 22 -8 7.2% -

Akiha lifts her leg forward and places her foot into the opponent. Keeps opponent stationary when hit and can only be special canceled. wall slams on an aerial opponent.

j.2C
Fakiha j2c.png
Damage Red Damage Proration Cancel Guard
700 303 70% (M) SP, EX, (J) LHA
First Active Active Recovery Frame Adv Circuit Invuln
14 7 - 8 (TK) 5.4% -

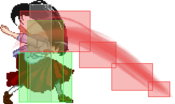
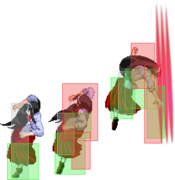
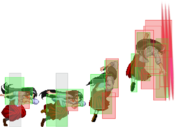
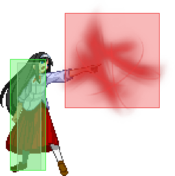
No longer an overhead, and has some odd momentum associated with it. Doesn't completely stop her momentum like Crescent Akiha's j.2C but doesn't completely retain it either. Has crossup hitboxes and knocks down airborne opponents. Also, the hitbox of this move is really misleading, as it doesn't hit above her, or even in front of her at all. It pretty much only hits below her. So in combos, a super double jump will almost always be necessary to get Akiha at the right height for j.2C to connect. Can be blocked high or low.

Universal Mechanics

Ground Throw
MB C-Akiha Throw.png
Damage Red Damage Proration Cancel Guard
200*7 (1266) (615) 100% - U
First Active Active Recovery Frame Adv Circuit Invuln
3 1 20 - 0.0% -

Akiha grabs the opponent by the neck and goes in a 7-hit sequence ending in an untechable knockdown.

Air Throw
Air Throw
j.6/4A+D
MB C-Akiha Throw Air.png
Damage Red Damage Proration Cancel Guard
1600 (Raw)
1000
489 30% - U
First Active Active Recovery Frame Adv Circuit Invuln
2 1 12 - 0.0% -

Akiha takes the opponent to the ground with the power of her legs. As a combo ender it will be untechable but will leave you at a distance.

Shield Counter
Shield Counter
236D after a successful Shield (Air OK)
MB F-Akiha 236D.png
MB F-Akiha j.236D.png
Ground Damage Red Damage Proration Cancel Guard
500 (345) 202 50% (SP), (EX), (J) LHA
First Active Active Recovery Frame Adv Circuit Invuln
9 4 18 -4 4.5% -

Same animation as 3C.

Air Damage Red Damage Proration Cancel Guard
500 (345) 202 50% - HA
First Active Active Recovery Frame Adv Circuit Invuln
9 4 - - 4.5% Full 1-3

Same animation as j.2C. Has a small amount of invincibilty on startup.

Shield Bunker
Shield Bunker
214D in neutral or blockstun
MB C-Akiha 214D.png
Bunker Damage Red Damage Proration Cancel Guard
500 202 100% - LHA
First Active Active Recovery Frame Adv Circuit Invuln
26 4 19 -5 0.0%
(-50.0% in blockstun)
Clash 1-10
(Clash) Damage Red Damage Proration Cancel Guard
500 202 100% - LHA
First Active Active Recovery Frame Adv Circuit Invuln
8 4 19 -5 0.0%/-50.0% Strike 1-7

Akiha's bunker bears special mention, as it has several odd properties: it has a low profile and hitboxes (though it still hits mid), and it moves her forward. Even on whiff, it can get you out of corner, especially if the opponent went into the air.

Due to its odd properties, however, it can fail you when you need it for regular bunker things, especially hitting airborne enemies. Generally, it's considered awkard and unreliable.

Blood Heat
Blood Heat
A+B+C during MAX
MB C-Akiha ABC.png
Damage Red Damage Proration Cancel Guard
100 0 100% - U
First Active Active Recovery Frame Adv Circuit Invuln
17 8 25 - uses all Full 1-24

Heat hitbox with some good reach.

Circuit Spark
Circuit Spark
A+B+C during hitstun/blockstun at MAX
MB C-Akiha CSpark.png
MB C-Akiha CSpark Air.png
Ground Damage Red Damage Proration Cancel Guard
100 0 100% - U
First Active Active Recovery Frame Adv Circuit Invuln
11 10 20 - removes all Full 1-39
Air Damage Red Damage Proration Cancel Guard
100 0 100% - U
First Active Active Recovery Frame Adv Circuit Invuln
12 10 15 - removes all Strike 1-30

Universal burst mechanic. Unlike Crescent/Full Heat activation, the hitbox and frame data doesn't vary between characters. However, you can be thrown out of this move if you input it in the air.


Special Moves

Disclaimer: For reasons involving momentum and disjointed stationary projectile hitboxes, the visual representation of Akiha's moves below may not always be pixel perfect.

Grounded Specials

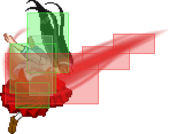
236X
MB C-Akiha 236 Startup.png
Startup makes you taller
MB F-Akiha 236A.png
A
A
MB F-Akiha 236B.png
B
B
MB C-Akiha 236C.png
EX
EX
A Damage Red Damage Proration Cancel Guard
400*3 (932) (706) 70% (O) -EX- LHA
First Active Active Recovery Frame Adv Circuit Invuln
16 6 20 -4 3.6%*3 (10.8%) -
  • Akiha's grounded flametongues. Together with the air version, they're also known as "Ribbons".

Reaches far, hitting three times.

B Damage Red Damage Proration Cancel Guard
1000 808 70% (O) -EX- LHA
First Active Active Recovery Frame Adv Circuit Invuln
10 6 29 -20 9.9% -

Has faster startup than the A version but only hits once. Incredibly unsafe on block.

EX Damage Red Damage Proration Cancel Guard
200*24 (2921) (1902) 70% (O) -EX- LHA
First Active Active Recovery Frame Adv Circuit Invuln
2+19 36 14 16 (vs Stand.)
17 (vs Crouch.)
-100.0% Full 1-4

Very advantageous on block, but post-flash Akiha will be vulnerable and if she gets hit, the rest of the move will be cancelled. Though since the already-set ribbons don't disappear on hit, you are likely to be on the winning side of any trade.

623X
MBAACC C-Akiha 623a.png
A - Dragon punch
A - Dragon punch
MBAACC C-Akiha 623b.png
B - Forward run
B - Forward run
MBAACC C-Akiha 623c.png
C - The actual reversal
A Damage Red Damage Proration Cancel Guard
600, 800 (1282) (560) 100% - LH, LHA
First Active Active Recovery Frame Adv Circuit Invuln
6 7 (3) 4 27 -13 5.4%, 7.2% (12.6%) High 1-15
  • Akiha's 623X series, also known as Momiji. Akiha runs to the opponent, launches them (if they aren't airbone already) and sending them to the ground with a slash. Despite being dragon punches, they are all weak reversals.

This shoryu has quick startup and depending on the situation can be used as an anti-air. Has invincibility on the upper part of Akiha's body and the first hit (ONLY the first one) is unblockable from the air.

B Damage Red Damage Proration Cancel Guard
400*2, 600, 800 (1987) (787) 100% EX (1-2) LH (1-3), LHA (4)
First Active Active Recovery Frame Adv Circuit Invuln
9 35 33 -17 3.6%*2, 5.4%, 7.2% (19.8%) Low 1-10, 23-29

Has ten frames of invincibility on Akiha's lower body and can be EX-Cancelled before you go into the airborne part of this move.

The first hit has minimal hitstun. This means that hitting an extended hurtbox can make the second hit whiff, letting the rest be blocked. 623C shares the same issue.

EX Damage Red Damage Proration Cancel Guard
400, 1000, 1500 (1502) (1092) 50% (O), 45% (O) (N), (SP), (EX), (J) LH (1-3), LHA (4)
First Active Active Recovery Frame Adv Circuit Invuln
4+3 35 43 -29 -100.0% Full 1-8
Clash 15-17, 21-22, 26-27

Akiha's metered true reversal. Very easy to outspace, jump over, or just otherwise cover, and it's hitbox and frame data leave much to be desired. Can be normal cancelled on hit after the last part, making it a fairly high damage reversal. OTG Relaunches

214X
MB F-Akiha 214A.png
MB F-Akiha 214B.png
MB F-Akiha 214C.png
A Damage Red Damage Proration Cancel Guard
900 606 70% -EX- LH
First Active Active Recovery Frame Adv Circuit Invuln
12 (min)* 2 22 -6 8.1% -
  • Akiha summons forward-moving ground traps that activate on contact with the opponent's collision box. All versions are air unblockable

A trap advances by holding any A/B/C button, and can be activated either on contact or on button release.

B Damage Red Damage Proration Cancel Guard
500*2 (984) (694) 80% -EX- LH
First Active Active Recovery Frame Adv Circuit Invuln
12 (min)* 2 (2) 6 26 -8 3.6%*2 (7.2%) -

B trap goes faster and only activates on contact.

EX Damage Red Damage Proration Cancel Guard
1000*N 858*N 60% (O) - LH
First Active Active Recovery Frame Adv Circuit Invuln
2+14 (min) 10 xN 2+45 -4 (min) -100.0% -

EX version will spawn multiple traps across the screen.

421X
Smoking Out Birds
421A/B/C (No EX)
MB F-Akiha 421A.png
MB F-Akiha 421B.png
MB F-Akiha 421C.png
Damage Red Damage Proration Cancel Guard
900 (A)
1500 (B/C)
505 (A)
1212 (B/C)
50% (A)
70% (B/C)
- LH
First Active Active Recovery Frame Adv Circuit Invuln
51 (A/C)
52 (B)
5 35 - 9.0% -
  • Akiha spawns a string ball in the air which will detonate shortly after she recovers. Distance and height varies on the version used.
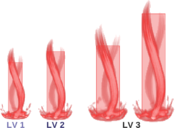
22X
Glaring at the Moon
22A/B/C
(No EX, Hold OK)
MB F-Akiha 22X.png
MB F-Akiha 22X Release.png
A
B/C
Damage Red Damage Proration Cancel Guard
- - - - -
First Active Active Recovery Frame Adv Circuit Invuln
- - 40
44
- - -
]X[ (Lv 1) Damage Red Damage Proration Cancel Guard
600 606 70% - LHA
First Active Active Recovery Frame Adv Circuit Invuln
17 (min) 3 - - 5.4% -
]X[ (Lv 2) Damage Red Damage Proration Cancel Guard
1000 808 70% - LHA
First Active Active Recovery Frame Adv Circuit Invuln
47 (min. Hold) 8 - - 0.9% -
]X[ (Lv 3) Damage Red Damage Proration Cancel Guard
600*3 (1302) (876) 70% - LH
First Active Active Recovery Frame Adv Circuit Invuln
108 (min. Hold) 10 - - 3.6%*3 (10.8%) -
  • F-Akiha's own pit series. The pits are chargeable by holding any A/B/C button, with 3 levels of strength on release depending on charge time. Two pits can be up at a time, and only one button is needed to hold them both. Will disappear when Akiha blocks/get hit, or by being held for too long.

Aerial Specials

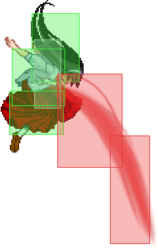
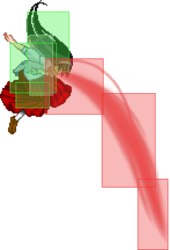
j.236X
Felling Birds (Air)
j.236A/B/[B]/C
MB F-Akiha j.236A.png
A
A
MB F-Akiha j.236B.png
B
B
MB F-Akiha j.236B BE.png
[B]
[B]
MB C-Akiha j.236C.png
EX
EX
A Damage Red Damage Proration Cancel Guard
800 505 70% (O) - LHA
First Active Active Recovery Frame Adv Circuit Invuln
25 4 5 17 (TK) 5.4% -

Air ribbons. A version will summon an upwards horizontal ribbon, this move will keep Akiha's momentum and the projectile is stationary, so the hitbox's position relative to Akiha will vary depending on the previous aerial movement. Very advantageous when TK'd.

B Damage Red Damage Proration Cancel Guard
800 505 70% (O) - LHA
First Active Active Recovery Frame Adv Circuit Invuln
24 2 9 8 (TK) 5.4% -

Stops your momentum dead and summons a downward ribbon.

[B] Damage Red Damage Proration Cancel Guard
800*2 (1342) (847) 70% (O) - LHA
First Active Active Recovery Frame Adv Circuit Invuln
30 2 9 15 (TK) 5.4%*2 (9.8%) -

Charged version has increased range and hits twice.

EX Damage Red Damage Proration Cancel Guard
400*8 (2848) (1436) 70% (O) - LHA
First Active Active Recovery Frame Adv Circuit Invuln
2+18 29 10 21 (TK) -100.0% Full 1-5

Aerial version of EX ribbon.

Arc Drive

Red Mistress - Locks of Hair
41236C during Max/Heat
(~X)
MB H-Akiha AD Throw.png
MB C-Akiha AD.png
(Throw)
(Strike)
Damage Red Damage Proration Cancel Guard
450*23 (3515)
300*13 (1550)
(2355)
(1302)
50% (O) - A
LHA
First Active Active Recovery Frame Adv Circuit Invuln
3+1 1 (4) 26 44 -31 ~ -9 removes all Full 1-45

This Arc Drive will try to grab the opponent instantly after the 55f superflash, and if it cannot, will go into a far-reaching upward multi-hit claw strike. This throw hitbox is actually blockable in the air only, making it an unique ground unblockable.

You can add more hits on a successful grab by pressing buttons, but it will make it actually do less damage if you do it without thinking.
You should only start mashing towards very end, when the proration of the AD already went down. This then can increase damage up to 3698.

Another Arc Drive

Red Mistress - Locks of Hair
41236C during Blood Heat
(~X)
MB C-Akiha AAD Throw.png
MB C-Akiha AAD Strike.png
(Throw)
(Strike)
Damage Red Damage Proration Cancel Guard
450*27, 500*15 (3957)
400*13, 1400*3 (3384)
(2531)
(2923)
50% (O) - U (Whiffs vs Air.)
LHA
First Active Active Recovery Frame Adv Circuit Invuln
2+3 1 (4) 26 44 -30 ~ -27 removes all Full 1-46

Improved version which will create an additionnal screen-wide field of fire.

Last Arc

Red Mistress - Blazing Flower
Grounded EX Shield during Blood Heat
MB C-Akiha LA.png
Spawns hitbox on the opponent
Damage Red Damage Proration Cancel Guard
17900 (3369 ~ 6838) (2800 ~ 5360) 50% + 50% * remaining BH time - LHA
First Active Active Recovery Frame Adv Circuit Invuln
2+3 X (74) 42 32 removes all Full 1-37

One of the worst Last Arcs in the game. Upon a grounded EX-Shield in Blood Heat, Akiha will summon ribbons from all sides on the enemy's position. This attack has non-zero startup, however, and can be blocked. It will also activate upon shielding a projectile, and can be reacted to during the 44f superflash, leading to it being blocked more often than not.

Like most LAs, damage dealt on hit will be proportional to the gauge left, between around 3500 and 7000, last hit causing hard Circuit Break. Due to the amount of hits, this LA has a tendency to cause Guard Breaks. Additionally, since this attack is technically a projectile, Akiha will recover during active frames.


MBAACC Navigation

General
FAQ
Advanced
AokoCrescentHalfFull
TohnoCrescentHalfFull
HimeCrescentHalfFull
NanayaCrescentHalfFull
KoumaCrescentHalfFull
MiyakoCrescentHalfFull
CielCrescentHalfFull
SionCrescentHalfFull
RiesbyfeCrescentHalfFull
V.SionCrescentHalfFull
WarachiaCrescentHalfFull
RoaCrescentHalfFull
MaidsCrescentHalfFull
AkihaCrescentHalfFull
ArcueidCrescentHalfFull
Powered CielCrescentHalfFull
Red ArcueidCrescentHalfFull
V.AkihaCrescentHalfFull
Mech-HisuiCrescentHalfFull
SeifukuCrescentHalfFull
SatsukiCrescentHalfFull
LenCrescentHalfFull
RyougiCrescentHalfFull
White LenCrescentHalfFull
NeroCrescentHalfFull
NACCrescentHalfFull
Koha-MechCrescentHalfFull
HisuiCrescentHalfFull
Neco-ArcCrescentHalfFull
KohakuCrescentHalfFull
Neco-MechCrescentHalfFull